Herunterladen Inhalt Inhalt Diese Seite drucken
Inhaltsverzeichnis

Werbung

Verfügbare Sprachen
  • DE

Verfügbare Sprachen

  • DEUTSCH, seite 4
Gebrauchsanweisung
Brugsanvisning
Instructions for use
Bruksanvisning
Mode d'emploi
Käyttöohje
Gebruiksaanwijzing
Manual de utilização
Istruzioni per l'uso
Instrucciones para el uso
Návod k použití
Návod na použitie
Instrukcje użytkowania
Használati utasítás
Instruc∑iuni de utilizare
Инструкци
за употреба
Инструкции по эксплуатации
Я

Werbung

Inhaltsverzeichnis

Fehlerbehebung

loading

Inhaltszusammenfassung für Whirlpool AMD 054

  • Seite 1 Gebrauchsanweisung Brugsanvisning Instructions for use Bruksanvisning Mode d’emploi Käyttöohje Gebruiksaanwijzing Manual de utilização Istruzioni per l’uso Instrucciones para el uso Návod k použití Návod na použitie Instrukcje użytkowania Használati utasítás Instruc∑iuni de utilizare Инструкци за употреба Инструкции по эксплуатации Я...
  • Seite 3 AMD 054 AMD 055 DEUTSCH Gebrauchsanweisung Seite 4 ENGLISH Instructions for use Page 29 FRANÇAIS Mode d’emploi Page 54 NEDERLANDS Gebruiksaanwijzing Pagina 79 ESPAÑOL Instrucciones para el uso Página 104 PORTUGUÊS Manual de utilização Página 129 ITALIANO Istruzioni per l’uso Pagina 154 ΕΛΛΑΣ...
  • Seite 4: Vor Der Inbetriebnahme Des Gerätes

    VOR DER INBETRIEBNAHME DES GERÄTES Damit Sie den größtmöglichen Nutzen aus Ihrem Gerät ziehen, lesen Sie bitte die Bedienungsanleitung aufmerksam durch und bewahren Sie sie griffbereit auf. SICHERHEITSVORSCHRIFTEN • Die elektrische Installation und Reparatur- • Finger oder Fremdkörper dürfen niemals in den Wartungsarbeiten müssen von einer Luftein-/auslass des Innen-&Außengeräts qualifizierten Fachkraft gemäß...
  • Seite 5: Hinweise Zum Umweltschutz

    HINWEISE ZUM UMWELTSCHUTZ • Dieses Gerät bestehen aus recyclingfähigem ENTSORGEN DES GERÄTES oder wieder verwertbarem Material. Es muss • Das Gerät ist entsprechend der europäischen gemäß den örtlichen Vorschriften entsorgt Richtlinie 2002/96/CE zur Entsorgung von werden. Vor dem Entsorgen/Verschrotten den elektrischen und elektronischen Geräten Netzstecker ziehen und das Netzkabel (WEEE) gekennzeichnet.
  • Seite 6: Produktbeschreibung

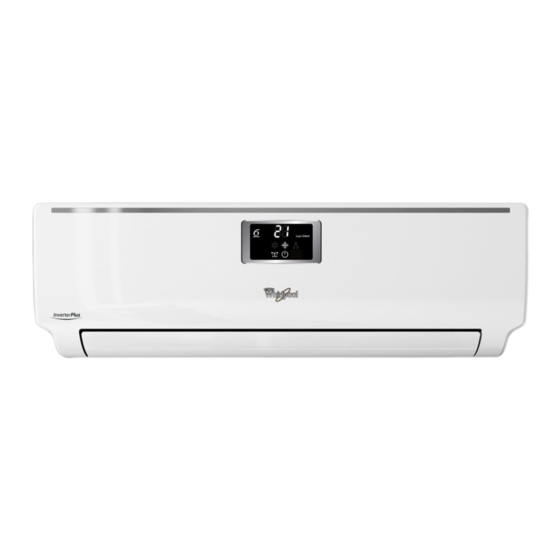
    PRODUKTBESCHREIBUNG Innengerät Außengerät 1. Lufteinlass 11. Lufteinlass 2. Frontblende 12. Leitungen und Netzkabel 3. Anzeigefeld 13. Drainageschlauch 4. Luftauslass 14. Luftauslass 5. Elektrischer Anschlusskasten 6. Ein/Aus-Schalter 7. Vertikale Lüfterklappe 8. Horizontale Lüfterklappe 9. Luftfilter 10. Fernbedienung Die Abbildungen in der Bedienungsanleitung beziehen sich auf Außenansichten der Standardmodelle; Form und Design können sich modellabhängig ändern.
  • Seite 7 BESCHREIBUNG DER ANZEIGEN DER BEDIENBLENDE Temperaturanzeige (1) Displays eingestellt und Raumtemperatur. Betriebsanzeige (2) Leuchtet bei Anschluss an das Stromnetz weiß. Sie leuchtet während des Betriebs weiß. Heizanzeige (3) Leuchtet im Heizmodus. Kühlanzeige (4) Leuchtet im Kühlmodus Entfeuchtungsanzeige (5) Leuchtet im Entfeuchtungsmodus Super Silent Anzeige (6) Leuchtet im Modus Super Silent (Superleise) Signalempfänger (7)
  • Seite 8: Funktionen Und Anzeigen Der Fernbedienung

    FUNKTIONEN UND ANZEIGEN DER FERNBEDIENUNG EIN/AUS-TASTE Mit dieser Taste wird das Gerät ein- und ausgeschaltet. 2-3. TASTEN ZUR WAHL DER RAUMTEMPERATUR Zur Einstellung der Temperatur. Zur Einstellung der aktuellen Uhrzeit. Zur Einstellung der Zeit im Timer-Modus. TASTE MODE (Betriebsart) Zur Auswahl der Betriebsart. TASTE Dient der Einstellung der Funktion 6th Sense (6.
  • Seite 9 ANZEIGEN AM DISPLAY DER FERNBEDIENUNG Anzeige Kühlen Anzeige Anzeige Entfeuchten Anzeige Schlaf Anzeige nur Lüfter Anzeige Pers. Umgebung Anzeige Heizen Anzeige Luftstrom (Jet) Autom. Lüfterdrehzahl Signalübertragung Max. Lüfterdrehzahl Display Timer einstellen Display aktuelle Zeit Mittlere-Hohe Lüfterdrehzahl °F Temperaturanzeige Mittlere Lüfterdrehzahl Display-Anzeige Temperatur einstellen Niedrige-Mittlere Lüfterdrehzahl Niedrige Lüfterdrehzahl...
  • Seite 10: Aufbewahrung Und Tipps Für Den Einsatz Der Fernbedienung

    AUFBEWAHRUNG UND TIPPS FÜR DEN EINSATZ DER FERNBEDIENUNG Batterien einlegen 1. Leicht auf den Batteriedeckel drücken und wie gezeigt in Pfeilrichtung abnehmen. 2. Setzen Sie 2 AAA Batterien (1,5 V) in das Fach ein. Auf die richtige Polung achten. 3. Das Batteriefach der Fernbedienung schließen. Entfernen der Batterien Batteriedeckel in Pfeilrichtung abnehmen.
  • Seite 11: Betriebsart - Beschreibung

    BETRIEBSART - BESCHREIBUNG Allgemeiner Betrieb: 1. Einschalten Drücken Sie die Taste On-Off. Wenn das Gerät das Signal empfängt, leuchtet die BETRIEBSANZEIGE am Display des Innengeräts auf. Warten Sie während der Zeit des Wechsels zwischen den Betriebsarten einige Sekunden lang und wiederholen Sie den Vorgang, falls das Gerät nicht gleich reagiert.
  • Seite 12: Richtung Des Luftstroms

    RICHTUNG DES LUFTSTROMS 5. Richtung des Luftstroms Der vertikale Luftstrom wird automatisch in einem bestimmten Winkel nach dem Einschalten des Gerätes in Übereinstimmung mit dem jeweiligen Betriebsmodus eingestellt. Die Richtung des Luftstroms kann auch nach Ihren persönlichen Wünschen eingestellt werden. Drücken Sie dazu die Schwenk-Taste Swing an Ihrer Fernbedienung.
  • Seite 13: Beschreibungen Der Betriebsarten Und Funktionen

    BESCHREIBUNGEN DER BETRIEBSARTEN UND FUNKTIONEN BETRIEBSART 6th SENSE Durch Drücken der Taste wird angezeigt, das Gerät geht direkt in die Betriebsart 6th Sense. In dieser Betriebsart werden Temperatur und Lüfterdrehzahl automatisch anhand der aktuellen Raumtemperatur eingestellt. Wärmepumpenmodelle Innen Betriebs art raumtemperatur 22 °C oder weniger HEATING (Heizen)
  • Seite 14 Funktionen JET und LIGHT Bei jedem Drücken der Taste JET (Light) wird der Funktionsstatus in der folgenden Reihenfolge verändert: • In den Betriebsarten COOLING (Kühlen) und HEATING (Heizen): JET ein / LICHT ein JET aus / LICHT ein JET aus / LICHT ein JET aus / LICHT aus •...
  • Seite 15 Betriebsart STANDARD SLEEP (Standardschlaf) wird an der Fernbedienung in dieser Betriebsart angezeigt. • Wenn Sie diesen Modus unter der Funktion COOLING (Kühlen) oder DEHUMIDIFYING (Entfeuchten) einstellen, hebt das Gerät die eingestellte Temperatur in der ersten Stunde um 1°C an, und für die zweite Stunden um ein weiteres 1°C, und bleibt dann konstant.
  • Seite 16 Funktion AUTO CLEAN (Selbstreinigung) • Durch Drücken dieser Taste in der Betriebsart COOL (Kühlen) oder DRY (Trocknen) wird angezeigt, und die Funktion AUTO CLEAN (Selbstreinigung) ist eingestellt. Nach dem Ausschalten des Geräts läuft der Lüfter des Innengeräts noch 10 Minuten weiter, um die Feuchtigkeit aus dem Innengerät zu vertreiben und um auf diese Weise ein gesundes, Schimmel freies Raumklima zu erzeugen.
  • Seite 17: Timer Off

    Funktion TIMER Die Taste T-ON/T-OFF (Timer ein/Timer aus) ermöglicht es Ihnen auch, die Funktion TIMER ON (Timer ein) sowie TIMER OFF (Timer aus) einzeln einzustellen. Es empfiehlt sich, den Timer durch Drücken der linken Tastenseite einzustellen, um eine behagliche Raumtemperatur zu haben, wenn Sie nach Hause . Die Ausschaltzeit (Timer Off) kann ebenfalls automatisch eingestellt werden, damit Sie nachts ungestört schlafen.
  • Seite 18 Hinweis: Die Funktion SUPER SILENT wird der Frontblende entsprechend. Das Gerät ist ausgeschaltet, wenn die Taste FAN (Lüfter) werksseitig auf °C eingestellt. gedrückt wird. NOTBETRIEB Funktion CHILD LOCK (Kindersicherung) In Notsituationen oder bei fehlender Drücken Sie gleichzeitig die Tasten + und -, um die Fernbedienung kann das Gerät durch Drücken der Tasten der Fernbedienung zu sperren oder zu Taste Ein/Aus, die sich am Innengerät befindet,...
  • Seite 19: Wartung

    3-in-1 Kombifilter. Diese Filter entfernen feine Partikel, neutralisieren Viren und Allergene und beseitigen Gerüche. Um die Leistungsfähigkeit dieser Filter zu erhalten, empfehlen wir Ihnen, diese Filter alle 2-3 Jahre auswechseln zu lassen. Kontaktieren Sie dazu bitte das autorisierte Whirlpool Service-Center.
  • Seite 20: Fehlersuche

    (H1 und SE sind keine Fehlercodes. H1 zeigt beim Heizen das Abtauen an, SE ist die Anzeige für die Energiesparfunktion.) Hinweis: Sind die Probleme weiterhin vorhanden, das Gerät ausschalten und von der Stromversorgung trennen. Dann das nächste Whirlpool Servicecenter kontaktieren. Nicht versuchen, das Gerät selbst zu transportieren, reparieren, zerlegen oder zu modifizieren.
  • Seite 21 INSTALLATIONS- SERVICE Vor der Installation 5. Stellen Sie das Gerät mit den am geringsten 1. Bitte lesen Sie diese Anleitung vor der beweglichen Teilen des Innengeräts mindestens Installation durch. 2,5 Meter über dem Boden oder dem 2. Das Gerät darf nur durch eine qualifizierte Aufstellort auf.
  • Seite 22 INSTALLATIONSANLEITUNG Installationsplan Der Abstand zur Decke sollte mindestens 150 mm Der Abstand von der betragen Wand sollte mindestens 150 mm betragen Der Abstand von der Wand sollte mindestens Innengerät 150 mm betragen Der Abstand zum Boden mindestens 2500 mm betragen Außengerät Der Lufteinlass muss mindestens 300 mm von...
  • Seite 23 Die beste Lage auswählen Innengerät Lage zur Einstellung des Innengeräts • Kein Gegenstand darf den Luftaustritt blockieren. Die Luft muss ungehindert in jede Ecke des Raums strömen können. Die Rohrlänge • Leitungen und Wandöffnung müssen sich leicht ist 5-15 m anbringen lassen.
  • Seite 24: Installation Der Inneneinheit

    INSTALLATION DER INNENEINHEIT 1. Installation der Montageplatte • Suchen Sie eine geeignete Stelle zur Montage der Platte entsprechend dem Aufstellort der Markierung an der mittleren Wasserwaage Inneneinheit und den Leitungen. • Die Montageplatte muss mit einer Wasserwaage oder einem Lot exakt waagerecht montiert werden.
  • Seite 25 WICHTIG: Leitungsanschlüsse - thermische Isolierung: Umwickeln Sie die Leitungsanschlüsse mit Isoliermaterial und fixieren Sie es mit Klebeband. Mit Vinyl-Klebeband umwickelt Thermische Isolierung Wärmeisolierung der Leitungen: a. Drainageschlauch unter die Leitung setzen. b. Isoliermaterial: Polytethenschaum über 6 mm Große Thermisch isolierte Leitung Leitung Stärke.
  • Seite 26 4. Kabel anschließen • Innengerät 1) Frontblende öffnen, Abdeckplatte durch Lösen der Schraube abnehmen. Abdeckplatte 2) Schließen Sie die Litzen des Stromkabels an den Klemmen der Inneneinheit exakt wie folgt an. 3) Sichern Sie das Kabel mit der Kabelschelle an der Klemmenleiste.
  • Seite 27: Installation Der Ausseneinheit

    INSTALLATION DER AUSSENEINHEIT 1. Ablassventil und Drainageschlauch installieren In der Betriebsart Heizen tropft Kondenswasser aus der Außeneinheit. Aus Gründen der Sauberkeit und des Umweltschutzes sollten Sie ein Ablassventil und einen Drainageschlauch verlegen, um das Kondenswasser gezielt abzuleiten. Montieren Sie das Ablassventil direkt am Boden der Außeneinheit und schließen Sie einen Ablaufschlauch an wie in der Abbildung rechts gezeigt.
  • Seite 28: Absaugen Der Luft

    ABSAUGEN DER LUFT Feuchte Luft im Kältemittelkreislauf kann zu Fehlfunktionen des Kompressors führen. Nach der Montage der Außen- und Inneneinheit muss der Kältemittelkreislauf entlüftet werden. Benutzen Sie dazu eine Vakuumpumpe, wie unten gezeigt. Hinweis: Da der Systemdruck hoch ist und der Umweltschutz berücksichtigt werden muss, darf das Kältemittel nicht direkt an die Umgebungsluft frei gesetzt werden.
  • Seite 29: Before Using The Appliance

    BEFORE USING THE APPLIANCE To make the most out of your new appliance, please read the user instructions carefully and keep them handy for future consultation. SAFETY PRECAUTIONS • The Installation and service/repair must be • Never block the air inlet or outlet of indoor and performed by a qualified technician, in outdoor unit.
  • Seite 30: Safeguarding The Environment

    SAFEGUARDING THE ENVIRONMENT • This appliance has been made of recyclable or SCRAPPING OF APPLIANCE re-usable material. Scrapping must be carried • This appliance is marked according to the out in compliance with local waste disposal European Directive 2002/96/EC, Waste regulations.
  • Seite 31: Product Description

    PRODUCT DESCRIPTION Indoor unit Outdoor unit 1. Air Intake 11. Air Intake 2. Front Panel 12. Pipes and Power Connection Cord 3. Display panel 13. Drain Hose 4. Air Outlet 14. Air Outlet 5. Electrical box 6. On/off switch 7. Vertical Adjustment Louver 8.
  • Seite 32 CONTROL PANEL DISPLAY INDICATORS DESCRIPTION Temperature indicator (1) Displays set and room temperature. Running indicator (2) It lights up in white when connecting to power supply. It lights up in white during operation. Heating indicator (3) It lights up during heating mode. Cooling indicator (4) It lights up during cooling mode.
  • Seite 33 REMOTE CONTROL FUNCTIONS AND INDICATORS ON/OFF BUTTON Starts and/or Stops the appliance by pressing this button. 2-3. TEMPERATURE SETTING BUTTONS Used to set temperature. Used to set time for clock. Used to set time in timer mode. MODE BUTTON Used to select the operation mode. BUTTON Used to set 6th sense operation.
  • Seite 34 INDICATOR SYMBOLS ON RC DISPLAY Cooling indicator indicator Dehumidifying indicator Sleep indicator Fan only indicator Around U indicator Heating indicator Jet indicator Auto fan speed Signal transmission High fan speed Display set timer Display current time Medium-High fan speed °F Temperature display Medium fan speed Set temperature dispaly indicator...
  • Seite 35 STORAGE AND TIPS FOR USING THE REMOTE CONTROL How to insert the batteries 1. Gently press down on the battery cover and push in the direction of the arrow to remove, as shown. 2. Put 2 AAA batteries (1.5V) into the compartment.
  • Seite 36: Operating Mode Description

    OPERATING MODE DESCRIPTION General Operation: 1. Turning on Press On-Off button, when the appliance receives the signal, the RUNNING indicator on indoor unit dispaly lights up. During mode changes wait a few seconds and repeat the operation if the appliance does not respond at once.
  • Seite 37: Airflow Direction Control

    AIRFLOW DIRECTION CONTROL 5. Airflow direction control Vertical airflow is automatically adjusted to a certain angle in accordance with the operation mode after turning on the appliance. The direction of airflow can be also adjusted to your own requirement by pressing the Swing button of the remote control.
  • Seite 38 MODE AND FUNCTION DESCRIPTIONS 6th SENSE MODE Press the button, will display, the appliance enters 6th sense mode directly. In this mode, temperature and fan speed will be automatically set based on the actual room temperature. Heat pump models Indoor Operation mode temperature 22°C or below...
  • Seite 39 JET and LIGHT functions Each time the JET (Light) button is is pressed, the operation status is changed in sequence: • Under COOLING and HEATING mode: JETon / LIGHTon JEToff / LIGHTon JEToff / LIGHTon JEToff / LIGHToff • Under other mode: LIGHToff LIGHTon Note:...
  • Seite 40 DIY SLEEP mode will display on remote control during this mode. This mode allows you to set your own sleep mode. How to set your own sleep mode • Under this mode, press SUPER SILENT button and hold it till the temperature display blinks, you can see "1 hour"...
  • Seite 41 AUTO CLEAN function • Pressing this button in COOL or DRY mode,the icon is displayed and the AUTO CLEAN function is set. After turning off the appliance, the indoor fan will keep running for 10 minutes to eliminate moisture in indoor unit, thus creating a healthy, mould-free environment.
  • Seite 42 TIMER function The T-On/T-Off button allows you to set TIMER ON function and TIMER OFF function separately. It is convenient to set the timer on by pressing the left side of this button to achieve a comfortable room temperature at the time you get home. You can also set timer off automatically to enjoy a good sleep at night by pressing right side of this button.
  • Seite 43: Emergency Operation

    SUPER SILENT function Note: this function is only available when the Press this button to let the unit operating with low product is off. Front panel temperature display will noise to get a quiet and comfortable room change accordingly when turning on the appliance. environment.
  • Seite 44: Maintenance

    Your product also has a HEPA filter and a 3 in 1 combo filter. These filters remove small particles, neutralizes viruses and allergens and eliminates odours. To maintain the efficiency of the filters, we advise you to replace these filters every 2-3 years by contacting a Whirlpool Authorized Service Centre.
  • Seite 45: Troubleshooting

    SE is the indicator of power save function). Note: If the problems still have, turn off the appliance and disconnect from power supply, then contact the nearest Whirlpool Authorized Service Center. Do not attempt to move, repair, disassemble, or modify the appliance by yourself.
  • Seite 46: Safety Precaution

    INSTALLATION SERVICE Before installation 4. Check the product to verify that it has not been 1. Please read this manual carefully before damaged before installation. installation. 5. Mount with the lowest moving parts of indoor 2. The appliance must be installed according to unit at least 2.5 m above floor or grade Level.
  • Seite 47: Installation Instructions

    INSTALLATION INSTRUCTIONS Installation diagram Distance from ceiling should be over 150mm Distance from wall should be over 150mm Distance from the wall Indoor unit should be over 150mm Distance from floor should be over 2500mm Outdoor unit Air intake distance from the wall should be over Air intake distance from 300mm...
  • Seite 48 Select the best location Indoor unit Location for Installing Indoor Unit • Where there is no obstacle near the air outlet and air can be easily blown to every corner of room. Pipe length is • Where piping and wall hole can be easily 5~15 meters arranged.
  • Seite 49: Indoor Unit Installation

    INDOOR UNIT INSTALLATION 1. Installing the Mounting Plate • Select a location to install the mounting plate Mark on the middle Gradienter according to the indoor unit location and piping direction. • Adjust the mounting plate horizontally with a gradienter or plumb line. •...
  • Seite 50 IMPORTANT: Piping Joints Thermal Insulation: Wrap the piping joints with thermal insulating materials and then wrap with a vinyl tape. Wrapped with vinyl type Thermal insulation Thermal Insulation piping: a. Place the drain hose under the piping. b. Insulation material: polythene foam over 6mm in Thermally insulated tube Large pipe...
  • Seite 51 4. Connecting the Cable • Indoor Unit 1) Open the front panel, remove the covering plate by loosening the screw. Covering plate 2) Connect the power connecting cord to the indoor unit by connecting the wires to the terminals on the control board individually as follows.
  • Seite 52: Outdoor Unit Installation

    OUTDOOR UNIT INSTALLATION 1. Install Drain Port and Drain Hose The condensate drains from the outdoor unit when the unit operates in heating mode. In order not to disturb your neighbours and protect the environment, install a drain port and a drain hose to direct the condensate water.
  • Seite 53: Air Purging

    AIR PURGING Air containing moisture remaining in the refrigeration cycle may cause a malfunction on the compressor. After connecting the indoor and outdoor units, evacuate air and moisture from refrigerant cycle using a vacuum pump, as shown below. Note: Because the system pressure is high and also to protect the environment, be sure not to discharge the refrigerant to the air directly.
  • Seite 54: Avant D'utiliser L'appareil

    AVANT D'UTILISER L'APPAREIL Pour tirer le meilleur parti de votre appareil, lisez attentivement la notice d'emploi et conservez-la pour toute consultation future. CONSIGNES DE SÉCURITÉ • Toute opération d'installation, d'entretien et de étrangers dans les ouvertures d'entrée/sortie de réparation doit être réalisée par un technicien l'unité&extérieure.
  • Seite 55: Conseils Pour La Protection De L'environnement

    CONSEILS POUR LA PROTECTION DE L'ENVIRONNEMENT • Cet appareil est fabriqué à partir de matériaux MISE AU REBUT DE L'APPAREIL recyclables et réutilisables. La mise au rebut de • Cet appareil porte le symbole de recyclage, cet appareil doit s'effectuer en respectant les conformément à...
  • Seite 56: Description De L'appareil

    DESCRIPTION DE L'APPAREIL Unité intérieure Unité extérieure 1. Bouche d'entrée d'air 11. Bouche d'entrée d'air 2. Panneau avant 12. Tuyaux et cordon d'alimentation 3. Écran d'affichage 13. Conduit de vidange 4. Bouche de sortie d'air 14. Bouche sortie d'air 5. Boîtier électrique 6.
  • Seite 57 DESCRIPTION DES INDICATEURS DE L'AFFICHAGE DU BANDEAU DE COMMANDE Indicateur de température (1) Affiche la température de consigne et la température ambiante. Indicateur de fonctionnement (2) Il s'allume en blanc lorsque l'appareil est mis sous tension. Il s'allume en blanc pendant le fonctionnement de l'appareil. Indicateur de chauffage (3) Il s'allume lorsque le mode Chauffage est sélectionné.
  • Seite 58 FONCTIONS ET INDICATEURS DE LA TÉLÉCOMMANDE TOUCHE ON/OFF (Marche/Arrêt) Appuyez sur cette touche pour démarrer et/ou arrêter l'appareil. 2-3. TOUCHES DE RÉGLAGE DE LA TEMPÉRATURE Pour régler la température. Pour régler l'heure. Pour régler la durée en mode Minuteur. TOUCHE MODE Pour sélectionner le mode de fonctionnement.
  • Seite 59 SYMBOLES DES INDICATEURS SUR L'AFFICHAGE DE LA TÉLÉCOMMANDE Indicateur de refroidissement Indicateur Mode Nuit Indicateur de déshumidification Indicateur Around U Indicateur Ventilation seule Indicateur Jet Indicateur de chauffage Transmission Signaux Vitesse de ventilation Auto Affichage réglage minuteur Affichage heure du jour Vitesse rapide de ventilation °F Affichage de la température...
  • Seite 60 RANGEMENT DE LA TÉLÉCOMMANDE ET ASTUCES RELATIVES À SON UTILISATION Comment introduire les piles 1. Appuyez doucement sur le couvercle des piles, et poussez dans le sens de la flèche pour le retirer (voir illustration). 2. Installez 2 piles AAA (1,5 V) dans le compartiment.
  • Seite 61: Description Du Mode De Fonctionnement

    DESCRIPTION DU MODE DE FONCTIONNEMENT Fonctionnement général : 1. Mise sous tension Appuyez sur la touche On-Off (marche/arrêt). Dès que l'appareil reçoit le signal, l'indicateur de FONCTIONNEMENT s'allume au niveau de l'écran d'affichage de l'unité intérieure. Lorsque vous changez de mode, attendez quelques secondes, puis répétez l'opération si l'appareil ne répond pas immédiatement.
  • Seite 62 CONTRÔLE DE L'ORIENTATION DU FLUX D'AIR 5. Contrôle de l'orientation du flux d'air Le flux d'air vertical est automatiquement réglé à un certain angle selon le mode de fonctionnement choisi après avoir mis l'appareil sous tension. Il vous est possible de régler le flux d'air en fonction de vos besoins en appuyant sur la touche Swing (Oscillation) de la télécommande.
  • Seite 63 DESCRIPTION DES MODES ET DES FONCTIONS MODE 6th SENSE Appuyez sur la touche s'affiche ; l'appareil entre directement en mode 6th sense. Lorsque ce mode est sélectionné, la température et la vitesse du ventilateur sont automatiquement réglées en fonction de la température ambiante. Modèles équipés de pompe à...
  • Seite 64 Fonctions JET et LIGHT (éclairage) Chaque pression sur la touche JET (Light) provoque la modification de l'état de fonctionnement dans l'ordre suivant : • Avec les modes REFROIDISSEMENT et CHAUFFAGE : Activation de la fonction Désactivation de la JET / activation de fonction JET / activation l'éclairage de l'éclairage...
  • Seite 65 Mode STANDARD SLEEP (Mode nuit standard) s'affiche sur la télécommande lorsque ce mode est sélectionné. • Lorsque vous sélectionnez ce mode avec le mode REFROIDISSEMENT ou DÉSHUMIDIFICATION, l'appareil laisse la température de consigne augmenter de 1 °C pendant la première heure, puis à nouveau de 1 °C pendant la deuxième heure.
  • Seite 66 Fonction AUTO CLEAN • Si vous appuyez sur cette touche en mode COOL (Refroidissement) ou DRY (Déshumidification), le symbole s'affiche et la fonction AUTO CLEAN (Nettoyage automatique) est réglée. Après la mise hors tension de l'appareil, le ventilateur intérieur s'active pendant 10 minutes pour éliminer l'humidité...
  • Seite 67 Fonction TIMER (Minuteur) La touche T-On/T-Off vous permet de régler séparément les fonctions TIMER ON (Minuteur activé) et TIMER OFF (Minuteur désactivé). Il est pratique de régler le minuteur en appuyant sur la moitié gauche de cette touche, de façon à bénéficier d'une agréable température ambiante à...
  • Seite 68: Fonctionnement De Secours

    Fonction SUPER SILENT (Fonctionnement super Remarque : cette fonction est disponible uniquement silencieux) lorsque l'appareil est éteint. L'affichage de la Appuyez sur cette touche pour faire fonctionner température sur le panneau avant sera modifié en l'appareil avec un niveau sonore réduit, de façon à conséquence dès que vous allumerez l'appareil.
  • Seite 69: Entretien

    • Ne tentez pas de nettoyer l'intérieur du l'efficacité des filtres, nous vous conseillons de les climatiseur par vous-même. remplacer tous les 2 ou 3 ans. Pour ce faire, • Ne lavez pas le filtre en machine. contactez un centre d'entretien agréé Whirlpool.
  • Seite 70 éteignez l'appareil et débranchez-le, puis contactez un affiché Service Après-vente agréé Whirlpool. (H1 et SE ne sont pas des codes d'erreur : H1 correspond à l'indicateur de dégivrage pendant le chauffage ; SE est l'indicateur de la fonction Power Save.) Note: If the problems still have, turn off the appliance and disconnect from power supply, then contact the nearest Whirlpool Authorized Service Center.
  • Seite 71 CONSEILS EN MATIÈRE D'INSTALLATION Avant de procéder à l'installation 4. Vérifiez que l'appareil n'a pas été endommagé pendant le transport. 1. Veuillez lire attentivement le présent manuel avant d'installer l'appareil. 5. Effectuez le montage en positionnant les parties en mouvement les plus basses de l'unité 2.
  • Seite 72: Instructions D'installation

    INSTRUCTIONS D'INSTALLATION Schéma d'installation Distance du plafond : supérieure à 150 mm Distance du mur : supérieure à 150 mm Distance du mur : Unité intérieure supérieure à 150 mm Distance du sol : supérieure à 2500 mm Unité extérieure Distance entre la bouche Distance entre la bouche d'entrée de l'air et le mur :...
  • Seite 73 Choix du meilleur emplacement Unité intérieure Emplacement pour installer l'unité intérieure • Choisissez un endroit ne présentant aucun obstacle à proximité de la bouche de sortie de l'air et où l'air peut aisément être diffusé dans La longueur de la tous les coins de la pièce.
  • Seite 74: Installation De L'unité Intérieure

    INSTALLATION DE L'UNITÉ INTÉRIEURE 1. Installation du support de montage • L'endroit du support de montage doit être choisi en fonction de l'emplacement de l'unité Repère au milieu Dispositif d'inclinaison intérieure et de l'orientation des conduites. • Ajustez le support de montage à l'horizontale à l'aide d'un dispositif d'inclinaison ou d'un fil à...
  • Seite 75: Remarque Importante

    REMARQUE IMPORTANTE : Isolation thermique des joints des conduites : Appliquez un matériau isolant autour des joints des conduites, puis recouvrez-les d'une bande de vinyle. Bande de vinyle de protection Isolation thermique Tuyauterie avec isolation thermique : a. Placez le tuyau de vidange sous la tuyauterie. b.
  • Seite 76 4. Branchement du câble Plaque de revêtement • Unité intérieure 1) Ouvrez le panneau avant, déposez la plaque de revêtement et desserrez la vis. 2) Branchez le cordon d'alimentation à l'unité intérieure en connectant les fils aux bornes Bleu respectives du tableau de commande, comme Noir Jaune/ indiqué...
  • Seite 77: Installation De L'unité Extérieure

    INSTALLATION DE L'UNITÉ EXTÉRIEURE 1. Installation de l'orifice et du tuyau d'évacuation Lorsque l'unité extérieure est en mode Chauffage, la condensation est évacuée à partir de cette unité. Afin de ne pas gêner vos voisins et de protéger l'environnement, installez un orifice et un tuyau d'évacuation pour orienter l'eau issue de la condensation.
  • Seite 78 PURGE DE L'AIR L'air imprégné d'humidité qui stagne dans le cycle de refroidissement peut entraîner une panne du compresseur. Après avoir raccordé les unités intérieure et extérieure, purgez l'air et éliminez les moisissures du cycle de refroidissement à l'aide d'une pompe à vide, comme illustré ci-dessous. Remarque : En raison de la pression élevée qui règne à...
  • Seite 79: Voorzorgsmaatregelen

    VOOR U HET APPARAAT GEBRUIKT Om uw nieuwe apparaat zo goed mogelijk te gebruiken, vragen wij dat u de instructies voor de gebruiker grondig doorneemt en ze bij de hand houdt om ze later te kunnen raadplegen. VOORZORGSMAATREGELEN • De installatie en het onderhoud/de reparatie •...
  • Seite 80 MILIEUBEHOUD • Dit apparaat werd gemaakt van materiaal dat WEGRUIMEN VAN APPARAAT kan worden gerecycled of hergebruikt. Het • Dit apparaat is gemarkeerd in overeenstemming apparaat moet worden weggeruimd in met de Europese Richtlijn 2002/96/EG voor overeenstemming met de lokale regelgeving elektrisch en elektronisch afval (WEEE).
  • Seite 81: Productbeschrijving

    PRODUCTBESCHRIJVING Binnenunit Buitenunit 1. Luchtinlaat 11. Luchtinlaat 2. Voorpaneel 12. Leidingwerk en stroomkabel 3. Weergavepaneel 13. Afvoerslang 4. Luchtuitlaat 14. Luchtuitlaat 5. Elektriciteitskast 6. Aan/uit-schakelaar 7. Ventilatierooster verticale aanpassing 8. Ventilatierooster horizontale aanpassing 9. Luchtfilter 10. Afstandsbediening De afbeeldingen in de gebruikershandleiding zijn gebaseerd op externe weergaven van standaardmodellen, de vorm en het ontwerp variëren naargelang het model.
  • Seite 82 BESCHRIJVING INDICATOREN DISPLAY BEDIENINGSPANEEL Indicator temperatuur (1) Geeft ingestelde temperatuur en kamertemperatuur weer. Indicator werking (2) Gaat branden (wit) wanneer het apparaat verbonden is met een stroombron. Dit blijft branden (wit) wanneer het apparaat in werking is. Indicator verwarmen (3) Gaat branden tijdens modus verwarmen.
  • Seite 83 FUNCTIES EN INDICATOREN AFSTANDSBEDIENING AAN/UIT-TOETS Druk op deze toets om het apparaat te starten en/of te stoppen. 2-3. TOETSEN TEMPERATUURINSTELLING Gebruikt om temperatuur in te stellen. Gebruikt om tijdstip voor klok in te stellen. Gebruikt om tijdstip in te stellen in timermodus.
  • Seite 84 INDICATORSYMBOLEN OP DISPLAY AFSTANDSBEDIENING Indicator koelen Indicator Indicator ontvochtigen Indicator slaapmodus Indicator alleen ventilator Indicator om u heen Indicator verwarmen Indicator jet Automatische ventilatorsnelheid Transmissie signaal Hoge ventilatorsnelheid Weergave timer ingesteld Weergave huidige tijd Gemiddeld hoge ventilatorsnelheid °F Weergave temperatuur Gemiddelde ventilatorsnelheid Indicator weergave ingestelde temperatuur Gemiddeld lage ventilatorsnelheid...
  • Seite 85 OPSLAG EN TIPS VOOR HET GEBRUIK VAN DE AFSTANDSBEDIENING Batterijen plaatsen 1. Duw het batterijdeksel lichtjes naar beneden en druk het in de richting van de pijl om het te verwijderen (Zie afbeelding). 2. Plaats 2 AAA-batterijen (1,5 V) in het batterijvak. Zorg ervoor dat de "+"...
  • Seite 86 BESCHRIJVING VAN DE WERKINGSMODI Algemene werking: 1. Inschakelen Druk op de toets On-Off. Wanneer het apparaat het signaal ontvangt, gaat de indicator IN WERKING op het display van de binnenunit branden. Wanneer u een andere modus kiest, moet u enkele seconden wachten en de handeling herhalen als het apparaat niet onmiddellijk reageert.
  • Seite 87 REGELING RICHTING LUCHTSTROOM 5. Regeling richting luchtstroom De verticale luchtstroom wordt automatisch aangepast naar een bepaalde hoek in overeenstemming met de werkingsmodus nadat het apparaat wordt ingeschakeld. De richting van de luchtstroom kan eveneens worden aangepast aan uw eigen behoeften. Druk hiervoor op de toets Swing op de afstandsbediening.
  • Seite 88 BESCHRIJVINGEN MODI EN FUNCTIES MODUS 6th SENSE Druk op de toets, wordt weergegeven, het apparaat gaat direct naar de modus 6th sense. In deze modus worden de temperatuur en de ventilatorsnelheid automatisch ingesteld op basis van de effectieve kamertemperatuur. Modellen warmtepompen Binnen- Werkings-modus temperatuur...
  • Seite 89: Koelen Of Ontvochtigen, Zal Het

    Functies JET en VERLICHTING Iedere keer dat de toets JET (Verlichting) ingedrukt wordt, verandert de werking achtereenvolgens in: • Bij werking KOELEN en VERWARMEN: JET aan / LICHT aan JET uit / LICHT aan JET uit / LICHT aan JET uit / Licht uit •...
  • Seite 90 • Als u deze modus instelt tijdens de werking VERWARMEN, zal het apparaat de ingestelde temperatuur tijdens het eerste uur met 1°C laten dalen en gedurende het tweede uur met nog 1°C, waarna de temperatuur constant blijft. 6th SENSE SLEEP-modus wordt weergegeven op de afstandsbediening in deze modus.
  • Seite 91 Functie AUTO CLEAN (Automatisch reinigen) • Druk op deze toets in de modus KOELEN of DROGEN. Het pictogram wordt weergegeven en de functie AUTO CLEAN (Automatisch reinigen) is ingesteld. Nadat u het apparaat hebt uitgeschakeld, blijft de ventilator in de binnenunit nog 10 minuten draaien om het vocht uit de binnenunit te verwijderen, op die manier wordt een gezonde, schimmelvrije omgeving gecreëerd.
  • Seite 92 Functie TIMER Met de toets T-On/T-Off kunt u de functie TIMER ON en de functie TIMER OFF apart instellen. U kunt de timer op een handige manier inschakelen. Druk gewoon op de linkerkant van deze toets om een aangename kamertemperatuur te verkrijgen wanneer u thuis komt.
  • Seite 93 Functie SUPER SILENT en gelijktijdig indrukken om te wisselen tussen °C Druk op deze toets om de unit zo geruisloos en °F. mogelijk te laten werken, zo verkrijgt u een stille en Opmerking: deze functie is alleen beschikbaar comfortabele woonomgeving. wanneer het apparaat is uitgeschakeld.
  • Seite 94 3 in 1 combifilter. Deze filters verwijderen kleine deeltjes, neutraliseren virussen en allergenen en elimineren onaangename luchtjes. Om de filters efficiënt te houden, raden wij u aan deze filters om de 2-3 jaar te vervangen. Neem hiervoor contact op met een erkende Whirlpool Klantenservice.
  • Seite 95 Whirlpool Authorized Service Center. (H1 and SE is not error code, H1 is the indicator of defrosting during heating, SE is the indicator of power save function).
  • Seite 96: Installatie Service

    INSTALLATIE SERVICE Voor installatie 4. Controleer het product om na te gaan dat het 1. Lees deze handleiding grondig door voor u het niet beschadigd werd voor de installatie. apparaat installeert. 5. Monteer het apparaat met de laagste 2. Het apparaat moet worden geïnstalleerd in bewegende onderdelen van de binnenunit overeenstemming met de nationale regelgeving minstens 2,5 m boven het vloerniveau.
  • Seite 97: Installatie-Instructies

    INSTALLATIE-INSTRUCTIES Installatieschema Afstand van plafond moet meer dan 150 mm zijn Afstand van muur moet meer dan 150 mm zijn Afstand van muur moet Binnenunit meer dan 150 mm zijn Afstand van vloer moet meer dan 2500 mm zijn Buitenunit Afstand tussen luchtinlaat Afstand tussen luchtinlaat en muur moet meer dan...
  • Seite 98 Kies de beste locatie Binnenunit Locatie om binnenunit te installeren • Waar er zich geen obstakel in de buurt van de luchtuitlaat bevindt en de lucht makkelijk naar elke hoek van de ruimte kan worden geblazen. Lengte leiding is • Waar het leidingwerk en de opening in de muur 5 ~ 15 meter makkelijk kunnen worden geplaatst.
  • Seite 99: Installatie Binnenunit

    INSTALLATIE BINNENUNIT 1. Montageplaat installeren • Kies waar u de montageplaat wilt installeren naargelang de locatie van de binnenunit en de Markering in het midden Waterpas richting van het leidingwerk. • Pas de montageplaat horizontaal aan met een waterpas of loodlijn. •...
  • Seite 100 BELANGRIJK: Thermische isolatie verbindingsstukken leidingwerk: Omwikkel de verbindingsstukken van het leidingwerk met thermisch isolatiemateriaal en omwikkel ze daarna met vinyltape. Omwikkeld met vinyltape Thermische isolatie Thermische isolatie leidingwerk: a. Plaats de afvoerslang onder het leidingwerk. b. Isolatiemateriaal: polytheenschuim met een dikte Thermisch geïsoleerde buis Grote leiding...
  • Seite 101 4. Kabel aansluiten • Binnenunit Dekplaat 1) Open het voorpaneel, verwijder de dekplaat door de schroef los te maken. 2) Sluit de stroomkabel aan op de binnenunit door de draden individueel aan te sluiten op de aansluitklemmen op het schakelbord als Blauw volgt.
  • Seite 102 INSTALLATIE BUITENUNIT 1. Afvoeropening en afvoerslang installeren De condens wordt afgevoerd van de buitenunit wanneer de unit in verwarmingsmodus werkt. Installeer een afvoeropening en -slang om het condenswater op te vangen. Zo stoort u uw buren niet en beschermt u het milieu. Installeer de afvoeropening op het frame van de buitenunit en sluit een afvoerslang aan op de opening zoals afgebeeld op de afbeelding rechts.
  • Seite 103 LUCHT ZUIVEREN Als er vochtige lucht in de koelcyclus blijft zitten, kan dit ertoe leiden dat de compressor defect raakt. Nadat u de binnen- en buitenuit hebt geïnstalleerd, moet u met een vacuümpomp de lucht en het vocht uit de koelcyclus halen, zoals hieronder afgebeeld. Opmerking: Aangezien de systeemdruk hoog is en om het milieu te beschermen, moet u ervoor zorgen dat u het koelmiddel niet rechtstreeks in de lucht laat.
  • Seite 104: Antes De Utilizar El Aparato

    ANTES DE UTILIZAR EL APARATO Para obtener el máximo rendimiento de su electrodoméstico, conviene leer atentamente las instrucciones de uso y guardarlas para futuras consultas. PRECAUCIONES DE SEGURIDAD • La instalación y el mantenimiento /reparaciones • No bloquee nunca la entrada o salida de aire de debe realizarlos un técnico cualificado, la unidad interior y exterior.
  • Seite 105: Respeto Del Medio Ambiente

    RESPETO DEL MEDIO AMBIENTE • Este aparato está hecho con material reciclable ELIMINACIÓN DEL APARATO o reutilizable. La eliminación del aparato deberá • Este aparato está marcado de conformidad con llevarse a cabo según las normas locales de la Directiva 2002/96/CE sobre Residuos de eliminación de desechos.
  • Seite 106: Descripción Del Producto

    DESCRIPCIÓN DEL PRODUCTO Unidad interior Unidad exterior 1. Toma de Aire 11. Toma de Aire 2. Panel Frontal 12. Tuberías y Cable de Conexión a Red 3. Panel del Display 13. Tubo de Descarga 4. Salida de Aire 14. Salida de Aire 5.
  • Seite 107 DESCRIPCIÓN DE LOS INDICADORES DEL PANEL DE MANDOS Indicador de temperatura (1) Muestra la temperatura configurada y la temperatura ambiente. Indicador de funcionamiento (2) Se enciende de color blanco cuando se conecta al suministro eléctrico. Se enciende de blanco durante el funcionamiento. Indicador de calefacción (3) Se enciende al usar el aparato en modo calefacción.
  • Seite 108 FUNCIONES E INDICACIONES DEL MANDO A DISTANCIA BOTÓN ON/OFF(encendido y apagado) Inicia o detiene el electrodoméstico pulsando este botón. 2-3. BOTONES PARA CONFIGURAR LA TEMPERATURA Se usa para fijar la temperatura. Se usa para fijar la hora del reloj. Se usa para fijar el tiempo del temporizador. BOTÓN MODE (modo) Permite seleccionar el modo de funcionamiento.
  • Seite 109 SÍMBOLOS INDICADORES EN LA PANTALLA RC Indicador de enfriamiento indicador Indicador del deshumidificador Indicador dormir Indicador de sólo ventilador Indicador de aire circundante Indicador de calefacción Indicador rápido Velocidad del ventilador automática Transmisión de la señal Velocidad del ventilador rápida Temporizador configurado Hora actual Velocidad del ventilador media-alta...
  • Seite 110 ALMACENAMIENTO Y RECOMENDACIONES SOBRE EL USO DEL MANDO A DISTANCIA Colocación de las pilas 1. Presione con cuidado hacia abajo la tapa que cubre las pilas y empújela en el sentido de la flecha para quitarla, tal y como se indica. 2.
  • Seite 111 DESCRIPCIÓN DEL MODO DE FUNCIONAMIENTO Funcionamiento general: 1. Encendido Pulse el botón On-Off, cuando el aparato recibe la señal, se enciende el indicador RUNNING (encendido) en el display de la unidad interior. Durante el cambio de modo espere unos instantes y repita la operación si el aparato no responde.
  • Seite 112 CONTROL DE LA DIRECCIÓN DEL AIRE 5. Control de la dirección del aire El flujo de aire vertical es ajustado de forma automática a un ángulo concreto según el modo de funcionamiento una vez encendido el aparato. La dirección del aire también puede ser ajustada como usted desee pulsando el botón Swing (oscilación) del mando a distancia.
  • Seite 113 DESCRIPCIONES DE MODO Y FUNCIÓN MODO 6º SENTIDO Pulse el botón , se mostrará , el aparato entra directamente en el modo 6º sentido. En este modo, la temperatura y la velocidad del ventilador serán configuradas de forma automática en función de la temperatura ambiente real. Modelos de bomba calorífica Temperatura Modo de funcionamiento...
  • Seite 114: Función Reloj

    Funciones JET y LIGHT Cada vez se pulsa el botón JET (Light), el estado de funcionamiento cambia en secuencia: • En modo REFRIGERACIÓN y DESHUMIDIFICADOR: RÁPIDO encendido / RÁPIDO apagado / LUZ encendido LUZ encendido RÁPIDO apagado / RÁPIDO apagado / LUZ apagado LUZ encendido •...
  • Seite 115 Modo 6th SENSE (6º sentido) se mostrará en el mando a distancia, en este modo. El aparato cambia la temperatura establecida automáticamente dependiendo de la temperatura actual de la habitación. Modo SLEEP DIY (reposo personalizado) se mostrará en el mando a distancia, en este modo.
  • Seite 116 Función LIMPIEZA AUTOMÁTICA • Al pulsar este botón en modo REFRIGERACIÓN o DESHUMIDIFICACIÓN, el se muestra el icono y se configura la función de LIMPIEZA AUTOMÁTICA. Una vez apagado el aparato, el ventilador interior seguirá funcionando durante 10 minutos para eliminar la humedad de la unidad interior y crear un entorno saludable y sin moho.
  • Seite 117 Función TEMPORIZADOR El botón T-On/T-Off permite activar o desactivar el funcionamiento del temporizador por separado. Es conveniente encender el temporizador pulsando la parte izquierda del botón para tener una temperatura ambiente agradable cuando vuelva a casa. También puede apagar el temporizador de forma automática para descansar bien por la noche, pulsando la parte derecha del botón.
  • Seite 118: Funcionamiento De Emergencia

    Función SUPER SILENT (silencioso) Nota: esta función sólo está disponible cuando el Pulse este botón para dejar en marcha el aparato de producto está apagado. El display de temperatura manera que haga poco ruido y conseguir un entono del panel frontal cambiará al encender el aparato. El agradable y cómodo.
  • Seite 119: Mantenimiento

    Para mantener la eficacia de los filtros, recomendamos cambiar los filtros cada 2-3 años; para ello póngase en contacto con el servicio de asistencia técnica de Whirlpool.
  • Seite 120: Solución De Problemas

    PL, PH, en el display de la unidad interior, apague el aparato y desenchúfelo de la red eléctrica. Se indica un código de Póngase en contacto con el Centro de Asistencia Whirlpool Autorizado más cercano. (H1 y SE error no son códigos de error. H1 es el indicador de la descongelación durante el calentamiento, SE es el indicador de la función de ahorro de energía)
  • Seite 121 SERVICIO DE INSTALACIÓN Antes de la instalación 4. Compruebe que el producto no haya sufrido 1. Antes de la instalación, lea este manual con daños antes de instalarlo. atención. 5. Móntelo con las piezas móviles inferiores de la 2. El aparato de aire acondicionado debe ser unidad interior al menos 2,5m por encima del instalado por técnicos cualificados según la suelo.
  • Seite 122: Instrucciones De Instalación

    INSTRUCCIONES DE INSTALACIÓN Diagrama de instalación La distancia desde el techo La distancia desde la pared debe ser superior a 150 mm debe ser superior a 150 mm La distancia desde la pared Unidad interior debe ser superior a 150 mm La distancia desde el suelo debe ser superior a 2.500 mm Unidad exterior...
  • Seite 123 Elija el mejor lugar Unidad interior Lugar para instalar la Unidad Interior • Sin obstáculos cerca de la salida de aire y el aire puede circular fácilmente hasta cada esquina de la habitación. La longitud de • Lugares en los que se pueda instalar tubería y los tubos es de realizar orificios de pared con facilidad.
  • Seite 124: Instalación De La Unidad Interior

    INSTALACIÓN DE LA UNIDAD INTERIOR 1. Instalación de la Placa de Montaje • Elija una ubicación para instalar la placa de montaje, teniendo en cuenta la posición de la Marque el medio Regla de nivel horizontal unidad interior y la dirección de la tubería. •...
  • Seite 125 IMPORTANTE: Aislamiento térmico de las uniones de tubería: Envuelva las uniones de tubería con material aislante térmico y cubra después con cinta de vinilo. Envuelto en cinta de vinilo Aislamiento térmico Aislamiento térmico de la tubería: a. Coloque la manguera de desagüe debajo de la Tubo con tubería.
  • Seite 126 4. Conexión del cable Placa • Unidad Interior 1) Abra el panel frontal y quite la placa soltando el tornillo. 2) Conecte el cable de alimentación a la unidad interior mediante la conexión de los hilos a Azul los terminales de la placa de control, uno por Negro Amarillo/ uno, como se indica.
  • Seite 127: Instalación De La Unidad Exterior

    INSTALACIÓN DE LA UNIDAD EXTERIOR 1. Instalación de la Boca de Descarga y la Manguera de Descarga La condensación desagua por la unidad exterior cuando el aparato funciona en modo de calefacción. Para no molestar a los vecinos y proteger el entorno, instale una boca y una manguera de desagüe para dirigir el agua de la condensación.
  • Seite 128: Purga De Aire

    PURGA DE AIRE El aire húmedo que queda en el ciclo refrigerante puede provocar un fallo de funcionamiento del compresor. Tras conectar las unidades interior y exterior, evacue el aire y la humedad del ciclo refrigerante mediante una bomba de vacío, como se ilustra a continuación. Nota: Debido a que la presión del sistema es elevado y para proteger el medio ambiente, no descargue el refrigerante directamente en la atmósfera.
  • Seite 129: Antes De Usar O Aparelho

    ANTES DE USAR O APARELHO Para tirar o máximo partido do seu novo aparelho, leia atentamente as instruções e conserve-as à mão para consulta futura. PRECAUÇÕES DE SEGURANÇA • A instalação e a manutenção/reparação devem entrada/saída de ar da unidade interior&exterior. ser executadas por um técnico qualificado, em •...
  • Seite 130: Eliminação Da Embalagem

    MEDIDAS DE PROTECÇÃO AMBIENTAL • Este aparelho foi fabricado com materiais ELIMINAÇÃO DO APARELHO recicláveis ou reutilizáveis. A eliminação do • Este aparelho está marcado de acordo com a aparelho deve ser feita em conformidade com as Directiva Europeia 2002/96/CE, relativa a normas locais relativas à...
  • Seite 131: Descrição Do Produto

    DESCRIÇÃO DO PRODUTO Unidade interior Unidade exterior 1. Entrada de ar 11. Entrada de ar 2. Painel frontal 12. Tubos e cabo eléctrico 3. Painel do visor 13. Mangueira de drenagem 4. Saída de ar 14. Saída de ar 5. Caixa eléctrica 6.
  • Seite 132 DESCRIÇÃO DOS INDICADORES DO VISOR DO PAINEL DE CONTROLO Indicador de temperatura (1) Apresenta a temperatura programada e a temperatura ambiente. Indicador de funcionamento (2) Acende na cor branca quando o aparelho é ligado à corrente eléctrica. Acende na cor branca durante o funcionamento. Indicador de aquecimento (3) Acende durante o modo de aquecimento.
  • Seite 133 FUNÇÕES E INDICADORES DO CONTROLO REMOTO BOTÃO ON/OFF Liga e/ou desliga o aparelho premindo este botão. 2-3. BOTÕES DE PROGRAMAÇÃO DA TEMPERATURA Utilizado para programar a temperatura. Utilizado para ajustar a hora do relógio. Utilizado para ajustar a hora no modo do temporizador.
  • Seite 134 SÍMBOLOS DOS INDICADORES NO VISOR DO CR Indicador de arrefecimento Indicador do modo Sleep Indicador de desumidificação Indicador da função Around U Indicador do modo Apenas ventilação Indicador do modo Jet Indicador de aquecimento Transmissão de sinal Velocidade automática da ventoinha Visualização da temporização programada Velocidade alta da ventoinha...
  • Seite 135 ARMAZENAMENTO E SUGESTÕES PARA USAR O CONTROLO REMOTO Como inserir as pilhas 1. Prima delicadamente a tampa das pilhas e empurre na direcção da seta para remover, conforme indicado. 2. Insira 2 pilhas AAA (1.5V) no compartimento. Certifique-se de que respeita a polaridade "+" e "-"...
  • Seite 136 DESCRIÇÃO DO MODO DE FUNCIONAMENTO Funcionamento geral: 1. Ligação do aparelho Prima o botão On-Off; quando o aparelho receber o sinal, o indicador de FUNCIONAMENTO da unidade interior acende. Durante uma alteração de modo, aguarde alguns segundos e repita a operação, caso o aparelho não responda.
  • Seite 137 CONTROLO DA DIRECÇÃO DO FLUXO DE AR 5. Controlo da direcção do fluxo de ar O fluxo de ar vertical é automaticamente ajustado para um determinado ângulo, de acordo com o modo de funcionamento utilizado depois de ligar o aparelho. Também poderá ajustar a direcção do fluxo de ar de acordo com os seus próprios requisitos, premindo o botão Swing (Oscilação) do controlo remoto.
  • Seite 138 DESCRIÇÕES DOS MODOS E DAS FUNÇÕES MODO 6th SENSE Se premir o botão , o símbolo é apresentado e o aparelho entra directamente no modo. Neste modo, a temperatura e a velocidade da ventoinha são automaticamente programadas, com base na temperatura ambiente real. Modelos com bomba de aquecimento Temperatura Modo de funcionamento...
  • Seite 139 Funções JET (RÁPIDO) e LIGHT (LUZ) Sempre que premir o botão JET (Light) (Rápido (Luz)), o modo de funcionamento muda na seguinte sequência: • No modo de ARREFECIMENTO e de AQUECIMENTO: Modo JET ligado / Modo JET desligado / Função LIGHT ligada Função LIGHT ligada Modo JET desligado / Modo JET desligado /...
  • Seite 140 • Se programar este modo durante o funcionamento no modo de AQUECIMENTO, o aparelho permite que a temperatura programada desça 1°C na primeira hora e 1°C adicional na segunda hora, mantendo, depois, a temperatura num valor constante. Modo 6TH SENSE SLEEP (Noite 6th Sense) Durante este modo, 2- é...
  • Seite 141 Função AUTO CLEAN (Limpeza automática) • Se premir este botão no modo de ARREFECIMENTO ou de SECAGEM, o ícone é apresentado e a função AUTO CLEAN (Limpeza automática) fica programada. Depois de desligar o aparelho, a ventoinha interna continuará em funcionamento durante 10 minutos para eliminar a humidade acumulada na unidade interior, criando, assim, um ambiente isento de bolores.
  • Seite 142 Função TIMER (Temporizador) O botão T-On/T-Off (Temporizador ligado/desligado) permite programar a função TIMER ON (Temporizador ligado) e a função TIMER OFF (Temporizador desligado) individualmente. É conveniente activar o temporizador, premindo o lado esquerdo deste botão, para desfrutar de uma temperatura ambiente confortável assim que chegar a casa.
  • Seite 143: Funcionamento De Emergência

    Função SUPER SILENT (Super silencioso) Nota: esta função só está disponível quando o Prima este botão para colocar a unidade a aparelho está desligado. A apresentação da funcionar com um nível baixo de ruído, para obter temperatura no painel frontal será alterada em um ambiente tranquilo e confortável.
  • Seite 144 • Não limpe o filtro na máquina de lavar eficiência dos filtros, recomenda-se que sejam roupa. substituídos a cada 2-3 anos. Para tal, contacte • Filtros adicionais: um Centro de Assistência Técnica Autorizado da O seu produto inclui um filtro HEPA e um filtro Whirlpool.
  • Seite 145: Resolução De Problemas

    F4, F5, H3, H4, H5, HC, L9, LP , PL, PH, desligue o aparelho e retire a ficha da tomada Indicação de código de eléctrica; em seguida, contacte o Centro de assistência técnica Whirlpool autorizado mais erro próximo. (H1 e SE não são códigos de erro, H1 é o indicador do processo de descongelação durante o aquecimento e SE é...
  • Seite 146 SERVIÇO DE INSTALAÇÃO Antes da instalação 4. Verifique o produto para confirmar que não 1. Leia este manual cuidadosamente antes de sofreu danos antes da instalação. iniciar os trabalhos de instalação. 5. Monte o aparelho com as peças móveis 2. O aparelho deve ser instalado por técnicos inferiores da unidade interior a uma distância qualificados, de acordo com as normas mínima de 2,5 metros acima do nível do chão.
  • Seite 147: Instruções De Instalação

    INSTRUÇÕES DE INSTALAÇÃO Esquema da instalação A distância para o tecto deve ser superior a 150 mm A distância para a parede deve ser superior a 150 mm A distância para a parede Unidade interior deve ser superior a 150 mm A distância para o chão deve ser superior a 2500 mm Unidade exterior...
  • Seite 148 Selecção do local ideal Unidade interior Local de instalação da unidade interior • Local onde não existam obstáculos perto da saída de ar e onde o ar possa ser facilmente emitido para todo o compartimento. O comprimento • Local onde os tubos e o orifício na parede do tubo é...
  • Seite 149: Instalação Da Unidade Interior

    INSTALAÇÃO DA UNIDADE INTERIOR 1. Instalação da placa de montagem • Seleccione um local para instalar a placa de montagem de acordo com a localização da Marca central Nível unidade interior e a direcção dos tubos. • Ajuste a placa de montagem horizontalmente com um nível ou um fio de prumo.
  • Seite 150 IMPORTANTE: Isolamento térmico das juntas dos tubos: Envolva as juntas das tubagens com materiais de isolamento térmico e, de seguida, envolva-os com fita de vinil. Envolvimento em fita de vinil Isolamento térmico Tubos com isolamento térmico: a. Posicione a mangueira de drenagem por baixo dos tubos.
  • Seite 151 4. Ligação do cabo • Unidade interior 1) Abra o painel frontal e retire a placa de cobertura, desapertando o respectivo Placa de cobertura parafuso. 2) Ligue o cabo de alimentação à unidade interior, ligando os fios aos terminais no quadro de controlo, um a um, da seguinte forma.
  • Seite 152: Instalação Da Unidade Exterior

    INSTALAÇÃO DA UNIDADE EXTERIOR 1. Instalação do orifício de drenagem e da mangueira de drenagem A água de condensação é drenada pela unidade exterior, quando a unidade funciona no modo de aquecimento. Para não perturbar os seus vizinhos e proteger o ambiente, instale um orifício de drenagem e uma mangueira de drenagem, para direccionar a água de condensação.
  • Seite 153 PURGA DE AR A permanência de ar com humidade no ciclo de refrigeração pode provocar uma avaria do compressor. Depois de ligar as unidades interior e exterior, elimine o ar e a humidade presentes no ciclo de refrigeração, utilizando uma bomba de vácuo, tal como mostrado abaixo. Nota: Dada a elevada pressão do sistema e também para proteger o ambiente, não descarregue o refrigerante directamente para o ar.
  • Seite 154 PRIMA DI UTILIZZARE L'APPPARECCHIO Per utilizzare al meglio il vostro nuovo apparecchio, vi invitiamo a leggere attentamente le istruzioni per l'uso e a conservarle per il futuro. PRECAUZIONI • L'installazione e la manutenzione/riparazione • Non bloccare mai l'ingresso e l'uscita dell'aria devono essere effettuate da un tecnico delle unità...
  • Seite 155: Consigli Per La Salvaguardia Dell'ambiente

    CONSIGLI PER LA SALVAGUARDIA DELL'AMBIENTE • Questo apparecchio è costituito da materiale SMALTIMENTO DELL'APPARECCHIO riciclabile o riutilizzabile. Lo smaltimento deve • Questo apparecchio è contrassegnato in essere effettuato in conformità alle norme locali conformità alla Direttiva Europea 2002/96/CE sullo smaltimento dei rifiuti. Prima della sui rifiuti da apparecchiature elettriche ed rottamazione, tagliare il cavo di alimentazione in elettroniche (RAEE).
  • Seite 156: Descrizione Prodotto

    DESCRIZIONE PRODOTTO Unità interna Unità esterna 1. Ingresso aria 11. Ingresso aria 2. Pannello frontale 12. Tubi e cavo di alimentazione 3. Pannello del display 13. Tubo flessibile di scarico 4. Uscita aria 14. Uscita aria 5. Scatola elettrica 6. Interruttore On/Off 7.
  • Seite 157 DESCRIZIONE DELLE SPIE SUL DISPLAY DEL PANNELLO COMANDI Indicatore di temperatura (1) Visualizza la temperatura impostata e la temperatura ambiente. Spia di funzionamento (2) Si accende in bianco quando l'apparecchio viene collegato all'alimentazione elettrica. Si accende in bianco durante il funzionamento. Spia di riscaldamento (3) Si accende durante la modalità...
  • Seite 158 SPIE E FUNZIONI DEL TELECOMANDO PULSANTE ON/OFF Premendo questo pulsante si accende e spegne l'apparecchio. 2-3. PULSANTI IMPOSTAZIONE TEMPERATURA Utilizzati per impostare la temperatura. Utilizzati per impostare l'ora dell'orologio. Utilizzati per impostare l'ora in modalità Timer. PULSANTE MODALITÀ Utilizzato per selezionare la modalità di funzionamento.
  • Seite 159 SIMBOLI SPIE SUL DISPLAY DEL TELECOMANDO Spia Raffreddamento spia Spia Deumidificazione Spia Riposo Spia Solo ventilatore Spia Attorno a te Spia Riscaldamento Spia Jet Velocità automatica ventilatore Trasmissione segnale Alta velocità ventilatore Display impostazione timer Display ora corrente Velocità medio-alta ventilatore °F Display temperatura Velocità...
  • Seite 160 CONSIGLI PER RIPORRE E UTILIZZARE IL TELECOMANDO Come inserire le batterie 1. Premere leggermente sul coperchio della batteria e in direzione della freccia per rimuoverlo, come illustrato. 2. Inserire 2 batterie AAA (1,5 V) nel vano. Assicurarsi che la polarità "+" e "-" sia posizionata correttamente.
  • Seite 161: Descrizione Delle Modalità Di Funzionamento

    DESCRIZIONE DELLE MODALITÀ DI FUNZIONAMENTO Funzionamento generale: 1. Accensione Premere il pulsante On-Off, quando l'apparecchio riceve il segnale, si accende la spia FUNZIONAMENTO sul display dell'unità interna. Durante i cambiamenti di modalità, attendere alcuni secondi e ripetere l'operazione se l'apparecchio non risponde subito. Quando si imposta il funzionamento in modalità...
  • Seite 162: Controllo Della Direzione Del Flusso D'aria

    CONTROLLO DELLA DIREZIONE DEL FLUSSO D'ARIA 5. Controllo della direzione del flusso d'aria Il flusso d'aria verticale quando si accende l'apparecchio viene regolato automaticamente a una determinata inclinazione in base alla modalità di funzionamento. La direzione del flusso d'aria può anche essere regolata a piacere premendo il pulsante Swing (Oscillazione) del telecomando.
  • Seite 163 DESCRIZIONI DELLE MODALITÀ E DELLE FUNZIONI MODALITÀ 6th SENSE Premere il pulsante , viene visualizzato l'apparecchio entra direttamente nella modalità 6th Sense. In questa modalità, la temperatura e la velocità del ventilatore sono impostate automaticamente in base alla temperatura ambiente effettiva. Modelli a pompa di calore Temperatura Modalità...
  • Seite 164 Funzioni JET e LUCE Ogni volta che si preme il pulsante JET (Light), lo stato di funzionamento cambia in quest'ordine: • In modalità RAFFREDDAMENTO e RISCALDAMENTO: JETon / LIGHTon JEToff / LIGHTon JEToff / LIGHTon JEToff / LIGHToff • In altre modalità: LIGHToff LIGHTon Nota:...
  • Seite 165 • Se si attiva questa modalità quando l'apparecchio è impostato su RISCALDAMENTO, la temperatura impostata diminuirà di 1°C durante la prima ora e ancora di 1°C durante la seconda ora, poi resterà costante. Modalità RIPOSO 6th SENSE viene visualizzato nel telecomando in questa modalità.
  • Seite 166 Funzione PULIZIA AUTOMATICA • Premendo il pulsante Auto Clean (Pulizia automatica) nella modalità RAFFREDDAMENTO o DEUMIDIFICAZIONE, viene visualizzata l'icona ed è impostata la funzione PULIZIA AUTOMATICA. Dopo aver spento l'apparecchio, il ventilatore dell'unità interna continua a funzionare per 10 minuti per eliminare l'umidità nell'unità...
  • Seite 167 Funzione TIMER Il pulsante T-On/T-Off consente di impostare separatamente la funzione TIMER ON e la funzione TIMER OFF. È indicato attivare il timer premendo il lato sinistro di questo pulsante per avere una temperatura ambiente gradevole quando si rientra a casa. Si può anche impostare lo spegnimento automatico dell'apparecchio a un determinato orario premendo il lato destro di questo pulsante per non avere...
  • Seite 168: Funzionamento D'emergenza

    Funzione SUPER SILENT Nota: questa funzione è disponibile soltanto Premendo questo pulsante l'apparecchio lavorerà in quando l'apparecchio è spento. La temperatura condizioni di bassa rumorosità, permettendovi di visualizzata nel pannello frontale cambia quando si godere di ambienti tranquilli e gradevoli. accende l'apparecchio.
  • Seite 169: Manutenzione

    3 in 1. Questi filtri eliminano le particelle di piccole dimensioni, neutralizzano i virus e gli allergeni ed eliminano gli odori. Per mantenere inalterata l'efficienza dei filtri, consigliamo di sostituirli ogni 2-3 anni contattando un centro assistenza autorizzato Whirlpool.
  • Seite 170 (H1 e SE non sono codici d'errore, H1 è la spia di sbrinamento durante il riscaldamento, SE è la spia della funzione Risparmio energetico.) Nota: Se i problemi persistono, spegnere l'apparecchio, scollegarlo dall'alimentazione, quindi contattare il Centro di Assistenza autorizzato Whirlpool più vicino. Non cercare di spostare, riparare, smontare o modificare da soli l'apparecchio.
  • Seite 171: Installazione

    INSTALLAZIONE Prima dell'installazione 5. Montare l'apparecchio con le parti mobili più 1. Leggere attentamente il presente manuale basse dell'unità interna ad almeno 2,5 m al di prima di installare l'apparecchio. sopra del pavimento o del livello del suolo. 2. L'apparecchio deve essere installato da tecnici 6.
  • Seite 172: Istruzioni Per L'installazione

    ISTRUZIONI PER L'INSTALLAZIONE Schema d'installazione La distanza dal soffitto La distanza dalla parete deve essere superiore a 150 mm deve essere superiore a 150 mm La distanza dalla parete Unità interna deve essere superiore a 150 mm La distanza dal pavimento deve essere superiore a 2500 mm Unità...
  • Seite 173 Scegliere la posizione migliore Unità interna Luoghi adatti all'installazione dell'unità interna • Dove non sia presente alcun ostacolo vicino all'uscita dell'aria e dove l'aria possa essere facilmente emessa e indirizzata in ogni angolo del La lunghezza del locale. tubo è di 5~15 m •...
  • Seite 174: Installazione Dell'unità Interna

    INSTALLAZIONE DELL'UNITÀ INTERNA 1. Installazione del telaio per montaggio a parete • Scegliere una posizione di installazione del telaio Segno al centro Livella secondo la posizione dell'unità interna e la direzione del tubo. • Regolare il telaio orizzontalmente con una livella o un filo a piombo.
  • Seite 175 IMPORTANTE: Isolamento termico dei giunti delle tubazioni: Avvolgere i giunti delle tubazioni con materiale di isolamento termico e quindi avvolgerli con un nastro in vinile. Ricoperto di nastro in vinile Isolamento termico Isolamento termico delle tubazioni: a. Collocare il tubo flessibile di scarico sotto le tubazioni.
  • Seite 176 4. Collegamento del cavo Piastra di copertura • Unità interna 1) Aprire il pannello frontale, rimuovere la piastra di copertura allentando la vite. 2) Connettere il cavo di alimentazione all'unità interna collegando singolarmente i fili ai morsetti sul quadro comandi. Nero Giallo- Verde...
  • Seite 177: Installazione Dell'unità Esterna

    INSTALLAZIONE DELL'UNITÀ ESTERNA 1. Installare l'attacco di scarico e il tubo flessibile di scarico La condensa viene scaricata dall'unità esterna quando l'unità è in funzione in modalità Riscaldamento. Per non disturbare i vicini e rispettare l'ambiente, installare un attacco di scarico e un tubo flessibile di scarico per canalizzare l'acqua di condensa.
  • Seite 178: Spurgo Dell'aria

    SPURGO DELL'ARIA L'aria contenente umidità che ristagna nel ciclo refrigerante può causare un malfunzionamento del compressore. Dopo il collegamento dell'unità interna e di quella esterna spurgare l'aria e l'umidità dal ciclo refrigerante con una pompa a vuoto, come illustrato di seguito. Nota: Dato che la pressione nel sistema è...
  • Seite 179: Προφυλαξεισ Ασφαλειασ

    ΠΡΙΝ ΑΠΟ ΤΗ ΧΡΗΣΗ ΤΗΣ ΣΥΣΚΕΥΗΣ Για να αξιοποιήσετε στο μέγιστο τις δυνατότητες της νέας σας συσκευής, διαβάστε προσεκτικά τις οδηγίες χρήστη και φυλάξτε τις σε ευπρόσιτο μέρος για μελλοντική αναφορά. ΠΡΟΦΥΛΑΞΕΙΣ ΑΣΦΑΛΕΙΑΣ • Η εγκατάσταση και η συντήρηση/επισκευή εσωτερικής&εξωτερικής μονάδας. πρέπει...
  • Seite 180: Προστασια Του Περιβαλλοντοσ

    ΠΡΟΣΤΑΣΙΑ ΤΟΥ ΠΕΡΙΒΑΛΛΟΝΤΟΣ • Η συσκευή αυτή έχει κατασκευαστεί από ΑΠΟΡΡΙΨΗ ΣΥΣΚΕΥΗΣ ανακυκλώσιμα ή επαναχρησιμοποιούμενα • Η συσκευή αυτή φέρει σήμανση σύμφωνα με υλικά. Η απόρριψη της συσκευής πρέπει να την ευρωπαϊκή οδηγία 2002/96/ΕΚ σχετικά με γίνεται σύμφωνα με τους τοπικούς τα...
  • Seite 181: Περιγραφη Προϊοντοσ

    ΠΕΡΙΓΡΑΦΗ ΠΡΟΪΟΝΤΟΣ Εσωτερική μονάδα Εξωτερική μονάδα Είσοδος αέρα 11. Είσοδος αέρα Μπροστινός πίνακας 12. Σωλήνες και καλώδιο ηλεκτρικής σύνδεσης Οθόνη 13. Εύκαμπτος σωλήνας αποστράγγισης Έξοδος αέρα 14. Έξοδος αέρα Κιβώτιο ηλεκτρικών συστημάτων Διακόπτης ενεργοποίησης/απενεργοποίησης Πτερύγιο κατακόρυφης ρύθμισης Πτερύγιο οριζόντιας ρύθμισης Φίλτρο...
  • Seite 182 ΠΕΡΙΓΡΑΦΗ ΕΝΔΕΙΞΕΩΝ ΟΘΟΝΗΣ ΠΙΝΑΚΑ ΕΛΕΓΧΟΥ Ένδειξη θερμοκρασίας (1) Εμφανίζει τη θερμοκρασία ρύθμισης και δωματίου. Ένδειξη λειτουργίας (2) Ανάβει με λευκό χρώμα όταν η συσκευή είναι συνδεδεμένη στην τροφοδοσία. Ανάβει με λευκό χρώμα κατά τη λειτουργία. Ένδειξη θέρμανσης (3) Ανάβει κατά τη διάρκεια του τρόπου λειτουργίας θέρμανσης. Ένδειξη...
  • Seite 183 ΛΕΙΤΟΥΡΓΙΕΣ ΚΑΙ ΕΝΔΕΙΞΕΙΣ ΤΗΛΕΧΕΙΡΙΣΤΗΡΙΟΥ ΚΟΥΜΠΙ ON/OFF (ΕΝΕΡΓΟΠΟΙΗΣΗ/ΑΠΕΝΕΡΓΟΠΟΙΗΣΗ) Εάν πατήσετε αυτό το κουμπί, η συσκευή ενεργοποιείται ή/και απενεργοποιείται. 2-3. ΚΟΥΜΠΙΑ ΡΥΘΜΙΣΗΣ ΘΕΡΜΟΚΡΑΣΙΑΣ Χρησιμοποιείται για ρύθμιση της θερμοκρασίας. Χρησιμοποιείται για ρύθμιση της ώρας του ρολογιού. Χρησιμοποιείται για ρύθμιση της ώρας στον τρόπο λειτουργίας χρονοδιακόπτη. ΚΟΥΜΠΙ...
  • Seite 184 ΣΥΜΒΟΛΑ ΕΝΔΕΙΞΕΩΝ ΣΤΗΝ ΟΘΟΝΗ ΤΟΥ ΤΗΛΕΧΕΙΡΙΣΤΗΡΙΟΥ Ένδειξη λειτουργίας ψύξης Ένδειξη Ένδειξη λειτουργίας αφύγρανσης Ένδειξη λειτουργίας ύπνου Ένδειξη λειτουργίας μόνο ανεμιστήρα Ένδειξη λειτουργίας Around U Ένδειξη λειτουργίας θέρμανσης Ένδειξη λειτουργίας ταχείας ψύξης/θέρμανσης Αυτόματη ταχύτητα ανεμιστήρα Μετάδοση σήματος Υψηλή ταχύτητα ανεμιστήρα Ένδειξη χρονοδιακόπτη ρύθμισης Μεσαία-υψηλή...
  • Seite 185 ΑΠΟΘΗΚΕΥΣΗ ΚΑΙ ΣΥΜΒΟΥΛΕΣ ΓΙΑ ΤΗ ΧΡΗΣΗ ΤΟΥ ΤΗΛΕΧΕΙΡΙΣΤΗΡΙΟΥ Τρόπος τοποθέτησης των μπαταριών 1. Πιέστε ελαφρά προς τα κάτω το καπάκι των μπαταριών και μετακινήστε το προς την κατεύθυνση του βέλους για να το αφαιρέσετε, όπως φαίνεται στην εικόνα. 2. Τοποθετήστε 2 μπαταρίες AAA (1,5V) στο διαμέρισμα.
  • Seite 186 ΠΕΡΙΓΡΑΦΗ ΤΡΟΠΟΥ ΛΕΙΤΟΥΡΓΙΑΣ Γενική λειτουργία: 1. Ενεργοποίηση Πατήστε το κουμπί On-Off (Ενεργοποίηση- Απενεργοποίηση). Όταν η συσκευή λάβει το σήμα, η ένδειξη ΛΕΙΤΟΥΡΓΙΑΣ στην οθόνη της εσωτερικής μονάδας θα ανάψει. Κατά την αλλαγή ενός τρόπου λειτουργίας, περιμένετε λίγα δευτερόλεπτα και επαναλάβετε τη διαδικασία, εάν...
  • Seite 187 ΕΛΕΓΧΟΣ ΚΑΤΕΥΘΥΝΣΗΣ ΡΟΗΣ ΑΕΡΑ 5. Έλεγχος κατεύθυνσης ροής αέρα Η κατακόρυφη ροή αέρα ρυθμίζεται αυτόματα σε μια συγκεκριμένη γωνία ανάλογα με τον τρόπο λειτουργίας μετά την ενεργοποίηση της συσκευής. Μπορείτε επίσης να ρυθμίσετε την κατεύθυνση της ροής αέρα ανάλογα με τις απαιτήσεις...
  • Seite 188 ΠΕΡΙΓΡΑΦΗ ΤΡΟΠΩΝ ΛΕΙΤΟΥΡΓΙΑΣ ΚΑΙ ΛΕΙΤΟΥΡΓΙΩΝ ΤΡΟΠΟΣ ΛΕΙΤΟΥΡΓΙΑΣ 6th SENSE Πατήστε το κουμπί και θα εμφανιστεί η ένδειξη . Η συσκευή μεταβαίνει αμέσως στον τρόπο λειτουργίας 6th sense. Σε αυτόν τον τρόπο λειτουργίας, η θερμοκρασία και η ταχύτητα του ανεμιστήρα ρυθμίζονται αυτόματα βάσει...
  • Seite 189 Λειτουργίες JET (ΤΑΧΕΙΑ ΨΥΞΗ/ΘΕΡΜΑΝΣΗ) και LIGHT (ΦΩΤΙΣΜΟΣ) Κάθε φορά που πατάτε το κουμπί JET (Light) (Ταχεία ψύξη/θέρμανση (Φωτισμός)), η κατάσταση λειτουργίας μεταβάλλεται διαδοχικά ως εξής: • Στον τρόπο λειτουργίας COOLING (ΨΥΞΗ) και HEATING (ΘΕΡΜΑΝΣΗ): Ενεργοποίηση ΤΑΧΕΙΑΣ Απενεργοποίηση ΤΑΧΕΙΑΣ ΨΥΞΗΣ/ΘΕΡΜΑΝΣΗΣ / ΨΥΞΗΣ/ΘΕΡΜΑΝΣΗΣ...
  • Seite 190 ΤΥΠΙΚΟΣ ΤΡΟΠΟΣ ΛΕΙΤΟΥΡΓΙΑΣ ΥΠΝΟΥ Κατά τη διάρκεια αυτού του τρόπου λειτουργίας εμφανίζεται στο τηλεχειριστήριο η ένδειξη • Όταν ρυθμίσετε αυτόν τον τρόπο λειτουργίας στη λειτουργία COOLING (ΨΥΞΗ) ή DEHUMIDIFYING (ΑΦΥΓΡΑΝΣΗ), η συσκευή αυξάνει αυτόματα τη θερμοκρασία ρύθμισης κατά 1°C την πρώτη ώρα και κατά 1°C ακόμη...
  • Seite 191 Λειτουργία AUTO CLEAN (ΑΥΤΟΜΑΤΟΣ ΚΑΘΑΡΙΣΜΟΣ) • Εάν πατήσετε το κουμπί αυτό στον τρόπο λειτουργίας COOL (ΨΥΞΗ) ή DRY (ΑΦΥΓΡΑΝΣΗ), εμφανίζεται το εικονίδιο και ρυθμίζεται η λειτουργία AUTO CLEAN (ΑΥΤΟΜΑΤΟΣ ΚΑΘΑΡΙΣΜΟΣ). Μετά την απενεργοποίηση της συσκευής, ο εσωτερικός ανεμιστήρας παραμένει σε λειτουργία για 10 λεπτά, ώστε...
  • Seite 192 Λειτουργία TIMER (ΧΡΟΝΟΔΙΑΚΟΠΤΗΣ) Με το κουμπί T-On/T-Off (Χρονοδιακόπτης ενεργοποίησης/απενεργοποίησης), μπορείτε να ρυθμίσετε τις λειτουργίες TIMER ON (ΧΡΟΝΟΔΙΑΚΟΠΤΗΣ ΕΝΕΡΓΟΠΟΙΗΣΗΣ) και TIMER OFF (ΧΡΟΝΟΔΙΑΚΟΠΤΗΣ ΑΠΕΝΕΡΓΟΠΟΙΗΣΗΣ) ξεχωριστά. Μπορείτε να ρυθμίσετε εύκολα το χρονοδιακόπτη ενεργοποίησης πατώντας την αριστερή πλευρά του κουμπιού αυτού, ώστε να υπάρχει μια ευχάριστη...
  • Seite 193 Λειτουργία SUPER SILENT (ΕΞΑΙΡΕΤΙΚΑ ΑΘΟΡΥΒΗ ΛΕΙΤΟΥΡΓΙΑΣ) και – για εναλλαγή μεταξύ βαθμών ΛΕΙΤΟΥΡΓΙΑ) °C και °F. Πατήστε το κουμπί αυτό για λειτουργία της Σημείωση: η λειτουργία αυτή είναι διαθέσιμη μόνο μονάδας με χαμηλά επίπεδα θορύβου, ώστε να όταν το προϊόν είναι απενεργοποιημένο. Η ένδειξη δημιουργηθεί...
  • Seite 194 αυτά κάθε 2-3 χρόνια μετά από επικοινωνία με • Μην καθαρίζετε το φίλτρο σε πλυντήριο ρούχων. ένα εξουσιοδοτημένο κέντρο τεχνικής • Επιπλέον φίλτρα: υποστήριξης της Whirlpool. Το προϊόν σας διαθέτει επίσης ένα φίλτρο HEPA και ένα συνδυαστικό φίλτρο 3 σε 1. Τα φίλτρα...
  • Seite 195: Αντιμετωπιση Προβληματων

    τροφοδοσία. Στη συνέχεια, επικοινωνήστε με το πλησιέστερο εξουσιοδοτημένο κέντρο συντήρησης της κωδικός σφάλματος Whirlpool. (Οι κωδικοί H1 και SE δεν είναι κωδικοί σφάλματος. Ο κωδικός H1 είναι η ένδειξη απόψυξης κατά τη θέρμανση, ενώ ο κωδικός SE είναι η ένδειξη της λειτουργίας εξοικονόμησης ενέργειας.) Σημείωση: Εάν...
  • Seite 196 ΕΓΚΑΤΑΣΤΑΣΗ - ΣΥΝΤΗΡΗΣΗ Πριν από την εγκατάσταση 4. Ελέγξτε το προϊόν για να βεβαιωθείτε ότι δεν 1. Διαβάστε το παρόν εγχειρίδιο προσεκτικά έχει υποστεί ζημιά πριν από την εγκατάσταση. πριν από την εγκατάσταση. 5. Τοποθετήστε τα κινούμενα εξαρτήματα στο 2. Η συσκευή πρέπει να εγκατασταθεί σύμφωνα κάτω...
  • Seite 197: Οδηγιεσ Εγκαταστασησ

    ΟΔΗΓΙΕΣ ΕΓΚΑΤΑΣΤΑΣΗΣ Διάγραμμα εγκατάστασης Η απόσταση από την οροφή πρέπει να είναι πάνω από Η απόσταση από τον τοίχο 150mm πρέπει να είναι πάνω από 150mm Η απόσταση από τον τοίχο πρέπει να είναι πάνω από Εσωτερική μονάδα 150mm Η απόσταση από το δάπεδο πρέπει...
  • Seite 198 Επιλογή βέλτιστης θέσης Θέση για εγκατάσταση της εσωτερικής μονάδας Εσωτερική μονάδα • Σε σημείο όπου δεν υπάρχουν εμπόδια κοντά στην έξοδο αέρα και ο αέρας μπορεί να διοχετευτεί εύκολα σε κάθε γωνία του δωματίου. • Σε σημείο όπου η σύνδεση της σωλήνωσης και Το...
  • Seite 199: Εγκατασταση Εσωτερικησ Μοναδασ

    ΕΓΚΑΤΑΣΤΑΣΗ ΕΣΩΤΕΡΙΚΗΣ ΜΟΝΑΔΑΣ 1. Εγκατάσταση της πλάκας στήριξης • Επιλέξτε μια θέση για την εγκατάσταση της πλάκας στήριξης ανάλογα με τη θέση της Εργαλείο μέτρησης Σημάδι στο κέντρο εσωτερικής μονάδας και την κατεύθυνση της κλίσης σωλήνωσης. • Προσαρμόστε σε οριζόντια θέση την πλάκα στήριξης...
  • Seite 200 ΣΗΜΑΝΤΙΚΟ: Θερμική μόνωση ενώσεων σωλήνωσης: Τυλίξτε τις ενώσεις της σωλήνωσης με θερμικό μονωτικό υλικό και, στη συνέχεια, καλύψτε τις με ταινία βινυλίου. Τύλιγμα με ταινία βινυλίου Θερμική μόνωση Σωλήνωση με θερμική μόνωση: a. Τοποθετήστε τον εύκαμπτο σωλήνα αποστράγγισης κάτω από τη σωλήνωση. Θερμικά...
  • Seite 201 4. Σύνδεση του καλωδίου • Εσωτερική μονάδα Πλάκα κάλυψης 1) Ανοίξτε τον μπροστινό πίνακα και αφαιρέστε την πλάκα κάλυψης χαλαρώνοντας τη βίδα. 2) Συνδέστε το καλώδιο ηλεκτρικής σύνδεσης στην εσωτερική μονάδα συνδέοντας ξεχωριστά τα σύρματα στους ακροδέκτες Μπλε στον πίνακα ελέγχου ως εξής. Μαύρο...
  • Seite 202 ΕΓΚΑΤΑΣΤΑΣΗ ΕΞΩΤΕΡΙΚΗΣ ΜΟΝΑΔΑΣ 1. Εγκατάσταση θύρας αποστράγγισης και εύκαμπτου σωλήνα αποστράγγισης Το συμπυκνωμένο νερό αποστραγγίζεται από την εξωτερική μονάδα όταν η μονάδα βρίσκεται στον τρόπο λειτουργίας θέρμανσης. Για να αποφευχθεί η ενόχληση των γειτόνων σας και να διασφαλιστεί η προστασία του περιβάλλοντος, τοποθετήστε μια θύρα...
  • Seite 203 ΕΞΑΕΡΩΣΗ Εάν παραμείνει αέρας με υγρασία στο κύκλωμα ψύξης, μπορεί να προκληθεί δυσλειτουργία του συμπιεστή. Μετά τη σύνδεση της εσωτερικής και εξωτερικής μονάδας, απομακρύνετε τον αέρα και την υγρασία από το κύκλωμα ψύξης χρησιμοποιώντας μια αντλία κενού, όπως παρουσιάζεται παρακάτω. Σημείωση: Καθώς...
  • Seite 204 Whirlpool Europe S.r.l. Viale G. Borghi, 27 - 21025 Comerio (VA) Phone 0332.759111 - Fax 0332.759268 www.whirlpool.eu 5019 326 02056 11/11...

Diese Anleitung auch für:

Amd 055

Inhaltsverzeichnis