HomeMatic Multi IO Box Installations- Und Bedienungsanleitung

Verwandte Anleitungen für HomeMatic Multi IO Box


Inhaltszusammenfassung für HomeMatic Multi IO Box
- Seite 1 Installations- und Bedienungsanleitung Installation instruction and operating manual Multi IO Box (DE) S. 2 Multi IO Box (EN) p. 37 HmIP-MIOB...
-
Seite 2: Lieferumfang
Lieferumfang Anzahl Bezeichnung Homematic IP Multi IO Box Schrauben 4,0 x 40 mm Dübel 6 mm Bedienungsanleitung Dokumentation © 2016 eQ-3 AG, Germany Alle Rechte vorbehalten. Ohne schriftliche Zustimmung des Herausgebers darf diese Anleitung auch nicht auszugsweise in irgendeiner Form reproduziert werden oder unter Verwendung elektronischer, mechanischer oder chemischer Verfahren verviel- fältigt oder verarbeitet werden. -
Seite 6: Inhaltsverzeichnis
6.3.8 Anschluss Temperaturbegrenzer ......25 Anlernen ................26 6.4.1 Anlernen an den Homematic IP Fußbodenheizungsaktor ........26 6.4.2 Anlernen an den Homematic IP Access Point . 28 Fehlerbehebung .............29 Befehl nicht bestätigt ............29 Duty Cycle ................30 Fehlercodes und Blinkfolgen ..........31... - Seite 7 Wiederherstellung der Werkseinstellungen ....33 Wartung und Reinigung ..........33 10 Allgemeine Hinweise zum Funkbetrieb .....34 Technische Daten ............35...
-
Seite 8: Hinweise Zur Anleitung
Hinweise zur Anleitung Hinweise zur Anleitung Lesen Sie diese Anleitung sorgfältig, bevor Sie Ihr Home- matic IP Gerät in Betrieb nehmen. Bewahren Sie die An- leitung zum späteren Nachschlagen auf! Wenn Sie das Gerät anderen Personen zur Nutzung über- lassen, übergeben Sie auch diese Anleitung. Benutzte Symbole: Achtung! Hier wird auf eine Gefahr hingewiesen. - Seite 9 Gefahrenhinweise Betreiben Sie das Gerät nur in trockener sowie staubfreier Umgebung, setzen Sie es keinem Ein- fluss von Feuchtigkeit, Vibrationen, ständiger Sonnen- oder anderer Wärmeeinstrahlung, Kälte und keinen mechanischen Belastungen aus. Das Gerät ist kein Spielzeug! Erlauben Sie Kindern nicht damit zu spielen. Lassen Sie das Verpa- ckungsmaterial nicht achtlos...
- Seite 10 Gefahrenhinweise Arbeiten am 230-V-Netz dürfen nur von einer Elektrofachkraft (nach VDE 0100) erfolgen. Dabei sind die geltenden Unfallverhütungsvorschriften zu beachten. Zur Vermeidung eines elektrischen Schlages am Gerät, schalten Sie bitte die Netz- spannung frei (Sicherungsautomat abschalten). Bei Nichtbeachtung der Installationshinweise können Brand oder andere Gefahren entstehen.
- Seite 11 Gefahrenhinweise Vor dem Anschließen des Aktors muss die Siche- rung im Sicherungskasten herausgenommen werden. Beachten Sie die Installationsvorschriften für Ins- tallationen in Verteilersystemen (DIN VDE 0100- 410). Die Steuerspannung des 0 bis 10-V-Ausgangs ist potentialgetrennt vom Netzpotential. Sie ist aller- dings keine Schutzkleinspannung (SELV). Dies ist bei Leitungsführung, Installation und Anschluss zu beachten.
-
Seite 12: Funktion Und Geräteübersicht
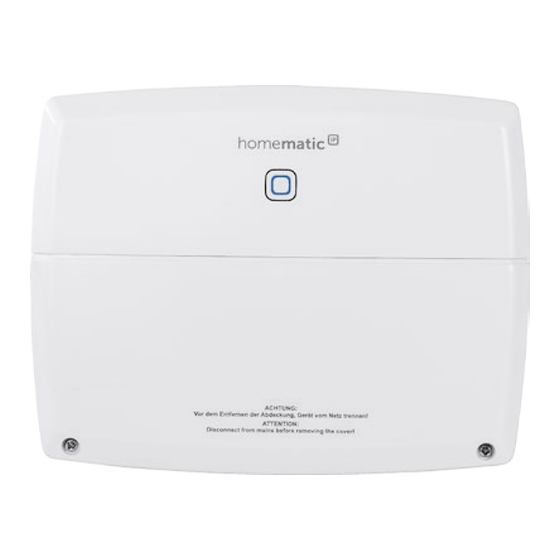
Funktion und Geräteübersicht Funktion und Geräteübersicht Die Homematic IP Multi IO Box ist die zentrale Steuer- einheit für das Schalten von Umwälzpumpen, Heizkes- seln und Zirkulationspumpen. Das Gerät ermöglicht eine komfortable und bedarfsgerechte Regelung der Raum- bzw. Wassertemperatur per Smartphone App nach Ihren individuellen Bedürfnissen. -
Seite 13: Allgemeine Systeminformationen
Dieses Gerät ist Teil des Smart-Home-Systems Homema- tic IP und kommuniziert über das HmIP Funkprotokoll. Die Homematic IP Multi IO Box kann in Verbindung mit dem Homematic IP Access Point komfortabel und indi- viduell per Smartphone über die Homematic IP App kon- figuriert werden. -
Seite 14: Montage
Weitere Informationen dazu entnehmen Sie bitte der Bedienungsanleitung des Hutschienen- adapters. Um die Multi IO Box mithilfe der Schrauben zu montie- ren, gehen Sie wie folgt vor: • Wählen Sie einen geeigneten Montageort in der Nähe der Heizungsanlage aus. -
Seite 15: Inbetriebnahme
Inbetriebnahme Inbetriebnahme Installationshinweise Bitte lesen Sie diesen Abschnitt erst vollständig, bevor Sie mit der Installation beginnen. Hinweis! Installation nur durch Personen mit einschlägigen elektrotechnischen Kenntnissen und Erfahrungen!* Durch eine unsachgemäße Installation gefährden Sie • Ihr eigenes Leben; • das Leben der Nutzer der elektrischen Anlage. Mit einer unsachgemäßen Installation riskieren Sie schwere Sachschäden, z. - Seite 16 Einbau des Elektroinstallationsmaterials; • Art des Versorgungsnetzes (TN-System, IT-System, TT-System) und die daraus folgenden Anschlussbedingungen (klassische Nullung, Schutzerdung, erforderliche Zusatzmaßnahmen etc.). Für den Einbau der Multi IO Box in einen Stromkreisverteiler, muss das Gerät entsprechend 0603, 43871 (Nieder- spannungsunterverteilung (NSUV)), DIN 18015-x eingebaut werden.
- Seite 17 Beachten Sie bei der Installation die Gefahrenhin- weise gemäß „2 Gefahrenhinweise“ auf Seite 2. Zugelassene Leitungsquerschnitte zum Anschluss an die Multi IO Box sind: Starre Leitung Flexible Leitung mit und ohne Aderendhülse 0,75 – 2,50 mm² 0,75 – 2,50 mm²...
-
Seite 18: Installation
Für eine komfortable Installation können Sie die Kabel durch die Kabeldurchführungen ziehen, nachdem Sie die Ausbrechöffnungen entfernt haben. Für die Installation der Multi IO Box gehen Sie wie folgt vor: • Öffnen Sie die Abdeckung (B), indem Sie die bei- den unteren Schrauben mit einem geeigneten Schraubendreher lösen und die Abdeckung ab-... -
Seite 19: Anschlussmöglichkeiten
Inbetriebnahme die Rastnasen der Abdeckung in die vorgesehe- nen Öffnungen schieben und die Schrauben fest- drehen. Anschlussmöglichkeiten 6.3.1 Anschluss Kessel 1▼ L▲ 2▼ L▲ 1▼... -
Seite 20: Anschluss Luftentfeuchter
Inbetriebnahme 6.3.2 Anschluss Luftentfeuchter Diese Anschlussmöglichkeit können Sie nur in Verbindung mit einem Homematic IP Access Point oder einer Homematic Zentrale CCU2 rea- lisieren. 1▼ L▲ 2▼ L▲ 1▼... -
Seite 21: Anschluss Change-Over-Pilot
Inbetriebnahme 6.3.3 Anschluss Change-Over-Pilot Diese Anschlussmöglichkeit können Sie nur in Verbindung mit einem Homematic IP Access Point oder einer Homematic Zentrale CCU2 rea- lisieren. 1▼ L▲ 2▼ L▲ 1▼ Heizen Kühlen... -
Seite 22: Anschluss Pumpe
Inbetriebnahme 6.3.4 Anschluss Pumpe 1▼ L▲ 2▼ L▲ 1▼... -
Seite 23: Anschluss Feuchtefühler
Inbetriebnahme 6.3.5 Anschluss Feuchtefühler ▼ ▼ ▼ Feuchtefühler... -
Seite 24: Anschluss Externes Change-Over-Signal
Inbetriebnahme 6.3.6 Anschluss externes Change-Over-Signal ▼ ▼ ▼ Kühlen Heizen... -
Seite 25: Anschluss Externe Schaltuhr
Inbetriebnahme 6.3.7 Anschluss externe Schaltuhr Diese Anschlussmöglichkeit können Sie nur in Verbindung mit einem Homematic IP Access Point oder einer Homematic Zentrale CCU2 rea- lisieren. 1▼ L▲ 2▼ L▲ 1▼ ▼ ▼ ▼ 6.3.8 Anschluss Temperaturbegrenzer Diese Anschlussmöglichkeit können Sie nur in... -
Seite 26: Anlernen
Anlernen Bitte lesen Sie diesen Abschnitt erst vollständig, bevor Sie mit dem Anlernen beginnen. Damit die Multi IO Box in Ihr System integriert werden und mit anderen Geräten kommunizieren kann, muss sie zunächst angelernt werden. Sie können die Multi IO Box entweder direkt an den Homematic IP Fußbodenheizungsaktor oder an den... - Seite 27 Inbetriebnahme Wenn Sie die Multi IO Box an einen Homematic IP Fußbo- denheizungsaktor anlernen möchten, müssen die beiden zu verknüpfenden Geräte in den Anlernmodus gebracht werden. Dafür gehen Sie wie folgt vor: • Drücken Sie die Systemtaste (A) der Multi IO Box für mind.
-
Seite 28: Anlernen An Den Homematic Ip Access Point
Weitere Informationen dazu entnehmen Sie bitte dem Homematic IP Anwenderhandbuch (zu finden im Downloadbereich unter www.eQ-3.de). Zum Anlernen der Multi IO Box an den Access Point gehen Sie wie folgt vor: • Öffnen Sie die Homematic IP App auf Ihrem Smartphone. -
Seite 29: Fehlerbehebung
Fehlerbehebung • Das Gerät erscheint automatisch in der Home- matic IP App. • Zur Bestätigung geben Sie in der App die letzten vier Ziffern der Gerätenummer (SGTIN) ein oder scannen Sie den QR-Code des Geräts. Die Gerä- tenummer finden Sie auf dem Aufkleber im Liefe- rumfang oder direkt am Gerät. -
Seite 30: Duty Cycle
Stunde (also 36 Sekunden in einer Stunde). Die Geräte dürfen bei Erreichen des 1-%-Limits nicht mehr senden, bis diese zeitliche Begrenzung vorüber ist. Gemäß dieser Richtlinie, werden Homematic IP Geräte zu 100 % nor- menkonform entwickelt und produziert. Im normalen Betrieb wird der Duty Cycle in der Regel nicht erreicht. -
Seite 31: Fehlercodes Und Blinkfolgen
Fehlerbehebung Fehlercodes und Blinkfolgen Blinkcode Bedeutung Lösung Kurzes Funkübertragung/ Warten Sie, bis die oranges Sendeversuch/ Übertragung been- Blinken Datenübertragung det ist. 1x langes Vorgang bestätigt Sie können mit der grünes Bedienung fort- Leuchten fahren. 1x langes Vorgang fehlge- Versuchen Sie es rotes schlagen erneut (s. - Seite 32 Fehlerbehebung Schnelles Anlernmodus Warten Sie auf die oranges beider Verknüp- Rückmeldung durch Blinken fungspartner aktiv die Geräte-LED (s. (direktes Anlernen) „7.3 Fehlercodes und Blinkfolgen“ auf Seite 31). 1x langes Vorgang fehlge- Versuchen Sie es rotes schlagen oder erneut („7.1 Befehl Leuchten Duty-Cycle-Limit nicht bestätigt“...
-
Seite 33: Wiederherstellung Der Werkseinstellungen
• Lassen Sie die Systemtaste wieder los, um das Wiederherstellen der Werkseinstellungen abzu- schließen. Das Gerät führt einen Neustart durch. Nach dem Neustart können Sie das Gerät wieder in Ihr Homematic IP System integrieren. Wartung und Reinigung Das Gerät ist wartungsfrei. Überlassen Sie eine War- tung oder Reparatur einer Fachkraft. -
Seite 34: Allgemeine Hinweise Zum Funkbetrieb
Allgemeine Hinweise zum Funkbetrieb trockenen und fusselfreien Tuch. Verwenden Sie keine lösemittelhaltigen Reinigungsmittel, das Kunststoffge- häuse und die Beschriftung können dadurch angegriffen werden. Allgemeine Hinweise zum Funk- betrieb Die Funk-Übertragung wird auf einem nicht exklusiven Übertragungsweg realisiert, weshalb Störungen nicht ausgeschlossen werden können. -
Seite 35: Technische Daten
Technische Daten Technische Daten Geräte-Kurzbezeichnung: HmIP-MIOB Versorgungsspannung: 230 V/50 Hz Stromaufnahme: 16 A max. Leistungsaufnahme Ruhebetrieb: 250 mW Max. Schaltleistung: Ausgang 1: 3680 W, cosφ≥0,95 (potentialfrei) Ausgang 2: 1840 W, cosφ≥0,95 (potentialfrei) Leitungsart u. -querschnitt: starre und flexible Leitung, 0,75 - 2,5 mm² Lastart: ohmsche Last Wirkungsweise:... - Seite 36 Technische Daten Schutzart: IP20 Schutzklasse: Umgebungstemperatur: 0 - 50 °C Abmessung (B x H x T ): 199 x 156 x 34 mm Gewicht: 365 g Funkfrequenz: 868,3 MHz/869,525 Empfängerkategorie: SRD category 2 Typ. Funk-Freifeldreichweite: 380 m Duty Cycle: < 1% pro h/< 10% pro h Technische Änderungen vorbehalten.
- Seite 68 Kostenloser Download der Homematic IP App! Free download of the Homematic IP app! Bevollmächtigter des Herstellers: Manufacturer’s authorised representative: eQ-3 AG Maiburger Straße 29 26789 Leer / GERMANY www.eQ-3.de...