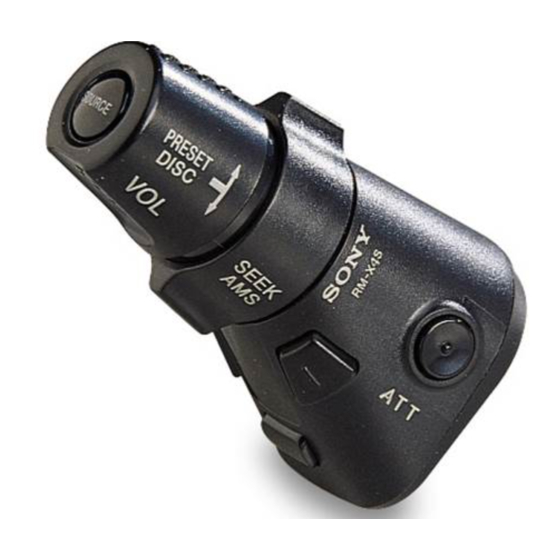
Sony RM-X4S Installationshandbuch
Fur autoradios
Vorschau ausblenden
Andere Handbücher für RM-X4S:
- Bedienungsanleitung (2 Seiten) ,
- Installationshandbuch (2 Seiten)
Notes
Installation
• Choose the mounting location carefully so that the rotary
commander will not interfere with operating the car.
Installation
• Do not install the rotary commander in a place where it may
Installation
jeopardize the safety of the (front) passenger in anyway.
• When installing the rotary commander, be sure not to
Montage
damage the electrical cables etc. on the other side of the
mounting surface.
Installazione
• Avoid installing the rotary commander where it may be
subject to high temperatures, such as from direct sunlight or
hot air from the heater etc.
1
Choose the exact location for the rotary
commander to be mounted, then clean the
mounting surface.
Dirt or oil impair the adhesive strength of the double-
sided adhesive tape.
2
Mark position for the supplied screw.
Use the screw hole on the mounting hardware B to
B
mark the positions.
If you cannot make the mounting hardware B fit
easy; cut the mounting hardware B to fit the steering
wheel column cover.
Mark
Marques
Markierung
Merkteken
Contrassegno di montaggio
3
Remove the steering wheel column cover, and
drill 2 mm diameter hole where you have
marked.
4
Warm the mounting surface and the double-
B
sided adhesive tape on the mounting
hardware B to the temperature of 20 °C to
30 °C, and attach the mounting hardware
onto the mounting surface by applying even
A
pressure. Then screw it down with the
supplied screw A.
Attach a piece of heavy duty tape etc. on the other side
Heavy duty tape etc.
Bande adhésive résistante, etc.
of the mounting surface to cover the protruding tips of
Sehr festes Klebeband o. ä.
the screw so that they will not interfere with the
Sterke kleefband of dergelijke
electrical cables etc. inside the steering wheel column.
Nastro adesivo pesante.
5
After installing the steering wheel column
cover, attach the rotary commander to the
mounting hardware by aligning the four
Holes
holes on the bottom of the rotary commander
Orifices
Aussparungen
to the four catches on the mounting
Gaten
hardware and sliding the rotary commander
Fori
until it locks into place as illustrated.
Note
If you are mounting the rotary commander to the steering
wheel column, make sure that the protruding tips of the
screws on the inner surface of the column do not in anyway
hinder or interfere with the movement of the rotating shaft,
operative parts of the switches or the electrical cables etc.
inside the column.
After connecting, bundle up the connecting
Connection
cord of the rotary remote with other
Raccordement
connecting cords of the audio equipment by
Anschließen
attaching the supplied cramper C. Be sure to
Aansluiting
leave some slack in the connecting cord
between the plug and the cramper as
Collegamento
illustrated.
Master unit
Appareil principal
Hauptgerät
Hoofdtoestel
Apparecchio principale
C
Remarques
Hinweise
• Choisissez soigneusement l'endroit de montage afin que le
• Wählen Sie den Montageort sorgfältig aus, so daß der
satellite de commande n'interfère pas avec les commandes
Joystick beim Fahren nicht im Wege ist.
de la voiture.
• Montieren Sie den Joystick nicht an einer Stelle, an der er
• N'installez pas le satellite de commande dans un endroit qui
eine Gefahr für den Beifahrer auf dem Vordersitz darstellen
risque de compromettre la sécurité du passager avant de
könnte.
quelque façon que ce soit.
• Achten Sie bei der Montage des Joystick darauf, die
• Lors de l'installation du satellite de commande, veillez à ne
Elektrokabel an der anderen Seite der Montagefläche nicht
pas endommager les câbles électriques, etc., situés de l'autre
zu beschädigen.
côté de la surface de montage.
• Montieren Sie den Joystick nicht an einer Stelle, an der er
• Evitez d'installer le satellite de commande là où il risque
hohen Temperaturen, zum Beispiel direktem Sonnenlicht
d'être soumis à des températures élevées comme sous le
oder der Warmluft aus der Wagenheizung, ausgesetzt ist.
rayonnement direct du soleil ou à côté d'une conduite de
chauffage, etc.
Wählen Sie die Stelle aus, an der Sie den
Choisissez la position de montage exacte du
satellite de commande et nettoyez la surface
Joystick montieren wollen, und reinigen Sie
de montage.
dann die Montagefläche.
Les souillures et l'huile altèrent le pouvoir adhérent de
Staub oder Fettspuren beeinträchtigen die Haftung des
l'adhésif double face.
doppelseitigen Klebebandes.
Marquez la position pour la vis fournies.
Markieren Sie die Stelle zum Anbringen der
mitgelieferten Schraube.
Utilisez l'orifice de vissage du support de montage B
Verwenden Sie dazu die Bohrung im Montageteil B.
pour marquer les positions.
Si vous ne parvenez pas à ajuster aisément le support
Wenn das Montageteil B nicht auf die Abdeckung der
de montage B, découpez le support de montage B de
Lenkradsäule paßt, schneiden Sie es bitte zurecht.
façon à qu'il s'adapte à la colonne de direction.
Déposez la garniture de la colonne de
Nehmen Sie die Abdeckung der Lenkradsäule
direction et percez un trou de 2 mm de
ab, und bohren Sie an der Stelle, die Sie
diamètre aux endroits que vous avez
gerade markiert haben, ein Loch von 2 mm
marqués.
Durchmesser.
Chauffez la surface de montage et l'adhésif
Erwärmen Sie die Montagestelle und das
double face sur le support de montage B à
doppelseitige Klebeband am Montageteil B
une température comprise entre 20 et 30 °C et
auf eine Temperatur von 20 bis 30 °C, und
fixez le support de montage sur la surface de
drücken Sie dann das Montageteil mit
montage en exerçant une pression uniforme.
gleichmäßigem Druck auf die Montagestelle.
Vissez ensuite la vis A fournie.
Befestigen Sie es dann mit der mitgelieferten
Schraube A.
Collez de la bande adhésive résistante, etc., de l'autre
côté de la surface de montage de manière à couvrir
Bringen Sie ein Stück sehr festes Klebeband o. ä. an der
l'extrémité saillante des vis de telle sorte qu'elle ne
Gegenseite der Montagefläche an, um die
puissent entrer en contact direct avec les câbles
vorstehenden Spitzen der Schrauben abzudecken,
électriques, etc., à l'intérieur de la colonne de
damit diese nicht die Elektrokabel in der Lenkradsäule
direction.
beschädigen können.
Après avoir remonté le couvercle de la
Bringen Sie nun die Abdeckung der
colonne de direction, fixez le satellite de
Lenkradsäule wieder an, und befestigen Sie
commande sur le support de montage en
dann den Joystick auf dem Montageteil,
alignant les quatre orifices pratiqués à la base
indem Sie die vier Aussparungen an der
du satellite sur les quatre ergots du support
Unterseite des Joystick an den vier Haken auf
de montage et faites coulisser le satellite de
dem Montageteil ausrichten und den Joystick
commande jusqu'à ce qu'il s'encliquette dans
daraufschieben, bis er einrastet, wie auf der
sa position définitive comme illustré.
Abbildung zu sehen.
Remarque
Hinweis
Si vous montez le satellite de commande sur la colonne de
Wenn Sie den Joystick an der Lenkradsäule montieren, achten
direction, assurez-vous que l'extrémité saillante des vis à
Sie darauf, daß die vorstehenden Spitzen der Schrauben an
l'intérieur de la colonne de direction n'entrave en aucune
der Innenfläche der Lenkradsäule die Bewegung der
façon le mouvement de l'axe, des organes de commande, des
Lenkwelle, die Funktionsteile der Schalter bzw. die
commutateurs ou des câbles électriques, etc., à l'intérieur de
Elektrokabel innerhalb der Lenkradsäule in keiner Weise
la colonne de direction.
behindern.
Une fois le raccordement terminé, réunissez le
Danach verbinden Sie das Verbindungskabel
des Joystick mit Hilfe der Klammer C mit den
cordon de connexion du satellite aux autres
cordons de connexion de l'équipement audio
anderen Verbindungskabeln des Audiogeräts.
à l'aide de l'agrafe C fournie. Veillez à laisser
Lassen Sie dabei, wie auf der Abbildung zu
sehen, das Kabel zwischen Stecker und
un peu de jeu dans les cordons de connexion
entre la fiche et l'agrafe comme illustré.
Klammer etwas durchhängen.
Opmerkingen
Note
• Ga zorgvuldig te werk bij het kiezen van een geschikte
• Scegliere attentamente la posizione di montaggio in modo
montagepositie zodat de bedieningssatelliet u nooit hindert
che il comando rotatorio non interferisca con la guida.
bij het rijden.
• Non installare il comando rotatorio in posizione tale da
• Installeer de bedieningssatelliet nooit op een plaats waar hij
poter compromettere in alcun modo la sicurezza del
de veiligheid van de (voor)passagier in gevaar kan brengen.
passeggero.
• Bij het installeren van de bedieningssatelliet moet u erop
• Al momento di installare il comando assicurarsi di non
letten dat u de elektrische bedrading en dergelijke aan de
danneggiare i cavi elettrici etc. nella parte posteriore della
andere kant van het montagevlak niet beschadigt.
superficie di montaggio.
• Installeer de bedieningssatelliet niet op plaatsen waar hij
• Non installare il comando in posizione soggetta ad alte
blootstaat aan hoge temperaturen, bijvoorbeeld door
temperature, ad esempio esposto alla luce solare diretta o al
rechtstreekse zonnestraling of warme lucht afkomstig van
calore proveniente dall'impianto di riscaldamento della
de verwarming, enz.
vettura.
Kies de exacte installatieplaats voor de
Scegliere la posizione esatta di montaggio del
bedieningssatelliet en maak vervolgens het
comando, quindi pulire la superficie di
montagevlak schoon.
montaggio.
Vuil of vet tasten het kleefvermogen van het
La sporcizia o l'unto possono pregiudicare la tenuta
dubbelzijdige plakband aan.
del nastro biadesivo.
Markeer een bevestigingspunt voor de
Segnare la posizione di montaggio per la vite
meegeleverde schroef.
in dotazione.
Markeer de posities aan de hand van de schroefgaten
Usare il foro per la vite sulla staffa di montaggio B
in de steun B.
per segnare la posizione.
Als het bevestigingselement B niet goed past, moet u
Se non è possibile installare la staffa di montaggio B
het overtollige gedeelte afsnijden zodat het wel in de
facilmente; tagliare la staffa di montaggio B per
stuurkolomkap past.
adattarla alla copertura del piantone di guida.
Verwijder de stuurkolomkap en boor een gat
Rimuovere il coperchio della colonna del
volante e praticare un foro di 2 mm di
van 2 mm op de gemarkeerde posities.
diametro nella posizione contrassegnata.
Warm het bevestigingsvlak en de
Riscaldare la superficie di montaggio e il
dubbelzijdige kleefband op de steun B op tot
nastro biadesivo sulla staffa di montaggio B
ad una temperatura compresa tra 20 °C e
een temperatuur van 20 à 30 °C en plaats de
steun op het bevestigingsvlak door
30 °C. Applicare la staffa di montaggio sulla
gelijkmatig aan te drukken. Schroef hem
superficie di montaggio esercitando una
vervolgens vast met de meegeleverde schroef
pressione omogenea, quindi fissarla
A.
avvitando la vite A in dotazione.
Applicare una striscia di nastro adesivo pesante
Breng een stuk tape of iets dergelijks aan op de andere
sull'altro lato della superficie di montaggio in modo
kant van het bevestigingsvlak om te voorkomen dat
de uitstekende schroefpunten in contact komen met de
da coprire la punta sporgente delle viti perché queste
elektrische bedrading en dergelijke binnenin de
non interferiscano con i cavi elettrici all'interno della
colonna del volante.
stuurkolom.
Plaats de stuurkolombekleding terug en
Dopo aver rimontato il coperchio della
bevestig de bedieningssatelliet op het
colonna del volante, montare il comando
montage-accessoire door de vier gaten
allineando i quattro fori sul fondo del
onderaan de commander te laten samenvallen
comando ai quattro fermi sulla staffa di
met de vier bevestigingsklemmen op het
montaggio e facendo scorrere il comando fino
montage-accessoire en verschuif de
a che non si blocca in posizione, come
commander tot hij op zijn plaats klikt zoals de
illustrato in figura.
illustratie laat zien.
Nota
Se il comando viene montato sulla colonna del volante,
Opmerking
assicurarsi che le punte sporgenti delle viti sulla superficie
Bij het monteren van de bedieningssatelliet op de
interna della colonna non pregiudichino o interferiscano in
stuurkolom, moet u ervoor zorgen dat de uitstekende punten
alcun modo con il movimento dell'albero, con i componenti
van de schroeven aan de binnenkant van de stuurkolom de
degli interruttori o con i cavi elettrici etc. all'interno della
stuurstang, schakelaars, elektrische bedrading, enzovoort in
colonna.
de stuurkolom niet hinderen.
Na het aansluiten bundelt u het snoer van de
Dopo aver effettuato il collegamento,
satelliet samen met andere snoeren door
raggruppare il cavo di collegamento del
middel van de meegeleverde klemband C.
comando insieme agli altri cavi di
collegamento dell'apparecchio audio con il
Laat wat speling in het snoer tussen de
stekker en de klemband, zoals de illustratie
morsetto C in dotazione. Assicurarsi che
laat zien.
rimanga un leggero gioco nel cavo di
collegamento tra la presa e il morsetto, come
illustrato in figura.
3-866-233-21 (1)
Rotary
Commander
Installation
Установка
Installation
Instalacja
Installation
Instalace
Montage
Εγκατάσταση
Installazione
Kurma
RM-X4S
Sony Corporation © 1999
Printed in France
Supplied Mounting Hardware
Matériel de montage fourni
Mitgelieferte Montageteile
Meegeleverde montage-
accessoires
Staffa di montaggio in
dotazione
A
B
'Κ3 × 12
C
Example of a mounting
location
Exemple de montage
Beispiel für die Montage
Montagevoorbeeld
Esempio di posizione di
montaggio

Verwandte Anleitungen für Sony RM-X4S


Inhaltszusammenfassung für Sony RM-X4S
- Seite 1 Klebebandes. dubbelzijdige plakband aan. del nastro biadesivo. RM-X4S Sony Corporation © 1999 Printed in France Supplied Mounting Hardware Mark position for the supplied screw. Marquez la position pour la vis fournies. Markieren Sie die Stelle zum Anbringen der...
- Seite 2 Примечания Uwagi Poznámky Σηµειώσεισ Notlar Прилагаемый монтажный Установка • Miejsce na montaż należy wybrać z rozmysłem i pilot umieścić • Místo pro instalaci zvolte s uvážením tak, aby otočný dálkový • Επιλέξτε προσεκτικά τη θέση στήριξησ, ώστε το • Montaj yerini dikkatle seçiniz ki döner kumanda otomobil •...