RELCO RT99PCG Kurzanleitung
RT99PCG
CARATTERISTICHE GENERALI
•
Regolazione continua o a gradini;
•
Comando a pulsante (RT99PCG);
•
;
•
Sensore indipendente dalla polarità di rete;
•
Distanza tra scheda e comandi: <2 mt.;
•
Memoria d'intensità luminosa anche in assenza di rete;
•
Accensione graduale;
•
Spegnimento graduale (solo continuo);
•
Accensione da presa comandata;
•
Protezione amperometrica con resistenza fusibile non ripristinabile (solo RT99PCG);
•
;
•
Potenza: 40÷300W;
•
Alimentazione 220-240V 50/60Hz;
•
;
•
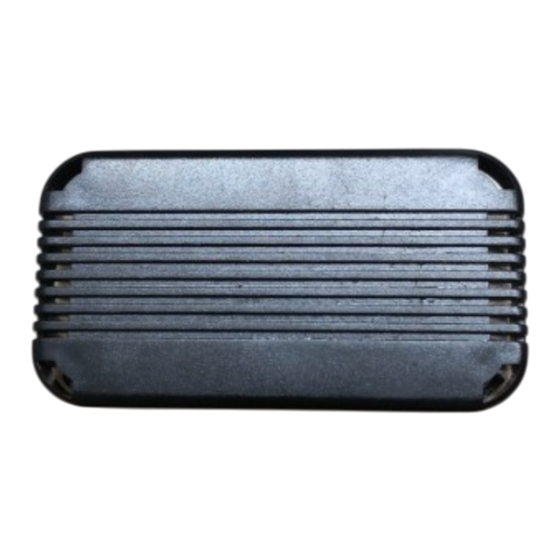
Dimensioni: 85x45x20 mm (RT99PCG).
INSTALLAZIONE
Il regolatore elettronico deve essere impiegato esclusivamente con carichi resistivi e su
apparecchi di illuminazione in classe I e II. Rispettare i dati di targa , posizionare il regolatore
lontano da fonti di calore. Limitare a 2 metri la lunghezza del cavo di collegamento del carico.
Il dispositivo viene installato passante sul cavo della lampada. Togliere il guscio superiore,
cablare come da schema utilizzando del cavo tipo H03VV-F come riportato sulla tabella di
seguito, togliere la guaina superiore del cavo di alimentazione per un massimo di 10 mm.
Effettuare un accurato serraggio delle viti dei morsetti di collegamento. Bloccare i cavi con
gli appositi fermacavi, inserire il guscio superiore a scatto.
Cavo di rete
Lato carico RT99PCG
L
NOTE
L'utilizzo del regolatore con comando sensoriale richiede, per un corretto funzionamento,
il rispetto di alcune norme:
• Il corpo illuminante da tavolo o pavimento deve essere provvisto di supporti isolanti di
altezza minimo 5 mm.
• Il conduttore del sensore deve essere separato da ogni parte in tensione da un isolamento
doppio o rinforzato.
• La superficie sensoriale, qualora venga utilizzato l'intero corpo lampada, deve avere una
buona conduzione elettrica tra tutte le sue parti (base, stelo, ecc.). La laccatura della
lampada riduce la sensibilità e la conduzione elettrica tra le parti.
• Il corpo illuminante deve essere provvisto di un dispositivo di ancoraggio per il conduttore
del sensore che assicuri una buona tenuta meccanica e conduzione elettrica con il corpo
lampada.
• Al momento dell'inserzione della spina di rete il dispositivo regola automaticamente la
sensibilità del sensore, non toccare la lampada durante questa operazione. Se si varia
la superficie d'appoggio della lampada la sensibilità potrebbe variare.
MODALITA' D'USO
Determinare la modalità di funzionamento per mezzo dei jumper colorati posizionati sulla
scheda come infigura 1 secondo la tabella riportata di seguito.
JUMPER
INSERITO
Rosso
Spento
Nero
Regolazione a gradini
La configurazione di default è con entrambi i jumper inseriti, quindi regolazione a gradini sen-
za accensione da presa comandata. Eseguire le operazioni di inserzione o disinserzione dei
jumper in assenza di tensione di rete, diversamente le funzioni non verranno abilitate.
FUNZIONAMENTO A GRADINI
L'accensione avviene tramite un breve tocco sulla parte sensoriale/pulsante della lampada.
Per ottenere la regolazione dell'intensità luminosa agire ripetutamente sulla parte sensoria-
le/pulsante della lampada sino a raggiungere il livello d'intensità luminosa desiderata. Per
spegnere da qualsiasi livello di regolazione mantenere il contatto con la parte sensoria-
le/pulsante della lampada per circa 1 secondo. Se viene tolto il jumper rosso viene abilitata
la funzione memoria da presa comandata.Sequenza luminosa: Spento, Massimo, Medio,
Minimo, Luce notturna, Spento.
FUNZIONAMENTO CONTINUO
La regolazione avviene agendo direttamente sulla parte sensoriale/pulsante della lampada.
L'accensione avviene tramite un breve tocco sulla parte sensoriale/pulsante della lampada.
Per ottenere la regolazione dell'intensità luminosa mantenere il contatto con la parte senso-
riale/pulsante della lampada sino a raggiungere il livello d'intensità luminosa desiderata: a
livello raggiunto interrompere il contatto. Qualora si desideri invertire il senso di regolazione
interrompere il contatto e ripristinarlo. Lo spegnimento avviene agendo nuovamente con
un breve tocco sulla parte sensoriale/pulsante. Al momento dello spegnimento il valore
dell'intensità luminosa viene memorizzato per essere ripristinato alla nuova accensione.
Un tocco leggermente prolungato al momento dell'accensione permette di ottenere diret-
tamente il massimo della luminosità. Se viene abilitata la funzione di accensione da presa
comandata (jumper rosso escluso) il regolatore si accenderà con la luminosità impostata
prima di essere spento.
GENERAL INFORMATION
•
Step or continuous control;
•
Push-button control (RT99PCG);
•
;
•
Sensor is independent from mains polarity;
•
Distance between circuit and control < 2 metres;
•
Light level memory even in case of net failure;
•
Soft-start;
•
Soft-stop (continuous only);
•
Wall control;
•
Amperometric protection with non resetting fuse protection (only RT99PCG);
•
;
•
Power 40÷300W;
•
Input 220-240V 50/60Hz;
•
•
INSTALLATION
The electronic dimmer should be used with resistive loads and class I and class II lighting
equipment only. Strictly follow the rating. Position the dimmer far from heat sources. Load
connection cable should not exceed 2 m in length. Install device in-line on lamp cable. Re-
move top housing, wire as shown in the diagram using HO3VV-F type cable; remove max 10
mm of the top sheath from the supply lead.Tighten connection terminal screws accurately.
Block the cables with appropriate cable lamps, snap the upper cover shut.
Mains cable
Load side RT99PCG
L
NOTE
The following rules should be observed to ensure that the electronic dimmer with sensorial
control operates correctly:
• The floor or table lighting appliance should be fitted with insulating supports having a
height of at least 5mm.
• The sensorial conductor should be isolated from any live part by a double or reinforced
insulation.
• If the entire lamp structure is used, the sensorial surface should have a good electrical
Classe I
Classe II
conduction between all its parts (base, stem, etc). Lacquering of the lamp structure will
3x0,75
2x0,75
reduce the sensitiveness and electrical conduction between the various parts of the lamp
itself.
5x0,75
4x0,75
• The lighting structure should be equipped with an anchoring device for the sensor con-
x
x
ductor ensuring a firm fixing on the lamp and good electrical conduction.
• When the lamp is plugged into the socket, the device will automatically adjust the sensitive-
ness of the sensor. Do not touch the lamp during this operation. If the surface on which
the lamp rests varies, the sensitiveness can also vary.
CONTROL MODE
Use coloured jumpers on the electronic circuit as shown in fig. 1 according to the following
table to determine control mode
Jumper
The default confi guration is with both jumpers included, and therefore step control without
activation from wall switch. Isolate from electricity before including or excluding the jumper
otherwise the functions will not be accepted
STEP CONTROL MODE
To switch on, briefl y touch the sensorial part /push-button of the lamp. To adjust the light
intensity, touch the sensorial part/push- button of the lamp repeatedly until the desired light
level is reached. To switch off from any adjustment level, make contact with the sensorial
part /push-button of the lamp for approx. 1 second. If the red jumper is in function, the
switching on from wall switch is activated.Light level sequence: Off, Max, Medium, Mini-
mum, Night light, Off.
ESCLUSO
Memoria
CONTINUOUS CONTROL MODE
Regolazione continua
To adjust the light intensity, touch the sensorial part /push-button of the lamp directly. To
adjust the light intensity, touch the sensorial part / push-button of the lamp repeatedly until
the desired light level is reached: interrupt the contact upon reaching the desired level. To
invert the light adjustment interrupt the contact and then touch the sensorial portion again.
To switch off, briefly touch the sensorial part / push-button of the lamp once again. Upon
switching off, the light level is memorized (except in the case of a power failure) and it is
restored when the lamp is switched on again. Maximum brightness can be obtained directly
upon switching on by making a slightly longer contact. If wall socket function is used (red
jumper excluded) dimmer will switch on at light level memorized when switched off.
•
•
•
•
•
•
•
•
•
•
•
•
•
•
•
INSTALLATION
Der Lichtregler ist vorgesehen zum Einbau in Leuchten der Schutzklasse I oder II. Er ist
ausschließlich vorgesehen zur Verwendung mit Glühlampen (ohmsche Lasten). Bei der
Installation sind die Nenndaten zu beachten. Der Lichtregler ist auf der Anschlußleitung der
Leuchte zu installieren, mit ausreichendem Abstand von Wärmequellen. Die Leitung zur Last
sollte dabei nicht länger sein als 2 m. Bei der Installation ist wie folgt vorzugehen:
•
•
•
•
•
•
;
Dimensioni: 85x45x20 mm (RT99PCG).
Included
Red
Swich Off
Black
step control
MERKMALE
Stufenlose Regulierung oder stufige Regulierung;
Tast egulierung (RT99PCG);
;
Phasenunabhängig;
Länge der Leitung zum externen Sensor: < 2 mt.;
Memoryfunktion der Lichtstärke auch wenn Stromkreis unterbrochen ist;
Bei Einschalten läuft der Lichtregler allmählich an;
Bei Ausschalten allmähliches Verlöschen (nur bei kontinuierlicher Dimmcharakteri
stik);
Gegen unbeabsichtigtes Einschalten an einer geschalteten Steckdose gesichert;
Überstromschutz mit nicht wieder einschaltbarer Sicherungsresistenz
(nur RT99PCG);
;
Nennlast: 40÷300W;
Nennspannung: 220÷240V 50/60Hz;
;
Abmessungen: 85x45x20 mm.(RT99PCG).
Oberschale öffnen;
Anschluß gemäß nebenstehendem Anschlußschema mit Leitung H03VV-F;
Abmantelung max.10mm;
Anschlußklemmen sorgfältig anziehen;
Oberschale aufsetzen und mit den beiliegenden Schrauben verschließen;
Kabel mit den vorgesehenen Kabelklemmen blockieren, Gehäuseoberhälfte.
Class I
Class II
3x0,75
2x0,75
5x0,75
4x0,75
x
x
Excluded
Memory
Continuous

Verwandte Anleitungen für RELCO RT99PCG


Inhaltszusammenfassung für RELCO RT99PCG
- Seite 1 • Accensione da presa comandata; Block the cables with appropriate cable lamps, snap the upper cover shut. • Protezione amperometrica con resistenza fusibile non ripristinabile (solo RT99PCG); Class I Class II • •...
- Seite 2 Ljusstyrkans minnesfunktion, åven när strömtillförseln är bruten; • Gradvis tändning; • Gradvis släckning (endast kontinuerlig); • Tändning med styrt uttag; • Skyddad med ej återställbar säkring (endast RT99PCG); • • Effekt 40÷300W; SCOLLEGARE LA SPINA POSIZIONARE I JUMPER PER IL DISCONNECT FROM MAINS FUNZIONAMENTO PRESCELTO •...