Werbung
Verfügbare Sprachen
Verfügbare Sprachen
Quicklinks
Werbung

Verwandte Anleitungen für Skandika Smart Training Station


Inhaltszusammenfassung für Skandika Smart Training Station
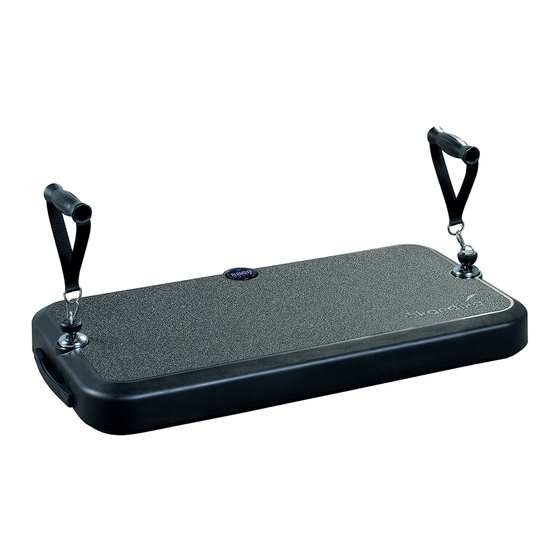
- Seite 1 Smart Training Station Art.Nr. SF-3310...
- Seite 2 MAX Trader GmbH Die Videos zum Auf- und Adresse Wilhelm-Beckmann-Str. 19, D-45307 Essen Abbau sowie FAQ und die Artikelnummer | Name SF-3310 | Smart Training Station Anleitungen zum Down- Klasse loaden findest Du auf Standard EN ISO 20957 unserer Skandika Service...
- Seite 3 SICHERHEITSHINWEISE WARNUNG Um die Verletzungsgefahr zu reduzieren, muss diese Anleitung vor dem Gebrauch vollständig gelesen und verstanden werden! Dieses Gerät ist ausschließlich für den Heimgebrauch in Über- einstimmung mit den Anweisungen in dieser Anleitung vorgesehen. Lesen Sie die Gebrauchsanlei- tung sorgfältig durch, bevor Sie das Gerät einsetzen und bewahren Sie die Gebrauchsanleitung für die weitere Nutzung auf.
- Seite 4 AUFBAUANLEITUNG AUFBAUANLEITUNG Bitte prüfen Sie anhand der Teile- und Checkliste, ob alle notwendigen Teile vorhanden sind. Evtl. sind schon einige Teile vormontiert, um Ihnen den Aufbau zu erleichtern. Platzieren Sie die Basiseinheit (1) auf einer ebenen Fläche mit genügend Freiraum und einer eventuel- len Unterlage zum Schutz des Untergrundes.
- Seite 5 AUFBAUANLEITUNG BENUTZUNGSMÖGLICHKEITEN Skandika Smart Training Station Sie haben die Möglichkeit, die in 4 unterschiedlichen Konfigurati- onen zu benutzen. Mit Handgriffen (40) oder der Trainingsstange (57) und jeweils mit oder ohne die Verlängerungen (58). Dementsprechend unterschiedlich ist der Aufbau: 1) Verwendung mit Handgriffen (40): Montieren Sie die Handgriffe (40) mittels der Karabinerhaken (41) wie in Abb.
- Seite 6 AUFBAUANLEITUNG 2) Verwendung mit Trainingsstange (57): Montieren Sie die Trainingsstange (57) mittels der Karabinerhaken (41) wie in Abb. 3 abgebildet an der Basiseinheit (1). Möchten Sie die Stange inklusive Verlängerungen (58) benutzen, müssen zuerst die Verlängerungen (58) an der Basis und dann die Trainingsstange (57) oben an den Verlängerungen (58) montiert werden, wiederum mit Hilfe der Karabinerhaken (41), siehe Abb.
- Seite 7 TRAININGSCOMPUTER / WIDERSTANDSSTUFEN TRAININGSCOMPUTER Mit Hilfe des Trainingscomputers auf der Basiseinheit (1) können Sie verschiedene Trainingsdaten ein- sehen und die Widerstandsstufen (Widerstand in kg) für Ihre Übungen einstellen: FUNKTIONEN: Scan, Stufe, Zeit, Anzahl, Kalorien. Einstellmöglichkeiten: Stufe (Level): Sie können den Widerstand von Stufe 1 bis Stufe 8 durch Drehen des Deckels verstel- len.
- Seite 8 TRAININGSCOMPUTER / WIDERSTANDSSTUFEN Wenn das Gerät nicht eingeschaltet ist, ist die Anzeige schwarz (Abbildung 1). Nach dem Einschalten werden alle Symbole 3 Sekunden lang angezeigt und der Widerstand wird automatisch auf Stufe 1 gesetzt. Drücken Sie den Trainingscomputer, um die Widerstandseinstellung zu starten (Abbildung 2). Nach dem Ziehen des Seils leuchtet das rote Schloss auf, was den zu diesem Zeitpunkt nicht einstell- baren Widerstand verdeutlicht (Abbildung 3).
- Seite 9 PFLEGE UND WARTUNG PFLEGE UND WARTUNG Einstellen der Zugseillänge: Wenn sich der Zugseil-Anschlag (19) wie in der Abbildung unten darge- stellt etwa ein Finger breit von der Basiseinheit gelöst hat, muss das Zugseil nachgespannt werden. Benutzen Sie den Innensechskantschlüssel (88) und drehen Sie die kleine Stellschraube im Uhrzeiger- sinn, bis sich der Anschlag (19) wieder in Position befindet.
- Seite 10 PFLEGE UND WARTUNG Ersetzen des Zugseils Wenn das Zugseil deutliche Abnutzungserscheinungen, Beschädigungen oder eine Durchmesserver- ringerung von weniger als der Hälfte des ursprünglichen Durchmessers aufweist, ersetzen Sie das Seil bitte. Befolgen Sie hierzu die folgenden Schritte: Schritt 1: Stellen Sie die Widerstandsstufe 8 ein und trennen Sie die Stromversorgung des Gerätes.
- Seite 11 PFLEGE UND WARTUNG Schritt 4: Nachdem das alte und das neue Zugseil verbunden sind, achten Sie darauf, dass diese Ver- bindung frei herausgezogen werden kann und nicht blockiert, z. B. durch zu kräftiges oder unkontrolliertes Ziehen und ziehen Sie die Seile vorsichtig mit Hilfe des Handgriffs heraus. Wenn das neue Zugseil herausgezogen ist, entfernen Sie das alte Zugseil und den Handgriff auf der anderen Seite (wie bei Schritt 2 zuvor).
- Seite 12 PFLEGE UND WARTUNG Schritt 5: Fädeln Sie das Zugseil in die Begrenzungskugel (28) und den Zugseil-Anschlag (19) ein, sichern Sie die Schrauben (66) und machen Sie einen Knoten am Ende des Zugseils und installieren Sie dann die Abdeckung (27). Montieren Sie das Zugseil auf der anderen Seite auf die gleiche Weise.
- Seite 13 EXPLOSIONSZEICHNUNG...
- Seite 14 TEILELISTE Teil Nr. Bezeichnung Spezifikationen Menge Teil Nr. Bezeichnung Spezifikationen Menge Basiseinheit Lager 608ZZ Befestigungsplatte für Griffe Rollenwellenkern ø8*27.6, 45# Druckplatte für Pneumatik-Zylinder Schraube M6*15 Zugseil ø4 Unterlegscheiben OD20*ID8.5*T1.5 Adapterplatte Schraube M5*8 Platte für Führungsstange Kleiner Lukendeckel Schraube M6*45 Pressplatte für Laufrad Schraube ST4.2*L16mm Platte für Drehtellerscheibe...
- Seite 15 AUF- UND ABWÄRMEN / TRAINING Auf- und Abwärmen Ein erfolgreiches Trainingsprogramm besteht aus einer Aufwärmphase, einer Trainingsphase und dem Ab- kühlen. Die Trainingshäufigkeit sollte für Anfänger bei 2- bis 3-mal die Woche angesetzt werden, immer mit mindestens einem Tag Pause zwischen den Trainingseinheiten. Nach einigen Monaten kann die Häufigkeit auf 4- bis 5-mal wöchentlich gesteigert werden.
- Seite 16 Sammlung zu. Diese können giftige Schwermetalle enthalten und unterliegen der Sondermüllbehandlung. Im Zuge ständiger Produktverbesse- Für Ersatzteile kontaktieren Sie bitte folgende E-Mail-Adresse: service@skandika.de rungen behalten Der Service erfolgt durch: MAX Trader GmbH, Wilhelm-Beckmann-Straße 19, 45307 Essen, wir uns technische...
- Seite 17 NOTIZEN ________________________________________________________________________________ ________________________________________________________________________________ ________________________________________________________________________________ ________________________________________________________________________________ ________________________________________________________________________________ ________________________________________________________________________________ ________________________________________________________________________________ ________________________________________________________________________________ ________________________________________________________________________________ ________________________________________________________________________________ ________________________________________________________________________________ ________________________________________________________________________________ ________________________________________________________________________________ ________________________________________________________________________________ ________________________________________________________________________________ ________________________________________________________________________________ ________________________________________________________________________________...
- Seite 18 MAX Trader GmbH Please visit the Skandika Adresse Wilhelm-Beckmann-Str. 19, D-45307 Essen Service portal on our Artikelnummer | Name SF-3310 | Smart Training Station website for setup & help Klasse videos, FAQs and downloa- Standard EN ISO 20957 dable instructions.
- Seite 19 SAFETY PRECAUTIONS WARNING To reduce risk of injury, read and understand this instruction manual before using the device! This machine is intended for home use only in accordance with the instructions provided in this manual. Read the instruction manual carefully before using this device and keep the instruction manual for future use. SAFETY PRECAUTIONS •...
- Seite 20 SET-UP INSTRUCTIONS SET-UP INSTRUCTIONS Please use the parts and checklist to check whether all the necessary parts are present. Some parts may already be pre-assembled to make assembly easier for you. Place the base unit (1) on a level surface with sufficient free space and, if necessary, a base to protect the surface.
- Seite 21 SET-UP INSTRUCTIONS UTILISATION OPTIONS Skandika Smart Training Stationin 4 different configurations. With You have the option of using the handles (40) or the push rod (57) and in each case with or without the extensions (58). The structure varies accordingly: 1) Use with handles (40): Attach the handles (40) to the base unit (1) using the snap hooks (41) as shown in Fig.
- Seite 22 SET-UP INSTRUCTIONS 2) Use with push rod (57): Attach the push rod (57) to the base unit (1) using the snap hooks (41) as shown in Fig. 3. If you want to use the bar including extensions (58), the extensions (58) must first be attached to the base and then the push rod (57) must be attached to the top of the extensions (58), again using the snap hooks (41), see Fig.
- Seite 23 EXERCISE COMPUTER / LEVELS EXERCISE COMPUTER resist- Using the training computer on the base unit (1), you can view various training data and set the ance levels (resistance in kg) for your exercises: Functions: Scan, Level, time, number, calories. Setting options: Level: You can adjust the resistance from level 1 to level 8 by turning the cover.
- Seite 24 EXERCISE COMPUTER / LEVELS When the machine is not powered on, the center control knob screen is black. (Figure 1) After startup, all ICONS are displayed brightly for 3s and the resistance is automatically set to level 1. Press the training computer to start the resistance adjustment function. (Figure 2) After pulling the rope, the red lock lights up, representing the unadjustable resistance at this time.
- Seite 25 CARE AND MAINTENANCE CARE AND MAINTENANCE Setting the pull rope length: If the pull rope stop plate (19) has come loose from the base unit by about a finger‘s width, as shown in the illustration below, the pull cable must be retightened. Use the Allen key (88) and turn the small adjusting screw clockwise until the stop plate (19) is back in position.
- Seite 26 CARE AND MAINTENANCE Replacing the pull rope If the pull rope shows clear signs of wear, damage or a reduction in diameter of less than half of the original diameter, please replace the rope. To do this, follow the steps below: Step 1: Set resistance level 8 and disconnect the power supply to the appliance.
- Seite 27 CARE AND MAINTENANCE Step 4: Once the old and new pull cords are connected, make sure that this connection can be pulled out freely and is not blocked, e.g. by pulling too hard or in an uncontrolled manner, and care- fully pull out the cords using the handle.
- Seite 28 CARE AND MAINTENANCE Step 5: Thread the pull cable into the limit ball (28) and the pull , secure the rope stop plate (19) screws (66) and tie a knot at the end of the pull cable and then install the cover (27). Install the pull rope on the other side in the same way.
- Seite 29 EXPLOSION DRAWING...
- Seite 30 PARTS LIST Part no. Description Specification Part no. Description Specification Base unit Bearing 608ZZ Handle fixing plate Roller shaft core ø8*27.6, 45# Pneumatic cylinders press plate Screw M6*15 Pull rope ø4 Washers OD20*ID8.5*T1.5 Adapter plate Screw M5*8 Small hatch cover Guide rod press plate Screw M6*45...
- Seite 31 WARM-UP AND COOL-DOWN / EXERCISE WARM-UP and COOL-DOWN A successful exercise program consists of a warm-up, aerobic exercise and a cool-down. Exercise for at least two or preferably three times a week, resting for a day between workouts. After several months, you may increase the frequency to four or five times per week.
- Seite 32 Ask at your council about the respective local disposal sites. In accordance with our policy of continual product impro- For spare parts please contact: service@skandika.de vement, we reserve the right Service centre: MAX Trader GmbH, Wilhelm-Beckmann-Straße 19, 45307 Essen,...
- Seite 33 NOTES ________________________________________________________________________________ ________________________________________________________________________________ ________________________________________________________________________________ ________________________________________________________________________________ ________________________________________________________________________________ ________________________________________________________________________________ ________________________________________________________________________________ ________________________________________________________________________________ ________________________________________________________________________________ ________________________________________________________________________________ ________________________________________________________________________________ ________________________________________________________________________________ ________________________________________________________________________________ ________________________________________________________________________________ ________________________________________________________________________________ ________________________________________________________________________________ ________________________________________________________________________________...
- Seite 34 MAX Trader GmbH vidéos de montage et de Adresse Wilhelm-Beckmann-Str. 19, D-45307 Essen démontage ainsi que la Artikelnummer | Name SF-3310 | Smart Training Station FAQ et les instructions de Klasse téléchargement sur notre Standard EN ISO 20957 page de service Skandika.
- Seite 35 INFORMATIONS DE SÉCURITÉ AVERTISSEMENT Pour réduire les risques de blessures, veuillez lire attentivement ce mode d’emploi avant d‘utiliser l’appareil ! Cet appareil est uniquement destiné à une utilisation domestique conformément aux instructions contenues dans ce mode d’emploi. Lisez attentivement le mode d’emploi avant d’utiliser l’appareil et conservez bien ce mode d’emploi.
- Seite 36 INSTRUCTIONS DE MONTAGE INSTRUCTIONS DE MONTAGE Veuillez vérifier à l‘aide de la liste de pièces et de contrôle si toutes les pièces nécessaires sont pré- sentes. Il se peut que certaines pièces soient déjà prémontées pour vous faciliter le montage. Placez l‘unité...
- Seite 37 INSTRUCTIONS DE MONTAGE OPTIONS D‘UTILISATION Skandika Smart Training Station Vous avez la possibilité d‘utiliser la dans 4 configurations différentes. Avec les poignées (40) ou la barre d‘entraînement (57) et avec ou sans les rallonges (58). La structure est donc différente : 1) Utilisation avec des poignées (40) :...
- Seite 38 INSTRUCTIONS DE MONTAGE 2) Utilisation avec une barre d‘entraînement (57) : Montez la barre d‘entraînement (57) sur l‘unité de base (1) à l‘aide des mousquetons (41) comme illustré dans la figure 3. Si vous souhaitez utiliser la barre avec les rallonges (58), il faut d‘abord monter les rallonges (58) sur la base, puis la barre d‘entraînement (57) en haut des rallonges (58), toujours à...
- Seite 39 ORDINATEUR D‘ENTRAÎNEMENT / NIVEAUX DE RÉSISTANCE ORDINATEUR D‘ENTRAÎNEMENT Grâce à l‘ordinateur d‘entraînement situé sur l‘unité de base (1), vous pouvez consulter différentes don- nées d‘entraînement et régler les niveaux de résistance (résistance en kg) pour vos exercices : FONCTIONS : Scan, niveau, temps, nombre, calories.
- Seite 40 ORDINATEUR D‘ENTRAÎNEMENT / NIVEAUX DE RÉSISTANCE Si l’appareil n’est pas allumé, l’écran est noir (figure 1). Après la mise en marche, toutes les icônes s’af- fichent pendant 3 secondes et la résistance est automatiquement réglée sur le niveau 1. Appuyez sur le compteur d’entraînement pour commencer à...
- Seite 41 ENTRETIEN ET MAINTENANCE ENTRETIEN ET MAINTENANCE Réglage de la longueur de la corde de traction : Si la butée du câble de traction (19) s‘est détachée de l‘unité de base d‘environ la largeur d‘un doigt comme le montre l‘illustration ci-dessous, le câble de traction doit être retendu.
- Seite 42 ENTRETIEN ET MAINTENANCE Remplacer le câble de traction Si le câble de traction présente des signes évidents d‘usure, d‘endommagement ou une réduction de diamètre inférieure à la moitié du diamètre initial, remplacez le câble. Pour ce faire, suivez les étapes suivantes : Étape 1 : Réglez le niveau de résistance 8 et débranchez l‘alimentation électrique de l‘appareil.
- Seite 43 ENTRETIEN ET MAINTENANCE Étape 4 : Une fois l‘ancienne et la nouvelle corde de traction reliées, veillez à ce que cette liaison puisse être retirée librement et ne soit pas bloquée, par exemple en tirant trop fort ou de manière in- contrôlée, et retirez les cordes avec précaution à...
- Seite 44 ENTRETIEN ET MAINTENANCE Étape 5 : Enfilez le câble de traction dans la boule de limitation (28) et la butée de câble de traction (19), bloquez les vis (66) et faites un nœud à l‘extrémité du câble de traction, puis ins- tallez le couvercle (27).
- Seite 45 VUE ÉCLATÉE...
- Seite 46 LISTE DES PIÈCES Pièce no. Description Spécifications Qté Pièce no. Description Spécifications Qté Unité de base Roulements 608ZZ Plaque de fixation pour poignées Noyau de l'arbre à rouleaux ø8*27.6, 45# Plaque de pression pour vérin M6*15 pneumatique Rondelles OD20*ID8.5*T1.5 Câble de traction ø4 M5*8 Plaque d'adaptation...
- Seite 47 ÉCHAUFFEMENT ET RÉCUPÉRATION / ENTRAÎNEMENT ÉCHAUFFEMENT et RÉCUPÉRATION Un programme d‘exercices réussi consiste en un échauffement, un exercice aérobique et une récupération. Entraînez-vous de préférence au moins deux ou trois fois par semaine, avec une pause d’un jour entre les séances d‘entraînement.
- Seite 48 Dans le cadre du travail continu d’amélioration des Pour d’accessoires ou de pièces de rechange, veuillez contacter : produits, nous nous réser- service@skandika.de vons le droit de procéder à Centre de service clients : MAX Trader GmbH, Wilhelm-Beckmann-Str. 19, 45307 Essen, des modifications tech- Allemagne niques et de design.
- Seite 49 NOTES ________________________________________________________________________________ ________________________________________________________________________________ ________________________________________________________________________________ ________________________________________________________________________________ ________________________________________________________________________________ ________________________________________________________________________________ ________________________________________________________________________________ ________________________________________________________________________________ ________________________________________________________________________________ ________________________________________________________________________________ ________________________________________________________________________________ ________________________________________________________________________________ ________________________________________________________________________________ ________________________________________________________________________________ ________________________________________________________________________________ ________________________________________________________________________________ ________________________________________________________________________________...
- Seite 50 NOTES ________________________________________________________________________________ ________________________________________________________________________________ ________________________________________________________________________________ ________________________________________________________________________________ ________________________________________________________________________________ ________________________________________________________________________________ ________________________________________________________________________________ ________________________________________________________________________________ ________________________________________________________________________________ ________________________________________________________________________________ ________________________________________________________________________________ ________________________________________________________________________________ ________________________________________________________________________________ ________________________________________________________________________________ ________________________________________________________________________________ ________________________________________________________________________________ ________________________________________________________________________________...
- Seite 51 NOTES ________________________________________________________________________________ ________________________________________________________________________________ ________________________________________________________________________________ ________________________________________________________________________________ ________________________________________________________________________________ ________________________________________________________________________________ ________________________________________________________________________________ ________________________________________________________________________________ ________________________________________________________________________________ ________________________________________________________________________________ ________________________________________________________________________________ ________________________________________________________________________________ ________________________________________________________________________________ ________________________________________________________________________________ ________________________________________________________________________________ ________________________________________________________________________________ ________________________________________________________________________________...
- Seite 52 Vertrieb & Service durch / Sales & Service by Ventes et services par MAX Trader GmbH Wilhelm-Beckmann-Straße 19 45307 Essen Germany SF-3310 DE_GB_FR 04/2024 Ver. 1.5...