Fronius MTG 250i Serviceanleitung
Vorschau ausblenden
Andere Handbücher für MTG 250i:
- Bedienungsanleitung (220 Seiten) ,
- Serviceanleitung (92 Seiten) ,
- Bedienungsanleitung (68 Seiten)

Verwandte Anleitungen für Fronius MTG 250i


Inhaltszusammenfassung für Fronius MTG 250i
- Seite 1 Service Manual MTG 250i - 550i MTG 270i - 400i US Style MTW 250i - 700i MHP 250i G - 550i G ML MHP 500i W - 700i W ML Serviceanleitung Service Manual 42,0410,2002 020-08082024...
-
Seite 3: Inhaltsverzeichnis
Inhaltsverzeichnis Vorwort und Sicherheitshinweise Erklärung Sicherheitshinweise Sicherheitshinweise Fronius Technischer Support National (TSN) Werkzeug und Messgeräte Erforderliches Werkzeug Mess- und Prüfmittel Hilfsmaterialien Funktionsbeschreibung Brennerkörper Schlauchpaket Koaxialkabel FSC - Fronius System Connector Fehler-Suchhilfe Allgemeines Fehlersuchbaum Komponenten austauschen Sicherheit ESD-Bestimmungen Übersicht Anzugsmomente Gasdüsen-Aufnahme tauschen MTB 320i G / ML, MTB 330i G / ML, MTB 400i G / ML, MTB 550i G / ML: Gasdüsen-Auf-... - Seite 4 Isolationsprüfung Gasdurchfluss-Prüfung Durchfluss- und Dichtheits-Prüfung Bedienelemente und Anzeigen Strom-Belastungstest / Spannungsabfallmessung Schlauchlängen...
-
Seite 5: Vorwort Und Sicherheitshinweise
Nur geschultes und autorisiertes Servicepersonal darf die beschriebenen Tätigkeiten durchführen. ▶ Sicherheits- und Warnhinweise beachten. Fronius Techni- Sollten Sie bei der Fehleranalyse Fragen haben, steht Ihnen Ihr Verkaufsteam scher Support Fronius Technischer Support National (TSN) als Ansprechpartner zur Verfügung. National (TSN) mailto: welding.techsupport@fronius.com Deutsch... -
Seite 6: Werkzeug Und Messgeräte
Werkzeug und Messgeräte Erforderliches Schraubendreher TX8, TX10, TX20 Werkzeug Schraubendreher ISK 3 mm, US Variante Gabelschlüssel SW 8 mm Gabelschlüssel SW 11 mm Gabelschlüssel SW 12 mm Gabelschlüssel SW 15 mm Gabelschlüssel SW 17 mm Spitzzange Seitenschneider klein CPC Ausziehwerkzeug (44,0450,1436) Verschleißteil WZ (42,0201,3216) Werkzeugset Gasdüsen-Aufnahme (44,0450,1938) Klemmzange... -
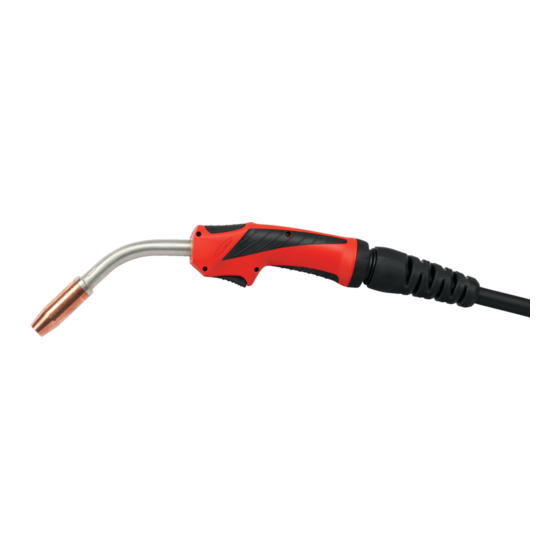
Seite 7: Funktionsbeschreibung
Flexible Verbindung zwischen Brennerkörper und Drahtvorschub, die alle für den Schweißbetrieb erforderlichen Leitungen enthält. Koaxialkabel Koaxialkabel kommen bei Fronius ausschließlich in gasgekühlten Schlauchpake- ten zum Einsatz. Der koaxiale, gleichmäßige Aufbau des Stromkabels und der Steuerleitung rund um den Drahtförder-Schlauch ist besonders kompakt. -
Seite 8: Fehler-Suchhilfe
Fehler-Suchhilfe Allgemeines Der Fehler-Suchbaum dient dem systematischen Auffinden und Beheben von Fehlerursachen. Bevor Sie mit der Fehlersuche beginnen, lesen Sie zuerst das Kapitel „Funktions- beschreibung“ um Verständnis für den Aufbau und die Funktionsweise der Schweißbrenner zu erlangen. -
Seite 9: Fehlersuchbaum
Fehlersuchbaum Identifizierung des Schweißbrenners Schweißbrenner laut PP- SER-2011 auf mechanische Schäden und Verschleißteile Defekte Teile tauschen überprüfen. nein Teile in Ordnung? Brennerkörper und Steuerlei- tung auf Isolation überprüfen. Isolation erneuern oder defekte Teile tauschen nein Isolation in Ordnung? Brennerkörper und Gasschlauch auf Durchfluss und Dichtheit Defekte Teile tauschen oder neu überprüfen. -
Seite 10: Komponenten Austauschen
Sicherheit WARNUNG! Fehlerhaft durchgeführte Arbeiten können schwerwiegende Personen- und Sachschäden verursachen. Alle in der Serviceanleitung beschriebenen Tätigkeiten dürfen nur von Fronius- geschultem Servicepersonal durchgeführt werden. Beachten Sie das Kapitel „Si- cherheitsvorschriften“ in der Bedienungsanleitung des Gerätes. WARNUNG! Ein elektrischer Schlag kann tödlich sein. -
Seite 11: Gasdüsen-Aufnahme Tauschen
Gasdüsen-Aufnahme tauschen MTB 320i G / ML, Am Brennerkörper sämtliche Ver- MTB 330i G / ML, schleißteile abnehmen MTB 400i G / Mit einer Wasserpumpenzange die ML, MTB 550i Gasdüsen-Aufnahme abmontieren G / ML: Gasdüsen-Auf- HINWEIS! nahme tauschen Bei Gasdüsen-Aufnahmen mit Sechs- kant kann die Gasdüsen-Aufnahme al- ternativ mit einem Gabelschlüssel SW 22 mm abmontiert werden. -
Seite 12: Mtb 250I W / Ml Mtb 400I W / Ml: Gasdüsen-Aufnahme Tauschen
Gasdüsen-Aufnahme mittels Werk- zeugset Gasdüsenaufnahme und mit Holex-Drehmomentschlüssel festziehen Anzugsmoment = 14 Nm Abschließend sämtliche Ver- schleißteile am Brennerkörper montieren HINWEIS! Bei Gasdüsen-Aufnahmen mit Sechs- kant kann die Gasdüsen-Aufnahme al- ternativ mit einem Gabelschlüssel SW 22 mm und einem Anzugsmoment von 14 Nm montiert werden. - Seite 13 Kleberreste vom Gewinde des Außenrohres entfernen Ersatzteile MTB 250i W /ML Ersatzteile MTB 400i W / ML Artikelnum- Menge Bezeichnung 44,0350,3250 Gasduesenaufn. kpl. W MTB 250i 44,0350,3273 Gasduesenaufn. kpl. W MTB 400i Aktivator aufbringen: auf das Gewinde des Außen- rohres am Innenrohr (ohne Abbil- dung) Loctite 620 auf den Aktivator auf-...
-
Seite 14: Mtb 500I W / Ml: Gasdüsen-Aufnahme Tauschen
MTB 500i W / Am Brennerkörper sämtliche Ver- ML: Gasdüsen- schleißteile abnehmen Aufnahme tau- Heißluftföhn auf 500°C stellen und schen die Gasdüsen-Aufnahme rundher- um, gleichmäßig erwärmen Mit einer Wasserpumpenzange die Gasdüsen-Aufnahme abmontieren HINWEIS! Ein starker Widerstand beim Lösen der Gasdüsen-Aufnahme kann ein Zei- chen für noch zu festen Sitz sein, in- nenliegende Teile können beschädigt werden. -
Seite 15: Mtb 700Iw+Ml: Gasdüsen-Aufnahme Tauschen
Artikelnum- Menge Bezeichnung 42,0402,0285 O-Ring Ø12x3mm FKM70 Verschleißteile der Reihe nach montieren WICHTIG! Der letzte Isolierring muss mit der Phase Lichtbogen-seitig mon- tiert sein! Vor dem Montieren der Gasdüsen- Aufnahme Aktivator auf das Ge- winde des Außenrohres aufbringen Loctite 620 wie abgebildet auf das Gewinde rundherum auftragen und zügig die Gasdüsen-Aufnahme mit- tels Werkzeugset Gasdüsenauf-... -
Seite 16: Druckstück Tauschen
Druckstück tauschen Druckstück tau- Rohrbogen (2) abnehmen schen Bei PullMig: Haltebügel (5) um 90° verdrehen und abnehmen Verschlussring (4) von der Griff- schale (3) lösen 4 Stk. / 6 Stk. Schraube TX8 (1) entfernen Griffschale abnehmen Anschlussteil aus der Brenner- Grundschale entnehmen Anschlussteil mittels Heißluftföhn auf ca. -
Seite 17: Wasserstopp Tauschen
Wasserstopp tauschen Übersicht der O-Ring Komponenten (1) (2) Innenhülse Dichthülse Druckfeder Die Wasserstopp-Sets sind in folgenden Varianten verfügbar: Rep-Set MHPi PM H2O Stop (4,102,009) für TPSi PullMig Schlauchpakete Rep-Set MHPi ML H2O-Stop (4,102,010) für TPSi MultiLock Schlauchpakete Wasserstopp de- Rohrbogen abnehmen montieren Innenhülse (2) mittels Nuss SW 8 mm entfernen... - Seite 18 Dichthülse wieder einsetzen WICHTIG! Der stirnseitige Dicht- ring muss in Richtung Rohrbogen weisen. Loctite 542 auf die Gewindegänge der Innenhülse auftragen Innenhülse einsetzen und festzie- Anzugsmoment = 2 Nm O-Ring (1) montieren Anschlussteil mit Durchfluss Ad- apter auf Funktion überprüfen Rohrbogen aufschrauben...
-
Seite 19: Standard-Schweißbrenner Gasgekühlt - Komponenten Tauschen
Standard-Schweißbrenner gasgekühlt - Kompo- nenten tauschen Standard- Verschlussring (2) von der Griff- Schweißbrenner schale lösen gasgekühlt - 4 Stk. Schraube TX8 (1) von der Griffschale öff- Griffschale lösen Alle Komponenten aus der Griff- (3) (4)(5) (6) (10) schale nehmen und anschließend demontieren Verschlussring Griffschale... -
Seite 20: Standard-Schweißbrenner Gasgekühlt - Komponenten Tauschen
Standard- Loctite 243 auf die 3 untersten Ge- Schweißbrenner windegänge vom Stromkabel auf- gasgekühlt - tragen Komponenten tauschen Anschlussteil / Brennerkörper (8) mittels Gabelschlüssel SW17 mm und SW15 mm auf Koaxialkabel (7) fest aufschrauben (gegenhalten) Anzugsmoment = 20 Nm LED wie abgebildet ablängen und polrichtig aufsetzen WICHTIG! Die abgeflachte Stelle der LED ist (-). -
Seite 21: Standard-Schweißbrenner Gasgekühlt - Griffschale Schließen
Standard- Griffschale wie abgebildet Schweißbrenner bestücken gasgekühlt - Griffschale HINWEIS! schließen Der Steuer-Print wird mittels Dau- menauflage positioniert. WICHTIG! Bei Multilock-Brennern muss das federnde Druckstück oben bei der Dichtung Daumenablage sein. Griffschale schließen Verschlussring (2) verriegeln 4 Stk. Schraube TX8 (1) verschrau- Anzugsmoment = 0,6 Nm Alle Taster auf Funktion überprüfen... -
Seite 22: Up/Down-Schweißbrenner Gasgekühlt - Komponenten Tauschen
Up/Down-Schweißbrenner gasgekühlt - Kompo- nenten tauschen Up/Down- Verschlussring (2) von der Griff- Schweißbrenner schale lösen gasgekühlt - 4 Stk. Schraube TX8 (1) von der Griffschale öff- Griffschale lösen Alle Komponenten aus der Griff- (3) (4)(5) (6) (10) schale nehmen und anschließend demontieren Verschlussring Griffschale... -
Seite 23: Up/Down-Schweißbrenner Gasgekühlt - Komponenten Tauschen
Up/Down- Loctite 243 auf die 3 untersten Ge- Schweißbrenner windegänge vom Stromkabel auf- gasgekühlt - tragen Komponenten tauschen Anschlussteil / Brennerkörper (8) mittels Gabelschlüssel SW17 mm und SW15 mm auf Koaxialkabel (7) fest aufschrauben (gegenhalten) Anzugsmoment = 20 Nm LED wie abgebildet ablängen und polrichtig aufsetzen WICHTIG! Die abgeflachte Stelle der LED ist (-). -
Seite 24: Up/Down-Schweißbrenner Gasgekühlt - Griffschale Schließen
Up/Down- Daumenauflage auf Steuer-Print Schweißbrenner aufsetzen gasgekühlt - Griffschale wie abgebildet Griffschale bestücken schließen WICHTIG! Der Steuer-Print wird mittels Daumenauflage positio- niert. WICHTIG! Auf ordentliche Ka- belführung achten! Griffschale schließen Verschlussring (2) verriegeln 4 Stk. Schraube TX8 (1) verschrau- Anzugsmoment = 0,6 Nm Alle Taster auf Funktion prüfen... -
Seite 25: Jobmaster-Schweißbrenner Gasgekühlt - Komponenten Tauschen
JobMaster-Schweißbrenner gasgekühlt - Kompo- nenten tauschen JobMaster- Verschlussring (2) von der Griff- Schweißbrenner schale lösen gasgekühlt - 4 Stk. Schraube TX8 (1) von der Griffschale öff- Griffschale lösen Alle Komponenten aus der Griff- (3) (4)(5) (6) (10) schale nehmen und anschließend demontieren Verschlussring Griffschale... -
Seite 26: Jobmaster- Schweißbrenner Gasgekühlt - Komponenten Austauschen
JobMaster- Loctite 243 auf die 3 untersten Ge- Schweißbrenner windegänge vom Stromkabel auf- gasgekühlt - tragen Komponenten austauschen Anschlussteil / Brennerkörper (8) mittels Gabelschlüssel SW17 mm und SW15 mm auf Koaxialkabel (7) fest aufschrauben (gegenhalten) Anzugsmoment = 20 Nm LED wie abgebildet ablängen und polrichtig aufsetzen WICHTIG! Die abgeflachte Stelle der LED ist (-). -
Seite 27: Jobmaster- Schweißbrenner Gasgekühlt - Griffschale Schließen
JobMaster- Daumenauflage mit Sichtglas auf Schweißbrenner Steuer-Print aufsetzen gasgekühlt - Griffschale wie abgebildet Griffschale bestücken schließen WICHTIG! Der Steuer-Print wird mittels Daumenauflage positio- niert. WICHTIG! Auf ordentliche Ka- belführung achten! Griffschale schließen Verschlussring (2) verriegeln 4 Stk. Schraube TX8 (1) verschrau- Anzugsmoment = 0,6 Nm Alle Taster auf Funktion prüfen Deutsch... -
Seite 28: Standard-Schweißbrenner Wassergekühlt - Komponenten Tauschen
Standard-Schweißbrenner wassergekühlt - Kom- ponenten tauschen Standard- Griffschale öffnen Schweißbrenner wassergekühlt - Verschlussring (2) von der Griff- Griffschale öff- schale lösen 4 Stk. Schraube TX8 (1) von der Griffschale lösen Alle Komponenten aus der Griff- (4) (5)(2)(6) (7) (10) schale nehmen und anschließend demontieren Verschlussring Brennertaste... -
Seite 29: Standard-Schweißbrenner Wassergekühlt - Komponenten Tauschen
Standard- O-Ringe auf Beschädigungen un- Schweißbrenner tersuchen wassergekühlt - Die Dichthülse samt O-Ringe wie- Komponenten der in das Anschlussteil / Bren- tauschen nerkörper setzen Den obersten O-Ring abnehmen Innenhülse korrekt einschrauben Etwas Loctite 542 auf das Gewinde der Innenhülse (6) auftragen Innenhülse mittels Steckschlüssel SW 8 mm in das Anschlussteil / Brennerkörper (7) schrauben... - Seite 30 Verschlussring aufsetzen Drahtförder-Schlauch (11) mit Syntheso Glep 1 einfetten Drahtförder-Schlauch (11) in das Anschlussteil / Brennerkörper (7) einsetzen und mit Positionierstift (5) fixieren Stromkabel (14) am Anschlussteil / Brennerkörper (7) mit Gabel- schlüssel SW 11 mm (Kabel) und (11) SW 12 mm (Überwurfmutter) auf- schrauben (16) (12)
-
Seite 31: Standard-Schweißbrenner Wassergekühlt - Griffschale Schließen
Restliche Komponenten am Kabel- baum anstecken (18) HINWEIS! Auf Grund von Quetschgefahr der Ka- bel, auf die richtige Verlegung in den Stegen (18) und Zugentlastungen (19) achten. (18) WICHTIG! Bei Multilock-Brennern muss das federnde Druckstück oben bei der Dichtung Daumenablage sein. (19) Schweißbrenner schließen (siehe Abschnitt „Griffschale schließen“) -
Seite 32: Zentralanschluss Wassergekühlt - Komponenten Tauschen
Zentralanschluss wassergekühlt - Komponenten tauschen Zentralan- Knickschutz-Feder (2) mittels Ha- schluss was- kenschlüssel lösen und herunter- sergekühlt - De- drehen montage 3 Stk. Schraube TX 10 (1) vom Zentralanschluss-Gehäuse lösen Kabelbinder vom Zentralanschluss lösen Die 4 Stiftkontakte (3) der Steuer- leitung mittels Ausziehwerkzeug ausziehen O-Ringe am Gaszapfen (4) auf... -
Seite 33: Zentralanschluss Wassergekühlt - Montage
Zentralan- WICHTIG! Beim Aufschieben der schluss was- Knickschutz-Feder die Aufsteckrich- sergekühlt - tung beachten Montage Knickschutz-Feder aufschieben (Aufsteckrichtung so, dass später der vorgepresste Federteil aufge- schraubt werden kann) Beschädigtes Schlauchstück vom Gasschlauch und Wasserschlauch mit Allzweck-Schere abtrennen Steckersockel (5) auf den Zentral- (6) (7)(8)(9) (10) anschluss (6) geben (Abstand las- sen um Steuerleitung einzupinnen) - Seite 34 Steuerleitung am Stromanschluss- (11) kontakt (11) mit Kabelbinder fixie- Zentralanschluss-Gehäuse wie ab- gebildet bestücken Anhand der Markierungen auf die Verlegung des Wasserschlauches achten Zentralanschluss-Gehäuse mit 3 Stk. Schraube TX10 (1) verschrau- Anzugsmoment = 1,3 Nm HINWEIS! Ein Abstand von 5 mm vor dem An- schlagstopp einhalten, damit bei der Wartung des Zentralanschluss der Ha- kenschlüssel einhaken kann.
-
Seite 35: Zentralanschluss Gasgekühlt - Komponenten Tauschen
Zentralanschluss gasgekühlt - Komponenten tau- schen Zentralan- 1 Stk. Schraube TX20 (1) vom Zen- schluss gas- tralanschluss-Gehäuse lösen gekühlt - De- Das komplette Zentralanschluss- montage Gehäuse (2) zurückziehen Die 4 Stiftkontakte der Steuerlei- (4)(5) tung aus dem Steckersockel (3) mittels Ausziehwerkzeug (6) aus- ziehen Das Koaxialkabel (5) mit 2 Gabel- schlüssel SW 15 mm vom Zentral-... -
Seite 36: Schlauchpaket Wassergekühlt Einziehen
Schlauchpaket wassergekühlt einziehen Schlauchpaket Steckersockel inkl. Stiftkontakte (2) (3)(4)(5) wassergekühlt (1) auf den Zentralanschluss (2) einziehen geben und in richtiger Reihenfolge bestücken Stromkabel (6) am Zentralan- schluss (2) mit Gabelschlüssel SW 11 mm (Kabel) und SW 12 mm (Überwurfmutter) montieren Drahtförder-Schlauch (3) einset- zen und mit dem Arretierbolzen fi- xieren... - Seite 37 Wie abgebildet sämtliche Komponenten anordnen (Steuerleitung zwischen Drahtförder-Schlauch und Wasserschlauch legen) Auf Rückseite Stecker zwischen Drahtförder-Schlauch und Wasserschlauch stecken Schlauchpaket einziehen Ausführung ohne LED: Wie abgebildet sämtliche Komponenten anordnen (Steuerleitung zwischen Drahtförder-Schlauch und Wasserschlauch legen) Schlauchpaket einziehen Deutsch...
-
Seite 38: Prüfung Nach Der Reparatur
Prüfung nach der Reparatur Prüfablauf Die Prüfungen müssen in folgender Reihe durchgeführt werden: Mechanische Prüfung Isolationsprüfung Gasdurchfluss und Dichtheit Wasserdurchfluss und Dichtheit Bedienelemente und Anzeigen Strombelastungs-Prüfung Mechanische Verschleißteile (Kontaktrohr, Gasdüse, Spritzerschutz, Drahteinlaufdüse, Prüfung Drahtführungsseele, etc.) dürfen nicht verschmutzt oder verschlissen sein Brennerkörper auf mechanische Beschädigungen prüfen und Konus auf Ver- schleiß... -
Seite 39: Durchfluss- Und Dichtheits-Prüfung
Die Prüfungen gemäß Bedienungsan- leitung Torch Flow Rate durch- zuführen. Die Grenzwerte dem Serviceprüfplan „PP-SER-2001 Durchfluss Brenner“ entnehmen. Durchfluss- und Prüfmittel: Durchfluss und Dichtheitsprüfgerät Dichtheits- Prüfung Die Prüfungen gemäß Bedienungsanleitung Durchfluss- und Dichtheitsprüfgerät durchzuführen Die Grenzwerte dem Serviceprüfplan „PP-SER-2002 Durchfluss Brenner“ ent- nehmen Bei Wassergekühlten Multilock Schweißbrennern zusätzlich die Dicht-... -
Seite 40: Strom-Belastungstest / Spannungsabfallmessung
Steuerleitung mit Adapter-Kabel verbinden und an Testbox an- schließen Tasten am Schweißbrenner betäti- gen und Funktion über Testbox überprüfen Elektrische Prüfung Schalterwippe links lang, nach vor- ne drücken = LED Endkraterstrom b) Schalterwippe links lang, nach hin- ten drücken = LED Hauptstrom Schalterwippe rechts kurz, nach vorne drücken = LED Down d) Schalterwippe rechts kurz, nach... -
Seite 41: Schlauchlängen
Schlauchlängen Brennertype 4,035,945 MTW 250i /FSC/3,5m/45° 4,035,946 MTW 250i /FSC/UD/3,5m/45°/LED 4,035,947 MTW 250i /FSC/JM/3,5m/45°/LED 4,035,948 MTW 250i /FSC/4,5m/45° 4,035,949 MTW 250i /FSC/UD/4,5m/45°/LED 4,035,950 MTW 250i /FSC/JM/4,5m/45°/LED 4,035,951 MTW 320i /FSC/3,5m/45°/LED 4,035,952 MTW 320i /FSC/UD/3,5m/45°/LED 4,035,953 MTW 320i /FSC/JM/3,5m/45°/LED 4,035,954 MTW 320i /FSC/4,5m/45°/LED 4,035,955 MTW 320i /FSC/UD/4,5m/45°/LED 4,035,956 MTW 320i /FSC/JM/4,5m/45°/LED 4,035,957 MTW 500i /FSC/3,5m/45°/LED... - Seite 42 Brennertype 4,035,964 MTW 700i /FSC/UD/3,5m/45°/LED 4,035,965 MTW 700i /FSC/JM/3,5m/45°/LED 4,035,966 MTW 700i /FSC/4,5m/45°/LED 4,035,967 MTW 700i /FSC/UD/4,5m/45°/LED 4,035,968 MTW 700i /FSC/JM/4,5m/45°/LED 4,047,784 MHP 280i G PM /FSC/5,85m/LED 4,047,785 MHP 280i G PM/FSC/UD/ 5,85m/LED 4,047,786 MHP 280i G PM/FSC/JM/ 5,85m/LED 4,047,787 MHP 280i G PM /FSC/9,85m/LED 4,047,788 MHP 280i G PM/FSC/UD/ 9,85m/LED 4,047,789 MHP 280i G PM/FSC/JM/...
- Seite 43 Brennertype 4,047,808 MHP 320i W PM /FSC/9,85m/LED 10,47 4,047,809 MHP 320i W PM/FSC/UD/ 10,47 9,85m/LED 4,047,810 MHP 320i W PM/FSC/JM/ 10,47 9,85m/LED 4,047,900 MHP 400i R /G/PAP/FSC/0,96m 4,047,901 MHP 400i R /G/PAP/FSC/1,04m 4,047,902 MHP 400i R /G/PAP/FSC/1,06m 4,047,903 MHP 400i R /G/PAP/FSC/1,12m 4,047,904 MHP 400i R /G/PAP/FSC/1,13m 4,047,905 MHP 400i R /G/PAP/FSC/1,15m 4,047,906 MHP 400i R /G/PAP/FSC/1,18m...
- Seite 44 Brennertype 4,047,918 MHP 700i R/W/PAP/FSC/1,06m 4,047,919 MHP 700i R/W/PAP/FSC/1,12m 4,047,920 MHP 700i R/W/PAP/FSC/1,13m 4,047,921 MHP 700i R/W/PAP/FSC/1,15m 4,047,922 MHP 700i R/W/PAP/FSC/1,18m 4,047,923 MHP 700i R/W/PAP/FSC/1,19m 4,047,924 MHP 700i R/W/PAP/FSC/1,20m 4,047,925 MHP 700i R/W/PAP/FSC/1,22m 4,047,926 MHP 700i R/W/PAP/FSC/1,31m 4,047,927 MHP 700i R/W/PAP/FSC/1,35m 4,047,929 MHP 700i R/W/PAP/FSC/1,40m 4,047,930 MHP 700i R/W/PAP/FSC/1,43m 4,047,931 MHP 700i R/W/PAP/FSC/1,32m...
- Seite 45 Brennertype 4,051,035 MHP 700i W ML/FSC/UD/ 3,35m/LED 4,051,036 MHP 700i W ML/FSC/UD/ 4,35m/LED 4,051,037 MHP 700i W ML/FSC/JM/ 3,35m/LED 4,051,038 MHP 700i W ML/FSC/JM/ 4,35m/LED 4,051,041 MHP 280i G PM /FSC/7,85m/LED 4,051,042 MHP 280i G PM/FSC/JM/ 7,85m/LED 4,051,043 MHP 280i G PM/FSC/UD/ 7,85m/LED 4,051,044 MHP 320i W PM /FSC/7,85m/LED 4,051,045 MHP 320i W PM/FSC/JM/...
- Seite 85 Torch type 4,035,964 MTW 700i /FSC/UD/3.5m/45°/LED 4,035,965 MTW 700i /FSC/JM/3.5m/45°/LED 4,035,966 MTW 700i /FSC/4.5m/45°/LED 4,035,967 MTW 700i /FSC/UD/4.5m/45°/LED 4,035,968 MTW 700i /FSC/JM/4.5m/45°/LED 4,047,784 MHP 280i G PM /FSC/5.85m/LED 4,047,785 MHP 280i G PM/FSC/UD/ 5.85m/LED 4,047,786 MHP 280i G PM/FSC/JM/ 5.85m/LED 4,047,787 MHP 280i G PM /FSC/9.85m/LED 4,047,788 MHP 280i G PM/FSC/UD/ 9.85m/LED...
- Seite 86 Torch type 4,047,808 MHP 320i W PM /FSC/9.85m/LED 10.47 4,047,809 MHP 320i W PM/FSC/UD/ 10.47 9.85m/LED 4,047,810 MHP 320i W PM/FSC/JM/ 10.47 9.85m/LED 4,047,900 MHP 400i R /G/PAP/FSC/0.96m 4,047,901 MHP 400i R /G/PAP/FSC/1.04m 4,047,902 MHP 400i R /G/PAP/FSC/1.06m 4,047,903 MHP 400i R /G/PAP/FSC/1.12m 4,047,904 MHP 400i R /G/PAP/FSC/1.13m 4,047,905 MHP 400i R /G/PAP/FSC/1.15m 4,047,906 MHP 400i R /G/PAP/FSC/1.18m...
- Seite 87 Torch type 4,047,918 MHP 700i R/W/PAP/FSC/1.06m 4,047,919 MHP 700i R/W/PAP/FSC/1.12m 4,047,920 MHP 700i R/W/PAP/FSC/1.13m 4,047,921 MHP 700i R/W/PAP/FSC/1.15m 4,047,922 MHP 700i R/W/PAP/FSC/1.18m 4,047,923 MHP 700i R/W/PAP/FSC/1.19m 4,047,924 MHP 700i R/W/PAP/FSC/1.20m 4,047,925 MHP 700i R/W/PAP/FSC/1.22m 4,047,926 MHP 700i R/W/PAP/FSC/1.31m 4,047,927 MHP 700i R/W/PAP/FSC/1.35m 4,047,929 MHP 700i R/W/PAP/FSC/1.40m 4,047,930 MHP 700i R/W/PAP/FSC/1.43m 4,047,931 MHP 700i R/W/PAP/FSC/1.32m...
- Seite 88 Torch type 4,051,035 MHP 700i W ML/FSC/UD/ 3.35m/LED 4,051,036 MHP 700i W ML/FSC/UD/ 4.35m/LED 4,051,037 MHP 700i W ML/FSC/JM/ 3.35m/LED 4,051,038 MHP 700i W ML/FSC/JM/ 4.35m/LED 4,051,041 MHP 280i G PM /FSC/7.85m/LED 4,051,042 MHP 280i G PM/FSC/JM/ 7.85m/LED 4,051,043 MHP 280i G PM/FSC/UD/ 7.85m/LED 4,051,044 MHP 320i W PM /FSC/7.85m/LED 4,051,045 MHP 320i W PM/FSC/JM/...
- Seite 89 English...
- Seite 91 English...