
Verwandte Anleitungen für Sanremo Milano LX SAP


Inhaltszusammenfassung für Sanremo Milano LX SAP
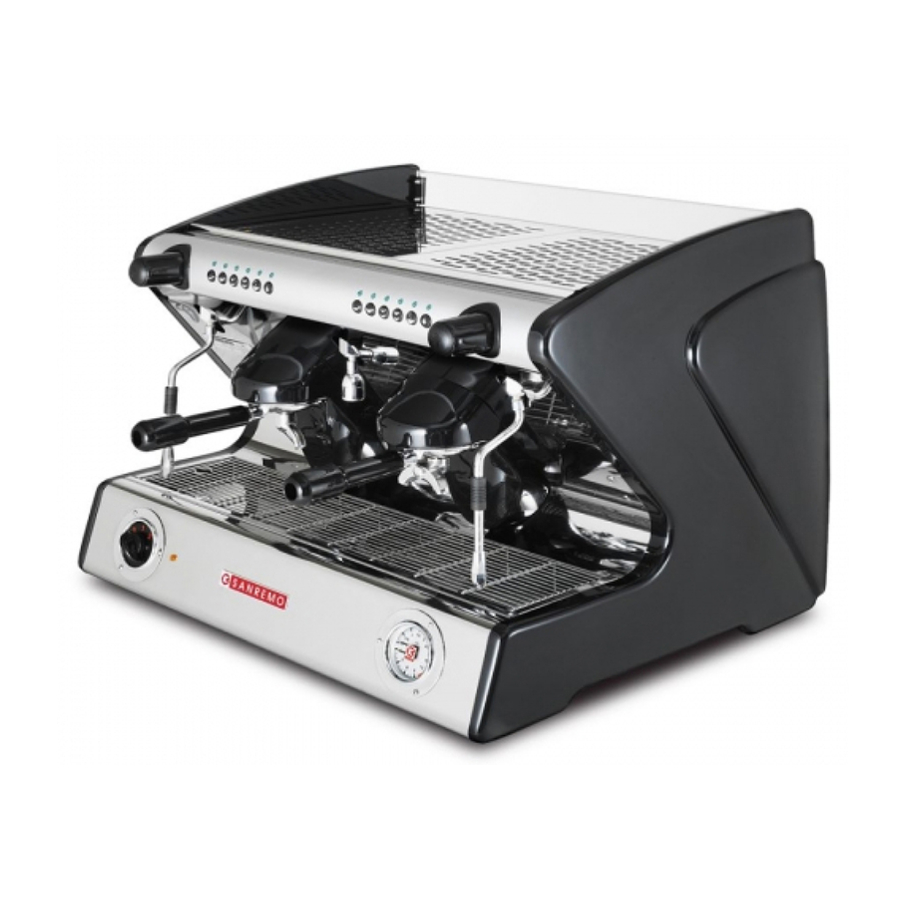
- Seite 1 Milano LX SAP mod. Milano LX SED Instruction Booklet Bedienungsanleitung Livret D’Instructions Libro De Instrucciones...
- Seite 3 Istruzioni per il modello Instruction for model Gebrauchsanweisung für das Notice pour le modèle Instrucciones para el modelo MILANO LX SAP MILANO LX SED Italiano Pagina English Page Deutsch Seite Francais Page Espagnol Página Modulo d’ordine ricambi Pagina/ Page/ Seite/ Page/Página Spare parts order form Bestellformular für Ersatzteile...
-
Seite 4: Caratteristiche Tecniche
Modello – MILANO LX SAP Semiautomatica ad erogazione continua tramite pulsantiera apposita a led luminosi ed interruttore per erogazione manuale continua. -
Seite 5: Installazione
ITALIANO INSTALLAZIONE Prima di installare la macchina, accertarsi che il voltaggio e la potenza della rete siano adeguati ai dati riportati nella tabella delle caratteristiche tecniche. Togliere quindi la macchina dall’imballo e collocarla in modo stabile e sicuro nel luogo destinatole, accertandosi che vi sia lo spazio neces- sario per l’utilizzo della stessa. -
Seite 6: Collegamento Idraulico
ITALIANO Collegamento idraulico 1) Le macchine devono essere alimentate solo con acqua fredda. 2) Se la pressione di rete è superiore ai 6 bar diventa indispensabile l’installazione di un riduttore di pressione da regolare in uscita ad un massimo di 6 bar. 3) Collegare il tubo di scarico alla vaschetta evitando curve troppo strette e cercando di mantene- re una pendenza sufficiente al deflusso dell’acqua di scarico. -
Seite 7: Controllo Preliminare
ITALIANO Controllo preliminare Prima di utilizzare la macchina accertarsi che: - L ’alimentazione sia inserita correttamente - Il tubo di carico sia correttamente collegato alla rete, che non vi siano perdite e che l’acqua sia aperta. - Il tubo di scarico sia posizionato secondo le precedenti istruzioni e fissato mediante fascetta stringi tubo. -
Seite 8: Programmazione Dosi
ITALIANO Erogazione caffè Mod. MILANO LX SAP Inserire il portafiltro (E) nell’apposita sede (F) ruotandolo in senso antiorario. Premere il tasto (I) e, dopo aver atteso che la quantità di caffè sia quella desiderata, riportarlo in posizione iniziale. Erogazione caffè Mod. MILANO LX SED Inserire il portafiltro (E) nell’apposita sede (F) ruotandolo in senso antiorario. -
Seite 9: Garanzia
In caso di danneggiamento al cavo di alimentazione rivolgersi ad un Centro Assisten- za SANREMO, poiché per la sua sostituzione è necessario un apposito utensile. La macchina deve essere impiegata in ambienti a temperature comprese tra 5°C e 35°C. - Seite 10 ITALIANO Collegamento della macchina nella versione con optional scaldatazze e pompa esterna Nel caso di danneggiamento ai cavi rivolgersi ad un centro assistenza, poiché per la LEGENDA sostituzione e’ necessario un D - INTERRUTTORE GENERALE apposito utensile. O - SPENTO 1 - ACCENSIONE POMPA ED AUTOMATISMI 2 - ACCENSIONE POMPA, AUTOMATISMI E RISCALDAMENTO ELETTRICO Q - INTERRUTTORE ECCENSIONE / SPEGNIMENTO PER SCALDATAZZE.
- Seite 11 ITALIANO Avvertenze per un corretto utilizzo delle pompe rotative 1) CORRETTO ALLINEAMENTO TRA POMPA E MOTORE A volte la rumorosità del gruppo è causata proprio da un’allineamento imperfetto, infatti quando l’accoppiamento tra i due componenti è rigido, non sempre il rotore della pompa e quello del motore si trovano in asse.
- Seite 12 ITALIANO pa e la caldaia, sia difettosa. In questo caso la pompa potrebbe rimanere a contatto con acqua calda (90/ 100°c.) e rovinarsi a causa dalle diverse dilatazioni dei materiali impiegati, il bloccaggio è la conseguenza più diffusa. 6) CONNESSIONI NON IDONEE Le pompe possono avere raccordi 3/8”...
- Seite 13 ITALIANO Premere entro 30” il pulsante K1GR1 (il led L1GR1 e L5GR1 si accendono) il display segnala: Programming Espresso Raggiunta la quantità desiderata premere il pulsante K1GR1. Ripetere l’operazione sui restanti pulsanti K2GR1 (two espresso) – K3GR1 (one coffee) – K4GR1 (two coffee) ATTENZIONE: programmando il 1°...
-
Seite 14: Funzioni Speciali
ITALIANO FUNZIONI SPECIALI A) Programmazione tecnico * Per entrare nel programma: Accendere la macchina e premere contemporaneamente i pulsanti K1GR1 e K5GR1 sulla pulsantiera del 1° gruppo (GR1) sino a quando il display visualizza: Language XXXX Per modificare il parametro visualizzato agire su K1GR1(+) o K2GR1(-) * Per passare alla visualizzazione del parametro successivo premere K5GR1 (menu). - Seite 15 ITALIANO dell’elettrovalvola durante la Pre-Infuzione) premere K5GR1. Il display visualizza: Pre-Brewing OFFs Espresso xxxx (Dbl Espresso) (Coffee) (DblCoffee) Premendo i pulsanti K1GR1(+) o K2GR2(-) si modifica il valore dei singoli pulsanti. * Per passare alla visualizzazione del parametro successivo (Abilitazione della funzione di Pre- Infusione) premere K5GR1.
- Seite 16 ITALIANO Per uscire dal programma premere il tasto K5GR1 in qualsiasi momento. * Azzeramento lettura litraggio. Quando il display visualizza: Select Drink Change H2Ofilter Bisogna rigenerare il depuratore della macchina da caffè. Per resettare la lettura del litraggio bisogna accendere la macchina premendo simultaneamente i tasti K3GR1 e K4GR1.
-
Seite 17: Informazione Agli Utenti
ITALIANO B) ASSENZA DI IMPULSI DEL CONTATORE VOLUMETRICO (5 SECONDI) La dosatura, dopo aver avviato un ciclo caffè a controllo volumetrico (EVx + POMPA sia in fase di erogazione che di programmazione) verifica il corretto funzionamento del contatore volumetrico tramite la rilevazione degli impulsi inviati dallo stesso al microcontrollore. Se non vengono rilevati impulsi per un tempo maggiore di 5 secondi consecutivi, il led relativo alla dose selezionata inizia a lampeggiare (1/2 ON ½... - Seite 18 ITALIANO - Azionamento manuale entrata acqua M1 - Erogazione di una dose corta di caffè - Manopola rubinetto vapore M2 - Erogazione di una dose lunga di caffè - Erogatore acqua M3 - Erogazione di due dosi corte di caffè - Interruttore generale M4 - Erogazione di due dosi lunghe di caffè...
- Seite 19 Tavola 1 Mod. MILANO LX” - Agg. 2/07...
- Seite 20 ITALIANO...
- Seite 21 ITALIANO...
- Seite 22 ITALIANO...
- Seite 23 ITALIANO LEGENDA ESPLOSO MILANO LX AGG. 02-07 10352055 PIEDINO D.52XH73 10022461 VASCHETTA SCARICO MLX 2/3GR POS. COD. DESCRIZIONE 10852460 TUBO SPIRALATO SCARICO L.2 MT 10015272 GRIGLIA SUP. MLX 1GR 10806099 FASCETTA INOX STRINGITUBO 10015274 GRIGLIA SUP. MLX 2GR 10015282 FIANCO DX MLX ROSSO 10015278 GRIGLIA SUP.
- Seite 24 ITALIANO 10402279 TROMBONCINO BRILL. LANCIA VAP. 10502028 OR 3037 VITON 10255028A RACCORDO GOMITO GIR.F1/8 10809019 VITE TBEI M3X8 BRUNITE 10806370B COPPIGLIA RUBINETTO 10852682 RACCORDO NI CH.22X38 1/8”MFM 10803547 RONDELLA D20 ZN 10852022 2611 1/8”M TAPPO RACCORDO 10402028 MEZZO DADO 1/2” RIALZATO CR. 10853085 DADO ESAGONALE 1/8”...
- Seite 25 ITALIANO 192C 10002663 CALDAIA RAME 1GR D.205 AT.1/2” C/TERRA 221C 10112083A CENTRALINA ON-OFF 1-2-3GR XLC 230V SAP 193A 10052146 GIGLEUR SENZA FORO TUBI 12 222A 10955018 ETICHETTA SAN REMO 70X11,3 193B 10052147 GIGLEUR FORO D.2 TUBI 12 222B 10955020 ETICHETTA SAN REMO 101X16,5 193C 10052148 GIGLEUR FORO D.4 TUBI 12...
- Seite 26 Schema elettrico MILANO LX 1GR SAP Agg. 1/06...
- Seite 27 ITALIANO...
- Seite 28 ITALIANO...
- Seite 29 ITALIANO...
- Seite 30 Schema elettrico MILANO LX 2GR SED Agg. 1/06...
- Seite 31 ITALIANO...
- Seite 32 ITALIANO Schema circuito idraulico MILANO LX SAP Agg. 1/06 1. Pompa di alimentazione 2. Distributore acqua con filtro 3. Elettrovalvola per riempimento automatico 4. Valvola di non ritorno 5. Manometro pressione pompa (f.s. 16bar) 6. Resistenza elettrica di riscaldamento 8. Elettrovalvola prelievo acqua calda 9.
- Seite 33 ITALIANO Schema circuito idraulico MILANO LX SED Agg. 1/06 1. Pompa di alimentazione 2. Distributore acqua con filtro 3. Elettrovalvola per riempimento automatico 4. Valvola di non ritorno 5. Manometro pressione pompa (f.s. 16bar) 6. Resistenza elettrica di riscaldamento 7a. Misuratore volumetrico 7b.
-
Seite 34: Specifications
Instructions are part of the product. Please keep this document. This booklet refers to the following models: Model – MILANO LX SAP Semi-automatic with continual dispensing through special pushbutton panel with indicator lights and switch for continual manual dispensing. -
Seite 35: Installation
ENGLISH INSTALLATION Before installing the appliance ensure that the mains voltage and power correspond to the data given in the specifications table. Take the appliance out of the packaging and put it in its final place of installation ensuring that it is stable and safe and that there is the necessary space for using it. Place the machine in a way that the distance between the grid and the floor is wider than 1,5 mt. -
Seite 36: Water Connection
ENGLISH Water connection 1) Only cold water must be supplied to the appliances. 2) If the mains water pressure exceeds 6 bar, a pressure reducer must be installed to regulate the outlet pressure to a maximum of 6 bar. 3) Connect the drain hose to the tray, avoiding sharp bends and keeping a sufficient slope for regular flow of the drain water. -
Seite 37: Preliminary Check
(B) counter-clockwise. Pay the utmost attention in order to prevent scald burns. Coffee with Mod. MILANO LX SAP Insert the filter holder (E) into the group head (F) turning the filter holder counter-clockwise. Press the button (I) and wait for the required quantity of coffee to be dispensed, then put it back to its original position. - Seite 38 ENGLISH Coffee with Mod. MILANO LX SED Insert the filter holder (E) into the group head (F) turning the filter holder counter-clockwise. Using the keypad (M) select the caption corresponding to the required type of coffee: M1=One strong/normal coffee. M2=One normal/weak coffee. M3=Two strong/normal coffees.
-
Seite 39: Warranty
The appliance is unsuitable for outdoor installation. To ensure safe use the appliance must be in a level position. If the power cable is damaged, have it replaced by a SANREMO After-Sales Service Centre, since a special tool is required for this purpose. -
Seite 40: Information For Users
INFORMATION FOR USERS In accordance with article 13 of legislative decree no. 151 “Implementation of directives 2002/95/ EC, 2002/96/EC and 2003/108/EC on restriction of the use of certain hazardous substances in electrical and electronic equipment and the disposal of waste”. The appliance or packaging is marked with the symbol of a bin with a cross to indicate that at the end of its working life it must be disposed of separately from other waste. - Seite 41 ENGLISH Machine connection optional cup heater and outside pump Report to the service centre in case of cable damage as special equipment is required to make LEGEND repairs. D - MAIN SWITCH O - OFF 1 - PUMP AND AUTOMATION SWITCH-ON 2 - PUMP, AUTOMATION AD HEATING SWITCH-ON Q - CUP HEATER ON/OFF LIT = ON...
-
Seite 42: Dry Operation
ENGLISH Warning – correct use of rotary pumps 1-Proper Alignment of Pump and Motor On occasion the noise of a motor-pump assembly is caused by a poor alignment. When the coupling between motor and pump is rigid, the pump rotor and the motor rotor may be out of axis. - Seite 43 ENGLISH 6) Wrong connections Pumps connectors are 3/8”NPT(conical) or 3/8” GAS(cylindrical). Connectors with thread different from the recommended type are occasionally used. Sealing is made with a glue or with teflon tape. If the connector is forced it is possible to create beards; if excess sealing glue is used the extra quantity of glue may enter into the pump body.
-
Seite 44: Special Functions
ENGLISH To exit from the program, press the button K5GR1 or wait for the display to show: Select Drink NB: to program a filter head (2 or 3) differently, proceed in the same way as above. PROGRAMMING HOT WATER MEASURES Press the button K5GR1 until the display shows: Programming Select within 30s... - Seite 45 ENGLISH * To display the next parameter, press K5GR1 (menu). The display shows: User Name XXXX To change the parameters, press the buttons K1GR1(+) or K2GR1(-) to select letters, numbers or symbols. To confirm the selection press K3GR1 (enter) * To display the next parameter, press K5GR1. The display shows: Relay:0Tea 1Saft XXXXX To change the parameters, press the buttons K1GR1 or K2GR1.
- Seite 46 ENGLISH * Press the button K5GR1 to end TECHNICAL PROGRAMMING. The display shows: Select Drink XXXXX CAUTION: having entered the TECHNICAL PROGRAMMING environment, to exit it is necessary to scroll all the menus using the button K5GR1; automatic exit from the “Technical Programming” phase is not envisaged.
- Seite 47 ENGLISH ALARMS A) BOILER LEVEL (FILLING) TIME OUT Whenever the level sensor detects a lack of water (sensor exposed), the filling phase is enabled (EVCAR + PUMP), while the micro-controller activates an internal timer for the duration of this phase. If EVCAR + PUMP remain energised continuously for a time exceeding time-out (x seconds), set through WIZARD or through the TECHNICAL PROGRAMMING, all the main dispensing functions are inhibited.
- Seite 48 ENGLISH PARTS – Boiler level indicator – Water inlet manual control M1 – One strong coffee – Steam tap knob M2 – One weak coffee – Water tap knob M3 – Two strong coffees – On/off switch M4 – Two weak coffees –...
- Seite 49 ENGLISH...
- Seite 50 ENGLISH...
- Seite 51 ENGLISH...
- Seite 52 ENGLISH...
- Seite 53 ENGLISH 10352055 FOOT D.52XH73 KEY TO EXPLODED VIEW MILANO LX REV. 02-07 10022461 DRAIN TRAY MLX 2/3GR POS. CODE DESCRIPTION 10852460 HELICALLY WOUND DRAIN PIPE L.2 M 10015272 UPPER GRID MLX 1GR 10806099 SS HOSE CLAMP 10015274 UPPER GRID MLX 2GR 10015282 R.H.
- Seite 54 ENGLISH 10402279 POL. STEAM NOZZLE JET 10502028 VITON O RING 3037 10255028A SWIVEL ELBOW F1/8 10809019 HEX CONV. SOCK. SCREW M3X8 BURNISHED 10806370B FAUCET SPLIT PIN 10852682 CONNECTOR NI CH.22X38 1/8”MFM 10803547 WASHER D20 ZN 10852022 2611 1/8”M CONNECTOR PLUG 10402028 CHROMED RAISED HALF NUT 1/2”...
- Seite 55 ENGLISH 192C 10002663 COPPER BOILER 1GR D.205 AT.1/2 » GROUND C. 222A 10955018 SAN REMO LABEL 70X11.3 193A 10052146 JET WITHOUT HOLE, PIPES 12 222B 10955020 SAN REMO LABEL 101X16.5 193B 10052147 JET HOLE D.2 PIPES 12 10952008 “MANUAL FILLING” LABEL 193C 10052148 JET HOLE D.4 PIPES 12...
- Seite 56 ENGLISH...
- Seite 57 ENGLISH...
- Seite 58 ENGLISH...
- Seite 59 ENGLISH...
- Seite 60 Wiring diagram MILANO LX 2GR SED Update 1/06...
- Seite 61 Wiring diagram MILANO LX 3GR SED Update 1/06...
- Seite 62 ENGLISH Hydraulic circuit diagram MILANO SAP Update 11-05 1. Supply pump 2. Water distributor with filter 3. Solenoid valve for automatic fill 4. Non-return valve 5. Pump pressure gauge (f.s. 16 bars) 6. Electrical heating element 7b. supply switch 8. Hot water run-off sol. valve 9.
- Seite 63 ENGLISH Hydraulic circuit diagram MILANO SED Update 11-05 1. Supply pump 2. Water distributor with filter 3. Solenoid valve for automatic fill 4. Non-return valve 5. Pump pressure gauge (f.s. 16 bars) 6. Electrical heating element 7a. Volume measurer 7b. supply switch 8.
-
Seite 64: Technische Daten
Lebensdauer der Maschine sorgfältig aufzubewahren. Sie bezieht sich auf die folgenden Modelle: Modell – MILANO LX SAP Halbautomatisch mit Dauerabgabe über eigene Druckknopftafel mit Leds und Schalter für manuelle Dauerabgabe. Lieferbar in den Ausführungen mit 1, 2, 3 Gruppen. -
Seite 65: Elektrischer Anschluss
DEUTSCH INSTALLATION Vor der Installation der Maschine sicherstellen, dass die Spannung und Leistung des Versorgungsnetzes den Daten entspricht, die in der Tabelle der technischen Daten aufgeführt sind. Dann die Maschine aus der Verpackung nehmen und an ihrem Aufstellungsplatz stabil und standsicher positionieren. Dabei darauf achten, dass genügend Platz für die Benutzung der Maschine zur Verfügung steht. - Seite 66 DEUTSCH Wasseranschluss 1) Die Maschinen sind ausschließlich mit kaltem Wasser zu speisen. 2) Liegt der Druck des Wassernetzes über 6 bar, muss ein Druckminderer eingebaut werden, der im Ausgang auf höchstens 6 bar einzustellen ist. 3) Den Abfluss-Schlauch an die Wanne anschließen und dabei enge Kurven vermeiden und versuchen, eine für den Abfluss des Abwassers ausreichende Neigung einhalten.
-
Seite 67: Abgabe Von Heißem Wasser
DEUTSCH BENUTZUNG Kontrolle vor der Inbetriebnahme Vor der Inbetriebnahme der Maschine sicherstellen, dass: - der Speisestecker richtig eingesteckt ist. - der Zulaufschlauch richtig an das Netz angeschlossen ist, keine Lecks auftreten und der Anschluss an das Wassernetz geöffnet ist. - der Abfluss-Schlauch nach den vorstehenden Anweisungen positioniert und mit einer Schlauchschelle befestigt ist. -
Seite 68: Programmierung Der Dosen
DEUTSCH Kaffeeabgabe Mod. MILANO LX SAP Den Filterträger (E) in seinen Sitz (F) einsetzen, indem er gegen den Uhrzeigersinn gedreht wird. Die Taste (I) drücken und nach Abwarten der gewünschten Kaffeemenge wieder in die Ausgangsposition bringen. Kaffeeabgabe Mod. MILANO LX SED Den Filterträger (E) in seinen Sitz (F) einsetzen, indem er gegen den Uhrzeigersinn gedreht wird. -
Seite 69: Ausfall Der Maschine
Ursachen wenden sich bitte qualifiziertes SANREMO Kundendienstzentrum. VOR DER DURCHFÜHRUNG VON ARBEITEN AN DER MASCHINE ODER VOR DER ENTFERNUNG VON GEHÄUSETEILEN IST STETS DIE STROMZUFUHR ZU UNTERBRECHEN. GARANTIE Jede gekaufte Maschine (bewahren Sie den Kassenzettel, die Rechnung und den Lieferschein auf) hat die gesetzliche Garantie: Diese sieht den kostenlosen Austausch von Teilen mit Produktionsfehlern vor. -
Seite 70: Information Für Die Benutzer
DEUTSCH Bei Beschädigungen des Speisekabels wenden Sie sich bitte an den SANREMO Kundendienst, da für den Austausch des Kabels ein Spezialwerkzeug benötigt wird. Die Maschine muss in Räumen mit einer Temperatur zwischen 5°C und 35°C betrieben werden. DEFEKTEN ODER BETRIEBSSTÖRUNGEN... -
Seite 71: Maschineneinbau Mit Sonderausstattung Tassenerwärmvorrichtung Und Außenpumpe
DEUTSCH Maschineneinbau mit Sonderausstattung Tassenerwärmvorrichtung und Außenpumpe Bei Beschädigungen ist eine Kundendienststelle zu verständigen, denn ABKÜRZUNGEN zum Austausch sind D - HAUPTSCHALTER Sonderwerkzeuge notwendig. O - AUS 1 - PUMPE UND AUTOMATISMEN EIN 2 - PUMPE, AUTOMATISMEN UND ELETROHEIZUNG EIN Q - EIN/AUS.-SCHALTER FÜR TASSENERWÄRMVORRICHTUNG. -
Seite 72: Hinweis Zum Korrekten Gebrauch Der Kapselpumpen
DEUTSCH Hinweis zum korrekten Gebrauch der Kapselpumpen 1) KORREKTE AUSRICHTUNG ZWISCHEN PUMPE UND MOTOR Gelegentlich kann ein geräuschvoller Betrieb des Aggregats durch eine nicht perfekte Ausrichtung verursacht werden. Wenn nämlich die Kupplung zwischen den beiden Bauteilen starr ist, liegen der Rotor der Pumpe und der des Motors nicht immer auf einer Achsenlinie. Der Schaden, der am häufigsten auftritt, wenn dieser Zustand andauert, ist die Blockierung der Pumpe. - Seite 73 DEUTSCH Das deutlichste Zeichen für fortwährende Hohlsogbildung ist ein zunehmend geräuschvollerer Betrieb der Pumpe. Wenn dieser Zustand anhält, sind die Folgen ähnlich denjenigen des Trockenbetriebs. 5) RÜCKLAUF VON WARMEM WASSER Es kann gelegentlich vorkommen, dass das im Wasserkreis vorgesehene Rückschlagventil zwischen Pumpe und Heizkessel defekt ist.
-
Seite 74: Programmierung Der Maschinen Über Zentrale Bedienungseinheit Mit Anzeige (Sonderausstattung)
DEUTSCH Programmierung der Maschinen über zentrale Bedienungseinheit mit Anzeige (Sonderausstattung) PROGRAMMIERUNG DER KAFFEEDOSIS * Unter Benutzung der Druckknopftafel mit 6 Tasten Die Taste K5GR1 der Druckknopftafel der 1. Gruppe (GR1) für mindestens 5 Sekunden drücken, bis das Display anzeigt: Programming Select within 30s Innerhalb von 30”... - Seite 75 DEUTSCH NB: Ist eine zweite Heißwassermenge gewünscht, ist der Arbeitsgang für Gruppe 2 (GR2) zu wie- derholen. PROGRAMMIERUNG DER REINIGUNG DER (EINZELNEN) GRUPPE Nacheinander die Tasten K5GR1 und K1GR1 der Gruppe drücken, die gereinigt werden soll. Das Display zeigt an: Washing Group Automatisch werden 5 Zyklen durchgeführt.
- Seite 76 DEUTSCH Durch die Bestätigung 0001 wird die Wahl eingefügt, 2 Heißwasserdosierungen zu programmieren (Tee). * Für den Übergang auf die Anzeige des nächsten Parameters K5GR1 drücken. Das Display zeigt an: TimeoutFillingUp 120sec Für die Änderung der Parameter die Tasten K1GR1(+) oder K2GR1(-) drücken. * Für den Übergang auf die Anzeige des nächsten Parameters K5GR1 drücken.
-
Seite 77: Rücksetzung Der Zählerablesung
DEUTSCH für das Verlassen alle Menüs über die Taste K5GR1 durchlaufen werden; ein automatisches Herausgehen aus der Phase der “Technischen Programmierung” ist nicht vorgesehen. B) Ablesen des Verzehrs * Die Taste K5GR1 drücken (ca. 30”), bis das Display anzeigt: Cumulative Total XXXXX was den Gesamtverzehr außer der Entnahme von heißem Wasser (Tee) darstellt . - Seite 78 DEUTSCH ALARMMELDUNG A) TIME OUT NIVEAU (BEFÜLLUNG) IM KESSEL Jedes Mal, wenn die Niveausonde einen Wassermangel feststellt (Sonde nicht bedeckt), wird die Befüllungsphase freigeschaltet (EVCAR + PUMPE), während der Mikrocontroller einen internen Timer für die Dauer dieser Phase aktiviert. Wenn EVCAR + PUMPE dauerhaft für einen Zeitraum erregt bleiben, der das über WIZARD oder mit Hilfe der TECHNISCHEN PROGRAMMIERUNG eingestellte Time-out (für Sekunden) überschreitet, werden alle Hauptfunktionen der Dosierung unterbunden.
- Seite 79 DEUTSCH LEGENDE A – Schalter für manuellen Betrieb - Wasser- – Niveau-Anzeige Heisswasser- Zufluss Aufbereitung – Drehknopf Dampfhahn M1 – Abgabe einer kurzen Dosis Kaffee C – Wasserabgabe M2 – Abgabe einer langen Dosis Kaffee D – Hauptschalter M3 – Abgabe von zwei kurzen Dosen Kaffee –...
- Seite 80 DEUTSCH...
- Seite 81 DEUTSCH...
- Seite 82 DEUTSCH...
- Seite 83 DEUTSCH...
- Seite 84 DEUTSCH LEGENDE EXPLOSIONSZEICHNUNG MILANO LX STAND 10352055 FUSS D.52XH73 02-07 10022461 ABFLUSSWANNE MLX 2/3GR 10852460 SPIRALSCHLAUCH ABFLUSS L.2 M POS. CODE BESCHREIBUNG 10806099 SCHLAUCHSCHELLE INOX 10015272 GITTER OBEN MLX 1GR 10015282 SEITENWAND RECHTS MLX ROT 10015274 GITTER OBEN MLX 2GR 10015286 SEITENWAND RECHTS MLX SCHWARZ 10015278...
- Seite 85 DEUTSCH 10402279 POL. SPRITZDÜSE DAMPFROHR 10502028 O-RING 3037 VITON 10255028A WINKELSTÜCK DREHB. F1/8 10809019 SCHRAUBE TBEI M3X8 BRÜNIERT 10806370B HAHNSPLINT 10852682 ANSCHLUSS NI CH.22X38 1/8”AG.IG.AG. 10803547 UNTERLEGSCHEIBE D20 VERZINKT 10852022 2611 1/8”AG ANSCHLUSSVERSCHLUSS 10402028 HALBE MUTTER 1/2” ERHÖHT VERCHROMT 10853085 SECHSKANTMUTTER 1/8”...
- Seite 86 DEUTSCH 192C 10002663 KUPFERKESSEL 1GR D.205 AT.1/2” C/ERDUNG 222A 10955018 SCHILD SAN REMO 70X11,3 193A 10052146 DÜSE OHNE ÖFFNUNG LEITUNGEN 12 222B 10955020 SCHILD SAN REMO 101X16,5 193B 10052147 DÜSE ÖFFNUNG D.2 LEITUNGEN 12 10952008 SCHILD “MANUELLE BEFÜLLUNG” 193C 10052148 DÜSE ÖFFNUNG D.4 LEITUNGEN 12 10952019 HINWEISSCHILD SCHALE...
- Seite 87 DEUTSCH...
- Seite 88 DEUTSCH...
- Seite 89 DEUTSCH...
- Seite 90 DEUTSCH...
- Seite 91 DEUTSCH...
- Seite 92 DEUTSCH...
-
Seite 93: Schema Hyrdraulikkreis Milano Lx Sap Aktualisierung
DEUTSCH Schema hyrdraulikkreis MILANO LX SAP Aktualisierung 01-06 1. Speisepumpe 2. Wasserverteiler mit Filter 3. Elektroventil für automatische Befüllung 4. Rückschlagventil 5. Manometer Pumpendruck (f.s. 16bar) 6. Elektrisches Heizelement 7b. Verteilungsschalter 8. Heißwasserhahn 9. Dampfhahn 10. Betriebsdruckwächter 11. Manometer Kesseldruck (f.s. 5.5bar) 12. -
Seite 94: Schema Hyrdraulikkreis Milano Lx Sed Aktualisierung
DEUTSCH Schema hyrdraulikkreis MILANO LX SED Aktualisierung 1-06 1. Speisepumpe 2. Wasserverteiler mit Filter 3. Elektroventil für automatische Befüllung 4. Rückschlagventil 5. Manometer Pumpendruck (f.s. 16bar) 6. Elektrisches Heizelement 7a. Volumenmesser 7b. Verteilungsschalter 8. Heißwasserhahn 9. Dampfhahn 10. Betriebsdruckwächter 11. Manometer Kesseldruck (f.s. 5.5bar) 12.