Inhaltsverzeichnis
Werbung
Verfügbare Sprachen
Verfügbare Sprachen
Quicklinks
GB - ENGLISH
Operating Instructions
Dear Customer,
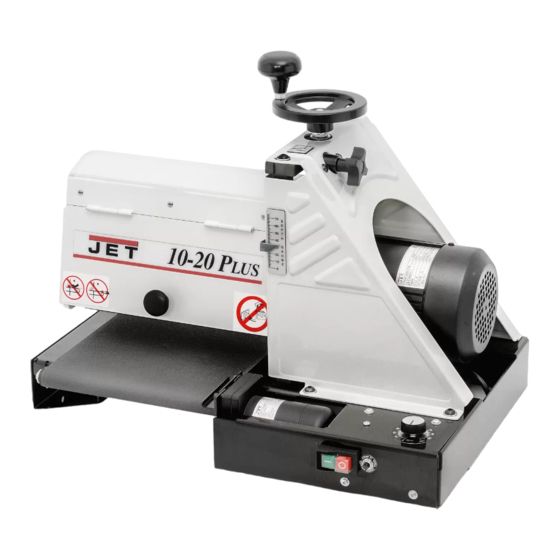
Many thanks for the confidence you have shown in us with the purchase of your new JET-machine. This manual has been
prepared for the owner and operators of a JET 10-20 Plus drum sander to promote safety during installation, operation and
maintenance procedures. Please read and understand the information contained in these operating instructions and the
accompanying documents. To obtain maximum life and efficiency from your sander, and to use the machine safely, read this
manual thoroughly and follow instructions carefully.
...Table of Contents
1. Declaration of conformity
2. Warranty
3. Safety
Authorized use
General safety notes
Remaining hazards
4. Machine specifications
Technical data
Workpiece dimensions
Noise emission
Contents of delivery
5. Transport and start up
Transport and installation
Assembly
Mains connection
Dust connection
Starting operation
6. Machine operation
7. Setup and adjustments
Wrapping abrasive strips
Selecting drum abrasives
Cleaning drum abrasives
Drum alignment
Conveyor belt adjustment
Conveyor belt changing
8. Maintenance and inspection
9. Trouble shooting
10. Available accessories
1. Declaration of conformity
On our own responsibility we hereby
declare that this product complies with
the regulations* listed on page 2.
Designed in consideration with the
standards**.
2. Warranty
The Seller guarantees that the
supplied product is free from material
defects and manufacturing faults. This
warranty does not cover any defects
which are caused, either directly or
indirectly, by incorrect use,
carelessness, accidental damage,
repair, inadequate maintenance or
cleaning and normal wear and tear.
Guarantee and/or warranty claims
must be made within twelve months
from the date of purchase (date of
invoice). Any further claims shall be
excluded.
This warranty includes all guarantee
obligations of the Seller and replaces
all previous declarations and
agreements concerning warranties.
The warranty period is valid for eight
hours of daily use. If this is exceeded,
the warranty period shall be reduced
in proportion to the excess use, but to
no less than three months.
Returning rejected goods requires the
prior express consent of the Seller and
is at the Buyer's risk and expense.
Further warranty details can be found
in the General Terms and Conditions
(GTC). The GTC can be viewed at
www.jettools.com or can be sent by
post upon request.
The Seller reserves the right to make
changes to the product and
accessories at any time.
3. Safety
3.1 Authorized use
This sander is designed for sanding
wood and similar materials only.
Sanding of other materials is not
permitted and may be carried out in
specific cases only after consulting
with the manufacturer.
The machine is not suitable for wet
sanding.
3
The proper use also includes
compliance with the operating and
maintenance instructions given in this
manual.
The machine must be operated only
by persons familiar with its operation
and maintenance and who are familiar
with its hazards.
The required minimum age must be
observed.
The machine must only be used in a
technically perfect condition.
When working on the machine, all
safety mechanisms and covers must
be mounted.
In addition to the safety requirements
contained in these operating
instructions and your country's
applicable regulations, you should
observe the generally recognized
technical rules concerning the
operation of woodworking machines.
Any other use exceeds authorization.
In the event of unauthorized use of the
machine, the manufacturer renounces
all liability and the responsibility is
transferred exclusively to the operator.
3.2 General safety notes
Woodworking machines can be
dangerous if not used properly.
Therefore the appropriate general
technical rules as well as the following
notes must be observed.
Read and understand the entire
instruction manual before attempting
assembly or operation.
Keep this operating instruction close
by the machine, protected from dirt
and humidity, and pass it over to the
new owner if you part with the tool.
No changes to the machine may be
made.
Werbung
Kapitel
Inhaltsverzeichnis

Verwandte Anleitungen für Jet 10-20 Plus


Inhaltszusammenfassung für Jet 10-20 Plus
- Seite 1 Dear Customer, Many thanks for the confidence you have shown in us with the purchase of your new JET-machine. This manual has been prepared for the owner and operators of a JET 10-20 Plus drum sander to promote safety during installation, operation and maintenance procedures.
-
Seite 2: Remaining Hazards
Daily inspect the function and Wood dust is explosive and can also Defective sanding belts can cause existence of the safety appliances represent a risk to health. injuries. before you start the machine. Dust form some tropical woods in The use of incorrect mains supply or a Do not attempt operation in this case, particular, and from hardwoods like damaged power cord can lead to... -
Seite 3: Transport And Installation
Fig 3 Fig 6 Use the four bolts and washers supplied in the hardware bag and bolt together form underneath. Fig 1 (avoid twisting of the sander base as this will effect conveyor belt tracking). 5. Transport and start up 5.3 Mains connection 5.1 Transport and installation Mains connection and any extension... -
Seite 4: Starting Operation
Grits that are too fine may sometimes 5.5 Starting operation burnish the wood (oak, for example is You can start the sanding drum with susceptible due to its open pores). the green on button on the control box. The red button on the control box Angling the workpiece provides the stops the motor. - Seite 5 Operate the sanding drum with the dust cover open. Hold the cleaning stick against the rotating drum and move it along the drum surface. It is good procedure to use a shop brush to remove any cleaning stick crumbs before resuming sanding operation.
-
Seite 6: Conveyor Belt Adjustment
Reduce federate or stock removal. Caster set. react before you proceed any further. Attention: The machine will start Refer to the JET-Pricelist Attention: when you reset the overload push for various grit sanding belts. Do not overtighten the conveyor button. -
Seite 7: Inhaltsverzeichnis
DE - DEUTSCH Gebrauchsanleitung Sehr geehrter Kunde, vielen Dank für das Vertrauen, welches Sie uns beim Kauf Ihrer neuen JET-Maschine entgegengebracht haben. Diese Anleitung ist für den Inhaber und die Bediener zum Zweck einer sicheren Inbetriebnahme, Bedienung und Wartung der Trommelschleifmaschine 10-20 Plus erstellt worden. - Seite 8 Die bestimmungsgemäße Verwendung beinhaltet auch die Einhaltung der vom Hersteller angegebenen Betriebs- und Wartungsanweisungen. Die Maschine darf ausschließlich von Personen bedient werden, die mit Betrieb und Wartung vertraut und über die Gefahren unterrichtet sind. Das gesetzliche Mindestalter ist einzuhalten. Neben den in der Gebrauchsanleitung enthaltenen Sicherheitshinweisen und den besonderen Vorschriften Ihres Landes sind die für den Betrieb von...
-
Seite 9: Allgemeine Sicherheitshinweise
Beachten Sie dass die elektrische Bearbeiten Sie nur ein Werkstück, das 3.2 Allgemeine Sicherheitshinweise Zuleitung nicht den Arbeitsablauf sicher auf dem Tisch aufliegt. Holzbearbeitungsmaschinen können behindert und nicht zur Stolperstelle bei unsachgemäßem Gebrauch Angaben über die min. und max. wird. gefährlich sein. -
Seite 10: Maschinenspezifikation
Montieren Sie die Vorschubband- 4. Maschinenspezifikation Seitenführungselemente (Tracker, Fig 5. Transport und Inbetriebnahme 4.1 Technische Daten 3) auf der Vorschubunterseite. Sie erleichtern die Vorschubband- Schleiftrommel (DxL) 127x255mm 5.1.Transport und Aufstellung Einstellung wesentlich. Drehzahl 1400 U/min Die Aufstellung der Maschine sollte in Schleifgeschwindigkeit 9,3 m/sec geschlossenen Räumen erfolgen,... -
Seite 11: Elektrischer Anschluss
Schrauben Sei zuerst das Untergestell 5.4 Absaug Anschluss 7. Schleiftrommel starten zusammen (richten Sie das Die Maschine muss vor der 8. Vorschub starten und Untergestell waagerecht aus und Inbetriebnahme an eine Absaugung Vorschubgeschwindigkeit ziehen Sie alle Schrauben fest). angeschlossen werden und zwar wählen. -
Seite 12: Rüst- Und Einstellarbeiten
Die Materialabnahme ist besser wenn Das Schleifband einführen bis es den Schleifbänder dehnen sich im Betrieb. in mehreren Durchgängen bei geringer Großteil des Schlitzes ausfüllt, den Eine neue Schleifbandeinspannung Zustellung und höherer Klemmhebel loslassen. (Fig 11) wird erforderlich wenn der Vorschubgeschwindigkeit gearbeitet Klemmhebel auf der Trommelachse Das Schleifband auf die Trommel... -
Seite 13: Schleifpapierauswahl
7.3 Schleifpapierreinigung Reinigen Sie das Schleifpapier regelmäßig mit dem gelieferten Reinigungsstift. Durch Entfernung der Schleifstaub- Ablagerungen wird die Lebensdauer des Schleifpapiers wesentlich ver- längert. Achtung: Tragen Sie stets eng anliegende Fig 15 Kleidung und Augenschutz. Seien Richten Sie nun die Trommel mit dem Sie aufmerksam und konzentriert. -
Seite 14: Vorschubband Wechsel
Die Montage des neuen Fahreinrichtung. Abflachungen ausrichten und die Vorschubbandes erfolgt in Für Schleifbänder in unterschiedlichen Gewindestifte festziehen. umgekehrter Reihenfolge. Körnungen siehe die Jet-Preisliste. Werkstück rutscht am Band- *Verschmutztes oder verschlissenes 8. Wartung und Inspektion Vorschubband- Vorschubband erneuern. Allgemeine Hinweise:... - Seite 15 Nous vous remercions de la confiance que vous nous portez avec l’achat de votre nouvelle machine JET. Ce manuel a été préparé pour l’opérateur de la ponceuse JET 10-20 Plus. Son but, mis à part le fonctionnement de la machine, est de contribuer à...
-
Seite 16: Sécurité
Conserver à proximité de la machine Ne jamais laisser la machine en tous les documents fournis avec marche sans surveillance. l’outillage (dans une pochette en Arrêter la machine avant de quitter la plastique, à l’abri de la poussière, de zone de travail. l’huile et de l’humidité) et veiller à... -
Seite 17: Indications Techniques
Danger par câble électrique (élement en céramique, Fig 3) du endommagé, usé ou mal branché. tapis au-dessous du convoyeur. Cela vous facilite le réglage du tapis. 4. Spécifications 10-20 Plus 4.1 Indications techniques Rouleau de ponçage (∅xL) Fig 1 127x255mm 5. -
Seite 18: Raccordement Au Réseau Électr
3. Démarrer le convoyeur et régler la 5.4 Racc. collecteur de poussières vitesse d‘avance. Avant la mise en exploitation Montage du socle: connecter la machine à un collecteur 4. Mettre en marche le collecteur de (Accessoire numéro: 608004) de poussières de manière à ce que le poussières collecteur se mette en marche Assembler tout d’abord le socle avec... -
Seite 19: Réglages
Tourner la bande abrasive pour augmenter la durée d‘utilisation. Remplacer immédiatement toutes bandes abrasives endommagées ou usées. Le réglage de la profondeur de passe nécessite de l’expérience et dépend surtout du grain de la bande abrasive, Fig 11 de la vitesse d’avance et du type de bois. -
Seite 20: Choix De Bande Abrasive
7.5 Réglage du convoyeur Ajuster avec les écrous de réglage (B, 7.4 Centrage du cylindre Fig 16) la tension du tapis des deux Déconnecter la machine du réseau. 7.2 Choix de bande abrasive côtés. Enlever la bande abrasive et utiliser Le bon choix de la bande abrasive est une barre de guidage droite (B,Fig très important pour optimiser l’effet de... -
Seite 21: Détecteur De Pannes
*Coupleur de l’entraînement desserré- Roulettes. Régler les aplatissements et resserrer Pour bandes abrasives de différents les tiges filetées. grains voir liste de prix JET. Pièce glisse sur le tapis- *Tapis usé ou sali- Remplacer le tapis. Vibration violente de la machine *Poussières à...