Herunterladen Inhalt Inhalt Diese Seite drucken
LaserLiner AL 22 Gebrauchsanweisung
Vorschau ausblenden Andere Handbücher für AL 22:

Werbung

Verfügbare Sprachen
  • DE

Verfügbare Sprachen

  • DEUTSCH, seite 3
Nivellierinstrument
Gebrauchsanweisung
Operating instructions
Gebruiksaanwijzing
Brugsanvisning
Mode d'emploi
Instruzioni per l'uso
Instrucciones de uso
AL 22 / AL 26
Innovation im Werkzeug
2-9
10-17
18-25
26-33
34-41
42-49
50-57

Werbung

Inhaltsverzeichnis
loading

Inhaltszusammenfassung für LaserLiner AL 22

  • Seite 1 Nivellierinstrument AL 22 / AL 26 Innovation im Werkzeug Gebrauchsanweisung Operating instructions 10-17 Gebruiksaanwijzing 18-25 Brugsanvisning 26-33 Mode d’emploi 34-41 Instruzioni per l’uso 42-49 Instrucciones de uso 50-57...
  • Seite 2: Inhaltsverzeichnis

    Inhalt Gebrauchsanweisung Mode d’emploi 34-41 Einleitung Introduction Bezeichnungen Désignations Einrichtung Installation Meßmethoden Méthodes de mesure 37-38 Kalibrierung Dosenlibelle/ Calibrage de la fiole Zielkreuz croix de mire 39-40 Pflege und Aufbewahrung Entretien et conservation Technische Daten Données techniques Instruction manual 10-17 Istruzioni per l'Uso 42-49 Introduction...
  • Seite 3: Gebrauchsanweisung

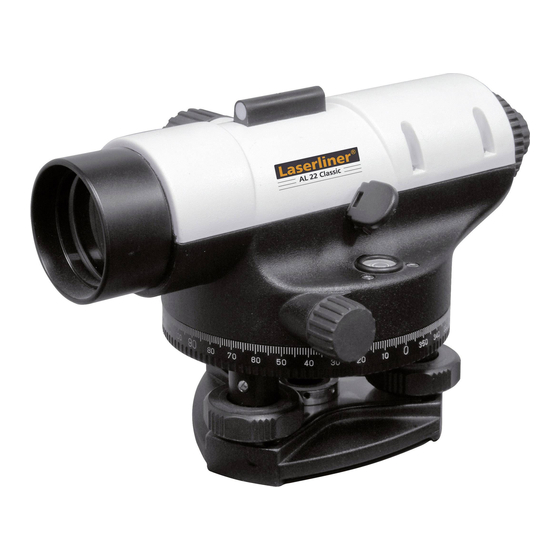
    Einleitung AL 22 / AL 26. Professionelle Nivellierinstrumente für das Bauwesen. Robuste und zuverlässige Zentimeter auf Meter Nivellierinstrumente mit heller (Multiplikator 100). Hochleistungsoptik für das Bau- Praktisch verstellbarer Klapp- wesen. spiegel für einfaches Ausrichten Selbsttätige Horizontierung der mittels Dosenlibelle. Ziellinie durch genauen, magne- Horizontalkreis mit endlosem tisch gedämpften Kompensator.
  • Seite 4: Einrichtung

    Einrichtung Bitte beachten Sie Den Klappspiegel so einrichten, Vor Beginn der Messung sollte das daß die Dosenlibelle gut erkennbar Gerät Zeit haben, die Außen- ist. temperatur anzunehmen. a) Drehen Sie beide Nivellier- schrauben entgegengesetzt: Aufstellen des Nivellierinstruments 1. Stativ auf bequeme b) Drehen Sie beide Nivellier- Beobachtungshöhe schrauben in die selbe Richtung:...
  • Seite 5: Meßmethoden

    Meßmethoden Wichtig: Restliche Neigungen des Differenz H wird negativ, wenn Zielkreuzes, die nach dem der Punkt B niedriger als der Einspielen der Dosenlibelle noch Punkt A liegt). vorhanden sind, werden durch den Wichtig: Eine leichte Abweichung Kompensator aufgehoben. Er beseitigt jedoch nicht solche des Zielkreuzes aus der Horizontalen verursacht keinen Neigungen, die aufgrund mangel-...
  • Seite 6 Meßmethoden 2. Instrument auf das Stativ set- O=1,44 m zen und befestigen. Genaue Zentrierung des Lotes über dem Bodenpunkt durch Verändern der Stativbeinlängen oder durch U=1,36 m Verschieben des Instrumentes auf dem Stativ vornehmen. Entfernungsbestimmung 1. Lattenwert am oberen 3. Fernrohr genau auf das erste Distanzstrich (0=1,44 m) und am Ziel mit Schnellvisierung und unteren Distanzstrich (U=1,36 m)
  • Seite 7: Zielkreuz

    Kalibrierung Dosenlibelle entfernten festen Lattenstand- 1. Überprüfung: punkten A und B aufstellen. Horizontalkreis auf 0° stellen. L=30-40 m Blase mit den Nivellierschrauben genau zentrisch in den Kreis der Dosenlibelle einspielen. Fernrohr um ½L ½L 180°/200 gon drehen. An der Nivellierlatte auf dem Punkt A den Wert a und an der 2.
  • Seite 8: Pflege Und Aufbewahrung

    Kalibrierung heißt, der gemessene Höhenunter- Anschließend die schied der ersten Messung und Kalibrierschrauben vorsichtig zweiten Messung ist gleich und das gegeneinander anziehen. Instrument arbeitet fehlerfrei. Falls die Höhenunterschiede ungleich b) Ist b größer als b , Schraube 3 2soll sind, so justieren Sie bitte das lösen und das Zielkreuz mit Instrument folgendermaßen: Schraube 1 solange einstellen, bis...
  • Seite 9: Technische Daten

    Standardabweichung 2,5 mm/km Fernrohr: Vergrößerung 22 fach (AL 22) 26 fach (AL 26) mm/cm-Schätzung bis 80 m/bis 160 m (AL 22) bis 100 m/bis 200 m(AL 26) minimale Zielweite 0,8 m Objektivöffnung 30 mm (AL 22) 33 mm (AL 26) Gesichtsfeld 1°...
  • Seite 10: Instruction Manual

    Contents Surveying level AL 22 / AL 26 Instruction manual 10-17 Introduction Designations Installation 13-14 Measuring methods Calibration levelling bubble / 15-16 crosshairs Care and storage Technical data Innovation in tools ENGLISH...
  • Seite 11: Introduction

    Introduction AL 22 / AL 26. Professional levelling instruments for the building and construction industry. Sturdy and reliable levelling and easy conversion of the instruments for the building and achieved readings from construction industry, with a centimetres to metres (multiplier high-performance lens producing 100).
  • Seite 12: Installation

    Installation Please note Adjust folding mirror in a way that Prior to its use, the instrument the levelling bubble is well visible. should be given time to adopt the a) Turn both levelling screws in prevailing temperature of the area. opposite senses: Positioning the level 1.
  • Seite 13: Measuring Methods

    Measuring methods Important: Remaining inclinations point B is 50 cm higher than point A. The difference H turns negative of the crosshairs which are left when point B is lower than point A. after the levelling bubble has been centred will be eliminated by the Important: A slight deviation of the compensator.
  • Seite 14 Measuring methods possible. Tread legs of tripod O=1,44 m firmly into the ground. 2. Attach instrument to tripod and fix it. Now centre the plumb bob exactly over the point by adjusting U=1,36 m the lenghts of the tripod legs or by changing the position of the instrument on the tripod.
  • Seite 15: Crosshairs

    Calibration Levelling bubble some 30 to 40 metres apart. At the point A on the staff, read the 1. Control: Set horizontal dial onto value a1 and at the point B on the 0°. Place bubble right into the centre of the circle on the levelling bubble L=30-40 m by turning the levelling screws.
  • Seite 16: Care And Storage

    Calibration values of the height differences by turning screw 3 until b2 = b2soll. achieved with the first and the After that, carefully tighten second measurement are equal, calibration screws against each and the instrument operates error- other. free. In case the height differences b) In case b2 is larger than b2soll, are not equal, the instrument has to loosen screw 3 and adjust crosshairs...
  • Seite 17: Technical Data

    Operating temperature -10° to +40° C Storage temperature -20° to +70° C Weight 1.400 g (AL 22) Weight 1.400 g (AL 26) Dimensions 210 x 120 x 130 mm (AL 22) Dimensions 210 x 120 x 135 mm (AL 26) ENGLISH...
  • Seite 18: Gebruiksaanwijzing

    Inhoud Waterpasinstrument AL22 / AL26 Gebruiksaanwijzing 18-25 Inleiding Beschrijvingen Instelling Meetmethoden 21-22 Kalibrering libelle / doelkruis 23-24 Onderhoud Technische gegevens Innovatie in gereedschap NEDERLANDS...
  • Seite 19: Inleiding

    Inleiding AL 22 / AL 26. Professionele waterpasintrumenten voor de bouw Robuuste en betrouwbare water- waarde van centimeter naar pasinstrumenten meter (multiplikator 100). met een helder hoogwaardig Praktische vestelbare klapspiegel optiek voor de bouw voor het eenvoudig Zelfstellende horizontering van afstellen van de libelle.
  • Seite 20: Instelling

    Instelling Let U goed op a) draait u beide afstelschroeven Voor het begin van de meting moet tegengesteld het apparaat de buiten- temperatuur hebben aangenomen. Opstellen van het waterpas- instrument b) draait u beide afstelschroeven in 1. Statief op ooghoogte de gelijke richting opstellen en de statiefpo- ten bij lossen onder-...
  • Seite 21: Meetmethoden

    Meetmethoden Belangrijk: Verdere neigingen van negatief wanneer punt B lager ligt dan punt A. het doelkruis die na het afstellen. van de libelle nog aanwezig zijn worden door de kompensator Belangrijk: Een licht afwijking van opgevangen. Hij compenseert ech- het doelkruis in het horizontale ter niet die neigingen welke veroorzaakt geen meetfout die door niet goed gebruik of afstel-...
  • Seite 22 Meetmethoden 2. Instrument op het statief O=1,44 m plaatsen en bevestigen. Preciese centrering van het lood boven het grondpunt door het veranderen van de statieflengte of door het verschuiven van het instrument U=1,36 m voorvereiden. Afstandberekening 1. Latwaarde of de bovenste 3.
  • Seite 23: Kalibrering

    Kalibrering Libelle Berekend u het hoogteverschil 1. Kontrolle: Horizontaal op 0 stel- (a1 - b1). Het hoogteverschil is len. Luchtbel met de nivoschroef pre- wegens gelijke doelen ook bij een cies centraal in het midden van de ongejusteerd doelkruis gelijk. libelle afstellen, verrekijker 180 / 200 L=30-40 m gon draaien.
  • Seite 24: Onderhoud

    Kalibrering 2. Afstelling schroeven voorzichtig Berekendu de waarde b2=a2-a1 en tegengesteld aandraaien. stelt u met behulp van de kalibreerschroeven, die na hat afne- Testen van de afstelling zolang her- men van de beschermkap achter het halen, tot (a1-b1)=a2-b2 is. okulaar zichtbaar zijn, het doelkruis Daarna de beschermkap opnieuw op de berekende waarde b2 plaatsen.
  • Seite 25: Technische Gegevens

    10'/2 mm Algemeen Gebruikstemperatuur -10 tot +40gr. Magazijntemperatuur -20 tot +70gr. Gewicht 1.400 g (AL 22) Gewicht 1.400 g (AL 26) Afmeting 210 x 120 x 130 mm (AL 22) Afmeting 210 x 120 x 135 mm (AL 26) NEDERLANDS...
  • Seite 26: Brugsanvisning

    Indhold Nivellérinstrumenter AL-22 og AL-26 Betjeningsvejledning 26-33 Indledning Klargøring og opstilling Måleprincipper Målemetoder Justering og verificering/ Verificering 31-32 Vedligeholdelse og opbevaring Tekniske data Innovation im Werkzeug DANSK...
  • Seite 27: Indledning

    Indledning AL 22 / AL 26. Professionelle nivellérinstrumenter til alle byggeopgaver. Robuste, velfungerende er lig med afstand i meter. nivellérinstrumenter med Hurtig opstilling og opretning lysstærk optik til alle ved hjælp af dåselibelle med forekommende afsætnings- og praktisk kipspejl. nivelléringsopgaver på...
  • Seite 28: Klargøring Og Opstilling

    2. Instrumentet Indsigtning anbringes på på 1. Kikkerten sigtes vha. sigtenoten stativet og skrues (AL 22) eller det optiske sigte fast med stativets (AL 26) groft ind mod stadiet. centralskrue. 3. Ved hjælp af fodskruerne spilles dåselibellen ind, så blæren befinder 2.
  • Seite 29: Måleprincipper

    Måleprincipper Vigtigt: Når dåselibellens blære er A (forskellen H er negativ, såfremt indenfor libellens centerring, punkt B ligger lavere end punkt A). udligner instrumentets kompensator automatisk eventuel Vigtigt: Har sigteplanet en lille afvigelse i sigteplanet, således at afvigelse fra vandret (instrumentet dette vil være vandret, uanset er ikke korrekt verificeret), vil instrumentets eventuelle (svage)
  • Seite 30: Målemetoder

    Målemetoder centralskrue, og stativet og O=1,44 m instrumentet centreres over vinklens toppunkt. 2. Instrumentet anbringes således på stativets topplade, at loddet hænger direkte over toppunktet. U=1,36 m Det er i denne forbindelse vigtigt, Afstandsmåling at opstillingen ikke ændres under 1. Stadiet opstilles i arbejdet.
  • Seite 31: Justering Og Verificering/Verificering

    Justering og verificering Dåselibelle Instrumentet opstilles på stativ 1. Kontrol: nøjagtig midt mellem de to stadier A Libellen spilles nøjagtigt ind, og B. hvorefter instrumentet drejes en L=30-40 m halv omgang (180° el. 200 ). Hvis libellen er korrekt justeret, forbliver blæren i centrum efter drejning.
  • Seite 32: Vedligeholdelse Og Opbevaring

    Verificering 2. Verificering: Når sigtekorset står nøjagtigt over Instrumentet forbliver opstillet på B2sand, spændes begge skruer stativ i den anden position (ca. 1m (1 og 3) let til mod hinanden, uden fra stadie A). Værdien B2sand = sigtelinien ændres. A2-A1+B1 beregnes. Gummi- beskyttelseskappen over Justérskruerne 2 og 4 anvendes justérskruerne fjernes, og med...
  • Seite 33: Tekniske Data

    Tekniske data Nivellérinstrumenter AL-22 og AL-26 Standardafvigelse ved 1km dobbeltnivellement 2,5 mm Kikkert: Forstørrelse 22 x (AL 22) 26 x (AL 26) mm-skøn, AL-22 / AL-26 til 80m / 100m cm-skøn, AL-22 / AL-26 til 160m / 200m Korteste fokusering 0,8m Objektiv-Ø, AL-22...
  • Seite 34: Mode D'emploi

    Contenu Instruments de nivellage AL 22 / AL 26 Mode d’emploi 34-41 Introduction Désignations Installation Méthodes de mesure 37-38 Calibrage de la fiole/croix de mire 39-40 Entretien et conservation Données techniques Innovation en outillage FRANÇAIS...
  • Seite 35: Introduction

    Introduction AL 22 / AL 26. Instruments de nivellage professionnels destinés à l’u- tilisation dans les ateliers de constructions Instruments de nivellage solides mire et conversion simple des et fiables avec optique claire à valeurs lues de centimètres en performance élevée pour les mètres (multiplicateur 100).
  • Seite 36: Installation

    Installation Veuillez tenir compte Ensuite, ajustez la fiole Avant de commencer la mesure, uniquement par les vis de nivellage l’instrument doit avoir le temps de de derrière (selon la figure). s’adapter à la température Ajuster le miroir à rabat de telle extérieure.
  • Seite 37: Méthodes De Mesure

    Méthodes de mesure mire ne se sont pas déplacées 2. La différence (A-B) donne la l’une contre l’autre même si différence d’hauteur H=+50 cm l’angle de vue (bouger l’oeil devant entre B et A. Le point B est 50 cm le verre oculaire) a changé.
  • Seite 38 Méthodes de mesure que la différence calculée B soit lue au-dessus du point de sol. Enfoncer à la ligne médiane. Ensuite, les pieds du trépied. marquer la hauteur du pied de 2. Placer l’instrument sur le mire. trépied et fixer. Effectuer le O=1,44 m centrage exact du fil à...
  • Seite 39: Croix De Mire

    Calibrage Fiole éloignées d’env. 30 à 40 m l’une de 1. Vérification: l’autre. Lire à la mire sur le point A Mettre le cercle horizontal sur 0°. la valeur a1 et sur le point B la Stabiliser la bulle avec les vis de L=30-40 m nivellage de manière centrale dans le cercle de la fiole.
  • Seite 40: Entretien Et Conservation

    Calibrage fautes. Si les différences d’hauteur les vis de calibrage soigneusement sont inégales, ajustez l’instrument de l’une contre l’autre. la manière suivante: b) Si b2 est supérieure à b2nominal, 2. Ajustage: desserrer la vis 3 et ajuster la croix Calculez la valeur b2 = a2- de mire à...
  • Seite 41: Données Techniques

    Données techniques Instruments de nivellage AL 22 / AL 26 Variation standard 2,5 mm/km Lunette d’approche: Grossissement 22 fois (AL 22) 26 fois (AL 26) Estimation mm/cm jusqu’à 80 m/à 160 m (AL 22) jusqu’à 100 m/à 200 m (AL 26) Portée de mire minimale...
  • Seite 42: Istruzioni Per L'uso

    Indice Strumento per livellazione AL 22 / AL 26 Istruzioni per l'Uso 42-49 Introduzione Definizioni Preparazione Metodi di misura 45-46 Taratura Livella Circolare / Croce di Mira 47-48 Cura e Conservazione Dati tecnici IUtensili innovativi ITALIANO...
  • Seite 43: Introduzione

    Introduzione AL 22 / AL 26. Strumenti professionali di livellazione per l'edilizia Strumenti di livellazione per (moltiplicatore 100). l'edilizia robusti e affidabili con Specchio ribaltabile agevolmente ottica chiara per elevate regolabile per un semplice prestazioni. allineamento mediante livella circolare. Orizzontalizzazione automatica della...
  • Seite 44: Preparazione

    Preparazione Si prega di fare attenzione a regolare la livella circolare soltanto quanto segue: con le viti di livello posteriori (v. illustrazione). Posizionare lo specchio Prima di iniziare la misurazione, si ribaltabile in modo che la livella raccomanda di lasciare allo strumento circolare risulti ben visibile.
  • Seite 45: Metodi Di Misura

    Metodi di misura caso di angolo visivo modificato negativa se il punto B è più basso del (allontanare e avvicinare l'occhio punto A). davanti all'oculare). Importante: Un leggero Importante: Inclinazioni residue della allontanamento della croce di mira dal croce di mira, ancora presenti dopo la piano orizzontale non provoca nessun stabilizzazione della livella circolare, errore di misurazione se lo strumento...
  • Seite 46 Metodi di misura terreno. Fare entrare i piedini d’appoggio del treppiedi. O=1,44 m 2. Collocare lo strumento sul treppiedi e fissarlo. Eseguire il centraggio preciso del filo a piombo sul punto del U=1,36 m terreno, modificando le prolunghe delle gambe del treppiedi oppure spostando lo strumento sul treppiedi.
  • Seite 47: Croce Di Mira

    Taratura Livella circolare tra loro circa 30-40 m. Leggere il valore 1. Controllo: a1 sul collimatore di livello in Portare su 0 il cerchio azimutale. corrispondenza del punto A e il valore b1 Stabilizzare la bolla precisamente al sul collimatore di livello in centro del cerchio della livella circolare corrispondenza del punto B.
  • Seite 48: Cura E Conservazione

    Taratura valore a2. A questo punto, dirigere lo appuccio di protezione, portare la croce strumento di livellazione sul collimatore di mira sul valore calcolato b2nom. in corrispondenza del punto B. Leggere il a) Se b2 è minore di b2nom, allentare la valore b2.
  • Seite 49: Dati Tecnici

    Telescopio: ingrandimento 22 volte (AL 22) 26 volte (AL 26) stima mm/cm fino a 80 m/fino a 160 m (AL 22) fino a 100 m/fino a 200 m(AL 26) ampiezza minima di puntamento: 0,8 m apertura obiettivo 30 mm (AL 22)
  • Seite 50: Instrucciones De Utilización

    Índice de contenido Instrumento de nivelación AL 22 / AL 26 Instrucciones de utilización 50-58 Introducción Definiciones Preparación Métodos de medición 53-54 Calibrado del nivel de burbuja esférico/ de la cruceta del visor 55-56 Cuidado y conservación Datos técnicos Innovación en la herramienta...
  • Seite 51: Introducción

    Introducción AL 22 / AL 26.Instrumentos profesionales de nivelación para el ramo de construcción. Instrumentos de nivelación robustos Práctico espejo rebatible para una y confiables con óptica de alto fácil alineación mediante el nivel de rendimiento para el ramo de burbuja esférico.
  • Seite 52: Preparación

    Preparación Preste atención a lo que sigue: a) Gire los dos tornillos niveladores en Antes de iniciar la medición, se sentido opuesto: recomienda que el aparato se adapte a la temperatura ambiente. Montar el instrumento de nivelación b) Gire los dos tornillos niveladores en 1.
  • Seite 53: Métodos De Medición

    Métodos de medición Importante: Las inclinaciones situado 50 cm más alto que el punto A. restantes de la cruceta del visor que (La diferencia H se torna negativa existen después de haber ajustado el cuando el punto B está localizado más nivel de burbuja esférico serán bajo que el A).
  • Seite 54 Métodos de medición aproximadamente sobre el punto del suelo. Fijar las puntas del trípode. O=1,44 m 2. Instalar el instrumento sobre el trípode, y fijarlo. Centrar con exactitud la plomada sobre el punto del suelo modificando las alturas de las patas del trípode o desplazando el U=1,36 m instrumento sobre el trípode.
  • Seite 55: Calibrado Del Nivel De

    Calibrado Nivel de burbuja esférico Hacer lectura sobre la regla niveladora 1. Control: del valor a1 en el punto A, y del valor b1 Ajustar el círculo horizontal a 0°. Situar en el punto B. Calcule la diferencia de exactamente la burbuja con ayuda de los altura (a1-b1).
  • Seite 56 Calibrado siguiente: b) Cuando b2 sea mayor que b2nominal, aflojar el tornillo 3 y arreglar la cruceta 2. Ajuste: del visor por el tornillo 1 hasta sean Calcule el valor b2nominal = a2-a1+b1, y b2=b2nominal. Después apretar sitúe el valor calculado en la cruceta del cuidosamente los tornillos calibradores visor, después de haber quitado la de manera diagonal.
  • Seite 57: Datos Técnicos

    Datos técnicos Instrumentos de nivelación AL 22 / AL 26 Desvío estándar: 2,5 mm/km Telescopio: Ampliación 22 veces (AL 22) 26 veces (AL 26) estimación mm/cm hasta 80 m/hasta 160 m (AL 22) hasta 100 m/hasta 200 m (AL 26) distancia mínima del objetivo...
  • Seite 58 Notizen LASERLINER ®...
  • Seite 59 Notizen LASERLINER ®...
  • Seite 60 Mayer & Wonisch GmbH & Co. KG Donnerfeld 2 D-59757 Arnsberg Telefon: +49 2932 - 638 300 Fax: +49 2932 - 638 333 Liefer- und Versandanschrift: Möhnestraße 149 D-59755 Arnsberg E-Mail: Info@Mayer-Wonisch.de...

Diese Anleitung auch für:

Al 26

Inhaltsverzeichnis