ELRO DVR534 Bedienungsanleitung
Digitale video recorder h.264
Quicklinks
SAFETY AND MAINTENANCE INSTRUCTIONS
SICHERHEITS- UND WARTUNGSHINWEISE
1
GB
INTRODUCTION
Click to stop the video playback.
This 4-channel real time Digital Video Recorder greatly maximizes the video
4- Slow Playback
quality and minimizes the file size (expand the storage capacity) with the feature
Press "SLOW" button to get 1/4X speed playback and press twice to get 1/8X
of H.264 video compression technology. Recorder accommodates 500GB hard disk.
speed playback.
You can set program recording up to 8 weeks in advance. To quickly backup, the
5- Previous / Next Hour (with mouse only)
USB port is built in for your convenience, or the network backup is also available.
Click to jump to the previous / next time interval in an hour.
It is possible simultaneous live viewing and working alarm for motion detector
6- Audio Playback
during recording. Recorder also include remote control and USB mouse control for
Press "SLOW" + "ZOOM" to select the live or playback sound of the audio
you easy operation.
channels.
HOW TO USE
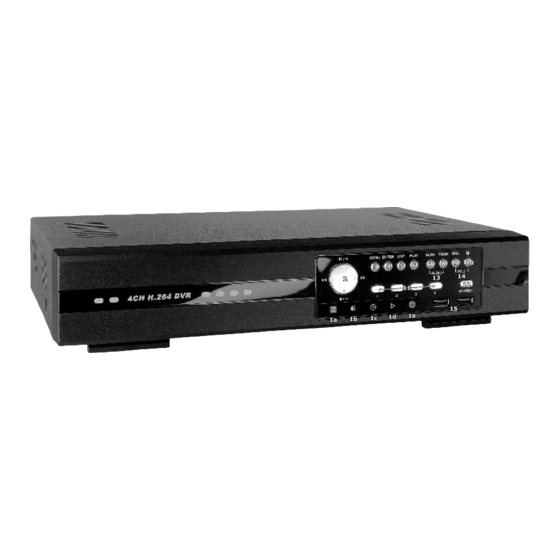
1.1 FRONT PANEL (Picture 1)
1
LED Indicators
-
The following LEDs will be ON when:
a
HDD
: HDD is reading or recording.
b
ALARM : An alarm is triggered (Selected models only).
c
TIMER : Timer recording is on.
d
PLAY
: Under playback status.
3.4 Search
e
POWER : DVR is powered on.
Press to quickly search the recorded files by four event lists.: RECORD LIST /
2
(
/ +) /
(
/ -) /
( ) /
( )
MOTION LIST / ALARM LIST / TIMER LIST, or select FULL LIST to show all the
-
Press one of these four buttons to move p/down/left/right.
event logs.
-
Under the playback mode, press these buttons to pause ( ) / stop ( ) / fast
To quickly search the time you want, select "QUICK SEARCH". Set the time range
rewind ( ) / fast forward ( ) the playback file.
you want, and select "Start" to play the recorded video clip during the specified
-
Under the setting mode, press
/
, to change the setting in the menu.
time.
3
MENU
-
Press to enter / exit the DVR menu mode.
4. IR REMOTE CONTROL (Picture 3)
4
ENTER
-
Press to confirm the setting.
Functions of control buttons on remote control:
5
LIST
1
Preset Press to set the preset points of the PTZ camera. Press " " / " " to
-
Press to quickly search the recorded files by four event lists.
move the cursor. Press the "ENTER" button to enter the submenu, and confirm
6
PLAY
the selection. Press the "Camera Menu" button to enter the menu mode,
-
Press this button to play the recorded video.
confirm the change and exit the menu.
2
CAMERA Press this button and the channel number that the PTZ camera is
7
SLOW
connected to control the PTZ camera.
-
Under the playback mode, press to slowly playback the recorded file.
3
Zoom max / Zoom min Use these buttons to adjust the optical zoom of the
8
ZOOM
PTZ camera in/out to the maximum/minimum size.
-
Press to enlarge the image of the selected channel in the FRAME or FIELD
recording mode
4
Zoom + / Zoom – Use these buttons to adjust the optical zoom in/out ratio
of the PTZ camera.
9
SEQ
5
Auto Press this button to enter the auto pan mode of the PTZ camera.
-
Press to display each channel in full screen one by one starting from CH1.
6
Camera Menu Press this button to enter the main menu of the PTZ camera.
When the last channel is displayed, it will repeat from CH1 again. To exit this
7
ID This button has no function for this version of the DVR.
mode, press "SEQ" again.
8
Digital Zoom Press this button to enlarge the image of the selected DVR
10
channel (2X zoom).
-
Press this button to show the 4 channel display mode.
9
- Audio CH + Use these two buttons to select the live or playback sound of
11 1 / 2 / 3 / 4
the DVR audio channels.
-
Press one of these buttons to select the channel to display.
10 Full Sequence / Quad Sequence Press "Full Sequence" button to display
12 SEARCH
each channel one by one, starting from CH1 to the last channel. Press "Quad
-
Press to enter the time search menu. Set the time range you want, and select
Sequence" button to display 4 channels at one time.
"START" to play the recorded video clip during the specified time.
11 - / + Press these two buttons to change the settings in the menu.
13 AUDIO (SLOW + ZOOM) (1a)
12
(Pause) /
-
Press these two buttons at the same time to select live or playback sounds of
press again to resume.
the audio channels.
Press " " button to stop the video playback, and return to the live mode of the
14 PTZ (SEQ +
) (1b)
DVR.
-
Press these two buttons at the same time to enter / exit the PTZ control mode.
13
(Fast rewind) /
15 USB port
playback file. Press " " button to forward the playback file.
-
There are two USB ports on the front panel, one for connecting your USB
14
(Play) Under the video playback mode, press to start playing the latest
mouse for mouse control, and the other one for connecting your USB flash
recorded file.
drive for video backup.
15 List To quick search the recorded files by events, press to show all types of the
Note: It's not allowed to have two USB mice or two USB flash drives
event lists.
connected on the front panel.
16 DVR Menu Press to enter the main menu of the DVR.
17 Channel Selection Buttons Press "16CH", "9CH" or "4CH" button to select
1.2 REAR PANEL (Picture 2)
the 16 / 9 / 4 channel display mode.
1
VIDEO IN (for channel 1~4)
18 SNAP When the DVR is not under the menu mode, connect a USB flash drive
-
Connect to video sources, such as cameras.
to the DVR, and press this button to take a snapshot for save the current live
2
VIDEO OUT
video image in the connected USB flash drive.
-
Connect to MAIN monitor for video output.
19 F1 (open disc tray) This button has no function for this version of the DVR.
3
AUDIO IN (for channel 1~4)
20 F2 (keylock) Press to automatically lock DVR keys.
-
Connect to audio sources, such as cameras equipped with the audio function.
21 F3 (R.E.T.R.) Press to activate the "R.E.T.R." (Remote Event Trigger
4
AUDIO OUT
Recording) function after 3/5/10 minutes.
-
Connect to an audio device, such as monitor or speaker.
22 Slow Press to playback the latest recorded video of the DVR. Press once to get
5
VGA
1/4X speed and press twice to get 1/8X speed.
23 DVR/PC This button has no function for this version of the DVR.
-
Connect to a LCD monitor directly.
6
EXTERNAL I/O
24 Number selection buttons Press these numbering selection buttons to select
numbers / to select the channel.
-
Insert the supplied 9PIN DSUB to this port for connecting external devices
(external alarm, PTZ camera, etc).
25 UP / DOWN / L (Left) / R (Right) / ENTER Press one of the direction
-
For detailed I/O port PIN configuration, please refer to manual on CDROM.
buttons, "UP", "DOWN", "L" or "R", to move the cursor up / down / left / right,
7
LAN
or control the movement of the PTZ camera. Press the "ENTER" button to
confirm the selection / enter a submenu mode.
-
Connect to Internet by LAN cable.
26 LCD adj. This button has no function for this version of the DVR.
8
DC 19V
Note: Because of universal remote control not all functions are available for
-
Connect to the supplied adapter.
this DVR model.
9
POWER SWITCH
-
Switch to "I" to turn on the power, and "O" to turn off the power.
5. USB mouse control
2. CONNECTIONS AND SETUP
5.1 Connect the mouse
Connect your USB mouse to one of the USB ports on the DVR front panel, and
2.1 Camera Connection
check if there's a mouse icon on the screen, indicating the USB mouse is detected
The cameras must be connected and power-supplied BEFORE the DVR is turned
properly. Move your mouse to enter the DVR password with the password keypad.
on. The DVR will automatically detect the video system of the connected
The default administrator password is 0000. The status will be changed from "key
camera(s) (NTSC / PAL), and switch itself to the correct system.
lock" to "administrator", and the quick menu bar appears on the left side of the
-
Connect the camera with the indicated power supply, and connect the camera
screen.
video output to the DVR video input port with a coaxial cable or RCA lines with
BNC connectors.
5.2 Quick Menu Bar
-
Connect the camera audio output to the DVR audio input port with a coaxial
Move to the arrow mark to extend the quick menu bar and show the five functions
cable or RCA lines with BNC connectors.
as follows:
2.2 Power Setup
Click to show the channel switch panel and select the channel you want.
This device should be operated only with the type of power source indicated on the
For details, please refer to "5.2.1 Channel Switch".
manufacturer's label. Connect the indicated AC power cord to the power adapter,
and plug into an electrical outlet. The power LED "
" will be on. It takes
Click to display the playback control panel, and click to play the latest
approximately 45 seconds to boot the system.
recorded video clip, or click to enter the search list. For details, please
Note: To ensure that your DVR works constantly and properly, it's
refer to "3.3 Playback".
recommended to use an UPS, Uninterruptible Power Supply, for
continuously operation. (Optional)
Switch to the channel you want first, and click to enter the zoom-in mode.
In this mode, click and drag the red frame on the bottom left of the screen
2.3 Main Menu
to move to the place you want to see. To exit this mode, click x.
Push the MENU button or right-click with mouse anywhere on the screen to show
the main menu as follows, and push MENU button or right-click again to exit
Click to select the audio channel you want.In the live mode, only the live
audio channels can be selected. In the playback mode playback audio
QUICK START
Click to set the status display, image settings,
channels can be selected.
and date & time.
DATE SETUP
Click to set the date display and daylight
Click to enter the PTZ mode and show the PTZ camera control panel. For
saving.
details, please refer to "5.2.2 PTZ Control Panel".
SYSTEM
Click to set the system configurations.
EVENT INFORMATION
Click to enter the event search menu.
5.2.1Channel Switch
ADVANCE CONFIG
Click to set CAMERA, DETECTION, ALERT,
NETWORK, SNTP, DISPLAY, RECORD and
REMOTE.
SCHEDULE SETTING
Click to set record timer and detection timer.
2.4 Date and Time Setting
Before operating your DVR, please set the date and time on your DVR first. Press
the "MENU" button (or right-click on the mouse) and enter the password to go to
the menu list. The default admin password is 0000. Move the cursor to "QUICK
START" and you can set the date and time saving in the "TIME SETUP" menu list.
Note: Please DO NOT change the date or time of your DVR after the
recording function is activated. Otherwise, the recorded data will be
5.2.2PTZ Control Panel
disordered and you will not be able to find the recorded file to backup
by time search. If users change the date or time accidentally when the
recording function is activated, it's recommended to clear all HDD data,
and start recording again.
Note: For the first time to use the DVR, please charge the DVR for at least 48
hours continuously after the date & time is set correctly.
2.5 Clear Hard Disk
It's recommended to clear all data in the hard disk for the first time to user this
DVR to ensure the recorded data are not mixed with other data previously saved in
the same hard disk. Press the "MENU" button (or right-click on the mouse) to
show the main menu, and select "SYSTEM", then select "SYSTEM INFO", then
select "CLEAR HDD" and then select HDD which you want to clear. The DVR will
reboot when HDD data is cleared.
2.6 Password Setting
Press the "MENU" button (or right-click on the mouse) and enter the password to
go to the menu list. Then, move the cursor to "SYSTEM" to enter the system
menu. In the "TOOLS" menu, select "SETUP" button for ADMIN PASSWORD and
press the "ENTER" button to enter the submenu to set the password (four digits).
The default admin password is 0000.
3. BASIC OPERATION
3.1 Live Page
You can see the live view screen with status icons:
Icon
Funktion
Icon
Funktion
Icon
Funktion
TIPS
-
It's not possible to have video output simultaneously on a monitor connected
Live audio
Playback audio
Audio channel
to "MONITOR" and a monitor connected to "VGA". A monitor connected to VGA
channel (1~4)
channel (1~4)
off
output overrules the composite output.
-
If your DVR is not working when pressing any button you might be under "Key
Lock" mode. Press any key and enter the password to exit this mode.
Digital zoom
Timer
Digital zoom on
-
Format the USB flash drive as FAT32 format before use.
off
recording
-
There must be at least 8192 images of recorded data for playback to work
properly. If not, your DVR will stop the playback.
Netzwerk nicht
Internet
-
Choose to allow the web browser ActiveX or applet in the pop-out message to
LAN connected
view the DVR images over the network with IE web browser after login.
angeschlossen
connected
USB flash
USB Mouse
drive / device
HDD overwrite
*** COMPLETE MANUAL: See CD, not all languages are available.
connected
connected
Key lock
PTZ mode on
Sequence
Administrator
Operator
Motion
Recording
Alarm
3.2 Recording
Manual Recording
By default, manual recording is on when the DVR is powered on and a HDD is
installed.
Event Recording
When the motion detection or alarm is on, the motion icon or alarm icon shows on
the screen for any motion or alarm event.
Timer Recording
When timer recording is on, you will see timer recording icon on the screen.
HDD Overwrite
By default, the HDD overwrite function is set to ON, and HDD Overwrite icon will
be shown on the screen.
3.3 Playback
Press the "PLAY" button on the DVR control panel, and the device will playback the
latest recorded video.
Note: There must be at least 8192 images of recorded data for playback to
work properly. If not, the device will stop playback. For example, if the
IPS is set to 30, the recording time should be at least 237 seconds
(8192 images / 30 IPS) for the playback to work properly.
1- Fast Forward / Fast Rewind
You can increase the speed for fast forward and rewind on this device.
In the playback mode:
Press " " once to get 4X speed forward and press twice to get 8X speed, etc.
and the
maximum speed is 32X.
Press " " once to get 4X speed rewind and press twice to get 8X speed,etc.
and the maximum speed is 32X.
Note: During playback, the image size of the recorded data (FRAME, FIELD or
CIF) will be shown on the screen.
2- Play / Pause
Press " " button to pause the playback.
In the pause mode:
Press " " button once to get one frame forward.
Press " " button once to get one frame rewind.
3- Stop
VEILIGHEIDS- EN ONDERHOUDSINSTRUCTIES
INSTRUCTIONS DE SECURITE ET D'ENTRETIEN
PL
Ten czterokanaùowy cyfrowy rejestrator sygnaùu wideo w czasie rzeczywistym
wydatnie zwiæksza jakoúã obrazu wideo, jednoczeúnie zmniejszajàc wielkoúã plików
(wiæksza zdolnoúã magazynowania) dziæki zastosowaniu metody kompresji H.264.
Rejestrator wyposaýony jest w dysk twardy o pojemnoúci 500 GB. Uýytkownik
moýe zaprogramowaã nagranie z 8-tygodniowym wyprzedzeniem. Urzàdzenie
wyposaýone jest w gniazdo USB uùatwiajàce kopiowanie plików. Kopiowanie moýna
teý zrealizowaã za poúrednictwem interfejsu sieciowego. Rejestrator posiada takýe
sterowanie pilotem i myszà z wyjúciem USB w celu jego ùatwej obsùugi.
SPOSÓB OBSÙUGI
Live audio of the 1st,2nd, 3rd or 4th audio channel
1.1 PANEL PRZEDNI (Rysunek 1)
1
Kontrolki LED
Playback audio of the 1st,2nd, 3rd or 4th audio channel
-
Funkcje sygnalizowane úwieceniem kontrolek LED:
a
HDD
b
ALARM
The audio channel is not selected.
c
TIMER (licznik czasu) : Wùàczony jest licznik czasowy nagrywania.
d
PLAY (ODTWARZANIE) : Informacja o stanie odtwarzania.
e
POWER (ZASILANIE)
2
(
/ +) /
(
/ -) /
-
Sùuýà do przesuwania do góry/w dóù/w lewo/w prawo.
-
W trybie odtwarzania sùuýà do wstrzymania odtwarzania (pauza) ( ) /
zatrzymania (stop) ( ) / przewijania do przodu ( ) / przewijania wstecz ( )
odtwarzanego pliku.
-
W trybie ustawieñ, naciúniæcie przycisków
w menu.
3
MENU
-
Jego naciúniæcie wywoùuje/wyùàcza menu DVR.
4
ENTER
-
Sùuýy do potwierdzania wprowadzonych zmian.
5
LIST
-
Wciúnij w celu szybkiego przeszukania zarejestrowanych plików przez cztery
listy zdarzeñ.
6
PLAY (ODTWARZANIE)
-
Sùuýy do uruchamiania odtwarzania nagranych plików wideo.
7
SLOW (POWOLI)
-
Jego naciúniæcie i przytrzymanie podczas odtwarzania powoduje odtworzenie
nagrania w zwolnionym tempie.
8
ZOOM (POWIÆKSZENIE)
-
Wciúnij by powiækszyã obraz wybranego kanaùu w trybie rejestracyjnym FRAME
(RAMKA) lub FIELD (POLE)
9
SEQ
-
Wciúnij w celu wyúwietlenia kaýdego kanaùu na peùnym ekranie, jeden po
drugim, zaczynajàc od CH1. Po wyúwietleniu ostatniego kanaùu, urzàdzenie
bædzie powtarzaã wyúwietlanie ponownie od CH1. Aby wyjúã z tego trybu,
ponownie wciúnij "SEQ".
10
-
Sùuýy do wùàczania trybu podglàdu czterech kanaùów.
(Stop) Press " " button to pause the video playback, and
11 1 / 2 / 3 / 4
-
Sùuýà do wyboru kanaùu do wyúwietlania.
12 SZUKAJ
-
Wciúnij, by wprowadziã menu szukania wg czasu. Ustaw ýàdany okres czasu i
(Fast forward) Press " " button to rewind the
wybierz "START", by wyúwietliã zarejestrowany obraz w wybranym zakresie
czasowym.
13 AUDIO (SLOW + ZOOM) (1a)
-
Jednoczesne naciúniæcie tych dwóch przycisków pozwala wybraã opcjæ dêwiæku
na ýywo lub odtwarzania nagranego dêwiæku dla poszczególnych kanaùów
audio.
14 PTZ (SEQ +
) (1b)
-
Jednoczesne naciúniæcie tych dwóch przycisków wùàcza/wyùàcz tryb PTZ.
15 Zùàcze USB
-
Na pùycie czoùowej znajdujà siæ dwa porty USB, jeden do podùàczenia myszy
USB do sterowania urzàdzeniem za pomocà myszy, a drugie wejúcie sùuýy do
podùàczenia urzàdzenia rejestrujàcego USB flash drive do zapisu archiwalnego.
Uwaga: Niedozwolone jest posiadanie podùàczonych do urzàdzenia dwóch
myszy USB lub dwóch urzàdzeñ rejestrujàcych USB flash drive.
1.2 PANEL TYLNY (Rysunek 2)
1
VIDEO IN (WEJÚCIE WIDEO, dla kanaùów 1~4)
-
Sùuýy do podùàczania êródeù sygnaùu wideo, takich jak np. kamery.
2
VIDEO OUT (WYJÚCIE WIDEO)
-
Sùuýy do podùàczania monitora gùównego (MAIN).
3
AUDIO IN (wejúcie audio, dla kanaùów 1~4)
-
Sùuýy do podùàczania êródeù sygnaùu audio, takich jak np. kamery wyposaýone
w funkcjæ nagrywania dêwiæku.
4
AUDIO OUT (WYJÚCIE AUDIO)
-
Sùuýy do podùàczania urzàdzenia audio, jak np. wzmacniacz lub wejúcie audio
telewizora.
5
VGA
-
Sùuýy do bezpoúredniego podùàczania monitora LCD.
6
EXTERNAL I/O (ZÙÀCZE WE/WY DLA URZÀDZEÑ ZEWNÆTRZNYCH)
-
Sùuýy do podùàczania urzàdzeñ zewnætrznych (alarm, kamera PTZ itp.) za
pomocà zùàcza 9-stykowego DSUB.
-
Szczegóùowy opis styków tego zùàcza podano w instrukcji obsùugi znajdujàcej
siæ na pùycie CDROM.
7
LAN
-
Umoýliwia poùàczenie z siecià Internet za pomocà kabla LAN.
8
DC 19 V (zasilanie pràdem staùym 19 V)
-
Gniazdo do podùàczenia zasilacza (zasilacz dostarczany w zestawie).
9
WYÙÀCZNIK ZASILANIA
-
Przeùàcz na "I" by wùàczyã zasilanie. Natomiast by wyùàczyã zasilanie, przeùàcz
na "O".
2. POÙÀCZENIA I KONFIGURACJA
2.1 Podùàczanie kamer
Kamery muszà byã podùàczone do rejestratora i zasilania PRZED wùàczeniem
rejestratora DVR. Rejestrator wykryje automatycznie system wideo (NTSC/PAL)
podùàczonych kamer i odpowiednio wybierze system dla kaýdego kanaùu.
-
C Podùàczyã kameræ do odpowiedniego êródùa zasilania i podùàczyã wyjúcie
wideo kamery z wejúciem wideo rejestratora DVR za pomocà kabla
koncentrycznego lub kabli RCA z wtykami BNC.
-
Podùàczyã wyjúcie audio kamery z wejúciem audio rejestratora DVR za pomocà
kabla koncentrycznego lub kabli RCA z wtykami BNC.
2.2 Zasilanie
ród³o zasilania musi mieæ parametry zgodne z podanymi na tabliczce
znamionowej urz¹dzenia. Pod³¹czyæ kabel sieciowy do zasilacza, umieœciæ wtyczkê
w gnieŸdzie sieciowym. Zaœwieci siê kontrolka LED zasilania "
systemu zajmuje oko³o 45 sekund.
Uwaga: Aby zapewniã ciàgùoúã i poprawnoúã pracy rejestratora, zaleca siæ
stosowaã zasilacz awaryjny (UPS) (opcjonalnie).
2.3 Menu gùówne
Wciúnij przycisk MENU lub prawy przycisk myszy w dowolnym miejscu ekranu, co
Video Channel 1~4
Click to switch to the channel you want in full
wywoùa poniýszy obraz menu gùównego, lub ponownie przycisk MENU lub prawy
screen.
przycisk myszy, by wyjúã
Sequence Display
Click to display each channel in full screen
SZYBKI START
one by one starting from CH1. When the last
channel is displayed, it will repeat from CH1
USTAWIENIE DATY
again.
SYSTEM
Quad Display
Press to show the 4-channel display mode.
INFORM. O ZDARZENIU
KONF. ZAAWANS.
Camera Menu
Click to enter the camera main menu. For
USTAW. HARMONOGR.
details about each camera menu, please refer
to its own user manual.
2.4 Ustawienie daty i czasu
Zanim przystàpisz do uýytkowania Twojego DVR, najpierw ustaw datæ i czas na
Enter
Click to confirm your selection / enter the
swoim rejestratorze. Wciúnij przycisk "MENU" (lub kliknij prawym przyciskiem
menu.
myszy) i wprowadê hasùo, by przejúã do wykazu menu. Domyúlnym hasùem
administracyjnym jest 0000. Przesuñ kursor do "SZYBKIEGO STARTU", a bædziesz
Up/Down/Left/Right
Click to move your selection up / down / left /
mógù ustawiã datæ i czas, zapisujàc je w wykazie menu "USTAWIENIE CZASU".
right, or change settings.
Uwaga: NIE NALEÝY zmieniaã ustawieñ daty i czasu po uruchomieniu funkcji
nagrywania. W przeciwnym wypadku zapisany plik nie znajdzie siæ w
Zoom in / out max
Click to zoom in on the image to the largest /
odpowiednim miejscu na liúcie i niemoýliwe bædzie wyszukanie go
zoom out on the image to its original size.
wedùug czasu nagrania w celu wykonania kopii zapasowej. W razie
przypadkowej zmiany daty lub czasu w trakcie trwania nagrywania,
Zoom in / out
Click to zoom in / out the image.
zaleca siæ wyczyúciã dane zapisane na dysku twardym i rozpoczàã
nagrywanie ponownie.
Focus near / far
Click to adjust the focus of the image.
Uwaga: Jeúli rejestrator DVR zostaù uruchomiony po raz pierwszy, powinien
pozostaã wùàczony przez 48 godzin bez przerwy od ustawienia daty I
Auto mode
Click to activate the auto function. Before
czasu.
using it, you need to assign a specific function
that will be enabled when "AUTO" is clicked.
2.5 Wyczyúã twardy dysk
For details, please refer to the user manual of
Zaleca siæ skasowanie wszystkich danych na twardym dysku przy pierwszym
the PTZ camera.
zastosowaniu tego rejestratora DVR celem zapewnienia, aby zapisane dane nie
mieszaùy siæ z innymi danymi zapisanymi wczeúniej na tym samym twardym
Preset point
Click to enter the PTZ preset point you want
dysku. Naciúnij przycisk "MENU" (lub kliknij prawym przyciskiem myszy), by
wywoùaã menu gùówne i wybraã "SYSTEM", nastæpnie wybierz "SYSTEM INFO",
to see.
nastæpnie wybierz "WYCZYÚÃ HDD", w nastæpnej kolejnoúci wybierz HDD, który
chcesz wyczyúciã. Rejestrator DVR zrestartuje z chwilà, gdy dane na HDD zostanà
skasowane.
2.6 Ustawienie hasùa
Wciúnij przycisk "MENU" (lub kliknij prawym przyciskiem myszy) i wprowadê hasùo,
by przejúã do listy menu. Nastæpnie przesuñ kursor do sùowa "SYSTEM", by
wprowadziã menu systemu. W menu "NARZÆDZIA" wybierz przycisk
"USTAWIENIE" dla HASÙA ADMIN (ADMIN PASSWORD) i wciúnij przycisk "ENTER"
w celu wprowadzenia podmenu do wprowadzania hasùa (cztery cyfry). Domyúlne
hasùo admin jest nastæpujàce: 0000.
3. FUNKCJE PODSTAWOWE
3.1 Ekran podglàdu w czasie rzeczywistym
Wyúwietlony zostanie ekran podglàdu na ýywo, z nastæpujàcymi ikonami:
w
~
w
w
m
w
m
m
m
m
w
SPECIFICATIONS
Video System
: NTSC / PAL (auto detection)
Video Compression Format
: H.264
Video Input (Composite video
signal 1 Vp-p 75Ù BNC)
: 4 Channels
Video Output (Composite video
signal 1 Vp-p 75Ù BNC)
: Main Monitor Output
Maximum Recording Rate (Frame)
: 704x480 pixels with 30 IPS <NTSC> /
704x576 pixels with 25 IPS <PAL>
Maximum Recording Rate (Field)
: 704x240 pixels with 60 IPS <NTSC> /
704x288 pixels with 50 IPS <PAL>
Maximum Recording Rate (CIF)
: 352x240 pixels with 120 IPS <NTSC> /
352x288 pixels with 100 IPS <PAL>
Image Quality
: Super Best, Best, High and Normal
Quick Search
: Time / Motion / Alarm search mode
Hard Disk Storage
: Accommodates 1 SATA HDD (capacity up to 1TB)
VGA Interface
: Built-in
Recording Mode
: Manual / Timer / Motion / Alarm / Remote
Multiplex Operation
: Live display / record / playback / backup /
network
USB Mouse Control
: Yes
Audio I/O
: 4 audio inputs, 1 audio output (Mono)
Motion Detection Area
: 16x12 grids per camera for all channels
Motion Detection Sensitivity
: 4 adjustable parameters for accurate detection
Pre-alarm Recording
: Yes
Backup Device
: USB 2.0 flash drive / Network
Web Transmitting Compression Format
: H.264
Ethernet
: 10/100 Base-T. Support remote control
and live view via Ethernet.
Web Interface
: Support licensed software "Video Viewer" /
Internet Explorer & Mozilla Firefox web browser /
QuickTime (5 users access simultaneously)
Operating System
: * Windows 7 / Vista / XP/ 2000
Network Protocol
: Support TCP/IP, PPPoE, DHCP and DDNS
Fully Remote Independent Operation
: Yes
Event Notification
: by ftp/ e-mail
IR Remote Control
: Yes (IR receiver built-in)
Mobile Surveillance
: Yes (including iPhone, BlackBerry &Win CE)
Picture Zoom
: 2X digital zoom (Live & Playback)
PTZ Control
: Yes
Alarm I/O
: 4 inputs, 1 output
Key Lock (Password Protection)
: Yes
Video Loss Detection
: Yes
Camera Title
: Support up to 6 letters
Video Adjustable
: Hue / Saturation / Contrast / Brightness
Power Source
: DC 19V
Power Consumption
: <42 W
Operating Temperature
: 10þC ~ 40þC (50þF~104þF)
System Recovery
: System auto recovery after power failure
IR remote controller's battery
: AAA size battery x 2
IR emission distance
: straight line 10m
* The specifications are subject to change without notice.
2
WPROWADZENIE
Uwaga: Do poprawnego odtwarzania konieczne jest, aby nagranie zawieraùo
minimum 8192 klatek. W przeciwnym wypadku odtwarzanie zostanie
zatrzymane. Na przykùad, jeúli liczbæ klatek na sekundæ (IPS)
ustawiono na 30, naczasgrania powinien wynosiã przynajmniej 237
sekund (8192 klatek/30), aby jego odtworzenie byùo moýliwe.
1- Przewijanie do przodu/wstecz
Prædkoúã przewijania do przodu i wstecz moýna regulowaã.
W trybie odtwarzania:
Jedno naciúniæcie przycisku " " wùàczy tryb przewijania do przodu z
prædkoúcià 4X, drugie naciúniæcie przycisku zmieni prædkoúã na 8X itp.,
prædkoúã maksymalna to 32X.
Jedno naciúniæcie przycisku " " wùàczy tryb przewijania wstecz z prædkoúcià
4X, drugie naciúniæcie przycisku zmieni prædkoúã na 8X itp., prædkoúã
maksymalna to 32X.
Uwaga: Podczas odtwarzania, na ekranie bædzie wyúwietlana informacja o
wielkoúci obrazu (FRAME, FIELD lub CIF).
: Odczyt lub zapis na dysku twardym.
2- Odtwarzanie / Pauza
: Wùàczony jest alarm (funkcja dostæpna w
Nacisnàã przycisk " ", aby wstrzymac odtwarzanie.
wybranych modelach).
W trybie wstrzymania odtwarzania (pauza):
Jedno naci
úniæcie przycisku " " powoduje wyúwietlenie kolejnej klatki.
: Wùàczone zasilanie rejestratora DVR.
Jedno naciúniæcie przycisku " " powoduje wyúwietlenie poprzedniej klatki.
( ) /
( )
3- Stop
Kliknij, jeúli chcesz zatrzymaã odtwarzanie wideo.
4- Odtwarzanie w zwolnionym tempie
Jedno naciúniæcie przycisku "SLOW" (POWOLI) wùàczy tryb odtwarzania z
prædkoúcià 1/4X, drugie naciúniæcie przycisku zmieni prædkoúã na 1/8X.
/
, powoduje zmianæ ustawienia
5- Poprzednia / Nastæpna godzina (tylko z myszà)
Kliknij, by przeskoczyã do poprzedniego / nastæpnego godzinnego okresu
czasowego.
6- Odtwarzanie plików audio
Nacisnàã przyciski "SLOW" + "ZOOM", aby wybraã opcjæ dêwiæku na ýywo lub
odtwarzania nagranego dêwiæku dla poszczególnych kanaùów audio.
D
êwiæk na ýywo z kanaùu 1, 2, 3, lub 4.
Odtwarzanie nagranego dêwiæku z kanaùu 1, 2, 3, lub 4.
Kanaù dêwiækowy nie jest wybrany.
3.4 Wyszukiwanie
Naciúnij, by szybko przeszukaã zarejestrowane pliki przez cztery listy zdarzeñ:
LISTA ZAPISÓW (RECORD LIST) / LISTA RUCHÓW (MOTION LIST) / LISTA
ALARMÓW (ALARM LIST) / LISTA ZEGARA (TIMER LIST), lub wybierz PEÙNÀ LISTÆ
(FULL LIST), by pokazaã wszystkie zarejestrowane zdarzenia.
Aby szybko przeszukaã ýàdany czas, wybierz funkcjæ "SZYBKIE SZUKANIE (QUICK
SEARCH)". Ustaw czas, który sobie ýyczysz, i wybierz "Start" by odtworzyã
zarejestrowane obrazy w trakcie wskazanego czasu.
4. Pilot zdalnego sterowania (Rysunek 3)
Przyciski na pilocie zdalnego sterowania:
1
Preset Przycisk ustawiania punktów nastawy kamery PTZ. Kursorem porusza
siæ za pomocà przycisków " " / " ". Nacisnàã przycisk „ENTER", aby przejúã
do menu podrzædnego i zatwierdziã wprowadzone zmiany. Przyciskiem
"Camera Menu" wywoùaã menu kamery, potwierdziã zmianæ i wyjúã z menu.
2
CAMERA Za pomoc
à tego przycisku oraz przycisku numeru wybranego kanaùu,
do którego podùàczona jest kamera PTZ moýna kontrolowaã kameræ PTZ.
3
Zoom max / Zoom min Przy pomocy tych klawiszy ustaw optyczne
powiækszenie kamery PTZ do/od maksymalnego/minimalnego rozmiaru.
4
Zoom + / Zoom – Przyciski sùuýàce do regulacji zoomu optycznego kamery
PTZ.
5
Auto Sùuýy do wùàczania trybu automatycznego panoramowania kamery PTZ.
6
Camera Menu Wywoùuje menu gùówne kamery PTZ.
7
ID Ten przycisk nie ma przydzielonej funkcji dla wersji DVR.
8
Digital Zoom Sùuýy do powiækszania obrazu wybranego kanaùu DVR
(powiækszenie 2X).
9
- Audio CH + Przyciski wyboru dêwiæku odtwarzanego/na ýywo dla
poszczególnych kanaùów audio.
10 Full Sequence / Quad Sequence Przycisk "Full Sequence" wùàcza funkcjæ
przeglàdu kanaùów w trybie peùnoekranowym, jeden po drugim, rozpoczynajàc
od CH1, aý do ostatniego kanaùu. Przycisk "Quad Sequence" wùàcza funkcjæ
jednoczesnego podglàdu 4 kanaùów.
11 - / + Sùuýà do zmiany ustawieñ w menu.
12
(Pause) /
(Stop) Nacisnàã przycisk " ", aby wstrzymaã odtwarzanie,
kolejne naciúniæcie tego przycisku przywróci tryb odtwarzania. Nacisnàã
przycisk " ", aby zatrzymaã odtwarzanie i powróciã do trybu podglàdu na
ýywo.
13
(Przewijanie wstecz) /
(Przewijanie naprzód) Nacisnàã przycisk
" ", aby przewinàã nagranie wstecz. Nacisnàã przycisk , aby przewinàã
nagranie do przodu.
14
(Odtwarzanie) Jego naciúniæcie w trybie odtwarzania powoduje
odtworzenie ostatnio nagranego pliku.
15 List Umoýliwia szybkie przeszukiwanie nagranych plików wedùug kategorii
zdarzeñ
16 DVR Menu Wywoùuje menu gùówne DVR.
17 Przyciski wyboru kanaùów Sùuýà do wyboru trybu podglàdu: "16CH", "9CH"
lub "4CH".
18 SNAP Gdy na ekranie nie jest wyúwietlane menu, podùàczyã pamiæã Flash USB
i nacisnàã ten przycisk, aby zapisaã klatkæ pliku wideo bieýàcego sygnaùu na
ýywo na podùàczonym urzàdzeniu pamiæci Flash.
19 F1 (wysuwanie tacki) Ten przycisk nie ma przydzielonej funkcji dla tej wersji
DVR.
20 F2 (blokada klawiatury) Wùàcza funkcjæ automatycznej blokady przycisków
rejestratora DVR.
21 F3 (R.E.T.R.) Wùàcza funkcjæ "R.E.T.R." (Remote Event Trigger Recording,
nagrywanie wyzwalane zdalnym zdarzeniem) po upùywie 3/5/10 minut.
22 Slow Jego naciúniæcie powoduje odtworzenie ostatniego nagrania w
zwolnionym tempie. Jedno naciúniæcie tego przycisku wùàczy tryb odtwarzania
z prædkoúcià 1/4X, drugie naciúniæcie przycisku zmieni prædkoúã na 1/8X.
23 DVR/PC Ten przycisk nie ma przydzielonej funkcji dla tej wersji DVR.
24 Przyciski numeryczne Sùuýà do wprowadzania wartoúci numerycznych i
wyboru kanaùów.
25 UP (DO GÓRY) / DOWN (W DÓÙ) / L (W LEWO) / R (W PRAWO) /
ENTER Przyciski sùuýàce do przesuwania kursora do góry, w dóù, w lewo, w
prawo i do sterowania ruchem kamery PTZ. Nacisnàã przycisk „ENTER", aby
zatwierdziã wybór/przejúã do menu podrzædnego.
26 LCD adj. Ten przycisk nie ma funkcji dla tej wersji DVR.
Uwaga: Pilot jest uniwersalny i nie wszystkie jego funkcje mogà byã dostæpne
w danym modelu rejestratora DVR.
". Uruchomienie
5. Sterowanie myszà USB
5.1 Podùàczenie myszy
Podùàcz swojà mysz USB do jednego z portów USB umiejscowionego na pùycie
czoùowej Twojego rejestratora DVR i sprawdê, czy na ekranie widoczna jest ikonka
myszy, wskazujàca prawidùowe wykrycie myszy USB. Porusz myszkà, by
wprowadziã hasùo DVR z bloku klawiszy. Bieýàce hasùo administratora brzmi 0000.
Zmieni siæ status z "Blokady klawiatury" (key lock) na "administrator" i z lewej
strony ekranu pojawi siæ pasek szybkiego menu.
Kliknij, by ustawiã wyúwietlenie
statusu,ustawienia obrazu, oraz daty & czasu.
5.2 Pasek szybkiego menu (Quick Menu)
Kliknij, by ustawiã wyúwietlenie daty i czasu
Przesuã siæ do znaczka strzaùki, by rozszerzyã pasek szybkiego menu celem
letniego.
pokazania piæciu nastæpujàcych funkcji:
Kliknij, by ustawiã konfiguracje systemu.
Kliknij, by wprowadziã menu szukania zdarzenia.
Kliknij tu, by pokazaã panel przeùàczania kanaùów celem wybrania
Kliknij, by ustawiã KAMERÆ, DETEKCJÆ,
ýàdanego kanaùu. Szczegóùy podano w pozycji "5.2.1 Przeùàcznik kanaùów".
POGOTOWIE, SIEÃ, SNTP, WYÚWIETLENIE, ZAPIS
I PILOT.
Kliknij tutaj, by wyúwietliã panel sterowania odtwarzaniem, nastæpnie
Kliknij, by ustawiã zegar zapisu i zegar detekcji.
kliknij, by odtworzyã zapisane odtatnio obrazy wideo, lub kliknij, by
wprowadziã listæ przeszukiwania lub kliknij by wprowadziã listæ
poszukiwañ. Informacje szczegóùowe podano w "3.3 Odtwarzanie".
Przeùàcz na kanaù, który chcesz, aby byù pierwszy i kliknij celem
wprowadzenia trybu powiækszania (zoom-in). W tym trybie kliknij i
przeciàgnij czerwonà ramkæ w lewym dolnym fragmencie ekranu celem
przeniesienia w zaplanowane miejsce. Aby wyjúã z tego trybu, kliknij x.
Kliknij tæ ikonkæ, by wybraã ýàdany kanaù audio. W trybie bezpoúrednim
moýna wybieraã jedynie aktywne/ruchome kanaùy audio. W trybie
odtwarzania moýna wybieraã tylko kanaùy audio do odtwarzania..
Kliknij ten przycisk, by wprowadziã tryb PTZ i wyúwietliã panel sterujàcy
kamery PTZ. Szczegóùy podano w rozdziale "5.2.2 Panel sterujàcy PTZ".
5.2.1Przeùàcznik kanaùów
Kanaù wideo 1~4
Wyúwietlanie sekwencyjne
Wyúwietlenie poczwórne
5.2.2Panel sterujàcy PTZ
Menu kamery
Enter
W
W
W
W
w
w
~
m
m
w
m
w
m
m
w
w
m
W
W
m m
m
m
m
m
m
m
m
m
m
W
m
m
m
M
w
w
DVR534
Digitale Video Recorder H.264
D
D
EINLEITUNG
Dieser digitale 4-Kanal-Echtzeit-Videorekorder maximiert die Videoqualität und
minimiert die Dateigröße (Erweiterung der Speicherkapazität) anhand der H.264
Videokomprimierungstechnologie. Der Rekorder verfügt über eine 500GB
Festplatte. Sie können die Programmaufzeichnungen bis zu 8 Wochen im Voraus
einstellen. Zur raschen Datensicherung dient Ihnen der USB-Anschluss. Zudem ist
auch eine Netzwerk-Sicherung möglich. Der Recorder verfügt auch über
Fernbedienung und USB Maussteuerung für einfache Bedienung.
BEDIENUNGSANLEITUNG
1.1 FRONTBLENDE (Abbildung 1)
1
LED-Anzeigen
-
Die folgenden LEDs sind AN, wenn:
a
HDD
: HDD liest oder aufzeichnet.
b
ALARM : Ein Alarm ausgelöst wird (nicht bei allen Modellen inklusive).
c
TIMER : Die zeitgesteuerte Aufnahme an ist.
d
PLAY
: Im Wiedergabezustand.
e
POWER : Der DVR angeschaltet ist.
2
(
/ +) /
(
/ -) /
( ) /
( )
-
Eine dieser vier Tasten drücken, um hoch / runter / nach links / nach rechts zu
gehen.
-
Drücken Sie im Wiedergabemodus diese Tasten, um die Wiedergabe der Datei
zu unterbrechen ( ) / anzuhalten ( ) / zurückzuspulen ( ) / vorzuspulen
( ).
-
Drücken Sie im Einstellmodus
/
, um die Einstellung im Menü zu ändern.
3
MENU
-
Drücken, um in den DVR-Menümodus zu gelangen bzw. den Modus zu
verlassen.
4
ENTER
-
Drücken, um die Eingabe zu bestätigen.
5
LIST
Für die Schnellsuche der aufgezeichneten Dateien in vier Ereignislisten
drücken.
6
PLAY
-
Drücken Sie diese Taste zur Wiedergabe des aufgezeichneten Videos.
7
SLOW
-
Drücken Sie diese Taste im Wiedergabemodus, um die aufgezeichnete Datei
langsam abzuspielen.
8
ZOOM
-
Zum Vergrößern des Bildes des ausgewählten Kanals im FRAME-Modus oder
FELD-Aufzeichnungsmodus drücken
9
SEQ
-
Für die Vollbildanzeige aller Kanäle nacheinander, beginnend mit CH1, drücken.
Wenn der letzte Kanal angezeigt wird, wird der Vorgang ab CH1 wiederholt.
„SEQ" nochmals drücken, um diesen Modus zu verlassen.
10
-
Diese Taste zum Anzeigen des 4-Kanal-Displaymodus drücken.
11 1 / 2 / 3 / 4
-
Eine dieser Tasten drücken, um den anzuzeigenden Kanal auszuwählen.
12 SUCHEN
-
Zum Aufrufen des Zeitsuchmenüs drücken. Den gewünschten Zeitbereich
einstellen und „START" wählen, um den aufgezeichneten Videoclip während der
vorgegebenen Zeit abzuspielen.
13 AUDIO (SLOW + ZOOM) (1a)
-
Diese beiden Tasten gleichzeitig drücken, um die Live- oder Wiedergabesounds
der Tonkanäle auszuwählen.
14 PTZ (SEQ +
) (1b)
-
Diese beiden Tasten gleichzeitig drücken, um in den PTZ-Steuermodus
(Schwenken/Neigen/Vergrößern) zu gelangen bzw. diesen zu verlassen.
15 USB-Anschluss
-
An der Vorderseite befinden sich zwei USB Ports, einer zum Anschließen Ihrer
USB Maus für die Maussteuerung und der andere zum Anschließen des USB
Flash-Laufwerks für die Videosicherung.
Hinweis:Zwei USB Mäuse oder zwei USB Flash-Laufwerke dürfen an der
Vorderseite nicht angeschlossen werden.
1.2 RÜCKWAND (Abbildung 2)
1
VIDEO IN (für Kanal 1-4)
-
Anschluss für Videoquellen (z.B. Kameras).
2
VIDEO OUT
-
Anschluss an den Hauptmonitor für Videoausgang.
3
AUDIO IN (für Kanal 1-4)
-
Anschluss an Audioquellen (z.B. mit Audiofunktionen ausgestattete Kameras).
4
AUDIO OUT
-
Anschluss an ein Audiogerät (z.B. Monitor oder Lautsprecher).
5
VGA
-
Direkter Anschluss an einen LCD-Monitor.
6
EXTERNAL I/O
-
Schieben Sie den mitgelieferten 9PIN DSUB in diesen Anschluss, um externe
Geräte anschließen zu können (externer Alarm, PTZ-Kamera, etc.).
-
Genaue I/O-Anschluss PIN-Konfiguration siehe Bedienungsanleitung auf der
CD-ROM.
7
LAN
-
Internetanschluss durch LAN-Kabel.
8
DC 19V
-
Anschluss an den mitgelieferten Adapter.
9
NETZSCHALTER
-
Mit „I" einschalten und mit „O" ausschalten.
2. ANSCHLÜSSE UND EINSTELLUNGEN
2.1 Anschließen der Kamera
Die Kameras müssen VOR dem Einschalten des DVR angeschlossen und mit Strom
versorgt werden. Der DVR erkennt das Videosystem der angeschlossenen
Kamera(s) (NTSC / PAL) automatisch und wechselt zum richtigen System.
-
Schließen Sie die Kamera an die angegebene Stromquelle an und verbinden
Sie den Kamera-Videoausgang anhand eines Koaxialkabels oder anhand von
RCA-Leitungen mit BNC-Anschlüssen mit dem DVR-Videoeingang.
-
Schließen Sie den Audio-Ausgang der Kamera anhand eines Koaxialkabels oder
anhand von RCA-Leitungen mit BNC-Anschlüssen an den DVR-Audio-Eingang
an.
2.2 Einschalten des Gerätes
Dieses Gerät darf nur mit der auf dem Etikett des Herstellers angegebenen
Stromquelle betrieben werden. Schließen Sie das angegebene AC-Netzkabel an
das Netzteil und an eine Steckdose an. Die LED „
" ist an. Das Hochfahren des
Systems dauert etwa 45 Sekunden.
Hinweis:Damit Ihr DVR richtig funktioniert und konstant läuft, wird die
Verwendung einer unterbrechungsfreien Stromversorgung (USV)
empfohlen (optional).
2.3 Hauptmenü
Die MENÜ Taste drücken oder den Bildschirm irgendwo mit der rechten Maustaste
anklicken, um das Hauptmenü wie folgt anzuzeigen und zum Verlassen nochmals
die MENÜ Taste drücken oder rechts klicken.
SCHNELLSTART
Anklicken, um Statusanzeige, Bildeinstellungen
und Datum & Zeit einzustellen.
DATUM EINSTELLEN
Anklicken, um Datumsanzeige und Sommerzeit
einzustellen.
SYSTEM
Anklicken, um die Systemkonfigurationen
einzustellen.
EREIGNISINFORMATION
Anklicken, um das Ereignissuchmenü
aufzurufen.
VORABKONFIGURATION
Anklicken, um KAMERA, DETEKTION, ALARM,
NETZWERK, SNTP, DISPLAY, AUFZEICHNUNG
und FERNBEDIENUNG einzustellen.
ZEITPLAN EINSTELLEN
Anklicken, um Aufzeichnungs- und
Detektionstimer anzuzeigen.
2.4 Einstellung von Datum und Zeit
Vor Inbetriebnahme des DVR bitte zuerst Datum und Zeit an Ihrem DVR einstellen.
Die „MENÜ" Taste drücken (oder mit der rechten Maustaste anklicken) und das
Passwort eingeben, um in die Menüliste zu gelangen. Das Standard Administrator
Passwort lautet 0000. Den Cursor auf „SCHNELLSTART" bewegen und das
Speichern von Datum und Zeit kann in der „ZEIT EINSTELLEN" Menüliste
eingestellt werden.
Hinweis: Bitte ändern Sie das Datum oder die Zeit des DVR NICHT nach der
Aktivierung der Aufnahmefunktion. Andernfalls werden die
aufgezeichneten Daten durcheinander gebracht und Sie können die
zu sichernde aufgezeichnete Datei nicht mehr per Zeitsuche finden.
Wurde das Datum/die Zeit versehentlich gelöscht während die
Aufnahmefunktion aktiviert war, wird es empfohlen, alle HDD-
Daten zu löschen und die Aufzeichnung erneut zu starten.
Hinweis: Laden Sie den DVR vor der ersten Inbetriebnahme mindestens 48
Stunden ununterbrochen auf, nachdem Sie das Datum und die Zeit
eingestellt haben.
Kliknij, aby przeùàczyã na kanaù w
widoku peùnoekranowym.
2.5 Festplatte löschen
Vor Erstinbetriebnahme des DVR wird empfohlen, sämtliche Daten auf der
Kliknij tu, celem wyúwietlenia kaýdego
Festplatte zu löschen, um zu gewährleisten, dass die aufgezeichneten Daten nicht
kanaùu na peùnym ekranie, jeden po
mit den vorher auf der Festplatte gespeicherten Daten vermischt werden. Die
drugi, poczàwszy od CH1. Po
„MENÜ" Taste drücken (oder mit der rechten Maustaste anklicken), um das
wyúwietleniu ostartniego ekranu,
Hauptmenü anzuzeigen und „SYSTEM" wählen, dann „SYSTEM INFO" wählen, dann
ponownie rozpocznie od Ch1.
„HDD LÖSCHEN" wählen und die HDD, die gelöscht werden soll, auswählen. Der
DVR wird neu gestartet, sobald die HDD Daten gelöscht sind.
Naciúnij, by uzyskaã tryb
jednoczesnego wyúwietlania 4
2.6 Einrichtung des Passworts
kanaùów.
Die „MENÜ" Taste drücken (oder mit der rechten Maustaste anklicken) und das
Passwort eingeben, um zur Menüliste zu gelangen. Dann den Cursor auf „SYSTEM"
bewegen, um das Systemmenü aufzurufen. Im Menü„EXTRAS" die „SETUP" Taste
für ADMINISTRATOR PASSWORT wählen und die „EINGABE" Taste drücken, um das
Kliknij tu, by wejúã do menu
Untermenü zum Erstellen des Passworts (vier Ziffern) aufzurufen. Das Standard
gùównego kamery. Szczegóùy
Administrator Passwort lautet 0000.
dotyczàce kaýdego menu kamery
naleýy szukaã w pordæczniku
3. GRUNDLEGENDE BEDIENUNG
uýytkownika tej kamery.
3.1 Live-Video-Seite
Kliknij tu, aby potwierdziã wybór /
Sie sehen den Live-Bildschirm mit den Zustandssymbolen:
wejúã
m
Symbol
Funktion
Symbol
Funktion
Wiedergabe
m
Live Audiokanal
Audiokanal
(1~4)
(1~4)
m
m
m
m
Digitaler Zoom
Digitaler Zoom
m
ein
aus
Netzwerk nicht
Mit Internet
m
angeschlossen
verbunden
USB Flash-
USB Maus
Laufwerk /
angeschlossen
Gerät
m
angeschlossen
m
Tastensperre
PTZ Modus ein
m
Administrator
Benutzer
m
Aufzeichnung
Alarm
3.2 Aufzeichnung
m
Manuelle Aufzeichnung
Wenn der DVR eingeschaltet und eine HDD installiert ist, ist manuelle
Aufzeichnung die Standardeinstellung.
Ereignisaufzeichnung
Wenn der Bewegungsmelder oder Alarm eingeschaltet ist, wird das Bewegungs-
oder Alarmsymbol für alle Bewegungs- oder Alarmereignisse auf dem Bildschirm
m
m
angezeigt.
Timeraufzeichnung
m
m m
Wenn Timeraufzeichnung eingeschaltet ist, wird das Timeraufzeichnungssymbol
m
auf dem Bildschirm angezeigt.
HDD Überschreiben
m
Standardmäßig ist die HDD Überschreibfunktion auf EIN gestellt und das Symbol
für HDD Überschreiben wird auf dem Bildschirm angezeigt.
3.3 Wiedergabe
w
Drücken Sie auf dem DVR-Bedienfeld die „PLAY" Taste, spielt das Gerät das zuletzt
aufgezeichnete Video ab.
Hinweis:Es müssen mindestens 8192 Bilder von aufgezeichneten Daten
vorliegen, damit die Wiedergabe korrekt ablaufen kann. Ist dies nicht
der Fall, stoppt das Gerät die Wiedergabe. Werden die Bilder pro
Sekunde (IPS) z.B. auf 30 eingestellt, sollte die Aufnahmezeit
mindestens 237 Sekunden (8192 Bilder / 30 IPS) betragen, damit die
Wiedergabe korrekt erfolgen kann.
1- Vorspulen/Zurückspulen
Im Wiedergabemodus können Sie bei diesem Gerät die Geschwindigkeit zum
Vor- und Zurückspulen erhöhen:
Einmal „ " drücken, um die 4-fache Vorspulgeschwindigkeit zu erreichen und
zweimal drücken, um die 8-fache Vorspulgeschwindigkeit zu erreichen. Die
Höchstgeschwindigkeit beträgt 32.
Einmal „ " drücken, um die 4-fache Rückspulgeschwindigkeit zu erreichen
und zweimal drücken, um die 8-fache Rückspulgeschwindigkeit zu erreichen.
Die Höchstgeschwindigkeit beträgt 32.
Hinweis:Während der Wiedergabe wird die Bildgröße der aufgezeichneten
Daten (FRAME, FIELD oder CIF) auf dem Bildschirm angezeigt.
2- Wiedergabe / Pause
„ " Drücken, um die Wiedergabe anzuhalten.
Im Pausenmodus:
„ " Taste einmal drücken, um ein Einzelbild vorwärts zu gelangen.
„ " Taste einmal drücken, um ein Einzelbild rückwärts zu gelangen.
3- Stopp
Zum Anhalten der Videowiedergabe anklicken.
4- Langsame Wiedergabe
Drücken Sie die „SLOW" Taste für eine Wiedergabe mit 1/4-facher
Geschwindigkeit. Zweimal drücken, um bei der Wiedergabe 1/8 der
Geschwindigkeit zu erzielen.
5- Vorige / Nächste Stunde (nur mit der Maus)
Anklicken, um zum vorigen / nächsten Zeitintervall in einer Stunde zu
springen.
6- Audiowiedergabe
„SLOW" + „ZOOM" drücken, um den Live- oder Wiedergabesound des
Tonkanals auszuwählen.
Live-Audio des 1., 2., 3. oder 4. Tonkanals
Wiedergabe-Audio des 1., 2., 3. oder 4. Tonkanals
Kein Tonkanal ausgewählt.
3.4 Suche
Für die Schnellsuche der aufgezeichneten Dateien in den vier Ereignislisten
drücken: AUFZEICHNUNGSLISTE / BEWEGUNGSLISTE / ALARMLISTE /
TIMERLISTE, oder VOLLSTÄNDIGE LISTE wählen, um alle Ereignisprotokolle
anzuzeigen.
Für die Schnellsuche der gewünschten Zeit „SCHNELLSUCHE" wählen. Den
gewünschten Zeitbereich einstellen und „Start" wählen, um den aufgezeichneten
Videoclip während der vorgegebenen Zeit abzuspielen.
4. INFRAROT-FERNBEDIENUNG (Bild 3)
Funktionen der Schaltknöpfe auf der Fernbedienung:
1
Preset Preset drücken, um die Standardpunkte auf der PTZ-Kamera
einzustellen. „ " / „ " drücken, um den Cursor zu bewegen. „ENTER" Taste
drücken, um in das Untermenü zu gelangen und die Auswahl zu bestätigen.
Drücken Sie die „Camera Menu" Taste, um in den Menümodus zu gelangen.
Änderung bestätigen und das Menü verlassen.
2
CAMERA Drücken Sie zur Steuerung der PTZ-Kamera diese Taste und die
Nummer des Kanals, an den die PTZ-Kamera angeschlossen ist.
3
Zoom max / Zoom min Mit diesen Tasten den optischen Zoom der PTZ
Kamera heran/heraus an die maximale / minimale Größe anpassen.
4
Zoom + / Zoom – Verwenden Sie diese Tasten, um das Verhältnis des
optischen Heran-/Herauszoomens der PTZ-Kamera anzupassen.
5
Auto Drücken Sie diese Taste zur Eingabe des automatischen Schwenkmodus
der PTZ-Kamera.
6
Camera Menu Drücken Sie diese Taste, um in das Hauptmenü der PTZ-
Kamera zu gelangen.
7
ID Diese Taste hat für diese DVR Version keine Funktion.
8
Digital Zoom Drücken Sie diese Taste, um das Bild des gewählten DVR-Kanals
(2-facher Zoom) zu vergrößern.
9
- Audio CH + Verwenden Sie diese beiden Tasten zur Auswahl des Live- oder
Wiedergabesounds der DVR-Tonkanäle.
10 Ganze Sequenz / Vierersequenz Drücken Sie die Taste „ganze Sequenz" zur
Anzeige aller Kanäle nacheinander, beginnend bei K1 bis zum letzten Kanal.
Drücken Sie die Taste „Vierersequenz", um 4 Kanäle gleichzeitig anzuzeigen.
11 - / + Drücken Sie diese beiden Tasten zur Änderung der Einstellungen in
diesem Menü.
12
(Pause) /
(Stopp) Drücken Sie die „ " Taste, um die Video-Wiedergabe
anzuhalten. Erneut drücken, um fortzufahren.
Drücken Sie die „ " Taste, um die Video-Wiedergabe zu stoppen und in den
Live-Modus des DVR zurückzukehren.
13
(Vorspulen) /
(Zurückspulen) Drücken Sie die „ " Taste zum
Zurückspulen der Wiedergabedatei. Drücken Sie die „ " Taste zum Vorspulen
der Wiedergabedatei.
14
(Play) Im Video-Wiedergabemodus drücken, um mit der Wiedergabe der
zuletzt aufgenommenen Datei zu beginnen.
15 List Zur Schnellsuche der aufgenommenen Dateien nach Ereignis drücken, um
alle Ereignislisten anzuzeigen.
16 DVR Menu Drücken, um in das Hauptmenü des DVR zu gelangen.
17 Auswahltasten für die Kanäle Drücken Sie die „16CH", „9CH" oder „4CH"
Taste, um den 16 / 9 / 4 Kanal-Anzeigemodus auszuwählen.
18 SNAP Befindet sich der DVR nicht im Menümodus, schließen Sie ein USB-
Flash-Laufwerk an und drücken Sie diese Taste, um zur Speicherung des
aktuellen Live-Videobilds auf dem angeschlossenen SB-Flash-Laufwerk einen
Schnappschuss zu machen.
19 F1 (Disc-Fach öffnen) Diese Taste hat für diese DVR Version keine Funktion.
20 F2 (Tastensperre) Zur automatischen Sperrung der DVR-Tasten drücken.
21 F3 (R.E.T.R.) Drücken, um nach 3/5/10 Minuten die Fernaufzeichungsfunktion
zu aktivieren.
22 Slow Zur Wiedergabe des zuletzt aufgenommenen Videos des DVR drücken.
Einmal drücken, um 1/4 der Geschwindigkeit zu erreichen und zweimal
drücken, um 1/8 der Geschwindigkeit zu erreichen.
23 DVR/PC Diese Taste hat für diese DVR Version keine Funktion.
24 Nummernauswahltasten Drücken Sie diese Tasten zur Auswahl der
Nummern / Kanäle.
25 UP / DOWN / L / R / ENTER Drücken Sie eine der Richtungstasten „UP",
„DOWN", „L" oder „R", um den Cursor hoch / runter / nach links / nach rechts
zu bewegen oder um die Bewegung der PTZ-Kamera zu steuern. Drücken Sie
die „ENTER" Taste zur Bestätigung der Auswahl bzw. um in den Untermenü-
Modus zu gelangen.
26 LCD Einst. Diese Taste hat für diese DVR Version keine Funktion.
Hinweis:Da dies eine Universal-Fernbedienung ist, sind für dieses DVR-Modell
nicht alle Funktionen verfügbar.
5. USB Maussteuerung
5.1 Die Maus anschließen
Die USB Maus an einen der USB Ports an der Vorderseite des DVR anschließen und
überprüfen, ob ein Maussymbol auf dem Bildschirm erscheint, das anzeigt, dass
die USB Maus gefunden wurde. Die Maus bewegen, um das DVR Passwort mit dem
Passwortziffernblock einzugeben. Das Standard Administrator Passwort lautet
0000. Der Status wird von „Tastensperre" auf „Administrator" geändert und die
Quickmenüleiste wird an der linken Seite des Bildschirms angezeigt.
5.2 Quickmenüleiste
Auf die Pfeilmarkierung bewegen, um die Quickmenüleiste zu erweitern und die
fünf Funktionen folgendermaßen anzuzeigen:
Klicken, um das Kanalschalter-Eingabefeld anzuzeigen und den
gewünschten Kanal auszuwählen. Für Details bitte in „5.2.1 Kanalschalter"
nachschlagen.
Klicken, um das Wiedergabe-Eingabefeld anzuzeigen und anklicken, um
den zuletzt aufgezeichneten Videoclip abzuspielen oder die Suchliste
aufzurufen. Für Details bitte in „3.3 Wiedergabe" nachschlagen.
Zuerst auf den gewünschten Kanal schalten und klicken, um den
Heranzoomen-Modus aufzurufen. In diesem Modus den roten Rahmen
unten links am Bildschirm anklicken und auf die Stelle ziehen, die Sie
betrachten wollen. Zum Verlassen dieses Modus auf x klicken.
Klicken, um den gewünschten Audiokanal auszuwählen. Im Livemodus
können nur Live Audiokanäle gewählt werden. Im Wiedergabemodus
können Wiedergabe-Audiokanäle gewählt werden.
Klicken, um den PTZ Modus aufzurufen und das PTZ Kamera-Eingabefeld
anzuzeigen. Für Details bitte in „5.2.2 PTZ Eingabefeld" nachschlagen.
5.2.1Kanalschalter
Video Kanal 1~4 Klicken, um auf den gewünschten Kanal im
Vollbildmodus zu schalten.
Sequenzanzeige
Klicken, um jeden Kanal im Vollbildmodus
nacheinander, beginnend mit CH1, anzuzeigen.
Wenn der letzte Kanal angezeigt wird, wird der
Vorgang ab CH1 wiederholt.
Quad Anzeige
Drücen, um den 4-Kanal Anzeigemodus
anzuzeigen.
5.2.2PTZ Control Panel
Kameramenü
Klicken, um das Kamera-
Hauptmenü aufzurufen. Für
Details über jedes Kameramenü
bitte in der jeweiligen
Bedienungsanleitung
nachschlagen.
Eingabe
Klicken, um die Auswahl zu
bestätigen / das Menü aufzurufen.
Symbol
Funktion
Auf/Ab/Links/Rechts
Klicken, um Ihre Auswahl auf / ab
/ links / rechts zu bewegen oder
die Einstellungen ändern.
Audiokanal aus
Heran- / Herauszoomen max.
Klicken, um das Bild vollständig zu
vergrößern / herauszoomen, um
das Bild auf seine Originalgröße
Timeraufzeichn
zurückzustellen.
ung
Heran- / Herauszoomen Klicken
um das Bild heran-
/herauszuzoomen.
HDD
Fokus nah / fern
Klicken, um den Fokus des Bildes
überschreiben
einzustellen.
Automatikmodus
Klicken, um die Automatikfunktion
MiHDD
überschreibent
zu aktivieren. Vor dem Anwenden
LAN verbunden
dieser Funktion muss eine
spezielle Funktion zugeordnet
werden, die aktiviert wird, sobald
auf „AUTO" geklickt wird. Für
Sequenz
Details bitte in der
Bedienungsanleitung der PTZ
Kamera nachschlagen.
Bewegung
Voreinstellungspunkt
Klicken, um den PTZ
Voreinstellungspunkt, den Sie
betrachten möchten, aufzurufen.
TIPPS
-
Es ist nicht möglich, einen Videoausgang gleichzeitig an einem mit „MONITOR"
verbundenen Monitor und einem mit „VGA" verbundenen Monitor zu haben. Ein
Monitor, der mit dem VGA Ausgang verbunden ist, setzt den Compositausgang
außer Kraft.
-
Läuft der DVR nicht, wenn Sie eine beliebige Taste drücken, befinden Sie sich
möglicherweise im „Tastensperre" Modus. Drücken Sie eine beliebige Taste und
geben Sie das Passwort zum Verlassen dieses Modus ein.
-
Formatieren Sie das USB-Flash-Laufwerk vor dem Betrieb als FAT32 Format.
-
Es müssen mindestens 8192 Bilder von aufgezeichneten Daten vorliegen,
damit die Wiedergabe korrekt ablaufen kann. Ist dies nicht der Fall, bricht der
DVR die Wiedergabe ab.
-
Lassen Sie nach dem Login den Webbrowser ActiveX oder das Applet in der
Popup-Mitteilung zum Betrachten der DVR-Bilder über das Netzwerk anhand
des IE-Webbrowsers zu.
*** VOLLSTÄNDIGES HANDBUCH: Siehe CD, nicht alle Sprachen
verfügbar.

Verwandte Anleitungen für ELRO DVR534


Inhaltszusammenfassung für ELRO DVR534
- Seite 1 SAFETY AND MAINTENANCE INSTRUCTIONS VEILIGHEIDS- EN ONDERHOUDSINSTRUCTIES SPECIFICATIONS DVR534 Video System : NTSC / PAL (auto detection) Video Compression Format : H.264 Video Input (Composite video signal 1 Vp-p 75Ù BNC) : 4 Channels Digitale Video Recorder H.264 Video Output (Composite video signal 1 Vp-p 75Ù...
- Seite 2 INLEIDING om goed terugspelen mogelijk te maken. In andere gevallen stop het INTRODUCTION Note : il doit y avoir au moins 8192 images de données enregistrées pour la INTRODUCCIÓN 3.3 Reproducción apparaat met terugspelen. Als bijvoorbeeld de IPS niet is ingesteld lecture pour fonctionner correctement.
- Seite 3 SAFETY AND MAINTENANCE INSTRUCTIONS VEILIGHEIDS- EN ONDERHOUDSINSTRUCTIES SPECIFICATIONS DVR534 Video System : NTSC / PAL (auto detection) Video Compression Format : H.264 Video Input (Composite video signal 1 Vp-p 75Ù BNC) : 4 Channels Digitale Video Recorder H.264 Video Output (Composite video signal 1 Vp-p 75Ù...
- Seite 4 BEVEZETÉS Megjegyzés: A megfelelõ lejátszáshoz legalább 8192 képnyi felvett adatra INTRODUCERE Puteþi creþte viteza derulãrii rapide înainte þi înapoi a acestui aparat. UVOD U režimu reprodukcije: Ez a 4-csatornás, valós idejû digitális videofelvevõ a H.264 tömörítési technika van szükség, ellenkezõ esetben a DVR megállítja a lejátszást. Acest aparat video digital cu 4 înregistrare maximizeazã...