Inhaltsverzeichnis
Werbung
Verfügbare Sprachen
Verfügbare Sprachen
Werbung
Inhaltsverzeichnis
Fehlerbehebung

Verwandte Anleitungen für DeLonghi ECAM20 11 Serie


Inhaltszusammenfassung für DeLonghi ECAM20 11 Serie
- Seite 1 De’Longhi Appliances via Seitz, 47 31100 Treviso Italia www.delonghi.com...
- Seite 2 ECAM20.11X - 21.11X - 22.11X KOFFIEAUTOMAAT MÁQUINA DE CAFÉ MAQUINA DE CAFÉ ΜΗΧΑΝΗ ΤΟΥ ΚΑΦΈ KAFFEMASKIN KAFFEMASKIN KAFFEMASKINE KAHVINKEITIN КОФЕМАШИНА КОФЕ ДЕМДЕУ ҚҰРЫЛҒЫСЫ KÁVÉFŐZŐGÉP KÁVOVAR KÁVOVAR EKSPRES DO KAWY КАФЕМАШИНА APARAT DE PREPARAT CAFEA KAHVE MAKINESI...
- Seite 3 pag. 6 pág. 21 pág.36 σελ. 51 sid. 67 sid. 82 sid. 97 siv. 112 стр. 127 143-бет 161-old. str. 176 str. 190 str. 205 стр. 220 pag. 235 say. 250...
- Seite 5 0,5 L...
-
Seite 7: Inhaltsverzeichnis
SOMMARIO 12. PREPARAZIONE DEL CAPPUCCINO ..... 13 12.1 Pulizia del cappuccinatore dopo l’uso ..14 1. AVVERTENZE FONDAMENTALI PER LA 13. PREPARAZIONE DELL’ACQUA CALDA ..14 SICUREZZA ..........7 14. PULIZIA ........... 14 2. AVVERTENZE DI SICUREZZA ......8 14.1 Pulizia della macchina .........14 2.1 Simbologia utilizzata nelle presenti 14.2 Pulizia del circuito interno della macchina ..15 istruzioni ........... -
Seite 8: Avvertenze Fondamentali Per La
1. AVVERTENZE FONDAMENTALI PER LA SICUREZZA • L’apparecchio non può essere utilizzato da persone (incluso i bambini) con ridotte ca- pacità fisiche, sensoriali o mentali o con mancanza di esperienza e di conoscenza, a meno che non siano sorvegliati o istruiti all’utilizzo in sicurezza dell’apparecchio da una persona responsabile per la loro sicurezza. -
Seite 9: Avvertenze Di Sicurezza
2. AVVERTENZE DI SICUREZZA Quando l’apparecchio è in funzione, il ripiano poggia tazze po- trebbe scaldarsi. 2.1 Simbologia utilizzata nelle presenti istruzioni 2.2 Uso conforme alla destinazione Le avvertenze importanti recano questi simboli. È assolutamen- Questo apparecchio è costruito per la preparazione del caffè e te necessario osservare queste avvertenze. -
Seite 10: Descrizione
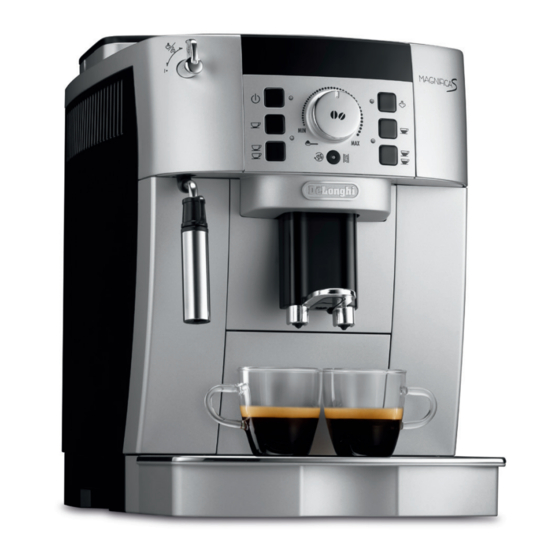
4. DESCRIZIONE 4.4 Descrizione delle spie 4.1 Descrizione dell’apparecchio Spia lampeggiante: indica che la macchina si sta riscaldando. (pag. 3 - A ) A1. Pannello di controllo A2. Manopola regolazione del grado di macinatura Indica che l’apparecchio sta erogando 1 o 2 tazze A3. -
Seite 11: Installazione Dell'apparecchio
5.2 Installazione dell’apparecchio 3. Collegare l’apparecchio alla rete elettrica e premere l’inter- ruttore generale (A8), posto sul retro dell’apparecchio, in Attenzione! posizione I (fig. 3). Quando si installa l’apparecchio si devono osservare le seguenti 4. Sul pannello di controllo lampeggia la spia (B7-fig. -
Seite 12: Autospegnimento
3. Per riattivare la funzione, premere nuovamente il tasto Pericolo Scottature! (a sinistra della manopola B6): la spia ECO si accende fissa. Durante il risciacquo, dai beccucci dell’ e rogatore del caffè (A12) 4. Premere il tasto (B8, a destra della manopola B6) fuoriesce un po’... -
Seite 13: Rimozione E Sostituzione Del Filtro Addolcitore
In questo caso, ripetere l’installazione dal punto 8. premere e mantenere premuto il tasto di cui si vuole mo- Ora il filtro è attivato e si può procedere all’uso della macchina. dificarela lunghezza finchè lampeggia la relativa spia e la macchina inizia ad erogare il caffè: rilasciare quindi il tasto;... -
Seite 14: Consigli Per Un Caffè Più Caldo
11.5 Consigli per un caffè più caldo • Durante l’uso, sul pannello di controllo potranno accender- si delle spie il cui significato è riportato nel capitolo “19. Per ottenere un caffè più caldo, si consiglia di: Significato delle spie”. • effettuare un risciacquo, prima dell’... -
Seite 15: Pulizia Del Cappuccinatore Dopo L'uso
13. PREPARAZIONE DELL’ACQUA CALDA gorifero (circa 5° C). Per evitare di ottenere un latte poco schiumato, oppure con bolle grosse, pulire sempre il cap- Pericolo Scottature! puccinatore (A18) come descritto nel paragrafo seguente Non lasciare la macchina senza sorveglianza quando viene ero- “Pulizia cappuccinatore dopo l’uso”. -
Seite 16: Pulizia Del Contenitore Dei Fondi Di Caffè
14.5 Pulizia dell’interno della macchina • dell’acqua calda, per qualche secondo, ruotando la mano- pola acqua calda/vapore (A19) in pos. I. Pericolo di scosse elettriche! Nota Bene : Prima di eseguire le operazioni di pulizia delle parti interne, la • E’... -
Seite 17: Decalcificazione
15. DECALCIFICAZIONE Attenzione! Decalcificare la macchina quando sul pannello di controllo (B) PULIRE L’INFUSORE SENZA USARE DETERSIVI PERCHÉ PO- lampeggia la spia (B5) (fig. 31). TREBBERO DANNEGGIARLO. Attenzione! • Prima dell’uso, leggere le istruzioni e l’ e tichettatura del 5. Immergere per circa 5 minuti l’infusore in acqua e poi ri- decalcificante, riportate sulla confezione del decalcificante sciacquarlo sotto il rubinetto. -
Seite 18: Programmazione Della Durezza
valli per rimuovere i residui di calcare dall’interno della La macchina è preimpostata in fabbrica sul livello 4 di durezza. macchina. Volendo è possibile programmare la macchina in base alla reale Dopo circa 25 minuti, l’apparecchio interrompe la decalcificazio- durezza dell’acqua in utenza nelle varie regioni, rendendo così meno frequente l’... -
Seite 19: Significato Delle Spie
18. SMALTIMENTO Capacità max. serbatoio acqua: 1,8 L Dimensioni LxPxH: 240x430x350 mm Non smaltire l’apparecchio insieme ai rifiuti domestici Lunghezza cavo: 1150 mm ma consegnatelo ad un centro di raccolta differenzia- Peso: 8,9 Kg ta ufficiale. Capacità max. contenitore chicchi: 250 g L’apparecchio è... - Seite 20 La macinatura è troppo fine e Ripetere l’ e rogazione caffè e ruotare la mano- quindi il caffè fuoriesce troppo pola di regolazione macinatura (A2-fig. 10) di lentamente o non esce del tutto. uno scatto verso il numero 7 in senso orario, mentre il macinacaffè...
-
Seite 21: Risoluzione Dei Problemi
20. RISOLUZIONE DEI PROBLEMI In basso sono elencati alcuni possibili malfunzionamenti. Se il problema non può essere risolto nel modo descritto, si deve contattare l’Assistenza Tecnica. PROBLEMA POSSIBILE CAUSA RIMEDIO Il caffè non è caldo. Le tazze non sono state pre-riscaldate. Riscaldare le tazze risciacquandole con dell’ac- qua calda (N.B: si può... - Seite 22 ECAM20.11X - 21.11X - 22.11X BEAN TO CUP ESPRESSO AND CAPPUCCINO MACHINE Instruction for use...
- Seite 25 CONTENTS 14. CLEANING..........14 14.1 Cleaning the machine .........14 1. FUNDAMENTAL SAFETY WARNINGS .....5 14.2 Cleaning the machine’s internal circuit ..14 14.3 Cleaning the coffee grounds container ..14 2. SAFETY WARNINGS ........6 14.4 Cleaning the drip tray and condensate tray .14 2.1 Symbols used in these instructions ....6 14.5 Cleaning the inside of the coffee machine ...15 2.2 Designated use ..........6...
-
Seite 26: Fundamental Safety Warnings
1. FUNDAMENTAL SAFETY WARNINGS • The appliance is not intended for use by persons (including children) with reduced physical, sensory or mental capabilities, or lack of experience and knowledge, unless they have been given supervision or instruction concerning use of the appliance by a person responsible for their safety. -
Seite 27: Safety Warnings
instruction concerning use of the appliance in a safe way and if they understand the hazards involved. • Children shall not play with the appliance. • Always unplug the appliance when left unattended and before assembly, taking apart or cleaning. Surfaces marked with this symbol become hot during use (the symbol is present in certain models only). -
Seite 28: Troubleshooting And Repairs
3.2 Troubleshooting and repairs button: to make 1 cup of long espresso coffee In the event of problems, first try and resolve them by reading button: to make 2 cups of long espresso coffee. the information given in the “20. Explanation of lights” and “19. Troubleshooting”... -
Seite 29: Installing The Appliance
not use the appliance if it is visibly damaged. Contact De’Longhi Customer Services. 5.2 Installing the appliance Important! When you install the appliance, you should respect the follow- ing safety warnings: • The appliance could be damaged if the water it contains freezes. -
Seite 30: Turning The Appliance On
softener filter (C4) as described in the section “10. WATER Important! SOFTENER FILTER”. If your model is not provided with a fil- To avoid damaging the appliance, do not place the main switch ter, you can request one from De’Longhi Customer Services. (fig. -
Seite 31: Water Softener Filter (Certain Models Only)
4. Press the button (on the right of the dial) to confirm the selection. The ECO light goes off. Please note: When in energy saving mode, a few seconds may elapse before the first coffee is delivered as the appliance must heat up again. 10. -
Seite 32: Selecting The Quantity Of Coffee In The Cup
appliance will grind and therefore the strength of the coffee obtained. Turn the dial to MIN for an extra mild coffee and to MAX for an extra strong coffee. Please note: • The first time you use the appliance, you will need to make Please note: a number of coffees to identify the correct dial position The grinding adjustment dial (A2) must only be turned when... -
Seite 33: Making Coffee Using Coffee Beans
• set a hotter coffee temperature (see the section “Setting • At the end of delivery, to increase the quantity of coffee the temperature”). in the cup, just press one of the coffee icons (within 3 seconds). 11.6 Making coffee using coffee beans Please note: Important! For hotter coffee, see the section “11.5. -
Seite 34: Making Cappuccino
12. MAKING CAPPUCCINO 12.1 Cleaning the cappuccino maker after use Always clean the cappuccino maker (A18) after use to avoid the Danger of burns! build-up of milk residues and prevent the spouts from clogging. During preparation steam is given off. Take care to avoid scalds. 1. -
Seite 35: Cleaning
1. Place a container under the cappuccino maker (A18) (as • Remove the drip tray (A17) (fig. 24), empty and clean. close as possible to avoid splashes). 2. Turn the steam dial (A19) to the I position. Delivery begins. 3. Stop by turning the steam dial to the 0 position. Please note: If “Energy Saving”... -
Seite 36: Cleaning The Inside Of The Coffee Machine
14.8 Cleaning the pre-ground coffee funnel 4. Replace the drip tray and grounds container. Check regularly (about once a month ) that the pre-ground 14.5 Cleaning the inside of the coffee machine coffee funnel (A6) is not blocked. If necessary, remove coffee deposits. -
Seite 37: Descaling
2. Empty the drip tray (A17) and grounds container (A13) and Please note: put both back in the machine. If the infuser is difficult to insert, before insertion, adapt it to the 3. Empty the water tank (A9) completely and remove the right size by pressing the two levers shown in fig. -
Seite 38: Setting Water Hardness
11. Place the container used to collect the descaler solution empty under the cappuccino maker and coffee spouts (fig. Level 1 36). 12. Turn the hot water/steam dial to the I position to begin Level 2 rinsing. Hot water is delivered first from the cappuccino maker, to continue and end with the coffee spouts. -
Seite 39: Explanation Of Lights
19. EXPLANATION OF LIGHTS LIGHT DISPLAYED POSSIBLE CAUSE REMEDY The hot water/steam dial must be Turn the hot water/steam dial. turned (A19) Insufficient water in the tank (A9). Fill the tank with water and/or insert it correct- ly, pushing it as far as it will go until it clicks into place. - Seite 40 LIGHT DISPLAYED POSSIBLE CAUSE REMEDY The "pre-ground coffee" function Place pre-ground coffee in the funnel or dese- has been selected without placing lect the “pre-ground” function. any pre-ground coffee in the fun- nel (A6). FLASHING The machine must be descaled. The descaling procedure described in the sec- tion “15.
-
Seite 41: Troubleshooting
20. TROUBLESHOOTING Below is a list of some of the possible malfunctions. If the problem cannot be resolved as described, contact Customer Services. PROBLEM POSSIBLE CAUSE REMEDY The coffee is not hot. The cups were not preheated. Warm the cups by rinsing them with hot water. Please note: the hot water or rinse function can be used. - Seite 45 De’Longhi Appliances via Seitz, 47 31100 Treviso Italia www.delonghi.com...
- Seite 46 INHALT 12.1 Reinigung des Milchaufschäumers nach dem Gebrauch .............14 1. GRUNDLEGENDE SICHERHEITSHINWEISE ..7 13. ZUBEREITUNG VON HEISSWASSER .... 15 2. SICHERHEITSHINWEISE ......8 14. REINIGUNG ..........15 2.1 In der Anleitung verwendete Symbole ..8 14.1 Reinigung der Kaffeemaschine ....15 2.2 Bestimmungsgemäßer Gebrauch ....8 14.2 Reinigung des Innenraums der 2.3 Bedienungsanleitung ........8 Kaffeemaschine...........15...
-
Seite 47: Grundlegende Sicherheitshinweise
1. GRUNDLEGENDE SICHERHEITSHINWEISE • Das Gerät darf nicht von Personen (einschließlich Kindern) mit eingeschränkten Kennt- nissen hinsichtlich seiner Handhabung bzw. einer Beeinträchtigung der Sinnesorgane verwendet werden, es sei denn, sie werden von einer Person überwacht, die für ihre Sicherheit verantwortlich ist, oder im sicheren Gebrauch des Gerätes geschult. •... -
Seite 48: Sicherheitshinweise
2. SICHERHEITSHINWEISE Achten Sie darauf, dass Sie nicht mit Wasserspritzern oder hei- ßem Dampf in Berührung kommen. Wenn das Gerät in Betrieb 2.1 In der Anleitung verwendete Symbole ist, könnte die Tassenablage heiß werden. Wichtige Hinweise sind durch die nachfolgenden Symbole gekennzeichnet. -
Seite 49: Beschreibung
4. BESCHREIBUNG 4.3 Beschreibung der Zubehörteile (Seite 2 - C) 4.1 Beschreibung des Gerätes C1. Reaktionsstreifen “Total Hardness Test” (Seite 3- A) C2. Messlöffel A1. Bedienblende C3. Flasche Entkalkungsmittel A2. Drehknopf zur Einstellung des Mahlgrads C4. Wasserenthärterfilter A3. Tassenablage 4.4 Beschreibung der Kontrolllampen A4. -
Seite 50: Erste Schritte
5. ERSTE SCHRITTE blieben sind. Es wird auf jeden Fall garantiert, dass diese Kaffeemaschine neu ist. 5.1 Kontrolle des Gerätes • Wir empfehlen Ihnen, die Wasserhärte so bald wie möglich Überzeugen Sie sich nach dem Auspacken, dass das Gerät unver- je nach individuellem Bedarf einzustellen, indem Sie, wie sehrt ist und keine Zubehörteile fehlen. -
Seite 51: Ausschalten Des Gerätes
schale gesammelt wird. Achten Sie darauf, dass Sie nicht mit 3 Stunden Wasserspritzern in Berührung kommen. 3. Die Taste (B8, rechts von Drehknopf) drücken, um • Zum Einschalten des Gerätes die Taste drücken die Auswahl zu bestätigen; die Kontrolllampen erlöschen. (B2-Abb. -
Seite 52: Ausbau Und Auswechseln Des
der Filter hat eine Lebensdauer von zwei Monaten bei norma- lem Gebrauch des Gerätes; wenn das Gerät mit eingesetztem Filter nicht betrieben wird, hält er max. drei Wochen. 3. Den Tank (A9) aus der Kaffeemaschine nehmen und mit Wasser befüllen (Abb. 1A). 4. -
Seite 53: Einstellung Der Temperatur
Wenn die Kaffeeausgabe zu langsam 1. Geben Sie die Kaffeebohnen in den Kaffeebohnenbehälter oder gar nicht erfolgt, eine Position (A7-Abb. 14). weiter nach rechts drehen. 2. Stellen Sie unter die Ausgüsse des Kaffeeauslaufs: Um hingegen einen stärkeren Kaffee - eine Tasse, wenn Sie einen Kaffee möchten (Abb. 15); auszugeben und eine bessere Crema - zwei Tassen, wenn Sie zwei Kaffees möchten (Abb. -
Seite 54: Zubereitung Von Cappuccino
• Füllen Sie nie vorgemahlenen Kaffee bei ausgeschalte- 5. Nach einigen Sekunden, sobald die Kontrolllampe ter Kaffeemaschine ein, um zu vermeiden, dass er im blinkt, den Ausgabeknopf für Dampf (A19) auf I drehen Innern der Maschine verstreut wird und die Maschine (Abb. -
Seite 55: Zubereitung Von Heisswasser
13. ZUBEREITUNG VON HEISSWASSER • 2 oder 3 Spülvorgänge, indem die Taste (B5) ge- drückt wird. Verbrennungsgefahr! • Heißwasser für einige Sekunden, indem der Ausgabeknopf Lassen Sie die Kaffeemaschine bei der Heißwasserausgabe nicht für Heißwasser/Dampf (A19) auf I gestellt wird. unbeaufsichtigt. -
Seite 56: Reinigung Des Innenraums Der Kaffeemaschine
4. Die Abtropfschale, zusammen mit dem Kaffeesatzbehälter, 1. Stellen Sie sicher, dass die Maschine sich korrekt ausge- wieder einsetzen; schaltet hat (siehe Kapitel “7. Ausschalten des Geräts“). 2. Den Wassertank (A9) herausziehen. 3. Die Serviceklappe der Brühgruppe (A10) auf der rechten 14.5 Reinigung des Innenraums der Seite öffnen (Abb. -
Seite 57: Entkalkung
7. Die Taste (B5) drücken und mindestens 5 Sekun- den lang gedrückt halten, um die Eingabe der Lösung zu bestätigen und die Entkalkung zu starten: die Kontrolllampe in der Taste bleibt permanent eingeschaltet, um den Start des Entkalkungsprogramms anzuzeigen. 8. Die Kontrolllampe für Dampf blinkt, um anzuzeigen, dass der Ausgabeknopf für Heißwasser/Dampf (A19) auf Igedreht werden muss. -
Seite 58: Programmierung Der Wasserhärte
16. Den Ausgabeknopf für Heißwasser/Dampf auf I stellen: 16.2 Wasserhärte einstellen das Gerät nimmt den Spülvorgang nur aus dem Milchauf- 1. Vergewissern Sie sich, dass die Kaffeemaschine ausge- schäumer wieder auf. schaltet ist (jedoch mit dem Hauptschalter auf Position I 17. -
Seite 59: Bedeutung Der Kontrolllampen
18. BEDEUTUNG DER KONTROLLLAMPEN ANGEZEIGTE KONTROLLLAMPE MÖGLICHE URSACHE ABHILFE Der Ausgabeknopf für Dampf/ Den Ausgabeknopf für Heißwasser/Dampf Heißwasser (A19) muss gedreht drehen. werden Das Wasser im Tank (A9) ist nicht Den Wassertank befüllen und korrekt einset- ausreichend. zen, indem er fest nach unten gedrückt wird, bis das Einrasten zu hören ist. - Seite 60 Wenn der Wasserenthärterfilter Etwas Wasser aus dem Milchaufschäumer (C4) vorhanden ist, könnte eine laufen lassen, indem der Ausgabeknopf für Luftblase in den Kreislauf frei- Dampf/Heißwasser (A19) auf I gedreht wird, gesetzt worden sein, welche die bis es gleichmäßig fließt (Abb.5). Ausgabe verhindert.
-
Seite 61: Lösung Der Probleme
19. LÖSUNG DER PROBLEME Nachstehend werden einige mögliche Betriebsstörungen aufgelistet. Wenn das Problem nicht auf die beschriebene Weise gelöst werden kann, wenden Sie sich bitte an den technischen Kundendienst. PROBLEM MÖGLICHE URSACHE ABHILFE Der Kaffee ist nicht heiß. Die Tassen wurden nicht vorgewärmt. Die Tassen durch Ausspülen mit warmem Wasser vorwärmen (unter Verwendung der Funktion Heißwasser) oder einen Spülvorgang... - Seite 62 SOMMAIRE 12. PRÉPARATION DU CAPPUCCINO ....29 12.1 Nettoyage de la buse à cappuccino après 1. CONSIGNES FONDAMENTALES POUR LA l'emploi ............29 SÉCURITÉ ..........22 13. PRÉPARATION DE L'EAU CHAUDE ....29 2. CONSIGNES DE SÉCURITÉ ......23 14. NETTOYAGE ..........29 2.1 Symboles utilisés dans ce mode d'emploi ...23 14.1 Nettoyage de la machine ......29 2.2 Utilisation conforme à...
-
Seite 63: Sécurité
1. CONSIGNES FONDAMENTALES POUR LA SÉCURITÉ • L'appareil peut être utilisé par des personnes (enfants compris) aux capacités physi- ques, sensorielles ou mentales réduites ou par des personnes sans l'expérience ni les connaissances nécessaires, à condition d'être surveillées ou après avoir reçu les ins- tructions relatives à... -
Seite 64: Consignes De Sécurité
2. CONSIGNES DE SÉCURITÉ 2.2 Utilisation conforme à la destination 2.1 Symboles utilisés dans ce mode d'emploi d'utilisation Les consignes importantes portent ces symboles. Il faut impéra- Cet appareil est construit pour la préparation du café et pour tivement respecter ces consignes. chauffer des boissons. -
Seite 65: Description
4. DESCRIPTION 4.4 Description des voyants 4.1 Description de l'appareil Voyant clignotant : indique que la machine est en cours de chauffage. (page 3 - A ) A1. Panneau de contrôle A2. Manette de réglage du degré de mouture Indique que la machine est en train de préparer A3. -
Seite 66: Installation De L'appareil
5.2 Installation de l'appareil 4. Sur le panneau de contrôle, le voyant (B7-fig. 4) clignote. Attention ! 5. Mettre la manette vapeur (A19) sur I (fig. 5) : l’appareil fait Lors de l'installation de l'appareil, respecter les consignes de couler de l'eau à travers la buse à cappuccino, puis s'éteint. sécurité... -
Seite 67: Arrêt Automatique
Prêter attention à ne pas venir en contact avec les éclaboussures 3. Pour réactiver la fonction, appuyer de nouveau sur la (à gauche de la manette B6) : le voyant ECO d'eau. touche s'allume et reste fixe. Pour éteindre l'appareil, appuyer sur la touche (B2-fig. -
Seite 68: Retrait Et Remplacement Du Filtre Adoucisseur
9. Faire couler au moins 500 ml d'eau, puis remettre la ma- café court, en appuyant sur la touche (B3) (≃40ml) ; nette vapeur sur 0. café allongé, en appuyant sur la touche (B8)(≃120ml) Nota Bene : deux cafés courts, en appuyant sur la touche (B4) ;... -
Seite 69: Conseils Pour Un Café Plus Chaud
manette B6) et la maintenir appuyée jusqu'à l'allumage Nota Bene : des voyants sur le panneau de contrôle ; • Pendant que la machine fait le café, la distribution peut 2. Appuyer sur la touche jusqu'à sélectionner la tempé- être interrompue à tout moment en appuyant sur l'une des rature souhaitée : touches de distribution. -
Seite 70: Préparation Du Cappuccino
12. PRÉPARATION DU CAPPUCCINO 1. Placer un récipient sous la buse à cappuccino et faire couler un peu d'eau pendant quelques secondes en tournant la Risque de brûlures ! manette vapeur (A19) sur I (fig. 5). Repositionner ensuite Durant ces préparations de la vapeur sort : faire attention à ne la manette vapeur sur 0 pour interrompre la distribution pas se brûler. -
Seite 71: Nettoyage Du Circuit Interne De La Machine
l’infuseur (A11), accessible après avoir ouvert le volet de ou sur le côté. Ceci peut endommager la machine, le plan d'ap- service (A10) ; pui ou la zone autour. panneau de contrôle (A1). Le bac de récupération est doté d’un flotteur (A16) (rouge) qui Attention ! indique le niveau d’... -
Seite 72: Nettoyage De L'entonnoir Pour L'introduction Du Café Pré-Moulu
14.8 Nettoyage de l’entonnoir pour l’introduction du café pré-moulu Grand levier Petit levier Contrôler périodiquement (environ une fois par mois) que l’ e ntonnoir pour l’introduction du café pré-moulu (A6) n’ e st pas bouché. Si nécessaire, enlever les dépôts de café. 14.9 Nettoyage de l'infuseur L’infuseur (A11) doit être nettoyé... -
Seite 73: Programmation De La Dureté De L'eau
Placer sous la buse à cap- (s'il a été précédemment enlevé) puis remplir le réservoir puccino (A18) et le bec jusqu’au niveau MAX avec de l’ e au fraîche et le remettre à verseur de café (A12) un sa place : le voyant vapeur clignote. -
Seite 74: Réglage De La Dureté De L'eau
16.2 Réglage de la dureté de l'eau 17. DONNÉES TECHNIQUES 1. S'assurer que la machine soit éteint (mais branchée au Tension : 220-240 V~ 50/60 Hz max. 10A réseau électrique et avec l'interrupteur général positionné Puissance absorbée : 1450 W sur I);... - Seite 75 La mouture est trop fine et le café Répéter la distribution du café et tourner d'un sort par conséquent trop lente- cran, vers le numéro 7 et dans le sens horaire, la ment ou ne sort pas du tout. manette de réglage de la mouture (A2-fig. 10), pendant que le moulin à...
-
Seite 76: Résolution Des Problèmes
20. RÉSOLUTION DES PROBLÈMES Ci-après sont énumérés certains dysfonctionnements possibles. Si le problème ne peut pas être résolu de la façon décrite, contacter l'Assistance Technique. PROBLEME CAUSE POSSIBLE SOLUTION Le café n'est pas chaud Les tasses n'ont pas été préchauffées. Chauffer les tasses en les rinçant avec de l'eau chaude (N.B.