Bluetti PowerOak AC200P Benutzerhandbuch
Tragbare powerstation
Vorschau ausblenden
Andere Handbücher für PowerOak AC200P:
- Benutzerhandbuch (40 Seiten) ,
- Bedienungsanleitung (40 Seiten) ,
- Bedienungsanleitung
Inhaltsverzeichnis
Verfügbare Sprachen
Verfügbare Sprachen
Inhaltsverzeichnis

Verwandte Anleitungen für Bluetti PowerOak AC200P


Inhaltszusammenfassung für Bluetti PowerOak AC200P
- Seite 1 TRAGBARE Powerstation AC200P Benutzerhandbuch...
- Seite 2 Contents Deutsch……………………………………………………………….…..01-13 English……………………………………………………………….…...16-30...
- Seite 3 Anschluss für duales Netzteil (Female 7909 auf XT90) √ Trolley √ Tragetasche Standard (im Zubehör enthalten) Optional (nicht inbegriffen, separat bei Bluetti erhältlich) Das Bild dient nur als Referenz, Die Bilder dienen nur als Rferenz. Das tatsächliche Aussehen kann abweichen.
-
Seite 4: Funktionsübersicht
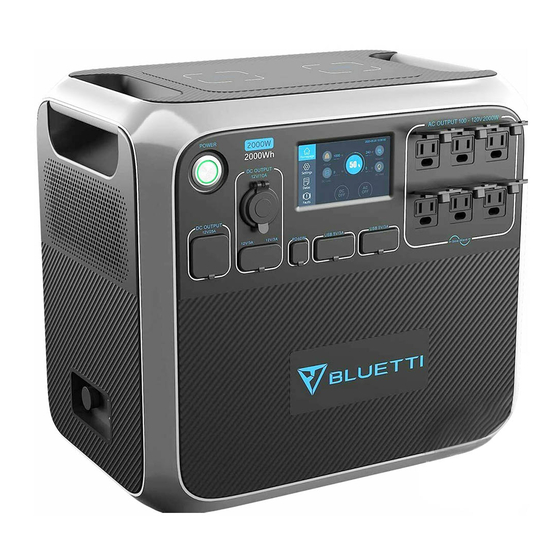
2. Funktionsübersicht Ein- / Ausschalter 12V / 25A Ausgang 12V / 10A Zigarettenanzünderanschluss 12V / 3A Ausgang USB Typ-C-Ladeanschluss PV / Kfz-Eingang LCD-Touch-Display 10. Netzteilanschluss 4 x USB-Ausgang 11. 2xSchnurloses Ladepad QI 2 x SchuKo Ausgang Anmerkung: AC steht für Wechselstrom PV steht für Photovoltaik (Solar Ladung) DC steht für Gleichstrom Kfz steht für Zigarettenanzünder... -
Seite 5: Starten Und Herunterfahren
3. Starten und Herunterfahren (1) Starten: Drücken Sie kurz den Netzschalter, die Kontrollleuchte leuchtet und die Maschine ist im Bereitschaftsmodus. (2) Herunterfahren: Halten Sie den Netzschalter länger als 2 Sekunden gedrückt. Die Bereitschaftsanzeige erlischt und die Maschine ist ausgeschaltet. Die Statuswarnung der LED-Anzeige BMS Überstrom oder Kurzschluss-Schutz Kontrollleuchte erlischt nach kurzem Blinken BMS-Starttimeout Kontrollleuchte blinkt ständig... - Seite 6 (Abbildung 1) Schaltfläche „Hauptmenü“ g. Datum/Uhrzeit Schaltfläche "Einstellungen" h. Anzeigetaste für DC-Lastinformationen Schaltfläche "Daten" i. DC EIN/AUS-Taste Schaltfläche "Fehler" j. AC EIN/AUS-Taste PV / Kfz Ladeanzeige k. Netzteil Ladeanzeige Schaltfläche für die BMS-Informationen l. AC-Lastinformationsanzeige (2) Klicken Sie auf die Einstellungsschaltfläche im Hauptmenü (Abbildung 1), um das Einstellungsmenü...
- Seite 7 Datum und Uhrzeit: 2000-00-00、00:00:00 Bitte prüfen Sie "Datum und Uhrzeit" mindestens einmal alle 2 Wochen. (Abbildung 2) (Abbildung 3) (3) Kehren Sie zum Hauptmenü zurück (Abbildung 1), klicken Sie auf die Schaltfläche " Daten" um die Seite auf Abbildung 4 aufzurufen. ●...
-
Seite 8: Aufladen Des Produkts
Mit Klicken auf die Schaltfläche "BMS Maintenance" können Sie die Informationen des ● BMS anzeigen lassen. Auf diesen Teil kann auch direkt über das Hauptmenü zugegriffen werden. Klicken Sie auf die Schaltfläche "Fehlerspeicher" um alle aufgezeichneten Fehlercodes ● zu sehen. Kehren Sie gemäß des Fehlercodes zum Hauptmenü zurück und klicken Sie auf die Fehlerschaltfläche um die entsprechenden Fehlerinformationen anzeigen zu lassen. - Seite 9 (2) Lademodus 2: Von den Sonnenkollektoren ● Wählen Sie ein Solarpanel mit Arbeitsspannung DC 35V-150V. ● Verbinden Sie das Solarpanel über das mitgelieferte Solarladekabel mit dem Produkt. ● Plug-and-Play-Aufladen: Nach dem Anschließen der Solaranlage wird der Ladevorgang automatisch gestartet, auch wenn das Gerät ausgeschaltet war. ●...
-
Seite 10: Entladung
(5) Lademodus 5: Von Blei-Säure-Batterien ● Verbinden Sie das mitgelieferte Ladekabel mit den positiven und negativen Polen der Batterie (Achten Sie dabei auf richtige Polung! Der rote Anschluss ist der Positivpol und der schwarze Anschluss ist der negative Pol). ● Wählen Sie im Einstellungsmenü, wie in Abbildung 2 gezeigt, die DC Eingangsquelle „Kfz“... -
Seite 11: Beispiele Für Lasten
9. Beispiele für Lasten (1) 12V / 25A, 12V / 3A, Zigarettenanzünderanschluss, USB- und Typ-C-Ausgangsanschluss sind geeignet für die meisten Produkte auf dem Markt. Einige Produkte können aber den Überstromschutz auslösen, wenn sie einen hohen Anlaufstrom benötigen. (2) Die Leistung elektrischer Produkte, die für die Wechselstromerzeugung verwendet werden, sollte weniger als 2000 W betragen.Je nach den technischen Gegebenheiten verschiedener elektrischen Produkte, können auch einige Klimaanlagen, Motoren und andere Geräte, die einen hohen Startstrom benötigen, den Überlastschutz auslösen. -
Seite 12: Spezifikation
11. Spezifikation Ausgabe Nennausgangsleistung 2000W Mindest Nennspannung 100-120Vac Maximale Nennspannung 220-240Vac < 5% Effizienz > 88% (R-Last) AC-Ausgang 2000W<Last<2500W, 2min; Überlastfähigkeit 2500W<Load, sofort Kurzschlussschutz Übertemperaturschutz Last<1500W, Max.45dB; Lärm Max>1500W, Max.54dB Nennspannung Nennstrom Gleichstrom 12V/25A Überlastleistung 330W<Last, 2 Sek. Kurzschlussschutz Nennspannung DC12V/10A Nennstrom Ausgang... - Seite 13 Eingabe Eingangsspannung 100-240VAC AC-Aufladen Maximale Ladespannung 58.8 VDC maximale Ladeleistung 500W Eingangsspannung 11.5V-14.4V/23V-28.8V Kfz-Eingang Eingangsstrom 8.2A Eingangsspannung 35V-150V 12A (auf 12A begrenzt, wenn Eingangsstrom Sonnenkollektor der Strom 12A überschreitet) Maximale Eingangsleistung 700W Bemerkungen: 1. Das PV-Laden hat eine automatische Ladeaktivierungsfunktion (Plug-and-Play): wenn ein Panel mit dem Produkt verbunden ist, startet das Gerät automatisch die Ladefunktion so lange, wie die Sonnenenergie zum Laden ausreicht.
-
Seite 14: Lagerungs- Und Wartungshinweise
12. Lagerungs- und Wartungshinweise (1) Bitte laden Sie die Maschine vor der Lagerung vollständig auf. (2) Schalten Sie alle Netzschalter aus. (3) Um die Ladekapazität der Batterie zu erhalten, laden und verwenden Sie sie bitte mindestens alle 6 Monate. (4) Sorgen Sie für eine ordnungsgemäße Belüftung während des Gebrauchs oder der Lagerung und halten Sie sie von brennbaren Gegenständen, Materialien oder Gase fern. - Seite 15 (4) Stellen Sie sicher, dass die Belastung die Leistungsgrenzen des Produktes einhält, d.h. die Last liegt innerhalb des maximalen und minimalen Bereichs jeder Ausgangsschnittstelle. Wenn die oben genannten Schritte das Problem nicht lösen, wenden Sie sich bitte an den Verkäufer um Hilfe zu erhalten. 15.
- Seite 16 Lindwurmstr. 114, 80337 München, Deutschland Handelsregister Nr.: HRB 261852 MwSt Nr.: DE342113007 Tel: 0049 421 87852946 E-Mail: logi@bluetti.de UK Kontakt: Firmenname: POWEROAK ENERGY UK CO., LTD Adresse: Unit 2 Northgate, Bolsover Busines Park, Bolsover, S44 6BD Handelsregister Nr.: 396829822 MwSt Nr.:...
- Seite 17 AC200P Portable Power Station User Manual...