Medion LIFE S47018 Bedienungsanleitung
Wifi aktion-camcorder
Vorschau ausblenden
Andere Handbücher für LIFE S47018:
- Bedienungsanleitung (422 Seiten) ,
- Bedienungsanleitung (162 Seiten)
Inhaltsverzeichnis
Werbung
Verfügbare Sprachen
Verfügbare Sprachen
Quicklinks
Werbung
Inhaltsverzeichnis

Verwandte Anleitungen für Medion LIFE S47018


Inhaltszusammenfassung für Medion LIFE S47018
- Seite 1 All manuals and user guides at all-guides.com WIFI Action Camcorder WIFI-actiecamcorder Caméscope d´action Wi-Fi ® ® MEDION LIFE S47018 (MD 87205) Bedienungsanleitung Istruzioni per l‘uso Mode d´emploi Handleiding User Manual 26.08.2014 15:51:41 26.08.2014 15:51:41...
-
Seite 2: Inhaltsverzeichnis
All manuals and user guides at all-guides.com Inhaltsverzeichnis Zu dieser Anleitung ..........5 1.1. In dieser Anleitung verwendete Symbole und Signalwörter ..........6 1.2. Bestimmungsgemäßer Gebrauch ....8 1.3. Hinweise zur Konformität ........ 9 Sicherheitshinweise ..........10 2.1. Allgemein ............10 2.2. Hinweis zur Netztrennung......11 2.3. - Seite 3 All manuals and user guides at all-guides.com 4.3. Rückseite ..............32 4.4. Unterseite ............33 4.5. Seitenansicht ............34 4.6. Armband-Fernbedienung ......35 Inbetriebnahme ..........36 5.1. Akku einsetzen ..........36 5.2. Laden des Akkus ..........38 5.3. microSD-Karten einsetzen und herausnehmen ...........41 5.4. Camcorder ein- und ausschalten ....42 Erste Schritte .............43 6.1.
- Seite 4 All manuals and user guides at all-guides.com 7.6. Betriebs-Modus wechseln ......54 7.7. WLAN (WiFi) nutzen .........54 OLED-Display ............57 Videos aufzeichnen ..........61 Fotos aufnehmen ..........62 10.1. Serienaufnahme (Burst) ........63 10.2. Zeitraffer-Aufnahme (Time Lapse) .....64 10.3. Selbstauslöser (Timer) ........65 Einstellungsmenü ..........66 11.1. Video-Auflösung ..........71 11.2.
- Seite 5 All manuals and user guides at all-guides.com 11.11. Töne (Beep) ............95 11.12. Automatische Abschaltung (Auto-Off ) ..98 11.13. Datum / Zeit ............. 100 11.14. RF ................. 103 11.15. Auf Werkseinstellung zurücksetzen ..106 Armband-Fernbedienung ......108 12.1. LED-Indikatoren ..........110 12.2. Batterie wechseln ..........
-
Seite 6: Zu Dieser Anleitung
All manuals and user guides at all-guides.com 1. Zu dieser Anleitung Lesen Sie vor Inbetriebnahme die Sicherheits- hinweise aufmerksam durch. Beachten Sie die Warnungen auf dem Gerät und in der Bedie- nungsanleitung. Bewahren Sie die Bedienungsanleitung im- mer in Reichweite auf. Wenn Sie das Gerät verkaufen oder weiter geben, händigen Sie unbedingt auch diese Anleitung und die Ga- rantiekarte aus. -
Seite 7: In Dieser Anleitung Verwendete Symbole Und Signalwörter
All manuals and user guides at all-guides.com 1.1. In dieser Anleitung verwendete Symbole und Signalwörter GEFAHR! Warnung vor unmittelbarer Le- bensgefahr! WARNUNG! Warnung vor möglicher Lebens- gefahr und/oder schweren irre- versiblen Verletzungen! VORSICHT! Hinweise beachten, um Verlet- zungen und Sachschäden zu ver- meiden! 6 von 642... - Seite 8 All manuals and user guides at all-guides.com ACHTUNG! Hinweise beachten, um Sachschä- den zu vermeiden! HINWEIS! Weiterführende Information für den Ge- brauch des Geräts. HINWEIS! Hinweise in der Bedienungsanleitung be- achten! WARNUNG! Warnung vor Gefahr durch elekt- rischen Schlag! Aufzählungspunkt / Information über Ereig- •...
-
Seite 9: Bestimmungsgemäßer Gebrauch
All manuals and user guides at all-guides.com 1.2. Bestimmungsgemäßer Gebrauch Das Gerät ist für Aufnahmen von Videos und Bildern im Digitalformat geeignet. • Das Gerät ist nur für den privaten und nicht für den in- dustriellen/kommerziellen Gebrauch bestimmt. Bitte beachten Sie, dass im Falle des nicht bestimmungs- gemäßen Gebrauchs die Haftung erlischt: •... -
Seite 10: Hinweise Zur Konformität
All manuals and user guides at all-guides.com 1.3. Hinweise zur Konformität Die Kamera erfüllt die Anforderungen der elektromagne- tischen Kompatibilität und elektrischen Sicherheit. Hiermit erklärt die Medion AG, dass das Produkt mit den folgenden europäischen Anforderungen übereinstimmt: • R&TTE Richtline 1999/5/EG •... -
Seite 11: Sicherheitshinweise
All manuals and user guides at all-guides.com 2. Sicherheitshinweise 2.1. Allgemein Dieses Gerät ist nicht dafür bestimmt, durch Personen (einschließlich Kinder) mit einge- schränkten physischen, sensorischen oder geistigen Fähigkeiten oder mangels Erfah- rung und/oder mangels Wissen benutzt zu werden, es sei denn, sie werden durch eine für Ihre Sicherheit zuständige Person beauf- sichtigt oder erhielten von Ihnen Anweisun- gen, wie das Gerät zu benutzen ist. -
Seite 12: Hinweis Zur Netztrennung
All manuals and user guides at all-guides.com GEFAHR! Halten Sie Verpackungsfolien von Kindern fern, es besteht Ersti- ckungsgefahr! 2.2. Hinweis zur Netztrennung • Um die Stromversorgung zu Ihrem Gerät zu unterbrechen, ziehen Sie den Netzad- apter aus der Steckdose. Halten Sie beim Abziehen immer den Netzadapter/Netz- stecker selbst fest. - Seite 13 All manuals and user guides at all-guides.com den Stromverbrauch bei ausgeschaltetem Zustand zu vermeiden. • Steckdosen zum Aufladen des Akkus müssen sich in der Nähe des Gerätes be- finden und leicht zugänglich sein. Verle- gen Sie die Kabel so, dass niemand darauf treten oder darüber stolpern kann.
-
Seite 14: Warnungen
All manuals and user guides at all-guides.com • Verwenden Sie den Netzadapter nicht mehr, wenn das Gehäuse oder die Zulei- tung zum Gerät beschädigt sind. Ersetzen Sie den Netzadapter durch einen gleichen Typs. • Verwenden Sie nur den beiliegenden Netzadapter Model: KSAS0060500100VEU, da es sonst zu Be- schädigungen kommen kann. - Seite 15 All manuals and user guides at all-guides.com • Beim Zerlegen des Geräts besteht die Ge- fahr eines Hochspannungsstromschlags. Prüfungen interner Bauteile, Änderungen und Reparaturen dürfen nur von Fach- kräften vorgenommen werden. Bringen Sie das Produkt zur Prüfung zu einem au- torisierten Service Center.
-
Seite 16: Akkuhinweise
All manuals and user guides at all-guides.com sen) in der Nähe des Gerätes oder darauf • Elektrische Schläge vermeiden • Öffnen Sie niemals das Gehäuse des Gerä- tes, außer zum Einsetzen des Akkus. • Schalten Sie den Camcorder bei Funkti- onsstörungen sofort aus. - Seite 17 All manuals and user guides at all-guides.com Verwenden Sie nur das mitgelieferte USB- Steckernetzteil (Ktec KSAS0060500100VEU) und den mitgelieferten Akku (FJ-SLB-10A) mit der Kamera! Beachten Sie folgende allgemeine Hinweise zum Umgang mit Akkus: • Halten Sie Akkus von Kindern fern. Falls ein Akku verschluckt wurde, suchen Sie umgehend einen Arzt auf.
- Seite 18 All manuals and user guides at all-guides.com sauber sind, und reinigen Sie sie gegebe- nenfalls. • Legen Sie grundsätzlich nur den mitgelie- ferten Akku ein. • Achten Sie beim Einlegen des Akkus auf die Polarität (+/–). • Lagern Sie den Akku an einem kühlen, trockenen Ort.
- Seite 19 All manuals and user guides at all-guides.com • Werfen Sie den Akku nicht ins Feuer, schließen Sie ihn nicht kurz und nehmen Sie ihn nicht auseinander. • Setzen Sie den Akku niemals übermäßi- ger Wärme wie durch Sonnenschein, Feu- er oder dergleichen aus! •...
-
Seite 20: Vorsichtsmaßnahmen
All manuals and user guides at all-guides.com • Bei niedrigen Temperaturen kann die Ka- pazität des Akkus durch die Verlangsa- mung der chemischen Reaktion deutlich abnehmen. Halten Sie für Aufnahmen bei kaltem Wetter einen zweiten Akku an ei- nem warmen Ort (z.B. Hosentasche) be- reit. - Seite 21 All manuals and user guides at all-guides.com • Trocken lagern Diese Kamera ist ohne das entsprechen- de Gehäuse nicht wasserdicht und funkti- oniert daher nicht einwandfrei, wenn sie ins Wasser getaucht wird oder wenn Flüs- sigkeiten in das Innere der Kamera gelan- gen.
- Seite 22 All manuals and user guides at all-guides.com zu große Nähe von Geräten, die star- ke elektromagnetische Felder erzeu- gen, beispielsweise Elektromotoren. Star- ke elektromagnetische Felder können zu Fehlfunktionen der Kamera führen oder die Datenaufzeichnung stören. • Zu starke Wärme vermeiden Verwenden oder lagern Sie die Kamera nicht unter Sonneneinstrahlung oder ho- hen Temperaturen.
- Seite 23 All manuals and user guides at all-guides.com bung oder umgekehrt bringen, kann sich im und am Gerät Kondenswasser bilden, das zu Funktionsstörungen und Schäden am Gerät führen kann. Warten Sie mit der Inbetriebnahme, bis sich die Temperatur des Gerätes an die Umgebungstempe- ratur angeglichen hat.
- Seite 24 All manuals and user guides at all-guides.com • Akku nicht entfernen, wenn Daten verar- beitet werden Wenn Bilddaten auf Speicherkarten auf- gezeichnet oder gelöscht werden, kann das Ausschalten der Stromversorgung zu einem Datenverlust führen oder die inter- ne Schaltung bzw. den Speicher beschä- digen.
- Seite 25 All manuals and user guides at all-guides.com • Akkus Bei niedrigen Temperaturen kann die Ak- kukapazität stark nachlassen. Wenn Sie bei kalten Temperaturen fotografieren, halten Sie einen warmen Ersatzakku be- reit. Wenn die Kontakte des Akkus ver- schmutzt sind, reinigen Sie sie mit einem trockenen, sauberen Tuch, oder verwen- den Sie einen Radiergummi, um Rück- stände zu entfernen.
-
Seite 26: Niemals Selbst Reparieren
2.6. Niemals selbst reparieren WARNUNG! Versuchen Sie auf keinen Fall, das Gerät selbst zu öffnen oder zu re- parieren. Es besteht die Gefahr des elektrischen Schlags! • Wenden Sie sich im Störungsfall an das Medion Service Center oder eine andere 25 von 642... -
Seite 27: Wasserdichtheit
All manuals and user guides at all-guides.com geeignete Fachwerkstatt, um Gefährdun- gen zu vermeiden. 2.7. Wasserdichtheit • Die im Zubehör enthaltene Armband- Fernbedienung sowie das Gehäuse in Kombination mit der wasserdichten Ge- häuse-Rückseite sind bis zu einer Tauch- tiefe von 60 Metern wasserdicht •... - Seite 28 All manuals and user guides at all-guides.com 2.7.1. Hinweise vor dem Tauchgang: • Überprüfen Sie das wasserdichte Gehäu- se. Entfernen Sie Schmutz, Sand und an- dere Partikel mit einem trockenen Tuch. • Stellen Sie sicher, dass das Gehäuse keine Kratzer oder Bruchstellen aufweist. •...
-
Seite 29: Über Das Gerät
All manuals and user guides at all-guides.com 3. Über das Gerät 3.1. Lieferumfang Bitte überprüfen Sie die Vollständigkeit der Lieferung und benachrichtigen Sie uns innerhalb von 14 Tagen nach dem Kauf, falls die Lieferung nicht komplett ist. Mit dem von Ihnen erworbenen Produkt haben Sie erhal- ten: •... - Seite 30 All manuals and user guides at all-guides.com • USB-Kabel • USB-Steckernetzteil • Software CD • Bedienungsanleitung und Garantieunterlagen 29 von 642...
-
Seite 31: Geräteübersicht
All manuals and user guides at all-guides.com 4. Geräteübersicht 4.1. Oberseite C W U N á U G T OLED Display G K P 1 C W U -Taste Power/Status LED1 30 von 642... -
Seite 32: Vorderseite
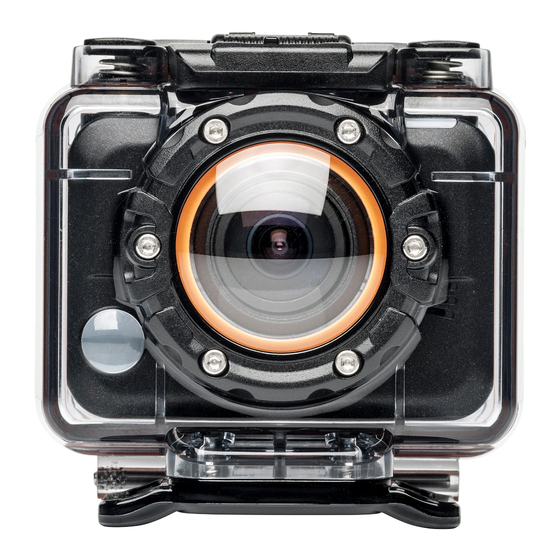
All manuals and user guides at all-guides.com 4.2. Vorderseite Kameralinse Lautsprecher Power/Status/Batterie LED2 31 von 642... -
Seite 33: Rückseite
All manuals and user guides at all-guides.com 4.3. Rückseite Power/Status LED3 Akkufach-Abdeckung 32 von 642... -
Seite 34: Unterseite
All manuals and user guides at all-guides.com 4.4. Unterseite Power/Status LED4 Mikrofon 33 von 642... -
Seite 35: Seitenansicht
All manuals and user guides at all-guides.com 4.5. Seitenansicht Anschluss für externes Mikrofon microUSB-Anschluss microSD-Speicherkarteneinschub mini HDMI-Ausgang 34 von 642... -
Seite 36: Armband-Fernbedienung
All manuals and user guides at all-guides.com 4.6. Armband-Fernbedienung Foto-Taste Grüne LED Video-Taste Rote LED 35 von 642... -
Seite 37: Inbetriebnahme
All manuals and user guides at all-guides.com 5. Inbetriebnahme 5.1. Akku einsetzen Zum Betrieb der Kamera wird der beiligende Lithium-Io- nen Akku benötigt. Schieben Sie den Akkufachdeckeld in Pfeilrichtung und öffnen sie den Deckel. 36 von 642... - Seite 38 All manuals and user guides at all-guides.com Legen Sie den Akku gemäß der Abbildung ein. Drücken Sie den Akku vorsichtig in die Kamera bis er hörbar einrastet. 37 von 642...
-
Seite 39: Laden Des Akkus
All manuals and user guides at all-guides.com Schließen Sie das Batteriefach und drücken Sie es vor- sichtig in Pfeilrichtung, bis es hörbar einrastet. 5.2. Laden des Akkus HINWEIS! Beim Kauf ist der Akku nicht geladen. Sie müs- sen den Akku aufladen bevor Sie die Kamera benutzen. - Seite 40 All manuals and user guides at all-guides.com Schließen Sie die Kamera mit dem mitgelieferten USB- Kabel an den USB-Anschluss Ihres PC oder eines ande- ren Gerätes mit USB-Anschluss an. 39 von 642...
- Seite 41 All manuals and user guides at all-guides.com Um den Akku über das Steckernetzteil zu laden, schlie- ßen Sie das USB-Kabel an die Kamera an. Schließen Sie das andere Ende an den USB-Netzadap- ter an und stecken Sie ihn in die Steckdose. 40 von 642...
-
Seite 42: Microsd-Karten Einsetzen Und Herausnehmen
All manuals and user guides at all-guides.com 5.3. microSD-Karten einsetzen und herausnehmen 5.3.1. Karte einsetzen Schalten Sie ggf. die Kamera aus. Stecken Sie die Speicherkarte, wie abgebildet, in den Kartenschacht. 41 von 642... -
Seite 43: Camcorder Ein- Und Ausschalten
All manuals and user guides at all-guides.com Um die Karte zu entnehmen, drücken Sie die Karte kurz nach unten, um sie zu entriegeln. Die Karte wird ein Stück heraus geschoben und kann entnommen werden. 5.4. Camcorder ein- und ausschalten ... -
Seite 44: Erste Schritte
All manuals and user guides at all-guides.com 6. Erste Schritte 6.1. Camcorder einschalten Drücken Sie die G K P 1 C W U -Taste für etwa 3 Sekun- den, um den Camcorder einzuschalten. Das Display schaltet sich ein und die Kamera befindet sich im Aufnahmemodus. -
Seite 45: Energiesparfunktion
All manuals and user guides at all-guides.com 6.2.1. Energiesparfunktion Sie können die automatische Ausschaltzeit wahlweise auf 1, 3, 5, 10, 30 oder 60 Minuten stellen bzw. komplett ab- schalten. Die Energiesparfunktion ist nicht aktiv während der Auf- nahme von Videoclips. 7. -
Seite 46: Wasserdichtes Gehäuse Verwenden
All manuals and user guides at all-guides.com 7.1.1. Wasserdichtes Gehäuse verwenden Öffnen Sie das wasserdichte Gehäuse, indem Sie gleichzeitig die Arretierung des Spannhebels in Pfeil- richtung schieben und diesen dann aufklappen. Legen Sie die Kamera in das Gehäuse und schließen Sie den Deckel. - Seite 47 All manuals and user guides at all-guides.com Verriegeln Sie das Gehäuse indem Sie den einen Teil des Spannhebels im Deckel einhaken und den ande- ren Teil dann nach unten umlegen bis er einrastet. 46 von 642...
- Seite 48 All manuals and user guides at all-guides.com Je nach Nutzung wählen Sie eine passende Halterung und schieben Sie die Kamerahalterung in die Ausspa- rung bis sie hörbar einrastet. 7.1.2. Position des Adapters verändern Abhängig davon, welche Halterung Sie mit dem wasser- dichten Gehäuse verwenden möchten, können sie die Po- sition des vormontierten Adapters ändern.
-
Seite 49: Gehäuserückseite Austauschen
All manuals and user guides at all-guides.com Sie können nun den Adapter zum Beispiel an der offe- nen Gehäuserückseite montieren. Befestigen Sie hierzu den Adapter mit den dazugehö- rigen vier Schrauben. 7.1.3. Gehäuserückseite austauschen Um die wasserdichte Gehäuserückseite gegen die offene Gehäuserückseite für Aufnahmen mit Ton auszutauschen, gehen Sie bitte vor wie folgt: ... - Seite 50 All manuals and user guides at all-guides.com Ziehen Sie die Gehäuserückseite gerade wie in der Ab- bildung gezeigt ab. Befestigen Sie die offene Gehäuserückseite. 49 von 642...
-
Seite 51: Befestigungsgurt Verwenden
All manuals and user guides at all-guides.com 7.2. Befestigungsgurt verwenden Mit Hilfe des Befestigungsgurtes können Sie das wasser- dichte Gehäuse der Kamera an nahezu jedem Objekt be- festigen. Ziehen Sie den Befestigungsgurt wie auf der Abbil- dung gezeigt durch die Öffnungen des Adapters. 50 von 642... -
Seite 52: Montage Des Zubehörs
All manuals and user guides at all-guides.com 7.3. Montage des Zubehörs Montieren Sie das Zubehör wie auf der Abbildung darge- stellt. 51 von 642... -
Seite 53: Funktionen Der Tasten
All manuals and user guides at all-guides.com 7.4. Funktionen der Tasten Taste Funktion • Drücken und halten für 3 Sekun- den: Camcorder an oder aus schal- ten. • Drücken, um zwischen verschiede- G K P 1 C W U - nen Modi zu wechseln: Video, Foto, Taste WLAN, Serienaufnahme, Zeitraffer,... -
Seite 54: Led-Indikatoren
All manuals and user guides at all-guides.com 7.5. LED-Indikatoren Der Camcorder verfügt über insgesamt vier LED-Indika- toren. Die Power/Status LEDs finden Sie auf der Oberseite, der Unterseite und auf der Rückseite des Camcorders. Sie die- nen dazu, dem Benutzer den Status des Camcorders un- abhängig von der Art der Befestigung in jedem Blickwin- kel anzuzeigen. -
Seite 55: Betriebs-Modus Wechseln
All manuals and user guides at all-guides.com 7.6. Betriebs-Modus wechseln Nach dem Start befindet sich der Camcorder im Video Aufnahme-Modus. Sie können sofort Videos aufzeichnen oder Fotos erstel- len. Drücken Sie die G K P 1 C W U -Taste, um zwischen Vi- deo- und Foto- Modus zu wechseln. - Seite 56 All manuals and user guides at all-guides.com Wenn Sie einen QR-Code-Reader auf Ih- rem Smartphone installiert haben, be- nutzen Sie bitte den nebenstehenden Code um die App herunterladen zu kön- nen. Drücken Sie die G K P 1 C W U -Taste wiederholt um zum WLAN-Modus (WiFi-Mode) zu gelangen.
- Seite 57 All manuals and user guides at all-guides.com Aktivieren Sie WLAN auf Ihrem Smartphone. Suchen Sie den Eintrag „ACTION_CAM_XXXXXX“ (XXXXXX ist ein Platzhalter für die Zeichenfolge, die von der Kamera generiert wird) und verbinden Sie Ihr Smartphone mit diesem Eintrag. ...
-
Seite 58: Oled-Display
All manuals and user guides at all-guides.com 8. OLED-Display Wenn Ihr Camcorder eingeschaltet ist, zeigt das OLED- Display die folgenden Informationen an: Aktueller Zeigt den aktuell eingestellten Modus Modus des Camcorders an. Benutzen Sie diesen Modus, um Videos aufzunehmen. Dieses Symbol zeigt außerdem die aktu- Video Modus ell gewählte Video-Auflösung. - Seite 59 All manuals and user guides at all-guides.com Wählen Sie diese Einstellung aus, um den Camcorder über WLAN mit einem Smartphone zu ver- binden. Videos und Fotos können WLAN dann auf Ihrem Smartphone wie- dergegeben werden. Mit dieser Einstellung werden mit einem Druck auf den Auslöser 10 Fotos in Folge aufgenommen.
- Seite 60 All manuals and user guides at all-guides.com In diesem Modus wird das Foto 10 Sekunden nach dem Drücken Selbstaus- des Auslösers aufgenommen. löser Benutzen Sie diesen Modus um die Voreinstellungen Ihres Cam- corders nach Ihren Bedürfnissen Einstellun- anzupassen. Dieses Symbol zeigt an, welche Funktion Funktion beim Drücken des Aus- lösers ausgeführt wird.
- Seite 61 All manuals and user guides at all-guides.com WIDE/UL- Zeigt die aktuelle Einstellung an: Brennweite Weitwinkel oder Ultra-Weitwinkel (FOV - Field of view) Zeigt den aktuell verbleibenden Speicherplatz auf der Speicher- karte an. Zeigt den aktuellen Akku-Lade- status an. Zeigt die Anzahl der aktuell auf Anzahl der der Speicherkarte gespeicherten Aufnahmen...
-
Seite 62: Videos Aufzeichnen
All manuals and user guides at all-guides.com 9. Videos aufzeichnen Um einen Film aufzunehmen, gehen Sie wie folgt vor: Schalten Sie den Camcorder mit einem langen Druck auf die G K P 1 C W U -Taste ein. 1080P ULTRA ... -
Seite 63: Fotos Aufnehmen
All manuals and user guides at all-guides.com HINWEIS! Wenn ein Video aufgezeichnet wird, werden zwei Dateien mit unterschiedlichen Größen auf der Speicherkarte abgelegt. Die kleinere Datei wird verwendet, um die Videos auf ei- nem Smartphone anzuzeigen. 10. Fotos aufnehmen Um Fotos aufzunehmen, gehen Sie bitte vor wie folgt: ... -
Seite 64: Serienaufnahme (Burst)
All manuals and user guides at all-guides.com HINWEIS! Fotoaufnahmen sind nur mit einer voreinge- stellen Auflösung von 5MP möglich. Diese Auflösung kann nicht verändert werden. 10.1. Serienaufnahme (Burst) Mit der Serienaufnahme werden mit nur einer Betätigung des Auslösers 10 Fotos aufgenommen. ... -
Seite 65: Zeitraffer-Aufnahme (Time Lapse)
All manuals and user guides at all-guides.com 10.2. Zeitraff er-Aufnahme (Time Lapse) In diesem Modus werden Fotos mit voreingestellten Zeit- abständen (1/3/5/10/30/60 Sekunden) aufgenommen. Die Aufnahme stoppt erst nach erneutem Betätigen des Auslösers. Diese aufeinanderfolgenden Bilder werden automatisch kombiniert und in einem Video abgespeichert. Das Video wird bei Anzeige dann schneller abgespielt als herkömm- liche Videos. -
Seite 66: Selbstauslöser (Timer)
All manuals and user guides at all-guides.com Aufgenommene Zeit Anzahl der aufgenommenen Bilder Betätigen Sie den Auslöser erneut, um die Zeitraffer- Aufnahme zu stoppen. 10.3. Selbstauslöser (Timer) In diesem Modus wird das Foto 10 Sekunden nach dem Drücken des Auslösers aufgenommen. ... -
Seite 67: Einstellungsmenü
All manuals and user guides at all-guides.com Drücken Sie den Auslöser. 10 Sekunden nach Betäti- gung des Auslösers wird das Foto aufgenommen. 11. Einstellungsmenü Um die Einstellungen des Camcorders zu verändern, drücken Sie bitte wiederholt auf die G K P 1 C W U -Taste bis sie zum Menüpunkt SETUP gelangen. - Seite 68 All manuals and user guides at all-guides.com Hier können Sie die Zeitabstände zwi- schen den einzelnen Aufnahmen ein- stellen (1/3/5/10/30/60 Sekunden). Zeitraffer Mit dieser Funktion können Sie die Ausrichtung des Camcorders verän- dern. Up/Down Im Loop-Modus aufgenommene Vi- deos ersetzen bei erschöpften Spei- cherplatz das jeweils älteste Video.
- Seite 69 All manuals and user guides at all-guides.com Löschen aufgenommener Videos oder Fotos von der Speicherkarte. Löschen Schließt das aktuelle Menü und kehrt zum vorherigen Screen zurück. Exit Wählen Sie das MORE Menü um Basis- MORE Menü Einstellungen des Camcorders zu ver- ändern.
- Seite 70 All manuals and user guides at all-guides.com Verändert die Bildschirmhelligkeit. Bright Verändert die Lautstärke der Töne. Beep Hier können Sie einstellen, nach wel- cher Zeit sich der Camcorder selbst- ständig abschaltet. Auto-Off Datum/Zeit ändern. Time Auswählen, um den Camcorder mit einer nachträglich erworbenen Arm- band-Fernbedienung zu koppeln.
- Seite 71 All manuals and user guides at all-guides.com Auf Werkseinstellung zurücksetzen. Default Schließt das aktuelle Menü und kehrt zum vorherigen Screen zurück. Exit Auslöser betätigen um einen markier- ten Menüeintrag zu bestätigen. Drücken Sie die G K P 1 C W U -Taste um zu scrollen und Menüeinträge zu mar- kieren.
-
Seite 72: Video-Auflösung
All manuals and user guides at all-guides.com 11.1. Video-Aufl ösung HINWEIS! Wenn ein Video aufgezeichnet wird, werden zwei Dateien mit unterschiedlichen Größen auf der Speicherkarte abgelegt („Dual Stream Recording“). Die kleinere Datei wird verwen- det, um die Videos auf einem Smartphone an- zuzeigen. - Seite 73 All manuals and user guides at all-guides.com SETUP MORE VIDEO Drücken Sie die G K P 1 C W U -Taste wiederholt, um durch die Auflösungs-Optionen zu scrollen. 16:9 Full HD Video, 1080P 960P 720P 1080P (1920x1080, 30fps) 1080P30 4:3 Widest HD Video, 1080P 960P...
- Seite 74 All manuals and user guides at all-guides.com Um das Menü zu verlassen, drücken Sie bitte erneut die G K P 1 C W U -Taste, bis der Eintrag EXIT erscheint und bestätigen sie durch Drücken des Auslösers. EXIT HINWEIS! Fotoaufnahmen sind nur mit einer voreinge- stellen Auflösung von 5MP möglich.
-
Seite 75: Brennweite (Fov - Field Of View)
All manuals and user guides at all-guides.com 11.2. Brennweite (FOV - Field of view) In diesem Menü können Sie die Brennweite einstellen. Drücken Sie die G K P 1 C W U -Taste wiederholt, bis der Eintrag SET (Einstellungen) angezeigt wird. ... - Seite 76 All manuals and user guides at all-guides.com ULTRA WIDE Ultra Weitwinkel PHOTO ULTRA WIDE Weitwinkel PHOTO Betätigen Sie den Auslöser, um eine Option auszuwäh- len. Um das Menü zu verlassen, drücken Sie bitte erneut die G K P 1 C W U -Taste, bis der Eintrag EXIT erscheint und bestätigen sie durch Drücken des Auslösers.
-
Seite 77: Zeitraffer-Einstellungen
All manuals and user guides at all-guides.com HINWEIS! Die Auswahl zwischen Weitwinkel und Ultra Weitwinkel ist nur im Foto-Modus verfügbar. Für Video-Aufnahmen ist immer Ultra Weit- winkel eingestellt. 11.3. Zeitraff er-Einstellungen In diesem Menü können Sie einstellen, wie lange die Pau- sen zwischen den Aufnahmen im Zeitraffer-Modus sind. - Seite 78 All manuals and user guides at all-guides.com SETUP MORE LAPSE Drücken Sie die G K P 1 C W U -Taste wiederholt, um durch die verfügbaren Optionen zu scrollen (1, 3, 5, 10, 30 oder 60 Sekunden). LAPSE Betätigen Sie den Auslöser, um eine Option auszuwäh- len.
-
Seite 79: Up/Down
All manuals and user guides at all-guides.com 11.4. Up/Down Mit der Aktivierung dieses Menüeintrags können Sie auf dem Kopf stehende Videos und Fotos aufnehmen. Diese Funktion ist dann sinnvoll, wenn Sie die Kamera hängend montieren, da dann die aufgenommen Dateien auf dem Fernseher oder Computer mit der richtigen Ausrichtung wiedergegeben werden. - Seite 80 All manuals and user guides at all-guides.com Drücken Sie die G K P 1 C W U -Taste wiederholt, um durch die verfügbaren Optionen zu scrollen (ON oder OFF). Betätigen Sie den Auslöser, um eine Option auszuwäh- len. ...
-
Seite 81: Löschen
All manuals and user guides at all-guides.com 11.5. Löschen Diese Funktion ermöglicht es Ihnen, Dateien auf der Spei- cherkarte zu löschen. Drücken Sie die G K P 1 C W U -Taste wiederholt, bis der Eintrag SET (Einstellungen) angezeigt wird. ... - Seite 82 All manuals and user guides at all-guides.com Löscht die zuletzt aufgenomme- ne Datei. LAST Löscht alle auf der Speicherkarte vorhandenen Dateien. Formatiert die Speicherkarte. FORMAT Betätigen Sie den Auslöser, um eine Option auszuwäh- len. Drücken Sie danach die G K P 1 C W U -Taste, um das Lö- schen zu bestätigen.
-
Seite 83: Diving (Tauchen)
All manuals and user guides at all-guides.com Um das Menü zu verlassen, drücken Sie bitte erneut die G K P 1 C W U -Taste, bis der Eintrag EXIT erscheint und bestätigen sie durch Drücken des Auslösers. EXIT ACHTUNG! Stellen Sie vor dem Löschvorgang si- cher, dass sich keine wichtigen Daten mehr auf der SD Karte befinden. - Seite 84 All manuals and user guides at all-guides.com Markieren Sie den Eintrag SETUP und bestätigen sie durch drücken des Auslösers. Wählen Sie nun den Eintrag DIVING (Tauchen) und betätigen Sie erneut den Auslöser, um in das Unter- menü zu gelangen. DIVING ...
-
Seite 85: Videoaufnahme
All manuals and user guides at all-guides.com 11.6.1. Aktivierter Tauch-Modus (ON) HINWEIS! Bei aktiviertem Tauch-Modus stehen nicht alle Funktionen zur Verfügung, um die Bedienung unter Wasser zu erleichtern. Es stehen folgende Menüs im Tauch-Modus zur Verfügung: VIDEO (1080P/30fps) PHOTO SETUP (Optionen DIVING (ON/OFF), DELETE (LAST/ALL/FORMAT/ EXIT) und EXIT.) Videoaufnahme... -
Seite 86: Fotoaufnahme
All manuals and user guides at all-guides.com Betätigen Sie den Auslöser erneut, um die Aufnahme zu stoppen. Das Display zeigt die Aufnahmelänge des Videos an. 00:02 STOP Fotoaufnahme Drücken Sie die G K P 1 C W U -Taste wiederholt, bis im Display PHOTO angezeigt wird. -
Seite 87: Loop
All manuals and user guides at all-guides.com EXIT 11.7. Loop Die Loop-Funktion erlaubt eine Schleifenaufzeichnung von jeweils 1-minütigen Videoaufnahmen. Das heißt, dass wenn Ihr Speichermedium voll ist, werden die ältesten Vi- deodaten mit den neusten überschrieben. Ohne einge- schaltete Loop-Funktion ist keine Aufnahme bei vollem Speicher möglich. - Seite 88 All manuals and user guides at all-guides.com HINWEIS! Um die Loop-Funktion nutzen zu können, be- nötigen Sie eine SDHC Speicherkarte mit min- destens 800 MB (maximal 32 GB) freiem Spei- cherplatz. HINWEIS! Die einzelnen Videoseqzenzen können nicht zusammenhängend abgespielt werden. Drücken Sie die G K P 1 C W U -Taste wiederholt, bis der Eintrag SET (Einstellungen) angezeigt wird.
- Seite 89 All manuals and user guides at all-guides.com LOOP Drücken Sie die G K P 1 C W U -Taste wiederholt, um durch die verfügbaren Optionen zu scrollen (ON oder OFF). LOOP Um das Menü zu verlassen, drücken Sie erneut die G K P 1 C W U -Taste, bis der Eintrag EXIT erscheint und bestätigen sie durch Drücken des Auslösers.
- Seite 90 All manuals and user guides at all-guides.com HINWEIS! Bei aktivierter Loop-Funktion beginnt die Auf- nahme automatisch, nachdem bei ausge- schalteter Kamera die Stromzufuhr über den AC-Adapter gestartet wird. Die Kamera schal- tet sich ein und die Aufnahme beginnt. Wird die Stromzufuhr unterbrochen, stoppt auch die Aufnahme und die Kamera schaltet sich aus.
-
Seite 91: Osd Up/Down
All manuals and user guides at all-guides.com HINWEIS! Wenn Sie die Automatische Abschaltung (AUTO-OFF) aktiviert haben, schaltet sich die Loop-Aufnahme automatisch aus, wenn der Akku leer ist. Nach dem Wiedereinschalten der Kamera muss eine neue Aufnahme gestar- tet werden. 11.8. OSD Up/Down Mit diesem Menü... - Seite 92 All manuals and user guides at all-guides.com Wählen Sie nun den Eintrag OSD UP/DOWN und betätigen Sie erneut den Auslöser, um in das Unter- menü zu gelangen. VIDEO UP/DOWN Drücken Sie die G K P 1 C W U -Taste wiederholt, um durch die verfügbaren Optionen zu scrollen (OSD UP oder OSD DOWN).
-
Seite 93: Led
All manuals and user guides at all-guides.com EXIT 11.9. LED In diesem Menü können Sie die LEDs ein- oder ausschal- ten. Drücken Sie die G K P 1 C W U -Taste wiederholt, bis der Eintrag SET (Einstellungen) angezeigt wird. ... - Seite 94 All manuals and user guides at all-guides.com Drücken Sie die G K P 1 C W U -Taste wiederholt, um durch die verfügbaren Optionen zu scrollen (ON oder OFF). Betätigen Sie den Auslöser, um eine Option auszuwäh- len. ...
-
Seite 95: Display-Helligkeit (Bright)
All manuals and user guides at all-guides.com 11.10. Display-Helligkeit (Bright) Diese Funktion ermöglicht es Ihnen, die Display-Helligkeit einzustellen. Drücken Sie die G K P 1 C W U -Taste wiederholt, bis der Eintrag SET (Einstellungen) angezeigt wird. Betätigen Sie den Auslöser, um in das Einstellungsme- nü... -
Seite 96: Töne (Beep)
All manuals and user guides at all-guides.com BRIGHT Betätigen Sie den Auslöser, um eine Option auszuwäh- len. Um das Menü zu verlassen, drücken Sie bitte erneut die G K P 1 C W U -Taste, bis der Eintrag EXIT erscheint und bestätigen sie durch Drücken des Auslösers. - Seite 97 All manuals and user guides at all-guides.com Betätigen Sie den Auslöser, um in das Einstellungsme- nü zu gelangen. Markieren Sie den Eintrag MORE und bestätigen sie durch drücken des Auslösers. Wählen Sie nun den Eintrag BEEP und betätigen Sie erneut den Auslöser, um in das Untermenü...
- Seite 98 All manuals and user guides at all-guides.com Lautstärke auf ein mittleres Maß einstellen. BEEP Töne aus. BEEP Betätigen Sie den Auslöser, um eine Option auszuwäh- len. Um das Menü zu verlassen, drücken Sie bitte erneut die G K P 1 C W U -Taste, bis der Eintrag EXIT erscheint und bestätigen sie durch Drücken des Auslösers.
-
Seite 99: Automatische Abschaltung (Auto-Off )
All manuals and user guides at all-guides.com 11.12. Automatische Abschaltung (Auto-Off ) Hier können Sie einstellen, nach welcher Zeit sich der Camcorder selbstständig abschaltet. Drücken Sie die G K P 1 C W U -Taste wiederholt, bis der Eintrag SET (Einstellungen) angezeigt wird. ... - Seite 100 All manuals and user guides at all-guides.com Drücken Sie die G K P 1 C W U -Taste wiederholt, um durch die verfügbaren Optionen zu scrollen (1 MIN, 3 MIN, 5 MIN, 10 MIN, 30 MIN, 60 MIN oder OFF). AUTO-OFF ...
-
Seite 101: Datum / Zeit
All manuals and user guides at all-guides.com 11.13. Datum / Zeit Drücken Sie die G K P 1 C W U -Taste wiederholt, bis der Eintrag SET (Einstellungen) angezeigt wird. Betätigen Sie den Auslöser, um in das Einstellungsme- nü... - Seite 102 All manuals and user guides at all-guides.com 23/"23/"4235 23<33 Drücken Sie die G K P 1 C W U -Taste SEL, um in das Feld für den Monat zu wechseln. Drücken Sie den Auslöser ADJ wiederholt, um den gewünschten Monat auszuwählen.
- Seite 103 All manuals and user guides at all-guides.com Drücken Sie die G K P 1 C W U -Taste, um das Feld OK zu markieren. 23/"23/"4236 23<33 Betätigen Sie den Auslöser (OK), um die Einstellun- gen zu übernehmen. Um das Menü zu verlassen, drücken Sie bitte erneut die G K P 1 C W U -Taste, bis der Eintrag EXIT erscheint und bestätigen sie durch Drücken des Auslösers.
- Seite 104 All manuals and user guides at all-guides.com 11.14. Mit dieser Funktion haben Sie die Möglichkeit, Ihren Cam- corder mit einer nachträglich erworbenen Armband-Fern- bedienung zu koppeln. HINWEIS! Die im Lieferumfang enthaltene Fernbedie- nung ist bereits mit Ihrem Camcorder verbun- den und muss nicht gekoppelt werden. ...
- Seite 105 All manuals and user guides at all-guides.com Der Camcorders kann nun mit der Armband-Fernbedie- nung verbunden werden. Drücken Sie an der Armband-Fernbedienung beide Tasten, die Video- und die Foto-Taste, gleichzeitig, um die Kopplung durchzuführen. Wenn zuerst die grüne LED an der Fernbedienung einmal, und dann die rote LED aufleuchtet, war die Kopplung erfolgreich.
- Seite 106 All manuals and user guides at all-guides.com HINWEIS! Weitere Informationen zu der Armband-Fern- bedienung entnehmen Sie bitte dem Kapitel „12. Armband-Fernbedienung“ auf Seite 108. Um das Menü zu verlassen, drücken Sie bitte am Cam- corder die G K P 1 C W U -Taste so oft, bis der Eintrag EXIT erscheint und bestätigen sie durch Drücken des Auslösers.
-
Seite 107: Auf Werkseinstellung Zurücksetzen
All manuals and user guides at all-guides.com 11.15. Auf Werkseinstellung zurücksetzen Hier können Sie Ihren Camcorder auf Werkseinstellung zurücksetzen und damit alle von Ihnen vorgenommenen Einstellungen löschen. Drücken Sie die G K P 1 C W U -Taste wiederholt, bis der Eintrag SET (Einstellungen) angezeigt wird. - Seite 108 All manuals and user guides at all-guides.com Drücken Sie die G K P 1 C W U -Taste wiederholt, um das Häkchen auszuwählen. DEFAULT Betätigen Sie den Auslöser, um zu das Zurücksetzen zu bestätigen. Um das Menü zu verlassen, drücken Sie bitte erneut die G K P 1 C W U -Taste, bis der Eintrag EXIT erscheint und bestätigen sie durch Drücken des Auslösers.
-
Seite 109: Armband-Fernbedienung
All manuals and user guides at all-guides.com 12. Armband-Fernbedienung HINWEIS! Die im Lieferumfang enthaltene Armband- Fernbedienung ist bereits mit Ihrem Camcor- der gekoppelt. Um eine nachträglich erwor- bene Armband-Fernbedienung zu koppeln, gehen Sie bitte vor wie im Kapitel „11.14. RF“ auf Seite 103 beschrieben. - Seite 110 All manuals and user guides at all-guides.com HINWEIS! Um Bilder im Zeitraffer, mit Selbstauslöser oder eine Serienaufnahme aufzunehmen, stel- len Sie bitte das entsprechende Programm im Menü der Kamera ein und drücken Sie dann die Foto-Taste auf der Fernbedienung. Im Zeit- raffer-Modus kann nur ein Foto über die Fern- bedienung ausgelöst werden.
-
Seite 111: Led-Indikatoren
All manuals and user guides at all-guides.com 12.1. LED-Indikatoren LED Indikator Beschreibung • Aufnahme des Fotos/der Vi- Grüne LED blinkt 1x deoaufnahme erfolgreich • Verbindung mit dem Camcor- Rote LED blinkt der fehlgeschlagen Grüne LED blinkt 1x, • Kopplung mit dem Camcorder danach blinkt die erfolgreich rote LED... -
Seite 112: Batterie Wechseln
All manuals and user guides at all-guides.com 12.2. Batterie wechseln Die Fernbedienung benötigt eine Knopfzellen-Batterie 3 V, CR2032. WARNUNG! Explosionsgefahr bei unsachge- mäßem Auswechseln der Batterie. Ersatz nur durch denselben oder einen gleichwertigen Batterietyp. Entfernen Sie die vier Schrauben auf der Gehäuse- Rückseite der Armband-Fernbedienung wie auf der Abbildung angegeben. - Seite 113 All manuals and user guides at all-guides.com Benutzen Sie ein geeignetes Werkzeug, um den äuße- ren Teil des Batterie-Halte-Bügels anzuheben. Entnehmen Sie die leere Batterie und entsorgen Sie diese bei einer Sammelstelle für Altbatterien. Legen Sie die neue Batterie vom Typ CR 2032 mit dem Pluspol nach oben in das Fach ein.
- Seite 114 All manuals and user guides at all-guides.com Legen sie den Batterie-Halte-Bügel vorsichtig wieder über die Batterie. Befestigen Sie die Gehäuse-Rückseite der Armband- Fernbedienung erneut, indem Sie sie mit den vier Schrauben fixieren. 113 von 642...
-
Seite 115: Verbindung Mit Einem Externen Bildschirm
All manuals and user guides at all-guides.com ACHTUNG! Um die Wasserdichtigkeit zu gewähr- leisten achten Sie vor der Verschrau- bung der Gehäuse-Rückseite darauf, dass der Dichtungs-Ring richtig plat- ziert ist. 13. Verbindung mit einem externen Bildschirm Gehen Sie wie folgt vor, um Videos oder Fotos auf einem externen Bildschirm anzuzeigen: ... - Seite 116 All manuals and user guides at all-guides.com Auf dem Display der Kamera wird der Eintrag PLAY- BACK angezeigt. Auf dem Fernseher werden Ihnen nun die mit der Kamera aufgenommenen Dateien angezeigt. Drücken Sie die G K P 1 C W U -Taste (SEL), um entwe- der Fotos, Loop-Videos oder Videos anzuzeigen.
- Seite 117 All manuals and user guides at all-guides.com Drücken Sie die G K P 1 C W U -Taste (NEXT) wieder- holt, um die gewünschte Datei auszuwählen. Drücken Sie auf den Auslöser (PLAY), um die Datei wiederzu- geben. Drücken Sie die G K P 1 C W U -Taste (BACK), um die Wiedergabe zu stoppen.
-
Seite 118: Verbindung Mit Einem Pc
All manuals and user guides at all-guides.com HINWEIS! Das verwendete Anzeigegerät muss DLNA-zer- tifiziert sein. Bitte stellen Sie außerdem sicher, dass sich Ihr Anzeigegerät in demselben Netz- werk befindet wie Ihr Smartphone bevor Sie die- se Funktion nutzen. 14. Verbindung mit einem PC Gehen Sie wie folgt vor, um den Camcorder mit einem PC oder Notebook zu verbinden: ... - Seite 119 All manuals and user guides at all-guides.com Schalten Sie den Camcorder ein, damit er von Ihrem System als Datenträger erkannt wird. HINWEIS! Im USB-Modus wechselt der Speicher in den „Read only“-Betrieb, d. h. die gespeicherten Da- ten können nur ausgelesen werden. Es ist im USB-Modus nicht möglich Daten auf dem Cam- corder zu speichern.
-
Seite 120: Systemvoraussetzung
All manuals and user guides at all-guides.com 14.1. Systemvoraussetzung • Microsoft® Windows 8.1 /Windows 8/Windows® 7/ Windows Vista® SP1 • 1 GB empf. freier Arbeitsspeicher • 1 GB empf. freier Festplattenspeicher • USB-Anschluss • CD-ROM Laufwerk 14.1.1. Steuern per Smartphone/Tablet •... - Seite 121 All manuals and user guides at all-guides.com Legen Sie die Installations-CD in das DVD-/CD-Lauf- werk ein. Führen Sie im Autostartfenster die „Autorun.exe“ aus. Befolgen Sie die Anweisungen zum Abschließen der Installation. Starten Sie das Programm ggf. über das Symbol auf dem Desktop.
-
Seite 122: Reinigung
All manuals and user guides at all-guides.com Doppelklicken Sie auf StartHDCam.exe. Befolgen Sie die Anweisungen zum Abschließen der Installation. Starten Sie das Programm ggf. über das Symbol auf dem Desktop. 16. Reinigung Verwenden Sie für die Reinigung nur ein trockenes, wei- ches Tuch. -
Seite 123: Entsorgung
All manuals and user guides at all-guides.com 17. Entsorgung VERPACKUNG Ihr Gerät befindet sich zum Schutz vor Trans- portschäden in einer Verpackung. Verpackun- gen sind Rohstoffe und somit wieder verwen- dungsfähig oder können dem Rohstoffkreislauf zurückgeführt werden. GERÄT Altgeräte dürfen nicht im normalen Hausmüll entsorgt werden. -
Seite 124: Technische Daten
All manuals and user guides at all-guides.com BATTERIEN/AKKUS Verbrauchte Batterien/Akkus gehören nicht in den Hausmüll. Die Batterien/Akkus müssen bei einer Sammelstelle für Altbatterien abge- geben werden. 18. Technische Daten Bildsensor 5 Megapixel CMOS Multifunktions-Modi HD Videokamera, Digitalkamera Objektiv f 1:2.8 (F2.5 mm) Display 21 mm / 0,83“... - Seite 125 All manuals and user guides at all-guides.com Auflösung: Video: 1920x1080 Pixel / 30 fpS 1280x960 Pixel / 30 fpS 1280x720 Pixel / 60 fpS Bilder: 5 MP - 2592x1944 Pixel PC Anschluss Micro USB 2.0 High-Speed-An- schluss TV-Ausgang mini HDMI WLAN-Standard WLAN 802.11 b/g/n 2.4 GHz Abmessungen...
- Seite 126 All manuals and user guides at all-guides.com relative Luftfeuchtigkeit (nicht kondensierend) in Betrieb 0 ~ 90 % während des Ladevorgangs 0 ~ 90 % Lagerung 0 ~ 95 % USB-NETZTEIL Modellnummer: KSAS0060500100VEU Hersteller: Ktec, China Eingangsspannung: 100 - 240 V ~ 50/60 Hz 0,18 A Ausgangsspannung: 5,0 V 1,0 A...
- Seite 127 All manuals and user guides at all-guides.com Technische und optische Änderungen sowie Druckfeh- ler vorbehalten. 126 von 642...
-
Seite 128: Impressum
Vervielfältigung in mechanischer, elektro- nischer und jeder anderen Form ohne die schriftliche Ge- nehmigung des Herstellers ist verboten Das Copyright liegt bei der Firma: Medion AG Am Zehnthof 77 45307 Essen Deutschland Die Anleitung kann über die Service Hotline nachbestellt werden und steht über das Serviceportal... - Seite 129 All manuals and user guides at all-guides.com letzte Seite 128 von 642...
- Seite 643 All manuals and user guides at all-guides.com letzte Seite 642 of 642...