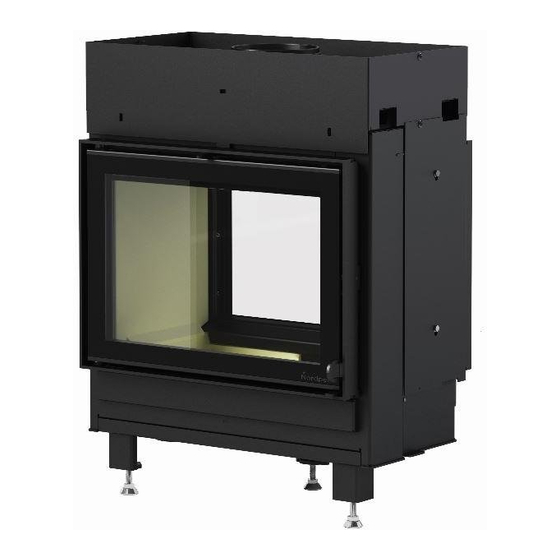
Herunterladen Inhalt Inhalt Diese Seite drucken

Werbung

Verfügbare Sprachen

Verfügbare Sprachen

User manual
GB
Montageanleitung
DE
Manuel d'installation
FR
Product no: IN-0N20T-010
Test report No: RRF: 29 15 3996
Last updated: 13.07.2016
2
9
19
N-20 T

Werbung

Inhaltsverzeichnis
loading

Inhaltszusammenfassung für Nordpeis N-20 T

  • Seite 1 N-20 T User manual Montageanleitung Manuel d’installation Product no: IN-0N20T-010 Test report No: RRF: 29 15 3996 Last updated: 13.07.2016...
  • Seite 2: Inhaltsverzeichnis

    2. Technical Information regularly. It is the responsibility of the client that these regulations are complied with in the country/region 3. Safety distances where the fireplace is installed. Nordpeis AS is not responsible for incorrect installation. 4. Assembly Assembling and adjusting the legs Important to check Air inlet...
  • Seite 3: Shared Flue Gas System

    (Pa) and regulations of the country where the product is installed. Data according to EN 13 229 Nordpeis AS is not responsible for wrongly assembled inserts. Area of convection air vent under Subject to errors and changes. insert (cm For the latest updated version of the manual go to www.
  • Seite 4: Safety Distances

    3. Safety distances Front frame FIG 6 Assemble frame to the insert body with provided screws and tools as shown on the drawing. Pay attention to Firewall correct postion of air lath and the air valve handle. Ensure that the minimum safety distances are fullfiled (FIG 1). Ignition air handle FIG 7 When connecting a steel chimney to the top outlet use Before assembling the handle screw in the fastening...
  • Seite 5: Operational Control

    Operational control some experience, but after a little while a natural rhythm When the insert is in upright position, and prior for the fire will be found. to mounting the surround, control that all functions IMPORTANT! Always remember to open are easy to maneuver and appear satisfactory. the air vent control (preferably also the door) before new wood logs are inserted into a hot burn A.
  • Seite 6: Door And Glass

    The CE mark is placed on the side of the insert.
  • Seite 7 Usage Not enough air to the combustion may cause the glass to soot. Hence, supply the fire with air just after the wood is added, so that the flames and gases in the combustion chamber are properly burnt. Open the air vent and have the door slightly ajar in order for the fla- mes to establish properly on the wood. Note that the air supply for the combustion also can be too large and cause an uncontrollable fire that very quickly heats up the whole combustion chamber to an extremely high temperature (when using with a closed or nearly closed door).
  • Seite 8: Some Advice In Case Of Combustion Problems

    Some advice in case of combustion problems Error Explanation Solution The chimney is blocked. Contact a chimney sweeper / dealer for more information or clean The flue is sooty or there is accumulated soot on the the flue, smoke baffle and burn chamber. No draught smoke baffle. The smoke baffle is wrongly positioned. Verify the assembly of the smoke baffle - see assembly instructions. Downdraught in the room caused by no draught, that the Light the fire with an open window. If this helps, more/bigger vents house is too “air tight”.
  • Seite 9 Sicherheitsvorschriften. Vor der Installation Ihres Gerätes beachten Sie bitte Schornsteinzug alle geltenden Bestimmungen. *1/ siehe Punkt 9 / Gemeinsam genutztes Rauchgassystem Grundsätzliche Anforderungen. Nordpeis ist nicht Zuluft (=mm AIR) für widerrechtliche oder inkorrekte Instalation Ihres Bodenplatte Gerätes verantwortlich.
  • Seite 10: Gemeinsam Genutztes Rauchgassystem

    1,45 Aufgabemenge (kg) 2. Technische Information Nachfüllintervall (Minuten) Öffnung des Verbrennungs- 40-50 Nordpeis-Geräte stellen eine neue Generation von luftreglers (%) Feuerstätten dar und sind freundlich zur Umwelt. Sie Periodisch* Betriebsweise ermöglichen eine bessere Wärmenutzung, brennen *Bei der normalen Kaminnutzung handelt es sich um eine periodische sauber und geben bei korrekter Befeuerung nur Verbrennung.
  • Seite 11: Sicherheitsabstand Zu Brennbarem Material

    3. Sicherheitsabstand zu brennbarem * Aufgrund nationaler Bestimmungen können al- ternative Ausführungen der Rauchgasmanschette Material vorliegen. Befolgen Sie beim Rauchgasanschluss am Schornstein die Empfehlungen des Schornstein- Stellen Sie sicher, dass die minimalen herstellers. Sicherheitsabstände eingehalten werden. (Abb. 1). Vorderseitiger Rahmen, Abb. 6 Montieren Sie mithilfe der beiliegenden Schrauben und Falls Sie einen Schornstein aus Stahlelementen Werkzeuge den Rahmen am Einsatzgehäuse, siehe...
  • Seite 12: Mehrzweckschlüssel

    Achtung: Dasselbe Verfahren gilt bei der Montage Nachdem die Flammen stabil sind und der Schorn- der rückseitigen Tür. stein angewärmt ist, schließen Sie das Primärluftven- til vollständig. Andernfalls können sich Einsatz und Achtung: Die Tür lässt sich demontieren, indem Schornstein überhitzen. Zur Regulierung der Luftzufuhr Sie dieselben Schritte in umgekehrter Reihenfolge benutzen Sie das Sekundärluftventil/ Regler für ausführen.
  • Seite 13: Thermotte

    Reinigungsmittel schaden dem Lack, falsche entnehmen Sie bitte der beiliegenden Garantiekarte Reinigungsmittel schaden dem Glas! Ein guter Tipp oder unserer Internetseite www.nordpeis.de ist, mit einem feuchten Lappen oder Küchenpapier etwas Asche aus der Brennkammer aufzunehmen und Garantie nur mittels datiertem Zahlungsbeleg gültig.
  • Seite 14: Grundsätzliche Anforderungen

    Anzünden, nachlegen Stellung des Absperrventils muß erkennbar sein. oder Entfernen der Asche. Befinden sich andere Feuerstätten in den Aufstellräumen oder in Räumen, die Ihr Nordpeis-Gerät ist nur für Verbrennung von mit Aufstellräumen in Verbindung stehen, müssen Schnittholz konstruiert und zugelassen. besondere Sicherheitseinrichtungen die vollständige...
  • Seite 15: Aufstellung Und Verbrennungsluftversorgung

    Offenstellung der Absperrvorrichtung sicherstellen, stehen, so müssen den offenen Kaminen nach dieser solange die Absperrvorrichtung nach Abschnitt B oder Norm mindestens 540 m³ Verbrennungsluft je Stunde die Feuerraumöffnung durch Feuerraumtüren, Jalousien m² Feuerraumöffnung und anderen Feuerstätten oder dergleichen Bauteile nicht vollständig geschlossen außerdem mindestens 1,6 m³...
  • Seite 16: Warmluftführung

    Bauteile, die nur kleine Flächen der Verkleidung des motte für Hausschornsteine oder Blechrohren aus offenen Kamins verdecken wie Fußböden, stumpf ange- mindestens 2 mm dickem Stahlblech nach DIN 1623, stoßene Wandverkleidungen und Dämmschichten DIN 1700, DIN 17 200 und entsprechenden auf Decken und Wänden, dürfen ohne Abstand an die Formstücken herzustellen. Abgasrohre innerhalb der Verkleidung herangeführt werden.
  • Seite 17: Nennwärmeleistung, Verbrennungslufteinstellungen Und Abbrandzeiten

    die Primärluft geschlossen und der Abbrand über die gen zu befüllen und bei größerer Stellung des Sekundärluft gesteuert. Lassen Sie den Ofen während Primärluftschiebers/-reglers so zu betreiben, daß dieser Anbrennphase nicht unbeaufsichtigt. der vorhandene Brennstoff schneller (mit Flamment- wicklung) abbrennt und dadurch der Schornsteinzug Zulässige Brennstoffe stabilisiert wird. Zur Vermeidung von Widerständen im Zulässiger Brennstoff ist Scheitholz mit einer Länge...
  • Seite 18 Im Schornstein liegt nach dem Entfernen eines Kaminofens eine Öffnung vor und erzeugt einen falschen Öffnungen müssen komplett zugemauert und somit abgedichtet werden. Zug. Das Mauerwerk im Schornstein ist defekt, d.h. es liegt keine Luftdichtheit um den Rauchgasrohreingang vor Abdichtung und Putz sind rissig und Bereiche sind nicht dicht. Der Einsatz und/oder die Abtrennung im Schornstein ist defekt und raucht beim...
  • Seite 19 Ne pas obstruer les prises d’air comburant Vous etes un client totalement responsables de l’execution de ces règles locales concernant Avertissement ! l’installation dans votre région / pays. Nordpeis n’est Des hottes aspirantes, fonctionnant dans la même pas responsable quant à l’installation" pièce ou le même espace que l’appareil peuvent engendrer des problèmes.
  • Seite 20: Informations Techniques

    Nordpeis AS n’est pas responsable du montage Carburant recommandé: Bois bûche défectueux d’un foyer. Taille de bûches recommandée (cm) Nordpeis se reserve le droit de modifier sans préavis les Charge de bois (kg) 1,45 caractéristiques techniques et dimensionnelles de ses Intervalle de recharge produits.
  • Seite 21 4. Assemblage Montage du mécanisme de fermeture automatique FIG 3 - FIG 12 de porte FIG 12 - FIG 15 Dans certains pays, un mécanisme de fermeture de Montage et réglage des pieds FIG. 3 porte automatique est obligatoire en vertu de la loi. L’insert est livré...
  • Seite 22: Allumer Le Feu Pour La Première Fois

    5. Allumer le feu pour la première fois IMPORTANT ! Rappelez-vous toujours d’ouvrir Quand le foyer est assemblé et toutes les instructions la commande d’allumage aussi bien que la ont été observées, le feu peut être allumé. commande d’apport d’air (de préférence aussi la Placez les bûches en bois soigneusement dans la porte) quand de nouvelles bûches en bois sont chambre de combustion pour éviter d’endommager les...
  • Seite 23: Conseils Pour Allumer Un Feu

    Ces joints Nordpeis peuvent étre achetés chez votre Avertissement: n’utilisez JAMAIS un revendeur. Seuls les joints Nordpeis permettent carburant d’éclairage comme essence, la l’application de la garantie.
  • Seite 24 petite quantité de bois à l’intérieur, quelques jours avant l’utilisation afin que l’humidité de la surface du bois Attention: Assurez-vous que le foyer n’est pas peut s’évaporer. surchauffé - il peut causer De tels dégâts ne sont pas irréparables à l’appareil. Tel dégâts Conseils généraux pour le feu n’sont pas couverts par la garantie.
  • Seite 25: Quelques Conseils En Cas De Problèmes De Combustion

    Quelques conseils en cas de problèmes de combustion Erreur Explication Solution La cheminée est obstruée. Contactez un ramoneur/un revendeur pour obtenir plus d’informations ou nettoyez le conduit, le déflecteur de fumée et la chambre de com- Le conduit est plein de suie ou de la suie s’est accu- Absence de bustion. mulée sur le déflecteur de fumée. tirage Vérifiez le montage du déflecteur de fumée (voir les instructions de Le déflecteur de fumée est mal positionné.
  • Seite 26 Pour une bonne combustion, suivez les recommandations présentes Mauvaise combustion (la température est trop basse). dans ce manuel d’utilisation. Vitre blanche Utilisation de matériaux inappropriés pour la combus- tion (comme : du bois peint ou imprégné, du plastique Assurez-vous d’utiliser uniquement du bois propre et sec. stratifié, du contre-plaqué, etc.).
  • Seite 27 N-20T= mm...
  • Seite 28 N-20T FIG 1 =Firewall / Hitzeschutzwand =Combustible material / Brennbares Material >800 >800 20 mm 450cm ≥ 450cm 380 mm ≥ ≥ >500 Insulation; 30 mm - SILCA 250 KM D ≥ 260 mm 450cm ≥ 450cm ≥ 0 mm 0 mm 300cm 300cm ≥...
  • Seite 29 Tools 4 mm 2 mm 3 mm 2,5 mm 13 mm TORX...
  • Seite 30 Thermotte FIG 2 ®™ Assembling / Aufbau / Assemblage Legs FIG 3 IP-0N20T-010 x3 21-50000-022 x3 21-30006-020 x3 13 mm...
  • Seite 31 Air inlet / Lufteinlass / FIG 4 TORX 21-30011-408 x4 Flue colar / Rauchgasmanschette FIG 5 4 mm 21-50001-018 x3 21-30001-520 x3...
  • Seite 32 Front frame Vorderseitiger Rahmen / FIG 6 IA-0N20T-014 x8 21-30003-610 x8 IA-0N20T-011 x8 21-40005-010 x8 4 mm Step I. (*) - 1. 2x 360⁰ Step II. - 1. 100% Step I. (*) - Schritt / Étape Ignition air handle / Zündluftgriff FIG 7 21-40001-406 x2 2 mm...
  • Seite 33 Back frame / Rückseitiger Rahmen FIG 8 IA-0N20T-014 x8 21-30003-61C x8 IA-0N20T-011 x8 TORX 21-30003-610 x8 Step I. (*) - 1. 2x 360⁰ Step II. - 1. 100% Step I. (*) - Schritt / Étape Heat shield / Hitzeschutzbleche FIG 9...
  • Seite 34 Heat shield / Hitzeschutzbleche FIG 10 60⁰ FIG 11 60⁰ 21-30011-408 x4...
  • Seite 35 FIG 12 Self closing door deactivation / Selbstschließendem Türmechanismus Deaktivierung 2,5 mm Front door assembling / Türmontage FIG 13...
  • Seite 36 Front door assembling FIG 14 FIG 15 Self closing door activation Selbstschließendem Türmechanismus Aktivierung 2,5 mm 2 x360 ⁰...
  • Seite 37 Back door - handle / Mehrzweckschlüssel FIG 16 Handle - front door FIG 17...
  • Seite 38 Operation handle - ignition valve usage FIG 18 Operation handle - secondary valve usage FIG 19...
  • Seite 39 GB: Maintenance / DE: Pfelge / Thermotte disassembling / assembling FIG 20 22-0N20T-161 x2 4 mm 21-30001-516 x2 FIG 21...
  • Seite 40 FIG 22 22-0N20T-080 x2 FIG 23...
  • Seite 41 FIG 24 FIG 24a...
  • Seite 42 FIG 24b...
  • Seite 43 Nordpeis AS Gjellebekkstubben 11 3420 Lierskogen, Norway N20T-CPR-2015/10/29 EN 13229:2001 / A2:2004 N-20T Heating of living accomodation / Kamin zum Heizen mit festen Brennstoffen Feuersicherheit : Fire safety: A1 WT Brandverhalten: Reaction to fire: Abstand zu nicht brennbaren Materialien: Distance to non-combustible:...
  • Seite 44 Nordpeis AS, Gjellebekkstubben 11, N-3420 LIERSKOGEN, Norway www.nordpeis.no...

Inhaltsverzeichnis