Herunterladen Inhalt Inhalt Diese Seite drucken
Klarstein MIDNIGHT SUN Bedienungsanleitung

Klarstein MIDNIGHT SUN Bedienungsanleitung

Decken-heizung & lampe
Inhaltsverzeichnis

Werbung

Verfügbare Sprachen
  • DE

Verfügbare Sprachen

  • DEUTSCH, seite 1
MIDNIGHT SUN
Decken-Heizung & Lampe
Ceiling Heater & Lamp
Radiador y lámpara de techo
Radiateur de plafond et plafonnier
Stufa a soffitto e lampada
10035321 10035322 10035323
www.klarstein.com
Hinweis: Dieses Produkt ist nur für gut isolierte Räume
oder für den gelegentlichen Gebrauch geeignet.
Note: This product is only suitable for well insulated
spaces or occasional use.
Nota: Este producto está indicado únicamente en
lugares abrigados o para una utilización punctual.
Remarque : Ce produit ne peut être utilisé que dans
des locaux bien isolés ou de manière occasionnelle.
Advertencia: Questo prodotto è adatto solo per spazi
ben isolati o uso occasionale.

Werbung

Inhaltsverzeichnis
loading

Inhaltszusammenfassung für Klarstein MIDNIGHT SUN

  • Seite 1 MIDNIGHT SUN Decken-Heizung & Lampe Ceiling Heater & Lamp Radiador y lámpara de techo Radiateur de plafond et plafonnier Stufa a soffitto e lampada 10035321 10035322 10035323 www.klarstein.com Hinweis: Dieses Produkt ist nur für gut isolierte Räume oder für den gelegentlichen Gebrauch geeignet.
  • Seite 3: Inhaltsverzeichnis

    Sehr geehrter Kunde, wir gratulieren Ihnen zum Erwerb Ihres Gerätes. Lesen Sie die folgenden Hinweise sorgfältig durch und befolgen Sie diese, um möglichen Schäden vorzubeugen. Für Schäden, die durch Missachtung der Hinweise und unsachgemäßen Gebrauch entstehen, übernehmen wir keine Haftung. Scannen Sie den folgenden QR-Code, um Zugriff auf die aktuellste Bedienungsanleitung und weitere Informationen rund um das Produkt zu erhalten.
  • Seite 4: Technische Daten

    TECHNISCHE DATEN Heizung Artikelnummer Abmessungen Leistung Nennspannung Stromversorgung 10035321 660 * 635 * 35 350 + 32 W 1,7 A 10035322 1085 * 635 * 35 600 + 36 W 3,0 A 230 V ~ 50 Hz 10035323 1285 * 635 * 35 800 + 40 W 3,6 A Fernbedienung...
  • Seite 5: Sicherheitshinweise

    SICHERHEITSHINWEISE Warnsymbole WARNUNG Dieses Signalwort bezeichnet eine Gefährdung mit einem mittleren Risikograd, die, wenn sie nicht vermieden wird, zu schweren Verletzungen oder zum Tod führen kann. WARNUNG VOR ELEKTRISCHER SPANNUNG Dieses Symbol weist auf Gefahren für das Leben und die Gesundheit von Personen durch elektrische Spannung hin.
  • Seite 6 Sicherheitshinweise Lesen Sie alle Sicherheitshinweise und alle Bedienungshinweise. Die Nichtbeachtung der Warnhinweise und Anweisungen kann zu einem Stromschlag, Brand und / oder schweren Verletzungen führen. Bewahren Sie alle Warn- und Sicherheitshinweise zum späteren Nachschlagen auf • Die Nichtbeachtung der Warnhinweise und Anweisungen kann zu einem Stromschlag, Brand und / oder schweren Verletzungen führen.
  • Seite 7 WARNUNG Verbrennungsgefahr! Einige Bestandteile dieses Geräts können sehr heiß werden und Verbrennungen verursachen. Besondere Vorsicht ist geboten, wenn Kinder und gebrechliche Personen anwesend sind. • Es ist gefährlich, das Gerät in der Nähe von Vorhängen und anderen brennbaren Materialien aufzustellen. •...
  • Seite 8 • Beachten Sie bei der Auswahl von Verlängerungen des Netzkabels die Leistungsaufnahme des Gerätes, die Kabellänge und den Verwendungszweck. Rollen Sie Verlängerungskabel vollständig ab. Vermeiden Sie elektrische Überlastungen. • Ziehen Sie vor Wartungs-, Pflege- oder Reparaturarbeiten am Gerät den Netzstecker aus der Netzsteckdose. Halten Sie dabei den Netzstecker fest. •...
  • Seite 9: Lieferumfang

    LIEFERUMFANG 1 x Heizelement 2 x Aufhängung 1 x Thermostat & 1x 4 x Schrauben Fernbedienung 4 x Dübel 1 x Bedienungsanleitung...
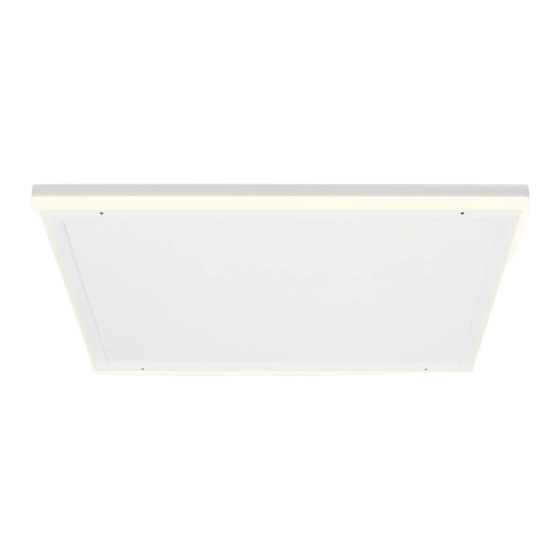
  • Seite 10: Geräteübersicht

    GERÄTEÜBERSICHT Vorderseite Rückseite Vordere Oberfläche LED-Umrandung Netzkabel LED-Netzeingang INSTALLATION Wichtige Hinweise • Die Montagearbeiten müssen von einem professionellen Elektriker durchgeführt werden! • LED-Eingangsleitungen müssen mit Schaltern verdrahtet werden, die die stromführenden Leitungen ungehindert unterbrechen können! • Trennen Sie vor der Montage und Verdrahtung alle Leitungen, die mit der LED-Eingangsleitung verdrahtet werden sollen, vom Stromnetz.
  • Seite 11 Installation Bohren Sie vier Löcher an der Decke mit dem richtigen Abstand A und B. Verwenden Sie einen Bohrer mit dem richtigen Durchmesser, damit das Paneel nicht herunterfällt! Deckenaufhängung Paneel Größe (mm) Lochabstand der Schrauben (mm) 660 * 635 (oder ähnlich) A500*B100 mm 1085 * 635 (oder ähnlich) A500*B300 mm...
  • Seite 12 Schieben Sie zuerst den hinteren Rahmen des Paneels hinein. Führen Sie dann das andere Ende der Deckenaufhängung auf der anderen Seite ein. Ansicht nach abgeschlossener Montage...
  • Seite 13: Set-Beschreibung Und Allgemeine Funktionen

    SET-BESCHREIBUNG UND ALLGEMEINE FUNKTIONEN Jedes Set besteht aus zwei Teilen: • Einer Fernbedienung mit digitaler Anzeige, in der die Elektronik, die Bedienelemente und der eingebaute Raumtemperaturfühler untergebracht sind. • Einem Steckdosenempfänger, der das Signal der Fernbedienung empfangen und dekodieren kann. Fernbedienungsfunktionen Die Fernbedienung erfasst mit ihrem integrierten Sensor die Raumtemperatur und sendet ein Signal an den Steckdosenempfänger, um die Heizung bei sich...
  • Seite 14: Fernbedienung

    FERNBEDIENUNG Kindersicherung Senden-Symbol Heizung Batteriestand Raumtemperatur Eingestellte Temperatur Datum Modus-Anzeige Kindersicherung ein/ Auswahl des Heizung ein/aus Anzeigeformats Runter Hoch Favorisierte Temperatur Einstellungen (FAV-Temperatur) Aktuelles Datum und Modus Uhrzeit einstellen...
  • Seite 15: Steckdosenempfänger

    STECKDOSENEMPFÄNGER EIN/AUS-Schalter für den Kopplungsmodus und Anzeigeleuchte Hinweis: Die EIN/AUS-Taste des Empfängers ist für den Kopplungsmodus vorgesehen. Zum Ein- und Ausschalten der Heizung, benutzen Sie die ON/OFF- Taste auf der Fernbedienung.
  • Seite 16: Bedienung Im Detail

    BEDIENUNG IM DETAIL Inbetriebnahme Wenn Sie die Heizung das erste Mal benutzen, müssen Sie zuerst die Fernbedienung und den Steckdosenempfänger verbinden. • Stecken Sie zuerst den Steckdosenempfänger in die Steckdose. • Halten Sie die EIN/AUS-Taste am Steckdosenempfänger 3 Sekunden lang gedrückt.
  • Seite 17: Temperatur Einstellen

    Temperatur einstellen Drücken Sie die Taste HOCH oder RUNTER, um die Ziel-Temperatur einzustellen. Falls sie einen Wochentimer eingestellt haben, können Sie die Temperatur ebenfalls manuell nachverstellen. Diese wird allerdings beim Start der nächsten Heizperiode mit der einprogrammierten Ziel-Temperatur überschrieben. Heizmodus auswählen Halten Sie die Taste MODE 3 Sekunden lang gedrückt, um den SMART-Modus oder den Modus TIMER ON/OFF auszuwählen.
  • Seite 18 Intelligente adaptive Startzeit Wenn Sie bei eingestelltem Wochentimer den SMART-Modus auswählen, wird die Heizung unabhängig vom voreingestellten Timer betrieben. Die Fernbedienung misst 3 Stunden vor der programmierten Startzeit die Temperaturdifferenz zwischen Raum und Ziel-Temperatur berechnet und entscheidet, um wie viel früher die Heizung eingeschaltet werden muss, damit die Ziel-Temperatur rechtzeitig erreicht wird.
  • Seite 19: Reinigung Und Pflege

    Wichtige Hinweise zur Bedienung • Eine Fernbedienung kann mit mehreren Empfängern gleichzeitig verbunden werden und somit mehrere Heizungen bedienen. • Alle Einstellungen müssen nach einem Batteriewechsel oder einer Batterieentnahme neu vorgenommen werden. • Um den Wochentimer zu nutzen, stellen Sie sicher, dass die TIMER-Funktion durch langes Drücken der MODE-Taste auf ON geschaltet wurde.
  • Seite 20: Spezielle Entsorgungshinweise Für Verbraucher In Deutschland

    SPEZIELLE ENTSORGUNGSHINWEISE FÜR VERBRAUCHER IN DEUTSCHLAND Entsorgen Sie Ihre Altgeräte fachgerecht. Dadurch wird gewährleistet, dass die Altgeräte umweltgerecht verwertet und negative Auswirkungen auf die Umwelt und menschliche Gesundheit vermieden werden. Bei der Entsorgung sind folgende Regeln zu beachten: • Jeder Verbraucher ist gesetzlich verpflichtet, Elektro- und Elek- tronikaltgeräte (Altgeräte) sowie Batterien und Akkus getrennt vom Hausmüll zu entsorgen.
  • Seite 21 • Bei einem Vertrieb unter Verwendung von Fernkommunikationsmitteln ist die unentgeltliche Abholung am Ort der Abgabe auf Elektro- und Elektronikgeräte der Kategorien 1, 2 und 4 gemäß § 2 Abs. 1 ElektroG, nämlich „Wärmeüberträger“, „Bildschirmgeräte“ (Oberfläche von mehr als 100 cm²) oder „Großgeräte“...
  • Seite 22: Hinweise Zur Entsorgung

    HINWEISE ZUR ENTSORGUNG Wenn es in Ihrem Land eine gesetzliche Regelung zur Entsorgung von elektrischen und elektronischen Geräten gibt, weist dieses Symbol auf dem Produkt oder auf der Verpackung darauf hin, dass dieses Produkt nicht im Hausmüll entsorgt werden darf. Stattdessen muss es zu einer Sammelstelle für das Recycling von elektrischen und elektronischen Geräten gebracht werden.
  • Seite 23: Produktdatenblatt

    PRODUKTDATENBLATT Modellkennung(en) 10035321 Angabe Symbol Wert Einheit Angabe Einheit Wärmeleistung Nur bei elektrischen Speicher-Einzelraumheizgeräten: Art der Regelung der Wärmezufuhr Nennwärmeleistung 0.35 Manuelle Regelung der Wärmezufuhr mit k.A. integriertem Thermostat Mindestwärmeleistung 0.35 Manuelle Regelung der Wärmezufuhr k.A. (Richtwert) mit Rückmeldung der Raum- und/oder Außentemperatur Maximale kontinuierliche 0.35...
  • Seite 24: Produktdatenblatt

    PRODUKTDATENBLATT Modellkennung(en) 10035322 Angabe Symbol Wert Einheit Angabe Einheit Wärmeleistung Nur bei elektrischen Speicher-Einzelraumheizgeräten: Art der Regelung der Wärmezufuhr Nennwärmeleistung Manuelle Regelung der Wärmezufuhr mit k.A. integriertem Thermostat Mindestwärmeleistung Manuelle Regelung der Wärmezufuhr k.A. (Richtwert) mit Rückmeldung der Raum- und/oder Außentemperatur Maximale kontinuierliche Elektronische Regelung der Wärmezufuhr...
  • Seite 25: Produktdatenblatt

    PRODUKTDATENBLATT Modellkennung(en) 10035323 Angabe Symbol Wert Einheit Angabe Einheit Wärmeleistung Nur bei elektrischen Speicher-Einzelraumheizgeräten: Art der Regelung der Wärmezufuhr Nennwärmeleistung Manuelle Regelung der Wärmezufuhr mit k.A. integriertem Thermostat Mindestwärmeleistung Manuelle Regelung der Wärmezufuhr k.A. (Richtwert) mit Rückmeldung der Raum- und/oder Außentemperatur Maximale kontinuierliche Elektronische Regelung der Wärmezufuhr...
  • Seite 27 Dear customer, Congratulations on your purchase. Please read the following instructions carefully and follow them to prevent potential damage. We accept no liability for damage caused by disregarding the instructions and improper use. Please scan the QR code to access the latest operating instructions and further information about the product.
  • Seite 28: Technical Data

    TECHNICAL DATA Heating Article number Dimensions: Power Rated voltage Power supply 10035321 660 * 635 * 35 350 + 32 W 1.7 A 10035322 1085 * 635 * 35 600 + 36 W 3.0 A 230 V ~ 50 Hz 10035323 1285 * 635 * 35 800 + 40 W...
  • Seite 29: Safety Instructions

    SAFETY INSTRUCTIONS Warning symbols WARNING This signal word indicates a hazard with a medium level of risk which, if not avoided, may result in serious injury or death. WARNING OF ELECTRICAL VOLTAGE This symbol indicates danger to life and health of persons due to electrical voltage.
  • Seite 30 Safety Instructions Read all safety instructions and all operating instructions. Failure to observe the warnings and instructions may result in electric shock, fire and / or serious injury. Keep all warnings and safety instructions for future reference • Failure to observe the warnings and instructions may result in electric shock, fire and / or serious injury.
  • Seite 31 WARNING Risk of burns! Some parts of this device can become very hot and cause burns. Special care should be taken when children and infi rm persons are present. • It is dangerous to place the device near curtains and other combustible materials.
  • Seite 32 • When selecting power cord extensions, consider the power consumption of the unit, the cable length and the intended use. Unroll extension cables completely. Avoid electrical overloads. • Disconnect the mains plug from the mains socket before carrying out maintenance, servicing or repair work on the device. Hold the mains plug while doing so.
  • Seite 33: Scope Of Delivery

    SCOPE OF DELIVERY 1 x heating element 2 x suspension 1 x thermostat & 1 x remote 4 x screws control 4 x dowels 1 x operating instructions...
  • Seite 34: Device Overview

    DEVICE OVERVIEW Front side Back side Front surface LED surround Power cable LED mains input INSTALLATION Please note: • The installation work must be carried out by a professional electrician. • LED input lines must be wired with switches that can interrupt the current- carrying lines without hindrance.
  • Seite 35 Installation Drill four holes on the ceiling with the correct spacing A and B. Use a drill with the right diameter so that the panel does not fall down. Ceiling suspension Panel size (mm) Hole spacing of the screws (mm) 660 * 635 (or similar) A500*B100 mm 1085 * 635 (or similar)
  • Seite 36 First push in the rear frame of the panel. Then insert the other end of the ceiling suspension on the other side. View after completed assembly...
  • Seite 37: Set Description And General Functions

    SET DESCRIPTION AND GENERAL FUNCTIONS Each set consists of two parts: • A remote control with digital display, which houses the electronics, the controls and the built-in room temperature sensor. • A socket receiver that can receive and decode the signal from the remote control.
  • Seite 38: Remote Control

    REMOTE CONTROL Child lock Transmit icon Heater Battery level Room temperature Set temperature Date Mode indicator Child lock on/off Selection of the display Heater on/off format Down Favorite temperature Settings (FAV temperature) Set current date and Modes time...
  • Seite 39: Socket Receiver

    SOCKET RECEIVER Pairing mode ON/OFF switch and indicator light Note: The ON/OFF button on the receiver is intended for pairing mode. To turn the heater on and off, use the ON/OFF button on the remote control.
  • Seite 40: Operation In Detail

    OPERATION IN DETAIL Commissioning When you use the heater for the first time, you must first connect the remote control and the socket receiver. • First plug the socket receiver into the socket. • Press and hold the ON/OFF button on the socket receiver for 3 seconds. •...
  • Seite 41: Setting The Temperature

    Setting the temperature Press the UP or DOWN button to set the target temperature. If you have set a weekly timer, you can also adjust the temperature manually. However, this will be overwritten with the programmed target temperature when the next heating period starts.
  • Seite 42: Open Window Detection

    Intelligent adaptive start time If you select the SMART mode with the weekly timer set, the heating is operated independently of the preset timer. The remote control measures the temperature difference between the room and the target temperature 3 hours before the programmed start time and calculates and decides by how much earlier the heating must be switched on to reach the target temperature on time.
  • Seite 43: Important Notes On Operation

    IMPORTANT NOTES ON OPERATION • One remote control can be connected to several receivers at the same time and thus operate several heaters. • All settings must be reset after changing or removing the batteries. • To use the weekly timer, make sure that the TIMER function has been switched to ON by pressing the MODE button for a long time.
  • Seite 44: Disposal Considerations

    DISPOSAL CONSIDERATIONS If there is a legal regulation in your country regarding the disposal of electrical and electronic equipment, this symbol on the product or on the packaging indicates that this product must not be disposed of with household waste. Instead, it must be taken to a collection point for the recycling of electrical and electronic equipment.
  • Seite 45: Product Data Sheet

    PRODUCT DATA SHEET Model identifier(s): 10035321 Item Symbol Value Unit Item Unit Heat output Type of heat input, for electric storage local space heaters only Nominal heat output 0.35 manual heat charge control, with integrated thermostat Minimum heat output 0.35 manual heat charge control with room and/or (indicative) outdoor temperature feedback...
  • Seite 46: Product Data Sheet

    PRODUCT DATA SHEET Model identifier(s): 10035322 Item Symbol Value Unit Item Unit Heat output Type of heat input, for electric storage local space heaters only Nominal heat output manual heat charge control, with integrated thermostat Minimum heat output manual heat charge control with room and/or (indicative) outdoor temperature feedback Maximum continuous heat...
  • Seite 47: Product Data Sheet

    PRODUCT DATA SHEET Model identifier(s): 10035323 Item Symbol Value Unit Item Unit Heat output Type of heat input, for electric storage local space heaters only Nominal heat output manual heat charge control, with integrated thermostat Minimum heat output manual heat charge control with room and/or (indicative) outdoor temperature feedback Maximum continuous heat...
  • Seite 49 Estimado cliente: Le felicitamos por la adquisición de este producto. Lea atentamente el siguiente manual y siga cuidadosamente las instrucciones de uso con el fin de evitar posibles daños. La empresa no se responsabiliza de los daños ocasionados por un uso indebido del producto o por haber desatendido las indicaciones de seguridad.
  • Seite 50: Datos Técnicos

    DATOS TÉCNICOS Calefacción Número del Dimensiones Potencia Tensión Suministro artículo nominal eléctrico 10035321 660 * 635 * 35 350 + 32 W 1,7 A 10035322 1085 * 635 * 35 600 + 36 W 3,0 A 230 V ~ 50 Hz 10035323 1285 * 635 * 35 800 + 40 W...
  • Seite 51: Indicaciones De Seguridad

    INDICACIONES DE SEGURIDAD Símbolos de advertencia ADVERTENCIA Esta palabra de señalización indica un peligro con un nivel de riesgo medio que, si no se evita, puede provocar lesiones graves o la muerte. ADVERTENCIA DE TENSIÓN ELÉCTRICA Este símbolo indica peligro para la vida y la salud de las personas debido a la tensión eléctrica.
  • Seite 52 Indicaciones de seguridad Lea todas las instrucciones de seguridad y todas las instrucciones de uso. El incumplimiento de las indicaciones de seguridad conlleva a riesgos de descarga eléctrica, incendio o lesiones personales graves. Conserve todas las advertencias e instrucciones de seguridad para futuras consultas •...
  • Seite 53 ADVERTENCIA ¡Peligro de quemaduras! Algunas partes del aparato se calientan mucho y pueden producir quemaduras. Tenga especial cuidado cuando haya niños y personas indefensas. • Es peligroso colocar el aparato cerca de cortinas y otros materiales combustibles. • Para evitar el riesgo de quemaduras, se debe tener especial cuidado cuando se utilice el calefactor en presencia de las siguientes personas: los bebés y los niños, las personas con piel sensible, los ancianos, los enfermos, las personas ebrias y las personas que toman pastillas para dormir.
  • Seite 54 • A la hora de seleccionar las extensiones de los cables de alimentación, tenga en cuenta el consumo de energía de la unidad, la longitud del cable y el uso previsto. Desenrolle completamente los cables de extensión. Evite las sobrecargas eléctricas. •...
  • Seite 55: Contenido Del Envío

    CONTENIDO DEL ENVÍO 1 x elemento calefactor 2 x suspensión 1 x termostato y 1 x mando a 4 x tornillo distancia 4 x taco (para tornillo) 1 x manual de instrucciones...
  • Seite 56: Vista General Del Aparato

    VISTA GENERAL DEL APARATO Parte frontal Parte trasera Superficie frontal Borde LED Cable de alimentación Entrada de alimentación LED INSTALACIÓN Notas importantes • ¡Los trabajos de instalación deben ser realizados por un electricista profesional! • ¡Las líneas de entrada de LED deben conectarse a interruptores que estén libres para interrumpir las líneas activas! •...
  • Seite 57 Instalación Perfore cuatro agujeros en el techo con la distancia correcta A y B. Utilice una broca con el diámetro adecuado para que el panel no se caiga Suspensión del techo Tamaño del panel (mm) Distancia entre los agujeros de los tornillos (mm) 660 * 635 (o similar) A500*B100 mm...
  • Seite 58 Deslice primero el marco posterior del panel. A continuación, inserte el otro extremo de la suspensión de techo en el otro lado. Vista tras el montaje completo...
  • Seite 59: Descripción Del Conjunto Y Funciones Generales

    DESCRIPCIÓN DEL CONJUNTO Y FUNCIONES GENERALES Cada juego consta de dos partes: • Un mando a distancia con pantalla digital que alberga la electrónica, los controles y el sensor de temperatura ambiente incorporado. • Un receptor de enchufe que puede recibir y descodificar la señal del mando a distancia.
  • Seite 60: Mando A Distancia

    MANDO A DISTANCIA Bloqueo infantil Icono de envío Calefacción Nivel de la batería Temperatura ambiente Temperatura configurada Fecha Señal del modo Bloqueo infantil ON/ Selección del formato Calentamiento ON/OFF de visualización Abajo Arriba Temperatura favorita Configuración (temperatura FAV) Selección de la hora Modo y el día de la semana actuales...
  • Seite 61: Receptor De Enchufes

    RECEPTOR DE ENCHUFES Interruptor ON/OFF del modo de emparejamiento y luz indicadora Nota: El botón ON/OFF del receptor es para el modo de emparejamiento. Para encender y apagar la estufa, utilice el botón ON/OFF del mando a distancia.
  • Seite 62: Operación En Detalle

    OPERACIÓN EN DETALLE Puesta en marcha Cuando utilice la estufa por primera vez, deberá conectar primero el mando a distancia y el receptor de la toma. • Conecte el enchufe a la toma de corriente. • Mantenga pulsado el botón ON/OFF del receptor de la toma durante 3 segundos.
  • Seite 63 Configurar la temperatura Pulse las teclas ARRIBA o ABAJO para ajustar la temperatura. Si ha programado un temporizador semanal, también puede ajustar la temperatura manualmente. Sin embargo, ésta se sobrescribe con la temperatura objetivo programada al inicio del siguiente periodo de calentamiento. Seleccionar el modo de calefacción Mantenga pulsado el botón MODE durante 3 segundos para seleccionar el modo SMART o el modo TIMER ON/OFF.
  • Seite 64 Hora de inicio inteligente y adaptable Si selecciona el modo SMART cuando se ajusta el temporizador semanal, la calefacción funciona independientemente del temporizador preestablecido. El mando a distancia mide la diferencia de temperatura entre la habitación y la temperatura objetivo 3 horas antes de la hora de inicio programada y decide cuánto antes se debe encender la calefacción para alcanzar la temperatura objetivo a tiempo.
  • Seite 65: Limpieza Y Cuidado

    Indicaciones importantes sobre el uso • Un mismo mando a distancia puede conectarse a varios receptores al mismo tiempo y así hacer funcionar varios calefactores. • Todos los ajustes deben realizarse de nuevo después de un cambio o retirada de pilas. •...
  • Seite 66: Indicaciones Sobre La Retirada Del Aparato

    INDICACIONES SOBRE LA RETIRADA DEL APARATO Si en su país existe una disposición legal relativa a la eliminación de aparatos eléctricos y electrónicos, este símbolo estampado en el producto o en el embalaje advierte de que no debe eliminarse como residuo doméstico.
  • Seite 67: Hoja De Datos Del Producto

    HOJA DE DATOS DEL PRODUCTO Denominación del modelo 10035321 Dato Símbolo Valor Unidad Dato Unidad Potencia térmica Solo con disposítivos de acumulación de calor eléctricos para abastecimiento local: Tipo de regulación del abastecimiento de calor Potencia térmica nominal 0.35 Regulación manual del abastecimiento de calor con termostato integrado: Potencia térmica mínima 0.35...
  • Seite 68: Hoja De Datos Del Producto

    HOJA DE DATOS DEL PRODUCTO Denominación del modelo 10035322 Dato Símbolo Valor Unidad Dato Unidad Potencia térmica Solo con disposítivos de acumulación de calor eléctricos para abastecimiento local: Tipo de regulación del abastecimiento de calor Potencia térmica nominal Regulación manual del abastecimiento de calor con termostato integrado: Potencia térmica mínima Regulación manual de abastecimiento de...
  • Seite 69: Hoja De Datos Del Producto

    HOJA DE DATOS DEL PRODUCTO Denominación del modelo 10035323 Dato Símbolo Valor Unidad Dato Unidad Potencia térmica Solo con disposítivos de acumulación de calor eléctricos para abastecimiento local: Tipo de regulación del abastecimiento de calor Potencia térmica nominal Regulación manual del abastecimiento de calor con termostato integrado: Potencia térmica mínima Regulación manual de abastecimiento de...
  • Seite 71 Cher client, chère cliente, Toutes nos félicitations pour l’acquisition de ce nouvel appareil. Lisez attentivement les indications suivantes et suivez-les pour éviter d'éventuels dommages. Nous ne saurions être tenus pour responsables des dommages dus au non-respect des consignes et à la mauvaise utilisation de l’appareil.
  • Seite 72: Fiche Technique

    FICHE TECHNIQUE Radiateur Numéro d'article Dimensions Puissance Tension Alimentation nominale 10035321 660 * 635 * 35 350 + 32 W 1,7 A 10035322 1085 * 635 * 35 600 + 36 W 3,0 A 230 V ~ 50 Hz 10035323 1285 * 635 * 35 800 + 40 W 3,6 A...
  • Seite 73: Consignes De Sécurité

    CONSIGNES DE SÉCURITÉ Symboles d'avertissement MISE EN GARDE Cet avertissement indique un danger avec un degré de risque moyen qui, s'il n'est pas évité, peut entraîner des blessures graves voire la mort. MISE EN GARDE RELATIVE À LA TENSION ÉLECTRIQUE Ce symbole signale les dangers mortels et pour la santé...
  • Seite 74 Consignes de sécurité Lisez toutes les consignes de sécurité et toutes les instructions d'utilisation. Le non-respect des avertissements et des instructions peut entraîner un choc électrique, un incendie et/ou des blessures graves. Conservez toutes les mises en garde et les consignes de sécurité pour pouvoir vous y référer ultérieurement •...
  • Seite 75 MISE EN GARDE Risque de brûlure ! Certaines parties de cet appareil peuvent être très chaudes et provoquer des brûlures. Il convient d'être particulièrement vigilant en présence d'enfants et de personnes handicapées. • Il est dangereux de placer l'appareil à proximité de rideaux ou d'autres matériaux infl ammables.
  • Seite 76 • Lorsque vous choisissez une rallonge d'alimentation, tenez compte de la puissance absorbée par l'appareil, de la longueur du cordon et de l'usage prévu. Déroulez complètement les rallonges. Évitez les surcharges électriques. • Débranchez l'appareil de la prise de courant avant de procéder à des travaux de maintenance, d'entretien ou de réparation.
  • Seite 77: Contenu De L'emballage

    CONTENU DE L'EMBALLAGE 1 x élément chauffant 2 x suspension 1 x thermostat et 1 x 4 x vis télécommande 4 x chevilles 1 x mode d'emploi...
  • Seite 78: Aperçu De L'appareil

    APERÇU DE L'APPAREIL Face avant Dos de l'appareil Surface avant Encadrement LED Câble secteur Entrée secteur LED INSTALLATION Remarques importantes • Les travaux de montage doivent être effectués par un électricien professionnel ! • Les lignes d'entrée LED doivent être câblées à des interrupteurs libres d'interrompre les lignes sous tension ! •...
  • Seite 79 Installation Percez quatre trous au plafond en respectant les distances A et B. Utilisez une mèche de diamètre approprié pour éviter que le panneau ne tombe ! Suspension au plafond Taille du panneau (mm) Distance entre les trous des vis (mm) 660 * 635 (ou similaire) A500*B100 mm...
  • Seite 80 Insérez d'abord le cadre arrière du panneau. Introduisez ensuite l'autre extrémité de la suspension de plafond de l'autre côté. Vue une fois le montage terminé...
  • Seite 81: Description De L'ensemble Et Fonctions Générales

    DESCRIPTION DE L'ENSEMBLE ET FONCTIONS GÉNÉRALES Chaque ensemble se compose de deux parties : • Une télécommande à affichage numérique dans laquelle sont logés l'électronique, les éléments de commande et la sonde de température ambiante intégrée. • Un récepteur de prise qui peut recevoir et décoder le signal de la télécommande.
  • Seite 82: Télécommande

    TÉLÉCOMMANDE Verrouillage parental Icône d'envoi Chauffage Niveau de la batterie Température ambiante Température réglée Date Affichage du mode Verrouillage parental marche / arrêt Choix du format Chauffage activé/ d'affichage désactivé Haut Température favorite Réglages (température FAV) Réglage de la date et Mode l'heure actuelles...
  • Seite 83: Récepteur De Prise

    RÉCEPTEUR DE PRISE Interrupteur MARCHE/ ARRÊT pour le mode de couplage et voyant lumineux Remarque : la touche MARCHE/ARRÊT du récepteur est prévu pour le mode couplage. Pour allumer ou éteindre le chauffage, utilisez la touche ON/OFF de la télécommande.
  • Seite 84: Fonctionnement En Détail

    FONCTIONNEMENT EN DÉTAIL Mise en marche Lorsque vous utilisez le chauffage pour la première fois, vous devez d'abord connecter ensemble la télécommande et le récepteur de la prise. • Branchez d'abord le récepteur de prise dans la prise. • Maintenez la touche MARCHE/ARRÊT du récepteur de prise pendant 3 secondes.
  • Seite 85 Réglage de la température Appuyez sur la touche HAUT ou BAS pour régler la température cible. Si vous avez réglé une minuterie hebdomadaire, vous pouvez également ajuster la température manuellement. Celle-ci est toutefois écrasée par la température cible programmée au début de la période de chauffage suivante. Choix du mode de chauffage Maintenez la touche MODE pendant 3 secondes pour sélectionner le mode SMART ou le mode TIMER ON/OFF.
  • Seite 86 Démarrage intelligent et adaptatif Si vous sélectionnez le mode SMART alors que la minuterie hebdomadaire est réglée, le chauffage fonctionnera indépendamment de la minuterie préréglée. La télécommande calcule la différence de température entre la pièce et la température cible 3 heures avant l'heure de démarrage programmée et décide de combien d'heures plus tôt le chauffage doit être activé...
  • Seite 87: Nettoyage Et Entretien

    Remarques importantes sur l'utilisation • Une télécommande peut être reliée à plusieurs récepteurs en même temps et ainsi commander plusieurs chauffages. • Tous les réglages doivent être refaits après un changement ou un retrait de pile. • Pour utiliser la minuterie hebdomadaire, vérifiez que la fonction TIMER est sur ON en appuyant longuement sur la touche MODE.
  • Seite 88: Informations Sur Le Recyclage

    INFORMATIONS SUR LE RECYCLAGE Si l'élimination des appareils électriques et électroniques est réglementée dans votre pays, ce symbole sur le produit ou sur l'emballage indique qu'il ne doit pas être mis au rebut avec les ordures ménagères. Vous devez l'acheminer vers un point de collecte pour le recyclage des appareils électriques et électroniques.
  • Seite 89: Fiche De Données Produit

    FICHE DE DONNÉES PRODUIT Référence (s) du produit 10035321 Donnée Symbole Valeur Unité Donnée Unité Puissance calorifique Uniquement pour les radiateurs électriques à accumulation : Type de régulation de l'apport de chaleur Puissance calorifique 0.35 Régulation manuelle de l'apport de chaleur n.c.
  • Seite 90: Fiche De Données Produit

    FICHE DE DONNÉES PRODUIT Référence (s) du produit 10035322 Donnée Symbole Valeur Unité Donnée Unité Puissance calorifique Uniquement pour les radiateurs électriques à accumulation : Type de régulation de l'apport de chaleur Puissance calorifique Régulation manuelle de l'apport de chaleur n.c.
  • Seite 91: Fiche De Données Produit

    FICHE DE DONNÉES PRODUIT Référence (s) du produit 10035323 Donnée Symbole Valeur Unité Donnée Unité Puissance calorifique Uniquement pour les radiateurs électriques à accumulation : Type de régulation de l'apport de chaleur Puissance calorifique Régulation manuelle de l'apport de chaleur n.c.
  • Seite 93 Gentile cliente, La ringraziamo per avere acquistato questo dispositivo. La preghiamo di leggere attentamente le seguenti indicazioni e di seguirle per prevenire eventuali danni. Non ci assumiamo alcuna responsabilità per danni scaturiti da una mancata osservanza delle avvertenze di sicurezza e da un uso improprio del dispositivo.
  • Seite 94: Dati Tecnici

    DATI TECNICI Stufa Numero articolo Dimensioni Potenza Tensione Alimentazione nominale 10035321 660 x 635 x 35 350 + 32 W 1,7 A 10035322 1085 x 635 x 35 600 + 36 W 3,0 A 230 V ~ 50 Hz 10035323 1285 x 635 x 35 800 + 40 W 3,6 A...
  • Seite 95: Avvertenze Di Sicurezza

    AVVERTENZE DI SICUREZZA Simboli di avvertimento AVVERTIMENTO Questa parola di segnalazione indica un pericolo con un livello medio di rischio che, se non evitato, può provocare lesioni gravi o morte. AVVERTIMENTO DI TENSIONE ELETTRICA Questo simbolo indica il pericolo per la vita e la salute delle persone a causa della tensione elettrica.
  • Seite 96 Avvertenze di sicurezza Leggere tutte le avvertenze di sicurezza e le istruzioni per l'uso. Il mancato rispetto delle avvertenze e delle indicazioni può causare scosse elettriche, incendi e/o gravi lesioni. Conservare tutte le avvertenze di sicurezza e le istruzioni per future consultazioni.
  • Seite 97 AVVERTIMENTO Pericolo di ustioni! Alcuni componenti del dispositivo possono diventare estremamente caldi e causare ustioni. È necessario prestare particolare attenzione in presenza di bambini e persone inferme. • È pericoloso posizionare il dispositivo vicino a tende e altri materiali combustibili. •...
  • Seite 98 • Quando si scelgono le prolunghe del cavo di alimentazione, considerare il consumo energetico del dispositivo, la lunghezza del cavo e l'uso previsto. Srotolare completamente i cavi di prolunga. Evitare sovraccarichi elettrici. • Scollegare la spina dalla presa di corrente prima di eseguire lavori di manutenzione, cura o riparazione del dispositivo.
  • Seite 99: Volume Di Consegna

    VOLUME DI CONSEGNA 1 x elemento riscaldante 2 x ganci per la sospensione 1 x termostato & 1 x 4 x viti telecomando 4 x tasselli 1 x manuale d'uso...
  • Seite 100: Descrizione Del Dispositivo

    DESCRIZIONE DEL DISPOSITIVO Lato anteriore Lato posteriore Superficie anteriore Bordo LED Cavo di alimentazione Ingresso di rete dei LED INSTALLAZIONE Note importanti • Le opere di installazione devono essere eseguite da un elettricista professionista! • I condotti d'ingresso dei LED devono essere cablati con interruttori in grado di interrompere senza impedimenti le linee che trasportano corrente! •...
  • Seite 101 Installazione Realizzare quattro fori sul soffitto con la giusta distanza A e B. Usare un trapano con il diametro corretto in modo che il pannello non cada! Fissaggio in sospensione a soffitto Dimensione del pannello (mm) Distanza dei fori delle viti (mm) 660 x 635 (o simile) A500 x B100 mm 1085 x 635 (o simile)
  • Seite 102 Per prima cosa, spingere il telaio posteriore del pannello. Poi inserire l'altra estremità del supporto di sospensione a soffitto dall'altro lato. Vista a montaggio completato...
  • Seite 103: Descrizione Del Set E Funzioni Generali

    DESCRIZIONE DEL SET E FUNZIONI GENERALI Ogni set è composto da due parti: • Un telecomando con display digitale che ospita l'elettronica, gli elementi di controllo e il sensore di temperatura ambiente integrato. • Un ricevitore a presa di corrente che può ricevere e decodificare il segnale del telecomando.
  • Seite 104: Telecomando

    TELECOMANDO Blocco di sicurezza per Icona di invio bambini Stufa Livello della batteria Temperatura ambiente Temperatura impostata Data Indicazione della modalità Blocco di sicurezza per bambini on/off Selezione del formato di Riscaldamento on/off visualizzazione Verso il basso Verso l'alto Temperatura preferita Impostazioni (temperatura FAV) Impostare data e ora...
  • Seite 105: Ricevitore Da Collegare Alla Presa Di Corrente

    RICEVITORE DA COLLEGARE ALLA PRESA DI CORRENTE Interruttore ON/OFF per la modalità di accoppiamento e spia luminosa Nota: il tasto ON/OFF sul ricevitore è per la modalità di accoppiamento. Per accendere e spegnere la stufa, utilizzare il tasto ON/OFF sul telecomando.
  • Seite 106: Il Funzionamento In Dettaglio

    IL FUNZIONAMENTO IN DETTAGLIO Messa in funzione Quando si usa la stufa per la prima volta, collegare prima il telecomando e il ricevitore a presa. • Per prima cosa, inserire la spina nella presa elettrica. • Tenere premuto il tasto ON/OFF sul ricevitore a presa per 3 secondi. •...
  • Seite 107: Impostare La Temperatura

    Impostare la temperatura Premere VERSO IL BASSO o VERSO L'ALTO per impostare la temperatura da raggiungere. Se è stato impostato un timer settimanale, è possibile anche regolare la temperatura manualmente. Tuttavia, questa viene sovrascritta con la temperatura da raggiungere programmata all'inizio della fase di riscaldamento successiva.
  • Seite 108 Ora di avvio adattivo intelligente Se si seleziona la modalità SMART quando il timer settimanale è impostato, la stufa funziona indipendentemente dal timer preimpostato. Il telecomando calcola la differenza di temperatura tra la stanza e la temperatura da raggiungere 3 ore prima dell'ora di inizio programmata e decide quanto prima il riscaldamento deve essere acceso in modo che la temperatura sia raggiunta in tempo.
  • Seite 109: Pulizia E Manutenzione

    Note importanti sull'utilizzo • Un telecomando può essere collegato a diversi ricevitori allo stesso tempo e controllare diverse stufe. • Tutte le impostazioni devono essere eseguite di nuovo dopo la sostituzione o la rimozione della batteria. • Per utilizzare il timer settimanale, assicurarsi che la funzione TIMER sia stata attivata premendo a lungo il tasto MODE.
  • Seite 110: Avviso Di Smaltimento

    AVVISO DI SMALTIMENTO Se nel vostro Paese sono vigenti regolamenti legislativi relativi allo smaltimento di dispositivi elettrici ed elettronici, questo simbolo sul prodotto o sull'imballaggio indica che non è consentito smaltire questo prodotto insieme ai rifiuti domestici. Il dispositivo deve invece essere portato in un centro di raccolta per il riciclaggio di dispositivi elettrici ed elettronici.
  • Seite 111: Scheda Informativa Del Prodotto

    SCHEDA INFORMATIVA DEL PRODOTTO Identificazione del 10035321 modello (i) Indicazione Simbolo Valore Unità Indicazione Unità Potenza termica Solo per gli apparecchi per il riscaldamento d'ambiente locale elettrici ad accumulo: Tipo di controllo dell´apporto termico Potenza termica nominale 0.35 Controllo manuale del carico termico con n.d.
  • Seite 112: Scheda Informativa Del Prodotto

    SCHEDA INFORMATIVA DEL PRODOTTO Identificazione del 10035322 modello (i) Indicazione Simbolo Valore Unità Indicazione Unità Potenza termica Solo per gli apparecchi per il riscaldamento d'ambiente locale elettrici ad accumulo: Tipo di controllo dell´apporto termico Potenza termica nominale Controllo manuale del carico termico con n.d.
  • Seite 113: Scheda Informativa Del Prodotto

    SCHEDA INFORMATIVA DEL PRODOTTO Identificazione del 10035323 modello (i) Indicazione Simbolo Valore Unità Indicazione Unità Potenza termica Solo per gli apparecchi per il riscaldamento d'ambiente locale elettrici ad accumulo: Tipo di controllo dell´apporto termico Potenza termica nominale Controllo manuale del carico termico con n.d.

Diese Anleitung auch für:

100353211003532210035323

Inhaltsverzeichnis