Klarstein Bornholm Single Smart Bedienungsanleitung
Vorschau ausblenden
Andere Handbücher für Bornholm Single Smart:
- Bedienungsanleitung (76 Seiten) ,
- Bedienungsanleitung (76 Seiten) ,
- Bedienungsanleitung (28 Seiten)
Inhaltsverzeichnis
Verfügbare Sprachen
Verfügbare Sprachen
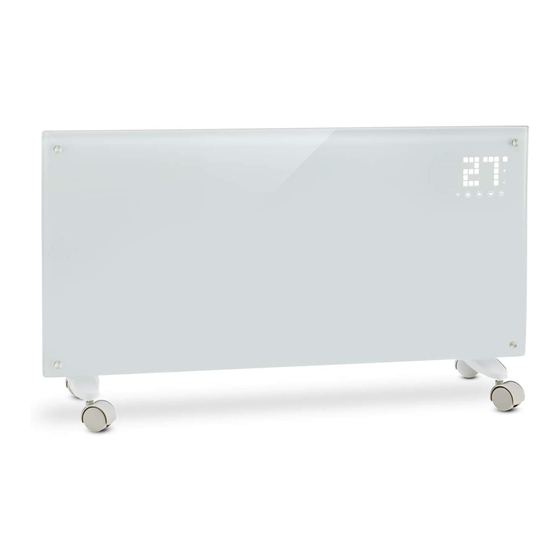
BORNHOLM
SINGLE SMART
Konvektions-Heizung
Convection Heater
Radiador de convección
Radiateur convecteur
Radiatore a convezione
10035235 10035236
www.klarstein.com
Hinweis: Dieses Produkt ist nur für gut isolierte Räume
oder für den gelegentlichen Gebrauch geeignet.
Note: This product is only suitable for well insulated
spaces or occasional use.
Nota: Este producto está indicado únicamente en
lugares abrigados o para una utilización punctual.
Remarque : Ce produit ne peut être utilisé que dans
des locaux bien isolés ou de manière occasionnelle.
Advertencia: Questo prodotto è adatto solo per spazi
ben isolati o uso occasionale.
Kapitel
Inhaltsverzeichnis

Verwandte Anleitungen für Klarstein Bornholm Single Smart


Inhaltszusammenfassung für Klarstein Bornholm Single Smart
- Seite 1 Convection Heater Radiador de convección Radiateur convecteur Radiatore a convezione 10035235 10035236 www.klarstein.com Hinweis: Dieses Produkt ist nur für gut isolierte Räume oder für den gelegentlichen Gebrauch geeignet. Note: This product is only suitable for well insulated spaces or occasional use.
-
Seite 3: Inhaltsverzeichnis
Sehr geehrter Kunde, wir gratulieren Ihnen zum Erwerb Ihres Gerätes. Lesen Sie die folgenden Hinweise sorgfältig durch und befolgen Sie diese, um möglichen Schäden vorzubeugen. Für Schäden, die durch Missachtung der Hinweise und unsachgemäßen Gebrauch entstehen, übernehmen wir keine Haftung. Scannen Sie den folgenden QR-Code, um Zugriff auf die aktuellste Bedienungsanleitung und weitere Informationen rund um das Produkt zu erhalten. -
Seite 4: Produktdatenblatt
PRODUKTDATENBLATT Modellkennung(en) 10035235,10035236 Angabe Symbol Wert Einheit Angabe Einheit Wärmeleistung Nur bei elektrischen Speicher-Einzelraumheizgeräten: Art der Regelung der Wärmezufuhr Nennwärmeleistung Manuelle Regelung der Wärmezufuhr mit Nein integriertem Thermostat Mindestwärmeleistung Manuelle Regelung der Wärmezufuhr Nein mit Rückmeldung der Raum- und/oder Außentemperatur Maximale kontinuierliche Elektronische Regelung der Wärmezufuhr Nein... -
Seite 5: Sicherheitshinweise
SICHERHEITSHINWEISE • Prüfen Sie vor der Benutzung die angegebene Spannung auf dem Typenschild und schließen Sie das Gerät nur an Steckdosen an, die der Spannung des Geräts entsprechen. • Falls das Netzkabel beschädigt ist, lassen Sie es von einer ausgebildeten Fachkraft ersetzen. - Seite 6 • Achten Sie darauf, dass das Netzkabel nicht über scharfe Kanten verläuft oder mit heißen Oberfl ächen in Berührung kommt. • Verdrehen und verbiegen Sie das Netzkabel nicht und wickeln Sie es nicht um das Gerät, da dies dazu führt, dass die Kabelisolierung schwächer wird und bricht. Achten Sie immer darauf, dass das gesamte Netzkabel von der Kabelaufwicklung abgewickelt ist.
-
Seite 7: Geräteübersicht
GERÄTEÜBERSICHT Luftauslass Schalter Füße mit Rollen... -
Seite 8: Montage
MONTAGE Freistehende Montage mit Rollen Rollen montieren Rollen entfernen Knopf drücken Schieben Schieben Wenn die Montage abgeschlossen ist, Knopf drücken, um die Rollen hören Sie einen Klick abzunehmen Wandmontage Von der Wand abnehmen Den Heizer 5 mm hochziehen und dann 10 mm nach links bewegen, um den Heizer abzunehmen... -
Seite 9: Bedienfeld Und Fernbedienung
BEDIENFELD UND FERNBEDIENUNG Taste: Einstellungen Anzeige: Timer Taste: Wert hoch Anzeige: Temperatur Taste: Wert runter LED-Ziffernanzeige Taste: Ein/Aus Taste: LED-Anzeige deaktivieren Betriebsleuchte: Heizelement Taste: Heizstufe hoch/runter Anzeige: niedrige Heizstufe Anzeige: WiFi Verbunden: an Anzeige: hohe Heizstufe Verbindung fehlgeschlagen: aus... -
Seite 10: Bedienung
BEDIENUNG Inbetriebnahme 1. Nehmen Sie das Gerät vorsichtig aus dem Karton. Heben Sie den Karton für die Lagerung außerhalb der Saison auf. 2. Achten Sie darauf, dass die Ein/Aus-Taste ausgeschaltet ist, bevor Sie das Gerät anschließen. 3. Die Heizung muss gemäß der Montageanleitung vollständig zusammengebaut und montiert sein. -
Seite 11: Kindersicherung
Im Betriebsmodus schaltet die Taste (12) zwischen niedriger Heizstufe (LOW), hoher Heizstufe (HIGH) und Heizstopp (OFF) um. Bei hoher Heizstufe leuchtet die Anzeige (7), bei niedriger Heizstufe leuchtet die Anzeige (6). Kindersicherung Drücken Sie im Heizbetrieb die Tasten (2) und (3) gleichzeitig. Die Kindersicherung ist nun aktiv und das System ist gesperrt. -
Seite 12: Gerätesteuerung Per Smartphone
GERÄTESTEUERUNG PER SMARTPHONE Wenn Sie Ihr Klarstein-Gerät in Ihr heimisches WLAN einbinden, können Sie es ganz bequem über die dazugehörige Klarstein-App bedienen. Die App ermöglicht es Ihnen, nicht nur das Gerät über Ihr Smartphone fernzusteuern, sondern bietet Ihnen zudem Zugang zu Rezepten und weiterführenden Informationen. -
Seite 13: Reinigung Und Pflege
Fehlerbehebung bei Verbindungsproblemen Wenn Ihr Klarstein-Gerät im WLAN nicht gefunden werden kann, überprüfen Sie Folgendes: • Ist das Gerät eingesteckt? • Ist die WLAN-Funktion des Smartphones aktiviert? • Ist die WLAN-Funktion des Klarstein-Gerätes aktiviert? (Befolgen Sie die Anweisungen in der App.) •... -
Seite 14: Hinweise Zur Entsorgung
HINWEISE ZUR ENTSORGUNG Wenn es in Ihrem Land eine gesetzliche Regelung zur Entsorgung von elektrischen und elektronischen Geräten gibt, weist dieses Symbol auf dem Produkt oder auf der Verpackung darauf hin, dass dieses Produkt nicht im Hausmüll entsorgt werden darf. Stattdessen muss es zu einer Sammelstelle für das Recycling von elektrischen und elektronischen Geräten gebracht werden.