Herunterladen Inhalt Inhalt Diese Seite drucken

Werbung

Verfügbare Sprachen
  • DE

Verfügbare Sprachen

  • DEUTSCH, seite 1
2
6
5
3
4
>
1
:
T8000
GEBRAUCHSANWEISUNG
BRUGSANVISNING
INSTRUCCIONES DE USO
MANUEL D'UTILISATION
OPERATING MANUAL
ISTRUZIONI D'USO
GEBRUIKSAANWIJZING
INSTRUKCJA OBSŁUGI
2
14
26
38
50
62
74
86

Werbung

Inhaltsverzeichnis
loading

Inhaltszusammenfassung für Tectro T8000

  • Seite 1 T8000 GEBRAUCHSANWEISUNG BRUGSANVISNING INSTRUCCIONES DE USO MANUEL D'UTILISATION OPERATING MANUAL ISTRUZIONI D’USO > GEBRUIKSAANWIJZING INSTRUKCJA OBSŁUGI...
  • Seite 2 Ihnen zum Kauf Ihres Tectro Klimageräts. Außer der Luftkühlung bietet dieses Klimagerät noch zwei weitere Funktionen: Luftentfeuchtung und Luftventilation. Das mobile Tectro Klimagerät lässt sich sehr einfach bedienen und problemlos an eine anderen Stelle platzieren. Sie haben ein Qualitätsprodukt gekauft, an dem Sie noch viele Jahre Freude haben werden, wenn Sie das Klimagerät auf sichere und sachgemäße Weise...
  • Seite 3 INHALT Gerätedaten Seite Teile Seite Vor der Inbetriebnahme Seite Installation Seite Bedienung Seite Wasserbehälter Seite Wartung Seite Garantiebestimmungen Seite Fehlersuche und Abhilfe Seite...
  • Seite 4: Gerätedaten

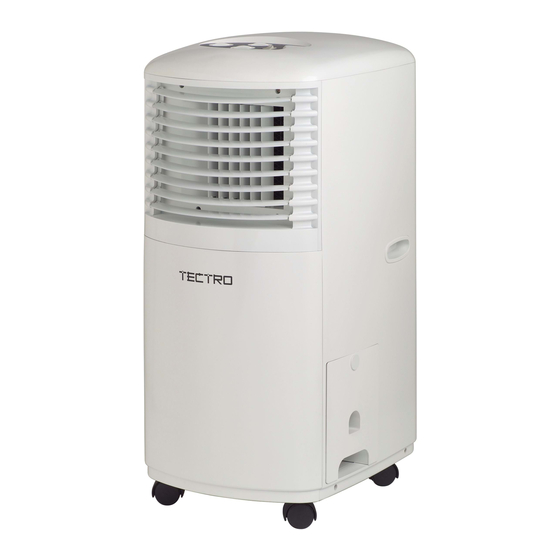
    GERÄTEDATEN Angegebene Werte sind Richtwerte, Änderungen vorbehalten Model T8000 Kühlleistung * - Enthalpiedifferenz nominal Btu/hr 8000 - Enthalpiedifferenz - gemäß EC-Norm 1800 Spannung V/Hz 220-240 / 50 Leistungsaufnahme Stromverbrauch nominal Luftumwältzvolume maximum Entfeuchtung maximum ** L/24h 13,5 Raumkapazität Kompressor Model rotary Kältemittel...
  • Seite 5 TEILE Vorderseite Bedienfeld Luftaustritt der gekühlten Luft Griff Lenkrad Wasserbehälter Rückseite Austritt der Absaugluft Lufteinlass Luftfilter aus Kunststoff Gitter Zubehör ¸ Adapter – zur Aufnahme des Schlauchs und zum Einstecken an der Rückseite der Klimaanlage. ¹ Adapter – für zur Aufnahme des Schlauchs und zum Einstecken in Schaumstoffstreifen.
  • Seite 6 VOR DER INBETRIEBNAHME Warnung! • Schließen Sie das Gerät an eine Schuko-Steckdose mit zulässiger Leistung an. (Siehe den Aufkleber an der Rückseite des Geräts.) • Die Abdeckplatten vor den Luftöffnungen des Geräts dürfen nicht verdeckt oder versperrt werden (Abb. 2). •...
  • Seite 7 ACHTUNG! Nichteinhaltung der oben genannten Anweisungen schließt den Hersteller/Händler von jeglicher Haftung aus. Energiespartipps • Benutzen Sie das Gerät nur in Räumen, die der empfohlenen Größe entsprechen (siehe die Gerätedaten). • Stellen Sie die Klimaanlage so auf, dass keine Möbel oder andere Gegenstände den Luftstrom versper- ren.
  • Seite 8 • Bei Verwendung des runden Fensteranschlusses Runder Fensteranschluss Bringen Sie in der Wand oder im Glas eine Öffnung (Durchschnitt > 112 mm) an, in die der Anschluss passt. Entfernen Sie den Adapter (denjenigen Adapter, der nicht mit dem Gerät verbunden ist) und schlie- ßen Sie den Schlauch direkt an den Fensteranschluss an.
  • Seite 9: Bedienung

    BEDIENUNG Thermostat Geschwindigkeitswahlschalter – GEBLÄSE NIEDRIG, GEBLÄSE HOCH, KÜHLUNG NIEDRIG, KÜHLUNG HOCH Zeitschaltuhr Kontrollleuchte Strom Kontrollleuchte Gebläse Kontrollleuchte Kühlung Kontrollleuchte Swing-Funktion Kontrollleuchte „Behälter voll“ Swing-Schalter EIN/AUS Stellen Sie die Zeitschaltuhr auf EIN (ON), dann läuft das Gerät ununterbrochen, bis es wieder ausge- schaltet wird.
  • Seite 10 Regeln der Richtung der Luftströmung Drücken Sie den Swing-Schalter auf „I“; die senkrechten Flügel bewegen sich hin und her, so dass der Luftstrom gleichmäßig verteilt wird. Die waagerechten Flügel müssen von Hand verstellt werden. ACHTUNG! 1. Der Kompressor hat eine längere Lebensdauer, wenn Sie nach dem Ausschalten mindestens drei Minuten warten, bevor Sie das Gerät wieder einschalten.
  • Seite 11: Wartung

    Mit Wasserablassschlauch (ständiger Wasserabfluss) Während des Kühlvorgangs wird der Luft Feuchtigkeit entzogen; diese Feuchtigkeit wird im Gerät gespei- chert. Wenn der Wasserbehälter voll ist: Nehmen Sie den Wasserbehälter aus dem Gerät. Ziehen Sie den Wasserschlauch im Gerät heraus. Entfernen Sie den Stöpsel aus dem Schlauch. Entfernen Sie den Stöpsel aus der Ablassöffnung.
  • Seite 12: Garantiebestimmungen

    ACHTUNG! Benutzen Sie das Gerät niemals ohne Filter. Lagerung nach der Saison Ziehen Sie den Stecker aus der Steckdose. Entfernen Sie alles Kondenswasser. Möglicherweise befindet sich noch etwas Wasser im Gerät; gehen Sie in dem Fall folgendermaßen vor: Ziehen Sie den Wasserbehälter und den Wasserschlauch im Gerät heraus. Entfernen Sie den Stöpsel aus dem Schlauch und lassen Sie das Wasser in den Wasserbehälter laufen.
  • Seite 13: Fehlersuche Und Abhilfe

    Die Versandkosten und das Versandrisiko des Gerätes, oder dessen Teile, gehen zu allen Zeiten zu Lasten des Käufers. Um unnötige Kosten zu vermeiden, raten wir Ihnen, immer zuerst die Gebrauchsanweisung genau durch- zulesen. Sollte ein Problem auch dann noch nicht zu lösen ist, können Sie das Klimagerät für eine Reparatur zu Ihrem Händler zurückbringen.
  • Seite 14 Kære kunde, Tillykke med det nye Tectro klimaanlæg. Anlægget har to funktioner ud over luftkøling, nemlig affugtning og luftcirkulation. Det mobile Tectro klimaanlæg er særdeles let at betjene og flytte. Dette kvalitetsprodukt vil give mange års glæde, hvis det bruges med omtanke.
  • Seite 15: Inhaltsverzeichnis

    INDHOLD Specifikation Side Dele Side Før ibrugtagning Side Installation Side Betjening Side Vandbeholder Side Vedligeholdelse Side Garantibestemmelser Side Afhjælpning af driftsforstyrrelser Side...
  • Seite 16: A Specifikation

    SPECIFIKATION Oplyste værdier er indikative, Ændringer forbeholdes Type T8000 Kølekapacitet * - enthalpy difference nominal Btu/hr 8000 - enthalpy difference - lever op til EC reglerne 1800 Tilslutningsspænding (1PH) V/Hz 220-240 / 50 Optaget kapacitet Strømforbrug nom. Luftcirkulation max. Affugtning max. **...
  • Seite 17: B Dele

    DELE Fronten Betjeningspanel Luftudtag for kølet luft Håndtag Svinghjul Vandbeholder Bagsiden Udtag for udsuget luft Luftindtag Luftfilter af kunststof Gitter Tilbehør ¸ Adapter – til gennemføring af slange og gennemføring bag på airconditioneren. ¹ Adapter – til gennemføring af slange og gennemføring af skumstrip.
  • Seite 18: Før Ibrugtagning

    FØR IBRUGTAGNING Advarsel! • Enheden skal tilsluttes til en jordet stikkontakt med typisk effekt. (Se mærkat på enhedens bagside.) • Afdækningspladerne til apparatets ventilationsåbninger må ikke tildækkes eller hindres (fig. 2). • Brug ikke apparatet i fugtige omgivelser som f.eks. badeværelse fig.
  • Seite 19: Installation

    Tips til energibesparelse • Enheden må kun bruges i rum med den anbefalede størrelse (se Specifikationen) • Opstil airconditioneren således, at luftstrømmen ikke hindres af møbler eller andre genstande. • Hold rullegardiner / gardiner lukket under de mest solrige timer på dagen. •...
  • Seite 20 • Hvis den runde vinduestilslutning anvendes Rund vinduestilslutning Lav en åbning (diameter > 112 mm) i den væg eller det glas, som tilslutningen passer i. Fjern adapteren (den adapter, der ikke er tilsluttet til enheden) og tilslut slangen direkte til vindu- estilslutningen.
  • Seite 21: E Betjening

    BETJENING Termostat Omskifter til hastighedsregulering – VENTILATOR LAV, VENTILATOR HØJ, KØLING LAV, KØLING HØJ Tænd-sluk-ur Kontrollampe for strøm Kontrollampe for ventilator Kontrollampe for køling Kontrollampe for sving-funktion Kontrollampe 'Beholder fuld' Sving-omskifter TIL/FRA Indstil TÆND-SLUK-URET på TIL. Enheden kører uafbrudt, indtil den slukkes. Kontrollampen for strøm begynder at lyse.
  • Seite 22: F Vandbeholder

    Regulering af luftstrømmens retning Indstil sving-omskifteren på position “I “. De lodrette blade bevæges frem og tilbage, således at luft- strømmen fordeles jævnt. De vandrette blade skal indstilles manuelt. OBS! 1. Kompressorens levetid forøges, hvis man efter slukning af enheden venter mindst tre minutter, før enheden tændes igen.
  • Seite 23: G Vedligeholdelse

    Med vandafløbsslange (konstant vandafløb) Under køleprocessen trækkes fugt ud af luften. Fugten samles inde i enheden. Når vandbeholderen er fuld, gøres følgende: Tag vandbeholderen ud. Træk vandslangen i enheden ud. Fjern afdækningskappen fra slangen. Fjern afdækningskappen fra udløbsåbningen. Tilslut slangen gennem åbningen. Skub vandbeholderen tilbage på...
  • Seite 24: H Garantibestemmelser

    Rengøring af filteret Brug en støvsuger eller bank forsigtigt på filteret for at fjerne støv og snavs. Derefter skal filtret skylles grun- digt under vandhanen (temperaturen må ikke være højere end 40˚ C). Tør filtreret og sæt det tilbage på plads. OBS! Brug aldrig enheden uden filtre.
  • Seite 25: Afhjælpning Af Driftsforstyrrelser

    Normale sliddele, såsom filteret, dækkes ikke af garantien. Garantien gælder kun ved fremvisning af den originale, daterede faktura, og hvis der ikke er foretaget nogen ændringer. Garantien dækker ikke skader forårsaget af misligholdelse eller handlinger, der afviger fra anvisnin- gerne i denne brugervejledning. Transportomkostninger og risici i forbindelse med transporten af klimaanlægget eller komponenter til anlægget altid er for kundens regning.
  • Seite 26 El acondicionador de aire Tectro portátil es sumamente fácil de manejar y transportar. Usted acaba de com- prar un producto de calidad absoluta, que le dará plena satisfacción durante muchos años, a condición que lo utilice debidamente.
  • Seite 27 ÍNDICE Especificaciones página Componentes página Previa la puesta en servicio página Instalación página Manejo página Depósito de agua página Mantenimiento página Garantía página Subsanar fallos página...
  • Seite 28 ESPECIFICACIONES Estos valores son a título indicativo, nos reservamos el derecho de hacer modificaciones Tipo T8000 Capacidad de refrigeración * - diferencia de entalpia valor nominal Btu/hr 8000 - diferencia de entalpia - conforme regulación EC 1800 Voltaje (1PH) V/Hz...
  • Seite 29 COMPONENTES Parte frontal Panel de control Evacuación del aire refrigerado Rueda multidireccional Depósito de agua Parte trasero Evacuación del aire aspirado Entrada de aire Filtro de aire, plástico Rejilla Accesorios ¸ Adaptador – para el acoplamiento del tubo flexible y para el acoplamiento en la parte trasera del acondicionador de aire.
  • Seite 30 PREVIA LA PUESTA EN SERVICIO ¡Atención! • Conectar la unidad a una toma de corriente a tierra con la potencia adecuada. (Ver la etiqueta en el dorso de la unidad.) • No tapar o bloquear las cubiertas de las aberturas de ventilación del aparato (fig.
  • Seite 31 Sugerencias para el ahorro de energía • Usar la unidad únicamente en habitaciones que tengan las dimensiones aconsejadas (ver Especificaciones). • Posicionar el acondicionador de aire de forma que el caudal de aire no quede bloqueado por muebles u otros objetos. •...
  • Seite 32 • Con el uso de un acoplamiento redondo para la ventana Acoplamiento redondo para la ventana Practicar una abertura (sección > 112 mm) en la pared o en la ventana donde encaja el acoplamiento. ∑ Retirar el adaptador (el adaptador que no está conectado con la unidad), acoplar el tubo flexible directamente al acoplamiento de la ventana.
  • Seite 33 MANEJO Termostato Selector de velocidad – VENTILACIÓN BAJA, VENTILACIÓN ALTA, REFRIGERACIÓN BAJA, REFRIGERACIÓN ALTA Temporizador Testigo corriente Testigo ventilador Testigo refrigeración Testigo función swing Testigo 'Depósito lleno' Conmutador swing Activar/Desactivar Graduar el TIMER (temporizador) en ON (activado), la unidad funcionará continuamente hasta que sea apagada.
  • Seite 34: Evacuación Del Agua

    Regulación de la dirección del flujo de aire Oprimir el selector swing en posición “I “; Las lamas verticales giran de izquierdas a derechas y vicever- sa para una distribución homogénea del aire. Las lamas horizontales deben graduarse manualmente. ¡ATENCIÓN! 1.
  • Seite 35 Con una goma de evacuación (evacuación permanente) Durante el proceso de refrigeración, la humedad es extraída del aire, esta humedad es almacenada en la unidad. Cuando el depósito del agua esté lleno: Extraer el depósito del agua del aparato Sacar la goma que está incorporada en la unidad. Retirar el tapón de la goma.
  • Seite 36 Limpieza del filtro Sacudir el filtro o limpiarlo con un aspirador, a continuación aclararlo bien debajo del grifo con agua cor- riente (temperatura máxima de 40°C). Secarlo y volver a colocar en la unidad. ¡ATENCIÓN! Nunca usar la unidad sin filtros. Almacenamiento al final de la temporada Desenchufar la unidad.
  • Seite 37 Componentes sujetos a desgaste normal, tales como el filtro, quedan excluidos de la garantía. La garantía se aplica únicamente si se presenta la factura de compra, fechada y sin modificación alguna. La garantía no cubre los daños causados por manipulaciones contrarias a las descritas en las instrucciones de uso o por negligencia.
  • Seite 38 Le climatiseur roulant Tectro est très facile à utiliser et à déplacer. Vous venez d’acquérir un produit de qualité dont vous pourrez profiter pendant de longues années à...
  • Seite 39 SOMMAIRE Spécifications page Pièces page Avant la première utilisation page Installation page Utilisation page Réservoir d’eau page Entretien page Garantie page Résoudre les pannes page...
  • Seite 40 SPÉCIFICATIONS Ces valeurs sont données à titre indicatif, sous réserve de modifications Model T8000 Puissance frigorifique * - enthalpy difference nominal Btu/hr 8000 - enthalpy difference - conforme aux exigences de l' UE 1800 Tension de raccordement (1PH) V/Hz 220-240 / 50 Puissance absorbée...
  • Seite 41 PIÈCES Devant Tableau de commande Sortie d’air froid Poignée Roulette pivotante Réservoir d’eau Derrière Sortie air aspiré Entrée de l’air Filtre à air en plastique Grille Accessoires ¸ Adaptateur – pour enfiler le tuyau et pour l’introduire à l’arrière du climatiseur. ¹...
  • Seite 42: Avant La Première Utilisation

    AVANT LA PREMIÈRE UTILISATION Avertissement! • Brancher l’appareil sur une prise reliée à la terre et de puissance suffisante (voir autocollant à l’arrière de l’appareil). • Ne pas couvrir ni bloquer les plaques recouvrant les ouvertures d’aération de l’appareil (fig. 2). •...
  • Seite 43 NOTE! Si les instructions mentionnées au-dessus ne sont pas observées, le fabricant/distributeur sera déchargé de toute responsabilité. Conseils pour économiser l’énergie • Utilisez l’appareil seulement dans les pièces dont le volume s’y prête (voir Spécifications). • Placez le climatiseur de façon à ce que son flux d’air ne soit pas entravé par des meubles ou par d’au- tres objets.
  • Seite 44 • Si vous utilisez le profil de raccordement rond pour fenêtre Profil de raccordement rond pour fenêtre Faites une ouverture (diamètre > 112mm) dans le mur ou dans la vitre pour le profil de raccordement. ∑ Retirez l’adaptateur (celui qui n’est pas relié à l’appareil), puis branchez directement le tuyau sur le raccordement de fenêtre.
  • Seite 45 UTILISATION Thermostat Bouton de réglage de la vitesse – VENTILATEUR LENT, VENTILATEUR RAPIDE, REFROIDISSEMENT FAIBLE, REFROIDISSEMENT FORT Minuterie Indicateur lumineux courant électrique Indicateur lumineux ventilateur Indicateur lumineux refroidissement Indicateur lumineux fonction Swing (balayage) Indicateur lumineux 'Réservoir plein' Interrupteur Swing (balayage) MARCHE/ARRÊT Mettez la MINUTERIE en position de MARCHE (ON), l’appareil fonctionne jusqu’à...
  • Seite 46 Le réglage de l’orientation du flux d’air Mettez l’interrupteur ‘Swing’ en position “I “, les lamelles verticales se mettent à pivoter de gauche à droite et diffusent ainsi le flux d’air dans la pièce de façon régulière. Les lamelles horizontales se posi- tionnent manuellement.
  • Seite 47 Avec tuyau de sortie d’eau (évacuation constante de l’eau) Lors du procédé de refroidissement, l’eau est extraite de l’air. Cette humidité reste dans l’appareil. Lorsque le réservoir d’eau est plein: Retirer le réservoir d’eau de l’appareil. Tirer le tuyau d’eau de l’appareil vers l’extérieur. Retirer le couvercle du tuyau.
  • Seite 48: Conditions De Garantie

    ATTENTION! N’utilisez jamais l’appareil sans filtres. Rangement en fin de saison Débranchez l’appareil. Éliminez toute l’eau de condensation. Il est possible qu’il reste un peu d’eau dans l’appareil. Si c’est le cas, procéder comme suit : Retirez le réservoir d’eau en le tuyau d’eau de l’appareil. Retirez le couvercle du tuyau et laissez couler l’eau dans le réservoir.
  • Seite 49: Résoudre Les Pannes

    Les frais d’expédition et les risques liés à l’envoi du climatiseur ou de ses pièces sont toujours à la charge de l’acheteur. Pour éviter des dépenses inutiles, nous vous conseillons de toujours consulter en premier le mode d’emploi. Si celui-ci ne donne pas de résultat, vous pouvez emmener le climatiseur à réparer chez votre distributeur. RÉSOUDRE LES PANNES Panne Cause...
  • Seite 50 Dear Sir, Madam, Congratulations on the purchase of your Tectro air conditioner. The mobile Tectro air con- ditioner is extremely easy to operate and move. You have acquired a high quality product that will provide you with many years of pleasure, on condition that you use it responsibly.
  • Seite 51 CONTENTS Specifications page Parts page Before use page Installation page Operation page Drainage page Maintenance page Guarantee page Problem shooting page...
  • Seite 52: A Specifications

    SPECIFICATIONS To be used as indication, subject to modifications Model T8000 Cooling capacity * - enthalpy difference nominal Btu/hr 8000 - enthalpy difference - conform EC regulation 1800 Power supply V/Hz 220-240 / 50 Power consumption Current nominal Air delivery maximum...
  • Seite 53: B Parts

    PARTS Front Control panel Cooling air outlet Handle Caster Water tank Back Exhaust air outlet Air inlet Plastic air filter Grill Accessoires ¸ Adaptor - for insertion over hose and into back of the air conditioner. ¹ Adaptor - for insertion over hose and into foam strip.
  • Seite 54: Before Use

    BEFORE USE Caution! • Make sure the unit is connected to a earthed, power supply of the correct rating. (Please refer to the rating label locating at the back side of the unit.) • Do not use this product for functions other than those described in this instruction manual.
  • Seite 55: D Installation

    Energy save tips • Please use the unit in the recommended room size. (Please refer to the Specifications). • Do not locate air conditioner where furniture or other objects can obstruct the air flow. • Keep blinds/curtains closed during the sunniest part of the day. •...
  • Seite 56 • Using the round window connectors Round window connector Dig a hole (diameter > 112mm) on the wall/glass to fit the supplied round window connector. Take off the adaptor (the one which does not connect with the unit), fit the hose directly to the round window connector.
  • Seite 57: Operation

    OPERATION Thermostat Speed switch with options for - LOW FAN, HIGH FAN, LOW COOL, HIGH COOL Timer Power indicator Fan operating indicator Cooling operating indicator Swing operation indicator 'Full water' indicator Swing switch Turning ON/OFF Set TIMER to ON for continuous operation (the unit will operate as long as it is not turned off). Power indicator comes on.
  • Seite 58: Drainage

    Regulating air flow direction Press the SWING switch to position " I ", the vertical louvers will swing from side to side for even air distribution. The horizontal louvers must be adjusted by hand. NOTICE! 1. To prolong the compressor's life, after switch-off of the unit, please wait for 3 minutes (at least) before re-switch.
  • Seite 59: Maintenance

    By water tube (continuous drainage) Pull out the water tank. Pull out the water tube inside the unit. Take off the cap on the tube. Remove the cap of the drain hole. Connect the water tube through the drain hole. Push the water tank into place.
  • Seite 60: Guarantee Conditions

    End season storage Unplug the unit. Drain the condensed water COMPLETELY. As there may have some remained water inside the unit, please also drain the unit as below: Pull out the water tank and the water tube inside the unit. Take off the cap of the water tube, make the water drain to the water tank.
  • Seite 61: I Problem Shooting

    PROBLEMSHOOTING Symptom Check Solution Is the machine plugged in ? Is the house power supply on ? The machine doesn't run. Is the 'FULL WATER' indicator on ? Empty the condensed water. Is the room temperature in the working range? Is there direct sunshine ? Put down the curtain.
  • Seite 62 Lei ha acquistato un prodotto di qualità, che Le offrirà molti anni di comfort, a condizione che venga usato in modo responsabile. Per una durata ottimale dello Tectro La invitiamo a leggere le istruzioni d’uso. Le auguriamo molta freschezza e comfort con il Suo Tectro.
  • Seite 63 CONTENUTO Specificazioni pagina Componenti pagina Operazioni preliminari pagina Installazione pagina pagina Serbatoio acqua pagina Manutenzione pagina Garanzia pagina Risoluzione dei problemi pagina >...
  • Seite 64: A Specificazioni

    SPECIFICAZIONI I valori riportati sono indicativi, dati soggetti a modifiche Modello T8000 Cap. di raffreddamento* - differenza di entalpia nominale Btu/hr 8000 - differenza di entalpia - conforme alle norme EC 1800 Alimentazione (1PH) V/Hz 220-240 / 50 Consumo energia Corrente nom.
  • Seite 65: B Componenti

    COMPONENTI Parte anteriore Pannello di controllo Bocca di uscita dell'aria refrigerata Maniglia Ruotino orientabile Serbatoio dell'acqua Parte posteriore Scarico dell'aria aspirata Presa aria Filtro dell'aria in materia plastica Griglia Accessori ¸ Adattatore – per il collegamento del tubo e l'inserimento sul retro del condizionatore. ¹...
  • Seite 66: Operazioni Preliminari

    OPERAZIONI PRELIMINARI Avvertenza! • Per l'allacciamento dell'unità alla rete di alimentazione elettrica servirsi di una presa a muro dotata di messa a terra ed in grado di erogare la potenza richiesta. (Fare riferimento all'etichetta sul retro dell'unità.) • Non coprire o bloccare le griglie di protezione che coprono le fig.
  • Seite 67: Installazione

    NOTA! Il fabbricante/distributore è esente da ogni responsabilità qualora non vengano osservate le suddette istruzioni. Suggerimenti per economizzare i consumi energetici • Utilizzare l'apparecchio solo in ambienti opportunamente dimensionati (consultare le Specifiche). • Posizionare il condizionatore in modo tale che il flusso d'aria non sia ostacolato da mobili o altri oggetti. •...
  • Seite 68 • Con applicazione del raccordo circolare per finestre Raccordo circolare per finestre Realizzare un'apertura (diametro > 112mm) nel muro o nella parete dove è possibile adattare il rac- cordo. ∑ Togliere l'adattatore (quello non collegato all'apparecchio), collegare il tubo direttamente al rac- cordo per finestra.
  • Seite 69: E Uso

    FUNZIONAMENTO Termostato Selettore velocità – VENTILATORE MINIMO, VENTILATORE MASSIMO, RAFFREDDAMENTO MINIMO, RAFFREDDAMENTO MASSIMO Timer Indicatore luminoso alimentazione Indicatore luminoso ventilatore Indicatore luminoso raffreddamento Indicatore luminoso oscillazione attiva Indicatore luminoso 'Serbatoio pieno' Selettore oscillazione Accensione/spegnimento Regolare il TIMER su ON, l'apparecchio rimane in funzione sino al momento in cui è spento. L'indicatore luminoso dell'alimentazione elettrica si accende.
  • Seite 70: Scarico Dell'acqua

    Regolazione dell'orientamento del flusso di aria Portare il selettore della funzione di oscillazione nella posizione “I “, la pale verticali si muovono alter- nativamente in due direzioni per permettere una ripartizione uniforme del flusso di aria. Le pale oriz- zontali possono essere regolate manualmente nella posizione voluta. ATTENZIONE! 1.
  • Seite 71: Manutenzione

    Mediante tubo di scarico (svuotamento costante) Durante il processo di raffreddamento viene sottratta umidità all'aria nell'ambiente: l'umidità è quindi rac- colta nell'apparecchio. Se il serbatoio dell'acqua è pieno: Estrarre il serbatoio dell'acqua. Portare all'esterno dell'apparecchio il tubo dell'acqua. Staccare il tappo che chiude l'estremità del tubo. Rimuovere anche il tappo del foro di scarico.
  • Seite 72: Garanzia

    Disattivazione di fine stagione Togliere la spina dalla presa. Eliminare l'acqua di condensa. E' possibile che vi sia ancora acqua residua nell'apparecchio, in questo caso, procedere nel modo sottostante: Estrarre il serbatoio e il tubo dell'acqua dall'interno dell'apparecchio. Togliere il tappo di chiusura del tubo e fare scorrere l'acqua nel serbatoio. Svuotare il serbatoio.
  • Seite 73: Risoluzione Dei Problemi

    Per prevenire costi inutili, si consiglia di consultare dapprima le istruzioni d’uso Qualora nelle istruzioni non sia presentata la soluzione corretta, rivolgersi al rivenditore di fiducia per la riparazione del condizionatore d’aria. RISOLUZIONE DEI PROBLEMI Guasto Causa Solutione L'apparecchio è allacciato alla fonte di alimentazione? L'allacciamento elettrico domestico è...
  • Seite 74 Geachte mevrouw, meneer, Van harte gefeliciteerd met de aankoop van uw Tectro airconditioner. Naast het koelen van lucht heeft deze airconditioner nog een tweetal functies, namelijk luchtontvochtiging en -circulatie. De verrijdbare Tectro airconditioner is uiterst gemakkelijk te bedienen en te verplaatsen.
  • Seite 75 INHOUD Specificaties pagina Onderdelen pagina Voor ingebruikname pagina Installatie pagina Bediening pagina Waterafvoer pagina Onderhoud pagina Garantiebepalingen pagina Storingen verhelpen pagina...
  • Seite 76: A Specificaties

    SPECIFICATIES Indicatief gebruiken, wijzigingen voorbehouden Model T8000 Koelcapaciteit * - enthalpieverschil nominaal Btu/hr 8000 - enthalpieverschil - conform CE-normering 1800 Aansluitspanning (1PH) V/Hz 220-240 / 50 Opgenomen vermogen Stroomverbruik nom. Luchtverplaatsing max. Ontvochtiging max. ** L/24h 13,5 Ruimtecapaciteit Compressor type...
  • Seite 77: B Onderdelen

    ONDERDELEN Voorzijde Bedieningspaneel Luchtuitlaat gekoelde lucht Hendel Zwenkwieltje Waterreservoir Achterzijde Uitlaat afgezogen lucht Luchtinlaat Plastic luchtfilter Rooster Accessoires ¸ Adapter – voor insteek slang en insteek aan de achterkant van de airconditioner. ¹ Adapter – voor insteek slang en insteek in foam strip.
  • Seite 78: Voor Ingebruikname

    VOOR INGEBRUIKNAME Waarschuwing! • Unit aansluiten op een geaard stopcontact met toelaatbaar ver- mogen. (Zie sticker aan de achterzijde van de unit.) • De afdekplaten voor de luchtopeningen van het apparaat niet afdekken of blokkeren (fig. 2). • Gebruik het apparaat niet in een vochtige omgeving, zoals bad- fig.
  • Seite 79: Installatie

    Energiebesparende tips • De unit alleen gebruiken in ruimtes van geadviseerde omvang (zie Specificaties). • Plaats de airconditioner zo dat meubels of andere objecten de luchtstroom niet blokkeren. • Houd jaloezieën / gordijnen tijdens het zonnigste gedeelte van de dag gesloten. •...
  • Seite 80 • Bij gebruik van ronde raamaansluiting Ronde raamaansluiting Maak een opening (doorsnede > 112mm) in de muur of in het glas waar de aansluiting in past. Verwijder de adapter (de adapter die niet met de unit verbonden is), sluit de slang direct aan op de raamaansluiting.
  • Seite 81: Bediening

    BEDIENING Thermostaat Keuzeschakelaar snelheid – VENTILATOR LAAG, VENTILATOR HOOG, KOEL LAAG, KOEL HOOG Timer Stroom controlelampje Ventilator controlelampje Koeling controlelampje Swing functie controlelampje 'Reservoir vol' controlelampje Swing schakelaar AAN/UIT Stel de TIMER in op AAN (ON), de unit blijft continu draaien tot deze uitgeschakeld wordt. Stroom controlelampje gaat branden.
  • Seite 82: Waterafvoer

    Reguleren richting luchtstroom Druk de swing schakelaar in positie “I “, de verticale bladen bewegen heen en weer zodat de lucht- stroom gelijkmatig verdeeld wordt. De horizontale bladen moeten handmatig versteld worden. ATTENTIE! 1. De compressor gaat langer mee als u na uitschakeling minstens drie minuten wacht met het opnieuw inschakelen van de unit.
  • Seite 83: Onderhoud

    Met waterafvoerslang (constante waterafvoer) Tijdens het koelproces wordt er vocht ontrokken aan de lucht, dit vocht wordt opgeslagen in de unit. Wanneer het waterreservoir vol is: Haal het waterreservoir eruit. Trek de waterslang in de unit naar buiten. Verwijder het afdekkapje van de slang.
  • Seite 84: Garantiebepalingen

    Opslag na het seizoen Haal de stekker uit het stopcontact. Verwijder al het condenswater. Het is mogelijk dat er nog wat water in de unit is achtergebleven, handel zoals hierna beschreven: Trek het waterreservoir en de waterslang binnenin de unit eruit. Verwijder het afdekkapje van de slang, en laat het water in het waterreservoir lopen.
  • Seite 85: Storingen Verhelpen

    STORINGEN VERHELPEN Storing Oorzaak Oplossing Is het apparaat aangesloten? Werkt de stroomvoorziening in huis? Het apparaat werkt niet. Brandt het lampje 'WATERRESERVOIR VOL'? Leeg het reservoir. Ligt de omgevingstemperatuur binnen het operationele bereik? Is er direct zonlicht? Sluit gordijnen / zonwering. Staan er teveel deuren / ramen open? Het apparaat werkt amper.
  • Seite 86 Serdecznie gratulujemy Państwu zakupu klimatyzatora Tectro. Oprócz chłodzenia powietr- za, klimatyzator ten ma jeszcze dwie inne funkcje, mianowicie odwilżanie i wentylacje. Przenośny klimatyzator Tectro jest wyjątkowo prosty w obsłudze i można go łatwo prze- mieszczać. Nabyli Państwo produkt wysokiej jakości, który - przy prawidłowej eksploatacji - będzie Państwu wiernie służył...
  • Seite 87 SPIS TREŚCI Parametry techniczne strona Części strona Przed pierwszym użyciem strona Montaż strona Obsługa strona Zbiornik wody strona Konserwacja strona Warunki gwarancji strona Wykrywanie usterek strona...
  • Seite 88: Parametry Techniczne

    PARAMETRY TECHNICZNE Podane wartości są orientacyjne, z zastrzeżeniem zmian Rodzaj / typ urządzenia T8000 Chłodzenie * - nominalna roznica entalpii Btu/hr 8000 - różnica entalpii - zgodne z przepisami Komisji Europejskiej 1800 Napięcie sieci zasilającej V/Hz 220-240 / 50 Moc pobierana Zużycie energii...
  • Seite 89: Części

    CZęŚCI Przód Pulpit obsługi Wylot schłodzonego powietrza Uchwyt Kółko obrotowe Zbiornik wody Tył Wylot wessanego powietrza Wlot powietrza Plastikowy filtr powietrza Kratka Akcesoria ¸ Złącze - do podłączenia węża oraz do gniazdka z tyłu klimatyzatora. ¹ Złącze do podłączenia węża i przeprowadzenia przez uszczelkę...
  • Seite 90: Przed Pierwszym Użyciem

    PRZED PIERWSZYM UŻYCIEM Uwaga! • Urządzenie podłączać tylko do uziemionego gniazdka o należy- tym napięciu elektrycznym (zob. napięcie na nalepce z tyłu apara- tu). • Nie przykrywać i nie blokować na aparacie otworów przepływu powietrza. • Nie używać aparatu w wilgotnych pomieszczeniach, jak np. łazienka czy pralnia.
  • Seite 91: Montaż

    UWAGA! Wykonanie nie zgodnie z instrukcją zwalnia producenta/dystrybutora z wszelkiej odpowiedzialności. Wskazówki dot. oszczędności energii • Aparat używaj tylko w pomieszczeniach o zaleconych rozmiarach. (zob. PARAMETRY TECHNICZNE). • Postaw klimatyzator tak, aby meble czy inne przedmioty nie blokowały przepływu powietrza. •...
  • Seite 92 • Z użyciem okrągłego mankietu do okna Okrągły mankiet do okna Zrób otwór (o średnicy > 112 mm) w ścianie lub w szybie, tak aby mankiet do niego pasował. Zdejmij złącze (element, który nie jest połączony z aparatem), podłącz wąż bezpośrednio do man- kietu okiennego.
  • Seite 93: Obsługa

    OBSŁUGA Termostat Przełącznik szybkości WENTYLACJA NISKO, WENTYLACJA WYSOKO, CHŁODZENIE NISKO, CHŁODZENIE WYSOKO Czasownik Lampka kontrolna prądu Lampka kontrolna wentylatora Lampka kontrolna chłodzenia Lampka kontrolna wychylenia Lampka kontrolna `Zbiornik jest pełny' Przełącznik wychylenia WŁĄCZONY/WYŁĄCZONY (ON/OFF) Ustaw CZASOWNIK (TIMER) w pozycję ON, aparat pracuje do momentu, kiedy go wyłączysz. Lampka kontrolna prądu się...
  • Seite 94 Regulowanie kierunku wydmuchu powietrza Wciśnij przełącznik wychylenia na pozycję " I ", pionowe łopatki wentylatora poruszają się tam i z pow- rotem, tak aby wydmuch powietrza był równomiernie rozłożony. Poziome łopatki ustawia się ręcznie. UWAGA! Kompresor będzie dłużej sprawny, jeżeli po wyłączeniu aparatu odczekasz co najmniej 3 minuty zanim aparat włączysz ponownie.
  • Seite 95: Konserwacja

    Aparat z wężem odprowadzającym wodę (odprowadzanie ciągłe) W trakcie procesu chłodzenia pochłaniana jest wilgoć z powietrza, która zbiera się w zbiorniku wody znaj- dującym się w aparacie. Kiedy zbiornik jest pełny: Wyjmij zbiornik wody z aparatu. Wąż do wody znajdujący się w aparacie wyciągnij na zewnątrz.
  • Seite 96: Warunki Gwarancji

    Przechowywanie aparatu po sezonie Wyjmij wtyczkę z gniazdka sieci. Usuń wszystką skondensowaną wodę. Aby się upewnić, że w aparacie nie zostały resztki wody, wykonaj następujące czynności: Wyjmij z aparatu zbiornik wody oraz wąż odprowadzający wodę. Zdejmij z węża nakrywkę i opróżnij wąż nad zbiornikiem. Opróżnij zbiornik wody.
  • Seite 97: Wykrywanie Usterek

    WYKRYWANIE USTEREK Awaria Przyczyna Sposób usunięcia Czy aparat jest podłączony do sieci? Czy nie odcięto dopływu prądu? Aparat nie działa. Czy świeci się lampka kontrolna `ZBIORNIK W takim wypadku opróżnij zbiornik. JEST PEŁNY' Czy temperatura otoczenia mieści się w zakresie możliwości aparatu? Czy przez okna wpadają...
  • Seite 98 DISTRIBUTED IN EUROPE BY PVG INTERNATIONAL b.v. i ÖSTERREICH 4 UNITED KINGDOM PVG Austria VertriebsgmbH Lister Gases Salaberg 49 Bridge Street 3350 HAAG Holloway Bank, Wednesbury tel: +43 7434/44867 West Midlands WS10 OAW fax: +43 7434/44868 Tel.: +44 121 506 1818 email: pvgaustria@zibro.com Fax:...

Inhaltsverzeichnis