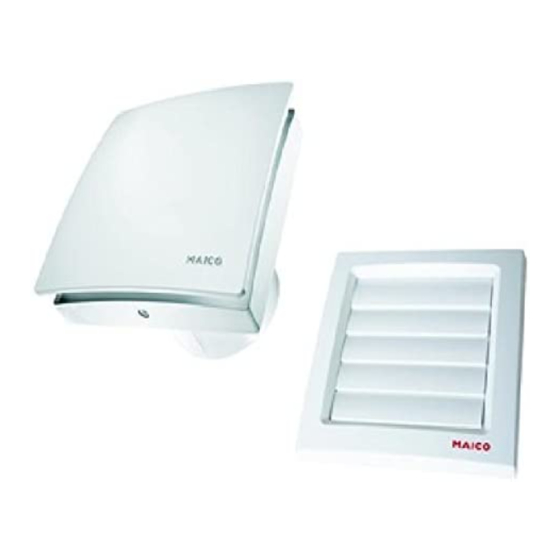
Maico AKE 100 Montage- Und Betriebsanleitung
Automatische kellerentfeuchtung
Vorschau ausblenden
Andere Handbücher für AKE 100:
- Montage- und betriebsanleitung (36 Seiten) ,
- Betriebsanleitung (32 Seiten) ,
- Montage- und betriebsanleitung (36 Seiten)
Inhaltsverzeichnis
Werbung
Verfügbare Sprachen
Verfügbare Sprachen
Quicklinks
Werbung
Inhaltsverzeichnis

Verwandte Anleitungen für Maico AKE 100


Inhaltszusammenfassung für Maico AKE 100
- Seite 1 Montage- und Betriebsanleitung Installation and operating instructions Notice de montage et mode d'emploi AKE 100 www.maico-ventilatoren.com Automatische Kellerentfeuchtung Automatic cellar dehumidification Déshumidificateur de cave automatique...
-
Seite 2: Geräteübersicht
Geräteübersicht Geräteübersicht 1 Gehäuse mit Motor 2 Flügelrad 3 Designabdeckung 4 Abdeckung 5 Innen-Klimasensor 6 Elektronikabdeckung 7 Elektronikplatine 8 Innengitter 9 Leitungstülle 10 Außenverschlussklappe – Wandstück 11 Außenverschlussklappe – Außenstück 12 Außen-Klimasensor mit Sensorverbin- dungskabel... -
Seite 3: Inhaltsverzeichnis
Inhaltsverzeichnis Inhaltsverzeichnis Lieferumfang .......... Qualifikation Fachinstallateur ....Bestimmungsgemäße Verwendung ..Sicherheitshinweise ......4.1 Allgemeine Sicherheitshinweise ..4.2 Sicherheitshinweise zu Installation, Betrieb, Reinigung und Wartung ..Produktinformationen ......Technische Daten ........6.1 Umgebungsbedingungen ....6.2 Technische Datentabelle ....Montagevorbereitungen ......7.1 Wand ..........7.2 Decke .......... -
Seite 4: Lieferumfang
1 Lieferumfang 1 Lieferumfang 4 Sicherheitshinweise • Ventilatoreinheit mit Innen-Klimasensor 4.1 Allgemeine Sicherheitshinweise • Außenverschlussklappe mit Außen-Klimasen- Das Gerät darf in folgenden Situationen auf kei- sor und Sensorverbindungskabel nen Fall eingesetzt werden: • Zwei Dichtbänder GEFAHR Entzündungs-/Brandgefahr • Montage- und Betriebsanleitung durch brennbare Materialien, Flüssigkeiten 2 Qualifikation Fachinstallateur oder Gase in der Nähe des Geräts. - Seite 5 4 Sicherheitshinweise WARNUNG Verletzungsgefahr durch GEFAHR Gefahr durch Stromschlag bei Saugwirkung des Geräts und drehendes Flü- Betrieb mit nicht komplett montiertem oder gelrad. beschädigtem Ventilator. Haare, Kleidung, Schmuck etc. können in das Vor dem Abnehmen des Elektronikabdeckung al- Gerät eingezogen werden, wenn Sie sich zu na- le Versorgungsstromkreise abschalten (Netzsi- he am Gerät aufhalten.
-
Seite 6: Produktinformationen
5 Produktinformationen • Ein zu entlüftender Raum muss mit einem un- verschließbaren, freien Zuluftquerschnitt von mindestens 150 cm² ausgestattet sein, z. B. mit Türlüftungsgitter MLK. 5 Produktinformationen Das Gerät ist ein Kleinraumventilator zum Ent- feuchten von Räumen, insbesondere Kellern und ähnlicher Nebenräume. Das Gerät besitzt ein feststehendes Innengitter und ist mit einem inte- grierten Innen-Klimasensor ausgerüstet. -
Seite 7: Technische Daten
Wohneinheit beträgt 4 Pa. schalten des Ventilators. 6.2 Technische Datentabelle Manuelles Lüften – Taster 2: Siehe Typenschild oder www.maico-ventilato- Das Gerät schaltet den Ventilator vollautomatisch ren.com. und bedarfsoptimiert ein und aus. Im Auszustand kann der Ventilator manuell mit dem Taster 2 ein- 7 Montagevorbereitungen geschaltet werden und somit ein manuelles Lüf-... -
Seite 8: Decke
7 Montagevorbereitungen ð Empfehlung: Wandhülse WH 150 einbauen. 2. Beigefügtes Dichtband am Stutzen mittig an- Einen Wanddurchbruch mit Mindestdurch- bringen. messer 115 mm anbringen. Bei rechtecki- 7.5 Ventilator gen Wanddurchbrüchen Montageplatte ZM 11 verwenden. 1. Gerät auspacken und Abdeckung abnehmen. 3. Netzleitung (Unterputz) bis an den Montageort verlegen, Abstandsmaße siehe oben. -
Seite 9: Montage Und Inbetriebnahme
8 Montage und Inbetriebnahme 4. Sensorverbindungskabel durch Öffnung der Außenabdeckung in Wanddurchbruch/Wand- hülse einlegen. 5. Verschlussklappe an Gehäuse andrücken, bis diese einrastet. 8.3 Befestigung des Sensorverbin- dungskabels 1. Sensorverbindungskabel durch Wanddurch- 6. Beigefügtes Schaumstoffband am Stutzen mit- tig anbringen. bruch/Wandhülse ziehen. Am Gerät unbedingt das Schaumstoffband 2. -
Seite 10: Elektrischer Anschluss
8 Montage und Inbetriebnahme 1. Im Gerät nur Einzeladern verlegen. Dazu ACHTUNG Kurzschlussgefahr und Gerätebe- Mantel der Netzleitung auf einer Länge von schädigung. Eindringendes Wasser bei 70 mm entfernen. Einzelne Adern auf 9 bis falscher Einführung der Netzleitung in das 10 mm abisolieren. Ventilatorgehäuse oder bei nicht fachgerecht eingebauter Leitungstülle. -
Seite 11: Inbetriebnahme
9 Wartung 10 Reinigung GEFAHR Lebensgefahr durch Strom- schlag. Netzsicherung ausschalten. ACHTUNG Gerätebeschädigung bei falschem Reinigungsmittel. Abdeckung nur mit Wasser reinigen. Keine aggressiven Reinigungsmittel verwenden. 1. Innenteile des Ventilators nur mit einem tro- 2. Den mitgelieferten Innen-Klimasensor ckenem Tuch reinigen. lagerichtig (Pfeile) in den Anschlusssockel ein- stecken. -
Seite 12: Demontage
12 Demontage Festen Sitz und richtige 13 Umweltgerechte Entsorgung Einbauorientierung prü- Das Gerät und auch die Verpackung enthalten fen. wiederverwertbare Stoffe, die nicht in den Rest- Beide LEDs blinken 5 Fehler Außen-Klima- müll gelangen dürfen. Entsorgen Sie die Verpa- sensor. Die Verbindung ckungsmaterialien sowie das Gerät umweltge- zum Außen-Klimasensor recht nach den in Ihrem Land geltenden Bestim-... -
Seite 13: Unit Overview
Unit overview Unit overview 1 Housing with motor 2 Impeller 3 Designer cover 4 Cover 5 Internal climate sensor 6 Electronics cover 7 Electronic circuit board 8 Internal grille 9 Cable grommet 10 External shutter – wall piece 11 External shutter – outer piece 12 External climate sensor with sensor con- nection cable... - Seite 14 Table of contents Table of contents Scope of delivery ........15 Specialist installer qualifications ..15 Intended use.......... 15 Safety instructions ....... 15 4.1 General safety instructions ..... 4.2 Safety instructions regarding in- stallation, operation, cleaning and maintenance ........Product information ......16 Technical data ........
-
Seite 15: Scope Of Delivery
1 Scope of delivery 1 Scope of delivery 4 Safety instructions • Fan unit with internal climate sensor 4.1 General safety instructions • External shutter with external climate sensor The unit must not be used in the following situ- and sensor connection cable ations under any circumstances: •... -
Seite 16: Product Information
5 Product information WARNING Risk of injury if foreign objects DANGER Danger if the relevant regula- are inserted into the unit. tions for electrical installations are not ob- Do not insert any objects in the unit. served. Before installing the electrics, shut down all sup- NOTICE A fan that is not installed correctly ply circuits, deactivate the mains fuse and secure may result in non-intended operation or im-... - Seite 17 5 Product information outdoor climate. To do this, an external shutter Display Function with an integrated external climate sensor MUST LED 1: On Automatic operating be connected. To aid in the room dehumidifica- mode tion, an aeration fan can be directly controlled by LED 1: Blinking* Manual ventilation the unit at the same time.
-
Seite 18: Technical Data
1. Deburr edges on the inside of the duct. 6.2 Technical data table 2. Perform installation preparations as described in Chapter Wall [} 18]. See rating plate or www.maico-ventilatoren.com. 7 Mounting preparations Suitable mounting material is to be provided by the customer. -
Seite 19: External Cover
8 Installation and commissioning 7.4 External cover 5 Internal climate sensor 1. Unpack the external shutter with external cli- 6 Electronics cover mate sensor and remove outer piece. To re- 4. Remove the electronics cover. Unlock locking lease the outer piece’s locking hook, unlock hook (→... -
Seite 20: Installation Of External Cover
8 Installation and commissioning 8.2 Installation of external cover 9 Cable grommet 2. Align housing horizontally and mark both dowel holes, see arrow. 3. Drill dowel holes with a Ø of 6 mm and insert dowels. 4. Push cable grommet carefully out of housing and remove it. -
Seite 21: Electrical Connection
8 Installation and commissioning 8. Insert housing into wall breakthrough/wall sleeve and secure with two screws. Do not in- sert the housing such that it is twisted or crushed. Make sure you use mounting mater- Setting button for start delay ial which is sized for the purpose. -
Seite 22: Maintenance
9 Maintenance 3 Designer cover 3 Designer cover 4 Cover 4 Cover 4. Fit designer cover. 3. Attach cover, switch on mains fuse, remove warning sign and carry out function test. Saving of the reference values is shown by LED 1 blinking. 11 Fault rectification 9 Maintenance Fault finding only by qualified electrician. -
Seite 23: Dismantling
Acknowledgements © Maico Elektroapparate-Fabrik GmbH. Transla- tion of the original operating instructions. Mis- prints, errors and technical changes are reserved. The brands, brand names and protected trade marks that are referred to in this document refer to their owners or their products. -
Seite 24: Vue D'ensemble De L'appareil
Vue d'ensemble de l'appareil Vue d'ensemble de l'appareil 1 Boîtier avec moteur 2 Hélice 3 Cache de protection design 4 Cache de protection 5 Détecteur d'atmosphère intérieure 6 Cache électronique 7 Platine électronique 8 Grille intérieure 9 Manchon de câble 10 Volet de fermeture extérieur –... - Seite 25 Sommaire Sommaire Volume de fourniture......Qualification de l'installateur spéciali- sé ............. Utilisation conforme ......Consignes de sécurité ......4.1 Consignes de sécurité générales ..4.2 Consignes de sécurité pour l'instal- lation, le fonctionnement, le net- toyage et l'entretien ......Informations produit......Caractéristiques techniques....
-
Seite 26: Volume De Fourniture
1 Volume de fourniture 1 Volume de fourniture ATTENTION Restriction de l'utilisation suite à vices de construction. • Unité de ventilateur avec détecteur d'atmo- En présence de vices de construction, de l'eau sphère intérieure pénètre souvent dans la cave par les sols ou les •... -
Seite 27: Consignes De Sécurité Pour L'instal- Lation, Le Fonctionnement, Le Net- Toyage Et L'entretien
4 Consignes de sécurité 4.2 Consignes de sécurité pour l'ins- AVERTISSEMENT Risque de blessure tallation, le fonctionnement, le net- lors des travaux en hauteur. Utiliser des auxiliaires d'accès vertical (échelles) toyage et l'entretien appropriés. Assurer la stabilité. Le cas échéant, faire appel à DANGER Danger pour les enfants et les une 2ème personne pour maintenir l'échelle. -
Seite 28: Informations Produit
5 Informations produit 5 Informations produit DANGER Danger en cas de non-respect L'appareil est un aérateur pour petite pièce ser- des consignes en vigueur relatives aux instal- vant notamment à déshumidifier les caves et lo- lations électriques. caux similaires. Cet appareil possède une grille Avant toute installation électrique, couper tous intérieure fixe et est équipé... - Seite 29 5 Informations produit avec le clignotement de la LED 2, l'appareil si- gnale que la déshumidification a réussi et se tra- duit par une réduction de l'humidité de la pièce d'au moins 0,2 g/m³ par rapport à la valeur de ré- férence.
-
Seite 30: Caractéristiques Techniques
Ce faisant, faire sortir le câble secteur d'au moins 110 mm 6.2 Tableau de données techniques du mur. Voir plaque signalétique ou www.maico-ventilato- 7.2 Plafond ren.com. 1. Effectuer les préparatifs de montage comme 7 Préparatifs de montage décrit au chapitre Mur [} 30]. -
Seite 31: Protection Externe
8 Montage et mise en service 3. Retirer le détecteur d'atmosphère intérieure. 7.4 Protection externe 1. Déballer le volet de fermeture extérieur avec 5 Détecteur d'atmosphère intérieure le détecteur d'atmosphère extérieure et retirer 6 Cache électronique l'élément extérieur. Pour détacher l'élément extérieur, déverrouiller les crochets d'arrêt (→... -
Seite 32: Montage De La Protection Externe
8 Montage et mise en service 8.2 Montage de la protection externe 8.4 Montage du boîtier 1. Introduire le boîtier dans le perçage de cloi- son / la gaine murale (TOP = haut). 9 Manchon de câble 2. Positionner le boîtier à l'horizontale et marquer les deux orifices des chevilles, voir flèches. -
Seite 33: Branchement Électrique
8 Montage et mise en service 6. Introduire le câble secteur dans l'espace de 3. Contrôler l'assise du manchon de câble. qui raccordement de manière à ce que le man- doit assurer une bonne étanchéité. chon de câble enserre complètement l'enve- 8.6 Montage final loppe du câble sans pénétrer trop à... -
Seite 34: Mise En Service
9 Entretien H et KH : ne pas toucher la membrane sur le côté plat de la paroi de détecteur / ne pas lui faire supporter de charges, car elle sera endommagée. 3. Placer le cache de protection. 8.7 Mise en service 1. -
Seite 35: Démontage
Mentions légales Le ventilateur ne se La turbine est bloquée. © Maico Elektroapparate-Fabrik GmbH. Traduc- met pas en marche Uniquement réservé aux tion du mode d'emploi d'origine en langue alle- professionnels : Retirer le mande. -
Seite 36: Schaltbilder
Schaltbilder / Wiring diagrams / Schémas de branchement Schaltbilder / Wiring diagrams / Schémas de branchement Entfeuchtungssteuerung Optionaler Taster für manuelles Lüften Anschluss für optionales Zuluftelement, z. B. ECA 11 E... - Seite 37 Notizen...
- Seite 40 Maico Elektroapparate-Fabrik GmbH Steinbeisstr. 20 78056 Villingen-Schwenningen Deutschland Service +49 7720 6940 info@maico.de 0185.1252.0002_06.21_DSW-AS-AV...