Herunterladen Inhalt Inhalt Diese Seite drucken
Wallbox COPPER C Installationsanleitung
Vorschau ausblenden Andere Handbücher für COPPER C:
Inhaltsverzeichnis

Werbung

Verfügbare Sprachen
  • DE

Verfügbare Sprachen

  • DEUTSCH, seite 27
COPPER C
INSTALLATION MANUAL
Installation Guide
Guía de instalación
Installationsanleitung
Guide d'installation
Installatiegids
Guida per I'installazione
Installasjonsveiledning
Installationsguide
Manual de instalação

Werbung

Inhaltsverzeichnis
loading

Inhaltszusammenfassung für Wallbox COPPER C

  • Seite 1 INSTALLATION MANUAL COPPER C Installation Guide Guía de instalación Installationsanleitung Guide d’installation Installatiegids Guida per I’installazione Installasjonsveiledning Installationsguide Manual de instalação...
  • Seite 2 English 3-14 Español 15-26 Deutsch 27-38 Français 39-50 Nederlands 51-62 Italiano 63-74 Norsk 75-86 Svenska 87-98 Português 99-110...
  • Seite 3: Inhaltsverzeichnis

    Contents Safety Recommendations Legal Notice Safety Instructions Product Description Installation Instructions Electrical Protection Dimensions and Positioning of the Device Drill Mounting Startup User Guide Maintenance Limited Warranty Service...
  • Seite 4: Safety Recommendations

    • Wallbox chargers can only be used under the operating parameters specified and within the normal ambient conditions described in the Product Description. • Do not use your Wallbox charger under adverse climatic conditions that could affect the vehicle or the Wallbox device. Do not open the cover in the rain.
  • Seite 5: Product Description

    Through the myWallbox platform, you can monitor energy consumption, view charging history and schedule charging sessions. You even have the option of configuring your Wallbox so that it charges at the most cost- effective time of the day.
  • Seite 6: General Specifications

    Face recognition / Wallbox App / RFID User interface Gesture control / Wallbox App / myWallbox Portal Charger status information 4.3” Screen / RGB LED / Wallbox App / myWallbox Portal Included features Power Sharing Smart Optional features 3G/4G connectivity / Power Boost [1] Only available for Type 2 3P chargers.
  • Seite 7: Product Information

    • 1x RutaSeal® sealing • Mounting parts • 4x Rubber Stoppers • Drilling template Following tools will be required for mounting your Wallbox: Tools required • Phillips Screwdriver • Drilling machine plus 10 mm drill bit • Cutter or wall cable cutter...
  • Seite 8: Installation Instructions

    • The Wallbox charger must be permanently connected to the electrical earth of the installation. • Before installing or cleaning your Wallbox make sure that the power supply is switched off and there is no power in the system.
  • Seite 9: Dimensions And Positioning Of The Device

    400 x 400 mm around it to provide sufficient space for the ergonomics is recommended. *between 1.30 m and 1.60 m above ground level Correct installation is absolutely essential and is outside the scope of the liability of Wallbox. Installation video available at https://wallbox.com/ Drill •...
  • Seite 10: Electrical Connection

    In the case that your Wallbox uses the rear input follow the steps in section 3-A. Otherwise go to section 3-B. 3-A. Rear connection Step 3-A.1: In the back of your Wallbox an area with a thinner wall can be found; use a cutter or any sharp tool and make an incision for entry of the cable.
  • Seite 11 L1 (Current line) The colours shown are not subject to international N (Neutral line) standards. Always check the correct connection. In the event that the earthing system is IT follow the configuration steps in 7. Configuring IT network Protective earth section.
  • Seite 12 SN and UID of your charger. At this point the Copper is registered in myWallbox. To further configure the network as IT follow the next steps: Step 7.4: Enter Wallbox App and select your charger from the charger list.
  • Seite 13: Startup

    Options menu. Startup Once the assembly process has been completed your Wallbox Copper C is ready to be used. However, please review the information below in detail before beginning to operate your Wallbox Copper C: • Do not use your Wallbox Copper C for purposes not described in the section Product Description.
  • Seite 14: Maintenance

    • Make sure that the power supply is turned off before you start cleaning your charger. • If you want to clean your Wallbox we recommend that you use a soft, dry or damp cloth. Do not use a spray or direct water stream to clean your Wallbox charger.
  • Seite 15 Índice Recomendaciones de seguridad Aviso legal Instrucciones de seguridad Descripción del producto Instrucciones de instalación Protección eléctrica Dimensiones y ubicación del dispositivo Perforación Montaje Puesta en marcha Guía del usuario Mantenimiento Garantía limitada Reparaciones...
  • Seite 16: Recomendaciones De Seguridad

    Wallbox. Cualquier daño resultante de tales acciones queda excluido de la garantía. La instalación de Wallbox debe realizarla un electricista profesional de acuerdo con las normas y reglamentos aplicables.
  • Seite 17: Descripción Del Producto

    A través de la plataforma myWallbox, puedes controlar el consumo de energía, ver el historial de cargas y programar nuevas sesiones. Incluso tienes la opción de configurar tu Wallbox para que cargue a la hora en la que el consumo energético resulta más económico.
  • Seite 18: Especificaciones Generales

    Reconocimiento facial / Wallbox App / RFID Interfaz de usuario Control gestual / Wallbox App / Portal myWallbox Información de estado del cargador Pantalla de 4,3” / RGB LED / Aplicación Wallbox / Portal myWallbox Características incluidas Power Sharing Smart...
  • Seite 19: Información Del Producto

    2 - Tipo 2 2 - 7,4 kW 3 - 11 kW 4 - 22 kW La caja de tu Wallbox debe contener los siguientes elementos: Componentes Piezas de montaje • Wallbox Copper con cable de carga • 4 tornillos de 6,3 x 40 mm •...
  • Seite 20: Instrucciones De Instalación

    • El cargador Wallbox debe estar conectado permanentemente a la toma de tierra de la instalación. • Antes de instalar o limpiar tu Wallbox, asegúrate de que la fuente de alimentación esté apagada y de que el sistema no reciba corriente.
  • Seite 21: Dimensiones Y Ubicación Del Dispositivo

    * entre 1,30 m y 1,60 m sobre el nivel del suelo cuadrada libre de 400 x 400 mm a su alrededor. La correcta instalación del dispositivo es esencial y Wallbox no se hace responsable de ninguna incidencia que pueda derivarse de ella.
  • Seite 22: Conexión Eléctrica

    3. Conexión eléctrica Utiliza siempre cables estándar que puedan transmitir la corriente configurada en el selector. Si tu Wallbox utiliza la toma trasera, sigue los pasos de la sección 3-A. De lo contrario, consulta la sección 3-B. 3-A. Conexión trasera Paso 3-A.1: En la parte trasera de tu Wallbox encontrarás una zona con una cubierta más fina.
  • Seite 23 L1 (cable de corriente) Los colores mostrados no están sujetos a las normas N (cable neutro) internacionales. Comprueba siempre que estén bien conectados. En caso de que el sistema de toma de tierra sea IT, sigue los pasos de configuración en 6. Toma de tierra de Sección Configuración de la red IT.
  • Seite 24 (UID). El Copper ya está registrado en myWallbox. Para configurar más ajustes de la red TI, sigue estos pasos: Paso 7.4: Accede a la aplicación Wallbox y selecciona tu cargador de la lista de cargadores que se muestra.
  • Seite 25: Puesta En Marcha

    Puesta en marcha Una vez completado el proceso de montaje, tu Wallbox Copper C está listo para usar. Antes de comenzar a usar tu Wallbox Copper C, lee detenidamente la siguiente información: • No utilices el Wallbox Copper C para fines no descritos en la sección «Descripción del producto».
  • Seite 26: Mantenimiento

    Garantía limitada Wallbox garantiza este producto contra defectos de los materiales y mano de obra por un período de dos años desde la fecha de compra. Durante este período, Wallbox reparará o reemplazará, a su discreción, cualquier producto defectuoso sin cargo para el propietario.
  • Seite 27 Inhalt Sicherheitsempfehlungen Rechtliche Hinweise Sicherheitshinweise Produktbeschreibung Installationsanweisungen Elektrische Sicherheit Maße und Anbringung des Geräts Bohrung Montage Inbetriebnahme Benutzerhandbuch Wartung Eingeschränkte Garantie Service...
  • Seite 28: Sicherheitsempfehlungen

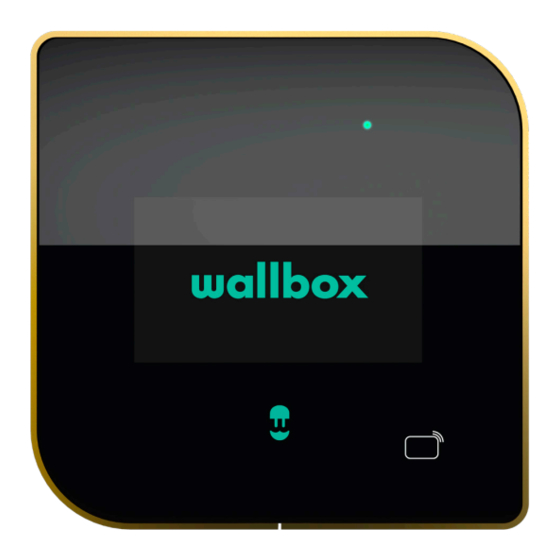
    Dieses Dokument soll als Referenzhandbuch für die Installation und den Betrieb der Ladestation verwendet werden. Die gezeigten Produktbilder dienen nur zur Veranschaulichung und stellen möglicherweise nicht die genaue Abbildung des Produkts dar. Wallbox behält sich das Recht vor, jederzeit und ohne vorherige Ankündigung Änderungen an den Produktspezifikationen und -verfahren sowie der Dokumentation vorzunehmen.
  • Seite 29: Empfehlungen Für Den Ladestecker

    Sammelstelle für Sonderabfälle oder zu einem Händler, der diesen Service anbietet, gebracht werden. Produktbeschreibung Einleitung Wallbox Copper C bietet ein innovatives Ladeerlebnis mit intuitiver Interaktion. Wallbox hat damit ein revolutionäres Ladesystem für Elektrofahrzeuge und Plug-in-Hybride entwickelt, das zum ersten Mal Gesichtserkennung und die Sense-Bewegungserkennungstechnologie integriert.
  • Seite 30: Allgemeine Spezifikationen

    Benutzeridentifikation Gesichtserkennung / Wallbox-App / RFID Benutzeroberfläche Gestensteuerung / Wallbox-App / myWallbox-Portal Statusinformation Ladestation 4,3-Zoll-Bildschirm / RGB-LED / Wallbox-App / myWallbox-Portal Enthaltene Ausstattung Power Sharing Smart Optionale Ausstattung 3G/4G-Konnektivität / Power Boost [1] Nur für Ladestationen mit Typ-2-Stecker, 3P, erhältlich.
  • Seite 31: Produktinformation

    • 4 x Dübel, Ø 8 mm • Installationsanleitung • 1 x RutaSeal®-Dichtung • Befestigungselemente • 4 x Gummistopfen • Bohrschablone Die folgenden Werkzeuge sind für die Montage der Wallbox-Ladestation erforderlich: Erforderliches Werkzeug • Kreuzschlitzschraubendreher • Bohrmaschine mit 10-mm-Bohrer • Cutter oder Kabelschneider • Torx T20...
  • Seite 32: Installationsanweisungen

    • Der Stromversorgungsanschluss muss den Normen und Bestimmungen für Verkabelung und Gebäudeinfrastruktur entsprechen. • Die Wallbox-Ladestation muss dauerhaft mit der elektrischen Masse der Installation verbunden sein. • Vor der Installation oder Reinigung der Wallbox-Ladestation muss sichergestellt werden, dass die Stromversorgung abgeschaltet und kein Strom im System vorhanden ist.
  • Seite 33: Maße Und Anbringung Des Geräts

    400 x 400 mm rundum wird empfohlen, um *zwischen 1,30 m und 1,60 m über dem Boden genügend Platz für Ergonomie zu schaffen. Eine korrekte Installation ist zwingend erforderlich und liegt nicht im Haftungsbereich von Wallbox. Installationsvideo verfügbar unter https://wallbox.com/ Bohrung •...
  • Seite 34: Stromanschluss

    Schritt 3-A.3: Befestigen Sie die Ladestation an der Wand. Setzen Sie die Schrauben in die markierten Stellen ein. Beginnen Sie oben und machen Sie dann weiter im Uhrzeigersinn (I-5. 1 ). Überprüfen Sie, ob die Wallbox Copper Ladestation fest an der Wand befestigt ist.
  • Seite 35: Ethernet-Anschluss (I-6)

    L1 (Außenleiter) abgebildeten Farben unterliegen nicht N (Neutralleiter) den internationalen Normen. Überprüfen Sie immer den korrekten Anschluss. Für den Fall, dass das Erdungssystem IT ist, befolgen Sie die Schutzleiter Konfigurationsschritte unter 7. Konfiguration des IT- Netzbereichs. 1. Schraube 2. Schraube I-5.2: Einphasiger Anschluss (1P) N (Neutralleiter) 4.
  • Seite 36: Halterung Für Ladestecker

    UID der Ladestation ein. Ab sofort ist die Copper Ladestation bei myWallbox registriert. Befolgen Sie die nächsten Schritte, um das Netz weiter als IT-Netz zu konfigurieren: Schritt 7.4: Wählen Sie in der Wallbox-App Ihre Ladestation aus der Liste der Ladestationen aus.
  • Seite 37: Inbetriebnahme

    IT-Netz. Inbetriebnahme Nach Abschluss der Montage ist die Wallbox Copper C Ladestation einsatzbereit. Sehen Sie sich jedoch vor Inbetriebnahme der Wallbox Copper C Ladestation bitte die folgenden Informationen im Detail an: • Verwenden Sie die Wallbox Copper C Ladestation nicht für Zwecke, die nicht im Abschnitt Produktbeschreibung beschrieben sind.
  • Seite 38: Wartung

    Wartung Ergreifen Sie einige Vorsichtsmaßnahmen, um eine korrekte Wartung sicherzustellen: • Innerhalb der Wallbox-Ladestation gibt es keine Teile, die der Benutzer warten muss. Nur ein qualifizierter Elektriker darf die Wallbox-Ladestation öffnen und verändern. • Vergewissern Sie sich, dass die Stromversorgung ausgeschaltet ist, bevor Sie mit der Reinigung der Ladestation beginnen.
  • Seite 39 Sommaire Recommandations de sécurité Mentions légales Consignes de sécurité Description du produit Consignes d'installation Protection électrique Dimensions et positionnement du dispositif Perceuse Montage Prise en main Guide de l'utilisateur Entretien Garantie limitée Réparation...
  • Seite 40: Recommandations De Sécurité

    Wallbox. Tout dommage résultant de telles actions ne sera pas couvert par la garantie. L'installation du dispositif Wallbox doit être effectuée par un électricien qualifié, conformément aux réglementations en vigueur. Les informations contenues dans le présent Guide d'installation ne dégagent pas l'utilisateur de son obligation de respecter toutes les normes et règles ou...
  • Seite 41: Description Du Produit

    Outre ces innovations, la technologie, la conception, la taille et la fonctionnalité du Copper C ont été nos priorités principales, afin de garantir des performances de charge optimales.
  • Seite 42: Spécifications Générales

    Reconnaissance faciale / Application Wallbox / RFID Interface utilisateur Contrôle gestuel / Application Wallbox / Portail myWallbox Informations sur l'état du chargeur Écran 4,3 po./ LED RVB / Application Wallbox / Portail myWallbox Fonctionnalités incluses Power Sharing Smart Fonctionnalités facultatives Connectivité 3G/4G / Power Boost [1] Uniquement disponible pour les chargeurs 3P de type 2.
  • Seite 43: Informations Sur Le Produit

    • Guide d'installation • 4 bouchons en caoutchouc • Pièces de montage • Gabarit de perçage Les outils suivants sont nécessaires au montage de votre Wallbox : Outils requis • Tournevis cruciforme • Perceuse + foret de 10 mm • Pince coupante ou coupe-câbles...
  • Seite 44: Consignes D'installation

    • La connexion de l'alimentation électrique doit être conforme aux normes et lois en vigueur en matière de câblage et d'infrastructure des bâtiments. • Le chargeur Wallbox doit être relié en permanence à la mise à la terre électrique de l'installation. • Avant d'installer ou de nettoyer votre Wallbox, assurez-vous que l'alimentation électrique est coupée et que le système n'est pas sous tension.
  • Seite 45: Dimensions Et Positionnement Du Dispositif

    400 mm 150 mm (hauteur par largeur) (I-1) est requise pour installer la borne de recharge Wallbox. • Lors de l'installation de la Wallbox, le câble doit facilement pouvoir atteindre la prise du véhicule. • Pour un fonctionnement sans danger de votre borne de recharge, il est important de respecter 150 mm...
  • Seite 46: Connexion Électrique

    Utilisez toujours des câbles standard pouvant conduire la charge de courant configurée au niveau du sélecteur d'intensité. Dans le cas où votre Wallbox utilise l'entrée arrière, suivez les étapes décrites à la section 3-A. Sinon, allez à la section 3-B.
  • Seite 47 L1 (circuit de courant) Les couleurs présentées ne sont pas soumises N (neutre) aux normes internationales. Veillez toujours à ce que le branchement soit correct. Dans le cas où le système de mise à la terre comporte un schéma IT, Mise à...
  • Seite 48 (UID) de votre chargeur. Le Copper est à présent enregistré dans myWallbox. Pour configurer le réseau sur IT, suivez les étapes suivantes: Étape 7.4 : Entrez dans l'appli Wallbox et sélectionnez votre chargeur dans la liste des chargeurs.
  • Seite 49: Prise En Main

    Prise en main Une fois le processus d'assemblage terminé, votre Wallbox Copper C est prêt à être utilisé. Toutefois, veuillez examiner en détail les informations ci-dessous avant de commencer à utiliser votre Wallbox Copper C : • N'utilisez pas votre Wallbox Copper C à des fins non décrites dans la sectionDescription du produit.
  • Seite 50: Entretien

    Wallbox garantit ce produit contre tout défaut de matériel et de fabrication pendant une période de deux ans à compter de la date d'achat. Au cours de cette période, Wallbox réparera ou remplacera, à sa discrétion, tout produit défectueux sans frais pour le propriétaire. Les produits de rechange ou les pièces réparées ne seront couverts que pour la partie encore valable de la garantie initiale ou pendant six mois, selon la période la plus...
  • Seite 51 Inhoud Veiligheidsaanbevelingen Wettelijke kennisgeving Veiligheidsinstructies Productomschrijving Installatie-instructies Elektrische bescherming Afmetingen en plaatsing van het apparaat Boor Montage Opstarten Gebruikershandleiding Onderhoud Beperkte garantie Service...
  • Seite 52: Veiligheidsaanbevelingen

    De Wallbox-lader is ontworpen, ontwikkeld en geproduceerd om te voldoen aan de vereisten, veiligheidsmaatregelen en normen van de richtlijnen in de conformiteitsverklaring.
  • Seite 53: Productomschrijving

    Via het myWallbox-platform kunt u het energieverbruik monitoren, de laadgeschiedenis bekijken en laadsessies plannen. U hebt zelfs de optie om uw Wallbox zo te configureren dat deze op het goedkoopste moment van de dag gaat laden.
  • Seite 54: Algemene Specificaties

    Connectiviteit Wifi/Ethernet/Bluetooth Gebruikersidentificatie Gezichtsherkenning/Wallbox-app/RFID Gebruikersinterface Gebarenbediening/Wallbox-app/myWallbox-portal Statusinformatie lader Scherm van 4,3"/RGB LED/ Wallbox-app /myWallbox-portal Inbegrepen functies Power Sharing Smart Optionele functies 3G/4G-connectiviteit/Power Boost [1] Alleen beschikbaar voor type 2 3P-opladers. [2] 3P alleen beschikbaar voor type 2. [3] Type A of type B volgens lokale regelgeving. Wanneer reststroomdetectie aanwezig is, kan RCCB type A voldoende zijn.
  • Seite 55: Productinformatie

    • Installatiegids • 1x RutaSeal®-afdichting • Montage-onderdelen • 4x rubberen stoppers • Boorsjabloon Voor de montage van uw Wallbox hebt u de volgende gereedschappen nodig: Benodigd gereedschap • Kruiskopschroevendraaier • Boormachine met boor van 10 mm • Kniptang of kabeltang...
  • Seite 56: Installatie-Instructies

    • De Wallbox-lader moet permanent worden aangesloten op de elektrische aarding van de installatie. • Voordat u uw Wallbox installeert of schoonmaakt, moet u controleren of de stroomtoevoer is uitgeschakeld en er geen stroom in het systeem aanwezig is.
  • Seite 57: Afmetingen En Plaatsing Van Het Apparaat

    400 x 400 mm rondom wordt aanbevolen om voldoende ergonomische ruimte te bieden. *tussen 1,30 m en 1,60 m boven de grond Een correcte installatie is absoluut noodzakelijk en valt buiten de verantwoordelijkheid van Wallbox. Er is een installatievideo beschikbaar op https://wallbox.com/ Boor •...
  • Seite 58: Elektrische Aansluiting

    Stap 3-A.3: Ga verder met het bevestigen van de lader aan de muur. Plaats de schroeven op de gemarkeerde posities. Begin aan de bovenkant en werk vervolgens met de klok mee (I-5. 1 ). Controleer of uw Wallbox Copper stevig aan de muur is bevestigd.
  • Seite 59 L1 (stroomdraad) De getoonde kleuren zijn niet onderworpen aan N (neutrale lijn) internationale normen. Controleer altijd of de aansluiting juist is. Als het aardingssysteem IT is, Beschermende volgt u de configuratiestappen in 7. Configuratie van aarde het IT-netwerkgedeelte. 1. Schroef 2.
  • Seite 60 UID van uw lader in. Nu is de Copper geregistreerd in myWallbox. Volg de volgende stappen om het netwerk verder te configureren als IT: Stap 7.4: Open de Wallbox-app en selecteer uw lader in de lijst met laders.
  • Seite 61: Opstarten

    Installatieopties. Opstarten Zodra het montageproces is voltooid, is uw Wallbox Copper C klaar voor gebruik. Lees de onderstaande informatie echter eerst uitvoerig door voordat u uw Wallbox Copper C in gebruik neemt: • Gebruik uw Wallbox Copper C niet voor doeleinden die niet worden beschreven in het gedeelte Productomschrijving.
  • Seite 62: Onderhoud

    Als u van mening bent dat uw product defect is, neem dan contact op met Wallbox voor instructies over waar u het product voor reparatie naartoe moet sturen of brengen.
  • Seite 63 Indice Raccomandazioni di sicurezza Nota legale Istruzioni di sicurezza Descrizione del prodotto Istruzioni di installazione Protezione elettrica Dimensioni e posizionamento del dispositivo Foratura Montaggio Avvio Guida dell'utente Manutenzione Garanzia limitata Servizio...
  • Seite 64: Raccomandazioni Di Sicurezza

    Le informazioni fornite in questa Guida per l'installazione non sollevano l'utente dalla responsabilità di seguire tutte le norme e gli standard o le normative locali, ove applicabili. Il caricabatterie Wallbox è stato progettato, sviluppato e realizzato per soddisfare i requisiti, le disposizioni di sicurezza e le norme secondo le direttive presentate nella dichiarazione di conformità.
  • Seite 65: Descrizione Del Prodotto

    Attraverso la piattaforma myWallbox è possibile monitorare il consumo energetico, visualizzare la cronologia di ricarica e programmare le sessioni di ricarica. Hai anche la possibilità di configurare il tuo Wallbox in modo che si ricarichi al momento più conveniente della giornata.
  • Seite 66: Specifiche Generali

    Riconoscimento facciale / App Wallbox / RFID Interfaccia utente Controllo gestuale / App Wallbox / Portale myWallbox Informazioni sullo stato del caricatore Schermo da 4,3" / LED RGB / App Wallbox / Portale myWallbox Funzioni incluse Power Sharing Smart Funzioni opzionali Connettività...
  • Seite 67: Informazioni Sul Prodotto

    • 1 guarnizione RutaSeal® • Parti di montaggio • 4 tappi in gomma • Dima di foratura Per montare la Wallbox sono necessari i seguenti strumenti: Strumenti necessari • Cacciavite Phillips • Trapano con punta da 10 mm • Tagliacavi o tagliacavi da parete...
  • Seite 68: Istruzioni Di Installazione

    • Il caricabatterie Wallbox deve essere collegato permanentemente alla presa elettrica a terra dell'impianto. • Prima di installare o pulire la Wallbox assicurarsi che l'alimentazione sia disattivata e che non ci sia corrente in circolo nel sistema.
  • Seite 69: Dimensioni E Posizionamento Del Dispositivo

    400 mm al fine di disporre di spazio sufficiente *tra 1,30 m e 1,60 m dal suolo per l'ergonomia. Una corretta installazione è assolutamente indispensabile ed esula dalla responsabilità di Wallbox. Video di installazione disponibile all'indirizzo https://wallbox.com/ Foratura • Utilizzare la dima di foratura come guida per contrassegnare il punto delle quattro viti di ancoraggio alla parete.
  • Seite 70: Collegamento Elettrico

    3. Collegamento elettrico Utilizzare sempre cavi standard in grado di veicolare la corrente impostata nel selettore di corrente. Nel caso in cui la Wallbox utilizzi l'ingresso posteriore, seguire i passaggi nella sezione 3-A. Altrimenti, passare alla sezione 3-B. 3-A. Collegamento posteriore Passaggio 3-A.1: Nella parte posteriore della Wallbox è...
  • Seite 71 L1 (Linea della corrente) I colori mostrati non sono soggetti agli standard N (Linea neutra) internazionali. Verificare sempre corretto collegamento. Nel caso in cui l'impianto a terra sia di tipo informatico seguire i passaggi di configurazione al punto 7. Sezione Configurazione della rete IT. Messa a terra protettiva 1.
  • Seite 72 Passaggio 6.3: Posizionare gli ancoraggi a parete sul muro. Inserire le viti nelle posizioni contrassegnate. 7. Configurazione della rete informatica Passaggio 7.1: Scaricare l'app Wallbox, disponibile da Android Play Store o Apple App Store. Passaggio 7.2: Accedere Passaggio 7.3: Aggiungere usando il proprio account.
  • Seite 73: Avvio

    Una volta completato il processo di assemblaggio, Wallbox Copper C è pronto per essere utilizzato. Tuttavia, si prega di consultare attentamente le informazioni di seguito prima di iniziare a utilizzare Wallbox Copper C: • Non utilizzare Wallbox Copper C per scopi non riportati nella sezione Descrizione del prodotto.
  • Seite 74: Manutenzione

    • Assicurarsi che la corrente sia disattivata prima di pulire il caricabatterie. • Se si desidera pulire la Wallbox, consigliamo l'utilizzo di un panno morbido, asciutto o umido. Non utilizzare uno spray o un flusso d'acqua diretto per pulire il caricabatterie Wallbox.
  • Seite 75 Innhold Sikkerhetsanbefalinger Juridisk merknad Sikkerhetsinstruksjoner Produktbeskrivelse Installasjonsinstruksjoner Elektrisk vern Enhetens dimensjoner og plassering Boring Montering Oppstart Brukerveiledning Vedlikehold Begrenset garanti Service...
  • Seite 76: Sikkerhetsanbefalinger

    Hvis sikkerhetsinformasjonen og instruksjonene som er angitt i denne håndboken og på selve enheten ikke følges, kan dette føre til elektrisk støt, brann og/eller alvorlige skader samt skader på kjøretøyet eller på Wallbox- enheten. Skader som skyldes slike handlinger dekkes ikke av garantien. Installasjon av Wallbox-enheten må...
  • Seite 77: Produktbeskrivelse

    I tillegg til disse innovasjonene benytter Copper C en sofistikert kombinasjon av teknologi, design, størrelse og funksjonalitet for å sikre optimal ladeytelse. Via myWallbox-plattformen kan du overvåke strømforbruk, se ladehistorikken og programmere ladeøkter. Du har til og med muligheten til å konfigurere din Wallbox slik at opplading skjer på den mest kostnadseffektive tiden av døgnet.
  • Seite 78: Generelle Spesifikasjoner

    Brukeridentifikasjon Ansiktsgjenkjenning / Wallbox App / RFID Brukergrensesnitt Bevegelseskontroll / Wallbox App / myWallbox Portal Laderstatusinformasjon 4,3" skjerm / RGB LED / Wallbox App / myWallbox Portal Inkluderte funksjoner Power Sharing Smart Valgfrie funksjoner 3G/4G-tilkobling / Power Boost [1] Kun tilgjengelig for 3P-ladere av type 2.
  • Seite 79: Nødvendig Verktøy

    • 4x veggfester, Ø 8 mm • Installasjonsveiledning • 1x RutaSeal®-forsegling • Monteringsdeler • 4x gummistoppere • Boremal Du trenger følgende verktøy for å montere Wallbox: Nødvendig verktøy • Phillips-skrutrekker • Drill samt en drillbit på 10 mm • Kutter eller veggkabelkutter • Torx-skrue, T20...
  • Seite 80: Installasjonsinstruksjoner

    • Wallbox-laderen må ha en permanent elektrisk jordtilkobling. • Før du installerer eller rengjør Wallbox, sørg for at strømtilførselen er frakoblet og at det ikke er strøm i systemet. • Laderen må installeres på et sted med tilstrekkelig ventilasjon, for å sikre at den holdes kjølig.
  • Seite 81: Enhetens Dimensjoner Og Plassering

    400 x 400 mm rundt den for å gi * mellom 1,30 m og 1,60 m over bakkenivå bevegelsesfrihet ved bruk. Det er helt avgjørende at installasjonen gjøres riktig, og dette har ikke Wallbox noe ansvar for. Installasjonsvideo er tilgjengelig på https://wallbox.com/ Boring •...
  • Seite 82 3. Strømtilkobling Bruk alltid standardledninger som kan føre strømmen som er innstilt i strømvelgeren. Hvis din Wallbox bruker den bakre inngangen, følg trinnene i avsnitt 3-A. Hvis ikke, gå til avsnitt 3-B. 3-A. Tilkobling bak Trinn 3-A.1: Bak på Wallboxen finnes et område der veggen er tynnere; bruk en kutter eller et annet skarpt verktøy og skjær et hull der ledningen kan føres inn.
  • Seite 83 Fargene som vises er ikke underlagt internasjonale L1 (strømledning) standarder. Kontroller alltid koblingene N (nøytralledning) er riktige. Hvis jordingssystemet er IT, følg konfigurasjonstrinnene i 7. Konfigurering for IT-nett- avsnittet. Jording 1. Skrue 2. Skrue I-5.2: Enfaset oppsett (1P) N (nøytralledning) 3.
  • Seite 84 SN og UID for laderen. Nå er Copper registrert i myWallbox. For å videre konfigurere nettverket som IT, følg de neste trinnene: Trinn 7.4: Gå inn i Wallbox App og velg laderen din i listen over ladere.
  • Seite 85: Oppstart

    Oppstart Etter at monteringsprosessen er utført, er Wallbox Copper C klar til bruk. Imidlertid bør du gå gjennom informasjonen nedenfor i detalj før du begynner å bruke Wallbox Copper C: • Ikke bruk Wallbox Copper C til formål som ikke er beskrevet i Produktbeskrivelse-avsnittet.
  • Seite 86: Vedlikehold

    • Vær sikker på at strømtilførselen er slått av før du begynner renhold av laderen din. • Hvis du ønsker å rengjøre Wallbox, anbefaler vi at du bruker en myk klut som er tørr eller fuktig. Ikke bruk noen slags spray eller direkte vannsprut for å rengjøre Wallbox-laderen.
  • Seite 87 Innehåll Säkerhetsrekommendationer Juridiskt meddelande Säkerhetsinstruktioner Produktbeskrivning Installationsinstruktioner Elektriskt skydd Enhetens mått och placering Borr Montering Uppstart Bruksanvisning Underhåll Begränsad garanti Service...
  • Seite 88: Säkerhetsrekommendationer

    Detta dokument är avsett att användas som referensguide för installation och drift av laddaren. Produktbilderna som visas är endast för illustrativa ändamål och behöver inte vara en exakt återgivning av produkten. Wallbox förbehåller sig rätten att göra ändringar i specifikationer och processer för produkten och dokumentationen när som helst utan föregående meddelande.
  • Seite 89: Produktbeskrivning

    Produktbeskrivning Inledning Wallbox Copper C ger en innovativ laddningsupplevelse med intuitiv interaktion. Wallbox har skapat ett revolutionerande laddningssystem för elfordon och plug-in-hybrider som för första gången integrerar ansiktsigenkänning och rörelseavkänning.
  • Seite 90: Allmänna Specifikationer

    Allmänna specifikationer Modell Copper C Sladdlängd 5 m (7 m tillval) Anslutningstyp Typ 1 (SAE J1772) eller typ 2 (IEC 62196-2) Laddningsläge Läge 3 Mått 168x168x54 mm (utan sladd) Vikt 1,5 kg (utan sladd) Driftstemperatur -25 ºC till +40 ºC Lagringstemperatur -40 ºC till +70 ºC...
  • Seite 91 • Installationsguide • 1 st RutaSeal®-tätning • Monteringsdelar • 4 st gummiproppar • Borrmall Följande verktyg krävs för att montera din Wallbox: Verktyg som krävs • Phillips skruvdragare • Borrmaskin med 10 mm borr • Kniv eller väggkabelskniv • Torx T20...
  • Seite 92: Installationsinstruktioner

    • Wallbox-laddaren måste vara permanent ansluten till installationens elektriska jordkabel. • Innan du installerar eller rengör din Wallbox måste du se till att strömförsörjningen är avstängd och att det inte finns någon ström i systemet. • Laddaren måste installeras på en tillräckligt ventilerad plats för att säkerställa att den förblir sval.
  • Seite 93: Enhetens Mått Och Placering

    I-1: Monteringsyta laddningsstation är minst 250x150 mm (höjd 400 mm och bredd) (I-1). • Vid montering av Wallbox ska kabeln enkelt nå fordonets inlopp. • För säker drift av din laddningsstation måste du iaktta de minsta avstånd som rekommenderas till andra tekniska installationer.
  • Seite 94 Om din Wallbox använder den bakre ingången följer du stegen i avsnitt 3-A. Annars går du till avsnitt 3-B. 3-A. Anslutning bak Steg 3-A.1: På baksidan av din Wallbox finns en yta med en tunnare vägg. Använd en kniv eller ett vasst verktyg och gör ett snitt för att komma in i kabeln.
  • Seite 95 L1 (strömkabel) De färger som visas följer inte internationella N (neutral kabel) standarder. Kontrollera alltid rätt anslutning. I händelse av att jordningssystemet är IT ska du följa konfigurationsstegen i 7. Konfigurera IT- Skyddsjord nätverkssektionen. 1. Skruv 2. Skruv I-5.2: Enfasinstallation (1P) N (neutral kabel) 3.
  • Seite 96 “+” -knappen på huvudsidan samt ange SN och UID för laddaren. Nu är Copper registrerad i myWallbox. Så här konfigurerar du nätverket ytterligare som IT: Steg 7.4: Gå in i Wallbox-appen och välj din laddare från laddarlistan.
  • Seite 97: Uppstart

    Uppstart När monteringsprocessen är slutförd är din Wallbox Copper C klar att användas. Läs dock igenom informationen nedan i detalj innan du börjar använda din Wallbox Copper C: • Använd inte din Wallbox Copper C för ändamål som inte beskrivs i avsnittet Produktbeskrivning.
  • Seite 98: Underhåll

    är i tillägg till, de obligatoriska lagstadgade rättigheter som gäller för försäljning av produkten till dig. Om du misstänker att din produkt är felaktig ska du kontakta Wallbox för instruktioner om vart du ska skicka eller ta med den för reparation.
  • Seite 99 Índice Recomendações de segurança Aviso legal Instruções de segurança Descrição do produto Instruções de instalação Proteção elétrica Dimensões e posicionamento do dispositivo Perfuração Instalação Inicialização Manual do utilizador Manutenção Garantia limitada Assistência...
  • Seite 100: Recomendações De Segurança

    As imagens do produto apresentadas são apenas para fins ilustrativos e podem não ser uma representação exata do mesmo. A Wallbox reserva-se o direito de fazer alterações às características técnicas e processos do produto e à documentação a qualquer momento, sem aviso prévio.
  • Seite 101: Descrição Do Produto

    Através da plataforma myWallbox, pode monitorizar o consumo de energia, visualizar o histórico de carregamento e agendar sessões de carregamento. Também tem a opção de configurar o Wallbox para carregar na altura do dia mais económica.
  • Seite 102: Especificações Gerais

    Identificação do utilizador Reconhecimento facial/App WALLBOX/RFID Interface do utilizador Controlo de gestos/App Wallbox/Portal myWallbox Informação do estado do carregador Ecrã de 4,3"/LED RGB/App Wallbox/Portal myWallbox Características incluídas Partilha de energia inteligente Características opcionais Conectividade 3G/4G/Aumento de potência [1] Apenas disponível para os carregadores de Tipo 2 3P.
  • Seite 103: Informações Do Produto

    • Manual de instalação • 4 rolhas de borracha • Elementos para montagem • Modelo de perfuração Serão necessárias as seguintes ferramentas para instalar o Wallbox: Ferramentas necessárias • Chave de estrela • Berbequim com broca de 10 mm • X-ato ou alicate cortador de cabos...
  • Seite 104: Instruções De Instalação

    • O carregador Wallbox deve ter ligação constante à ligação à terra da instalação. • Antes de instalar ou limpar o Wallbox, certifique-se de que a fonte de alimentação está desligada e que não há energia no sistema. • O carregador deve ser instalado num local suficientemente ventilado para garantir que permanece fresco.
  • Seite 105: Dimensões E Posicionamento Do Dispositivo

    área livre de 400 x 400 mm à volta do mesmo para proporcionar espaço suficiente para a ergonomia. A instalação correta é absolutamente essencial e está fora do âmbito da responsabilidade da Wallbox. Vídeo de instalação disponível em https://wallbox.com/ Perfuração •...
  • Seite 106: Ligação Elétrica

    3. Ligação elétrica Use sempre cabos padrão que possam conduzir a corrente que foi configurada no seletor de corrente. Caso o Wallbox utilize a entrada posterior, siga os passos da secção 3-A. Caso contrário, vá para a secção 3-B. 3-A. Ligação posterior Passo 3-A.1: na parte de trás do Wallbox, encontra uma área com uma parede mais fina;...
  • Seite 107 L1 (fase) As cores apresentadas não estão sujeitas a normas N (neutro) internacionais. Verifique sempre se a ligação está correta. Caso o sistema de ligação à terra seja TI, siga os passos de configuração indicados em 7. Terra Secção Configuração da rede de TI . 1.
  • Seite 108 Número de série e o Identificador Único do carregador. Nesta altura, o Copper será registado no myWallbox. Para configurar ainda mais a rede como TI, siga os seguintes passos: Passo 7.4: entre na App Wallbox e selecione o carregador na lista de carregadores.
  • Seite 109: Inicialização

    Inicialização Uma vez concluído o processo de montagem, o Wallbox Copper C estará pronto a ser usado. No entanto, analise as informações detalhadas abaixo antes de começar a utilizar o Wallbox Copper C: • Não utilize o Wallbox Copper C para fins não descritos na secçãoDescrição do produto.
  • Seite 110: Manutenção

    Garantia limitada A Wallbox garante este produto contra defeitos de materiais e mão de obra por um período de dois anos a partir da data de compra. Durante este período, a Wallbox irá reparar ou substituir, a seu critério, qualquer produto defeituoso sem custos para o proprietário.
  • Seite 112 www.wallbox.com...

Inhaltsverzeichnis