Inhaltsverzeichnis
Werbung
Verfügbare Sprachen
Verfügbare Sprachen
Quicklinks
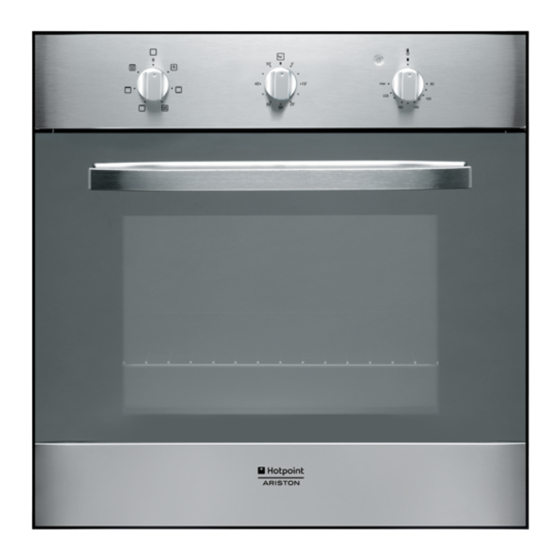
FHS 51 IX/HA S
FH 51 /HA S
Italiano
Istruzioni per l'uso
FORNO
Sommario
Istruzioni per l'uso,1
Avvertenze,2
Assistenza,5
Descrizione dell'apparecchio,7
Descrizione dell'apparecchio,9
Installazione,10
Avvio e utilizzo,12
Programmi,12
Precauzioni e consigli,14
Manutenzione e cura,14
English
Operating Instructions
OVEN
Contents
Operating Instructions,1
Warnings,2
Assistance,5
Description of the appliance,7
Description of the appliance,9
Installation,16
Start-up and use,18
Cooking modes,18
Precautions and tips,20
Maintenance and care,20
Français
Mode d'emploi
FOUR
Sommaire
Mode d'emploi,1
Avertissements,3
Assistance,5
Description de l'appareil,7
Description de l'appareil,9
Installation,22
Mise en marche et utilisation,24
Programmes,24
Précautions et conseils,26
Nettoyage et entretien,26
Español
Manual de instrucciones
HORNO
Sumario
Manual de instrucciones,1
Advertencias,3
Asistencia,5
Descripción del aparato,8
Descripción del aparato,9
Instalación,28
Puesta en funcionamiento y uso,30
Programas,30
Precauciones y consejos,32
Mantenimiento y cuidados,32
Portuges
Instruções para a utilização
FORNO
Índice
Instruções para a utilização,1
Advertências,4
Assistência,6
Descrição do aparelho,8
Descrição do aparelho,9
Instalação,34
Início e utilização,36
Programas,36
Precauções e conselhos,38
Manutenção e cuidados,38
Deutsch
Bedienungsanleitung
BACKOFEN
Inhaltsverzeichnis
Bedienungsanleitung,1
Hinweise,4
Kundendienst,6
Beschreibung Ihres Gerätes,8
Beschreibung Ihres Gerätes,9
Installation,40
Inbetriebsetzung und Gebrauch,42
Programme,42
Vorsichtsmaßregeln und Hinweise,44
Reinigung und Pflege,44
Werbung
Inhaltsverzeichnis

Verwandte Anleitungen für Hotpoint Ariston FHS 51 IX/HA S


Inhaltszusammenfassung für Hotpoint Ariston FHS 51 IX/HA S
- Seite 1 FHS 51 IX/HA S FH 51 /HA S Italiano Español Istruzioni per l’uso Manual de instrucciones FORNO HORNO Sommario Sumario Istruzioni per l’uso,1 Manual de instrucciones,1 Avvertenze,2 Advertencias,3 Assistenza,5 Asistencia,5 Descrizione dell’apparecchio,7 Descripción del aparato,8 Descrizione dell’apparecchio,9 Descripción del aparato,9 Installazione,10 Instalación,28...
- Seite 2 Avvertenze Warnings ATTENZIONE: Questo apparecchio e le sue parti WARNING: The appliance and its accessible parts accessibili diventano molto caldi durante l’uso. become hot during use. Care should be taken to Bisogna fare attenzione ed evitare di toccare gli avoid touching heating elements. Children less than 8 elementi riscaldanti.
-
Seite 3: Avertissements
Avertissements Advertencias ATTENTION : Cet appareil ainsi que ses parties ATENCIÓN: Este aparato y sus partes accesibles se accessibles deviennent très chauds pendant leur vuelven muy calientes durante el uso. Por lo tanto, es fonctionnement. Il faut faire attention à ne pas toucher importante evitar tocar los elementos calentadores. -
Seite 4: Zur Beachtung
Advertências Hinweise ATENÇÃO: Este aparelho e as suas partes ZUR BEACHTUNG: Bei Gebrauch wird dieses acessíveis aquecem muito durante a utilização. Gerät und alle zugänglichen Teile sehr heiß. É preciso ter atenção e evitar tocar os elementos Es ist darauf zu achten, dass die Heizelemente que aquecem. - Seite 5 Assistenza Assistance ! Non ricorrere mai a tecnici non autorizzati. ! Never use the services of an unauthorised technician. Comunicare: Please have the following information to hand: • Il tipo di anomalia; • The type of problem encountered. • Il modello della macchina (Mod.) •...
-
Seite 6: Kundendienst
En el SAT encontrará recambios, accesorios y productos específicos para la limpieza y mantenimiento de su electrodoméstico a precios competitivos. ESTAMOS A SU SERVICIO Assistência ! Nunca recorra a técnicos não autorizados. Comunique: • o tipo de avaria; • o modelo da máquina (Mod.); •... -
Seite 7: Descrizione Dell'apparecchio
Descrizione dell’apparecchio Vista d’insieme 1 POSIZIONE 1 2 POSIZIONE 2 3 POSIZIONE 3 4 POSIZIONE 4 5 POSIZIONE 5 6 GUIDE di scorrimento dei ripiani 7 Ripiano LECCARDA 8 Ripiano GRIGLIA 9 Pannello di controllo Description of the appliance Overall view 1 POSITION 1 2 POSITION 2 3 POSITION 3... -
Seite 8: Descripción Del Aparato
Descripción del aparato Vista en conjunto 1 POSICIÓN 1 2 POSICIÓN 2 3 POSICIÓN 3 4 POSICIÓN 4 5 POSICIÓN 5 6 GUÍAS de deslizamiento de las bandejas 7 Bandeja GRASERA 8 Bandeja PARRILLA 9 Panel de control Descrição do aparelho Vista de conjunto 1 POSIÇÃO 1 2 POSIÇÃO 2... - Seite 9 Descrizione dell’apparecchio Descripción del aparato Pannello di controllo Panel de control 1 Spia TERMOSTATO 1 Spia TERMOSTATO 2 Manopola TERMOSTATO 2 Piloto TERMOSTATO 3 Manopola TIMER 3 Mando TEMPORIZADOR 4 Manopola PROGRAMMI 4 Mando PROGRAMAS Description of the appliance Descrição do aparelho Control panel Painel de comandos 1 THERMOSTAT indicator light...
-
Seite 10: Collegamento Elettrico
Installazione Centraggio e fissaggio Per fissare l’apparecchio al mobile: aprire la porta del forno e avvitare 4 viti a legno nei 4 fori posti sulla cornice perimetrale. ! È importante conservare questo libretto per poterlo consultare in ogni momento. In caso di vendita, di cessione o di trasloco, assicurarsi che resti insieme all’apparecchio per informare il nuovo proprietario sul funzionamento e sui relativi avvertimenti. -
Seite 11: Targhetta Caratteristiche
! L’installatore è responsabile del corretto collegamento elettrico e TARGHETTA CARATTERISTICHE dell’osservanza delle norme di sicurezza. larghezza cm 43,5 Dimensioni* altezza cm 32,4 Prima di effettuare l’allacciamento accertarsi che: profondità cm 41,5 • la presa abbia la messa a terra e sia a norma di legge; •... -
Seite 12: Avvio E Utilizzo
Avvio e utilizzo Programmi ! Per tutti i programmi è impostabile una temperatura tra 60°C e MAX, tranne: ATTENZIONE ! Il forno è dotato di un sistema di arresto griglie che consente di estrarle senza che • GRILL (si consiglia di impostare solo su MAX); queste fuoriescano dal forno. - Seite 13 PIZZA • Per una buona cottura della pizza ultilizzate il programma MULTICOTTURA. • Utilizzare una teglia in alluminio leggero, appoggiandola sulla griglia in dotazione. Con la leccarda si allungano i tempi di cottura e difficilmente si ottiene una pizza croccante. •...
-
Seite 14: Precauzioni E Consigli
Precauzioni e consigli Per ulteriori informazioni, sulla corretta dismissione degli elettrodomestici, i detentori potranno rivolgersi al servizio pubblico preposto o ai rivenditori. ! L’apparecchio è stato progettato e costruito in conformità alle norme Risparmiare e rispettare l’ambiente internazionali di sicurezza. •... -
Seite 15: Pulire La Porta
Pulire la porta Pulire il vetro della porta con spugne e prodotti non abrasivi e asciugare con un panno morbido; non usare materiali ruvidi abrasivi o raschietti metallici affilati che possono graffiare la superficie e causare la frantumazione del vetro. Per una pulizia più... -
Seite 16: Electrical Connection
Installation Centring and fixing Secure the appliance to the cabinet by opening the oven door and inserting 4 screws into the 4 holes on the outer frame. ! Please keep this instruction booklet in a safe place for future reference. If the appliance is sold, given away or moved, please make sure the booklet is also passed on to the new owners so that they may benefit from the advice contained within it. -
Seite 17: Electrical Connections
! The installer must ensure that the correct electrical connection has been APPLIANCE SPECIFICATIONS performed and that it is fully compliant with safety regulations. width 43.5 cm Before connecting the appliance to the power supply, make sure that Dimensions* height 32,4 cm •... -
Seite 18: Start-Up And Use
Start-up and use Cooking modes ! A temperature value can be set for all cooking modes between 60°C and WARNING! The oven is provided with a stop system to extract the Max, except for racks and prevent them from coming out of the oven (1). •... -
Seite 19: Cooking Advice Table
PIZZA • For best results when cooking pizza, use the MULTI-COOKING mode. • Use a light aluminium pizza pan. Place it on the rack provided. For a crispy crust, do not use the dripping pan (prevents crust from forming by extending cooking time). •... -
Seite 20: Precautions And Tips
Precautions and tips The crossed out “wheeled bin” symbol on the product reminds you of your obligation, that when you dispose of the appliance it must be separately collected. ! This appliance has been designed and manufactured in compliance with Consumers should contact their local authority or retailer for information international safety standards. -
Seite 21: Cleaning The Oven Door
Cleaning the oven door Clean the glass part of the oven door using a sponge and a non-abrasive cleaning product, then dry thoroughly with a soft cloth. Do not use rough abrasive material or sharp metal scrapers as these could scratch the surface and cause the glass to crack. -
Seite 22: Raccordement Électrique
Installation Centrage et fixation Pour fixer l’appareil au meuble : ouvrir la porte du four et visser 4 vis à bois ! Conservez ce mode d’emploi pour pouvoir le consulter à tout moment. dans les 4 trous du cadre. En cas de vente, de cession ou de déménagement, veillez à ce qu’il suive l’appareil pour informer le nouveau propriétaire sur son fonctionnement et lui fournir les conseils correspondants. - Seite 23 ! L’installateur est responsable du bon raccordement électrique de l’appareil PLAQUE SIGNALETIQUE et du respect des normes de sécurité. largeur 43,5 cm Dimensions* hauteur 32,4 cm Avant de procéder au branchement, assurez-vous que : profondeur 41,5 cm • la prise est bien munie d’une terre conforme à la loi; •...
-
Seite 24: Mise En Marche Et Utilisation
Mise en marche et utilisation Programmes ! Pour tous les programmes, vous pouvez sélectionner une température ATTENTION ! Le four est équipé d’un système d’arrêts de grilles comprise qui permet de les retirer sans que entre 60°C et MAX., sauf pour : ces dernières sortent entièrement du four (1). - Seite 25 PIZZA • Pour bien cuire vos pizzas, utilisez le programme MULTICUISSON. • Utilisez un plat en aluminium léger et enfournez-le sur la grille du four. Si vous utilisez la lèchefrite, vous prolongerez le temps de cuisson et obtiendrez difficilement une pizza croustillante. •...
-
Seite 26: Précautions Et Conseils
Précautions et conseils et réduire l’impact sur la santé humaine et l’environnement. Le symbole de la ‘‘poubelle barrée’’ est apposée sur tous les produits pour rappeler les obligations de collecte séparée. ! Cet appareil a été conçu et fabriqué conformément aux normes Les consommateurs pourront confier leur appareil usagé... -
Seite 27: Nettoyage De La Porte
Nettoyage de la porte Nettoyer la vitre de la porte avec des produits non abrasifs et des éponges non grattantes, essuyer ensuite avec un chiffon doux. Ne pas utiliser de matériaux abrasifs ou de racloirs métalliques aiguisés qui risquent de rayer la surface et de briser le verre. -
Seite 28: Conexión Eléctrica
Instalación ! Es importante conservar este manual para poder consultarlo en todo momento. En caso de venta, de cesión o de mudanza, verifique que permanezca junto al aparato para informar al nuevo propietario sobre su funcionamiento y sobre las advertencias correspondientes. ! Lea atentamente las instrucciones: contienen importante información sobre la instalación, el uso y la seguridad. - Seite 29 Conexión del cable de alimentación eléctrica a la red PLACA DE CARACTERÍSTICAS Instale en el cable un enchufe normalizado para la carga indicada en la placa ancho 43,5 cm. de características (ver al costado). En el caso de conexión directa a la red, es Dimensiones* altura 32,4 cm.
-
Seite 30: Puesta En Funcionamiento Y Uso
Puesta en funcionamiento y uso Programas ! En todos los programas se puede fijar una temperatura ATENCIÓN! El horno está dotado de un sistema de bloqueo de las entre 60ºC y MAX, excepto en: parrillas que permite quitarlas sin que sobresalgan del horno (1). •... -
Seite 31: Tabla De Cocción
PIZZA • Per una buona cottura della pizza ultilizzate il programma MULTICOTTURA. • Utilice una bandeja para pizza de aluminio liviano apoyándola sobre la parrilla suministrada con el horno. Utilizando la grasera se aumenta el tiempo de cocción y difícilmente se obtiene una pizza crocante. -
Seite 32: Precauciones Y Consejos
Precauciones y consejos tachado se marca sobre todos los productos para recordar al consumidor la obligación de separarlos para la recogida selectiva. El consumidor debe contactar con la autoridad local o con el vendedor para ! El aparato ha sido proyectado y fabricado en conformidad con las normas informarse en relación a la correcta eleminación de su electrodoméstico internacionales de seguridad. -
Seite 33: Limpiar La Puerta
Limpiar la puerta Limpie el vidrio de la puerta con esponjas y productos no abrasivos y séquelo con un paño suave; no utilice materiales ásperos abrasivos o raederas metálicas afiladas que puedan rayar la superficie y quebrar el vidrio. Para lograr una limpieza más profunda es posible desmontar la puerta del horno: 1. -
Seite 34: Instalação
Instalação ! É importante guardar este folheto para poder consultá-lo a qualquer momento. No caso de venda, cessão ou mudança, assegure-se que o mesmo permanece com o aparelho para informar o novo proprietário sobre o funcionamento e sobre as respectivas advertências. ! Leia com atenção as instruções: há... - Seite 35 Ligação do cabo de fornecimento à rede eléctrica PLACA DAS CARACTERÍSTICAS Monte no cabo uma ficha em conformidade com as normas para a carga indicada na placa de identificação (veja ao lado). largura 43,5 cm Medidas* altura 32,4 cm No caso de uma ligação directa à rede, será necessário interpor, entre o profundidade 41,5 cm aparelho e a rede, um interruptor omnipolar com abertura mínima entre os contactos de 3 mm.
-
Seite 36: Início E Utilização
Início e utilização Programas ! Para todos os programas pode ser definida uma temperatura entre 60°C ATENÇÃO! O forno está equipado com um sistema de bloqueio das e MÁX., excepto:. grelhas que permite retirá-las sem que estas ressaiam do forno (1). •... -
Seite 37: Tabela De Cozedura
PIZZA • Para cozer bem uma pizza utilize o programa de COZEDURA MÚLTIPLA. • Utilize uma forma de alumínio leve, apoie-a na grelha do forno. Se utilizar a bandeja pingadeira aumentará os tempos de cozedura e dificilmente será obtida uma pizza crocante. •... -
Seite 38: Precauções E Conselhos
Precauções e conselhos para optimizar a taxa de recuperação e reciclagem dos materiais que os compõem e impedir potenciais danos à saúde e ao meio ambiente. O símbolo da lixeira cancelada está indicado em todos os produtos para ! Este aparelho foi projectado e fabricado em conformidade com as normas lembrar o dever de colecta selectiva. -
Seite 39: Limpeza Da Porta
Limpeza da porta Limpe o vidro da porta com esponjas e produtos não abrasivos e enxugue com um pano macio; não use materiais ásperos, abrasivos ou espátulas metálicas afiadas que podem arranhar a superfície e quebrar o vidro. Para uma limpeza mais cuidadosa é possível desmontar a porta do forno: 1. -
Seite 40: Elektroanschluss
Installation Zentrieren und Befestigen Befestigung des Gerätes am Möbel: Öffnen Sie die Backofentür und schrauben Sie die 4 Holzschrauben in die 4 im Backofenrahmen vorgesehenen Löcher ! Bewahren Sie diese Bedienungsanleitung bitte sorgfältig auf, damit Sie sie ein. jederzeit zu Rate ziehen können. Sorgen Sie dafür, dass sie im Falle eines Verkaufs, eines Umzugs oder einer Übergabe an einen anderen Benutzer das Gerät stets begleitet, damit auch der Nachbesitzer die Möglichkeit hat, darin nachschlagen zu können. -
Seite 41: Deklarierte Energieverbrauchsklasse Erzwungene Konvektion Heizfunktion: Echte Heißluft
! Der Installateur ist für den ordnungsgemäßen elektrischen Anschluss sowie TYPENSCHILD die Einhaltung der Sicherheitsvorschriften verantwortlich. Breite 43,5 cm Abmessungen* Höhe 32,4 cm Vor dem Anschluss stellen Sie bitte sicher, dass: Tiefe 41,5 cm • die Steckdose geerdet ist und den gesetzlichen Bestimmungen entspricht; •... -
Seite 42: Inbetriebsetzung Und Gebrauch
Inbetriebsetzung und Gebrauch Programme ! Für alle Programme kann eine Gartemperatur von 60° bis MAX. eingestellt ACHTUNG! Der Ofen ist mit einem Arretierungssystem der Roste werden, mit Ausnahme der Programme: ausgestattet. Damit lassen diese sich ausziehen, ohne aus dem Ofen •... - Seite 43 GRILL PIZZA • Schieben Sie den Grillrost in die Führung 3 oder 4 ein, und legen Sie die • Zum optimalen Garen einer Pizza verwenden Sie das Programm Echte zu garenden Speisen auf die Mitte des Grillrostes. Heißluft • Es empfiehlt sich, die höchste Energiestufe zu verwenden. Im Übrigen ist •...
-
Seite 44: Vorsichtsmaßregeln Und Hinweise
Vorsichtsmaßregeln und Hinweise über den herkömmlichen Haushaltsmüllkreislauf entsorgt werden. Altgeräte müssen separat gesammelt werden, um die Wiederverwertung und das Recycling der beinhalteten Materialien zu optimieren und die ! Das Gerät wurde entsprechend den strengsten internationalen Einflüsse auf die Umwelt und die Gesundheit zu reduzieren. Das Symbol Sicherheitsvorschriften entworfen und gebaut. -
Seite 45: Backofentür Reinigen
Backofentür reinigen Reinigen Sie die Backofentür aus Glas bitte nur mit einem weichen Schwamm und mildem Spülmittel und trocknen Sie sie abschließend mit einem weichen Tuch. Verwenden Sie keine rauen, scheuernden Materialien oder scharfkantige, metallische Schaber, da diese Kratzer auf ihrer Oberfläche hinterlassen und das Zerbrechen des Glases zur Folge haben können. - Seite 48 195114213.01 12/2013 - XEROX FABRIANO...