Dovre 2020 Einbauanleitung Und Gebrauchsanweisung
Feuerstaette
Vorschau ausblenden
Andere Handbücher für 2020:
- Einbauanleitung und gebrauchsanweisung (72 Seiten) ,
- Gebrauchsanweisung (253 Seiten) ,
- Einbauanleitung und gebrauchsanweisung (305 Seiten)
Inhaltsverzeichnis
Verfügbare Sprachen
Verfügbare Sprachen
INSTALLATIEVOORSCHRIFTEN EN GEBRUIKSAANWIJZING
INSTALLATION INSTRUCTIONS AND OPERATING MANUAL
INSTALLATION ET MODE D'EMPLOI
EINBAUANLEITUNG UND GEBRAUCHSANWEISUNG
INSTRUCCIONES DE INSTALACIÓN Y USO
ISTRUZIONI PER L'INSTALLAZIONE E L'USO
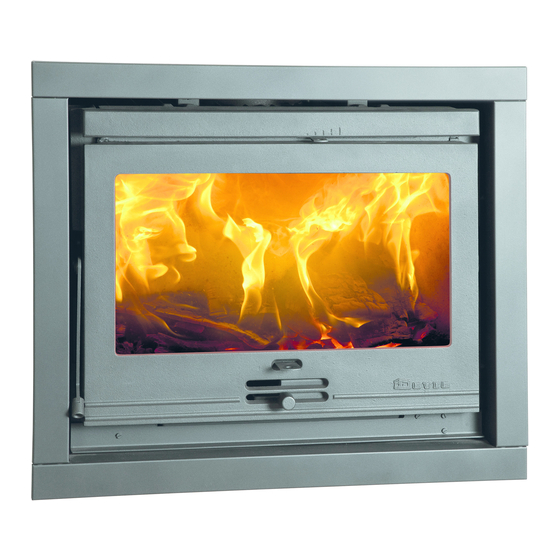
Inzethaard 2020, 2200, 2210, 2220, 2500,
All manuals and user guides at all-guides.com
2510 en 2520
KACHEL
STOVE
POELE
FEUERSTÄTTE
ESTUFA
STUFA
03.27883.200 – 02/2012
Kapitel
Inhaltsverzeichnis

Verwandte Anleitungen für Dovre 2020


Inhaltszusammenfassung für Dovre 2020
- Seite 106 All manuals and user guides at all-guides.com Inhaltsverzeichnis Einleitung Konformitätserklärung Sicherheit Installationsbedingungen Allgemeines Schornstein Belüftung des Raums Boden und Wände Produktbeschreibung Installation Vorbereitung Einbau in einen vorhandenen Kamin Einbau in einen neuen Kamin Montieren des externen Rahmens Inbetriebnahme Erste Inbetriebnahme Brennstoff Anzünden Heizen mit Holz...
-
Seite 107: Einleitung
Das Gerät darf nicht verändert werden; verwenden Sie stets Original-Ersatzteile. dass die Einsatzöfen 2020, 2200, 2210, 2220, 2500, 2510 und 2520 gemäß EN 13229 produziert werden. Das Gerät ist zum Aufstellen in einem Wohnraum gedacht. Es muss hermetisch dicht an einen gut funktionierenden Schornstein angeschlossen werden. -
Seite 108: Sicherheit
All manuals and user guides at all-guides.com Sicherheit Sorgen Sie für eine ausreichende Ventilation in dem Raum, in dem das Gerät aufgestellt ist. Achtung! Alle Sicherheitsvorschriften müssen Bei nicht ausreichender Ventilation ist die strikt eingehalten werden. Verbrennung nur unvollständig, wodurch sich giftige Gase in dem Raum ausbreiten können. -
Seite 109: Belüftung Des Raums
All manuals and user guides at all-guides.com Der Schornstein muss aus feuerfestem Material Wenn der Dachfirst mehr als 3 Meter vom bestehen, vorzugsweise aus Keramik oder Schornstein entfernt ist: halten Sie die in der Edelstahl. folgenden Abbildung angegebenen Maße ein. A = der höchste Punkt des Daches innerhalb eines Der Schornstein muss luftdicht und gut gereinigt Abstands von 3 Metern. -
Seite 110: Boden Und Wände
All manuals and user guides at all-guides.com Boden und Wände Produktbeschreibung Der Boden, auf dem das Gerät aufgestellt wird, muss über ein ausreichendes Tragvermögen verfügen. Für das Gewicht des Geräts vgl. die Anlage "Technische Daten". Im Boden unter dem Gerät und in den Wänden rund um das Gerät dürfen sich keine elektrischen Leitungen befinden. -
Seite 111: Installation
All manuals and user guides at all-guides.com Sie können die Drehrichtung der Tür ändern. Das Das Gerät kann mit einem externen Rahmen Gerät wird mit ab Werk mit nach rechts drehender geliefert werden, auf dem Sie einen Zierrahmen Tür geliefert. befestigen können. -
Seite 112: Ändern Der Drehrichtung Der Tür
All manuals and user guides at all-guides.com Ändern der Drehrichtung der Tür Das Anschlussschema ist modellspezifisch. Sie können die Drehrichtung der Tür nach Wunsch Lassen Sie den Anschluss von einem ändern. Das Gerät wird mit ab Werk mit nach rechts sachkundigen Elektriker vornehmen. -
Seite 113: Einbau In Einen Neuen Kamin
All manuals and user guides at all-guides.com 3. Schließen Sie die Basis des Schornsteins mit nicht brennbarem Material ab. 4. Bringen Sie in der Basis eine Öffnung für das Abfuhrrohr mit einem Durchmesser von 150 mm 5. Zentrieren Sie die Öffnung in der Basis auf das Anschlussstück an dem Ofen. -
Seite 114: Bau Eines Neuen Kamins
All manuals and user guides at all-guides.com vorhanden sein. Gehen Sie wie folgt vor, wenn Sie Klemmplatten an den Seiten des Geräts diese Funktion verwenden möchten: befestigen, ohne die Schrauben ganz fest anzudrehen. Der externe Rahmen wird nämlich 1. Entfernen Sie die zwei Druckplatten auf dem zwischen dem Gerät und den Klemmplatten Konvektionskasten, indem Sie sie mit einem befestigt;... -
Seite 115: Montieren Des Externen Rahmens
All manuals and user guides at all-guides.com 1. Mauern Sie den Fuß des Ofens. 09.20015.057 Sorgen Sie dafür, dass die Tür des Ofens frei über die Aufstellfläche des Ofens schwingen kann. 2. Mauern Sie den Kamin weiter auf bis zum Rauchfang. -
Seite 116: Ausführung
All manuals and user guides at all-guides.com 1. Montieren Sie den externen Rahmen, indem Sie 4. Platzieren Sie an jeder Seite drei Stützplättchen die zwei Seiten mit zwei Schrauben miteinander zwischen dem Zierrahmen und dem externen verbinden; vgl. die nachfolgende Abbildung. Rahmen;... -
Seite 117: Inbetriebnahme
All manuals and user guides at all-guides.com Inbetriebnahme Dabei entsteht viel Rauch und es kommt zu Rußablagerungen an der Gerätetür und im Erste Inbetriebnahme Schornstein. Der Wasserdampf kondensiert im Gerät und kann aus dem Gerät austreten und zu Wenn Sie das Gerät zum ersten Mal in Betrieb schwarzen Flecken auf dem Fußboden führen. -
Seite 118: Heizen Mit Holz
All manuals and user guides at all-guides.com Lose Stapelung 2. Stapeln Sie auf den Holzstücken zwei Lagen Anzündehölzchen kreuzweise übereinander. 3. Legen Sie den Anzünderblock zwischen die unterste Lage von Anzündehölzchen, und zünden Sie den Anzünderblock gemäß der Anleitung auf der Verpackung an. -
Seite 119: Heizen Mit Braunkohlebriketts
All manuals and user guides at all-guides.com Nachdem Sie die Anleitung zum Anzünden befolgt Heizen mit Braunkohlebriketts haben: Braunkohlebriketts brennen in etwa derselben Weise 1. Öffnen Sie die primäre Luftklappe vollständig. wie Holz. Sorgen Sie mit dem primären Lufteinlass für 2. -
Seite 120: Löschen Des Feuers
All manuals and user guides at all-guides.com das Feuer, bis es vollständig erloschen ist. Wenn dies Hinweise der Fall ist, können alle Luftklappen geschlossen werden. Heizen Sie niemals mit geöffneter Tür. Heizen Sie das Gerät regelmäßig gut durch. Entaschen Wenn Sie lange mit niedriger Flamme heizen, Nach dem Verbrennen von Holz bleibt eine relativ können sich im Schornstein Ablagerungen von geringe Menge Asche zurück. -
Seite 121: Nebel
All manuals and user guides at all-guides.com 4. Setzen Sie die Aschenlade wieder ein, und Entfernen Sie eventuell zuerst die feuerfesten schließen Sie die Tür des Geräts. Innenplatten. Vgl. das Kapitel "Installation" für Anleitungen zum Entfernen und Anbringen von Nebel Innenplatten. -
Seite 122: Glas Reinigen
All manuals and user guides at all-guides.com Schmieren 4. Schrauben Sie das Stützplättchen los, indem Sie die Mutter M8 losdrehen. Das Stützplättchen Obwohl Gusseisen eigentlich "selbstschmierend" ist, befindet sich in der Mitte an der Oberplatte des müssen bewegliche Teile doch regelmäßig Geräts. - Seite 123 All manuals and user guides at all-guides.com 1. Öffnen Sie die Tür des Geräts; das Scharnier ist dann sichtbar und zugänglich. 2. Drehen Sie die zwei Befestigungsbolzen des Scharniers etwas los. Die Befestigungsbolzen befinden sich an der Innenseite des Ofens. 3.
-
Seite 124: Anlage 1: Technische Daten
All manuals and user guides at all-guides.com Anlage 1: Technische Daten Modell 2200 2210 2220 2020 Nominalleistung 8 kW (Modell 2020: 7 kW) Schornsteinanschluss (Durchmesser) 150 mm 2200 2210 2220 2020 Gewicht 140 kg 175 kg 150 kg 130 kg... - Seite 125 All manuals and user guides at all-guides.com Modell 2500 2510 2520 Nominalleistung 10 kW Schornsteinanschluss (Durchmesser) 150 mm 2500 2510 2520 Gewicht 150 kg 180 kg 160 kg 2500 2510 2520 Kennzeichen Brennstoff Holz, max. Länge 50 cm 50 cm 50 cm Empfohlener Brennstoff Holz...
-
Seite 126: Anlage 2: Anschlussschemata
All manuals and user guides at all-guides.com Anlage 2: Anschlussschemata Die Abkürzungen in den Schemata haben die folgenden Bedeutungen: Thermo-Switch Ventilator Ventilator Lampe Widerstand Schalter mit zwei Zuständen Modell 2020 1 2 3 4 5 6 230 V Änderungen aufgrund technischer Verbesserungen vorbehalten... - Seite 127 All manuals and user guides at all-guides.com Modell 2220 und Modell 2520 2 3 4 5 6 230 V Modell 2210 und Modell 2510 230 V Änderungen aufgrund technischer Verbesserungen vorbehalten...
- Seite 128 All manuals and user guides at all-guides.com Modell 2200 und Modell 2500 230 V B5 B6 Die Modelle 2200 und 2500 verfügen über einen Zwei-Zustände-Schalter zur Regelung der Geschwindigkeit; es gibt keine Thermostatfunktion. Änderungen aufgrund technischer Verbesserungen vorbehalten...
-
Seite 129: Anlage 3: Abmessungen
All manuals and user guides at all-guides.com Anlage 3: Abmessungen 2020 09.20017.044 Änderungen aufgrund technischer Verbesserungen vorbehalten... - Seite 130 All manuals and user guides at all-guides.com 2200 09.20017.043 Änderungen aufgrund technischer Verbesserungen vorbehalten...
- Seite 131 All manuals and user guides at all-guides.com 2210 09.20017.015 Änderungen aufgrund technischer Verbesserungen vorbehalten...
- Seite 132 All manuals and user guides at all-guides.com 2220 09.20017.014 Änderungen aufgrund technischer Verbesserungen vorbehalten...
- Seite 133 All manuals and user guides at all-guides.com 2500 09.20017.042 Änderungen aufgrund technischer Verbesserungen vorbehalten...
- Seite 134 All manuals and user guides at all-guides.com 2510 09.20017.016 Änderungen aufgrund technischer Verbesserungen vorbehalten...
- Seite 135 All manuals and user guides at all-guides.com 2520 09.20017.012 Änderungen aufgrund technischer Verbesserungen vorbehalten...
- Seite 136 All manuals and user guides at all-guides.com 2520BS 09.20017.013 Änderungen aufgrund technischer Verbesserungen vorbehalten...
-
Seite 137: Anlage 4: Abstand Zu Brennbarem Material
All manuals and user guides at all-guides.com Anlage 4: Abstand zu brennbarem Material Minimaler Belüftungsraum außerhalb des Strahlungsbereichs Abmessungen der feuerfesten Bodenplatte in Zentimetern Mindestabmessungen feuerfeste Bodenplatte V > H + 30 > 60 S > H + 20 > 40 Änderungen aufgrund technischer Verbesserungen vorbehalten... -
Seite 138: Anlage 4: Diagnoseschema
All manuals and user guides at all-guides.com Anlage 4: Diagnoseschema Problem Holz brennt nicht durch Liefert nicht ausreichend Wärme Rauchrückschlag beim Nachfüllen Gerät brennt zu stark, nicht gut regelbar Flammenanschlag an das Glas Mögliche Ursache Mögliche Lösung Ein kalter Schornstein führt zu unzureichendem Zug. Folgen Sie der Nicht ausreichender Zug Anleitung zum Anzünden im Kapitel "Verwendung";... -
Seite 139: Index
All manuals and user guides at all-guides.com Index Brennstoff Anthrazitkohle benötigte Menge Braunkohle Abdichtungsschnur der Tür geeignet Abgas Holz Massenfluss 20-21 nachfüllen Abmessungen ungeeigneter Abnehmen Brennstoffe Konvektionswärme 7, 10 geeignete Abschlussplatte Konvektionsraum Carbolineum Achtung Ventilation Versicherungsbedingungen Dauernder Gebrauch Anschluss Drehrichtung Abmessungen ändern Anstecken... - Seite 140 All manuals and user guides at all-guides.com Nasses Holz Nebel, nicht heizen Haube auf dem Schornstein Nominale Leistung Heizen Nominalleistung 20-21 Anthrazitkohle Brandstoff nachfüllen Braunkohlebriketts Brennstoff nachfüllen 14, 16 Ofenscheibenreiniger unzureichende Wärme Ö Holz Öffnen aufbewahren Aschenlade brennt nicht durch geeignete Sorte nass trocknen...
- Seite 141 All manuals and user guides at all-guides.com Schornstein Wetterbedingungen, nicht heizen Teer Wirkungsgrad 20-21 Temperatur 20-21 Temperaturanstieg Messabschnitt 20-21 Zierrand Teppich montieren Tragvermögen des Bodens 20-21 Trocknen von Holz Tür Abdichtungsschnur Abschluss Drehrichtung ändern nachstellen Ungeeigneter Brennstoff Ventilation Faustregel Ventilationsgitter Ventilator elektrisch thermostatisch...