Herunterladen Inhalt Inhalt Diese Seite drucken
Inhaltsverzeichnis

Werbung

Verfügbare Sprachen

Verfügbare Sprachen

1100mm P-51 V2
Dago Red
Miss America
Voodoo
Blue Thunder II
Instruction Manual
Bedienungsanleitung
Manuel d'utilisation
操作手册
FMSMODEL.COM
SIMPLE
RIGID
STABLE
SIMPLE ASSEMBLY
STRONG DURABLE EPO
SMOOTH FLYING PERFORMANCE

Werbung

Inhaltsverzeichnis
loading

Inhaltszusammenfassung für FMS P-51 V2 Dago Red

  • Seite 1 1100mm P-51 V2 Dago Red Miss America Voodoo Blue Thunder II Instruction Manual Bedienungsanleitung Manuel d’utilisation 操作手册 FMSMODEL.COM SIMPLE RIGID STABLE SIMPLE ASSEMBLY STRONG DURABLE EPO SMOOTH FLYING PERFORMANCE...
  • Seite 3 WARNING WARNING: Read the ENTIRE instruction manual to become familiar with the features of the product before operating. Failure to operate the product correctly can result in damage to the product,personal property and cause serious injury. This is a sophisticated hobby product and NOT a toy. It must be operated with caution and common sense and failure to do so could result in injury or damage to the product or other property.
  • Seite 4: Inhaltsverzeichnis

    Introduction By popular demand, FMS is proud to announce the re-release mAh pack for extended flight times. of the 1100mm P-51 racer; wearing the optional trim scheme of • Metal trunnion landing gear Dago Red, Miss America, Voodoo, Blue Thunder II.
  • Seite 5: Model Assembly

    Model assembly Main wing assembly HKM3.0*20 1. Fit the wing set into the fuselage cutouts and secure with the included screws. Horizontal stabilizer installation 1. Slide the horizontal stabilizer spar into the slot near the rear of the fuselage. 2. Connect the two pieces (left and right) horizon- tal stabilizer onto the spar and fit them into the fuselage cutouts.
  • Seite 6 Model assembly Installation of the pushrods 1.With the servos centered, install the pushrod as shown and adjust until the control surface is neutral when no input is given. Installation of pitot tube 1. Apply foam safe glue at wingtip, then insert the pitot tube as shown.
  • Seite 7: Battery Installation

    Battery installation 1.Pull back on the latch and remove the battery hatch. 2.Apply the hook tape to the cable end of the battery. 3.Slide the full charged battery into the battery compartment with the power supply cable toward the rear end of the plane. Note: The center of gravity can be adjusted by moving the battery forward or aft.Having the correct center of gravity is critical to achieving proper flight characteristics.
  • Seite 8: Control Throws

    Transmitter and model setup Before getting started, bind your receiver with your transmitter. Bank left Please refer to your transmitter manual for proper operation. CAUTION: To prevent personal injury, DO NOT install the propel- ler assembly onto the motor shaft while testing the control surfac- es.
  • Seite 9: Clevis Installation

    Clevis installation 1.Pull the tube from the clevis to the linkage. 2.Carefully spread the clevis, then insert the clevis pin into the desired hole in the control horn. 3.Move the tube to hold the clevis on the control horn. Control horn and servo arm settings More control throw Horns Arms...
  • Seite 10: Before Flying The Model

    Before flying the model Flying course Find a suitable flying site Take off While applying power, slowly steer to keep the model straight. Find a flying site clear of buildings, trees, power lines and The model should accelerate quickly. As the model gains flight other obstructions.
  • Seite 11: Trouble Shooting

    Trouble shooting Problem Possible Cause Solution Aircraft will not respond to -Lower throttle stick and throttle trim to lowest settings. -ESC is not armed. the throttlebut responds to -Reverse throttle channel on transmitter. -Throttle channel is reversed. other controls. -Damaged spinner, propeller, -Replace damaged parts.
  • Seite 12 Miss America Screw set Fuselage FMSMA101 FMSEH114 Main wing Control Horns FMSMA102 FMSEH115 Horizontal stabilizer Tire set FMSEH116 FMSMA103 Vortex Generator Multiple Connector Part 2 FMSMA104 FMSCON002 Canopy Set Propeller FMSMA105 FMSPROP063 Air Speed Head Motor board FMSMA106 FMSBM044 Exhaust pipe Motor Mount FMSMA107 FMSDJ021...
  • Seite 13: User Manual Of Brushless Speed Controller

    User Manual of Brushless Speed Controller Thanks for purchasing our Electronic Speed Controller (ESC). High power system for RC model is very dangerous, please read this manual carefully. In that we have no control over the correct use, installation, application, or maintenance of our products,no liability shall be assumed nor accepted for any damages, losses or costs resulting from the use of the product.
  • Seite 14: Protection Function

    User Manual of Brushless Speed Controller Begin To Use Your New ESC IMPORTANT! Because different transmitter has different throttle range, please calibrate throttle range before flying. Throttle range setting (Throttle range should be reset whenever a new transmitter is being used) 1.Switch on the transmi t ter, move throttle stick to the top position.
  • Seite 15 Program the ESC with your transmitter (4 Steps) Note: Please make sure the throttle curve is set to 0 when the throttle stick is at bottom position and 100% for the top position. NO.1 Enter program mode 1.Switch on transmitter, move throttle stick to top position, connect the battery pack to ESC 2.Wait for 2 seconds, the motor should emit special tone like "beep-beep-"...
  • Seite 16: Warnhinweise

    Warnhinweise WARNUNG: Lesen Sie die GESAMTE Bedienungsanleitung, um sich vor der Inbetriebnahme mit den Funktionen des Produkts vertraut zu machen. Wenn das Produkt nicht ordnungsgemäß bedient wird, kann dies zu Schäden am Produkt oder persönlichem Eigentum führen und schwere Verletzungen verursachen.Dieses Produkt ist kein Spielzeug! Es muss mit Vorsicht und gesundem Menschenver- stand betrieben werden.
  • Seite 17: Einleitung

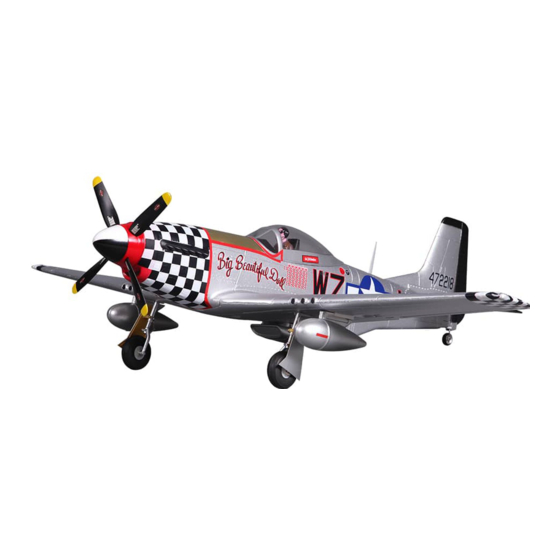
    900kV-Motors und des 80A-Flugregler in Verbindung mit einem 4S Akku erreicht die P-51 Geschwindigkeiten von über Inhalt 140 km/h..............Einleitung Erleben Sie mit der FMS P-51 einen Air Racer der Unlimit- ............Lieferumfang ed-Klasse! ..........Monatge des Modells ..........
  • Seite 18: Monatge Des Modells

    Montage des Modells Montage der Tragfläche HKM3.0*20 1. Setzen Sie die Fläche in den Rumpf ein und sichern Sie sie mit den mitgelieferten Schrauben. Montage der Höhenleitwerke 1. Schieben Sie das Höhenleitwerks-Rohr durch den Rumpf. 2. Achten Sie beim montieren der beiden Höhen- leitwerke darauf, dass die Ruderhörner nach unten zeigen.
  • Seite 19 Montage des Modells Montage der Anlenkungen 1. Montieren Sie die Anlenkungsgestänge an am Servo, welches sich dabei in neutraler Stellung befin- den sollte. Montage des Pitotrohrs 1. Tragen Sie für EPO Schaum geeigneten Klebstoff an den Flächenenden auf und setzen Sie dann das Rohr wie abgebildet ein.
  • Seite 20: Einsetzen Des Akkus

    Einstezen des Akkus 1. Nehmen Sie die Haube ab. 2. Befestigen Sie den Akku mit dem Klettband. 3. Schieben Sie den geladenen Akku mit den Kabeln nach hinten in bis ganz nach vorne im Akkufach. Hinweis: Der Schwerpunkt des Modells kann durch verschie- ben des Akkus verändert werden.
  • Seite 21: Ruderausschläge

    Testen der Steuerfunktionen Bevor Sie mit diesem Schritt beginnen, binden Sie bitte der Rollen links Anleitung ihres Senders entsprechend den Empfänger mit dem Sender. ACHTUNG: Um mögliche Verletzungen zu vermeiden darf der Propeller bei dem Testen der Ruder NICHT auf der Welle montiert sein.
  • Seite 22: Montage Der Gabelköpfe

    Montage der Gabelköpfe 1. Ziehen Sie den Ring vom Gabelkopf zum Gestänge. 2. Spreizen Sie den Gabelkopf vorsichtig und führen Sie den Gabelkopfstift in das gewünschte Loch im Ruderhorn ein. 3. Befestigen Sie den Ring um den Gabelkopf am Ruderhorn zu halten.
  • Seite 23: Vor Dem Erstflug

    Vor dem Erstflug Fluggrundlagen Finden Sie einen geeigneten Flugplatz Starten Beschleunigen Sie das Modell vorsichtig und steuern Sie es Finden Sie einen Flugplatz frei von Gebäuden, Bäumen, langsam um es gerade zu halten. Erhöhen Sie die Stromleitungen und anderen Hindernissen. Bis Sie wissen, Beschleunigung und halten Sie eine gleichmäßige wie viel Fläche Sie zum fliegen brauchen, wählen Geschwindigkeit um das Modell in einem schönen Anstellwinkel...
  • Seite 24: Mögliche Ursache

    Problemlösungen Problem Mögliche Ursache Lösung Modell nimmt kein Gas an, -Gasknüppel ist nicht ganz unten oder Trimmung zu hoch -Regler reagiert nicht andere Steuerungsbefehle -Gaskanal am Sender umkehren -Gaskanal ist umgekehrt funktionieren aber -Spinner, Propeller,Motor oder -Defekte Teile austauschen Ungewöhnliche Motorhalterung defekt -Lose Teile befestigen Propellergeräusche oder...
  • Seite 25 Miss America Rumpf Schrauben Set FMSMA101 FMSEH114 Tragflächen Set Ruderhörner FMSMA102 FMSEH115 Räder Set Höhenleitwerk FMSMA103 FMSEH116 Vortex Generatoren Multi Connector System FMSMA104 FMSCON002 Cockpit Propeller FMSMA105 FMSPROP063 Air-Speed-Kopf Motorbord FMSMA106 FMSBM044 Abgasrohr Motorhalter FMSMA107 FMSDJ021 Motorhaube Motorwelle FMSMA108 FMSDZ029 Spinner Einziehfahrwerk FMSEH109...
  • Seite 26: Anleitung Des Brushless Reglers

    Anleitung des Brushless Reglers Vielen Dank für den Kauf unseres Brushless Reglers (ESC). Hochleistungssysteme für RC-Modelle sind sehr gefährlich, lesen Sie bitte diese Anleitung sorgfältig durch. Insofern haben wir keine Kontrolle über die korrekte Verwendung, Installation, Anwendung oder Wartung unserer Produkte. Für Schäden, Verluste oder Kosten, die durch die Verwendung des Produkts entstehen, wird keine Haftung übernommen.
  • Seite 27 Anleitung des Brushless Reglers Beginnen Sie mit der Verwendung Ihres neuen Brushless Reglers WICHTIG! Da verschiedene Sender unterschiedliche Gasbereiche haben, kalibrieren Sie bitte den Gasbereich, bevor Sie fliegen. Gasbereichseinstellung (Der Gasbereich sollte zurückgesetzt werden, wenn ein neuer Sender verwendet wird.) 1.Sender einschalten und den Gashebel in die obere Position (Motor Vollgas) bringen.
  • Seite 28: Programmieren Sie Den Regler Mit Ihrem Sender (4 Schritte)

    Programmieren Sie den Regler mit Ihrem Sender (4 Schritte) Hinweis: Stellen Sie sicher, dass der Gasweg auf 0 eingestellt ist, wenn der Gasknüppel sich in der unteren Position befindet und 100% wenn der Gasknüppel sich in der oberen Position ist. NO.1 Rufen Sie den Programmiermodus auf 1.Sender einschalten, Gashebel nach oben bewegen Position, verbinden Sie den Akku mit Brushless Regler.
  • Seite 29 ATTENTION ATTENTION : Lisez intégralement ce manuel d’utilisation pour vous familiariser avec les caractéristiques de ce produit avant de l’utiliser. Ne pas utiliser correctement ce produit peut entraîner des dommages au produit, aux biens matériels et causer des blessures graves. Il s’agit d’un produit de loisir technique, sophistiqué, et non d’un jouet.
  • Seite 30: Introduction

    Introduction A la demande générale, FMS est fier d’annoncer une réédition réaliste, rampes d’échappement, entrée d’air, cloisons du P-51 Racer en 1100mm d’envergure, avec le choix entre d’ailes, antenne, etc. • Logement de batterie surdimensionné capable de recevoir différents décors : Dago Red, Miss America, Voodoo et Blue des packs allant jusqu’à...
  • Seite 31: Assemblage Du Modèle

    Assemblage du modèle Montage des ailes HKM3.0*20 1. Placez l'aile sous le fuselage et fixez là avec les vis fournies. Montage du stabilisateur horizontal 1. Glissez le tube de clé de stab par les trous à l'ar- rière dufuselage. 2. Montez les deux demi-stabs(gauche et droit)comme montré.
  • Seite 32 Assemblage du modèle Montage de la commande de profondeur 1. Servo au neutre, montez et réglez la commande et les chappes. Branchez les chapes dans le trou le plus éloigné du guignol. Montage du tuve de pitot 1. Placez le tube de pitot dans le trou de l'aile comme montré.
  • Seite 33: Mise En Place De L'accu

    Mise en place de la batterie 1. Enlevez la trappe d'accès à la batterie. 2. Tirez la face "douce" du velcro adhésif situé dans le fuselage. Collez cette face à votre pack d'accus. 3. Placez un pack d'accus dans le fuselage et attachez-le avec les sangles d'accu pré-installées Note : Le centre de gravité...
  • Seite 34 Piquer Lacet à gauche Lacet à droite Contrôle des débattements Les débattements conseillés pour votre P-51 V2 FMS sont les suivants (Réglages de doubles débattements) CONSEILS : Pour le premier vol, pilotez le Grands débattements Petits débattements modèle avec les petits débattements. La première...
  • Seite 35: Montage Des Chapes

    Montage des chapes 1.A et B. Sortez le tube verrou de chape vers la commande. 2.C. Ouvrez la chape avec précaution, puis insérez le pion dans le trou désiré du guignol. 3.D, E et F. Glissez le tube verrou sur la chape. Réglage des guignols et des palonniers de servos Plus de débattement Guignols...
  • Seite 36: Avant De Faire Voler Le Modèle

    Avant de faire voler le modèle Pilotage du modèlev Trouvez un site de vol adapté Décollage Trouvez un site de vol dégagé, à l'écart de bâtiments, d'arbres, En mettant progressivement les gaz, maintenez l'axe avec la de lignes électriques ou autres obstacles. Jusqu'à ce que vous direction, le modèle va accélérer rapidement.
  • Seite 37: Dépannage

    Dépannage Problème Cause possible Solution Le moteur de l'avion ne -Le contrôleur n'est pas armé. -Abaissez le manche de gaz et son trim tout en bas. répond pas, mais les autres -La voie des gaz est inversée. -Inversez la voie des gaz sur l'émetteur. commandes répondent.
  • Seite 38 Miss America Fuselage Jeu de vis FMSMA101 FMSEH114 Paire d'ailes Guignols FMSMA102 FMSEH115 Stabilisateur horizontal Jeu de roues FMSMA103 FMSEH116 Système multi-connecteur Vortex Genrators FMSMA104 FMSCON002 Cabine Hélice FMSPROP063 FMSMA105 Tube de pitot Plaque moteur FMSMA106 FMSBM044 Pipes d'échappement Support moteur FMSMA107 FMSDJ021 Capot...
  • Seite 39: Manuel Du Contrôleur Brushless

    Manuel d’utilisation du contrôleur de vitesse brushless Merci d’avoir acheté notre contrôleur électronique de vitesse (ESC). Les puissantes motorisations de modèles radio- commandés sont très dangereuses, aussi merci de lire attentivement ce manuel. Comme nous n’avons aucun contrôle sur l’utilisation,l’installation, ou l’entretien corrects de nos produits, aucune responsabilité ne sera assumée ou acceptée pour tous dégâts,pertes ou coûts résultant de l’utilisation de ce produit.
  • Seite 40 Manuel d’utilisation du contrôleur de vitesse brushless Pour commencer à utiliser votre nouveau contrôleur IMPORTANT! Comme différents émetteurs ont des plages de gaz différentes, merci de calibrer la plage des gaz avant de voler. Réglage de la plage des gaz (La plage des gaz doit être réinitialisée si vous utilisez un nouvel émetteur). 1.Allumez l’émetteur,placez le manche de gaz tout en haut.
  • Seite 41 Programmation du contrôleur avec votre émetteur (4 étapes) Note : Assurez-vous que la courbe de gaz est à 0 quand le manche de gaz est en position basse et à 100 % pour la position haute. NO.1 Entrer en mode de programmation 1.Allumer l’émetteur, placer le manche de gaz tout en haut, branchez le pack d’accus au contrôleur.
  • Seite 42 警告 警告: 在组装、 调整及飞行前请务必认真阅读产品说明书以熟知产品的特性。 请严格按照说明书提示进行飞机的 组装、 调整及飞行。 如操作不当会造成产品本身损坏及其它财产损失, 甚至造成严重的人身伤害。 声明: 模型不是玩具, 具有一定的危险性, 操作者需要具备一定的飞行经验, 初学者请在专业人士指导下操作。 禁止十四岁以下儿童操作、 飞行。 安全须知 本产品飞行由无线电遥控器控制, 在飞行过程中可能会受到外界强信号源干扰而导致失控, 甚至坠机。 因此, 在 飞行过程中务必始终与飞机保持一定的安全距离, 避免意外碰撞、 受伤。 ⸺请勿在发射器电池低电量的情况下操纵模型飞机。 ⸺请勿在公路、 人群、 高压线密集区、 机场附近及其它法律法规明确禁止飞行的场合飞行。 ⸺请勿在雷雨、 大风、 大雪或者其它恶劣气象环境下飞行。 ⸺请严格遵照产品指导说明及安全警告操作本产品及其相关配置 (例如充电器、 电池等) 。 ⸺请勿将相关化工类产品、 零部件、 电子部件等置于儿童可触及的范围。 ⸺请勿将电子件暴漏于潮湿的环境中,...
  • Seite 43: 产品特点

    Voodoo、Blue Thunder II 涂 装,再 次 推 出 曾 经 名 声 大 噪 的 • EPO 泡沫。 1100mm 级别运动竞速机 P-51D “野马” 。 • 环保水性漆。 FMS 1100mm P-51D “野马”在有限的条件下创造无限的 可能。在外观上, 它轮廓精准、 线条利落, 有可媲美更大尺寸“野 马”的高还原度,像真细节随处可见:带前倾角度的可收放起 目录 落架、 四叶桨、 襟翼、 驾驶舱、 机头排气管、 机腹进气口和排气口、...
  • Seite 44: 机体安装

    机体安装 主翼安装 HKM3.0*20 1. 将主翼安装至机身底部槽位, 使用所附螺丝固定主 翼。 平尾安装 1. 将平尾对接管安装至机身尾部槽位。 2. 将左右平尾安装至对接管, 往机身方向合拢平尾。 KA2.6*12 3. 使用所附螺丝固定平尾。...
  • Seite 45 机体安装 连接钢丝安装 1. 保持舵机回中状态, 将连接钢丝安装至平尾舵机摇臂。 空速管安装 1. 在图示槽位打胶, 将空速管安装至打胶槽位。 泡沫胶示意图 螺旋桨安装 1. 如图所示, 依序安装螺旋桨和桨罩组。 HKM3.0*20...
  • Seite 46: 电池安装

    电池安装 1. 移开座舱。 2. 取下电池板上的魔术贴 (毛面) 贴于电池表面。 3. 如图所示, 将电池置于电池舱内, 用魔术带绑紧, 使有电源 线的那端朝向飞机的尾部。 注意:由于不同电池厂家生产的电池重量有轻微的差异,需要 调整电池的前后位置来平衡飞机的重心位置。 接收机连接示意图 副翼 如图所示, 以 Futaba 遥控器为例, 将副翼舵机信号线插入接 收机副翼通道、 升降舵舵机信号线插入接收机升降舵通道、 平尾 方向舵舵机信号线插入接收机方向舵通道、 电调信号线插入 接收机油门通道。 最后将所有连接线整理整齐并固定在电池 油门 仓后部的凹槽内, 随后固定好接收机 。 垂尾 请注意, 如产品带有襟翼功能, 则将襟翼舵机信号线插入接收 机的襟翼通道(6CH)。 如产品配有LED,则LED信号线可插入任 起落架 何闲置通道。...
  • Seite 47: 遥控器设置

    遥控器设置 警告: 为保证安全, 在遥控器参数设置及舵面调整过程中, 请务必拆下螺旋桨, 以免电机意外启动发生事故。 遥控器发射机开机前, 确 保油门杆在最低位置, 其它摇杆在中立位置。 开发射机并给接收机通电, 随后听到电调初始化音 (音符释义见后文 “电调说明书” ) 。 观 察所有舵面是否回中, 如果没有回中, 尽量通过调整舵机摇臂角度、 连杆长度的方式来使舵面回中, 若调整长度在安全范围内仍未回 中, 则使用遥控器通道微调或者菜单中的 “Sub Trim” 选项来使舵面归中。 如下图所示观察摇杆动作与舵面动作的对应关系, 如发生 舵面反向需要使用遥控器中的通道反向功能来纠正。 左推 1.移动发射器上的控制杆位置, 确保舵面可以自如移动。 副翼 右推 爬升 升降 降落 转左 转向 转右...
  • Seite 48: 夹头安装方式

    夹头安装方式 1. 保证舵机为回中状态, 将连接杆夹头调整到合适位置。 2. 将 O 型圈移开, 打开夹头, 将夹头安装到舵角孔位。 3. 将 O 型圈移回相应位置, 锁紧夹头。 舵角和舵机摇臂安装 大舵面 舵角 摇臂 平尾 图示是舵角和舵面摇臂的出厂设置。 首飞建议用出厂设置 的舵角飞行。 首飞后, 可按图调整舵角。 垂尾 小舵面 副翼 重心调整 通过移动电池在电池舱内的前后位置调整飞机的重心 ,使飞机保 70-80mm 持水平或稍微头重的状态。 首飞以后, 重心位置可以根据你自 己的飞行偏好再做更改。 1.如图所示, 推荐重心位置是机翼前缘往后 70-80mm处 (安 装电池以后)...
  • Seite 49: 飞行前准备

    飞行前准备 起飞前的检查 每次飞行前须做严格的地面检查, 可有效避免飞行事故的发生。 1. 检查全机螺丝是否安装到位、 舵角摇臂连接可靠。 机翼快拆装置已锁紧。 2. 安装电池, 并调整飞机重心到说明书推荐位置。 3. 动力电池、 遥控器发射机电池等已充满电, 处于可靠工作状态。 4. 发射机油门杆保持在最低位 (推荐使用带有油门锁定功能的遥控设备) , 打开发射机, 随后连接动力电池, 待电调初始化完成 后检查各个舵面是否回中, 是否动作正确。 5. 轻推油门观察螺旋桨转向是否正确。 所有检查完成后, 方可进行飞行, 初学者首次飞行需要有经验的爱好者协助完成, 避免因操作不当发生飞行事故。 合适的飞行场地 航模飞行须远离人群、 建筑物、 树木、 高压线及禁飞区的空旷场地 (至少 2-3 个足球场大小) 。 初学者飞行前需要向有经验的爱 好者询问相关安全事宜。...
  • Seite 50: 故障检修指导

    故障检修指导 问题 问题原因 解决方式 油门推杆无响应, 但舵机 ⸺降低油门推杆和油门微调设定 ⸺电调未连接电机 有响应 ⸺反过来重新装油门通道 ⸺油门通道反向 ⸺桨罩、 桨、 电机、 电机架坏了 ⸺更换损坏的配件 桨的噪音过大或者震动过大 ⸺桨或者桨罩的小部件松动了 ⸺把桨、 桨夹和桨罩的小部件拧紧 ⸺桨装反了 ⸺反过来重新装桨 飞行时间变短, 飞机无力 ⸺电池电量低 ⸺重新给电池充电 ⸺桨装反了 ⸺依照电池说明书更换新的电池 ⸺电池坏了 ⸺舵面、 舵角、 连接杆、 舵机坏了 ⸺更换或者维修坏了的配件 飞舵面不动, 或者动作响 ⸺连接线坏了或者接头松了 ⸺检查所有连接线, 确保所有接头无松 应较慢 动现象...
  • Seite 51 座舱组 桨 FMSBT105 FMSPROP063 风速管 电机板 FMSBT106 FMSBM044 排气管 电机架 FMSBT107 FMSDJ021 机头罩 电机轴 FMSBT108 FMSDZ029 桨罩 电子收放 FMSEH109 FMSRE016 3948-900KV电机 贴纸 FMSBT110 PRKV9001 主起落架系统 80A 电调 PRESC036 FMSBT111 主起落架 9克数码舵机-正向 FMSBT112 FMS9GDP 连接杆 9g克数码舵机-54 度 FMSEH113 FMS9GD54 如需查找产品图片, 请登录FMS官方淘宝店https://fmsmodel.taobao.com。...
  • Seite 52: 电调使用说明

    电调使用说明 感谢您购买本产品! 无刷动力系统功率强大,错误的使用可能造成人身伤害和设备损坏。为此我们强烈建议您在使用设备前仔细阅 读本说明书,并严格遵守规定的操作程序。我们不承担因使用本产品或擅自对产品进行改造所引起的任何责任,包括但不限于对附 带损失或间接损失的赔偿责任。 产品特色 1. 所有器件均为原装正品,确保电调具有一流品质和极高的可靠性。 2. 具有强大的耐流能力。 3. 具备输入电压异常保护、电池低压保护、过热保护、油门信号丢失保护等多重保护功能。 4. 具有普通启动、柔和启动、超柔和启动三种启动模式,兼容固定翼飞机及直升机。 5. 可设定油门行程,兼容各种遥控器。具备平滑、细腻的调速手感,一流的调速线性。 6. 最高转速可以达 210000 RPM(2 极马达) 、70000 RPM(6 极马达) 、35000 RPM(12 极马达) 。 产品功能简要说明(粗体字为出厂默认值) 1. 刹车设定:无刹车 / 有刹车。 2. 电池类型:Lipo(锂电池)/ NiMH(镍氢) 。 3. 电池低压保护模式:逐渐降低功率 / 立即关闭输出。 注:低压保护时,将油门摇杆拉到最小油门的位置后即可重新启动马达,但因为此时仍处于低压状况,所以功率输出较小。...
  • Seite 53 电调使用说明 首次使用您的无刷电子调速器 特别强调! 为了让电调适应您的遥控器油门行程,在首次使用本电调或更换其他遥控器使用时,均应重新设定油门行程。 油门行程设定说明: 1. 开启遥控器,将油门打到最高点。 2. 将电调接上电池,等待 2 秒。 3.“哔 - 哔 -”油门最高点确认音。 4. 将油门推到最低等待 1 秒。 5.N 声短鸣音表示锂电节数。 6.“哔 -”油门最低点确认音 7. 系统准备就绪可以起飞。 正常使用开机过程说明 : 1. 开启遥控器,将油门打到最低点。 2. 电调接上电池,鸣叫提示音符“ ♪123” ,表示上电正常。 3. 发出 N 声短鸣音,表示锂电池节。 4. 自检 OK,发出长鸣音“哔⸺”系统准备就绪。 5.
  • Seite 54: 遥控器编程设定说明

    遥控器编程设定说明 注意:务必检查遥控器中油门曲线的设置,确保摇杆最低点位置对应的油门输出值为 0,最高点位置对应输出值为 100%。 一、 进入编程模式 1. 开启遥控器,将油门打到最高,电调接上电池。 2. 等待 2 秒,马达鸣叫“哔 - 哔 -”提示音。 3. 再等待 5 秒,马达鸣叫“ 56712”特殊提示音 , 表示已经进入编程模式。 二、 选择设定项 进入编程设定后,会听到 8 种鸣叫音,按如下顺序循环鸣叫,在鸣叫某个提示音后,3 秒内将油门打到最低,则进入该设定项。 提示音 设定项 “哔” (1 短音) 刹车 “哔 - 哔 -” (2 短音) 电池类型...

Inhaltsverzeichnis