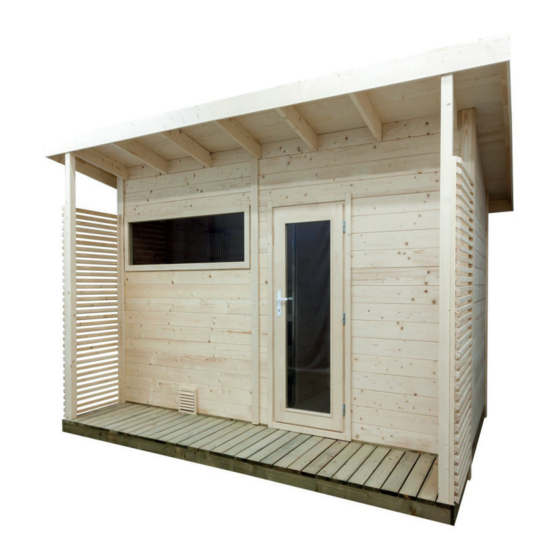
Sentiotec SCALA Large Montageanleitung
Gartensauna 459 x 313 x 272 cm

Verwandte Anleitungen für Sentiotec SCALA Large


Inhaltszusammenfassung für Sentiotec SCALA Large
- Seite 16 Table of Contents 1. Montage Vorbereitung 1.1. Wichtige Hinweise 1.2. Wartung und Reinigung 1.3. Fundament 1.4. Verankerung der Außensauna 1.5. Entsorgung 1.6. Benötigtes Werkzeug 1.7. Stückliste 2. Grundrissplan / Fundament 3. Ansicht / Abmessungen 4. Montage Kabine 4.1. Montage Grundrahmen 4.2.
-
Seite 17: Montage Vorbereitung
1. Montage Vorbereitung Lesen Sie diese Montageanleitung gut durch und bewahren Sie sie auf. So können Sie jederzeit Produktinformationen nachlesen. Sie finden diese Montageanleitung auch im Downloadbereich unserer Webseite auf www.sentiotec.com/downloads. 1.1. Wichtige Hinweise ● Erkundigen Sie sich bei Ihrer zuständige Baubehörde (Gemeindeamt, Ma- gistrat) bezüglich den Bauvorschriften und Belastungsnormen. -
Seite 18: Wartung Und Reinigung
Montageanleitung S. 4/14 ● Das Holz der Außensauna ist unbehandelt. Um die Lebensdauer zu erhöhen, empfehlen wir, außen mit einer geeigneten Holzschutzfarbe zu streichen. ● Die Innen zu verwendenden Holzteile dürfen nicht mit Farbe behandelt werden. 1.2. Wartung und Reinigung ● Die Sauna sollte innen mit einem feuchten Tuch gereinigt werden. Verwenden Sie nur warmes Wasser - keine Reinigungsmittel. ●... -
Seite 19: Verankerung Der Außensauna
Montageanleitung S. 5/14 1.4. Verankerung der Außensauna Es ist sehr wichtig, dass die Außensauna fest mit der Bodenplatte oder dem Streifenfundament verankert wird. Bei starkem Wind können große Kräfte auf das Gartenhaus einwirken. Um Schäden am eigenen oder fremden Eigentum zu vermeiden ist eine fachgerechte Verankerung unbedingt notwendig. Wir weisen Sie darauf hin, dass die Verankerung des Gartenhauses im Verantwortungsbereich des Kunden liegt, und wir für auftretende Schäden keine Gewährleistung übernehmen. 1.5. -
Seite 20: Benötigtes Werkzeug
Montageanleitung S. 6/14 1.6. Benötigtes Werkzeug ● Hammer und Beilageholz oder einen Gummihammer ● Akkuschrauber mit Bits für Kreuzschrauben und Torx ● Rollmaßband ● Bohrer mit Durchmesser 3 mm, 10 mm, 20 - 30 mm (für Stromkabel Saunaofen) ● Wasserwaage ● Innensechskant-Schlüssel 1,5 mm ● Universalmesser ● Leiter Dieses Symbol kennzeichnet Tipps und nützliche Hinweise Vorbohren Ablängen auf Naturmaß... -
Seite 21: Stückliste
Montageanleitung S. 7/14 1.7. Stückliste Name Dimensions No. of items Grundrahmen Grundrahmen (imprägniert) 2080x146x40 Grundrahmen (imprägniert) 1990x146x40 Grundrahmen (imprägniert) Mittelwand 1910x146x40 Grundrahmen (imprägniert) 1910x146x40 W1: Vorderseite mit Fenster und Tür Blockbohle mit Bohrungen für Zuluft 2160x146x40 Blockbohle 2160x146x40 14 Blockbohle 1040x146x40 Blockbohle 118x146x40 Blockbohle 287x146x40 Blockbohle 1990x146x40... - Seite 22 Montageanleitung S. 8/14 Name Dimensions No. of items Boden Bodenrahmen (imprägniert) 1905x100x40 Bodenrahmen (imprägniert) 1995x100x40 Bodenrahmen (imprägniert) 272x100x40 41 Bodenbretter 1900x95x19 Bodenbretter mit Ausschnitt 1900x60x19 Bodenbretter mit Ausschnitt 1900x60x19 Sockelleiste 1910x25x20 Sockelleiste 2000x25x20 Sockelleiste 950x25x20 Sockelleiste 965x25x20 Sockelleiste 970x25x20 Sockelleiste 95x25x20 Sockelleiste 140x25x20...
- Seite 23 Montageanleitung S. 9/14 Name Dimensions No. of items Dach außen Dachsparren 82° 1719x130x40 Dachsparren 82° 1719x130x40 Windlatten Unterstützungsleisten 82° oben 2000x40x40 Windlatten Unterstützungsleisten 82° unten 1126x40x40 66 Dach Nut- und Federbretter 2275x95x19 Windlatten 82°seitlich unten 1571x150x20 Windlatten 82°seitlich oben 1571x150x20 Windlatten 2295x150x20 Dachstütze links...
- Seite 24 Montageanleitung S. 10/14 Name Dimensions No. of items Terrasse Grundrahmen (imprägniert) 2090x95x40 32 Bodenbretter 825x120x25 Abdeckbretter 825x95x25 Sichtschutzelement 1970x780x60 Dachstütze links 2550x70x70 Dachstütze rechts 2550x70x70 Zubehör Lüftungsschieber 620P 215x170x20 Lüftungsgitter 250x250x30 Kopfstütze 520S 430x250x70 Lampenschutzgitter 920S Leuchte ohne Leuchtmittel Polymerkleber (290ml) 12 Edelstahl Lüftungsgitter Metall Winkel 60x60x3...
-
Seite 25: Grundrissplan / Fundament
Montageanleitung S. 11/14 2. Grundrissplan / Fundament 4070 1910 2000 Fundament 4130 2000 2130... -
Seite 26: Ansicht / Abmessungen
Montageanleitung S. 12/14 3. Ansicht / Abmessungen 4590 3130... -
Seite 27: Montage Kabine
Montageanleitung S. 13/14 4. Montage Kabine ACHTUNG! Beachten Sie den Grundriss auf Seite 11 und die Abbildungen ab Seite 15. 4.1. Montage Grundrahmen Legen Sie den imprägnierten Grundrahmen auf das Fundament wie dies im Grundriss und in den Fundament-Darstellungen angezeigt ist (siehe Seite 11 und 12). -
Seite 28: Montage Bänke Und Rückenlehne
Montageanleitung S. 14/14 4.6. Montage Bänke und Rückenlehne 4.7. Montage Fenster und Türen Setzen Sie zuerst den Fensterrahmen innen ein und verschrauben ihn mit der Kabinenwand. Setzen Sie das Glas von außen ein und montieren Sie den zweiten Fensterrahmen. Stellen Sie die Innentür vom Vorraum aus in die Türöffnung und fixieren Sie ihn durch die Montage der Türverblendung innen von der Sauna-Innenseite. -
Seite 57: Figure Di Montaggio (Dopo L'ultima Lingua)
Tuinsauna SCALA Large 459 x 313 x 272 cm MONTAGEANLEITUNG Nederlands SCALA-L Versie 08/21 Artikelnr. 1-053-023... - Seite 71 Pictures p. 15/35 4.1. 12 Pcs. 5 x 90 16 Stk.
- Seite 72 Pictures p. 16/35 4.2. 5 x 60 5 x 60 4.3.
- Seite 73 Pictures p. 17/35 5 x 90 5 x 90...
- Seite 74 Pictures p. 18/35 5 x 90...
- Seite 75 Pictures p. 19/35...
- Seite 76 Pictures p. 20/35...
- Seite 77 Pictures p. 21/35 4.4. 3,2 x 40 3,2 x 40...
- Seite 78 Pictures p. 22/35 4.5. 4 x 70 Dachauflageleisten 1910x40x40mm 82° 2000x40x40mm 82° 1910x40x40mm 2000x40x40mm...
- Seite 79 Pictures p. 23/35 3,5 x 40...
- Seite 80 Pictures p. 24/35 4.6. 5 x 60 5 x 60 4,5 x 50...
- Seite 81 Pictures p. 25/35 3,5 x 50 4.7. 12 Pcs. 3,2 x 40 12 Pcs. 3,2 x 40...
- Seite 82 Pictures p. 26/35 11 Pcs. 3,2 x 40...
- Seite 83 Pictures p. 27/35 3,2 x 40...
- Seite 84 Pictures p. 28/35 4.8. 3,2 x 40 Sockelleisten 1910 2000 1910 4.9. 3,5 x 40...
- Seite 85 Pictures p. 29/35 4.10. 6 x 120 6 x 150...
- Seite 86 Pictures p. 30/35 3,5 x 35 2295 2295 2295 2295...
- Seite 87 Pictures p. 31/35 3,5 x 50 3,5 x 50 3,5 x 50...
- Seite 88 Pictures p. 32/35 4.11. 4 x 80 4 x 80 4 x 70 3,5 x 50 3,5 x 50...
- Seite 89 Pictures p. 33/35 4.12. 3,5 x 50 3,5 x 50...
- Seite 90 Pictures p. 34/35 4.13. 4 x 70 4 x 70...
- Seite 91 Pictures p. 35/35 4 x 70 3,5 x 50 4 x 70 3,5 x 50...
- Seite 92 GmbH | Division of Harvia Group | Wartenburger Straße 31, A-4840 Vöcklabruck T +43 (0) 7672/22 900-50 | F -80 | info@sentiotec.com | www.sentiotec.com...