Herunterladen Inhalt Inhalt Diese Seite drucken
Sentiotec SOLIDE VIEW Montageanleitung

Sentiotec SOLIDE VIEW Montageanleitung

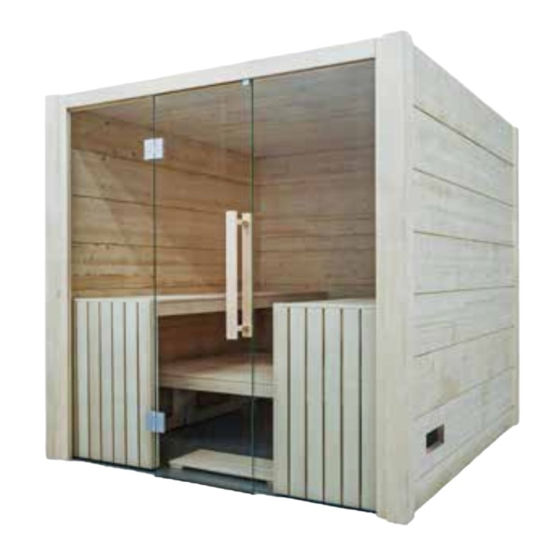
Solid wood sauna 212 x 204 x 206 cm
Inhaltsverzeichnis

Werbung

Verfügbare Sprachen
  • DE

Verfügbare Sprachen

  • DEUTSCH, seite 12
Solid wood sauna
SOLIDE VIEW
212 × 204 × 206 cm
ASSEMBLY INSTRUCTION
English
Version 04/20
SOLIDE VIEW
Artikel-Nr. 1-052-613
EN
DE
FR
ES
RU

Werbung

Inhaltsverzeichnis
loading

Inhaltszusammenfassung für Sentiotec SOLIDE VIEW

  • Seite 1 Solid wood sauna SOLIDE VIEW 212 × 204 × 206 cm ASSEMBLY INSTRUCTION English SOLIDE VIEW Version 04/20 Artikel-Nr. 1-052-613...
  • Seite 2: Inhaltsverzeichnis

    Table of Contents Preparing for installation 1.1. Tools required 1.2. Maintenance and cleaning 1.3. Disposal 1.4. Parts list 2. Floor plan 3. Assembling the cabin 3.1. Assembling the base frame 3.2. Assembling the cabin walls 3.3. Assembling the glass elements 3.4.
  • Seite 3: Preparing For Installation

    These assembly instructions can also be found in the downloads section of our website: www.sentiotec.com/downloads. Important note: ● Before you begin work, check the parts list to ensure that all the individual parts have been delivered.
  • Seite 4: Tools Required

    Assembly instruction p. 4/10 1.1. Tools required ● Hammer with a wooden head or a mallet ● Cordless screwdriver with bits for cross-head screws and Torx ● Roller tape measure ● Drill bits with a diameter of 3 mm, 10 mm, 20 - 30 mm (for sauna heater power cable) ●...
  • Seite 5: Maintenance And Cleaning

    Assembly instruction p. 5/10 1.2. Maintenance and cleaning ● The sauna should be cleaned with a damp cloth. Only use warm water – no cleaning products. ● We recommend heating the cabin once a month if the sauna is not used for a long time.
  • Seite 6: Parts List

    Assembly instruction p. 6/10 1.4. Parts list No. of Name Dimensions items Base frame 1 Base frame with cut-out 200 × 13 × 4 cm 2 Base frame 200 × 13 × 4 cm Wall elements 6 Block planks for rear wall (without holes) 200 ×...
  • Seite 7 Assembly instruction p. 7/10 No. of Name Dimensions items Interior fittings 2 Bench left / right 183.5 × 62 × 9 cm 2 Bench foot left / right 91.5 × 62 × 6 cm 1 Foot step panel 190 × 62 × 6 cm 2 Foot step feet 60 ×...
  • Seite 8: Floor Plan

    Assembly instruction p. 8/10 2. Floor plan Option:...
  • Seite 9: Assembling The Cabin

    Assembly instruction p. 9/10 Assembling the cabin ATTENTION! Note the floor plan on page 8 and the illustrations from page 11 onwards. 3.1. Assembling the base frame Start with the base frame with the cut-out and then add the left and right base frames.
  • Seite 10: Assembly Instruction

    Assembly instruction p. 10/10 3.5. Assembling the roof elements Start at the back with the roof element with the LED light and pay attention to the cable outlet. After putting in the roof elements, they must be screwed to the walls. 3.6.
  • Seite 11 Massivsauna SOLIDE VIEW 212 x 204 x 206 cm MONTAGEANLEITUNG Deutsch SOLIDE VIEW Version 04/20 Artikel-Nr. 1-052-613...
  • Seite 12 Inhaltsverzeichnis 1. Montage Vorbereitung 1.1. Benötigtes Werkzeug 1.2. Wartung und Reinigung 1.3. Entsorgung 1.4. Stückliste 2. Grundriss 3. Montage Kabine 3.1. Montage Bodenrahmen 3.2. Montage Kabinenwände 3.3. Montage Glaselemente 3.4. Montage Bänke 3.5. Montage Dachelemente 3.6. Montage Abdeckleisten 3.7. Montage Glastür 3.8.
  • Seite 13: Montage Vorbereitung

    Lesen Sie diese Montageanleitung gut durch und bewahren Sie sie in der Nähe der Sauna auf. So können Sie jederzeit Produktinformationen nachlesen. Sie finden diese Montageanleitung auch im Downloadbereich unserer Webseite auf www.sentiotec.com/downloads. Wichtige Hinweise: ● Kontrollieren Sie, bevor Sie mit der Arbeit beginnen, anhand der Stückliste, ob alle Einzelteile auch tatsächlich mitgeliefert wurden.
  • Seite 14: Benötigtes Werkzeug

    Montageanleitung S. 4/10 1.1. Benötigtes Werkzeug ● Hammer und Beilageholz oder einen Gummihammer ● Akkuschrauber mit Bits für Kreuzschrauben und Torx ● Rollmaßband ● Bohrer mit Durchmesser 3 mm, 10 mm, 20 - 30 mm (für Stromkabel Saunaofen) ● Wasserwaage ●...
  • Seite 15: Wartung Und Reinigung

    Montageanleitung S. 5/10 1.2. Wartung und Reinigung ● Die Sauna sollte mit einem feuchten Tuch gereinigt werden. Verwenden Sie nur warmes Wasser - keine Reinigungsmittel. ● Wird die Sauna längere Zeit nicht benutzt, empfehlen wir, die Kabine einmal im Monat aufzuheizen. Harzgallen sind kein Reklamationsgrund.
  • Seite 16: Stückliste

    Montageanleitung S. 6/10 1.4. Stückliste Az Bezeichnung Maß Bodenrahmen 1 Bodenrahmen mit Ausschnitt 200 x 13 x 4 cm 2 Bodenrahmen 200 x 13 x 4 cm Wandelemente 6 Blockbohlen für Rückwand (ohne Bohrungen) 200 x 27 x 4 cm 11 Blockbohlen 200 x 27 x 4 cm 1 Blockbohlen mit Ausschnitt...
  • Seite 17 Montageanleitung S. 7/10 Az Bezeichnung Maß Inneneinrichtung 2 Bank links / rechts 183,5 x 62 x 9 cm 2 Bankfuß links / rechts 91,5 x 62 x 6 cm 1 Fußauftrittplatte 190 x 62 x 6 cm 2 Fußauftritt Füße 60 x 43 x 4 cm 1 Fußauftrittplatte 190 x 43 x 9 cm...
  • Seite 18: Grundriss

    Montageanleitung S. 8/10 2. Grundriss Variante:...
  • Seite 19: Montage Kabine

    Montageanleitung S. 9/10 Montage Kabine ACHTUNG! Beachten Sie den Grundriss auf Seite 8 und die Abbildungen ab Seite 11. 3.1. Montage Bodenrahmen Beginnen Sie mit dem Bodenrahmen mit dem Ausschnitt und ergänzen dann die Bodenrahmen links und rechts. Verschrauben Sie die Bodenrahmen an den Ecken. 3.2.
  • Seite 20: Montage Dachelemente

    Montageanleitung S. 10/10 3.5. Montage Dachelemente Beginnen Sie hinten mit dem Dachelement mit dem LED-Licht und achten Sie dabei auf den Kabelauslass. Nachdem die Dachelemente eingelegt wurden, müssen diese mit den Wänden verschraubt werden. 3.6. Montage Abdeckleisten Die Abdeckleisten außen an die Ecken halten und von innen verschrauben. 3.7.
  • Seite 21 Sauna en bois massif SOLIDE VIEW 212 x 204 x 206 cm INSTRUCTIONS DE MONTAGE Français SOLIDE VIEW Version 04/20 Référence 1-052-613...
  • Seite 22 Table des matières Préparation du montage 1.1. Outils requis 1.2. Entretien et nettoyage 1.3. Élimination 1.4. Nomenclature 2. Plan 3. Montage de la cabine 3.1. Montage du cadre de plancher 3.2. Montage des parois de la cabine 3.3. Montage des éléments en verre 3.4.
  • Seite 23: Préparation Du Montage

    Vous avez ainsi accès à tout moment aux informations sur le produit. Vous trouverez également ces instructions de montage dans la rubrique de téléchargement de notre site Internet www.sentiotec.com/downloads. Remarques importantes : ● Avant de commencer les travaux, vérifiez au moyen de la nomenclature si toutes les pièces ont bien été...
  • Seite 24: Outils Requis

    Instructions de montage page 4/10 1.1. Outils requis ● Marteau et cales ou maillet en caoutchouc ● Visseuse électrique avec bits pour vis en croix et Torx ● Ruban de mesure ● Foret de 3 mm de diamètre, 10 mm, 20 - 30 mm (pour câble électrique poêle de sauna) ●...
  • Seite 25: Entretien Et Nettoyage

    Instructions de montage page 5/10 1.2. Entretien et nettoyage ● Le sauna doit être nettoyé au moyen d’un chiffon humide. N’utilisez que de l’eau chaude, pas de détergent. ● Si le sauna n’est pas utilisé pendant une période prolongée, nous recom- mandons de chauffer la cabine une fois par mois.
  • Seite 26: Nomenclature

    Instructions de montage page 6/10 1.4. Nomenclature Az Désignation Dimensions Cadre de plancher 1 Cadre de plancher avec découpe 200 x 13 x 4 cm 2 Cadre de plancher 200 x 13 x 4 cm Éléments muraux 6 Madriers pour paroi arrière (sans alésages) 200 x 27 x 4 cm 11 Madriers 200 x 27 x 4 cm...
  • Seite 27 Instructions de montage page 7/10 Az Désignation Dimensions Équipement intérieur 2 Banc gauche / droit 183,5 x 62 x 9 cm 2 Pied de banc gauche / droit 91,5 x 62 x 6 cm 1 Plaque de marchepied 190 x 62 x 6 cm 2 Marchepied pieds 60 x 43 x 4 cm 1 Plaque de marchepied...
  • Seite 28: Plan

    Instructions de montage page 8/10 2. Plan Variante :...
  • Seite 29: Montage De La Cabine

    Instructions de montage page 9/10 3. Montage de la cabine ATTENTION ! Référez-vous au plan à la page 8 et l’illustration à partir de la page 11. 3.1. Montage du cadre de plancher Commencez par le cadre de plancher avec découpe, puis ajoutez les cadres de plancher à...
  • Seite 30: Montage Des Éléments De Toit

    Instructions de montage page 10/10 3.5. Montage des éléments de toit Commencez à l’arrière par l’élément de toit avec la LED d’éclairage et tenez compte de la sortie du câble. Une fois les éléments de toit insérés, ils doivent être vissés aux parois. 3.6.
  • Seite 31 Sauna de madera maciza SOLIDE VIEW 212 x 204 x 206 cm MANUAL DE INSTRUCCIONES Español SOLIDE VIEW Versión 04/20 N.° art. 1-052-613...
  • Seite 32 ÍNDICE Preparación del montaje 1.1. Herramientas necesarias 1.2. Mantenimiento y limpieza 1.3. Eliminación 1.4. Lista de componentes 2. Plano 3. Montaje de la cabina 3.1. Montaje de las estructuras base 3.2. Montaje de las paredes de la cabina 3.3. Montaje de los elementos de vidrio 3.4.
  • Seite 33: Preparación Del Montaje

    De esta manera podrá consultar la información del producto en cualquier momento. Las instrucciones de montaje también están disponibles en el área de descargas de nuestra página web www.sentiotec.com/downloads. Indicaciones importantes: ● Antes de empezar el montaje, compruebe que haya recibido todas las piezas indicadas en la lista de componentes.
  • Seite 34: Herramientas Necesarias

    Manual de instrucciones pág. 4/10 1.1. Herramientas necesarias ● Martillo y mártir de madera, o bien un mazo de goma ● Destornillador eléctrico con puntas de estrella y Torx ● Cinta métrica ● Brocas de 3 mm, 10 mm y 20 - 30 mm (para el cable de alimentación del calefactor de la sauna) ●...
  • Seite 35: Mantenimiento Y Limpieza

    Manual de instrucciones pág. 5/10 1.2. Mantenimiento y limpieza ● Limpie la sauna utilizando un paño húmedo. Utilice solamente agua tibia; no añada detergentes. ● Si la sauna no se va a utilizar durante un período de tiempo prolongado, se recomienda calentar la cabina una vez al mes. La aparición de bolsas de resina no constituye un motivo de reclama- ción.
  • Seite 36: Lista De Componentes

    Manual de instrucciones pág. 6/10 1.4. Lista de componentes Ctd. Denominación Medidas Estructuras base 1 Estructura base con muesca 200 x 13 x 4 cm 2 Estructuras base 200 x 13 x 4 cm Elementos de pared 6 Tablones macizos para la pared del fondo 200 x 27 x 4 cm (sin perforaciones) 11 Tablones macizos...
  • Seite 37 Manual de instrucciones pág. 7/10 Ctd. Denominación Medidas Mobiliario interior 2 Bancos (izquierdo y derecho) 183,5 x 62 x 9 cm 2 Pies de banco (izquierdo y derecho) 91,5 x 62 x 6 cm 1 Plataforma reposapiés 190 x 62 x 6 cm 2 Pies de la plataforma reposapiés 60 x 43 x 4 cm 1 Plataforma reposapiés...
  • Seite 38: Plano

    Manual de instrucciones pág. 8/10 2. Plano Variante:...
  • Seite 39: Montaje De La Cabina

    Manual de instrucciones pág. 9/10 Montaje de la cabina ¡ATENCIÓN! Tenga en cuenta el plano de la página 8 y las imágenes de la página 11 y siguientes. 3.1. Montaje de las estructuras base Empiece por la estructura base que tiene la muesca y añada las estructuras base izquierda y derecha.
  • Seite 40: Montaje De Los Elementos Del Techo

    Manual de instrucciones pág. 10/10 3.5. Montaje de los elementos del techo Empiece desde el fondo colocando el elemento de techo provisto de LED; tenga en cuenta la salida del cable eléctrico. Después de colocar todos los elementos de techo, atorníllelos a las paredes. 3.6.
  • Seite 41: Руководство По Монтажу

    Деревянная сауна SOLIDE VIEW 212 x 204 x 206 см РУКОВОДСТВО ПО МОНТАЖУ Русский SOLIDE VIEW Версия 04/20 Артикул № 1-052-613...
  • Seite 42 Содержание Подготовительные работы 1.1. Требуемые инструменты 1.2. Уход и очистка 1.3. Утилизация 1.4. Список деталей 2. Схема 3. Монтаж кабины 3.1. Монтаж рамы основания 3.2. Монтаж стенок кабины 3.3. Монтаж стеклянных элементов 3.4. Монтаж скамеек 3.5. Монтаж потолочных элементов 3.6. Монтаж защитных накладок 3.7.
  • Seite 43: Подготовительные Работы

    кумент рядом с сауной, чтобы иметь возможность в любое время проверить информацию о продукте. Это же руководство по монтажу также доступно в разделе «Download» на веб-сайте www.sentiotec.com. Важное примечание. ● Прежде чем начать работы, убедитесь в наличии всех деталей, проверив...
  • Seite 44: Требуемые Инструменты

    Руководство по монтажу Стр. 4/10 1.1. Требуемые инструменты ● Молоток и деревянная подкладка или резиновая киянка ● Аккумуляторный шуруповерт с битами под винты с крестообразной головкой и Torx ● Рулетка ● Сверло диаметром 3 мм, 10 мм, 20 - 30 мм (для...
  • Seite 45: Уход И Очистка

    Руководство по монтажу Стр. 5/10 1.2. Уход и очистка ● Используйте для очистки сауны влажную ткань. Используйте только теплую воду без чистящего средства. ● Если сауна не используется в течение длительного времени, рекомен- дуется раз в месяц включать в кабине нагрев. Смоляные...
  • Seite 46: Список Деталей

    Руководство по монтажу Стр. 6/10 1.4. Список деталей Ая Наименование Размер Рама основания 1 Рама основания с вырезом 200 x 13 x 4 см 2 Рама основания 200 x 13 x 4 см Элементы стенок 6 Рейка задней стенки (без отверстий) 200 x 27 x 4 см...
  • Seite 47 Руководство по монтажу Стр. 7/10 Ая Наименование Размер Внутреннее оснащение 2 Скамейка левая / правая 183,5 x 62 x 9 см 2 Ножка для левой / правой скамейки 91,5 x 62 x 6 см 1 Панель для подножки 190 x 62 x 6 см 2 Подставка...
  • Seite 48: Схема

    Руководство по монтажу Стр. 8/10 2. Схема Вариант:...
  • Seite 49: Монтаж Кабины

    Руководство по монтажу Стр. 9/10 Монтаж кабины ВНИМАНИЕ! См. схему на стр. 8 и изображение на стр. 11. 3.1. Монтаж рамы основания Сначала установите элемент с вырезом, затем установите элементы осно- вания слева и справа. Зафиксируйте раму основания в углах с помощью шурупов.
  • Seite 50: Монтаж Потолочных Элементов

    Руководство по монтажу Стр. 10/10 3.5. Монтаж потолочных элементов Начать сзади, с потолочного элемента со светодиодной подсветкой. Учиты- вать положение кабельного вывода. После установки потолочного элемента прикрутить его шурупами к стенкам. 3.6. Монтаж защитных накладок Поддерживая защитные накладки снаружи, прикрутить их изнутри. 3.7.
  • Seite 51: Assembly Pictures (According To The Last Language)

    Assembly pictures S. 11/20 3.1. 200 × 13 × 4 cm 4 pcs. 5 x 90 3.2. 200 × 27 × 4 cm...
  • Seite 52 Assembly pictures S. 12/20 60 pcs. 5 x 90 5 x 90 3,5 x 40...
  • Seite 53 Assembly pictures S. 13/20 3.3. 32 pcs. 5 x 90 5 x 90...
  • Seite 54 Assembly pictures S. 14/20 184 × 9.6 × 4 cm 5 x 100...
  • Seite 55 Assembly pictures S. 15/20 3.4. 82 cm 5 x 70 4 x 60 3.5 x 50 4 x 70...
  • Seite 56 Assembly pictures S. 16/20 5 x 70 5 x 100...
  • Seite 57 Assembly pictures S. 17/20 3.5. 38 pcs. 5 x 90...
  • Seite 58 Assembly pictures S. 18/20 3.6. 32 pcs. 4 x 60 4 x 60...
  • Seite 59 Assembly pictures S. 19/20 3.7.
  • Seite 60 GmbH | Division of Harvia Group | Wartenburger Straße 31, A-4840 Vöcklabruck T +43 (0) 7672/22 900-50 | F -80 | info@sentiotec.com | www.sentiotec.com...

Inhaltsverzeichnis