Herunterladen Inhalt Inhalt Diese Seite drucken
Sentiotec VENUS VITAL Benutzerhandbuch
Vorschau ausblenden Andere Handbücher für VENUS VITAL:

Werbung

Verfügbare Sprachen

Verfügbare Sprachen

Benutzerhandbuch
DE
Infrarotkabine
VENUS VITAL
 1/12
23.04.2018

Werbung

Inhaltsverzeichnis
loading

Inhaltszusammenfassung für Sentiotec VENUS VITAL

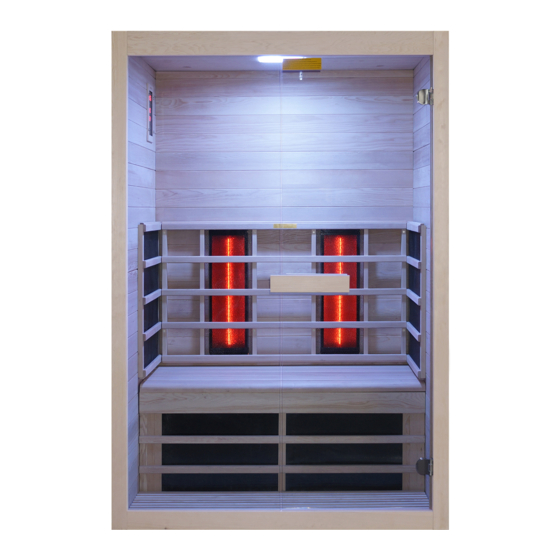
  • Seite 1 Benutzerhandbuch Infrarotkabine VENUS VITAL  1/12 23.04.2018...
  • Seite 2 Wenn Sie während der Nutzung der Infrarotkabine Unbehagen verspüren, verlassen Sie die Kabine sofort und konsultieren Sie Ihren Arzt. Nach der Einnahme von Alkohol, starken Medikamenten oder Betäubungsmitteln dürfen Sie auf keinen Fall die heiße Infrarotkabine betreten! Technische Daten Modell Venus Vital Kabinenmaterial Hemlock Länge 1286 mm...
  • Seite 3: Einzelteile Der Kabine (Abweichungen Möglich)

    TEILELISTE Einzelteile der Kabine (Abweichungen möglich) NAME MENGE Kisten-Nr. Rückwand (1860 x 1190 x 43 mm) Seitenwand 1 (mit Bedienfeld, 1900 x 898 x 48 mm) Seitenwand 2 (1900 x 898 x 48 mm) Türquerleiste (unten, 1166 x 70 x 40 mm) Frontglas (1759 x 597 x 6 mm) Türquerleiste (oben, 1166 x 90 x 40 mm) Deckenplatte (1268 x 888 x 28 mm)
  • Seite 4 Zubehörteile (Abweichungen möglich) Glas-Clip Gummistreifen Φ 4 x 45 Φ 4 x 25 Φ 4 x 12 Φ 6 x 60 Verbundschraube 1 Stk. 22 Stk. 8 Stk. 4 Stk. 2 Stk. 4 Stk. MONTAGEANLEITUNG Hinweise zur Montage Entfernen Sie die Transportverpackung und prüfen Sie vor der Montage, ob die Infrarotkabine vollständig und in einwandfreiem Zustand geliefert wurde.
  • Seite 5 MONTAGEANLEITUNG Montageschritte Hinweis: Rückwand verfügt über Lüftungsschlitze. 5 cm Abstand zur nächsten Wand einhalten!  5/12...
  • Seite 6 MONTAGEANLEITUNG Montageschritte 5 cm Hinweis: Schließen Sie die Kabel für die Waden-Heizelemente an. 2 cm  6/12...
  • Seite 7 MONTAGEANLEITUNG Montageschritte Steuergerät Netzteil Sechskant- schraube Scharnierun- terteil Scharnierober- Gummidichtung fläche Glastür Gummidichtung Glas-Clip Griff Glastür Griff Gummi- Holzabdeckung streifen Hinweis: Schließen Sie alle Kabel auf dem Dach der Kabine an.  7/12...
  • Seite 8: Temperatureinstellungen

    BEDIENUNGSANLEITUNG Verbinden Sie die Leistungseinheit mit der Wandsteckdose. Auf dem Display beginnt die LED-Anzeige zu blinken. Nun können die Infrarotheizelemente, die Leuchte und die Musikfunktion eingeschaltet werden. 1) Inbetriebnahme Drücken Sie auf , um die Kabine einzuschalten. Die Heizelemente beginnen zu heizen.
  • Seite 9 6) MP3-Player Wenn die Stromversorgung des MP3-Players eingeschaltet ist, drücken Sie lange auf die Taste „M“, um den MP3-Player zu aktivieren. Wenn ein USB-Gerät angeschlossen ist, wird automatisch eine Datei von diesem Gerät wiedergegeben. Andernfalls wird standardmäßig die Bluetooth-Funktion des MP3-Players aktiviert. Schalten Sie anschließend die Bluetooth-Suchfunktion des Mobiltelefons ein und suchen Sie nach dem Bluetooth-Gerät „FJF - BT“.
  • Seite 10 SCHALTPLAN Farbleuchte Eingangsspannung Leistung Nennstrom Sicherheitsstufe Modell Temperaturfühler Bedienfeld Lüfter Steuergerät Antenne Lautsprecher Waden (Heizelement 3) Vorderseite (Heizelement 1) Rückseite (Heizelement 2)  10/12...
  • Seite 11 SERVICE Gebrauchsanleitung Trinken Sie viel Flüssigkeit vor und nach der Verwendung der Infrarotkabine. Trocknen Sie sich vollständig ab. Die optimale Kabinentemperatur für eine angenehme Sitzung liegt zwischen 35 und 40 °C. Spätestens nach einer Heizzeit von einer Stunde sollte die Kabine ausgeschaltet und eine Heizpause von mindestens 30 Minuten eingelegt werden.
  • Seite 12 SERVICE GARANTIEKARTE Füllen Sie dieses Formular aus, fotografieren/scannen Sie es, und senden Sie es per E-Mail an: _____________________________________________ Kaufdatum: ____________________________________ Steuergerätetikett Seriennummer: _________________________________ Referenznummer: _______________________________ Name: ________________________________________ Artikelzustand (ungeöffnet, vor Kurzem geöffnet oder gebraucht) _________________________________ Kennzeichnen Sie in der folgenden Abbildung (mit einem Kreis), welches Heizelement oder welche Platte fehlerhaft ist.
  • Seite 13 User’s manual Infrared Cabin VENUS VITAL  1/12 2018/4/23...
  • Seite 14: Technical Data

    If you feel uncomfortable while using the infrared cabin, stop immediately and consult with your doctor. Never go to a hot infrared cabin if you have taken alcohol, strong medicines or narcotics. Technical data Model Venus Vital Cabin material Hemlock Length...
  • Seite 15: Parts List

    PARTS LIST Cabin Individual parts (variations possible) NAME Q’TY Box No Back panel (1860 * 1190 * 43 mm) Side panel 1 (w/control panel 1900 * 898 * 48 mm) Side panel 2 (1900 * 898 * 48 mm) Door cross bar (lower, 1166 * 70 * 40 mm) Front glass (1759 * 597 * 6 mm) Door cross bar (upper, 1166 * 90 * 40 mm) Top panel (1268 * 888 * 28 mm)
  • Seite 16 Hardware parts (variations possible) Glass Clip Rubber strip Φ 4 * 45 Φ 4 * 25 Φ 4 * 12 Φ 6 * 60 Mixed Screw 22 x ASSEMBLE INSTRUCTIONS Assemble tips Please remove transport packaging and inspect that your infrared cabin has been delivered complete and intact before beginning assemble.
  • Seite 17 ASSEMBLE INSTRUCTIONS Assemble steps Note: Back panel has ventilation slots. Must keep 5 cm away from the next wall!  5/12...
  • Seite 18 ASSEMBLE INSTRUCTIONS Assemble steps 5 cm Note: Connect the calves heater cables. 2 cm  6/12...
  • Seite 19: Control Box

    ASSEMBLE INSTRUCTIONS Assemble steps Control box Power box Hex screw Hinge bottom Hinge surface Rubber fitting Glass door Rubber fitting Glass clip Handle Glass door Handle Rubber Wood cover Strip Note: connect all cables on the roof of the cabin  7/12...
  • Seite 20 OPERATING INTRUCTIONS Connect the power unit to wall outlet, the LED indicator will start to blink on the display. Now it is possible to switch on the infrared heaters, the light and the music function. 1) Startup Press to switch on the cabin and heaters start to work, the length of time is automatically set to 99 minutes and the air temperature inside the cabin will be displayed.
  • Seite 21 6) Mp3 player In the condition of connecting electricity, long press “ M “, the MP3 player power on, (if the player is inserted with a USB, it will acquiescently play USB file), otherwise, the MP3 player will turn on Bluetooth by default. Then turn on the Bluetooth search function of mobile phone and search “FJF - BT”...
  • Seite 22: Circuit Diagram

    CIRCUIT DIAGRAM Color light Input Voltage Power Rating Current Rating Safety Grade Model Temperature Control panel Sensor Control box Antenna Speaker Calves (heater 3) Front (heater 1) Back (heater 2)  10/12...
  • Seite 23: Use Instructions

    SERVICE Use instructions Drink plenty of liquids before and after use of the infrared cabin. Dry yourself off completely. The optimal cabin temperature for a pleasant session lies between 35 and 40°C. After a heating period of an hour at the latest, the cabin should be switched off and a heating brake of at least 30 minutes should be taken.
  • Seite 24: Guarantee Card

    SERVICE GUARANTEE CARD Fill in this form and make a picture of it and Email to: ______________________________________________ Date of purchase: _______________________________ Serial Number: _________________________________ Control unit label Reference number: ______________________________ Name: ________________________________________ Article state (unopened, just opened or used): ________ Please encircle on picture below which heater or which panel has a fault.
  • Seite 25 Mode d’emploi Cabine infrarouge VENUS VITAL  1/12 23.4.2018...
  • Seite 26: Données Techniques

    Si vous ressentez un malaise lors de l’utilisation de la cabine infrarouge, arrêtez immédiatement et consultez votre médecin. N’entrez jamais dans une cabine infrarouge sous l’influence d’alcool, de médicaments puissants ou de stupéfiants. Données techniques Modèle Venus Vital Matériau de la cabine Pruche Longueur 1286 mm...
  • Seite 27: Liste Des Pièces

    LISTE DES PIÈCES Pièces de la cabine (variations possibles) N° QTÉ N° boîtier Panneau arrière (1860 * 1 190 * 43 mm) Panneau latéral 1 (avec panneau de commande 1900 * 898 * 48 mm) Panneau latéral 2 (1900 * 898 * 48 mm) Traverse de porte (inférieure, 1166 * 70 * 40 mm) Fenêtre avant (1759 * 597 * 6 mm) Traverse de porte (supérieure, 1166 * 90 * 40 mm)
  • Seite 28: Instructions De Montage

    Matériel (variations possibles) Clip pour vitre Bande en caoutchouc Φ 4 * 45 Φ 4 * 25 Φ 4 * 12 Φ 6 * 60 Vis de montage 22 x INSTRUCTIONS DE MONTAGE Conseils pour le montage Veuillez retirer l’emballage de transport et vérifier que la cabine infrarouge a bien été livrée en état complet et intacte avant de commencer le montage.
  • Seite 29 INSTRUCTIONS DE MONTAGE Étapes de montage Remarque : Les fentes de ventilation du panneau arrière doivent se trouver au moins à 5 cm d’une autre paroi!  5/12...
  • Seite 30 INSTRUCTIONS DE MONTAGE Étapes de montage 5 cm Note : raccordez le câble du chauffage des mollets. 2 cm  6/12...
  • Seite 31: Étapes De Montage

    INSTRUCTIONS DE MONTAGE Étapes de montage Boîtier de commande Boîtier électrique Vis hexagonale Arrière de charnière Raccord en Surface de caoutchouc charnière Porte en verre Raccord en caoutchouc Clip de fixation de verre Poignée Porte en verre Poignée Bande en caout- Recouvrement en bois chouc Remarque : raccordez tous les câbles sur le toit de la cabine.
  • Seite 32: Instructions De Service

    INSTRUCTIONS DE SERVICE Raccordez le bloc d’alimentation à la prise murale, le voyant LED se met à clignoter sur l’écran. Il est maintenant possible d’allumer les chauffages infrarouges, l’éclairage et la fonction musique. 1) Démarrage Appuyez sur pour mettre la cabine en marche et allumer les chauffages. La durée est automatiquement réglée sur 99 minutes, et la température de l’air à...
  • Seite 33 6) Lecteur Mp3 Si la connexion électrique est établie, appuyez longtemps sur « M ». Le lecteur MP3 démarré, (si le lecteur est branché a un disque U, il joue le fichier U), autrement, le lecteur MP3 fonctionne en mode Bluetooth par défaut.
  • Seite 34: Schéma De Câblage

    SCHÉMA DE CÂBLAGE Éclairage coloré Tension d’entrée Puissance nominale Courant nominal Niveau de sécurité Modèle Ventila- Capteur de teur température Panneau de commande Boîtier de commande Antenne Enceinte Mollets (chauffage 3) Avant (chauffage 1) Arrière (chauffage 2)  10/12...
  • Seite 35: Instructions D'utilisation

    SERVICE Instructions d’utilisation Buvez beaucoup de liquide avant et après l’utilisation de la cabine infrarouge. Séchez vous complètement. La température optimale de la cabine pour une session agréable se trouve entre 35 et 40 °C. Après la période de chauffe d’une heure au plus, la cabine doit être désactivée et le chauffage interrompu pendant au moins 30 minutes.
  • Seite 36: Carte De Garantie

    SERVICE CARTE DE GARANTIE Remplissez ce formulaire et photographiez-le. Puis envoyez la photo par e-mail à : _____________________________________________ Date d’achat : __________________________________ Étiquette de l’unité de commande Numéro de série : _______________________________ Référence : ____________________________________ Nom : _________________________________________ État de l’article (pas ouvert, ouvert, ou utilisé) : _______ Veuillez entourer sur la photo ci-dessous le chauffage ou le panneau défectueux.

Inhaltsverzeichnis