Sunny SF-E3903 Benutzerhandbuch
Inhaltsverzeichnis
Verfügbare Sprachen
Verfügbare Sprachen
Quicklinks
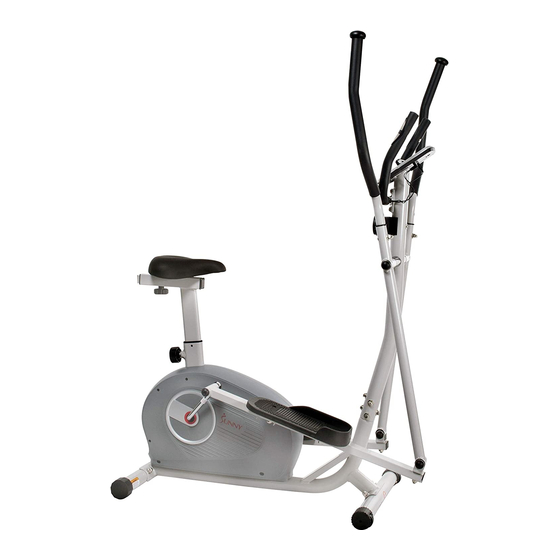
TWO IN ONE MAGNETIC ELLIPTICAL
English, Page 16 ~ 27
Español, Page 28 ~ 39
Français, Page 40 ~ 51
Deutsch, Seite 52 ~ 63
UPRIGHT BIKE
SF-E3903
USER MANUAL
IMPORTANT! Please retain owner's manual for maintenance and adjustment instructions. Your
satisfaction is very important to us, PLEASE DO NOT RETURN UNTIL YOU HAVE
CONTACTED US: support@sunnyhealthfitness.com or 1-877-90SUNNY (877-907-8669).
¡IMPORTANTE! Conserve el manual del propietario para las instrucciones de mantenimiento y
ajuste. Susatisfacción es muy importante para nosotros, NO DEVUELVA HASTA HABERNOS
CONTACTADO: support@sunnyhealthfitness.com ó 1- 877 - 90SUNNY (877-907-8669).
IMPORTANT! Veuillez conserver le manuel du propriétaire pour les instructions de réglage
etd'entretien.Votre satisfaction est très importante pour nous, VEUILLEZ NE PAS EFFECTUER
DE RETOUR AVANT DE NOUS AVOIR CONTACTÉ : support@sunnyhealthfitness.com ou
1- 877 – 90SUNNY (877-907-8669).
WICHTIG! Bitte bewahren Sie das Benutzerhandbuch für Wartungs- und Einstellanweisungen
auf. Ihre Zufriedenheit ist besonders wichtig für uns, BITTE SCHICKEN SIE DAS PRODUKT
NICHT ZURÜCK, EVOR SIE SICH MIT UNS IN VERBINDUNG GESETZT HABEN:
support@sunnyhealthfitness.com oder 1-877-90SUNNY (877-907-8669).
Inhaltsverzeichnis
Fehlerbehebung

Verwandte Anleitungen für Sunny SF-E3903


Inhaltszusammenfassung für Sunny SF-E3903
- Seite 1 TWO IN ONE MAGNETIC ELLIPTICAL UPRIGHT BIKE SF-E3903 USER MANUAL IMPORTANT! Please retain owner’s manual for maintenance and adjustment instructions. Your English, Page 16 ~ 27 satisfaction is very important to us, PLEASE DO NOT RETURN UNTIL YOU HAVE CONTACTED US: support@sunnyhealthfitness.com or 1-877-90SUNNY (877-907-8669).
-
Seite 4: Wichtige Sicherheitshinweise
7. Portez des vêtements adéquats lors de l’utilisation de l’appareil. Évitez les vêtements amples qui risqueraient de se prendre dans l’appareil. 8. Ne mettez pas le doigt ni aucun objet dans les pièces mobiles de l’appareil. 9. La capacité de poids maximale de cet appareil est de 110 kg (240lb). 10. -
Seite 5: Exploded Diagram
EXPLODED DIAGRAM 1... - Seite 6 EXPLODED DIAGRAM 2...
- Seite 13 Boulon M10 × 45 Écrou Boulon M6 × 30 Boulon M6 × 15 ∅6,5 × Ø16 × 1,5 106L Carter Gauche Rondelle 106R Carter Droit Boulon M6 × 9 ST4,2 × 20 Clé Allen ST4,2 × 16 Clé Allen Capteur Clé...
- Seite 14 Bolzen M8 x 62 Schraube M8 X 40 ∅8,5 X ∅16 X 1,5 Bolzen M8 x 20 Beilagscheibe Lenkerstütze Pedalplatte Hülse ∅19 x ∅32 x 75 Lagerträger ∅19 x ∅26 x 0,3 Gewellte Unterlegscheibe Kugellager 6001RS Computer Laperplatte Kreuzschlitzschraube M5 x 10 Schwungradachse Handgriffpuls Schwungrad...
- Seite 15 ∅6,5 x Φ16 x 1,5 Schraube ST4,2 x 20 Beilagscheibe Schraube ST4,2 x 16 Bolzen M6 x 9 Sensor Inbusschlüssel Lochabdeckung Inbusschlüssel Schraubenmutter Schraubenschlüssel S13-14-15 Bolzen M6 x 15 Schraubenschlüssel S17-19 HARDWARE PACKAGE...
- Seite 16 Ordering Replacement Parts (U.S. and Canadian Customers only) Please provide the following information in order for us to accurately identify the part(s) needed: ✓ The model number (found on cover of manual) ✓ The product name (found on cover of manual) ✓...
- Seite 53 MONTAGEANLEITUNG Wir schätzen Ihre Erfahrung im Umgang mit den Produkten von Sunny Health and Fitness. Für Fragen zu Teilen oder Hilfe bei der Fehlerbehebung kontaktieren Sie uns bitte unter support@sunnyhealthfitness.com oder 1-877-90SUNNY (877-907-8669). SCHRITT 1: 产品装配方式 Befestigen Vorderen Hinteren Stabilisator (Nr. 4 und Nr. 1) mit Vierkantansatzbolzen (Nr.
- Seite 54 Wir schätzen Ihre Erfahrung im Umgang mit den Produkten von Sunny Health and Fitness. Für Fragen zu Teilen oder Hilfe bei der Fehlerbehebung kontaktieren Sie uns bitte unter support@sunnyhealthfitness.com oder 1-877-90SUNNY (877-907-8669). SCHRITT 2: Entfernen Sie mit dem Schraubenschlüssel (Nr. C) Schraube (Nr. 55) und Gewölbte...
- Seite 55 Wir schätzen Ihre Erfahrung im Umgang mit den Produkten von Sunny Health and Fitness. Für Fragen zu Teilen oder Hilfe bei der Fehlerbehebung kontaktieren Sie uns bitte unter support@sunnyhealthfitness.com oder 1-877-90SUNNY (877-907-8669). SCHRITT 3: Befestigen Sie 2 Hülsen (Nr. 43) und 2 Gewellte Unterlegscheiben (Nr.
- Seite 56 Wir schätzen Ihre Erfahrung im Umgang mit den Produkten von Sunny Health and Fitness. Für Fragen zu Teilen oder Hilfe bei der Fehlerbehebung kontaktieren Sie uns bitte unter support@sunnyhealthfitness.com oder 1-877-90SUNNY (877-907-8669). SCHRITT 4: Befestigen Sie 2 Linke Und Rechte Pedale (Nr.
- Seite 57 Wir schätzen Ihre Erfahrung im Umgang mit den Produkten von Sunny Health and Fitness. Für Fragen zu Teilen oder Hilfe bei der Fehlerbehebung kontaktieren Sie uns bitte unter support@sunnyhealthfitness.com oder 1-877-90SUNNY (877-907-8669). SCHRITT 5: Befestigen Sie die Kleine Griffstange (Nr. 50) mit Bolzen (Nr.
- Seite 58 Wir schätzen Ihre Erfahrung im Umgang mit den Produkten von Sunny Health and Fitness. Für Fragen zu Teilen oder Hilfe bei der Fehlerbehebung kontaktieren Sie uns bitte unter support@sunnyhealthfitness.com oder 1-877-90SUNNY (877-907-8669). SCHRITT 6: Befestigen Sie die Linke und Rechte Griffstange (Nr.
- Seite 59 Wir schätzen Ihre Erfahrung im Umgang mit den Produkten von Sunny Health and Fitness. Für Fragen zu Teilen oder Hilfe bei der Fehlerbehebung kontaktieren Sie uns bitte unter support@sunnyhealthfitness.com oder 1-877-90SUNNY (877-907-8669). SCHRITT 8: Stecken Sie die Sattelstütze (Nr. 69) in den Hauptrahmen (Nr.
-
Seite 60: Einstellen Des Widerstands
EINSTELLUNGEN UND GEBRAUCHSANWEISUNG SO TRANSPORTIEREN SIE DAS FAHRRAD Halten Sie die Linke und Rechte Griffstange (Nr. 37L & 37R) fest und neigen Sie das Rad, bis die Transporträder am Stabilisator Vorne (Nr. 4) den Boden berühren. Jetzt können Sie das Fahrrad an den gewünschten Ort bringen. EINSTELLEN DES WIDERSTANDS Stellen Sie den Widerstand des Fahrrads mit dem Spannungseinstellknopf (Nr. -
Seite 61: Einlegen Und Austauschen Der Batterie
EINLEGEN UND AUSTAUSCHEN DER BATTERIE EINLEGEN DER BATTERIEN 1. Nehmen Sie 2 AAA-Batterien aus der Zählerbox. 2. Betätigen Sie die Verschlussklappe der Batterieabdeckung am Computer (Nr. 45) und entfernen Sie dann die Batterieabdeckung. 3. Legen Sie 2 AAA-Batterien in das Batteriefach auf der Rückseite des Computer (Nr. 45) ein. Achten Sie vor dem Einsetzen der Batterie auf die Pole + und –. -
Seite 62: Funktionen Und Betrieb
AININGSCOMPUTER FUNKTIONSTASTEN: MODE: Drücken Sie die Taste, um TIME, DISTANCE und CAL zur Voreinstellung auszuwählen. Drücken Sie die Taste für die Anzeige des Wertes der Auswahlfunktion auf dem LCD oder betätigen Sie nach der Einstellung die Enter-Taste. Halten Sie die Taste 3 Sekunden lang gedrückt, um alle Werte außer dem Hodometer auf Null zurückzusetzen. - Seite 63 5..DISTANZ: Akkumuliert die Gesamtdistanz von 0,0 bis 9999 M ( Meilen). Der Benutzer kann die Zieldistanz durch Drücken der Tasten SET & MODE voreinstellen. Jedes Inkrement ist 0,1 M (Meilen). Zählt während des Trainings automatisch vom Zielwert herunter. 6. ZEIT: Akkumuliert die Gesamtzeit von 00:00 bis 99:59.
-
Seite 64: Fehlerbehebung
FEHLERBEHEBUNG PROBLEM LÖSUNG 1..Nehmen Computer überprü fen Sie, ob das Kabel des Computers ordnungsgemäß mit dem Kabel verbunden ist, das von der Standstütze ausgeht. Es gibt keine Anzeige auf dem 2. Prüfen Sie, ob die Batterien richtig positioniert Computer. sind und ob die Batteriefedern richtig an den Batterien anliegen.