Sunny UPRIGHT ROW-N-RIDE EXERCISER 077S Bedienungsanleitung
Inhaltsverzeichnis
Verfügbare Sprachen
Verfügbare Sprachen
Quicklinks
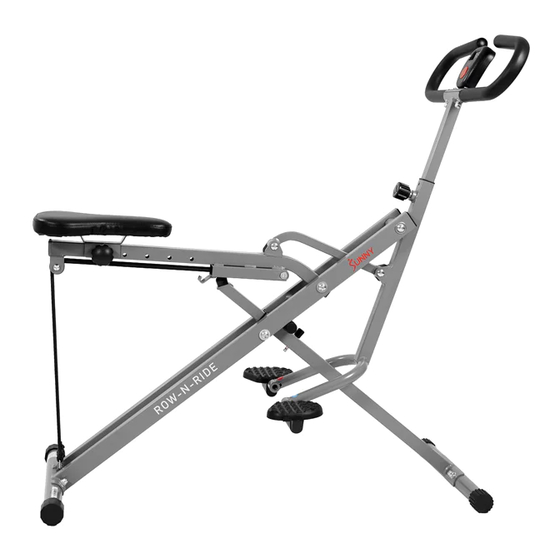
UPRIGHT ROW-N-RIDE EXERCISER
English, Page 7~14
Español, Page 15~22
Français, Page 23~30
Deutsche, Seite 31~38
USER MANUAL
IMPORTANT! Please retain owner's manual for maintenance and adjustment instructions. Your satisfaction
is very important to us, PLEASE DO NOT RETURN UNTIL YOU HAVE CONTACTED US:
support@sunnyhealthfitness.com or 1-877-90SUNNY (877-907-8669).
¡IMPORTANTE! Conserve el manual del propietario para las instrucciones de mantenimiento y ajuste. Su
satisfacción es muy importante para nosotros, NO DEVUELVA HASTA HABERNOS ONTACTADO:
support@sunnyhealthfitness.com ó 1-877-90SUNNY (877-907-8669).
IMPORTANT! Veuillez conserver le manuel du propriétaire pour les instructions de réglage et d'entretien.
Votre satisfaction est très importante pour nous, VEUILLEZ NE PAS EFFECTUER DE RETOUR AVANT
DE NOUS AVOIR CONTACTÉ: support@sunnyhealthfitness.com ou 1-877-90SUNNY (877-907-8669).
WICHTIG! Bitte bewahren Sie das Benutzerhandbuch für Wartungs- und Einstellanweisungen auf. Ihre
Zufriedenheit ist besonders wichtig für uns, BITTE SCHICKEN SIE DAS PRODUKT NICHT ZURÜCK,
BEVOR SIE SICH MIT UNS IN VERBINDUNG GESETZT HABEN: support@sunnyhealthfitness.com
oder 1-877-90SUNNY (877-907-8669).
NO. 077S
Inhaltsverzeichnis

Verwandte Anleitungen für Sunny UPRIGHT ROW-N-RIDE EXERCISER 077S


Inhaltszusammenfassung für Sunny UPRIGHT ROW-N-RIDE EXERCISER 077S
- Seite 1 UPRIGHT ROW-N-RIDE EXERCISER NO. 077S USER MANUAL English, Page 7~14 IMPORTANT! Please retain owner’s manual for maintenance and adjustment instructions. Your satisfaction is very important to us, PLEASE DO NOT RETURN UNTIL YOU HAVE CONTACTED US: support@sunnyhealthfitness.com or 1-877-90SUNNY (877-907-8669). Español, Page 15~22 ¡IMPORTANTE! Conserve el manual del propietario para las instrucciones de mantenimiento y ajuste.
-
Seite 3: Informations De Sécurité Importantes
INFORMATIONS DE SÉCURITÉ IMPORTANTES Nous vous remercions d’avoir choisi notre produit. Pour votre santé et votre sécurité, veuillez utiliser correctement cet appareil. Il est important de lire entièrement le présent manuel avant d’assembler l’appareil et de l’utiliser. L’utilisation sûre et efficace n’est possible que si l’appareil est correctement assemblé, entretenu et utilisé. -
Seite 4: Exploded Diagram
EXPLODED DIAGRAM 22 22 27 26 16 16 5 33 5 33 HARDWARE PACKAGE #12 M8*42 #21 47*40*M8 1PC M8*13... -
Seite 6: Liste Des Éléments
LISTE DES ÉLÉMENTS N ° Description Spécification QTÉ N ° Description Spécification QTÉ Mousse Butée Ø25*1.5 Bouchon Tube de Selle Boulon M8*42 Rondelle OD20*ID11 Guidon Écrou Rondelle OD22*ID8 Cadre Principal Écrou M8*13 Broche Tube de Guidon Bouchon Ø19*35 Tube de Raccordement de la Bague Selle Tube de Raccord de la Pédale... - Seite 7 Ordering Replacement Parts (U.S. and Canadian Customers only) Please provide the following information in order for us to accurately identify the part(s) needed: The model number (found on cover of manual) The product name (found on cover of manual) ...
- Seite 32 MONTAGEANLEITUNG Wir schätzen Ihre Erfahrung im Umgang mit den Produkten von Sunny Health and Fitness. Für Fragen Teilen oder Hilfe Fehlerbehebung, kontaktieren bitte unter support@sunnyhealthfitness.com oder 1-877-90SUNNY (877-907-8669). SCHRITT 1: Öffnen Sie den Hauptrahmen (Nr. 28) wie in der Abbildung links dargestellt.
- Seite 33 Wir schätzen Ihre Erfahrung im Umgang mit den Produkten von Sunny Health and Fitness. Für Fragen Teilen oder Hilfe Fehlerbehebung, kontaktieren bitte unter support@sunnyhealthfitness.com oder 1-877-90SUNNY (877-907-8669). SCHRITT 3: M8*42 M8*13 Nehmen Bolzen (Nr. Schraubenmutter (Nr. 6) aus dem Handbuchbeutel.
- Seite 34 Wir schätzen Ihre Erfahrung im Umgang mit den Produkten von Sunny Health and Fitness. Für Fragen Teilen oder Hilfe Fehlerbehebung, kontaktieren bitte unter support@sunnyhealthfitness.com oder 1-877-90SUNNY (877-907-8669). SCHRITT 6: Schieben Sie den Zähler (Nr. 41) in die Halterung auf der Griffstange (Nr.
- Seite 35 Wir schätzen Ihre Erfahrung im Umgang mit den Produkten von Sunny Health and Fitness. Für Fragen Teilen oder Hilfe Fehlerbehebung, kontaktieren bitte unter support@sunnyhealthfitness.com oder 1-877-90SUNNY (877-907-8669). SCHRITT 9: Haken Sie die Elastische Seile (Nr. 42) aus dem Sitzverbindungsrohr (Nr. 31) aus und verbinden Sie die...
-
Seite 36: Einlegen Und Austauschen Der Batterie
EINLEGEN UND AUSTAUSCHEN DER BATTERIE Batterieabdeckung Batterie EINLEGEN DER BATTERIEN 1. Nehmen Sie 1 AA-Batterie aus der Zählerbox. 2. Betätigen Sie die Verschlussklappe der Batterieabdeckung am Zähler (Nr. 41) und entfernen Sie dann die Batterieabdeckung. 3. Legen Sie 1 AA-Batterie in das Batteriefach auf der Rückseite des Zähler (Nr. 41) ein. Achten Sie vor dem Einsetzen der Batterie auf die Pole + und –. -
Seite 37: Technische Daten
TRAININGSCOMPUTER TECHNISCHE DATEN: TIME (ZEIT)………………..…….………00:00-99:59 MIN/SEK. CNT (ANZAHL)… ……………………..0-9999 RUDERSCHLÄGE CAL (KALORIEN) …………………….…0-9999 KCAL TOTAL (GESAMT)…...………………..0-9999 RUDERSCHLÄGE FUNKTIONEN: TIME (ZEIT): Zeigt die Zeit des Workouts während des Trainings an. CNT (ANZAHL): Speichert die Ruderschläge während des Trainings. CAL (KALORIEN): Zeigt die Kalorienmenge an, die während des Trainings verbraucht wurde. TOTAL (GESAMT): Zeigt die Gesamtanzahl der Ruderschläge seit dem Einsetzen der Batterien an. -
Seite 38: Einstellanweisungen
EINSTELLANWEISUNGEN EINSTELLEN DER GRIFFSTANGE Lösen Sie den Knopf (Nr. 10) und ziehen Sie. Heben oder enken Sie das Griffstangenrohr (Nr. 7) auf die gewünschte Höhe. Ziehen Sie den Knopf (Nr. 10) fest. EINSTELLEN DES SITZES Lösen und entfernen Sie den Knopf (Nr. 21), der sich unter dem Sitzverbindungsrohr (Nr. - Seite 39 KLAPPANLEITUNG A. Stellen Sie das Sitzrohr (Nr. 25) mit dem Stift (Nr. 29) auf die niedrigste Stufe. HINWEIS: Stellen Sie sicher, dass die Elastische Seile (Nr. 42) beim Zusammenklappen nicht mit dem Hauptrahmen (Nr. 28) verbunden sind. B. Stellen Sie das Griffstangenrohr (Nr. 7) mit dem Knopf (Nr.