
Verwandte Anleitungen für Klarfit Rocketkid


Inhaltszusammenfassung für Klarfit Rocketkid
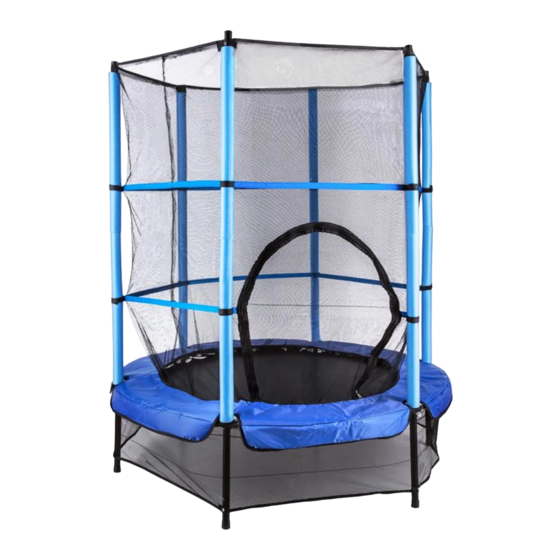
- Seite 1 10027935 10027936 10028956 10028957 10028958 10030654 10030655 Rocketkid Trampolin Trampoline Tappeto elastico Cama elástica...
-
Seite 3: Inhaltsverzeichnis
Sehr geehrter Kunde, wir gratulieren Ihnen zum Erwerb Ihres Gerätes. Lesen Sie die folgenden Hinweise sorgfältig durch und befolgen Sie diese, um möglichen Schäden vorzubeugen. Für Schäden, die durch Missachtung der Hinweise und unsachgemäßen Gebrauch entstehen, übernehmen wir keine Haftung. Scannen Sie den folgenden QR-Code, um Zugriff auf die aktuellste Bedienungsanleitung und weitere Informationen rund um das Produkt zu erhalten. - Seite 4 • Dieses Gerät ist nicht dafür bestimmt, durch Personen (einschließlich Kinder) mit eingeschränkten physischen, sensorischen oder geistigen Fähigkeiten oder mangels Erfahrung und/oder mangels Wissen benutzt zu werden, es sei denn,sie werden durch eine für ihre Sicherheit zuständige Person beaufsichtigt oder erhielten von ihr Anweisungen, wie das Gerät zu benutzen ist.
-
Seite 5: Aufbauhinweise
Kleine Objekte/Verpackungsteile Bewahren Sie kleine Objekte und Verpackungsteile außerhalb der Reichweite von Kindern auf, damit sie nicht von diesen verschluckt werden können. Lassen Sie kleine Kinder nicht mit Folie spielen. Transport des Gerätes Bitte bewahren Sie die Originalverpackung auf. Um einen ausreichenden Schutz beim Transport des Gerätes zu erreichen, verpacken Sie das Gerät in der Originalverpackung. -
Seite 6: Unfallursachen
UNFALLURSACHEN Salti Es dürfen keine Saltos auf dem Trampolin ausgeführt werden, denn eine Landung auf dem Kopf oder dem Nacken kann zu Nacken- oder Rückenverletzungen oder auch von Lähmungen bis hin zum Tode führen. Auch durch unkontrolliertes hin und her springen kann es zu Verletzungen kommen. Mehrere Nutzer gleichzeitig Bei mehreren Nutzern die gleichzeitig das Trampolin benutzen erhöht sich automatisch das Unfallrisiko. -
Seite 7: Methoden Zur Unfallverhütung
Fehlerhafte Wartung Überprüfen Sie das Trampolin stets vor dem Gebrauch auf zerrissene oder abgenutzte Matten und Abdeckmatten, verbogene Rahmen, fehlende Teile, lose oder kaputte Federn und Gestellstabilität Defekte oder verschlissene Teile müssen unverzüglich ersetzt werden. Bis zur vollständigen Wiederherstellung darf das Trampolin nicht benutzt werden. Schlechtes Wetter Das Trampolin sollte nur bei gutem Wetter genutzt werden. -
Seite 8: Lieferumfang
LIEFERUMFANG Teile Anzahl Standfüße Obere Schaumstoffummantelung Untere Schaumstoffummantelung Obere Netzstange/Verbindungsstange Untere Netzstange/Verbindungsstange 6 Rahmen/Gebogenes Rahmenteil Schutzmatte mit Netz Schraubenzieher Schrauben Sprungmatte mit Netz und Kordel Federn (Bungee cords) -
Seite 9: Aufbau
AUFBAU • Stecken Sie die vier Rahmenbauteile zusammen, so dass Sie einen geschlossenen Kreis erhalten. • Legen Sie den Rahmen nun flach auf den Boden und stecken Sie die Standfüße in die sechs Öffnungen. Da die Ober- und Unterseite identisch sind, spielt es keine Rolle auf welcher Seite Sie anfangen. - Seite 10 • Nehmen Sie eine der Bungee Cords (k, im Folgenden: „Federn“), ziehen Sie sie durch eine Lasche der Sprungmatte und formen Sie eine Schlaufe, durch die Sie das Stift-Ende ziehen (siehe Abbildungen oben und unten). • Wiederholen Sie diese Prozedur für alle 30 Laschen und prüfen Sie den Halt, indem Sie Druck auf die Matte ausüben (mit der Hand), ohne sich darauf zu stellen.
- Seite 11 • Verbinden Sie nun jeweils eine untere Verbindungsstange mit einer oberen Verbindungsstange, in- dem Sie die dünnere Seite der oberen Stange in die breitere Öffnung der unteren Stange schieben und drehen die Stangen ineinander bis die Bohrungen für die Verschraubung übereinander liegen.
-
Seite 12: Hersteller & Importeur (Uk)
• Das Sicherheitsnetz ist mit sechs oberen und sechs unteren Klettverschlüssen ausgestattet. Pro Stange ein oberer und ein unterer Klettverschluss. • Befestigen Sie je einen oberen und unteren Klettverschluss an einer Stange, indem Sie den Klettver- schluss um die Stange ziehen und schließen. -
Seite 13: Safety Instructions
Dear customer, Congratulations on the purchase of your device. Please read the following instructions carefully and follow them to prevent potential damage. We accept no liability for damage caused by disregarding the instructions and improper use. Please scan the QR code to access the latest operating instructions and further information about the product. - Seite 14 • This device is not intended for use by persons (including children) with reduced physical, sensory or mental capabilities, or lack of experience and/or knowledge, unless they have been given supervision or instruction concerning use of the appliance by a person responsible for their safety. Children should be supervised to ensure that they do not play with the device.
- Seite 15 Small objects/packaging parts Keep small objects and packaging parts out of the reach of children so that they cannot be swallowed by them. Do not let small children play with plastic film. Transport of the unit Please keep the original packaging. To achieve sufficient protection when transporting the unit, pack the unit in the original packaging.
-
Seite 16: Causes Of Accidents
CAUSES OF ACCIDENTS Somersaults No somersaults may be performed on the trampoline, because landing on the head or neck can lead to neck or back injuries or even paralysis and death. Injuries can also result from uncontrolled jumping back and forth. Multiple users at the same time If several users use the trampoline at the same time, the risk of accidents increases automatically. - Seite 17 Faulty maintenance Always check the trampoline before use for torn or worn mats and cover mats, bent frames, missing parts, loose or broken springs and frame stability. Defective or worn parts must be replaced immediately. The trampoline must not be used until it has been fully restored. Bad weather The trampoline should only be used in good weather.
-
Seite 18: Package Contents
PACKAGE CONTENTS Parts Quantity Stands Upper foam sheathing Lower foam sheathing Upper net rod/connecting rod Lower net rod/connecting rod Frame / curved frame part Protective mat with net Screwdriver Screws Jumping mat with net and cord Springs (Bungee cords) - Seite 19 ASSEMBLY • Put the four frame components together so that you get a closed circle. • Now lay the frame flat on the floor and insert the feet into the six openings. Since the top and bottom are identical, it doesn't matter which side you start on.
- Seite 20 • Take one of the bungee cords (k, hereafter: 'springs'), pull it through a tab of the jump mat and form a loop through which you pull the pin end (see illustrations above and below). • Repeat this procedure for all 30 tabs and check the hold by applying pressure to the mat (with your hand) without standing on it.
- Seite 21 • Now connect a lower connecting rod with an upper connecting rod by pushing the thinner side of the upper rod into the wider opening of the lower rod and turn the rods into each other until the holes for the screw connection are on top of each other.
- Seite 22 • The safety net is equipped with six upper and six lower Velcro fasteners. One upper and one lower Velcro fastener per pole. • Attach one upper and one lower Velcro fastener to a pole by pulling the Velcro fastener around the pole and closing it. MANUFACTURER &...
-
Seite 23: Indicaciones De Seguridad
Estimado cliente: Le felicitamos por la adquisición de este producto. Lea atentamente el siguiente manual y siga cuidadosamente las instrucciones de uso con el fin de evitar posibles daños. La empresa no se responsabiliza de los daños ocasionados por un uso indebido del producto o por haber desatendido las indicaciones de seguridad. - Seite 24 • Este aparato no está diseñado para ser manejado por personas (incluidos niños) con discapacidades físicas, sensoriales o mentales o con falta de experiencia y/o conocimientos, salvo que estén supervisados por una persona responsable o hayan recibido instrucciones sobre cómo utilizar el aparato.
- Seite 25 Objetos pequeños/piezas de embalaje Mantenga los objetos pequeños y las piezas del embalaje fuera del alcance de los niños para evitar que los ingieran. No permita que los niños jueguen con los plásticos. Transporte del aparato Conserve el embalaje original. Para ofrecer suficiente protección durante el transporte, embale el aparato en su embalaje original.
- Seite 26 CAUSAS DE ACCIDENTES Saltos mortales No se pueden realizar saltos mortales en la cama elástica, porque aterrizar sobre la cabeza o el cuello puede provocar lesiones en el cuello o la espalda, o incluso la parálisis o la muerte. Las lesiones también pueden ser consecuencia de los saltos incontrolados de un lado a otro.
- Seite 27 Mantenimiento defectuoso Examine siempre la cama elástica antes de utilizarla para ver si hay superficies de apoyo o recubrimientos rotos o desgastados, estructuras dobladas, piezas que faltan, muelles sueltos o rotos y estabilidad de la construcción general. Las piezas defectuosas o desgastadas deben ser sustituidas inmediatamente. La cama elástica no debe utilizarse hasta que se haya reparado por completo.
-
Seite 28: Contenido Del Envío
CONTENIDO DEL ENVÍO Piezas Cantidad Patas Recubrimiento superior de espuma Recubrimiento inferior de espuma Barra de red superior/barra de conexión Barra de red inferior/barra de conexión 6 Estructura/parte curva de la estructura Esterilla de protección con red Destornillador Tornillos Superficie de salto con red y cuerda Muelles (cuerdas elásticas) - Seite 29 MONTAJE • Una los cuatro componentes de la estructura de manera que se logre un círculo cerrado. • Ahora coloque la estructura en el suelo e inserte las patas en los seis orificios. Como la parte superior y la inferior son idénticas, no importa por qué...
- Seite 30 • Coja una de las cuerdas elásticas (k, en adelante: "muelles"), pásela por una pestaña de la superficie de salto y haga un lazo por el que pase el extremo del pasador (consulte las ilustraciones anterior y siguiente). • Repita este procedimiento para las 30 pestañas y compruebe la sujeción aplicando presión sobre la superficie de salto (con la mano) sin ponerse de pie sobre ella.
- Seite 31 • Ahora, una un poste de conexión inferior con una poste superior introduciendo el lado más fino del poste superior en la abertura más ancha del poste inferior; posteriormente, enrosque ambos postes hasta que los agujeros para la conexión de los tornillos se superpongan entre sí. Para ello, desplace el recubrimiento de espuma para acceder a los respectivos extremos.
- Seite 32 • La red de seguridad está equipada con seis cierres de velcro superiores y seis inferiores. Existe un cierre de velcro superior y otro inferior por poste. • Fije un cierre de velcro superior y otro inferior a un poste colocando el cierre de velcro alrededor del poste y cerrándolo.
-
Seite 33: Consignes De Sécurité
Cher client, chère cliente, Toutes nos félicitations pour l’acquisition de ce nouvel appareil. Lisez attentivement les indications suivantes et suivez-les pour éviter d'éventuels dommages. Nous ne saurions être tenus pour responsables des dommages dus au non-respect des consignes et à la mauvaise utilisation de l’appareil. - Seite 34 • Cet appareil n'est pas destiné à être utilisé par des personnes (y compris des enfants) ayant des capacités physiques, sensorielles ou mentales limitées ou dénuées d'expérience et/ou de connaissances, sauf sous surveillance ou après avoir été formées par un responsable de leur sécurité...
- Seite 35 Petits objets/pièces d'emballage Gardez les petits objets et pièces d'emballage hors de portée des enfants afin qu'ils ne puissent pas les avaler. Ne laissez pas les jeunes enfants jouer avec les plastiques d'emballage. Transport de l'appareil Transport de l'appareil : veuillez conserver l'emballage d'origine. Afin de fournir une protection adéquate lors du transport de l'appareil, remettez-le dans son emballage d'origine.
-
Seite 36: Causes Des Accidents
CAUSES DES ACCIDENTS Sauts Aucun saut périlleux ne peut être effectué sur le trampoline, car un atterrissage sur la tête ou le cou peut entraîner des blessures au cou ou au dos, voire une paralysie ou même la mort. Des blessures peuvent également résulter de sauts incontrôlés en avant et en arrière. - Seite 37 Entretien défectueux Avant toute utilisation, vérifiez toujours le trampoline pour vous assurer que les tapis et les housses ne sont pas déchirés ou usés, que les cadres ne sont pas déformés, qu'il ne manque pas de pièces, que les ressorts ne sont ni lâches ni cassés et que le cadre est stable Les pièces défectueuses ou usées doivent être remplacées immédiatement.
-
Seite 38: Contenu De L'emballage
CONTENU DE L'EMBALLAGE Pièces Quantité Pieds de support Gaine supérieure en mousse Gaine inférieure en mousse Barre de filet supérieure/barre de connexion Barre de filet inférieure/barre de connexion Cadre / partie courbe du cadre Tapis de protection avec filet Tournevis Tapis de saut avec filet et corde Ressorts (cordes élastiques) - Seite 39 INSTALLATION • Assemblez les quatre éléments du cadre de manière à obtenir un cercle fermé. • Posez maintenant le cadre à plat sur le sol et insérez les pieds dans les six ouvertures. Comme le haut et le bas sont identiques, vous pouvez commencer par n'importe quel côté.
- Seite 40 • Prenez l'un des sandows (k, ci-après : "ressorts"), tirez-le à travers une languette du tapis de saut et formez une boucle à travers laquelle vous tirez l'extrémité de la tige (voir les illustrations ci-dessus et ci-dessous). • Répétez cette procédure pour les 30 onglets et vérifiez la tenue en exerçant une pression sur le tapis (avec votre main) sans monter dessus.
- Seite 41 • Reliez maintenant un poteau inférieur à un poteau supérieur en poussant le côté le plus fin du poteau supérieur dans l'ouverture la plus large du poteau inférieur et tournez les poteaux l'un dans l'autre jusqu'à ce que les trous pour le raccord à vis soient l'un sur l'autre. Pour ce faire, déplacez la gaine de mousse pour avoir accès aux extrémités respectives.
- Seite 42 • Le filet de sécurité est équipé de six fermetures auto agrippantes supérieures et six inférieures. Une fermeture auto agrippante supérieure et une inférieure par poteau. • Attachez une fermeture auto agrippante supérieure et une inférieure à un poteau en tirant la fermeture auto agrippante autour du poteau et en la fermant.
-
Seite 43: Avvertenze Di Sicurezza
Gentile cliente, la ringraziamo per l'acquisto del dispositivo. La preghiamo di leggere attentamente le seguenti istruzioni per l’uso e di seguirle per evitare possibili danni. Non ci assumiamo alcuna responsabilità per danni scaturiti da una mancata osservanza delle avvertenze di sicurezza e da un uso improprio del dispositivo. - Seite 44 • Questo dispositivo non è progettato per essere utilizzato da persone (inclusi bambini) con limitate facoltà fi siche, psichiche e sensoriali o carenza di esperienza e/o conoscenze, a meno che siano supervisionate da una persona responsabile del loro controllo o abbiano ricevuto istruzioni sull'utilizzo corretto e sicuro del dispositivo.
- Seite 45 Piccoli oggetti/Componenti d'imballaggio Conservare i piccoli oggetti e i componenti d'imballaggio fuori dalla portata dei bambini, in modo che non li ingeriscano. Non lasciare che i bambini giochino con la pellicola. Trasporto del dispositivo Si prega di conservare l'imballaggio originale. Per assicurare una protezione sufficiente durante il trasporto, mettere il dispositivo nell'imballaggio originale.
-
Seite 46: Cause Degli Incidenti
CAUSE DEGLI INCIDENTI Capriole Non si possono fare capriole sul trampolino, perché l'atterraggio sulla testa o sul collo può portare a lesioni al collo o alla schiena o addirittura alla paralisi o alla morte. Le lesioni possono anche derivare da salti incontrollati in avanti e indietro. - Seite 47 Manutenzione difettosa Controllare sempre il trampolino prima dell'uso per verificare la presenza di materassini e tappetini di copertura strappati o usurati, telai piegati, parti mancanti, molle allentate o rotte e la stabilità del telaio. Le parti difettose o usurate devono essere sostituite immediatamente. Il trampolino non deve essere utilizzato fino a quando non è...
-
Seite 48: Contenuto Della Confezione
CONTENUTO DELLA CONFEZIONE Parti Quantità Piedi d'appoggio Rivestimento superiore in schiuma Rivestimento inferiore in schiuma Asta superiore della rete/asta di collegamento Asta inferiore della rete/asta di collegamento Telaio/Parte curva del telaio Materassino di protezione con rete Cacciavite Viti Materassino con rete e cordoncino Molle (Bungee cords) - Seite 49 MONTAGGIO • Unire i quattro componenti del telaio in modo da ottenere un cerchio chiuso. • Ora stendere il telaio sul pavimento e inserire i piedi d'appoggio nelle sei aperture. Dato che la parte superiore e quella inferiore sono identiche, non importa da quale lato si inizia.
- Seite 50 • Prendere una delle Bungee Cords (k, di seguito: "molle"), tirarla attraverso una linguetta del materassino e formare un fiocco attraverso il quale tirare l'estremità del perno (vedi illustrazioni sopra e sotto). • Ripetere questa procedura per tutte e 30 le linguette e controllare la tenuta applicando una pressione sul tappetino (con la mano) senza starci sopra.
- Seite 51 • Ora collegare un'asta inferiore con una superiore spingendo il lato più sottile dell'asta superiore nell'apertura più ampia dell'asta inferiore e girare le aste l'una nell'altra finché i fori per il collegamento a vite si trovano uno sopra l'altro. Per fare ciò, spostare il rivestimento di schiuma per accedere alle rispettive estremità.
- Seite 52 • La rete di sicurezza è dotata di sei chiusure in velcro superiori e sei inferiori. Ogni palo ha una chiusura in velcro superiore e una inferiore. • Attaccare una chiusura in velcro superiore e una inferiore a un'asta tirando la chiusura in velcro intorno all'asta e chiudendola.