Herunterladen Inhalt Inhalt Diese Seite drucken
sportplus SP-T-110 Bedienungsanleitung

sportplus SP-T-110 Bedienungsanleitung

Fitness-trampolin
Vorschau ausblenden Andere Handbücher für SP-T-110:

Werbung

Verfügbare Sprachen
  • DE

Verfügbare Sprachen

  • DEUTSCH, seite 1
BEDIENUNGSANLEITUNG
FITNESS-TRAMPOLIN
DE
INSTRUCTION MANUAL
FITNESS TRAMPOLINE
GB
MODE D'EMPLOI
TRAMPOLINE DE GYM
FR
ISTRUZIONI PER L'USO
TRAMPOLINO FITNESS
IT
MANUAL DE INSTRUCCIONES
TRAMPOLÍN DE FITNESS
ES
SP-T-110
SP-T-110-IM-V01.indb 1
4/19/2021 3:36:26 PM

Werbung

Inhaltsverzeichnis
loading

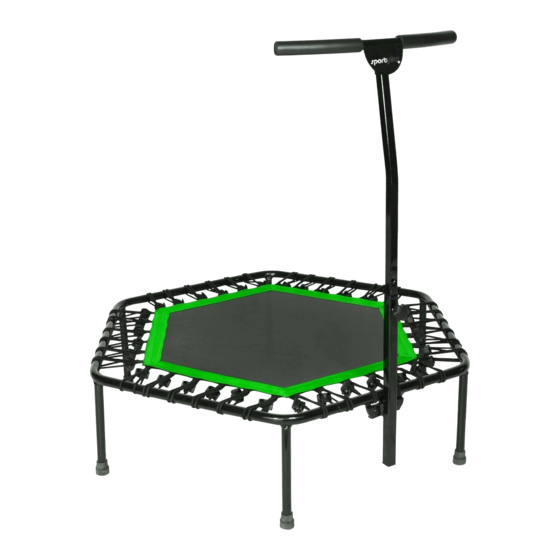
Inhaltszusammenfassung für sportplus SP-T-110

  • Seite 1 BEDIENUNGSANLEITUNG FITNESS-TRAMPOLIN INSTRUCTION MANUAL FITNESS TRAMPOLINE MODE D'EMPLOI TRAMPOLINE DE GYM ISTRUZIONI PER L’USO TRAMPOLINO FITNESS MANUAL DE INSTRUCCIONES TRAMPOLÍN DE FITNESS SP-T-110 SP-T-110-IM-V01.indb 1 4/19/2021 3:36:26 PM...
  • Seite 2: Inhaltsverzeichnis

    Sehr geehrte Kundin, sehr geehrter Kunde, Wir gratulieren Ihnen zu Ihrem neuen SportPlus Produkt und sind überzeugt, dass Sie mit diesem Produkt zufrieden sein werden. Um eine stets optimale Funktion und Leistungsbereitschaft Ihres Produktes zu gewährleisten, haben wir eine Bitte an Sie: •...
  • Seite 3: Sicherheitshinweise

    Die Montage des Produkts muss sorgfältig und von 2 erwachsenen Personen vorgenommen werden. • Bevor Sie mit dem Zusammenbau des Produkts beginnen, lesen Sie die Aufbauschritte sorgfältig durch und sehen Sie sich die Bauzeichnung an. SP-T-110-IM-V01.indb 3 4/19/2021 3:36:26 PM...
  • Seite 4: Weitere Hinweise

    Ein verschlissenes oder beschädigtes Sprungtuch sofort ersetzen. • Das Trampolin gegen unbefugte und unbeaufsichtigte Nutzung sichern. • Verwenden Sie das Trampolin nicht als Sprungbrett zuanderen Gegenständen. • Nicht von anderen Objekten auf das Trampolin springen. SP-T-110-IM-V01.indb 4 4/19/2021 3:36:26 PM...
  • Seite 5: Teileliste

    3. TEILELISTE BESCHREIBUNG ABBILDUNG ANZAHL Sprungtuch Sprungtuch-Abdeckung Rahmenteil Rahmenteil mit Metalplatte Standbein mit Gummifu Handgriff Oberes Rohr Unteres Rohr Elastische Befestigungsschlaufe Schraube Mutter Federscheibe Unterlegscheibe Feststellschraube Schraubenschlüssel Innensechskantschlüssel Spannwerkzeug Schutzring SP-T-110-IM-V01.indb 5 4/19/2021 3:36:26 PM...
  • Seite 6: Montagehinweise

    Überprüfen Sie vor dem Zusammenbau anhand der Teileliste die Vollständigkeit der gelieferten Einzelteile. SCHRITT 1 Befestigen Sie 5 Standbeine (5) an den Rahmenteilen (3) und 1 Standbein (5) an dem Rahmenteil mit Metalplatte (4), indem Sie die Standbeine bis zum Anschlag auf die Gewindestutzen drehen. SP-T-110-IM-V01.indb 6 4/19/2021 3:36:26 PM...
  • Seite 7 4. MONTAGEHINWEISE SCHRITT 2 Schieben Sie je einen Schutzring (18) auf den längeren Ausleger der Rahmenteile (3, 4). SCHRITT 3 Stecken Sie die 6 Rahmenteile (3, 4) zusammen. SP-T-110-IM-V01.indb 7 4/19/2021 3:36:27 PM...
  • Seite 8 4. MONTAGEHINWEISEE SCHRITT 4 Schieben Sie die Schutzringe (18) über die Kontaktstellen der Rahmenteile (3, 4). Hinweis: Die Schutzringe schützen die Befestigungsschlaufen (9) vor der Reibung an den Rohrkanten. SP-T-110-IM-V01.indb 8 4/19/2021 3:36:27 PM...
  • Seite 9 Beginnen Sie mit einer der beiden Befestigungsschlaufen an der Metalplatte und fädeln Sie die Schlaufe durch die Öffnung in der Metalplatte (siehe Detailzeichnung). F r gleichm ige Tuchspannung und erleichterten Aufbau, bringen Sie die elastischen Befestigungsschlaufen abwechselnd an gegenüberliegenden Seiten an (1-2-3-4 etc.). SP-T-110-IM-V01.indb 9 4/19/2021 3:36:27 PM...
  • Seite 10 7 28 3 1 35 Setzen Sie die Befestigung des Sprungtuchs mit den verbleibenden 32 elastischen Befestigungsschlaufen fort. Eine mögliche Reihenfolge der Befestigung entnehmen Sie der oben abgebildeten Darstellung. An jeder der 6 Seiten werden 6 elastische Befestigungsschlaufen angebracht. SP-T-110-IM-V01.indb 10 4/19/2021 3:36:27 PM...
  • Seite 11 Sichern Sie die Verbindung mit 2 Muttern (11). Verwenden Sie hierzu den mitgelieferten Schraubenschlüssel (15). Hinweis: Es handelt sich hierbei um selbstsichernde Muttern. Ziehen Sie die Muttern mit dem Schraubenschlüssel so fest, dass die Bolzen den Kunststoffring durchdringen. SP-T-110-IM-V01.indb 11 4/19/2021 3:36:28 PM...
  • Seite 12 ” Stecken Sie das obere Rohr (7) in das untere Rohr (8). Stellen Sie die gewünschte Länge ein und sichern Sie die Verbindung, indem Sie die Feststellschraube (14) in die Aufnahme am unteren Rohr drehen. SP-T-110-IM-V01.indb 12 4/19/2021 3:36:28 PM...
  • Seite 13 4. MONTAGEHINWEISE SCHRITT 9 „ “ ¸ Stecken Sie den Handgriff (6) auf das obere Rohr (7). Sichern Sie die Verbindung mit 2 Schrauben (10), 2 Federscheiben (12) und 2 Unterlegscheiben (13). SP-T-110-IM-V01.indb 13 4/19/2021 3:36:28 PM...
  • Seite 14 4. MONTAGEHINWEISE SCHRITT 10 Legen Sie die Sprungtuch-Abdeckung (2) auf den Trampolinrahmen. Achten Sie auf die Position der Aussparung für das untere Rohr. SP-T-110-IM-V01.indb 14 4/19/2021 3:36:28 PM...
  • Seite 15 4. MONTAGEHINWEISE SCHRITT 11 Befestigen Sie die Sprungtuch-Abdeckung (2) mit den Bändern an den Standbeinen des Rahmens. SP-T-110-IM-V01.indb 15 4/19/2021 3:36:29 PM...
  • Seite 16 Stellen Sie die Höhe des Handgriffs (6) auf Ihre Körpergrösse ein, indem Sie die Länge der Haltestange anpassen. Achten Sie darauf, dass nach der Montage die Markierung auf dem oberen Rohr (7) nicht sichtbar ist. Fixieren Sie die Höhe mit Hilfe er Feststellschraube (14). SP-T-110-IM-V01.indb 16 4/19/2021 3:36:29 PM...
  • Seite 17: Training

    Die gelenkschonenden Eigenschaften und der hohe Kalorienverbrauch machen das Fitness- Trampolin zu einem beliebten Ausdauer-Fitnessgerät. Hinweis: In den folgenden Beispielübungen ist das Gerät vereinfacht ohne Haltestange dargestellt. Bei geeigneten Übungen können Sie für mehr Standsicherheit die Hände auf den Handgriff legen. SP-T-110-IM-V01.indb 17 4/19/2021 3:36:29 PM...
  • Seite 18: Training , Ausdauer

    1 bis 3 Minuten. Danach wieder zu Laufbewegung (Übung 1) wechseln ÜBUNG 4: AUS LEICHTER KNIEBEUGUNG BEIDSEITIG ABSPRINGEN UND WIEDER WEICH AUF TRAMPOLIN LANDEN. Beinachse beim Absprung und bei der Landung stabil halten. 15 mal wiederholen. SP-T-110-IM-V01.indb 18 4/19/2021 3:36:29 PM...
  • Seite 19 10 x wiederholen. ÜBUNG 8: GEWICHT AUF VORDERES BEIN VERLAGERN. HINTERES BEIN LEICHT VOM BODEN ABHEBEN. Ein Bein in tiefer Kniebeugung, anderes Bein berührt den Boden. Beinachse stabil halten. Keinen runden Rücken. 10 x wiederholen. SP-T-110-IM-V01.indb 19 4/19/2021 3:36:29 PM...
  • Seite 20 Knie leicht gebeugt, Fuss des anderen Beines berührt das Trampolin nicht. Augen schliessen. Beide Arme 3x Richtung Decke bewegen und wieder zurück. Falls das Gleichgewicht nicht gehalten werden kann, Augen sofort öffnen. 2 bis 3 x wiederholen. SP-T-110-IM-V01.indb 20 4/19/2021 3:36:29 PM...
  • Seite 21: Wartung, Reinigung Und Pflege

    Verpackungsmaterialien sind Rohstoffe und können wieder verwendet werden. Trennen Sie die Verpackungen sortenrein und führen Sie diese im Interesse der Umwelt einer ordnungsgem en Entsorgung zu. N here Informationen erhalten Sie auch bei Ihrer zuständigen Verwaltung. SP-T-110-IM-V01.indb 21 4/19/2021 3:36:29 PM...
  • Seite 22: Service Und Ersatzteile

    Im Falle eventueller Mängel am Produkt wenden Sie sich bitte direkt an unser Serviceteam. Zu diesem Zweck empfehlen wir Ihnen, den Kaufbeleg sorgfältig aufzubewahren. Für Fragen zum Aufbau und zur Anwendung Ihres SportPlus Produkts sowie zur Ersatzteil- bestellung steht Ihnen unser Serviceteam selbstverständlich auch jederzeit zur Verfügung.
  • Seite 23: Gewährleistungen

    9. GEWÄHRLEISTUNGEN SportPlus versichert, dass das Produkt, auf das sich die Gewährleistung bezieht, aus qualitativ hochwertigen Materialien hergestellt und mit u erster Sorgfalt berpr ft wurde. Sollten sich dennoch bei normaler Verwendung und Wartung innerhalb der hiernach genannten Gewährleistungsfrist Defekte ergeben, Wenden Sie sich bitte an unser Service- Team.
  • Seite 24: Technical Data

    Dear Customer, Congratulations for choosing a SportPlus product. We have every expectation that you will be fully satisfied with your new purchase. To guarantee optimal function of this product, please adhere to the following instructions: • Before using this product for the first time, please read the manual carefully! •...
  • Seite 25: Safety Instructions

    • Please note that there is always a risk of injury when using tools to carry out manual tasks. Therefore, please exercise caution when assembling this product. SP-T-110-IM-V01.indb 25 4/19/2021 3:36:30 PM...
  • Seite 26: Other Tips

    Replace a worn-out or damaged trampoline net immediately. • Secure the trampoline against unauthorized and unsupervised use. • Do not use the trampoline as a means to jump onto other objects. • Do not jump from other objects onto the trampoline. SP-T-110-IM-V01.indb 26 4/19/2021 3:36:30 PM...
  • Seite 27: Part List

    Trampoline net cover Frame tube Frame tube with metal plate Support frame with rubber foot Handle Top frame Bottom frame Flexible attachment loop Bolt Spring washer Washer Set screw Wrench Hex key Outil pour tendre Protection ring SP-T-110-IM-V01.indb 27 4/19/2021 3:36:31 PM...
  • Seite 28: Assembly Instructions

    Attach the support frames (5) to the frame tubes (3) and 1 support frame (5) to the frame tube with metal plate (4) by screwing the support frames onto the threaded couplings all the way till the end. SP-T-110-IM-V01.indb 28 4/19/2021 3:36:31 PM...
  • Seite 29 4. ASSEMBLY INSTRUCTIONS STEP 2 Slide one protective ring (18) on each longer arm of the frame parts (3, 4). STEP 3 Put the 6 frame tubes (3, 4) together. SP-T-110-IM-V01.indb 29 4/19/2021 3:36:31 PM...
  • Seite 30 4. ASSEMBLY INSTRUCTIONS STEP 4 Slide the protective rings (18) over the contact points of the frame parts (3, 4). Note: The protective rings protect the mounting loops (9) from friction on the tube edges. SP-T-110-IM-V01.indb 30 4/19/2021 3:36:31 PM...
  • Seite 31 (see detailed diagram). In order to ensure even net tension and to facilitate assembly, fix the elastic attachment loops alternately to the respective opposite side (1-2-3-4 etc.) SP-T-110-IM-V01.indb 31 4/19/2021 3:36:31 PM...
  • Seite 32 Continue assembling the trampoline net using the remaining 32 elastic attachment loops. Refer to the upper picture for more details on the order of attachment. Secure 6 elastic attachment loops each to each of the 6 sides. SP-T-110-IM-V01.indb 32 4/19/2021 3:36:31 PM...
  • Seite 33 (4). Secure the connection with 2 nuts (11). To do so, us the wrench (15) provided. Note: These are self-locking nuts. Tighten them with the wrench only until the screws pierce the plastic ring. SP-T-110-IM-V01.indb 33 4/19/2021 3:36:31 PM...
  • Seite 34 STEP 8 ” Insert the top frame (7) into the bottom frame (8). Adjust the length as desired and secure the connection by screwing the set screw (14) onto the mount of the bottom frame. SP-T-110-IM-V01.indb 34 4/19/2021 3:36:32 PM...
  • Seite 35 4. ASSEMBLY INSTRUCTIONS STEP 9 „ “ ¸ Attach the handle (6) to the top frame (7). Secure the connection with 2 bolts (10), 2 spring washers (12) and 2 washers (13). SP-T-110-IM-V01.indb 35 4/19/2021 3:36:32 PM...
  • Seite 36 4. ASSEMBLY INSTRUCTIONS STEP 10 Place the trampoline net cover (2) on the trampoline framework. Check the correct position of the recess for the bottom frame. SP-T-110-IM-V01.indb 36 4/19/2021 3:36:32 PM...
  • Seite 37 4. ASSEMBLY INSTRUCTIONS STEP 11 Attach the trampoline net cover (2) to the support frames of the framework using the straps. SP-T-110-IM-V01.indb 37 4/19/2021 3:36:32 PM...
  • Seite 38 Adjust the handle height (6) to your body height by adjusting the length of the holding rod accordingly. Make sure the marking on the top frame (7) will not be visible after installation. Secure the height using the set screw (14). SP-T-110-IM-V01.indb 38 4/19/2021 3:36:33 PM...
  • Seite 39: Training

    The low-impact features and the high calorie consumption make this fitness trampoline a popular fitness equipment. Note: The following sample exercises will show a simplified version of the device without holding rod. If suitable, place your hands on the handle for more stability. SP-T-110-IM-V01.indb 39 4/19/2021 3:36:33 PM...
  • Seite 40 1 to 3 minutes. Then continue again with running (exercise 1). EXERCISE 4: SLIGHTLY BEND YOUR KNEES AND JUMP, THEN LAND SOFTLY ON THE TRAMPOLINE. Keep your leg axis stable when jumping off and landing. Repeat 15 times. SP-T-110-IM-V01.indb 40 4/19/2021 3:36:33 PM...
  • Seite 41 EXERCISE 8: SHIFT THE BODY WEIGHT TO THE FRONT LEG. SLIGHTLY LIFT THE BACK LEG. One knee bent far down with the other leg touching the floor. Keep the leg axis stable. Avoid rounded spine. Repeat 10 x. SP-T-110-IM-V01.indb 41 4/19/2021 3:36:33 PM...
  • Seite 42 Knee slightly bent; foot of the other leg does not touch the trampoline. Close your eyes. Move both arms 3x towards the ceiling and back. If you cannot keep the balance, open your eyes. Repeat 2 to 3 x. SP-T-110-IM-V01.indb 42 4/19/2021 3:36:33 PM...
  • Seite 43: Maintenance, Cleaning And Care

    7. NOTES ON DISPOSAL Packaging materials are raw materials and can be recycled. Separate the packaging materials and dispose of them properly in the interest of the environment. Your local administration can provide additional information. SP-T-110-IM-V01.indb 43 4/19/2021 3:36:33 PM...
  • Seite 44: Service And Replacement Parts

    Our service team is naturally available at any time to assist you with additional questions regarding the assembly and use of your SportPlus product as well as ordering spare parts. Service time: Monday to Friday, 9.00 a.m.
  • Seite 45: Warranty

    9. WARRANTY SportPlus guarantees that the product this warranty applies to was manufactured using high-quality materials and has been inspected with the utmost attention. Should there be any defects within the hereinafter stipulated warranty period and under normal use and maintenance conditions, please contact our service team.
  • Seite 46: Indications Techniq Ues

    Chè re cliente, Cher client, Nous vous fé licitons pour l' achat de votre nouveau produit SportPlus et sommes convaincus q ue vous en serez satisfait. Pour garantir un fonctionnement parfait et un rendement toujours plus optimal de votre produit, nous vous prions de suivre ces instructions.
  • Seite 47: Consignes De Sé Curité

    Enlevez tous les mat riaux d'emballage et positionnez ensuite toutes les pi ces sur une surface libre. Cela vous offre un bon aper u et vous facilite l assemblage. Prot gez la surface de montage avec un rev tement afin de ne pas salir et/ou rayer. SP-T-110-IM-V01.indb 47 4/19/2021 3:36:34 PM...
  • Seite 48: Autres Indications

    Veuillez-vous assurer q ue le trampoline ne soit pas utilisé sans autorisation ou involontairement. • N utilisez pas le trampoline comme tremplin de saut pour aller sur d autres objets. • Il est interdit de sauter de d autres objets sur le trampoline. SP-T-110-IM-V01.indb 48 4/19/2021 3:36:34 PM...
  • Seite 49: Liste Des Piè Ces

    Poigné e Tube sup rieur Tube inf rieur Bande de fixation lastique É crou Rondelle ressort Rondelle plate Vis de blocage Clé plate Clé pour vis à six pans creux Outil pour tendre Anneau de protection SP-T-110-IM-V01.indb 49 4/19/2021 3:36:34 PM...
  • Seite 50: Notices Explicatives De Montage

    Fixez 5 montants (5) aux parties du cadre (3) et 1 montant (5) à la partie du cadre avec pla q ue m é talli q ue (4) en tournant les montants jusqu leur enclenchement sur les filetages. SP-T-110-IM-V01.indb 50 4/19/2021 3:36:34 PM...
  • Seite 51 Faites coulisser un anneau de protection (18) sur chaque bras long des pi ces de structure (3, 4). 3E É TAPE Insé rez les 6 parties du cadres (3, 4) les uns dans les autres. SP-T-110-IM-V01.indb 51 4/19/2021 3:36:34 PM...
  • Seite 52 Faites coulisser les anneaux de protection (18) sur les points de contact des piè ces de structure (3, 4). Remarq ue : Les anneaux de protection prot gent les boucles de fixation (9) contre tous frottements sur les bords du tube. SP-T-110-IM-V01.indb 52 4/19/2021 3:36:35 PM...
  • Seite 53 Pour une tension r guli re de la toile et pour faciliter l assemblage, montez les bandes de fixation lastiques une par une en alternance d un c t puis de l autre (1-2-3-4 etc.). SP-T-110-IM-V01.indb 53 4/19/2021 3:36:35 PM...
  • Seite 54 Vous pouvez vous reporter l illustration pr sent e ci-dessus afin d obtenir un exemple de sé q uence de pose. 6 bandes de fixation lastiques seront attach es chacun des 6 c t s. SP-T-110-IM-V01.indb 54 4/19/2021 3:36:35 PM...
  • Seite 55 S é curisez le raccord avec 2 é crous (11). Utilisez pour cet assemblage la cl plate fournie (15). Remarq ue : Il s agit d crous autobloquants. Serrez les crous avec la cl plate pour que les boulons p n trent dans l anneau en plastique. SP-T-110-IM-V01.indb 55 4/19/2021 3:36:35 PM...
  • Seite 56 Ins rez le tube sup rieur (7) dans le tube inf rieur (8). Ajustez la longueur souhait e et s curisez le raccord en tournant la vis de blocage (14) dans le passage sur le tube inf rieur. SP-T-110-IM-V01.indb 56 4/19/2021 3:36:36 PM...
  • Seite 57 9E É TAPE „ “ ¸ Insé rez la poigné e (6) sur le tube sup rieur (7). S é curisez le raccord avec 2 vis (10), 2 rondelles ressort (12) et 2 rondelles plates (13). SP-T-110-IM-V01.indb 57 4/19/2021 3:36:36 PM...
  • Seite 58 4. NOTICES EXPLICATIVES DE MONTAGE 10E É TAPE Positionnez le revê tement de la toile du trampoline (2) sur le cadre du trampoline. Tenez compte de la position des videments pour le tube inf rieur. SP-T-110-IM-V01.indb 58 4/19/2021 3:36:36 PM...
  • Seite 59 4. NOTICES EXPLICATIVES DE MONTAGE 11E É TAPE Attachez le revê tement de la toile du trampoline (2) avec les bandes aux montants du cadre. SP-T-110-IM-V01.indb 59 4/19/2021 3:36:36 PM...
  • Seite 60 Veillez ce qu apr s l assemblage le marquage sur le tube sup rieur (7) ne soit pas visible. Fixez la hauteur l aide de la vis de blocage (14). SP-T-110-IM-V01.indb 60 4/19/2021 3:36:37 PM...
  • Seite 61: Entrainement

    Remarq ue : Dans les exercices suivants donn s en exemple, la repr sentation de l appareil est simplifi e, sans barre de maintien. Lors des exercices approprié es, vous pouvez placer vos mains sur la poign e afin d obtenir plus de stabilit . SP-T-110-IM-V01.indb 61 4/19/2021 3:36:37 PM...
  • Seite 62 EXERCICE 4 : SAUT AVEC LES DEUX JAMBES, GENOUX LÉ GÈ REMENT PLIÉ S, ET ATTERRISSAGE DOUX SUR LE TRAMPOLINE Lors du saut et lors de l'atterrissage, tenez les axes des jambes stables. Ré pé tez 15 fois. SP-T-110-IM-V01.indb 62 4/19/2021 3:36:37 PM...
  • Seite 63 SOL DE LA JAMBE À L' ARRIÈ RE. Maintenez une jambe avec un pliage du genou prononc alors que l'autre jambe touche le sol. Gardez les axes des jambes stables. Ne faites pas le dos rond. Ré pé tez 10 fois. SP-T-110-IM-V01.indb 63 4/19/2021 3:36:37 PM...
  • Seite 64 Faites bouger les deux bras 3 fois en direction du plafond et revenez au mouvement initial. Si l' quilibre ne peut pas tre maintenu, ouvrez les yeux imm diatement. Ré pé tez 2 à 3 fois. SP-T-110-IM-V01.indb 64 4/19/2021 3:36:37 PM...
  • Seite 65: Maintenance, Nettoyage Et Entretien

    Des informations compl mentaires sont galement mises votre disposition par l administration locale dont vous dé pendez. SP-T-110-IM-V01.indb 65 4/19/2021 3:36:37 PM...
  • Seite 66: Service Et Piè Ces De Rechange

    Pour des q uestions concernant la mise en place et l'utilisation de votre produit SportPlus ainsi q ue pour la commande de piè ces dé taché es, veuillez contacter notre é q uipe du service clientè...
  • Seite 67: Garanties

    9. GARANTIES SportPlus assure, que le produit, qui se r f re la garantie, a t fabriqu avec des mat riaux d excellente qualit et v rifi avec le plus grand soin. Cependant, si avec une utilisation et un entretien normaux, durant le d é lai de garantie cit é ici, des d é fauts venaient à...
  • Seite 68: Legenda Delle Icone

    Gentile Cliente, congratulazioni per l ’ ac q uisto del Suo nuovo prodotto SportPlus, che siamo certi Le garantirà la massima soddisfazione. Per garantire funzionamento e prestazioni sempre ottimali del Suo prodotto, La preghiamo di rispettare le condizioni che seguono: •...
  • Seite 69: Precauzioni Per La Sicurezza

    • Usando come riferimento l’elenco delle parti, controllare che la confezione sia integra. Smaltire il materiale di imballaggio solo una volta finito di montare. SP-T-110-IM-V01.indb 69 4/19/2021 3:36:37 PM...
  • Seite 70 Sostituire immediatamente un telo da salto usurato o danneggiato. • Assicurare il trampolino da usi non autorizzati e non supervisionati. • Non utilizzare il prodotto come trampolino da lancio verso altri oggetti. • Non saltare da altri oggetti sul trampolino. SP-T-110-IM-V01.indb 70 4/19/2021 3:36:38 PM...
  • Seite 71: Elenco Delle Parti

    Gamba con piedino in gomma Impugnatura Tubo superiore Tubo inferiore Anello di fissaggio elastico Vite Dado Rondella elastica Rondella Vite di fermo Chiave per dadi Chiave a brugola Utensile di serraggio Anello di protezione SP-T-110-IM-V01.indb 71 4/19/2021 3:36:38 PM...
  • Seite 72: Note Per Il Montaggio

    PASSAGGIO 1 Fissare 5 gambe (5) alle parti del telaio (3) e 1 gamba (5) alla parte del telaio con piastra metallica (4) ruotando la gamba nell attacco filettato fino a far scattare in posizione. SP-T-110-IM-V01.indb 72 4/19/2021 3:36:38 PM...
  • Seite 73 4. NOTE PER IL MONTAGGIO PASSAGGIO 2 Infilare un anello di protezione (18) su ogni braccio più lungo delle parti del telaio (3, 4). PASSAGGIO 3 Fissare insieme le 6 parti del telaio (3, 4). SP-T-110-IM-V01.indb 73 4/19/2021 3:36:38 PM...
  • Seite 74 PASSAGGIO 4 Infilare gli anelli di protezione (18) sui punti di contatto delle parti del telaio (3, 4). Nota: gli anelli di protezione salvaguardano gli anelli di fissaggio (9) dall’attrito con il bordo dei tubi. SP-T-110-IM-V01.indb 74 4/19/2021 3:36:39 PM...
  • Seite 75 (vedere il dettaglio in figura). Per garantire una tensione uniforme del telo e facilitare il montaggio, applicare gli anelli di fissaggio alternativamente su un lato e poi sul lato opposto (1-2-3-4 e cos via). SP-T-110-IM-V01.indb 75 4/19/2021 3:36:39 PM...
  • Seite 76 Continuare a montare il telo da salto utilizzando i 32 anelli di fissaggio rimasti. La figura illustrata sopra mostra una possibile sequenza di montaggio. Su ognuno dei 6 lati sono applicati 6 anelli di fissaggio elastici. SP-T-110-IM-V01.indb 76 4/19/2021 3:36:39 PM...
  • Seite 77 Assicurare il collegamento con 2 dadi (11). Utilizzare a tal fine la chiave per dadi fornita (15). Nota: Q uesti sono dadi autobloccanti. Stringere i dadi con la chiave in modo che i bulloni penetrino nell’anello di plastica. SP-T-110-IM-V01.indb 77 4/19/2021 3:36:39 PM...
  • Seite 78 4. NOTE PER IL MONTAGGIO PASSAGGIO 8 ” Inserire il tubo superiore (7) nel tubo inferiore (8). Impostare la lunghezza desiderata e assicurare il collegamento ruotando la vite di fermo (14) nell’attacco del tubo inferiore. SP-T-110-IM-V01.indb 78 4/19/2021 3:36:40 PM...
  • Seite 79 4. NOTE PER IL MONTAGGIO PASSAGGIO 9 „ “ ¸ Inserire l’impugnatura (6) sul tubo superiore (7). Assicurare il collegamento con 2 viti (10), 2 rondelle elastiche (12) e 2 rondelle (13). SP-T-110-IM-V01.indb 79 4/19/2021 3:36:40 PM...
  • Seite 80 4. NOTE PER IL MONTAGGIO PASSAGGIO 10 Posizionare la copertura del telo da salto (2) sul telaio del trampolino. Osservare la posizione della cavità per il tubo inferiore. SP-T-110-IM-V01.indb 80 4/19/2021 3:36:40 PM...
  • Seite 81 4. NOTE PER IL MONTAGGIO PASSAGGIO 11 Utilizzando le fascette, fissare la copertura del telo da salto (2) alle gambe del telaio. SP-T-110-IM-V01.indb 81 4/19/2021 3:36:40 PM...
  • Seite 82 Regolare l’altezza dell’impugnatura (6) in base al proprio corpo, così da utilizzare agevolmente la barra di sostegno. Assicurarsi che dopo il montaggio il segno sul tubo superiore (7) non sia visibile. Fissare l’altezza con l’aiuto della vite di fermo (14). SP-T-110-IM-V01.indb 82 4/19/2021 3:36:41 PM...
  • Seite 83: Allenamento

    Nota: Negli esercizi d’esempio riportati di seguito, l’attrezzo è illustrato per comodità senza la barra di sostegno. Q uando gli esercizi lo richiedono, è possibile afferrare l'impugnatura con le mani per ottenere una maggiore stabilità . SP-T-110-IM-V01.indb 83 4/19/2021 3:36:41 PM...
  • Seite 84 1 a 3 minuti. Successivamente tornare al passo (esercizio 1). ESERCIZIO 4: SALTELLI A PIEDI UNITI E GINOCCHIA LEGGERMENTE FLESSE, CON ATTERRAGGIO MORBIDO SUL TRAMPOLINO. Mantenere l'asse delle gambe sia in fase di salto che di atterraggio. Ripetere 15 volte. SP-T-110-IM-V01.indb 84 4/19/2021 3:36:41 PM...
  • Seite 85 Ripetere 10 volte. ESERCIZIO 8: SPOSTAMENTO DEL PESO SULLA GAMBA ANTERIORE. PICCOLO SOLLEVAMENTO DELLA GAMBA POSTERIORE DAL PAVIMENTO. Una gamba molto piegata, l'altra tocca il pavimento. Mantenere l'asse delle gambe. Non inarcare la schiena. Ripetere 10 volte. SP-T-110-IM-V01.indb 85 4/19/2021 3:36:41 PM...
  • Seite 86 Chiudere gli occhi. Allungare 3 volte le braccia in direzione del soffitto e poi riportare alla posizione di partenza. In caso di perdita di e q uilibrio, aprire immediatamente gli occhi. Ripetere 2– 3 volte. SP-T-110-IM-V01.indb 86 4/19/2021 3:36:41 PM...
  • Seite 87: Manutenzione, Pulizia E Cura

    7. CONSIGLI PER LO SMALTIMENTO I materiali di imballaggio sono materie prime e possono essere riutilizzati. Separare il materiale di imballaggio secondo il tipo e smaltirlo nel rispetto dell’ambiente. Ulteriori informazioni sono disponibili anche presso l’amministrazione locale. SP-T-110-IM-V01.indb 87 4/19/2021 3:36:41 PM...
  • Seite 88: Assistenza E Pezzi Di Ricambio

    Societ . A tal fine, si consiglia di conservare attentamente lo scontrino fiscale. Per domande sull'installazione e l'uso del prodotto SportPlus acq uistato, come pure per ordinare i pezzi di ricambio, rivolgersi in q ualsiasi momento al team di assistenza della Società...
  • Seite 89: Garanzia

    9. GARANZIA SportPlus assicura che il prodotto coperto da tale garanzia è stato fabbricato con materiali di alta q ualità ed è stato controllato con la massima cura. Nel caso in cui, durante il normale utilizzo e l'ordinaria manutenzione coperti dalla garanzia di seguito indicata, emergano difetti al prodotto rivolgersi al team di assistenza della Società...
  • Seite 90: Leyenda De Símbolos

    Estimada cliente, estimado cliente, Le felicitamos por su nuevo producto SportPlus, y estamos convencidos de q ue q uedará completamente satisfecho con é l. Para garantizar un funcionamiento y capacidad de rendimiento ó ptimos de su producto, le pedimos q ue: •...
  • Seite 91: Indicaciones De Seguridad

    • Compruebe en la lista de piezas q ue est á n todos los componentes. Deseche el material de embalaje solo cuando se finalizado el montaje. SP-T-110-IM-V01.indb 91 4/19/2021 3:36:42 PM...
  • Seite 92: Más Información

    Cambiar de inmediato la lona de saltos desgastada o dañ ada. • Proteger el trampolí n contra un uso no autorizado o indebido. • No utilice el trampolí n como medio de salto hacia otros objetos. • No saltar al trampolí n desde otros objetos. SP-T-110-IM-V01.indb 92 4/19/2021 3:36:42 PM...
  • Seite 93: Lista De Piezas

    Tubo superior Tubo inferior Cinta elá stica de sujeció n Tornillo Tuerca Arandela de resorte Arandela Tornillo de ajuste Llave de tuercas Llave de hexá gono interior Dispositivo de sujeció n Anillo de protecció n SP-T-110-IM-V01.indb 93 4/19/2021 3:36:43 PM...
  • Seite 94: Instrucciones De Montaje

    Fije 5 patas (5) a las piezas del cuadro (3) y 1 pata (5) a la pieza del cuadro con placa de metal (4) girando la pata hasta el tope sobre la unió n roscada. SP-T-110-IM-V01.indb 94 4/19/2021 3:36:43 PM...
  • Seite 95 4. INSTRUCCIONES DE MONTAJE PASO 2 Introduzca cada uno de los anillos de protecció n (18) en los brazos largos de las piezas del cuadro (3, 4). PASO 3 Una las 6 piezas del cuadro (3, 4). SP-T-110-IM-V01.indb 95 4/19/2021 3:36:43 PM...
  • Seite 96 Introduzca los anillos de protecci ó n (18) en los puntos de contacto de las piezas del cuadro (3, 4). Nota: Los anillos de protecció n protegen las cintas de sujeció n (9) en caso de rozamiento en los bordes de los tubos. SP-T-110-IM-V01.indb 96 4/19/2021 3:36:43 PM...
  • Seite 97 (v ase dibujo de detalle). Para una tensi ó n de lona regular y para facilitar el montaje, colo q ue las cintas el á sticas de sujeció n alternando en ambos lados (1-2-3-4 etc.). SP-T-110-IM-V01.indb 97 4/19/2021 3:36:43 PM...
  • Seite 98 Contin e la fijaci n de la lona de saltos con las 32 cintas el sticas restantes. Un orden posible de fijaci n lo podr extraer de la imagen representada anteriormente. Las 6 cintas elá sticas de sujeció n se colocará n en cada una de las 6 partes. SP-T-110-IM-V01.indb 98 4/19/2021 3:36:43 PM...
  • Seite 99 Asegure la uni ó n con 2 tuercas (11). Utilice para ello la llave de tuercas suministrada (15). Nota: Se trata de tuercas autoblocantes. Apriete las tuercas con la llave de tuercas para q ue los pernos penetren en el anillo de plá stico. SP-T-110-IM-V01.indb 99 4/19/2021 3:36:44 PM...
  • Seite 100 4. INSTRUCCIONES DE MONTAJE PASO 8 " Introduzca el tubo superior (7) en el tubo inferior (8). Ajuste la longitud deseada y asegure la unió n girando el tornillo de ajuste (14) en el alojamiento del tubo inferior. SP-T-110-IM-V01.indb 100 4/19/2021 3:36:44 PM...
  • Seite 101 4. INSTRUCCIONES DE MONTAJE PASO 9 „ “ ¸ Inserte el mango (6) en el tubo superior (7). Asegure la unió n con dos tornillos (10), 2 arandelas de resorte (12) y 2 arandelas (13). SP-T-110-IM-V01.indb 101 4/19/2021 3:36:44 PM...
  • Seite 102 4. INSTRUCCIONES DE MONTAJE PASO 10 Coloq ue la cubierta de la lona de saltos (2) en el cuadro del trampolí n. Preste atenció n a la posició n de la hendidura del tubo inferior. SP-T-110-IM-V01.indb 102 4/19/2021 3:36:45 PM...
  • Seite 103 4. INSTRUCCIONES DE MONTAJE PASO 11 Fije la cubierta de la lona de saltos (2) con las cintas a las patas del cuadro. SP-T-110-IM-V01.indb 103 4/19/2021 3:36:45 PM...
  • Seite 104 Ajuste la altura del mango (6) a su altura adaptando la longitud de la varilla de sujeció n. Aseg ú rese de q ue la marca en el tubo superior (7) no sea visible despu s del montaje. Fije la altura con ayuda del tornillo de ajuste (14). SP-T-110-IM-V01.indb 104 4/19/2021 3:36:45 PM...
  • Seite 105: Entrenamiento

    Nota: En los siguientes ejemplos de ejercicio, el aparato est simplificado y presentado sin varilla de sujeci ó n. Para una mayor estabilidad en los ejercicios, colo q ue las manos en el mango. SP-T-110-IM-V01.indb 105 4/19/2021 3:36:45 PM...
  • Seite 106 EJERCICIO 4: SALTAR A AMBOS LADOS CON UN MOVIMIENTO LIGERO DE RODILLA Y ATERRIZAR SUAVEMENTE SOBRE EL TRAMPOLÍN. Mantener estable la alineaci ó n de la pierna durante el salto y el aterrizaje. Repetir 15 veces. SP-T-110-IM-V01.indb 106 4/19/2021 3:36:45 PM...
  • Seite 107 EJERCICIO 8: TRANSFERIR EL PESO A LA PIERNA DELANTERA. LEVANTAR LIGERAMENTE DEL SUELO LA PIERNA TRASERA. Genuflexionar una pierna bastante con la otra tocando el suelo. Mantener estable la alineació n de la pierna. No curvar la espalda. 10 repeticiones. SP-T-110-IM-V01.indb 107 4/19/2021 3:36:45 PM...
  • Seite 108 í n. Cerrar los ojos. Mover ambos brazos 3 veces en direcció n al techo y volver. Si no se pudiera mantener el eq uilibrio, abrir los ojos. 2– 3 repeticiones. SP-T-110-IM-V01.indb 108 4/19/2021 3:36:45 PM...
  • Seite 109: Limpieza, Cuidado Y Mantenimiento

    Los materiales de embalaje son materias primas y se pueden volver a usar. Separe los embalajes seg n su tipo y elim nelos de forma adecuada por inter s medioambiental. Pó ngase en contacto con su administració n competente si desea má s informació n. SP-T-110-IM-V01.indb 109 4/19/2021 3:36:46 PM...
  • Seite 110: Servicio Y Piezas De Repuesto

    A este fin, le recomendamos que conserve cuidadosamente la factura de compra. Nuestro personal de servicio est á a su disposici ó n en todo momento para cual q uier pregunta sobre el montaje y uso de su producto SportPlus, así como para el pedido de piezas de repuesto.
  • Seite 111: Garantías

    9. GARANTÍAS SportPlus garantiza que el producto, en lo que se refiere a la garant a, ha sido fabricado con materiales de alta calidad y comprobado con la m á xima atenci ó n. P ó ngase en contacto con nuestro personal de servicio si se presentan defectos, en condiciones normales de uso y servicio dentro de los plazos de garantí...
  • Seite 112: Service-Hotline

    +34 - 932 204 048 (Las tasas de llamada será n sufragados por su compañ í a telefó nica / su contrato de telé fono.) Correo electró nico: service@sportplus.org URL: https://sportplus.de Latupo GmbH Stahltwiete 21 22761 Hamburg Germany SP-T-110-IM-V01.indb 112 4/19/2021 3:36:46 PM...

Inhaltsverzeichnis