Herunterladen Inhalt Inhalt Diese Seite drucken
Optelec ClearView+ Bedienungsanleitung

Optelec ClearView+ Bedienungsanleitung

Erweiterte ausstattungsmerkmale und funktionen
Vorschau ausblenden Andere Handbücher für ClearView+:
Inhaltsverzeichnis

Werbung

Verfügbare Sprachen
  • DE

Verfügbare Sprachen

  • DEUTSCH, seite 25
Advanced Features and Functions
Erweiterte Ausstattungsmerkmale und Funktionen
Fonctionnalités et fonctions avancées
Geavanceerde eigenschappen en functies
Funzioni Avanzate
Características y funciones avanzad

Werbung

Inhaltsverzeichnis
loading

Inhaltszusammenfassung für Optelec ClearView+

  • Seite 1 Advanced Features and Functions Erweiterte Ausstattungsmerkmale und Funktionen Fonctionnalités et fonctions avancées Geavanceerde eigenschappen en functies Funzioni Avanzate Características y funciones avanzad...
  • Seite 2: Inhaltsverzeichnis

    Optelec ClearView ClearView Advanced Features and Functions ........9 Introduction ............10 About this manual ............ 11 Unpacking, Installation and Setup ....... 12 Operation ............... 14 Operation – Switching ON / OFF ......14 Adjusting the magnification ........14 Choosing viewing modes ........15 Auto-focus lock ............
  • Seite 3 Optelec ClearView ClearView Erweiterte Ausstattungsmerkmale und Funktionen ..25 Einleitung ............... 26 Über dieses Handbuch ..........27 Auspacken, Aufbau und Inbetriebnahme .... 28 Bedienung .............. 30 Ein- und Ausschalten ..........30 Wahl des Ansichtsmodus ........30 Einstellung der Vergrößerung........31 Ausschalten des Autofokus ........
  • Seite 4 Optelec ClearView ClearView Fonctionnalités et fonctions avancées ......41 Introduction ............42 À propos du manuel ..........43 Déballage, installation et réglage ......44 Fonctionnement ............ 46 Interrupteur On / Off ..........46 Sélection du mode de visualisation ......46 Réglage du grossissement ........
  • Seite 5 Optelec ClearView ClearView Geavanceerde eigenschappen en functies ....57 Introductie .............. 58 Over deze handleiding ..........59 Uitpakken en installatie ........60 Gebruik ..............62 Aan / uit schakelaar ..........62 Verschillende leesstanden instellen ......62 Vergroting regelen ........... 63 Focus toets/Autofocus blokkering ......
  • Seite 6 Optelec ClearView ClearView Funzioni Avanzate ............73 Introduzione ............74 A proposito di questo manuale ........ 75 Apertura della confezione, installazione e accensione ............. 76 Funzionamento ............78 Accensione/Spegnimento ........78 Differenti modalità di visualizzazione ....... 78 Regolazione dell’ingrandimento ......79 Blocco della messa a fuoco automatica (Auto-focus) ................
  • Seite 7 Optelec ClearView ClearView Características y funciones avanzadas ......89 Felicitaciones por su ClearView ......90 Acerca de este manual ..........91 Desembalaje, instalación y configuración ..92 Operación .............. 94 Botón On / Off (encendido / apagado) ..... 94 Diversos modos de visualización ......94 Ajuste de la amplificación ........
  • Seite 8 Optelec ClearView Optelec Offices Worldwide | Optelec kantoren wereldwijd | Optelec dans le monde | Filiali Optelec nel mondo | Optelec oficinas por todo el mundo | Optelec Zweigniederlassungen Weltweit ........107...
  • Seite 9: Clearview

    Every effort has been made to ensure that the information contained in this user manual is correct at the time of publication. Neither Optelec, nor any of its associates, shall be held responsible for any errors or damages that may result from any incorrect use of the information contained in this manual.
  • Seite 10: Introduction

    Optelec ClearView Introduction Congratulations on choosing the ClearView , an auto-focus desktop electronic video magnifier developed by Optelec in the Netherlands. The ClearView enables you to read, write, view photos, do work and much more. The ClearView magnifies and enhances text, objects and images in different colors, brightness and contrast.
  • Seite 11: About This Manual

    Optelec ClearView If you have any questions or suggestions concerning the use of this product, contact your Optelec distributor or Optelec’s headquarters by consulting the contact information page found at the end of this manual. Your feedback is greatly appreciated. We hope you enjoy working...
  • Seite 12: Unpacking, Installation And Setup

    5. These monitors may only be fitted as an integrated part of the unit. - Feature Packs (optional) for additional ClearView functionality. Optelec offers two feature packs: Feature Pack Basic (with Semi-color, Find and ˗ Pointer functions) Feature Pack Advanced (with Semi-color, Find ˗...
  • Seite 13 Note: if your ClearView system was delivered to you in separate modules, unpack each module carefully before proceeding with installation, and consult the accompanying installation guide to install the different modules. Contact your Optelec distributor for further instructions if required. English...
  • Seite 14: Operation

    Optelec ClearView Operation When using the ClearView , place your hands on the wrist support at the front of the table for easier access to the control buttons, and for steady table movement. Operation – Switching ON / OFF To power both the system and monitor, press the ON / OFF button that is located right above the magnification button on the reading table.
  • Seite 15: Choosing Viewing Modes

    Optelec ClearView Choosing viewing modes Pressing this button cycles you through 3 different viewing modes: Photo mode full color (or gray scale with a monochrome unit) Reading mode: This mode enhances the foreground / background contrast. Pictures and text are displayed in high contrast black and white.
  • Seite 16: Object Lighting On /Off

    Optelec ClearView When the auto-focus feature is in locked mode, a red light on the central control button (mode / zoom) lights up. To turn the auto-focus back on, simply press the auto-focus button again. The red indicator light turns off.
  • Seite 17: Locking The Reading Table

    Optelec ClearView the auto-focus button for four seconds to have this information displayed. Press it again for four seconds to turn this feature off. Locking the reading table Lift the red lever located at the front of the table to lock the table in a stable position.
  • Seite 18: Feature Packs

    ClearView Feature Packs Feature Packs provide increased functionality to the ClearView . Optelec offers two Feature Packs: a Basic and Advanced Feature Pack. 4.1 Feature Pack Basic The Feature Pack Basic offers selectable semi-color combinations, grayscale, Full Color+, and the find and position locator.
  • Seite 19: Find Function (Position Locator)

    Optelec ClearView Find function (position locator) The find function provides you with a quick overview of the text, which helps you easily locate the part of a document which is of interest. Press the position locator button to activate the find function.
  • Seite 20: 4.2 Feature Pack Advanced

    Optelec ClearView 4.2 Feature Pack Advanced The Feature Pack Advanced contains all the features of the Feature Pack Basic and adds the line marker, window shade and PC-switch functions. For a description of the semi-colors and position locator functions, refer to section Feature Pack Basic.
  • Seite 21: Activating Line Markers / Window Shades

    Optelec ClearView Activating line markers / window shades Pressing this button cycles you through the line markers, window shades and full screen camera image modes. Line markers are used as guides to make reading text easier. The window shades function may be used to...
  • Seite 22: Adjusting The Monitor

    Optelec ClearView Adjusting the Monitor The ClearView TFT monitor with standard arm can be adjusted in height and viewing angle for an optimal reading position. Adjusting the monitor assists in preventing glare. Firmly grip the flat panel on both sides to adjust to your preferred position.
  • Seite 23: Troubleshooting

    Optelec ClearView Troubleshooting Manufacturer’s default settings If you experience any difficulty operating the system, reset the factory default settings. Switch the ClearView off and wait 3 seconds. Then press and hold the On / Off button till the red ring light starts flashing.
  • Seite 24: Contacting Product Support

    Contacting Product Support If you have questions about operating, installing or setting up your ClearView , contact your Optelec distributor or the Optelec office nearest you. See the last pages of this manual for a complete list of Optelec addresses. English...
  • Seite 25: Clearview

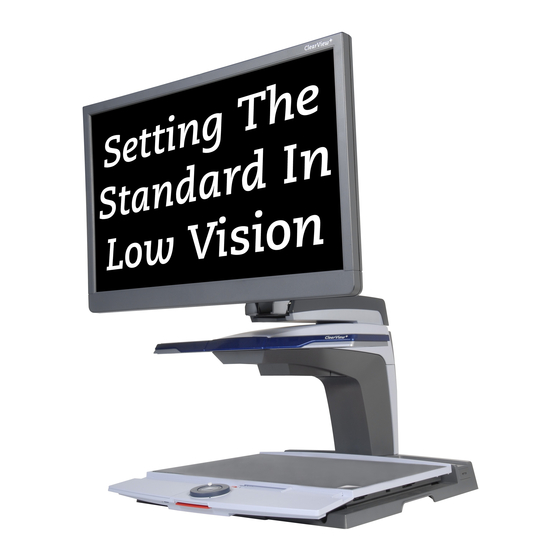
    ClearView ClearView Erweiterte Ausstattungsmerkmale und Funktionen Optelec ist Teil der Tieman-Gruppe und wurde 1975 in Rockanje in den Niederlanden gegründet. Seit 1975 entwickelt und produziert Optelec innovative Produkte, die sehbehinderten und blinden Menschen den Alltag erleichtern. Ausführlichere Informationen über die Produkte von Optelec erhalten Sie auf der Website www.optelec.com.
  • Seite 26: Einleitung

    Sie den ClearView benutzen. Sollten Sie Fragen oder Anregungen zur Nutzung dieses Produktes haben, wenden Sie sich bitte an Ihren Händler oder direkt an Optelec. Die entsprechenden Kontaktdaten finden Sie auf der letzten Seite dieser Bedienungsanleitung. Wir freuen uns über Ihre Rückmeldung und wünschen Ihnen viel Spaß...
  • Seite 27: Über Dieses Handbuch

    (z.B. 22” TFT-Bildschirm, elektronische Box für HD-Einheiten oder die knopflose Bedienung). Über dieses Handbuch Bei Optelec werden Produkte mit deren Funktionen kontinuierlich verbessert. Neue Funktionen könnten deshalb nicht immer aktuell in die mitgelieferten Bedienungsanleitungen eingefügt sein. Bitte informieren Sie sich auf unserer Homepage www.optelec.de...
  • Seite 28: Auspacken, Aufbau Und Inbetriebnahme

    Kapitel 5. Alle Monitore können nur als integrierter Teil der Einheit genutzt werden. - Erweiterungssatz (optional) für Sonderfunktionen des ClearView . Optelec bietet zwei Erweiterungssätze an: Erweiterungssatz 1 - Basis Modul • Erweiterungssatz 2 - Komfort Modul • Für den vollen Bedienungsumfang der PC-Einheit benötigen Sie den Erweiterungssatz 2.
  • Seite 29 Optelec ClearView - Fußschalter (optional), um zwischen dem Bild der eingebauten Kamera und externen Quellen, z. B. PC- Bild, umzuschalten. - Netzteil und Kabel, um den ClearView an die Stromversorgung anzuschließen. - ClearView Vorbereitung und Verwendung - ClearView Sicherheit und Pflege - Einem Informationsblatt für die Installation.
  • Seite 30: Bedienung

    Optelec ClearView Bedienung Legen Sie während der Nutzung des ClearView die Hände auf die Handauflage an der Tischfront. Gleichzeitig können Sie die Bedienelemente einfach erreichen und zudem den Lesetisch verschieben. Ein- und Ausschalten Drücken Sie den Ein-/Ausschalter, der sich über der Vergrößerungstaste befindet, um das Gerät und den...
  • Seite 31: Einstellung Der Vergrößerung

    Optelec ClearView werden in Schwarz/Weiß dargestellt. Falls Sie ein Erweiterungssatz mit Lesefarben benutzen, kann die Farbkombination für Vorder- und Hintergrund geändert werden. Umgekehrter Lesemodus: Dieser Modus kehrt die im Lesemodus ausgewählten Vorder- und Hintergrundfarben um. Fotomodus mit Graustufe (nur bei Voreinstellung im Service-Menü)
  • Seite 32: Ein- Und Ausschalten Der Objektbeleuchtung

    Optelec ClearView Durch Drücken der Autofokus-Taste können Sie das automatische Scharfstellen ausschalten. Dies ist sinnvoll, wenn Sie schreiben, zeichnen oder basteln wollen. Wenn der automatische Fokus ausgeschaltet ist, leuchtet ein rotes Lämpchen an der Kontrolltaste (Modus/Zoom). Um den Autofokus wieder anzuschalten, drücken Sie die Taste erneut.
  • Seite 33: Anzeige Der Systeminformationen Auf Dem Bildschirm

    Optelec ClearView Anzeige der Systeminformationen auf dem Bildschirm Sie können sich den Vergrösserungsfaktor und die Systemkon-figuration auf dem Bildschirm anzeigen lassen. Halten Sie dazu die Autofokus-Taste vier Sekunden lang gedrückt. Um diese Informationen wieder auszublenden, drücken Sie die Taste erneut vier Sekunden lang.
  • Seite 34: Erweiterungssatz

    Optelec ClearView Erweiterungssatz Erweiterungssätze sind optional. Die Erweiterungssätze liefern Ihnen weitere Funktionen für den ClearView Optelec bietet Ihnen zwei Erweiterungssätze: Basis- Erweiterungssatz und Komfort-Erweiterungssatz. 4.1 Basis-Erweiterungssatz Das Feature Pack Basic bietet auswählbare Lesefarbenkombinationen, Graustufen, Echtfarbe+, den Übersichtsmodus und den Lichtzeiger.
  • Seite 35: Übersichtsmodus (Positionsanzeiger)

    Optelec ClearView Drücken Sie diese Taste im Fotomodus, um zwischen Echtfarbe-, Echtfarbe+ und Graustufenmodus zu wechseln. Im Echtfarbenmodus+ sind die Farben gesättigter um das Farbbild zu verbessern und mit mehr Kontrast darzustellen. Übersichtsmodus (Positionsanzeiger) Der Übersichtsmodus ist ein hilfreiches Werkzeug, mit dem Sie durch Ihren Text scrollen können, um sich einen...
  • Seite 36: Umschalten Zwischen Integrierter Kamera Und Pc/Externer Quelle

    Optelec ClearView Bildschirmabdeckung und eine Umschaltfunktion auf einen externen PC. Für eine Beschreibung der Vorder- und Hintergrundfarben sowie der Funktion Übersichtsmodus und Pointer lesen Sie bitte das Kapitel 4.1. Umschalten zwischen integrierter Kamera und PC/externer Quelle Wenn ein PC oder eine andere externe HDMI-Quelle an Ihren ClearView angeschlossen ist, können Sie über...
  • Seite 37: Einschalten Von Leselinien Und Bildabdeckungen

    Optelec ClearView Einschalten von Leselinien und Bildabdeckungen Durch Drücken dieser Taste können Sie zwischen Leselinien, Bildabdeckungen und dem Vollbild der Kamera wählen. Leselinien helfen, sich leichter im Text zu orientieren. Mit Hilfe der Bildabdeckungen können Sie Teile des Bildes ausblenden, wenn die Bildschirmhelligkeit unangenehm ist.
  • Seite 38: Einstellung Des Monitors

    Optelec ClearView Einstellung des Monitors Der ClearView + TFT Bildschirm mit Standardarm kann in der Höhe und im Betrachtungswinkel so angepasst werden, dass Sie eine optimale Sitzposition beim Lesen haben. Außerdem werden Blendungen vermieden. Fassen Sie den Monitorhalter fest an beiden Seiten an und bringen Sie ihn in die gewünschte Position.
  • Seite 39: Problembehandlung

    Optelec ClearView Problembehandlung Fabrikeinstellungen Falls bei der Bedienung Probleme auftreten, können Sie das Gerät auf die Fabrikeinstellungen zurücksetzen. Schalten Sie dazu das Gerät aus, warten Sie drei Sekunden und halten Sie anschließend den Ein- /Ausschalter drei Sekunden lang gedrückt. Ihr ClearView startet nun wieder mit den ursprünglichen...
  • Seite 40: Kontakt/Beratung

    Staub oder Fremdkörper festgesetzt haben. Kontakt/Beratung Falls Sie Fragen zur Bedienung, Installation oder Einstellung Ihres ClearView haben, wenden Sie sich bitte direkt an Ihren Händler oder die nächste Optelec- Niederlassung. Eine Liste mit entsprechenden Adressen finden Sie auf der letzten Seite dieser Bedienungsanleitung. Deutsch...
  • Seite 41: Clearview

    Optelec ClearView ClearView Fonctionnalités et fonctions avancées Depuis 1975, la société Optelec développe et met au point des produits novateurs à l’intention des personnes aveugles et malvoyantes, afin qu’elles puissent réaliser ses activités quotidiennes. Pour plus de renseignements sur nos produits et nos services, nous vous invitons à...
  • Seite 42: Introduction

    Si vous avez des questions ou des suggestions à propos de l’utilisation de ce produit, veuillez communiquer avec votre distributeur ou avec le siège social d’Optelec en consultant la liste des coordonnées des différents bureaux d’Optelec présentée à la dernière page du manuel. Vos commentaires sont grandement appréciés.
  • Seite 43: À Propos Du Manuel

    électronique pour le système haute définition, ou le module de fonction Zero Button). À propos du manuel Optelec améliore constamment ses produits ainsi que leurs fonctions. Il est donc possible que ce manuel ne soit pas à jour. Veuillez vous rendre à la section Support de notre site Internet www.optelec.com...
  • Seite 44: Déballage, Installation Et Réglage

    Optelec ClearView Déballage, installation et réglage Le ClearView est un système modulaire muni d’une sortie HDMI standard, qui vous permet de connecter le ClearView à n’importe quel moniteur HDMI compatible, ou à un téléviseur. L’appareil ClearView comprend: - L’unité de base avec un plateau de lecture muni d’un panneau de commande intégré;...
  • Seite 45 Optelec ClearView - Les modules de fonctions (offerts en option) vous permettent de rajouter au ClearView des fonctions supplémentaires. Deux types de modules de fonctions vous sont proposés: Le module de fonctions de base ˗ Le module de fonctions avancées ˗...
  • Seite 46: Fonctionnement

    Optelec ClearView Fonctionnement Pour permettre un accès facile aux boutons de contrôle, et pour assurer la stabilité au plateau de lecture lorsque vous utilisez le ClearView , veuillez placer vos mains sur le repose-poignets situé devant le plateau de lecture.
  • Seite 47: Réglage Du Grossissement

    Optelec ClearView (offert en option), les combinaisons de couleur d’avant et d’arrière-plan peuvent ainsi être modifiées. Mode lecture inversé: ce mode vous permet d’inverser la sélection de combinaison de couleur de l'avant et de l’arrière-plan. Modes photo dans l’échelle de gris.
  • Seite 48: Éclairage On / Off

    Optelec ClearView automatique, il suffit d'appuyer de nouveau sur la même touche, et le voyant lumineux rouge s'éteindra. Éclairage On / Off Pour éteindre l’éclairage, appuyez sur cette touche pendant 4 secondes. Cela peut facilité la lecture de documents et de magazines en format papier glacé.
  • Seite 49: Verrouillage Du Plateau De Lecture

    Optelec ClearView pendant 4 secondes. Cela vous permet de voir affichés à l’écran le niveau de grossissement ainsi que la configuration du système. Si vous appuyez sur cette touche de nouveau, l’écran reprendra son fonctionnement habituel. Verrouillage du plateau de lecture Soulevez légèrement le levier...
  • Seite 50: Les Modules De Fonctions

    Les modules de fonctions Les modules de fonctions vous permettent d’optimiser les fonctions du ClearView . Optelec vous propose deux types de module de fonctions : le module de fonctions avancées et le module de fonctions de base. 4.1 Module de fonctions de base Le module de fonctions de base propose des combinaisons de couleurs sélectionnables, des niveaux de gris, pleine...
  • Seite 51: Fonction Rechercher (Indicateur De Position)

    Optelec ClearView Fonction rechercher (indicateur de position) La fonction rechercher vous permet d’obtenir un aperçu complet de votre document de lecture, et vous offre la possibilité de cibler un bloc de texte précis. Pour activer cette fonction, appuyez sur la touche de l’indicateur de position pendant quelques secondes.
  • Seite 52: Basculement Entre La Caméra Interne, La Source Externe Et L'ordinateur

    Optelec ClearView Basculement entre la caméra interne, la source externe et l’ordinateur Si un ordinateur ou une autre source externe est connecté au ClearView veuillez appuyer sur cette touche, ou utilisez la pédale au pied, pour basculer entre l’image de la caméra et l’image de l’écran de l’ordinateur.
  • Seite 53: Positionnement Des Lignes Et Des Caches

    Optelec ClearView affichage plein écran. Les lignes sont utilisées comme guides pour faciliter la lecture de texte. Les caches servent à bloquer une partie de l’image lorsque la luminosité de l’écran est gênante. Positionnement des lignes et des caches Lorsque les lignes et les caches sont activés (voir plus loin), le fait de...
  • Seite 54: Réglage Du Moniteur

    Optelec ClearView Réglage du moniteur La hauteur ainsi que l’angle de visualisation des moniteurs ClearView avec bras standard peuvent être réglés, afin de prévenir les éblouissements et les reflets de lumière, ainsi que pour permettre à l’utilisateur une posture confortable.
  • Seite 55: Dépannage

    Optelec ClearView Dépannage Aucune image n'apparaît sur le moniteur du ClearView après sa mise en fonction: - Vérifiez que le système est bien branché (bouton rouge sur le panneau de commande). - Vérifiez que tous les câbles et toutes les connexions des dispositifs sont bien en place.
  • Seite 56: Coordonnées Et Soutien

    Si vous avez des questions concernant le fonctionnement, l'utilisation ou l'installation de votre système, n'hésitez pas à communiquer avec votre distributeur ClearView ou le siège Optelec le plus proche. Vous trouverez à la dernière page de ce manuel une liste complète des adresses Optelec. Français...
  • Seite 57: Clearview

    Optelec producten en diensten. Deze gebruikershandleiding is met de grootste zorg samengesteld zodat de informatie klopt op de datum van uitgifte. Optelec en de distributeurs van Optelec nemen geen verantwoordelijkheid voor schade aan uw ClearView door gebruik anders dan in deze handleiding.
  • Seite 58: Introductie

    Introductie Gefeliciteerd met de aanschaf van uw ClearView , een automatisch scherpstellende beeldschermloep, ontwikkeld door Optelec om slechtzienden te ondersteunen. ClearView kan gebruikt worden bij lezen, schrijven, het bekijken van foto’s en uitvoeren van hobby’s. Met eenvoudige bediening vergroot u teksten en objecten in meerdere kleuren.
  • Seite 59: Over Deze Handleiding

    (bijvoorbeeld een andere monitor, monitor plaat of Pluspakket). Over deze handleiding Optelec verbetert continue haar producten en de functionaliteit ervan. Het kan daarom voorkomen dat deze handleiding niet de meest recente versie is. Kijk daarom op onze website www.optelec.nl...
  • Seite 60: Uitpakken En Installatie

    (basis unit) worden geplaatst. Een monitorplaat is hierbij niet nodig. - Pluspakket (optioneel). Het Pluspakket voorziet uw ClearView van extra functies (zie Hoofdstuk 5 & 6) en kan worden aangesloten op ieder monochroom of kleurensysteem. Optelec biedt 2 verschillende pluspakketten: Basis Pluspakket ˗ Nederlands...
  • Seite 61 Optelec ClearView Uitgebreid Pluspakket ˗ - Voetschakelaar (optioneel, alleen te gebruiken bij kleuren- en computersystemen). - Snoeren en adapter om de ClearView aan te sluiten. - ClearView Installatie en gebruik - ClearView Veiligheid en verzorging - ClearView installatieboekje. ** Wanneer uw ClearView...
  • Seite 62: Gebruik

    Optelec ClearView Gebruik Leg uw handen op de polssteunen, welke zich aan de voorzijde van het leesplateau bevinden, wanneer u de ClearView gebruikt. Hierdoor zijn de toetsen altijd binnen handbereik en kunt u de tafel eenvoudig bewegen. Aan / uit schakelaar Druk deze toets in om het systeem aan- en uit te schakelen.
  • Seite 63: Vergroting Regelen

    Optelec ClearView kleuren. Ook in deze stand wordt het contrast van de voor- en achtergrond verhoogd en kunnen de voor- en achtergrond kleuren worden aangepast. Fotostand met grijstinten NB: Wanneer de grijs instelling op uw ClearView geactiveerd is, ziet u door op deze toets te drukken 4...
  • Seite 64: Objectverlichting Aan/Uit

    Optelec ClearView Objectverlichting aan/uit Door vier seconden op deze toets te drukken, wordt de objectverlichting uitgeschakeld. Deze weergave maakt het mogelijk glossy magazines / documenten te lezen. Door vier seconden weer op deze toets te drukken of een andere leesstand te kiezen, wordt de objectverlichting terug ingeschakeld.
  • Seite 65: Systeeminformatie In Beeld Zetten

    Optelec ClearView Systeeminformatie in beeld zetten U kunt de vergrotingsfactor en de systeemconfiguratie (informatie over systeemtype en monitor type) in beeld zetten. Druk de focus toets gedurende vier seconden in om systeeminformatie weer te geven op het scherm van uw systeem.
  • Seite 66: Pluspakketten

    Optelec ClearView Pluspakketten Het Pluspakket vergroot het aantal functies van de ClearView . Optelec biedt een keuze uit twee verschillende Pluspakketten; Basis versie • Uitgebreide versie • 4.1 Pluspakket – Basis Het Basis Pluspakket beschikt over functies voor het instellen van verschillende voor- en achtergrond kleuren, grijstinten, fotostand, fotostand+, en voor de Pointer/Zoekfunctie (positie bepalen op het beeldscherm).
  • Seite 67: Zoekfunctie (Positie Bepalen Op Het Beeldscherm)

    Optelec ClearView Zoekfunctie (positie bepalen op het beeldscherm) De zoekfunctie is een handig hulpmiddel om het gewenste tekstgedeelte te vinden doordat er een overzicht over het document wordt gegeven. Druk de pointer in om de zoekfunctie te activeren. Nu gaat het beeld naar de laagste...
  • Seite 68: Schakelen Tussen Camerabeeld En Het Pc Beeld/Externe Bron

    Optelec ClearView Schakelen tussen camerabeeld en het PC beeld/externe bron Indien een PC of andere externe bron is aangesloten op de ClearView schakelt u met deze toets of de voetschakelaar (optioneel) tussen het camerabeeld, het PC beeld, of een andere HDMI bron, zoals een externe camera.
  • Seite 69: Positioneren Van Lijnen En Beeldafdekking

    Optelec ClearView Beeldschermafdekking wordt veelal gebruikt om een deel van de tekst te blinderen. Positioneren van lijnen en beeldafdekking Wanneer lijnen en beeldafdekking zijn geactiveerd, kan door middel van het draaien aan deze toets de positie van de lijnen of beeldafdekking worden gewijzigd. Het veranderen...
  • Seite 70: Het Verstellen Van De Monitor

    Optelec ClearView Het verstellen van de monitor De ClearView TFT monitor met standaard arm kan zowel in hoogte als in kijkhoek worden versteld en garandeert zodoende een optimaal kijkgemak en minimale lichtreflecties. Om het scherm in de gewenste positie te plaatsen, pakt u het scherm aan beide zijden vast en beweegt u het scherm voorzichtig omhoog of omlaag.
  • Seite 71: Problemen Oplossen

    Optelec ClearView Problemen oplossen Er is geen beeld - Controleer of het apparaat is ingeschakeld (rode knop op de X-Y tafel) - Controleer of alle modulen correct zijn aangesloten - Controleer of alle stroomkabels goed zijn aangesloten - Controleer, indien u geen ClearView...
  • Seite 72: Contact En Service

    Contact en service Wanneer u vragen heeft over bediening, gebruik of installatie van uw ClearView , neem dan contact op met uw leverancier of een Optelec kantoor. Op de laatste pagina van deze handleiding staat een adresoverzicht van alle Optelec vestigingen. Nederlands...
  • Seite 73: Clearview + Funzioni Avanzate

    Visitate il sito web di Optelec all’indirizzo www.optelec.com per ulteriori informazioni sui prodotti e i servizi Optelec. Le informazioni contenute nel presente manuale sono corrette e aggiornate alla data della sua pubblicazione.
  • Seite 74: Introduzione

    È importante leggere questo manuale prima di utilizzare questo videoingranditore. Se avete domande o richieste inerenti a questo prodotto, non esitate a contattare il vostro distributore locale o la sede centrale Optelec facendo riferimento ai contatti elencati nell’ultima pagina del manuale. Ogni vostro riscontro sarà apprezzato.
  • Seite 75: A Proposito Di Questo Manuale

    Optelec ClearView A proposito di questo manuale Optelec aggiorna costantemente i prodotti e le loro funzionalità. E’ quindi possibile che questo manuale non sia l’ultima versione. Per cortesia scaricate l’ultima versione del manuale dalla sezione Support sul sito www.optelec.com. Italiano...
  • Seite 76: Apertura Della Confezione, Installazione E Accensione

    Optelec ClearView Apertura della confezione, installazione e accensione ClearView è un sistema modulare con un’uscita standard di tipo HDMI. Ciò significa che è possibile collegare ClearView+ a tutti i monitor compatibili HDMI, siano essi schermi catodici (CRT) o schermi piatti a cristalli liquidi (TFT) o ad un apparecchio TV.
  • Seite 77 Optelec ClearView - Interruttore a pedale (opzionale) per passare dall’immagine della telecamera interna all’immagine di fonti esterne, per esempio l’immagine del PC. - Un alimentatore con relativi cavi per collegare ClearView ad una presa elettrica. - ClearView Installazione ed uso...
  • Seite 78: Funzionamento

    Premere il pulsante On / Off per accendere/spegnere sia il sistema che il monitor. ClearView+ si avvierà nella stessa modalità colori in cui si trovava al momento del suo ultimo spegnimento. Un monitor non Optelec dovrà essere acceso/spento separatamente. Differenti modalità di visualizzazione Premendo questo pulsante si compie un ciclo di 3 diverse modalità...
  • Seite 79: Regolazione Dell'ingrandimento

    Optelec ClearView Feature Pack con la funzione combinazioni colore, i colori di sfondo e primo piano possono essere modificati. Modalità di lettura inversa: con questa modalità si invertono le combinazioni scelte per i colori di sfondo e primo piano della Modalità Lettura.
  • Seite 80: Illuminazione Oggetto On /Off

    Optelec ClearView Per riattivare la funzione di messa a fuoco automatica, premere nuovamente il pulsante Auto Focus. L’indicatore luminoso rosso si spegnerà. Illuminazione oggetto ON /OFF Premendo questo pulsante per quattro secondi, potete spegnere l’illuminazione sull’oggetto che volete ingrandire. Questo permette di facilitare la lettura di riviste e documenti su carta patinata.
  • Seite 81: Blocco Del Piano Di Lettura

    Optelec ClearView sistema). Premere il pulsante Auto-focus per quattro secondi per visualizzare queste informazioni. Premerlo nuovamente per quattro secondi per rimuoverle. Blocco del piano di lettura Sollevare leggermente verso l’alto la levetta rossa posta al centro del piano di lettura, per bloccare il movimento del piano stesso.
  • Seite 82: Feature Pack

    Feature Pack Attenzione: i Feature Pack sono opzionali. l Feature Pack aumentano le funzionalità di ClearView Optelec offre 2 tipi di Feature Pack: Basic e Advanced. 4.1 Feature Pack Basic Il Feature Pack Basic offre combinazioni di colori selezionabili, scala dei grigi, Colori reali+, Puntatore e funzione Trova.
  • Seite 83: Funzione Trova (Indicatore Di Posizione)

    Optelec ClearView In modalità Colori reali+, i colori sono più saturi, quindi migliora il contrasto dei colori. Funzione Trova (indicatore di posizione) La funzione Trova è molto utile, poichè permette di avere una panoramica dell’intero documento che state leggendo, per individuare rapidamente la parte di testo che interessa.
  • Seite 84: Commutazione Tra La Telecamera Interna E Il Pc / Fonte Esterna

    Optelec ClearView Commutazione tra la telecamera interna e il PC / fonte esterna Nel caso in cui ClearView sia collegato ad un computer, o ad un’altra fonte esterna, premere questo pulsante, oppure l’interruttore a pedale, per commutare tra l’immagine proveniente dalla telecamera interna e quella proveniente dal PC.
  • Seite 85: Attivazione Dei Marcatori Di Righe / Finestre

    Optelec ClearView Attivazione dei marcatori di righe / finestre Premendo questo pulsante, si attiveranno in sequenza i marcatori di righe, di finestre e le immagini a tutto schermo provenienti dalla telecamera. I marcatori di righe vengono utilizzati come guide per rendere più facile la lettura di un testo.
  • Seite 86: Regolazione Del Monitor

    Optelec ClearView Regolazione del Monitor Il monitor ClearView TFT con braccio standard permette di regolare l’altezza e l’inclinazione, per ottenere una posizione di lettura più comoda ed evitare fastidiosi riflessi. Afferrate lo schermo ai suoi lati con entrambe le mani e posizionatelo come preferite.
  • Seite 87: Risoluzione Dei Problemi

    Optelec ClearView Risoluzione dei problemi Non compare alcuna immagine sullo schermo di ClearView , una volta acceso l’apparecchio: - Verificare che l’apparecchio sia stato acceso (con il pulsante rosso di accensione sul piano di lettura). - Verificare tutte le connessioni dei cavi e delle parti hardware.
  • Seite 88: Contatti / Assistenza Tecnica

    Optelec ClearView - Verificare i cavi di connessione video (HDMI) dal computer verso la Base (non collegare il computer direttamente al monitor). - Verificare lo stato del pulsante - Con l’interruttore a pedale: verificare l’installazione del Feature Pack Advanced. - Verificare eventuali malfunzionamenti del computer, collegando direttamente il PC al monitor.
  • Seite 89: Clearview

    Si desea obtener más información sobre todos los productos y servicios de Optelec, haga el favor de dirijirse a la página web de Optelec: www.optelec.com. Hemos hecho todo lo posible para asegurarnos de que la información contenida en este manual fuera correcta al...
  • Seite 90: Felicitaciones Por Su Clearview

    Optelec ClearView Felicitaciones por su ClearView Felicitaciones por la compra de su ClearView . ClearView es un sistema de amplificación de objetos y textos, proyectados en pantalla de vídeo, con auto-foco continuo, destinado a ayudar a personas con deficiencias visuales.
  • Seite 91: Acerca De Este Manual

    Optelec ClearView Si después de haber leído este manual, tiene preguntas, inquietudes o puntos a clarificar, no dude en consultarnos, consultar a su proveedor o a su distribuidor local. Acerca de este manual Debido a que estámos constantemente mejorando nuestros productos y sus funcionalidades, es posible que no sea la versión más reciente de este manual.
  • Seite 92: Desembalaje, Instalación Y Configuración

    - Un módulo de funciones (optativo) para proporcionar funcionalidades adicionales al ClearView . Optelec ofrece 2 módulos de funciones: El módulo de funciones básicas, ˗ el módulo de funciones avanzadas.
  • Seite 93 Optelec ClearView - Un pedal (optativo) para alternar la imagen de la cámara interna y las fuentes externas como la imagen de una PC. - Una fuente de alimentación y cables para conectar el ClearView a un tomacorriente. - ClearView...
  • Seite 94: Operación

    Optelec ClearView Operación Cuando utilice el ClearView , para facilitar el acceso a los botones de control y permitir un movimiento estable del tablero, ubique las manos sobre el apoya muñecas, en la parte frontal del tablero. Botón On / Off (encendido / apagado) Presione el botón ON / OFF (encendido/apagado)
  • Seite 95: Ajuste De La Amplificación

    Optelec ClearView 1. Modo de la foto a todo color. 2. Modo de lectura: Este modo realza el contraste del primero plano/del fondo. Los cuadros y el texto serán exhibidos en blanco y negro. Si el paquete de la característica opcional fue comprado con la unidad, la combinación de color de fondo y del primero plano...
  • Seite 96: Iluminación Del Objeto Encendido/Apagado

    Optelec ClearView Iluminación del objeto encendido/apagado Presionar este botón durante cuatro segundos le permite apagar la iluminación del objeto. Esta opción resulta útil a la hora de leer revistas o documentos con un papel brillante. Cambiar el modo de visualización o presionar el botón nuevamente durante cuatro segundos volverá...
  • Seite 97: Freno Del Tablero De Lectura

    Optelec ClearView Freno del tablero de lectura Para bloquear el movimiento del tablero de lectura, mueva ligeramente hacia arriba la palanca roja situada en la parte delantera del mismo. El freno permite al usuario mantener el tablero detenido firmemente en la posición deseada. El tablero de lectura también puede usarse para escribir a mano o para...
  • Seite 98: Módulos De Funciones

    ClearView Módulos de funciones Los módulos de funciones aumentan la funcionalidad del ClearView . Optelec ofrece 2 módulos de funciones: avanzadas y básicas. 4.1 Módulo de funciones básicas El Módulo de Funciones Básico ofrece la posibilidad de seleccionar combinaciones de semi-color, escala de grises, Todo color+, así...
  • Seite 99: Función Buscar (Localizador De Posición)

    Optelec ClearView Función Buscar (localizador de posición) La función buscar ofrece un panorama rápido del texto que lo ayuda a ubicar facilmente la parte relevante del documento. Presione brevemente el botón localizador de posición para activar la función Buscar. Cuando la función Buscar está...
  • Seite 100: Cambie Entre La Cámara Y La Pc Interna/La Fuente Externa

    ClearView Cambie entre la cámara y la PC interna/la fuente externa Si la PC o la otra fuente de Optelec del external está conectada con el ClearView , presione este botón, o el interruptor de pie, para accionar la palanca entre la imagen interna de la cámara, o una imagen de plena pantalla de la...
  • Seite 101: Activación De Marcadores De Línea / Tonos De Ventanas

    Optelec ClearView Activación de marcadores de línea / tonos de ventanas Pulsando este botón se pasa por marcadores de línea, tonos de ventanas e imágenes de cámara de pantalla completa (no hay marcadores en este modo). Los marcadores de línea sirven de guía, para que la lectura de textos resulte más fácil.
  • Seite 102: Botón Horizontal / Vertical

    Optelec ClearView Botón horizontal / vertical Presionando este botón se cambian las líneas y las ventanas de la posición vertical a la posición horizontal. Nota: Los marcadores de línea y las ventanas sólo se pueden visualizar cuando aparece la imagen de la cámara interna.
  • Seite 103: Ajuste De La Pantalla Del Monitor

    Optelec ClearView Ajuste de la pantalla del monitor Es posible regular la altura y el ángulo de visualización del monitor TFT de ClearView con el brazo estándar. Regular el monitor permite evitar todo reflejo. Sujete firmemente el panel plano de ambos lados para ubicarlo en su posición preferida.
  • Seite 104: Problemas Eventuales Y Su Solución

    Optelec ClearView Problemas eventuales y su solución No hay imagen en el monitor ClearView después de encenderlo: - Verifique que la unidad esté encendida (botón rojo “Power” en el tablero X / Y) y que haya corriente. - Controle todos los contactos y las conexiones tanto de cables como de hardware.
  • Seite 105 Optelec ClearView - Controle los cables de contacto del vídeo (HDMI) del ordenador a la unidad básica (no conecte la PC directamente al monitor). - Controle la posición del botón - Verifique que no haya desperfectos en el ordenador, conectando la PC directamente con el monitor.
  • Seite 106: Contacto / Soporte Al Producto

    Si tiene preguntas sobre cómo armar, operar, usar o instalar su sistema, le rogamos se ponga en contacto con el distribuidor, su proveedor o con la oficina de Optelec más cercana a su domicilio. Consulte la última página de este manual donde se incluye una lista completa de direcciones de las oficinas de Optelec en el mundo.
  • Seite 107 Optelec ClearView Optelec Offices Worldwide | Optelec kantoren wereldwijd | Optelec dans le monde | Filiali Optelec nel mondo | Optelec oficinas por todo el mundo | Optelec Zweigniederlassungen Weltweit Optelec Europe Optelec US Pesetastraat 5a 17757 US Highway 19 North,...
  • Seite 108 Optelec ClearView RFD-06014 Rev: A Version 1.0 © August 2021 Optelec, The Netherlands All rights reserved...

Inhaltsverzeichnis