Inhaltsverzeichnis
Werbung
Verfügbare Sprachen
Verfügbare Sprachen
Quicklinks
Werbung
Kapitel
Inhaltsverzeichnis

Verwandte Anleitungen für Schubert Subi88 Harmony


Inhaltszusammenfassung für Schubert Subi88 Harmony
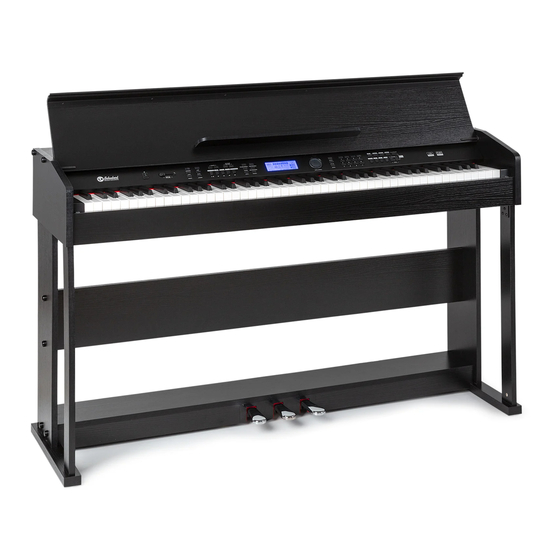
- Seite 1 Subi88 Harmony Keyboard Teclado Clavier Tastiera 10035596 10035847...
-
Seite 3: Inhaltsverzeichnis
Sehr geehrter Kunde, wir gratulieren Ihnen zum Erwerb Ihres Gerätes. Lesen Sie die folgenden Hinweise sorgfältig durch und befolgen Sie diese, um möglichen Schäden vorzubeugen. Für Schäden, die durch Missachtung der Hinweise und unsachgemäßen Gebrauch entstehen, übernehmen wir keine Haftung. Scannen Sie den QR-Code, um Zugriff auf die aktuellste Bedienungsanleitung und weitere Informationen rund um das Produkt zu erhalten. -
Seite 4: Technische Daten
TECHNISCHE DATEN Artikelnummer 10035596, 10035847 Tastatur 88-Tasten-Standard-Pianoklaviatur Anzeige LED-Anzeige Klangfarben 360 verschiedene Instrumente Stile 160 Stile Demo 80 Demolieder Effekte Anschlagsempfindlichkeit, Hall, Chor, Dual, Aufteilen, Funktionsmenü, Soundkonsole Aufnahme Einzelspur, mehrere Spuren, kombinierte Aufnahme Begleitung Start/Stop, Synchronisieren, Einfüllen, Geschwindigkeit Akkord ABC-Auto-Akkord Pedale Linkes Pedal (Pianopedal), rechtes Pedal (Haltepedal) Externe Anschlüsse... -
Seite 5: Sicherheitshinweise
SICHERHEITSHINWEISE • Lesen Sie sich die Bedienungsanleitung vor der Verwendung des Geräts aufmerksam durch, um Sach- und/oder Personenschäden zu vermeiden. • Schließen Sie das Gerät ausschließlich mit dem im Lieferumfang enthaltenen Netzstromadapter an eine Steckdose an. Durch die Verwendung von anderen Netzstromadaptern könnte Ihr Gerät beschädigt werden. -
Seite 6: Tasten Und Anschlüsse
TASTEN UND ANSCHLÜSSE Linkes Bedienfeld Im Stilmodus 1 POWER - Ein-Ausschalter 13 START/STOP Wiedergabe starten/anhalten 2 MASTER VOLUME – Hauptlautstärkeregler 14 SYNC – Synchronisierungsfunktion öffnen/ 3 LESSON - Lernmodus schließen 4 DSP - DSP aktivieren/deaktivieren 15 FILL IN 1 – Variation 1 einfügen 5 TEMPO ∨/∧–... -
Seite 7: Song ∨/Volume
Rechtes Bedienfeld 23 Wahlrad: Wert einstellen speichern. 24 VOICE: Instrumente aktivieren 34 M1 - Konsoleneinstellung laden 25 Ziffernfeld mit +/-: Zahlenwerte einstellen 35 M1 - Konsoleneinstellung laden 26 REC - Aufnahme 36 BANK - Speicherbank wechseln 37 SONG ∨/VOLUME ∨ 27 TRACK 1 –... - Seite 8 Rückseite 39 Externer Stromanschluss 40 USB (TO DEVICE) - USB-Anschluss 41 OUTPUT – Audioanschluss für externes Audioequipment 42 PEDAL-Anschluss 43 MIDI IN Anschluss – Empfangen von MIDI-Informationen, welche von externem MIDI-Equipment oder Computern gesendet wurden 44 MIDI OUT Anschluss – Informationen des Geräts über diesen Anschluss an Computer oder andere MIDI-Geräte senden 45 USB (MIDI)-Anschluss...
-
Seite 9: Montage
MONTAGE Bezeichnung Stückzahl Braune Plastikabdeckung TM6*50 Schrauben TM6*20 Schrauben Innenschraube M6-Handschraube Montage des Klavierkörpers 1. Befestigen Sie den Pedalkasten mit der Handschraube (M6). 2. Drücken Sie 10 Stück Muttern in die entsprechenden Löcher der linken und rechten Stehplatte, der linken und rechten Standsäulen und der Anschlussplatte 3. -
Seite 11: Inbetriebnahme Und Bedienung
INBETRIEBNAHME UND BEDIENUNG Stromversorgung 1. Vergewissern Sie sich, dass das Gerät ausgeschaltet ist, wenn Sie es an die Stromverbindung anschließen. 2. Verbinden Sie den Anschlussstecker des Netzstromadapters mit dem DC-Anschluss des Geräts. 3. Stecken Sie den Netzstromstecker in die Steckdose. 4. - Seite 12 • Sie können beispielsweise Lieder, welche Sie auf dem Klavier gespielt haben, auf dem Computer speichern oder MIDI- Dokumente Ihres Computers über das Gerät abzuspielen. Hinweis: Das USB-Audiozubehör kann nicht zur gleichzeitig für Audio-Eingang und Audio-Ausgang eingestellt werden. Anschluss an andere Geräte •...
- Seite 13 Netzschalter 1. Vergewissern Sie sich zunächst, dass der Netzstromadapter richtig angeschlos- sen wurde. 2. Wenn Sie die Taste POWER drücken, wird der LCD-Bildschirm heller und zeigt den Startbildschirm an. Hinweis: Wenn der LCD-Bildschirm nicht erleuchtet wird, nachdem Sie die Taste POWER gedrückt haben, überprüfen Sie, ob der Netzstromadapter richtig angeschlossen wurde.
-
Seite 14: Touchfunktion (Anschlagsempfindlichkeit)
vor Beginn der Funktion präsent. Nach dem Aktivieren der Funktion ist zusätzlich das Instrument „R2“ vorhanden. 1. Drücken Sie zum Öffnen der Funktion die Taste DUAL. „R2“ erscheint auf dem LCD-Bildschirm. Zusätzlich werden der Klangname und die Nummer des zu- sätzlichen Klangs angezeigt. -
Seite 15: Begleitung
1. Drücken Sie zum Aktivieren der Funktion die Taste TOUCH. Die voreingestellte Touchfunktion ist „002“ und wird auf dem LCD-Bildschirm angezeigt. 2. Sie können durch mehrfaches Drücken der Taste Touch, um in der Reihenfolge „001-003; OFF“ eine der Funktionen auswählen. 3. - Seite 16 • Dieses Instrument verfügt über mehrere automatische Begleitungen, welche Sie in der Stiltabelle einsehen können. Wählen Sie einfach die passende aus und genießen Sie es. Automatische Begleitung wiedergeben (nur den Perkussionsteil abspielen) 1. Drücken Sie die Taste STYLE, um in den Stilmodus zu gelangen. In der oberen linken Ecke des LCD-Bild- schirms leuchtet die Anzeige „STYLE“...
- Seite 17 Hinweis: Wenn Sie die Taste FILL IN 1 oder FILL IN 2 gedrückt halten, wird die Variation so lange in die Begleitung eingefügt, bis Sie die Taste loslassen. Die Begleitung wechselt dann wieder in das Hauptprogramm. Das Drücken der Taste FILL IN ändert das voreingestellte Hauptprogramm. Wenn Die Begleitung stoppt, zeigt der LCD-Bildschirm dies an.
- Seite 18 DSP ist eine Technologie zur Schallfeldlokalisierung, die den Klang in der realen Umgebung imitiert. Wenn Sie diese Funktion verwenden, können Sie eine offenere und vollere Wiedergabe hören. 1. Der DSP-Effekt wird beim Einschalten automatisch eingeschaltet, und die Markierungen "REVERB" und "CHORUS"...
-
Seite 19: Funktionsmenü
FUNKTIONSMENÜ Funktionsmenü Drücken Sie die Taste FUNCTION MENU, um in das Funktionsmenü zu gelangen. Der LCD-Bildschirm zeigt den entsprechenden Wert an. Im Funktionsmenü können Sie die einzelnen Werte durch Drücken der Tasten + und - einstellen. Inhalt LCD-Anzeige Anpassungsbereich voreingestellter Wetrt Melodie XXX Tune -50 - +50... - Seite 20 Taktart 1. Drücken Sie zur Auswahl der Taktart zunächst die Taste FUNCTION MENU und wählen Sie „Beat-Type“ aus. Der LCD-Bildschirm zeigt „XXX BeatType“ an. Sie können zur Auswahl der Taktart die Tasten + und – drü- cken. Insgesamt stehen 9 Taktarten (0, 2-9) zur Verfügung. 2.
- Seite 21 Zurücksetzen auf Werkseinstellung Drücken Sie, während das Gerät ausgeschaltet ist, gleichzeitig die Tasten + und -. Das Gerät wird auf Werkseinstellung zurückgesetzt und löscht alle Nutzerdaten, inklusive: Nutzerlieder, Registrierung, Speicher. Der LCD-Bildschirm zeigt in dieser Zeit „Wait…!“ an. Nachdem das Gerät zurückgesetzt wurde, kann es ganz normal verwendet werden.
-
Seite 22: Musiksteuerung
Musiksteuerung 1. Taktleitfunktion • Ein Lied verfügt bereits über einen leitenden Takt bevor das Intro gespielt wird. 2. Vor- und Zurückspulen, Wiedergabe-/Pause- und Stoppfunktion von Liedern • Durch Drücken der Taste werden Lieder während der Wiedergabe vorgespult. • Durch Drücken der Taste werden Lieder während der Wiedergabe zurückgespult. •... - Seite 23 Hinweise: • Die Stildaten können nur in der Begleitspur aufgenommen werden. Die Aufnahmeanzeige verfügt über drei verschiedene Status: „Shine, Light, Go out. “ • „Shine“ bedeutet, dass diese Spur für die Aufnahme ausgewählt wurde. Wenn auf der Spur bereits Daten vorhanden sind, werden diese durch die aktuelle Aufnahme überschrieben, wenn Sie fortfahren.
-
Seite 24: Mp3-Wiedergabe
1, TRACK 2, TRACK 3), von welcher Sie die Aufnahme löschen möchten. Wenn Die Anzeige einer Spur er- leuchtet wird, bedeutet dies, dass die Daten gelöscht werden. Wenn die Anzeige ausgeht, bedeutet dies, dass die Daten behalten werden. Wenn die Anzeigen aller Spuren aufleuchten, bedeutet dies, dass alle aufgenommenen Lieder gelöscht werden, wenn der Löschvorgang von Ihnen, durch Drücken der Taste +, autorisiert wird. -
Seite 25: Anhang
Lernmodus 1: Dauer 1. Drücken Sie die Taste LESSON, um den Lernmodus 1 zu aktivieren. Aktuell wiedergegebene Lieder werden gestoppt. Der LCD-Bildschirm zeigt „Les1 R“ an. Das Gerät wird die Übungsdauer schätzen. Das richtige Spielen der Akkorde und Noten wird in diesem Lernmodus nicht berücksichtigt. 2. -
Seite 26: Hinweise Zur Entsorgung
HINWEISE ZUR ENTSORGUNG Wenn es in Ihrem Land eine gesetzliche Regelung zur Entsorgung von elektrischen und elektronischen Geräten gibt, weist dieses Symbol auf dem Produkt oder auf der Verpackung darauf hin, dass dieses Produkt nicht im Hausmüll entsorgt werden darf. Stattdessen muss es zu einer Sammelstelle für das Recycling von elektrischen und elektronischen Geräten gebracht werden. - Seite 27 Dear Customer, Congratulations on purchasing this equipment. Please read this manual carefully and take care of the following hints to avoid damages. Any failure caused by ignoring the items and cautions mentioned in the instruction manual are not covered by our warranty and any liability. Scan the QR code to get access to the latest user manual and other information about the product.
-
Seite 28: Technical Data
TECHNICAL DATA Item number 10035596, 10035847 Keyboard 88-key standard keyboard with touch response Display Voice 360 kinds of voices Style 160 styles Demo 80 demo songs Effect control Touch, reverb, chorus, dual, split, function menu, sound console Record Single track, multi tracks, combined record Accompaniment control Accompaniment volume, transpose control, MP3 function Chord control... -
Seite 29: Safety Instructions
SAFETY INSTRUCTIONS • Read the operating instructions carefully before using the appliance to avoid damage to property and/ or personal injury. • Only connect the unit to a mains socket using the mains power adapter supplied. The use of other mains adapters could damage your unit. -
Seite 30: Panel Control And Display Illustration
PANEL CONTROL AND DISPLAY ILLUSTRATION Left control panel In style mode 1 POWER button 13 START/STOP Start or stop to play Open/Close power accompaniment 2 MASTER VOLUME button 14 SYNC – Open/Close sync function Adjust volume size 15 FILL IN A – Fill in variation A 3 LESSON button 16 FILL IN B –... - Seite 31 Right control panel 23 Data wheel: Adjust the value. To tune out panel setting1 promptly 24 VOICE: Switch to voice function state 35 M2 25 Number/+: Adjust parameters To tune out panel setting2 promptly 26 REC button: Start the record function 36 BANK 27 TRACK1 button: Choose track 1 in record Switch memory bank...
- Seite 32 Back panel 39 External power jack: Connect to external power adaptor 40.USB(MP3) equipment jack 40 Connect USB equipment 41 Audio out jack:: Connect to external audio equipment 42 Pedal input jack: Connect to pedal 43 MIDI IN jack: Receiving MIDI information that was sent out by external MIDI equipment or computer 44 MIDI OUT jack: Sending data of this piano to computer or MIDI equipment by this jack 45 USB(MIDI) jack.
-
Seite 33: Installation
INSTALLATION Assembly parts Piano body assembly 1. Using 1 pcs of plum-blossom M6 screw to fix on the plastic pedal box 2. Press 10 pcs of nuts into the corresponding holes of left & right stand board, left & right stand pillars and connection board 3. -
Seite 35: Getting Stated & Operation
GETTING STATED & OPERATION Power supply 1. Please make sure that this instrument is at off state before connecting power. 2. Connect power adaptor to the DC jack of this instrument. 3. Insert plugs of power adaptor into AC power socket. 4. - Seite 36 into USB port of computer, it can transfer information with computer in both direction Such as you can store the music that you had played on this piano to the computer, you also can play MIDI document of your computer by this piano as well.
- Seite 37 Power switch 1. Firstly, Please make sure that the power had been connected correctly. 2. Press down Power button, LCD display screen will become lighter, displaying boot screen, indicating that the piano had been opened. Note: If the LCD screen has not been lit when you pressed down POWER button, please check that whether the power was connected correctly.
- Seite 38 +/-buttons. 3. The voice effect that was superposed by two kinds of different voices can be heared when you play the keyboard, it seems that two kinds of instru- ments are playing at the same time. 4. Press Dual voice button again, the dual voice effect can be closed, “R2”cursor goes out in LCD, LCD display screen recovers previous state.
-
Seite 39: Accompaniments
sponse state. Piano performance mode This piano designs this function specially,you can tune out piano tone of full keyboard promptly in other state. 1. Pressing the PIANO button,the piano performance mode can be entered into or exited directly. 2. Choosing and starting style in piano performance mode. The accompani- ment control can be operated same other mode,but style only play percus- sion music part,there is no harmony accompaniment part. - Seite 40 This instrument has built in various kinds of auto accompaniment (The detailed information,please see style appendix list),you can choose your favorite accompaniment style and enjoy the pleasure that accompaniments bring to you as much as you can. Play auto accompaniment (Only play percussion music voice part). 1.
- Seite 41 Play different accompaniment paragraphs 1. Pressing STYLE button,the styles can be selected by pressing +/- button,numbers buttons at this time. 2. Pressing AUTO CHORD button to enter into auto bass chord mode. 3. Pressing SYNC button to open sync start function. 4.
- Seite 42 which is a normal caused by switching effect switches. Sound console The played volume of every tracks can be controlled solely by sound console function. 1. Pressing the SOUND CONSOLE button to enter into sound console function menu.LCD will display corresponding value temporarily.The fist time to enter into the sound console menu when the power is on, The first option is "Percussion music track volume"of sound console menu.The option that was entered into again later is same as the option that exited from last time.
-
Seite 43: Function Menu
FUNCTION MENU Pressing[FUNCTION MENU]button to enter into function menu, LCD displays present function menu option temporarily,to set the parameters of present menu by pressing [-] / [ +] buttons.. Inhalt LCD-Anzeige Anpassungsbereich voreinge- stellter Wert Melodie Tune -50 - +50 Tastaturteilung Keyboard split 1 –... - Seite 44 2. Pressing [-] and [ + l buttons at the same time.beat type will recover to presetting value:004. Metronome volume setting 1. Pressing[FUNCTION MENU+)or[FUNCTION MENU-] button to choose metronome volume setting menu,LCD displays "xxx MetroVol" temporarily,You can press [+)/[-] button to set metronome volume at this time,range:0~127.
- Seite 45 Save setting to storage 1. registration bank includes 2 groups storage memory state (M1-M2) 2. When you press [STORE]button,press one of [M1 ]-[M2] button at the same time,present panel can be setted to registration memory.Please notice:This operation will cover previous stored registration memory.
- Seite 46 Record your own songs The record function of this piano can record/replay your performance,you can appreciate your own opus by replaying.You can record many pieces of users'songs in this piano,every song can record 3pcs tracks at most,it is 1 pc accompaniment track and 2pcs melody tracks. The accompaniment track was used for recording style,it is songs'accompaniment,The melody track was used for recording playing melody.The accompaniment track and melody track can record at the same time,but,it cann't record 2pcs melody tracks at the same time,of course,you also can only record melody or...
- Seite 47 This piano will choose one empty melody track to store record automatically (the system will choose automatically in the order of small to large.such as:if track2 has data,then,the system will choose track3 to store this time record)in record preparation state,if two tracks had already have data,then,it will choose track2 to store record.
- Seite 48 Play and control songs This instrument has presetting many kinds of different types songs.Every song has learning function.(For detailed information, please see songs list). Enjoy songs 1. Pressingthe SONG button to enter into song mode, LCD lights “SONG”marking,All songs will begin with loop play now.
- Seite 49 Song learning mode The learning function of song are consist of [Lesson], [Left], [Right]these three buttons.these three buttons are valid only in song mode.All songs can be learned by three mode:Durationlearning,Pitch learning and play mode. This piano can give score based on your learning situation when the learning was over,it helps you to make progress continously in learning process.
-
Seite 50: Appendix
Learning mode3: P lay mode 1. Pressing [Learn) button repeatly to enter into learning mode3 in the state that song has been stopped play. " Les3 R"reminder marking lights in LCD .The system only estimate the correctness of duration and pitch that learner are playing comprehensively. -
Seite 51: Disposal Considerations
DISPOSAL CONSIDERATIONS If there is a legal regulation for the disposal of electrical and electronic devices in your country, this symbol on the product or on the packaging indicates that this product must not be disposed of with household waste. Instead, it must be taken to a collection point for the recycling of electrical and electronic equipment. - Seite 53 Cher client, chère cliente, Toutes nos félicitations pour l’ a cquisition de ce nouvel appareil. Lisez attentive- ment les indications suivantes et suivez-les pour éviter d'éventuels dommages. Nous ne saurions être tenus pour responsables des dommages dus au non-res- pect des consignes et à la mauvaise utilisation de l’ a ppareil. Scannez le QR-Code pour obtenir la dernière version du mode d'emploi ainsi que d'autres informa- tions concernant le produit SOMMAIRE...
-
Seite 54: Fiche Technique
FICHE TECHNIQUE Numéro d'article 10035596, 10035847 Clavier 88 touches standard de piano Affichage Affichage LED Sons 360 instruments Styles 160 styles Démo 80 chansons démo Effets Sensibilité d'attaque, réverbération, chorus, double, division, menu de fonction, console de son Enregistrement Piste unique, plusieurs pistes, enregistrement combiné Accompagnement Démarrage / arrêt, synchronisation, arrangement, vitesse Accord... -
Seite 55: Consignes De Sécurité
CONSIGNES DE SÉCURITÉ • Lisez attentivement le mode d'emploi avant d'utiliser l'appareil afin d'éviter des dommages matériels et / ou des blessures corporelles. • Branchez l'appareil sur une prise électrique uniquement à l'aide de l'adaptateur secteur fourni. L'utilisa- tion d'autres adaptateurs secteur peut endommager votre appareil. •... -
Seite 56: Touches Et Connexions
TOUCHES ET CONNEXIONS Panneau de commande de gauche Mode style 1 POWER - Bouton de marche/arrêt 13 START/STOP démarrage / arrêt de la lecture 2 MASTER VOLUME - Réglage du volume 14 SYNC – ouverture / fermeture de la fonction principal de synchronisation 3 LESSON - Mode d'aprentissage... -
Seite 57: Song ∨/Volume
Panneau de commande de droite 23 Molette de sélection : valeur de consigne 35 M1 - Charger le réglage de la console 24 VOICE : activer les instruments 36 BANK - Changer de banque de mémoire 37 SONG ∨/VOLUME ∨ 25 Champ numérique avec +/- : réglage des valeurs numériques passer au titre MP3 suivant... - Seite 58 Dos de l'appareil 39 Alimentation externe 40 USB (TO DEVICE) - port USB 41 OUTPUT – Connexion audio pour équipement audio externe 42 PEDAL - prise de la pédale 43 prise MIDI IN – pour recevoir des informations MIDI envoyées par des équipements MIDI externes ou des ordinateurs 44 prise MIDI OUT –...
-
Seite 59: Montage
MONTAGE Description Quantité Cache plastique brun Vis TM6*50 Vis TM6*20 Vis interne Vis à main M6 Montage du corps du clavier 1. Fixez le pédalier avec la vis à main (M6). 2. Enfoncez 10 pièces d'écrous dans les trous correspondants des plaques verticales gauche et droite, des colonnes gauche et droite et de la plaque de raccordement 3. -
Seite 61: Mise En Marche Et Utilisation
MISE EN MARCHE ET UTILISATION Alimentation 1. Assurez-vous que l'appareil est éteint lorsque vous le bran- chez. 2. Connectez la fiche de connexion de l'adaptateur secteur à la connexion CC de l'appareil. 3. Branchez la fiche dans la prise. 4. Lorsque vous appuyez sur le bouton POWER, l'écran LCD af- fiche "Loading"... - Seite 62 Remarque : L'accessoire audio USB ne peut pas être configuré pour l'entrée audio et la sortie audio en même temps. Connexion avec d'autres appareils • Connectez le port MIDI IN de votre appareil au port MIDI OUT d'autres appareils pour utiliser le piano comme source audio.
- Seite 63 Interrupteur principal 1. Tout d'abord, assurez-vous que l'adaptateur secteur est correctement branché. 2. Appuyez sur le bouton POWER, l'écran LCD s'éclaircit et affiche l'écran de dé- marrage. Remarque : si l'écran LCD ne s'allume pas après avoir appuyé sur le bouton POWER, vérifiez que l'adaptateur secteur est correctement branché.
- Seite 64 truments différents soient joués en même temps. 4. Vous pouvez interrompre la fonction en appuyant à nouveau sur la touche DUAL. Le voyant "R2" disparaît de l'écran et l'écran revient à son état précé- dent. Remarque : si vous divisez le clavier de l'instrument, la fonction deux voies n'est disponible que pour les touches de droite.
-
Seite 65: Accompagnement
les autres modes. Cependant, un seul accompagnement de batterie peut être sélectionné et non une harmonique. Remarque : dans ce mode, vous pouvez ouvrir à la fois la console audio et le menu des fonctions. La fonction d'accord est automatiquement fermée lorsque ce mode est activé. - Seite 66 bouton SYNC pour synchroniser le style. Le tempo s'allume également sur l'écran LCD. Jouez n'importe quelle touche pour démarrer la performance. Jouer l'accompagnement automatique (toutes les pistes) 1. Démarrez l'accompagnement automatique des accords de basse : appuyez sur la touche [A.B.C.] une fois pour passer en mode d'accord de basse automatique.
- Seite 67 5. Lorsque vous appuyez sur INTRO / ENDING, l'écran affiche "NOR" pour signifier que l'instrument est en mode de préparation de jeu. L'accompagnement automatique démarre immédiatement lorsque vous jouez un accord dans la plage de la main gauche du clavier. 6.
- Seite 68 Le DSP est une technologie de localisation de champ sonore qui imite le son dans l'environ- nement réel. Utilisez cette fonction pour entendre une lecture plus ouverte et complète. 1. L'effet DSP s'active automatiquement à la mise sous tension et les voyants "REVERB" et "CHORUS" s'al- lument sur l'écran LCD.
-
Seite 69: Menu De Fonctions
MENU DE FONCTIONS Menu de fonctions Appuyez sur FUNCTION MENU pour accéder au menu des fonctions. L'écran LCD affiche la valeur corres- pondante. Vous pouvez régler les valeurs personnalisées dans le menu des fonctions en appuyant sur + et -. N°... - Seite 70 Style de métronome 1. Pour choisir le type de métronome, appuyez d'abord sur FUNCTION MENU et sélectionnez "Beat-Type". L'écran LCD affiche "Beat-Type". Choisissez le type de métronome avec les touches + et - Au total, 9 types de métronomes (0, 2-9) sont disponibles. 2.
- Seite 71 Réinitialiser aux paramètres d'usine L'appareil étant éteint, appuyez en même temps sur + et -. L'appareil est réinitialisé aux paramètres d'usine et supprime toutes les données utilisateur, y compris : les chansons utilisateur, l'enregistrement, la mé- moire. Pendant ce temps, l'écran LCD affiche "Wait ...!". Une fois l'appareil réinitialisé, il peut être utilisé normalement.
- Seite 72 Contrôle par la musique 1. Fonction de contrôle par le tempo • Une chanson comprend déjà un tempo avant que l'intro ne soit jouée. 2. Avance rapide, retour rapide, lecture / pause et arrêt des chansons • Appuyez sur la touche pour avancer rapidement les morceaux pendant la lecture. •...
- Seite 73 • "Shine" signifie que cette piste est sélectionnée pour l'enregistrement. S'il y a déjà des données sur la piste, elles seront écrasées par l'enregistrement en cours si vous continuez. • "Light" signifie que les données de la piste seront écrasées de manière synchrone au cours du processus d'enregistrement.
-
Seite 74: Mode Apprentissage
Lecture des MP3 Connexion MP3 : Cette connexion peut être utilisée pour lire des chansons au format MP3. • Les morceaux peuvent être lus / mis en pause en appuyant sur PLAY / PAUSE. • Sélectionnez le morceau précédent en appuyant sur SONG ∧et réduisez le volume est réduit en ap- puyant sur VOLUME ∨... - Seite 75 Mode d'apprentissage 1 : durée 1. Appuyez sur le bouton LESSON pour activer le mode d'apprentissage 1 Les chansons en cours de lecture s'arrêteront. L'écran LCD affiche "Les1 R". L'appareil évaluera la durée de l'exercice. Le jeu correct des accords et des notes n'est pas pris en compte dans ce mode d'apprentissage.
-
Seite 76: Informations Sur Le Recyclage
INFORMATIONS SUR LE RECYCLAGE S‘il existe une réglementation pour l‘élimination ou le recyclage des appareils électriques et électroniques dans votre pays, ce symbole sur le produit ou sur l‘emballage indique que cet appareil ne doit pas être jeté avec les ordures ménagères. Vous devez le déposer dans un point de collecte pour le recyclage des équipements électriques et électroniques. - Seite 77 Estimado cliente: Le felicitamos por la adquisición de este producto. Lea atentamente el sigui- ente manual y siga cuidadosamente las instrucciones de uso con el fin de evi- tar posibles daños. La empresa no se hace responsable por los daños causados por el incumplimiento de las instrucciones y el uso indebido.
-
Seite 78: Datos Técnicos
DATOS TÉCNICOS Número de artículo 10035596, 10035847 Teclado Piano estándar de 88 teclas Indicador Indicador LED Tonos 360 instrumentos diferentes Estilos 160 estilos Demo 80 canciones demo Efectos Sensibilidad a la pulsación, reverberación, coro, voz dual, separación, menú de funciones, consola de sonido Grabación Pista única, varias pistas, grabación combinada Acompañamiento... -
Seite 79: Indicaciones De Seguridad
INDICACIONES DE SEGURIDAD • Lea atentamente el manual de instrucciones antes de utilizar el aparato para evitar daños personales y/o materiales. • Conecte el aparato solamente a una toma de corriente con la fuente de alimentación incluida en el envío. Si utiliza otras fuentes de alimentación podría averiar el aparato. -
Seite 80: Teclas Y Conexiones
TECLAS Y CONEXIONES Panel de control izquierdo En modo silencio 1 POWER: encender/apagar 13 START/STOP: iniciar/detener la reproducción 2 MASTER VOLUME: regulador de volumen 14 SYNC: abrir/cerrar función de sincronización principal 15 FILL IN 1: añadir variación 1 3 LESSON: modo aprendizaje 16 FILL IN 2: añadir variación 2 4 DSP: activar/desactivar DSP 17 START/STOP: iniciar/detener la reproducción... -
Seite 81: Song ∨/Volume
Panel de control derecho 23 Rueda de ajustes: seleccionar valor 35 M1: cargar configuración de consola 24 VOICE: activar instrumentos 36 BANK: cambiar el espacio de memoria 37 SONG ∨/VOLUME ∨ 25 Teclado numérico con +/-: seleccionar valores numéricos Saltar a la siguiente pista MP3 26 REC: grabación Mantener presionada para reducir el volumen 27 TRACK 1: seleccionar para grabar la pista 1... - Seite 82 Parte trasera 39 Toma para suministro eléctrico externo 40 USB (TO DEVICE): puerto USB 41 OUTPUT: toma de audio para equipo de audio externo 42 Toma para el pedal 43 Toma MIDI IN: para recibir información MIDI, la cual se envía desde equipos MIDI u ordenadores 44 Toma MIDI OUT: para enviar información del aparato al ordenador o a otros dispositivos MIDI a través de esta toma 45 Toma USB (MIDI)
-
Seite 83: Montaje
MONTAJE Descripción Número de piezas Cubierta marrón plástico Tornillos TM6x50 Tornillos TM6x20 Tornillo interior Mando M6 Montaje de la estructura del piano 1. Fije las cajas de los pedales con el mando (M6). 2. Introduzca 10 tuercas en los orificios correspondientes de las placas de soporte izquierda y derecha, las columnas izquierda y derecha y la placa de conexión 3. -
Seite 85: Puesta En Funcionamiento
PUESTA EN FUNCIONAMIENTO Suministro eléctrico 1. Asegúrese de que el aparato esté apagado cuando lo conecte al suministro eléctrico. 2. Conecte el conector de la fuente de alimentación a la toma CC del aparato. 3. Conecte el enchufe a la toma de corriente. 4. - Seite 86 Nota: el accesorio de audio USB no puede utilizarse al mismo tiempo para la entrada y la salida de audio. Conectar a otros dispositivos • Si conecta la toma MIDI IN de su aparato a la MIDI OUT de un segundo dispositivo, podrá utilizar el piano como fuente de sonido.
- Seite 87 Interruptor principal 1. Primero asegúrese de que la fuente de alimentación esté correctamente conect- ada. 2. Si presiona la tecla POWER se enciende la pantalla LCD y esta muestra la pan- talla de inicio. Nota: si la pantalla LCD no se ilumina después de presionar la tecla POWER, compruebe que la fuente de alimentación esté...
- Seite 88 2. Seleccione el segundo tono que desee con la tecla VOICE y las teclas `+ y -. 3. De este modo, ambos instrumentos se reproducen de manera sincronizada y simula que se están tocando dos instrumentos diferentes al mismo tiempo. 4.
-
Seite 89: Acompañamiento
2. La selección del acompañamiento funciona del mismo modo que en otros modos. No obstante, solamente puede seleccionarse un acompañamiento de percusión y ningún armónico. Nota: en este modo puede abrir tanto la consola de sonido como el menú de funciones. La función de acordes se cierra automáticamente al activar este modo. - Seite 90 3. La parte de percusión del estilo puede reproducirse inmediatamente con la tecla START/STOP. También puede presionar la tecla SYNC para sincronizar el estilo. El punto del compás también se ilumina en la pan- talla LCD. Puede tocar cualquier tecla para iniciar la actuación. Reproducir acompañamiento automático (todas las pistas) 1.
- Seite 91 2. Presione la tecla AUTO CHORD para activar la función de acorde automático. 3. Presione la tecla SYNC para abrir la función de sincronización. 4. Para seleccionar la reproducción principal 1, presione la tecla FILL IN 1. 5. Si presiona la tecla INTRO/ENDING, la pantalla muestra "NOR", lo que significa que el instrumento se en- cuentra en el modo de preparación.
- Seite 92 DSP es una tecnología de localización del campo auditivo que imita el sonido en el entor- no real. Si utiliza esta función puede escuchar una reproducción más abierta y completa. 1. El efecto DSP se activa automáticamente al encender el aparato y la marca "REVERB" y "CHORUS" se encienden en la pantalla LCD.
-
Seite 93: Menú De Funciones
MENÚ DE FUNCIONES Menú de funciones Pulse la tecla FUNCTION MENU para acceder al menú de funciones. La pantalla LCD muestra el valor cor- respondiente. En el menú de funciones puede ajustar cada uno de los valores pulsando las teclas + y -. Núm. - Seite 94 Tipo de compás 1. Para seleccionar el tipo de compás, primero pulse la tecla FUNCTION MENU y elija "Beat Type". La pantalla LCD muestra "XXX BeatType". Puede pulsar las teclas + y - para elegir el tipo de compás. En total existen 9 tipos de compás (0, 2-9) disponibles.
- Seite 95 Restablecer los valores de fábrica Con el aparato apagado, pulse simultáneamente las teclas + y -. El aparato restablece los ajustes de fábrica y elimina todos los datos del usuario, incluidas las canciones de este, el registro y la memoria. En ese momen- to, la pantalla LCD muestra "Wait...!".
- Seite 96 Control de la música 1. Función de señalización de compás • Una canción ya dispone del compás marcado antes de que se toque la intro. 2. Funciones de retroceso, avance, reproducción/pausa y detención en canciones • Pulsando la tecla se avanza en la canción durante la reproducción. •...
- Seite 97 scribirán por los de la grabación actual si continúa. • "Light" significa que los datos existentes en la pista se sobrescribirán de manera sincronizada con el pro- ceso de grabación. • "Go Out" significa que esta pista no tiene o no dispone de datos, pero su reproducción durante la grabación se ha prohibido.
- Seite 98 Toma MP3: a través de esta toma pueden reproducirse canciones en formato MP3. • Pulsando la tecla PLAY/PAUSE se reproducen/pausan las canciones. • Pulse la tecla SONG ∧ para seleccionar la pista anterior y la tecla VOLUME ∨ para bajar el volumen. •...
- Seite 99 Modo aprendizaje 1: duración 1. Pulse la tecla LESSON para activar el modo de aprendizaje 1. Las canciones reproducidas en ese momento se detienen. La pantalla LCD muestra "Les1 R". El aparato estima la duración del ejercicio. En este modo de aprendizaje no se tienen en cuenta la elección correcta de acordes y notas.
-
Seite 100: Indicaciones Sobre La Retirada Del Aparato
INDICACIONES SOBRE LA RETIRADA DEL APARATO Si en su país existe una disposición legal relativa a la eliminación de aparatos eléctricos y electrónicos, este símbolo estampado en el producto o en el embalaje advierte que no debe eliminarse como residuo doméstico. - Seite 101 Gentile Cliente, La ringraziamo per aver acquistato il dispositivo. La preghiamo di leggere at- tentamente le seguenti istruzioni per l’uso e di seguirle per evitare possibi- li danni. Non ci assumiamo alcuna responsabilità per danni scaturiti da una mancata osservanza delle avvertenze di sicurezza e da un uso improprio del dispositivo.
-
Seite 102: Dati Tecnici
DATI TECNICI Numero articolo 10035596, 10035847 Tastiera Tastiera di pianoforte standard con 88 tasti Visualizzazione Indicazione LED Timbro 360 strumenti diversi Stili 160 stili Demo 80 brani demo Effetti Sensibilità di pressione, risonanza, coro, dual, dividere, menù funzioni, consolle sound Registrazione Traccia singola, diverse tracce, registrazione combinata Accompagnamento... -
Seite 103: Avvertenze Di Sicurezza
AVVERTENZE DI SICUREZZA • Leggere attentamente il manuale d'uso prima dell'utilizzo per evitare danni a cose e/o persone. • Collegare il dispositivo a una presa elettrica utilizzando esclusivamente l'adattatore incluso in consegna. L'utilizzo di altri adattatori può danneggiare il dispositivo. •... -
Seite 104: Tasti E Connessioni
TASTI E CONNESSIONI Pannello di controllo sinistro In modalità stile 1 POWER - Interruttore on/off 13 START/STOP - Avviare/fermare la riprodu- 2 MASTER VOLUME - Manopola del volume zione principale 14 SYNC - Aprire/chiudere la funzione di sincro- 3 LESSON - Modalità lezione nizzazione 4 DSP - Attivazione/disattivazione DSP 15 FILL IN 1 - Inserire variazione 1... - Seite 105 Pannello di controllo destro 23 Manopola di selezione: impostare il valore del pannello di controllo. 24 VOICE: attivare gli strumenti 34 M1 - Aprire l'impostazione del pannello di 25 Campo numeri con +/-: impostare i numeri controllo 26 REC - Registrazione 35 M1 - Aprire l'impostazione del pannello di 27 TRACK 1 - Selezionare traccia 1 per la regi- controllo...
- Seite 106 Lato posteriore 39 Connessione di alimentazione esterna 40 USB (TO DEVICE) - Connessione USB 41 OUTPUT - Connessione audio per equipaggiamento esterno 42 Connessione PEDALE 43 Connessione MIDI IN - Ricezione di informazioni MIDI, trasmesse da equipaggiamento MIDI esterno o da computer 44 Connessione MIDI OUT - Inviare informazioni del dispositivo a computer o altri dispositivo MIDI 45 Connessione USB (MIDI)
-
Seite 107: Montaggio
MONTAGGIO Denominazione Numero di pezzi Copertura plastica marrone Viti TM6*50 Viti TM6*20 Vite femmina Vite di regolazione M6 Montaggio del corpo del pianoforte 1. Fissare la pedaliera con la vite di regolazione (M6). 2. Inserire 10 dadi nei fori corrispondenti del pannello di posizionamento sinistro e destro, delle colonne a sinistra e a destra e della piastra di collegamento. -
Seite 109: Messa In Funzione E Utilizzo
MESSA IN FUNZIONE E UTILIZZO Alimentazione 1. Assicurarsi che il dispositivo sia spento quando lo si collega all'alimentazione. 2. Collegare lo spinotto dell'adattatore con la connessione DC del dispositivo. 3. Inserire la spina nella presa elettrica. 4. Quando si preme il tasto POWER, sullo schermo LCD appare "Loading", a indicare che il pianoforte è... - Seite 110 Connessione ad altri dispositivi • Se si collega la connessione MIDI IN del proprio dispositivo con la connessione MIDI OUT di altri dispositivi, è possibile utilizzare il pianoforte come fonte sonora. • Se si collega la connessione MIDI OUT del proprio dispositi- vo con la connessione MIDI IN di altri dispositivi, è...
- Seite 111 Interruttore generale 1. Assicurarsi prima di tutto che l'adattatore sia ben collegato. 2. Quando si preme POWER, lo schermo LCD si illumina e appare la schermata di avvio. Nota: se lo schermo LCD non si illumina dopo aver premuto POWER, control- lare se l'adattatore è...
- Seite 112 4. La funzione viene disattivata premendo di nuovo DUAL. L'indicazione "R2" scompare dallo schermo, che torna allo stato precedente. Nota: se la tastiera dello strumento è stata divisa, la funzione duale è di- sponibile solo per i tasti della mano destra. I tasti della mano sinistra non sono dotati di tale funzione.
-
Seite 113: Accompagnamento
può selezionare solo un accompagnamento con strumenti a percussione e non armonici. Nota: in questa modalità è possibile è possibile aprire sia la consolle di re- golazione del suono che il menù funzioni. La funzione accordo viene chiusa automaticamente quando si attiva questa modalità. Metronomo (scansione del ritmo) Se non si è... - Seite 114 piacere per iniziare la performance. Riproduzione dell'accompagnamento automatico (tutte le tracce) 1. Per avviare l'accompagnamento basso-accordo automatico: premere la prima volta il tasto [A.B.C] per ac- cedere alla modalità automatica basso-accordo. La tastiera è suddivisa in due sezioni, quella per la mano sinistra è...
- Seite 115 lità di preparazione. L'accompagnamento inizia non appena si suona un accordo nella sezione della tastiera della mano sinistra. 6. Dopo l'intro, l'accompagnamento passa al programma principale. 7. Se si preme FILL IN 2, viene inserita una piccola variazione nell'accompagnamento. Finita la variazione, l'accompagnamento torna automaticamente al programma principale.
- Seite 116 Con DSP si intende una tecnologia per localizzare il campo del suono, che imita il suono nell'am- biente reale. Quando si utilizza questa funzione, si può sentire una riproduzione più aperta e piena. 1. L'effetto DSP si aziona automaticamente all'accensione e sullo schermo LCD si illuminano i simboli "RE- VERB"...
-
Seite 117: Menù Funzioni
MENÙ FUNZIONI Menù funzioni Premere FUNCTION MENU per entrare in questo menù. Lo schermo LCD visualizza il valore. Nel menù funzioni possono essere impostati i singoli valori premendo + e -. Indice Spia LCD Intervallo di regola- Valore predefinito zione Melodia XXX Tune -50 - +50... - Seite 118 Tipo di ritmo 1. Per selezionare il tipo di ritmo premere FUNCTION MENU e selezionare "Beat-Type". Sullo schermo LCD appare "XXX BeatType". Il tipo di ritmo può essere selezionato con i tasti + e -. Sono disponibili complessi- vamente 9 tipi di ritmo (0, 2-9). 2.
- Seite 119 Impostazione della memoria di registrazione del pannello di controllo Questo strumento è dotato di un'impostazione della memoria di registrazione del pannello di controllo, che può essere utilizzata per salvare le impostazioni usate con maggiore frequenza e per poterle utilizzare più rapidamente quando se ne ha bisogno, in modo da facilitare l'uso dello strumento.
- Seite 120 Controllo della musica 1. Funzione ritmo guida • Un brano è già dotato di un ritmo guida prima che venga suonato l'intro. 2. Avanzare e retrocedere rapidamente, play/pausa e stop dei brani • Premere per avanzare rapidamente nei brani durante la riproduzione. •...
- Seite 121 • "Light" significa che i dati presenti sulla traccia vengono sovrascritti in modo sincronizzato nel processo di registrazione. • "Go Out" significa che questa traccia non presenta alcun dato o non ha dati a disposizione, la cui riprodu- zione è stata vietata durante la registrazione. •...
- Seite 122 Riproduzione MP3 Connessione MP3: tramite questa connessione è possibile riprodurre brani in formato MP3. • Premendo PLAY/PAUSE è possibile riprodurre/mettere in pausa i brani. • Premendo SONG ∧ viene selezionato il brano precedente e con VOLUME ∨ si abbassa il volume. •...
- Seite 123 Modalità di apprendimento 1: durata 1. Premere LESSON per attivare la modalità di apprendimento 1. Le canzoni in riproduzione vengono fermate. Sullo schermo LCD appare "Les1 R". Il dispositivo fa una stima della durata dell'esercizio. La corretta esecu- zione di accordi e note non viene tenuta in considerazione in questa modalità. 2.
-
Seite 124: Avviso Di Smaltimento
AVVISO DI SMALTIMENTO Se nel proprio paese si applicano le regolamentazioni inerenti lo smaltimento di dispositivi elettrici ed elettronici, questo simbolo sul prodotto o sulla confezione segnala che questi prodotti non possono essere smaltiti con i rifiuti normali e devono essere portati a un punto di raccolta di dispositivi elettrici ed elettronici. - Seite 125 ANHANG APPENDIX Liste der Instrumente Voice List Abkürzung Instrument Name Abbreviation Piano Stereo Grand Piano StGrdPno Piano Acoustic Grand Piano (wide) 1 GrandPnW Piano Acoustic Grand Piano (dark) GrandPnD Piano Octave Piano 1 OctPno1 Piano Octave Piano 2 OctPno2 Piano Piano &...
- Seite 126 Piano Harpsichord (wide) HarpsiW Piano Harpsichord (octave mix) 1 HarpsiO Piano Harpsichord Release HarpsiR Piano Harpsichord (with key off ) HarpsiOf Piano Clavi 1 Clavi Piano Clavi 2 Clavi 2 Piano Clavi (wide) 1 ClaviW1 Piano Clavi (wide) 2 ClaviW2 Piano Clavi Wah ClaviWa...
- Seite 127 Organ Mellow Drawbar Organ MellDrOr Organ Detuned Drawbar Organ 1 DeDraOr Organ Detuned Drawbar Organ 2 DeDraOr2 Organ Italian 60's Organ 60'sOrgn Organ 1970 Percussive Organ 1970PcOr Organ Percussive Organ 1 PercOrgn1 Organ Percussive Organ 2 PercOrg2 Organ Light Click Organ LClickOr Organ Detuned Percussive Organ...
- Seite 128 Guitar Stereo Steel Guitar StSteGt Guitar Steel Guitar Bend GtBend Guitar Steel Guitar Harmonics GtHarm Guitar Velocity Steel Guitar 1 VelSte1 Guitar Velocity Steel Guitar 2 VelSte2 Guitar Velocity Steel Guitar 3 VelSte3 Guitar Electric Guitar ( jazz) 1 JazzGtr Guitar Electric Guitar ( jazz) 2 JazzGt2...
- Seite 129 Bass Electric Bass (pick) 1 PickBass Bass Electric Bass (pick) 2 PickBas2 Bass Fretless Bass 1 Fretless Bass Fretless Bass 2 Fretless2 Bass Slap Bass 1 SlapBass Bass Slap Bass 2 SlapBass2 Bass Synth Bass 1 SynBass Bass Synth Bass 2 SynBass2 Bass Synth Bass 3 (resonance)
- Seite 130 Ensemble Legato Strings LegatStr Ensemble Orchestra Orchstr Ensemble 60's Strings 60'sStr Ensemble Solo Strings SoloStr Ensemble Choir Aahs 1 ChoirAah Ensemble Choir Aahs 2 ChoirAh2 Ensemble Humming Humming Ensemble Voice Oohs VoiceOoh Ensemble Analog Voice AnaVoice Ensemble Synth Voice SynVoice Ensemble Bass Hit Plus BassHit...
- Seite 131 Reed Soprano Sax 1 SprnoSax Reed Soprano Sax 2 SprnSax2 Reed Sweet Soprano Sax SweSpSax Reed Alto Sax AltoSax Reed Soft Alto Sax SoftAlto Reed Tenor Sax 1 TenorSax Reed Tenor Sax 2 TenoSax2 Reed Baritone Sax BariSax Reed Sweet Oboe SwetOboe Reed Oboe 1...
- Seite 132 Synth Pad Pad 2 (warm) WarmPad Synth Pad Pad 2a (sine pad) SinePad Synth Pad Pad 3 (polysynth) 1 PolySyPd Synth Pad Pad 4 (choir) ChoirPad Synth Pad Pad 4a (itopia) ItopiaPd Synth Pad Pad 5 (bowed) 1 BowedPad Synth Pad Pad 6 (metallic) 1 MetalPad Synth Pad...
- Seite 133 Combined Voice Orchestra Orchest Combined Voice Full Strings 1 FullStr1 Combined Voice Symphonic Symphon Chinese Instruments GuZheng GuZheng Chinese Instruments PiPa PiPa Chinese Instruments ErHu 1 ErHu1 Chinese Instruments Bandi Bandi Chinese Instruments Hulusi Hulusi Chinese Instruments LuSheng 1 LuShen1 Chinese Instruments SuoNa SuoNa...
- Seite 134 List der Stile Style List Genre Name Abkürzung Abbreviation 8 BEAT 8 Beat Piano 8BtPiano 8 BEAT 8 Beat 1 8Beat1 8 BEAT 8 Beat Shuffle 8BtShufl 8 BEAT Guitar Pop 1 GtPop1 8 BEAT 8 Beat Hip Hop 8BtHiHop 8 BEAT 8 Beat R&B...
- Seite 135 BALLAD R&B Ballad 1 R&BBad1 BALLAD Guitar Ballad GtBallad BALLAD Ballad Rock BalladRk BALLAD Piano pop PianoPop BALLAD Soft Ballad SoftBald BALLAD Natural Ballad NatuBld BALLAD Love Ballad LoveBld BALLAD Easy Ballad EasyBld BALLAD Slow Ballad SlowBald BALLAD Folk Ballad FolkBld BALLAD Pop Ballad 1...
- Seite 136 DANCE Rap 1 Rap1 DANCE Disco Disco DANCE Soft Disco SoftDisc DANCE Disco Party DscParty DANCE 70’s Disco 70’sDisc DANCE Club Dance ClubDanc DANCE Euro Dance EuroDanc DANCE Hip Hop 2 HipHop2 SOUL & FUNK Funk 1 Funk1 SOUL & FUNK Classic Funk ClasFunk SOUL &...
- Seite 137 Liste der Lider Song List Genre Name Abkürzung Classify Abbreviation FOLK & COUNTRY Jambalaya Jambalaya FOLK & COUNTRY Ding! Dong! Merril on High DingDong FOLK & COUNTRY Battle Hymne of the Republic Battle FOLK & COUNTRY The Old Gray Mare GrayMare FOLK &...
- Seite 138 Genre Name Abkürzung Classify Abbreviation JAZZ & FUSION Funk Funk JAZZ & FUSION I Can… I Can… JAZZ & FUSION Sea Shore SeaShore JAZZ & FUSION Guitar & Saxphone Gt&Sax JAZZ & FUSION The Hip Hop’s Night HipHopNt JAZZ & FUSION Blue Lunch BlueLunch JAZZ &...