
Verwandte Anleitungen für Schubert Carnegy 61


Inhaltszusammenfassung für Schubert Carnegy 61
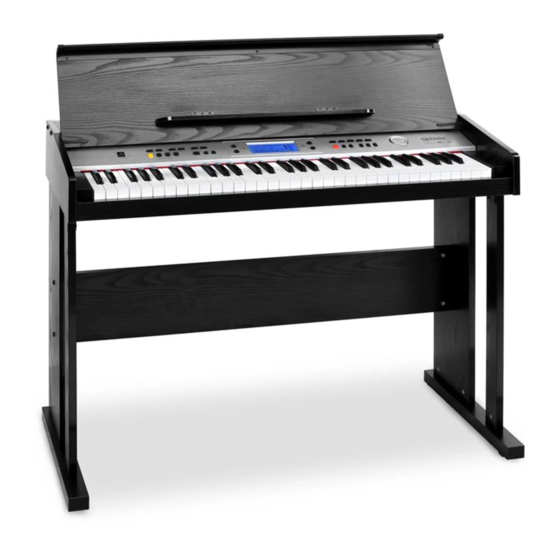
- Seite 1 Carnegy 61 E-Piano Electric Piano Piano électrique Piano electrónico Piano elettrico 10009094...
-
Seite 3: Inhaltsverzeichnis
Sehr geehrter Kunde, wir gratulieren Ihnen zum Erwerb Ihres Gerätes. Lesen Sie die folgenden Hinweise sorgfältig durch und befolgen Sie diese, um möglichen Schäden vorzubeugen. Für Schäden, die durch Missachtung der Hinweise und unsachgemäßen Gebrauch entstehen, übernehmen wir keine Haftung. Scannen Sie den folgenden QR-Code, um Zugriff auf die aktuellste Bedienungsanleitung und weitere Informationen rund um das Produkt zu erhalten. -
Seite 4: Sicherheitshinweise
SICHERHEITSHINWEISE • Befolgen Sie alle in der Bedienungsanleitung gegebenen Hinweise, um sich und andere nicht zu verletzen und Schäden am Gerät oder dessen Umgebung zu vermeiden. Dies beinhaltet (aber nicht ausschließlich darauf begrenzt), die nachfolgenden Informationen: • Bauen Sie das Gerät nicht auseinander und Modifizieren Sie das Gerät keinesfalls. - Seite 5 • Stellen Sie das E-Piano nicht in die Nähe von anderen elektrischen Geräten, wie beispielsweise Fernseher, Radios, Lautsprechern etc. da andernfalls gegenseitige Störungen auftreten können. Stellen Sie keine schweren Gegenstände auf dem Gerät ab und schlagen Sie nicht mit schweren Gegenständen auf die Tasten. •...
-
Seite 6: Panel Control And External Function
PANEL CONTROL AND EXTERNAL FUNCTION Left panel control Hauptlautstärke 12 Einfügen Tempo 13 Variation Begleitlautstärke 14 Start/Stopp Einzelakkord 1 15 Aufnahme Einzelakkord 2 16 Wiedergabe Fingerakkord 17 Programm Schlussakkord 18 Schlaginstrumente Schlussbass 19 Metronom Akkordeon 20 Transponierung 10 Intro/ Ende 21 Gitarre 11 Synchronisierung 22 LCD-Bildschirm... - Seite 7 Right panel control 23 Klavier 33 Eine Taste 24 Stil 34 Folgen 25 Ton 35 Ensemble 26 Zahlen 0 9/+/- 36 Speichern 27 Dual 37 M1 28 Geteilt 38 M2 29 Halten 39 M3 30 Vibration 40 M4 31 Berühren 41 Ein/Aus 32 Demo Back panel control...
-
Seite 8: Vorbereitung
VORBEREITUNG Stromverbindung 1. Stellen Sie sicher, dass sich der Netzschalter des E-Pianos in der Position „OFF“ (aus) befindet. Sollte dies nicht der Fall sein, bringen Sie den Schalter in die Position „OFF“. 2. Verbinden des Netzkabels: Stecken Sie den Netzstecker in die Steckdose. Vorsicht : Wenn das Gerät nicht in Verwendung ist, sollten Sie den Netzstecker aus der Steckdose ziehen, um zu verhindern, dass das Netzkabel zu einem Hindernis wird und um Unfälle zu vermeiden. - Seite 9 Verbindung mit Verstärker oder Hi-Fi Equipment Dieses E-Piano verfügt über ein integriertes Lautsprechersystem. Es kann mit externen Verstärkern oder Lautsprechersystemen verbunden werden. Schalten Sie das E-Piano und die externen Geräte hierfür zunächst aus. Stecken Sie anschließend das eine Ende des Stereoaudiokabels in den LINE-IN oder AUX-IN Anschluss des Hi-Fi Equipments und stecken Sie anschließend das andere Ende in den LINE OUT Anschluss an der Rückseite des E-Pianos.
-
Seite 10: Montage Des Gerätekorpus
MONTAGE DES GERÄTEKORPUS Illustration Name Anzahl Winkel Schraubenmutter Schraube TM6*50 Schraube TA4*12 Schraube TM6*20... -
Seite 11: Effekte Und Bedienung
1. Verwenden Sie 8 TA4*12 Schrauben, um die Winkeleisen jeweils an der rechten und linken Standhalterung zu fixieren. Fixieren Sie 4 Schraubenmuttern in den 4 Löchern des Verbindungsstücks. 3. Verwenden Sie 4 TM6*50 Schrauben, um das Verbindungsstück an der rechten und linken Standhalterung zu fixieren. Legen Sie den Gerätekorpus auf die Holzhalterung und fixieren Sie diesen dort mit 4 TM6*20 Schrauben. - Seite 12 Wenn Sie die Taste SPLIT erneut drücken, verlassen Sie diese Funktion. Das E-Piano nimmt dann wieder die Stimme des unteren Tastaturbereichs an. Auf dem Bildschirm wird „SPL/Off“ angezeigt. Halten Drücken Sie zum Starten der Hallfunktion die Taste SUSTAIN. Dadurch wird ein Halleffekt erzeugt, wenn Sie schwarze und weiße Tasten zur gleichen Zeit spielen.
-
Seite 13: Stilfunktionen
STILFUNKTIONEN Stilauswahl Dieses E-Piano verfügt über 300 verschiedene Stile, aus welchen Sie auswählen können. Siehe Stiltabelle im Anhang. Drücken Sie zum Aktivieren der Stilfunktion die Taste STYLE. Die aktuell ausgewählte Stilnummer wird auf dem LED-Bildschirm angezeigt. Der werkseitig eingestellte Stil ist „000“. Sie können die Nummer des gewünschten Stils direkt über die Zahlentasten 0 - 9 eingeben oder die Tasten +/- drücken. -
Seite 14: Akkordbegleitung
Wenn die Synchronisationsfunktion aktiviert wurde, blinkt auf dem LED- Bildschirm ein roter Punkt auf. Wenn Sie im Synchronisationsstatus die Taste INTRO/ENDING drücken und eine der 19 Tasten der linken Hand drücken, startet die Stilwiedergabe ab dem Intro Fill-in (Auffüllen) Drücken Sie die Taste FILL-IN um während der Stilwiedergabe ein Intermezzo einzufügen und dadurch den Performance-Effekt zu erhöhen. -
Seite 15: Statusspeicher
Fingerakkord Nachdem ein Stil ausgewählt wurde, können Sie die Taste FINGER CHORD drücken, um die Finger-Bass-Akkord-Funktion zu starten. Wenn Sie nun im Akkordbereich eine der 19 Tasten drücken, sind verschiedene Begleitakkorde zu hören. Drücken Sie zum Verlassen dieser Funktion die Taste START/STOP. Siehe Abbildung unten. - Seite 16 Metronomgeräusch und die Aufnahme kann nicht fortgesetzt werden. Jedes Mal, wenn diese Taste gedrückt wird, wird die vorherige Aufnahme gelöscht und das Gerät erneut in den Aufnahmemodus versetzt. 2. Drücken Sie zur Wiedergabe der Aufnahme die Taste PLAY. 3. Drücken Sie die Taste PROG, um in den Stilspeichermodus zu gelangen. Drücken Sie die Tastatur, um einen Stilabsatz zu speichern.
- Seite 17 FEHLERBEHEBUNG Problem Mögliche Ursache Beim Ein-/Ausschalten des Geräts Dies ist normal und kein Grund zur ertönt ein leises Geräusch. Besorgnis. Nach dem Einschalten ertönt beim Überprüfen Sie die Lautstärkeeinstellung Drücken der Tasten kein Ton. und passen Sie diese gegebenenfalls an. Prüfen Sie, ob ein Kopfhörer oder andere Geräte verbunden sind.
-
Seite 18: Hinweise Zur Entsorgung
HINWEISE ZUR ENTSORGUNG Wenn es in Ihrem Land eine gesetzliche Regelung zur Entsorgung von elektrischen und elektronischen Geräten gibt, weist dieses Symbol auf dem Produkt oder auf der Verpackung darauf hin, dass dieses Produkt nicht im Hausmüll entsorgt werden darf. Stattdessen muss es zu einer Sammelstelle für das Recycling von elektrischen und elektronischen Geräten gebracht werden. -
Seite 19: Technical Data
Dear Customer, Congratulations on purchasing this device. Please read the following instructions carefully and follow them to prevent possible damages. We assume no liability for damage caused by disregard of the instructions and improper use. Scan the QR code to get access to the latest user manual and more product information. -
Seite 20: Safety Instructions
SAFETY INSTRUCTIONS • Do not disassemble or modify this instrument in any way, otherwise it will cause the shock, scalding and personal injury risk. You should entrust the internal inspection, debugging and maintenance to your dealer or the place you bought it form. •... - Seite 21 personal. • Regularly examine whether screws are tightened. You should tighten them if you have found the loose screws. • Do not place power cord near heating source such as radiator etc. Do not over bend power cord. • Do not place heavy objects on power cord. Do not place power cord where people walk.
-
Seite 22: Panel Control And External Function
PANEL CONTROL AND EXTERNAL FUNCTION Left panel control Master Volume 12 Fill-in Tempo 13 Variation Accomp Volume 14 Start/Stop Single Chord 1 15 Record Single Chord 2 16 Play Finger Chord 17 Program Chord Close 18 Percussion Bass Close 19 Metronome Accordion 20 Transpose 10 Intero/ending... - Seite 23 Right panel control 23 Piano 33 One Key 24 Style 34 Follow 25 Tone 35 Ensemble 26 Number 0~9/+/- 36 Memory 27 Dual 37 M1 28 Split 38 M2 29 Sustain 39 M3 30 Vibration 40 M4 31 Touch 41 Power Switch 32 Demo Back panel control DC 9V...
-
Seite 24: Preparation Before Performance
PREPARATION BEFORE PERFORMANCE Power connection 1. Firstly, Make sure whether the power switch of Electrical piano is at OFF position. If not, pull the Switch to OFF position. 2. Connect the power cord: Insert power cord into power socket. Caution: When you do not use this electrical piano, you should get out of the plug of AC power from power socket safely in order to avoid the obstacle of piano parts or other accident for the power is on for along time. - Seite 25 Connection with Amplifier or Hi-Fi Equipment This electrical piano has built-in speaker system. It can be connected with other external amplifier or speaker system. First turn off the power of electrical piano and external equipment, then insert one end of stereo audio cable into LINE IN or Aux IN jack of other hi-fi equipment and insert the other end into LINE OUT jack in rear panel of electronic piano.
-
Seite 26: Installation Of Piano Body
INSTALLATION OF PIANO BODY Illustration Name Quantity Angle iron Nut screw Screw-TM6*50 Screw-TA4*12 Screw-TM6*20... - Seite 27 1. Use 8 pcs TA4*12 screws to fix the angle iron on the left and right stand board separately. 2. Fix the 4pcs of nut screw into the four holes of connection boad. 3. Use the 4pcs of TM6*50 screw to fix the connection board with the left and right stand board, then the stand is assembled ready.
- Seite 28 The display shows “SPL/Off”. Sustain Press [SUSTAIN] button to start sustain function. It will produce prolonged effect if you play with B/W keys at the same time. Press [SUSTAIN] button again to exit the function. Vibration Press [VIBRATION] button to start vibration function. It will produce the aquiver effect tone if you play with B/W keys at the same time.
-
Seite 29: Style Function
STYLE FUNCTION Selecting Style This electrical piano has 300 kinds of style for your choice. For style table, please refer it to detailed Appendix. Press [STYLE] button to enter Style selection function. LED displays current style number. The default style is “000”. You can select the style by pressing the number 0~9 buttons directly or press “+/-”... -
Seite 30: Chord Accompaniment
enhance the performance effect, after finishing the inserted style, the piano will continue to play the original style. Variation At the mode of style, press [VARIATION] button, the piano will play the style with an style of variation. Press [VARIATION] button to exit this function. Mode of piano performance The digital piano designed this function specially. - Seite 31 Finger chord When style is started, press[FINGER CHORD] button to enter the function of fingered auto bass chord. Now in 1-19 keys of chord area, applying different fingerings to hear different chord accompaniments. Press [START/STOP] button to exit this function. Chord Close Under chord state, press [CHORD CLOSE] button to stop chord accompaniment while style continues to play.
- Seite 32 programming is finished. The best style play effect can be got by adjusting [TEMPO ∧/∨] buttons. Every time, you press [PROG] button, it will clear last memory and enter into programming mode again. Demo playback The total demo songs is 80pcs. Press [DEMO] button to play song.
- Seite 33 TROUBLE SHOOTING Trouble Possible reason/eliminating method Accompanying a little noise when Normal phenomenon. please do not worry. turning ON/OFF power After turning on power, press Check whether volume control key is at keyboard but no sound can be proper position or headphone jack is held emitted.
-
Seite 34: Disposal Considerations
DISPOSAL CONSIDERATIONS If there is a legal regulation for the disposal of electrical and electronic devices in your country, this symbol on the product or on the packaging indicates that this product must not be disposed of with household waste. Instead, it must be taken to a collection point for the recycling of electrical and electronic equipment. -
Seite 35: Anhang
Cher client, chère cliente, Toutes nos félicitations pour l’acquisition de ce nouvel appareil. Lisez attentivement les indications suivantes et suivez-les pour éviter d'éventuels dommages. Nous ne saurions être tenus pour responsables des dommages dus au non-respect des consignes et à la mauvaise utilisation de l’appareil. Scannez le QR-Code pour obtenir la dernière version du mode d'emploi ainsi que d'autres informations concernant le produit. -
Seite 36: Consignes De Sécurité
CONSIGNES DE SÉCURITÉ • Suivez l'ensemble des consignes indiquées dans le mode d'emploi pour éviter de vous blesser ou de blesser autrui et pour éviter d'endommager l'appareil ou son environnement. Cela comprend (sans s'y limiter) les informations suivantes : • Ne démontez pas ou modifiez aucunement l'appareil. - Seite 37 objets lourds. • Débranchez le cordon d'alimentation de la prise de courant si vous prévoyez de ne pas utiliser l'appareil pendant une longue période. Retirez toujours la fiche secteur de la prise par la tête de la fiche et jamais par le cordon d'alimentation.
-
Seite 38: Panneau De Contrôle Et Fonction Externe
PANNEAU DE CONTRÔLE ET FONCTION EXTERNE Panneau de contrôle gauche Volume principal 12 Insérer Tempo 13 Variation Volume de l'accompagnement 14 Mise en marche/arrêt Accord unique 1 15 Enregistrement Accord unique 2 16 Lecture Doigté des accords 17 Programme Accord final 18 Instruments de percussion Basse finale 19 Métronome... - Seite 39 Panneau de contrôle droit 23 Piano 33 Une touche 24 Style 34 Suivre 25 Son 35 Ensemble 26 Nombre 0 9/+/- 36 Enregistrer 27 Dual 37 M1 28 Séparé 38 M2 29 Réverbe 39 M3 30 Vibrato 40 M4 31 Toucher 41 Marche/arrêt 32 Démo Panneau de contrôle arrière...
-
Seite 40: Préparation
PRÉPARATION Connexion électrique 1. Assurez-vous que l'interrupteur d'alimentation du piano électrique est sur la position « OFF ». Si ce n'est pas le cas, mettez l'interrupteur sur la position « OFF ». 2. Connexion du cordon d'alimentation : branchez la fiche dans la prise. Attention : lorsque l'appareil n'est pas utilisé, débranchez le cordon d'alimentation de la prise pour éviter que le cordon ne devienne un obstacle et pour éviter les accidents. - Seite 41 Connexion avec un amplificateur ou un équipement hi-fi Ce piano électrique est équipé d'un système de haut-parleurs intégré. Il peut être connecté à des amplificateurs ou des systèmes de haut-parleurs externes. Pour ce faire, il faut d'abord éteindre le piano électrique et les appareils externes.
-
Seite 42: Montage Du Corps De L'appareil
MONTAGE DU CORPS DE L'APPAREIL Illustration Nombre Angle Écrou Vis TM6*50 Vis TA4*12 Vis TM6*20... - Seite 43 1. Utilisez 8 vis TA4*12 pour fixer les cornières aux supports de pied respectivement droit et gauche. Fixez 4 écrous dans les 4 trous du connecteur. 3. Utilisez 4 vis TM6*50 pour fixer le connecteur aux supports de pied droit et gauche.
- Seite 44 clavier. L'écran affiche « SPL/Off ». Réverbe Appuyez sur le bouton SUSTAIN pour lancer la fonction de réverbe. Cela crée un effet de réverbération lorsque vous appuyez sur les touches noires et blanches en même temps. Appuyez une nouvelle fois sur le bouton SUSTAIN pour couper la fonction de réverbe.
-
Seite 45: Fonctions De Style
FONCTIONS DE STYLE Choix du style Ce piano électrique propose plus de 300 styles différents que vous pouvez choisir. Cf. le tableau des styles en annexe. Pour activer la fonction de style, appuyez sur la touche STYLE. Le numéro du style actuellement sélectionné s'affiche sur l'écran LED. -
Seite 46: Accord D'accompagnement
Lorsque la fonction de synchronisation a été activée, un point rouge clignote sur l'écran LED. Si vous appuyez sur la touche INTRO/ENDING lors de la synchronisation et que vous appuyez sur l'une des 19 touches de gauche, la lecture du style commence à... -
Seite 47: Fonction D'enregistrement
Doigté des accords Après avoir sélectionné un style, vous pouvez appuyer sur la touche FINGER CHORD pour lancer la fonction d'accord de basse de doigts. Si vous appuyez maintenant sur l'une des 19 touches de la section d'accords, divers accords d'accompagnement peuvent être entendus. - Seite 48 peut pas être poursuivi. Chaque fois que vous appuyez sur cette touche, l'enregistrement précédent est effacé et l'appareil se remet en mode d'enregistrement. 2. Pour écouter l'enregistrement, appuyez sur le bouton PLAY. 3. Appuyez sur la touche PROG pour accéder au mode de sauvegarde de style.
-
Seite 49: Résolution Des Problèmes
RÉSOLUTION DES PROBLÈMES Problème Cause possible L'appareil fait un léger bruit C'est normal et il n'y a pas lieu de s'inquiéter. lorsque vous l'allumez/éteignez. Après la mise en marche, aucun Vérifiez le réglage du volume et ajustez-le si son n'est émis lorsque l'on appuie nécessaire. -
Seite 50: Informations Sur Le Recyclage
INFORMATIONS SUR LE RECYCLAGE Si la mise en rebut des appareils électriques et électroniques est réglementée dans votre pays, ce symbole sur le produit ou sur l'emballage indique qu'il ne doit pas être éliminé avec les ordures ménagères. Vous devez l'acheminer vers un point de collecte pour le recyclage des appareils électriques et électroniques. -
Seite 51: Datos Técnicos
Estimado cliente: Le felicitamos por la adquisición de este producto. Lea atentamente el siguiente manual y siga cuidadosamente las instrucciones de uso con el fin de evitar posibles daños. La empresa no se responsabiliza de los daños ocasionados por un uso indebido del producto o por haber desatendido las indicaciones de seguridad. -
Seite 52: Indicaciones De Seguridad
INDICACIONES DE SEGURIDAD • Siga todas las indicaciones presentes en las instrucciones de seguridad para evitar lesiones personales y daños en el aparato o su entorno. Esto incluye (solo a modo de ejemplificación) la siguiente información: • No desmonte el aparato ni lo modifique bajo ninguna circunstancia. De lo contrario, puede ocasionar descargas eléctricas, quemaduras y lesiones personales. - Seite 53 del enchufe y nunca del cable. • • Asegúrese de instalar el soporte siguiendo las instrucciones y de apretar todas las conexiones. Seleccione una posición adecuada para instalar el piano eléctrico en el soporte. • • Al colocar el piano eléctrico en el soporte, asegúrese de que los dedos no se le atrapen entre el piano y el soporte.
-
Seite 54: Panel De Control Y Funciones Externas
PANEL DE CONTROL Y FUNCIONES EXTERNAS Panel de control izquierdo Volumen principal 12 Relleno Ritmo 13 Variación Volumen de acompañamiento 14 Inicio/parada Acorde único 1 15 Grabación Acorde único 2 16 Reproducción Acorde con dedos 17 Programa Acorde final 18 Instrumentos de percusión Grave final 19 Metrónomo Acordeón... - Seite 55 Panel de control derecho 23 Piano 33 Una tecla 24 Estilo 34 Seguimiento 25 Tono 35 Conjunto 26 Números 0 9/+/- 36 Guardar 27 Dual 37 M1 28 Dividido 38 M2 29 Sostenido 39 M3 30 Vibración 40 M4 31 Táctil 41 Encender/apagar 32 Demo Panel de control trasero...
-
Seite 56: Preparación
PREPARACIÓN Conexión eléctrica 1. Asegúrese de que el interruptor principal del piano eléctrico se sitúe en la posición "OFF" (apagado). Si no es el caso, coloque el interruptor en la posición "OFF". 2. Conectar el cable de alimentación: introduzca el cable de alimentación en la toma de corriente. - Seite 57 Conexión a amplificador o equipo HiFi Este piano eléctrico dispone de un sistema de altavoces integrado. Puede conectarse a un amplificador externo o a un sistema de altavoces. Para ello, apague primero el piano eléctrico y los dispositivos externos. Conecte primero un extremo del cable de audio estéreo a la toma LINE IN o AUX-IN del equipo HiFi y conecte, a continuación, el otro extremo de la toma LINE OUT a la parte trasera del piano eléctrico.
-
Seite 58: Montaje De La Estructura Del Aparato
MONTAJE DE LA ESTRUCTURA DEL APARATO Ilustración Nombre Cantidad Ángulo Tuerca de unión Tornillo TM6*50 Tornillo TA4*12 Tornillo TM6*20... - Seite 59 1. Utilice 8 tornillos TA4*12 para fijar los listones en ángulo al soporte izquierdo y derecho. Fije 4 tuercas de unión en los 4 orificios del conector. 3. Utilice 4 tornillos TM6*50 para fijar el conector al soporte derecho e izquierdo.
- Seite 60 Sostenido Para iniciar la función de reverberación, pulse la tecla SUSTAIN. Así se genera un efecto de reverberación cuando toque las teclas negra y blanca al mismo tiempo. Pulse la tecla SUSTAIN una vez más para abandonar la función. Vibrato Para iniciar la función de vibrato, pulse la tecla VIBRATION.
-
Seite 61: Funciones De Estilo
FUNCIONES DE ESTILO Selección de estilo Este piano eléctrico dispone de más de 300 estilos que puede seleccionar. Consulte la tecla de estilo anexa. Para activar la función del estilo, pulse la tecla STYLE. El número de estilo seleccionado se muestra en la pantalla LED. El estilo adoptado por defecto es "000". -
Seite 62: Acompañamiento De Acorde
19 teclas de la mano izquierda, la reproducción del estilo comienza desde la introducción. Fill-in (relleno) Presione la tecla FILL-IN para insertar un intermedio durante la reproducción del estilo y así aumentar el efecto de la actuación. En cuanto se finalice el estilo del intermedio, el piano eléctrico regresa al estilo original. - Seite 63 Acorde con dedos Después de haber seleccionado un estilo, puede presionar la tecla FINGER CHORD para iniciar la función de acorde grave con dedos. Si pulsa una de las 19 teclas de la zona de acordes se escucharán distintos acordes de acompañamiento.
- Seite 64 2. Pulse la tecla PLAY para reproducir la grabación. 3. Pulse la tecla PROG para acceder al modo de memoria de estilo. Pulse el teclado para guardar un fragmento del estilo. El estilo ajustado puede contar con un máximo de 32 teclas presionadas. Pulse la tecla PLAY para reproducir a continuación el estilo ajustado que tras la memorización conformará...
-
Seite 65: Reparación De Anomalías
REPARACIÓN DE ANOMALÍAS Problema Posible causa Al encender y apagar el aparato Es normal y no debe preocuparle. suena un ligero sonido. Tras el encendido, no hay sonido al Compruebe el nivel de volumen y adáptelo tocar las teclas. según corresponda. Compruebe que no haya auriculares u otros dispositivos conectados. -
Seite 66: Indicaciones Para La Retirada Del Aparato
INDICACIONES PARA LA RETIRADA DEL APARATO Si en su país existe una disposición legal relativa a la eliminación de aparatos eléctricos y electrónicos, este símbolo estampado en el producto o en el embalaje advierte de que no debe eliminarse como residuo doméstico. -
Seite 67: Dati Tecnici
Gentile cliente, la ringraziamo per l'acquisto del dispositivo. La preghiamo di leggere attentamente le seguenti istruzioni per l’uso e di seguirle per evitare possibili danni. Non ci assumiamo alcuna responsabilità per danni scaturiti da una mancata osservanza delle avvertenze di sicurezza e da un uso improprio del dispositivo. -
Seite 68: Avvertenze Di Sicurezza
AVVERTENZE DI SICUREZZA • Rispettare tutte le avvertenze contenute nel manuale d'uso per evitare lesioni e danni al dispositivo e all'ambiente circostante. Queste includono le seguenti informazioni (ma non si limitano esclusivamente a esse): • Non disassemblare il dispositivo e non modificarlo in alcun caso. In caso contrario, possono risultare scosse elettriche, ustioni e lesioni a persone. - Seite 69 schiacciarsi le dita. • - Il piano elettrico deve essere sempre trasportato da almeno 2 persone. In caso contrario, il supporto potrebbe cadere e causare danni a cose e/o persone. • - Assicurarsi regolarmente che le viti siano ben strette. Se sono allentate, stringerle immediatamente.
-
Seite 70: Pannello Di Controllo E Funzioni Esterne
PANNELLO DI CONTROLLO E FUNZIONI ESTERNE Pannello di controllo sinistro Volume principale 12 Inserimento Ritmo 13 Variazione Volume dell'accompagnamento 14 Start/Stop Accordo singolo 1 15 Registrazione Accordo singolo 2 16 Riproduzione Accordo con diteggiatura 17 Programma Accordo finale 18 Percussioni Basso finale 19 Metronomo Fisarmonica... - Seite 71 Pannello di controllo destro 23 Pianoforte 33 Un tasto 24 Stile 34 Seguire 25 Suono 35 Ensemble 26 Numeri 0 9/+/- 36 Salvare 27 Dual 37 M1 28 Suddivisione 38 M2 29 Sustain 39 M3 30 Vibrato 40 M4 31 Touch 41 On/Off 32 Demo Pannello di controllo posteriore...
-
Seite 72: Preparazione
PREPARAZIONE Collegamento all'alimentazione 1. Assicurarsi che l'interruttore del piano elettrico sia in posizione "OFF" (spento). Se non è così, metterlo su "OFF". 2. Collegare il cavo di alimentazione: inserire la spina nella presa elettrica. Attenzione: se il dispositivo non è in uso, staccare la spina dalla presa per evitare che il cavo sia di intralcio ed eventuali incidenti. - Seite 73 Collegamento con amplificatori o impianti HiFi Questo piano elettrico è dotato di un sistema di altoparlanti interno. Può essere collegato con amplificatori esterni o impianti. Iniziare spegnendo il piano elettrico. Inserire poi un'estremità del cavo audio stereo nella connessione LNE-IN o AUX-IN dell'impianto HiFi e inserire poi l'altra estremità nella connessione LINE OUT sul retro del piano elettrico.
- Seite 74 MONTAGGIO STRUTTURA PRINCIPALE DEL DISPOSITIVO Illustrazione Nome Quantità Angolare Dado Vite TM6*50 Vite TA4*12 Vite TM6*20...
- Seite 75 1. Utilizzare 8 viti TA4*12 per fissare gli angolari ai supporti destro e sinistro. Fissare 4 dadi nei 4 fori dei connettori. 3. Utilizzare 4 viti TM6*50 per fissare i connettori ai supporti destro e sinistro. Poggiare la struttura principale del dispositivo sul supporto di legno e fissarlo con 4 viti TM6*20.
- Seite 76 Sustain Premere SUSTAIN per attivare l'effetto Hall. Quando si premono tasti bianchi e neri insieme si crea un effetto di risonanza. Premere nuovamente SUSTAIN per disattivare la funzione. Vibrato Premere VIBRATION per attivare l'effetto Vibrato. Questo genera un effetto vivace quando si premono contemporaneamente i tasti bianchi e neri. Premere nuovamente il tasto per disattivare la funzione.
-
Seite 77: Funzioni Stilistiche
FUNZIONI STILISTICHE Selezione dello stile Questo piano elettrico mette a disposizione oltre 300 stili diversi. V. la tabella degli stili in allegato. Premere STYLE per attivare la funzione. Il numero dello stile selezionato compare sullo schermo LED. Lo stile impostato in fabbrica è "000". -
Seite 78: Accompagnamento Con Accordi
Fill-in (riempire) Premere FILL-IN per aggiungere un intermezzo durante la riproduzione dello stile e aumentare l'effetto della performance. Non appena è terminato lo stile inserito, il piano elettrico torna a suonare nello stile originale. Variazione Se si preme VARIATION in modalità stilistica, il piano elettrico suona lo stile impostato con variazioni. - Seite 79 Accordo con diteggiatura Dopo aver selezionato uno stile, premere FINGER CHORD per attivare la funzione dito-basso-accordo. Se si preme uno dei 19 tasti nell'area degli accordi, si sentono diversi accordi di accompagnamento. Premere START/ STOP per abbandonare la funzione. V. immagine sotto. Accordo finale Se in modalità...
- Seite 80 2. Premere PLAY per riprodurre la registrazione. 3. Premere PROG per raggiungere la modalità di salvataggio dello stile. Premere la tastiera per salvare un passaggio stilistico. Lo stile regolato può avere al massimo 32 battute. Premere PLAY per riprodurre successivamente lo stile regolato, che dopo il salvataggio va a creare una sorta di stile autoprodotto.
-
Seite 81: Correzione Degli Errori
CORREZIONE DEGLI ERRORI Problema Possibile causa Si sente un lieve rumore quando si È normale e non è motivo di preoccupazione accende/spegne il dispositivo. Dopo l'accensione non si sente Controllare il volume e regolarlo di alcun suono alla pressione dei tasti. conseguenza. -
Seite 82: Avviso Di Smaltimento
AVVISO DI SMALTIMENTO Se nel vostro Paese sono vigenti regolamenti legislativi relativi allo smaltimento di dispositivi elettrici ed elettronici, questo simbolo sul prodotto o sull'imballaggio indica che non è consentito smaltire questo prodotto nei rifiuti casalinghi. Il dispositivo deve invece essere portato in un centro di raccolta per il riciclaggio di dispositivi elettrici ed elettronici. - Seite 83 ANHANG APPENDIX Tontabelle Table of Tones Name Name Name Acoustic Grand Piano Synth Brass 1 Telephone Ring Bright Acoustic Piano Synth Brass 2 Helicopter Electric Grand Piano Soprano Sax Applause Honky-tonk Piano Alto Sax Gunshot Rhodes Piano Tenor Sax Percussion Chorused Piano Baritone Sax Rhythm electric Piano...
- Seite 84 Viola FX 8 (sci-fi) String Piano Cello Sitar Metal Piano Contrabass Banjo Light rhythm Piano Tremolo Strings Shamisen Electric Piano Pad Pizzicato Strings Koto Classical piano Orchestral Harp Kalimba Organ Guitar Timpani Bagpipe Electric Guitar String Ensemble 1 Fiddle Synthesis Nylon Guitar String Ensemble 2 Shanai Synth Electronic Guitar...
- Seite 85 Synth Trumpet Marimba Synth Lead Double kalimba Bass Trombone Metal FX Bright kalimba Trombone ensemble Electronic FX Crystal kalimba rhythm Trombone Electronic String Synth kalimba Ensemble High Trombone Wind FX Electronic bagpipe baritone Trombone Clarinet FX Wind bagpipe Synth Trombone Organ FX High bagpipe Violin French Horn...
- Seite 86 Stiltabelle Table of Styles Name Name Name Beat1 Soul4 Mideast Beat2 Soul5 Beat3 Newsoul Love_ballad Beat4 Big_band1 EasyBeat Beat5 Big_band2 SoftBeat Beat6 Blue_grass Pop_samba1 Beat7 Jazz_samba Pop_samba2 Beat8 Jazz_waltz1 Shuffle Beat9 Jazz1 Jazz Band Beat10 Jazz2 Shuffle1 Beat11 Swing1 Shuffle2 Beat12 Swing2 Slow_folk...
- Seite 87 Dance6 Rhumba OrientalBeat10 Dance7 Tango1 OrientalBeat11 Dance8 Bossanoval2 OrientalBeat12 Dance9 Bossanoval3 OrientalBeat13 Dance10 Bossanoval4 OrientalBeat14 Bachata1 Bossanoval5 Classical beat1 Bachata2 Calypso Classical beat2 Soul_funk Tango2 Classical beat3 Euro_soul Tango3 JazzRock1 Funky_soul1 March1 JazzRock2 Funky_soul2 March2 Soft Rock Funky_soul3 March3 Classic Rock Funky_soul4 March4 Folk rock1...
- Seite 88 Name Name Name Britpop2 New Orleans Blues Middle East tango2 NewRock New York Blues Middle East tango3 Modern dance1 Piano Blues Reggae March1 Modern dance2 Soul-Blues Reggae March2 Modern dance3 Urban Blues Reggae March3 Modern dance4 Blues waltz1 Reggae March4 Modern dance5 Blues merengue1 Classical polka...
- Seite 89 Spring Song Rudolph the Red-Nosed Carmen Minute Waltz Op Reindeer Silver Carmen Aragon Gavotte Beethoven Sonata Carmen Overture Schubert Serenade O sole mio Cute little spider Serenade - Haydn Socks 2 Clementine sonata Moments Musicaux Winter Croatian Rhapsody Hungarian Dance...