Herunterladen Inhalt Inhalt Diese Seite drucken
Inhaltsverzeichnis

Werbung

Verfügbare Sprachen
  • DE

Verfügbare Sprachen

  • DEUTSCH, seite 3
All manuals and user guides at all-guides.com

Werbung

Inhaltsverzeichnis
loading

Inhaltszusammenfassung für Philips DSR 1010

  • Seite 1 All manuals and user guides at all-guides.com...
  • Seite 2 All manuals and user guides at all-guides.com...
  • Seite 3: Inhaltsverzeichnis

    Vielen Dank dafür, dass Sie sich für den Philips DSR 1010 Satellitenempfänger entschieden haben. Dieser Philips Satellitenempfänger ermöglicht den Empfang von digitalen Satellitenprogrammen und –diensten. Wir wünschen Ihnen guten Empfang und viel Freude mit Ihrem neuen Philips DSR 1010! Anmerkung: Dieses Gerät ist für Deutschland, Österreich und Italien bestimmt. INHALT SICHERHEITSHINWEISE .
  • Seite 4: Sicherheitshinweise

    All manuals and user guides at all-guides.com SICHERHEITSHINWEISE Wichtige Hinweise zum Betrieb Im folgenden Abschnitt finden Sie wichtige Hinweise zum Betrieb, Aufstellungsort und Anschluß des Receivers. Lesen Sie diese Hinweise sorgfältig, bevor Sie das Gerät in Betrieb nehmen. Längere Abwesenheit/Gewitter Schalten Sie das Gerät bei längerer Abwesenheit und bei Gewitter grundsätzlich mit dem Netzschalter vorne rechts am Gerät aus.
  • Seite 5: Wichtige Hinweise Zum Aufstellungsort Und Zur Montage

    All manuals and user guides at all-guides.com Wichtige Hinweise zum Aufstellungsort und zur Montage Aufstellungsort Jedes elektronische Gerät entwickelt Wärme. Die Erwärmung liegt jedoch in einem ungefährlichen Bereich. Empfindliche Möbeloberflächen und Furniere können sich durch die ständige Wärmeeinwirkung im Laufe der Zeit leicht verfärben. Ebenso können die Gerätefüße in Verbindung mit behandelten Möbeloberflächen Farbveränderungen hervorrufen.
  • Seite 6: Anschlüsse Fernbedienung

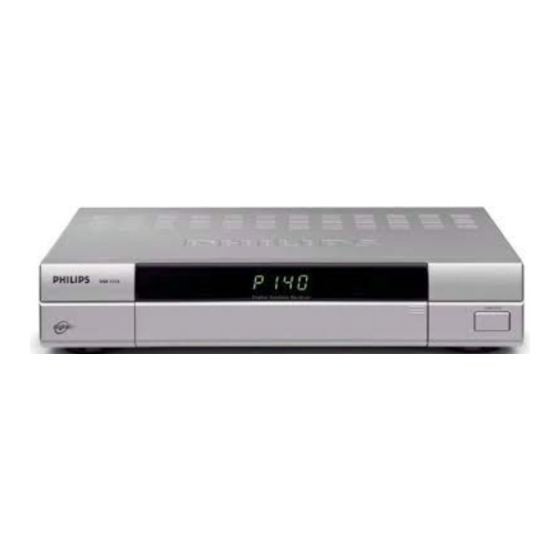
    All manuals and user guides at all-guides.com ANSCHLÜSSE FERNBEDIENUNG An der Rückseite des Gerätes finden Sie folgende Anschlüsse: 1 - 230V / 50 Hz Verbinden Sie das Netzkabel mit der Netzbuchse. 2 - AUDIO TV L u. R Audio-Ausgang, linker und rechter Kanal zum Anschluß an eine Stereoanlage.
  • Seite 7 All manuals and user guides at all-guides.com FERNBEDIENUNG Menu : Aktiviert das Haupt- emote : Fernbedienung Menü: ontrol Funktionsbeschrei- • Programmverwal- bung ein/aus. tung • Sender Suchlauf • Satellitenauswahl avoriten: Auswahl ver- • Installation. schiedener Favoriten-Bänke. Exit : Wechselt auf das Im Menü: zuletzt gewählte Einstellung der...
  • Seite 8: Bedienung Nahbedienung

    All manuals and user guides at all-guides.com BEDIENUNG 3.1 NAHBEDIENUNG Öffnen (und schließen) Sie die Klappe an Frontseite des Gerätes durch Drücken auf die markierte Fläche (rechts). Die Nahbedienung umfaßt die Tasten STANDBY = Bereitschaft, 8 und 9 für Weiterschaltung der Programme aufwärts / abwärts (Ch -/+), sowie + und * für die Einstellung der Lautstärke (VOL-/+).
  • Seite 9: Funktionen Der Fernbedienung

    All manuals and user guides at all-guides.com 3.2 FUNKTIONEN DER FERNBEDIENUNG Das Einschalten aus Standby erfolgt mit der roten Taste oder mit einer Zifferntaste 0 ... 9 . Eine Funktionsbeschreibung der Fernbedienung ist in die Gerätesoftware integriert. Um sie aufzurufen, drücken Sie einfach die Taste RC auf der Fernbedienung und dann die Tasten, zu der Sie Hilfe wünschen - der zugehörige Hilfetext wird dann eingeblendet.
  • Seite 10 All manuals and user guides at all-guides.com Die Organisation für die Radio-Programme ist identisch, d.h. es gibt einen separaten Programm- Pool für 2000 Radio-Speicherplätze und weitere 10 zugehörige Radio-Favoritenbänke mit je 1000 Plätzen. Hinweis: Bitte beachten Sie, daß nach einen Satelliten-, Transponder-, oder Manuell - Suchlauf, die neu gefundenen Programme im Programm-Pool unter «Neue Freie»...
  • Seite 11: Tv / Radio - Umschaltung

    All manuals and user guides at all-guides.com Das obige Beispiel zeigt die Verwendung des Platzhalters „-----„, um z.B. die Programme einer Programmgruppe an einer bestimmten Speicherstelle zu plazieren. Die Auswahl der Favoritenbänke erfolgt durch Drücken der Taste F , gefolgt von einer zugeordneten Zifferntasten 0...9 .
  • Seite 12: Toneinstellungen

    All manuals and user guides at all-guides.com hören. Um nur noch eine Sprache zu hören, wählen Sie mit der Taste + (oder *) «Mono-L» oder «Mono-R» und bestätigen Sie Ihre Auswahl mit der Taste OK . Die aktuelle Auswahl ist weiß hinterlegt. Die meisten aller zwei- oder mehrsprachigen Sendungen werden jedoch über separate Tonspuren ausgestrahlt.
  • Seite 13: Timer

    All manuals and user guides at all-guides.com 3.8 TIMER Über die Taste wird das Menü «Timer-Programmierung» aufgerufen. Es können bis zu 8 Timer-Ereignisse wahlweise mit TV- oder Radio-Programmen eingegeben werden. Hinweis: Beachten Sie, dass auch der Videorecorder auf identische Aufnahmezeiten eingestellt werden muß.
  • Seite 14: Epg - Programminformation (Basisnavigator)

    All manuals and user guides at all-guides.com 3.9 EPG - PROGRAMMINFORMATION (BASISNAVIGATOR) Im EPG (Electronic Programme Guide) werden Informationen zur aktuellen und zu folgenden Sendungen angezeigt. Der Umfang dieser programmbegleitenden Informationen wird vom jeweiligen Programmanbieter festgelegt und ist von Programm zu Programm sehr unterschiedlich. Viele Programme werden auch ohne verwertbare Zusatzinformation (SI-Daten) ausgestrahlt.
  • Seite 15: Menüstruktur

    All manuals and user guides at all-guides.com MENÜSTRUKTUR 4.1 PROGRAMME 4.1.1 Favoriten-Bank Rufen Sie mit der Taste M das Hauptmenü auf und drücken Sie dann zweimal die Taste OK Sortieren, Tauschen, Kopieren und Löschen von Programmen - alles in einem Menü! Wählen Sie eine der Favoritenbänke 0...9.
  • Seite 16: Favoriten-Namen Ändern

    All manuals and user guides at all-guides.com Dabei wird auch der Einstell-Fokus auf das linke bzw. rechte Fenster umgeschaltet - d.h. es wird das Programm eingestellt, dessen Programmname mit gelber Schrift dargestellt wird. Sie sehen also bei jeder Aktion, ob Kopieren, Tauschen oder Löschen, das zugehörige Bild im aktuell gewählten Fenster.
  • Seite 17: Kindersicherung

    All manuals and user guides at all-guides.com Im Untermenü «Antennensignal» können Sie bei Bedarf Ihre Parabolantenne optimal ausrichten. Drehen Sie die Antenne so, dass bei den Skalen für Feldstärke und Empfangsgüte ein Optimum entsteht. Bei sehr schwachen Signalen kann die Feldstärkeskala auch auf 0 gehen - optimieren Sie dann das Signal mit der Skala für die Empfangsgüte.
  • Seite 18: Suchlauf

    All manuals and user guides at all-guides.com Aktivieren der Kindersicherung Um die Sperrung der mit «?» markierten Programme zu aktivieren, schalten Sie im Menü «Kindersicherung» das Eingabefeld {Sicherung} auf EIN und bestätigen Sie beim Verlassen des Menüs mit der Taste OK . Bei Aufruf der markierten Programme werden Sie zur Eingabe Ihrer fünfstelligen PIN aufgefordert.
  • Seite 19: Manuelle Eingabe (Für Experten)

    All manuals and user guides at all-guides.com Wenn z.B. zu einer bekannten Programmgruppe ein neues Programm in Betrieb geht, so reicht es, ein Programm aus dieser Programmgruppe vorab über Programmwahl einzustellen - die erforderlichen Parameter werden in den Transponder-Suchlauf übernommen. Erscheint in der «START»-Zeile die Meldung «...
  • Seite 20: Installation / Werkseinstellung

    All manuals and user guides at all-guides.com 4.4 INSTALLATION / WERKSEINSTELLUNG Nach Eingabe der folgenden Zahlenkombination im Menü «PIN ändern», können Sie Änderungen bei den Geräteeinstellungen wieder rückgängig machen und Ihr Gerät in den Auslieferungszustand (Werkseinstellung) zurücksetzen. Wählen Sie hierzu das Menü «PIN ändern» Taste M > Programme > Kinder-Sicherung > PIN 1.
  • Seite 21: Signalwege

    All manuals and user guides at all-guides.com Zeichensatz auswählen Im DVB-Standard ist die automatische Umschaltung des Zeichensatzes definiert - leider halten sich nicht alle Sendeanstalten an diese Normierung, so dass dann in einem Text Zeichen aus einem falschen Zeichensatz erscheinen können. Im Gerät ist die automatische Zeichensatzumschaltung vorgesehen, es können aber bei Bedarf verschiedene Zeichensätze fest eingestellt werden, so dass z.B.
  • Seite 22: Lnb-Einstellungen

    All manuals and user guides at all-guides.com Bei einem aktiven Timer-Ereignis, also wenn sich Ihr Gerät zur vorprogrammierten Zeit auf das gewünschte Programm schaltet, werden am Anschluß 8 der VCR-Scart-Buchse 12 V ausgegeben. (12 V Schaltspannung). Ein «Sat-Record» fähiger Videorecorder erkennt dieses Schaltsignal und schaltet automatisch auf Aufnahme (Record).
  • Seite 23: Diseqc (Digital Satellite Equipment Control)

    All manuals and user guides at all-guides.com 4.4.5 DiSEqC (Digital Satellite Equipment Control) Im DiSEqC Menü müssen die Steuersignale nach den Erfordernissen Ihrer Satelliten-Anlage eingestellt werden. 22 kHz - Signal {AUS} 22 kHz nicht aktiv. {High/Low} 22 kHz schaltet zwischen High- und Low-Band. {Pos.
  • Seite 24 All manuals and user guides at all-guides.com Nach der Auswahl «1 Receiver-Software» wird folgendes Menü eingeblendet! ACHTUNG Download-Software-Version V Y.Y Receiver-Software-Version V X.X Fortsetzen ? JA = OK NEIN = E Nach Drücken der Taste OK wird eine Versionsprüfung durchgeführt. Sollte sich auf dem Datenkarussell eine ältere Version befinden, so erhalten Sie einen entsprechenden Hinweis - Bei Bedarf können Sie den Download wieder vorzeitig abbrechen.
  • Seite 25: Glossar

    All manuals and user guides at all-guides.com GLOSSAR Band Frequenzband eines Satelliten. Low-Band (unteres Band) und High-Band (oberes Band). (Conditional Access) steht für verschlüsselte Programme. CVBS (Composite Video Burst Sync): deutsch FBAS-Signal (Farb Bild Austast Synchron) Video-Standard für TV- oder VCR-Geräte). DiSEqC (Digital Satellite Equipment Control).
  • Seite 26: Technische Daten

    All manuals and user guides at all-guides.com TECHNISCHE DATEN Programme • 2000 Speicherplätze für TV-Programme und für 2000 Radio-Programme. • 10 individuell belegbare Favoritenbänke mit jeweils 1000 Programmplätzen. (z.B. für Programmsparten SPORT, NEWS, MUSIK usw.). • 8 Satelliten (einzeln aktivierbar). •...
  • Seite 27 All manuals and user guides at all-guides.com RF-Bereich • Sat-IF-Frequenzbereich 950 - 2150 MHz • Eingangspegelbereiche 43 - 83 dBµV • Empfangsschwelle (EB/NO) < 4,5 dB TV-System digital • Modulation, FEC, Demultiplexer DVB-S-Standard • Video-Auflösung CCIR 601 (720 x 576) •...
  • Seite 28: Fehlerbehebung

    All manuals and user guides at all-guides.com FEHLERBEHEBUNG Bei Problemen mit dem Philips DSR 1010 sollten Sie zuerst folgende Punkte prüfen. FEHLER MÖGLICHE URSACHE MAßNAHME Kein Bild, kein Ton und keine Empfänger nicht an das Netz Netzanschluss prüfen. Netztaste Displayanzeige.
  • Seite 29 All manuals and user guides at all-guides.com Dear customer, Congratulations on your choice of Philips DSR 1010 satellite receiver. This Philips satellite receiver will allow you to obtain digital satellite programmes and services. We wish you much viewing pleasure with your new Philips DSR 1010.
  • Seite 30: Safety Instruction

    All manuals and user guides at all-guides.com SAFETY INSTRUCTION Important remarks on operation The following section contains important remarks concerning the operation, location and connection of the receiver. Please read these instructions carefully before using the unit for the first time. Extended absence/use during adverse weather conditions Always switch off the unit during periods of extended absence and during thunder storms by means of the power switch located on the front right-hand side.
  • Seite 31 All manuals and user guides at all-guides.com Important remarks on location and assembly Location All electronic equipment generates heat, which is however not dangerous. Delicate furniture surfaces and finishes may become slightly discoloured over time due to the permanent heat source. Likewise, the feet of the equipment may cause discolouring on treated surfaces.
  • Seite 32: Connections

    All manuals and user guides at all-guides.com CONNECTIONS The following connections are located on the back of the unit: 1 - 230 V/50 Hz: Connect the power cable to the power socket. 2 - AUDIO TV L & R: Audio output, left and right-hand channel for connecting to a stereo unit. 3 - TV: Connect the TV connection socket to your television unit using the SCART cable supplied.
  • Seite 33 All manuals and user guides at all-guides.com YOUR REMOTE : Detailed : Activates MAIN- Remote Control func- MENU: tions on-screen- • channel Arrangement. Display (OSD) on/off. • Channel Search. • Satellite Selection. • Installation. : Choose favourite chan- nel list Menu: : Switch to previous Change transparency...
  • Seite 34: Operating Your Unit

    All manuals and user guides at all-guides.com OPERATING YOUR UNIT 3.1 LOCAL OPERATION Open (and close) the flap on the front of the unit by pressing the marked area (on the right-hand side). Local operation is by means of the keys STANDBY , 8 and 9 for switching between channels upwards/downwards (CH -/+), as well as + and * for adjusting the volume (VOL -/+).
  • Seite 35: Remote Control Functions

    All manuals and user guides at all-guides.com 3.2 REMOTE CONTROL FUNCTIONS Switching on from standby mode is done using the red key or using the number keys 0 ... 9 The unit software contains a functional description for the remote control. To consult this, simply press the RC key on the remote control and then the keys for which you require assistance - the appropriate help instructions appear on the screen.
  • Seite 36 All manuals and user guides at all-guides.com To manage this (over)supply of channels and to keep them clearly arranged, the memory for the TV channels is divided into two areas - a channel pool with 2,000 storage positions and 10 associated favourite lists with 1,000 storage positions each.
  • Seite 37: Channel Name

    All manuals and user guides at all-guides.com Select favourite lists by pressing the F key, followed by one of the associated number keys 0...9 . N.B.: After selecting a channel the following message is displayed: Number and name of favourite list currently selected. TV : F0 : ALL Mon.
  • Seite 38: Adjusting The Sound

    All manuals and user guides at all-guides.com The stereo display in the figure below means that only one language is being transmitted in stereo. The content of the left-hand window is set by the trans- mitting station - e.g. «German» or «ger» could be displayed in line 1 of the left-hand window instead of «Stereo».
  • Seite 39: Timer

    All manuals and user guides at all-guides.com 3.8 TIMER The timer programming menu is accessed by pressing the key. Up to 8 timer events can be input for TV or radio channels, as required. N.B.: Please note that with the selection «VCR record = Standard», the video recorder must also be set to identical recording times (see also under 4.4.3 Signal paths (5) VCR record).
  • Seite 40: Epg - Programme Information (Basic Navigator)

    All manuals and user guides at all-guides.com 3.9 EPG - PROGRAMME INFORMATION (BASIC NAVIGATOR) The EPG (Electronic Programme Guide) contains information on current and subsequent programmes. The extent of this channel-related information is determined by the individual provider and varies greatly from one channel to the next.
  • Seite 41: Menu Structure

    All manuals and user guides at all-guides.com MENU STRUCTURE 4.1 CHANNELS 4.1.1 Favourite list Call up the main menu using the M key and then press the OK key twice. Sorting, swapping, copying and deleting channels - in one single menu! Select one of the favourite lists 0...9.
  • Seite 42: Changing The Favourite Name

    All manuals and user guides at all-guides.com N.B.: The transparency of the superimposed image can be switched between variable and fixed (fixed in not transparent) using the F key. In ‘VAR’ mode the transparency can be increased or decreased using the +* keys.
  • Seite 43: Parental Control

    All manuals and user guides at all-guides.com If necessary, you can align your parabolic antenna using the sub-menu «Antenna signal». Turn the antenna to the optimum position in the scales indicating field strength and signal reception quality. If the signal is very weak, the field strength scale may also fall to 0 - in which case you should optimise the signal using the reception quality scale.
  • Seite 44: Search Mode

    All manuals and user guides at all-guides.com N.B.: Please note that, when the parental control is activated, the «Favourite list», «Channel pool» and «Search mode» menus can only be accessed by entering the five-digit PIN. This is to prevent overriding the parental control function, e.g. by deleting the marking or adjusting the blocked channels via the transponder search mode (...
  • Seite 45 All manuals and user guides at all-guides.com 4.3 SATELLITES The ASTRA 19.2° and Eutelsat 13° (Hotbird) satellites are activated as per the default factory settings. Six other satellites are pre-programmed, but not activated. If you expand your reception equipment, you can make the required settings and activations for the pre-programmed satellites in the ‘Satellite’...
  • Seite 46: Satellites

    All manuals and user guides at all-guides.com 4.4 INSTALLATION / FACTORY SETTING After entering the following number combination in the «change PIN» menu, you can reset changes to the unit settings and restore your unit to its delivery condition (factory setting). To do this select the «change PIN»...
  • Seite 47: Menu Language

    All manuals and user guides at all-guides.com 4.4.2 Menu language Select language. The menu language can be switched between {{German}, {English}, {French}, {Italian}, {Spanish}, {Dutch} and {Turkish}. Select character set. Automatic switching of the character set is defined in the DVB standard - however unfortunately not all stations observe this standard with the result that characters from an incorrect character set may appear in a text.
  • Seite 48: Lnb Settings

    All manuals and user guides at all-guides.com Sat record The video output signal (pin 19 of the VCR socket) to the VCR is always available. In the case of an active timer event, that is when your machine switches to the desired channel at the pre-programmed time, 12 V are output at pin 8 of the VCR Scart socket (12 V turn-on voltage).
  • Seite 49: Download Over Air (Software Update Via Satellite)

    All manuals and user guides at all-guides.com DiSEqC {OFF}, {ON} Select {ON}, if you connect the receiver to a DiSEqC-compatible satellite receiver. DiSEqC repeat (use for cascade arrays) {OFF} no repetition of DiSEqC signal the DiSEqC signal is repeated once the DiSEqC signal is repeated twice 4.4.6 Download Over Air (software update via satellite) You can update the operating software and the channel lists (each individually) for your receiver...
  • Seite 50: Glossary

    All manuals and user guides at all-guides.com GLOSSARY Band Frequency band of a satellite. Low band and high band. Conditional Access: denotes encrypted channels. CVBS Composite Video Burst Sync: video standard for TV or VCR equipment. DiSEqC Digital Satellite Equipment Control. Digital Video Broadcast.
  • Seite 51: Technical Data

    All manuals and user guides at all-guides.com TECHNICAL DATA Channels • 2000 storage positions for TV channels and for 2000 radio channels. • 10 individually definable favourite lists each containing 1000 channel positions (e.g. for channel types SPORT, NEWS, MUSIC etc.). •...
  • Seite 52: Software-Update

    All manuals and user guides at all-guides.com RF range • Sat-IF frequency range 950 - 2150 MHz • Input level ranges 43 - 83 dBµV • Reception threshold (EB/NO) < 4.5 dB TV system digital • Modulation, FEC, demultiplexer DVB-S standard •...
  • Seite 53: Troubleshooting

    All manuals and user guides at all-guides.com TROUBLESHOOTING When you have problems with your Philips DSR 1010, first check following points. PROBLEM POSSIBLE CAUSE ACTION No picture, no sound and no front Receiver is not plugged into the Check mains connection. Press panel display.
  • Seite 54 All manuals and user guides at all-guides.com...
  • Seite 55 All manuals and user guides at all-guides.com Caro cliente, Grazie per avere scelto il ricevitore satellitare digitale Philips DSR 1000, che vi consentirà di ricevere i programmi e i servizi satellitari digitali. Col nuovo DSR 1010 ti auguriamo una visione ancora piu’ piacevole.
  • Seite 56: Sicurezza

    All manuals and user guides at all-guides.com SICUREZZA Informazioni importanti sul funzionamento Questo capitolo contiene informazioni importanti su funzionamento, collocazione e connessione del ricevitore. È fondamentale leggere attentamente queste istruzioni prima di utilizzare l'apparecchio. Assenze prolungate / utilizzo in condizioni atmosferiche avverse Provvedere sempre a scollegare l'apparecchio in caso di periodi prolungati di assenza e in caso di temporali agendo sull'interruttore di rete posto sulla parte destra del pannello...
  • Seite 57 All manuals and user guides at all-guides.com Informazioni importanti su collocazione e installazione Collocazione Ogni apparecchio elettronico genera calore, comunque inferiore al livello di rischio. Tuttavia, alcuni tipi di mobili possono scolorirsi con il tempo per effetto dell'emissione costante di calore. Allo stesso modo, anche il contatto con le basi d'appoggio dell'apparecchio possono determinare scolorimento di talune superfici trattate.
  • Seite 58: Connessioni

    All manuals and user guides at all-guides.com CONNESSIONI Sul pannello posteriore dell'apparecchio sono presenti le seguenti connessioni: 1 - 230 V/50 Hz: Inserire il cavo di rete nella presa di corrente. 2 - AUDIO TV Dx e Sx: Uscita audio, canale destro e sinistro per la connessione all'impianto stereo.
  • Seite 59 All manuals and user guides at all-guides.com TELECOMANDO : Mostra funzioni tele- : Attiva MENU comando su scher- PRINCIPALE: mo (OSD) • Ordinamento canali. acceso/spento. • Ricerca canali. • Selezione satellite. • Installazione. : Scelta menu elenchi canali preferiti: modi- fica grado di : Torna al canale trasparenza su...
  • Seite 60: Funzionamento

    All manuals and user guides at all-guides.com FUNZIONAMENTO 3.1 COMANDI SULL'APPARECCHIO Aprire (e chiudere) lo sportello sul pannello frontale dell'apparecchio premendo sulla parte destra indicata. I comandi sull'apparecchio comprendono i tasti STANDBY = Attesa, V e W per passare al canale superiore e inferiore CH -/+ , C e B per regolare il volume VOL -/+ .
  • Seite 61: Funzioni Telecomando

    All manuals and user guides at all-guides.com 3.2 FUNZIONI TELECOMANDO L'accensione dell'apparecchio dal modo standby è possibile agendo sul tasto rosso ovvero premendo uno dei tasti 0…9. Il software dell'apparecchio contiene la descrizione delle funzioni telecomando. Per consultarla, basta premere il tasto RC sul telecomando e quindi i tasti per cui si richiede l'assistenza – appariranno sullo schermo le relative istruzioni.
  • Seite 62 All manuals and user guides at all-guides.com consultare agevolmente, la memoria dei programmi TV si suddivide in due settori, vale a dire un cosiddetto Pool canali contenente 2000 memorie e 10 Banche preferiti da 1000 memorie ciascuna. Anche i canali radio sono organizzati in maniera analoga: un pool canali separato per 2000 memorie radio e altre 10 banche preferiti per canali radio da 1000 memorie ciascuna.
  • Seite 63: Commutazione Tv / Radio

    All manuals and user guides at all-guides.com Per selezionare un elenco preferiti, premere il tasto F seguito da uno dei tasti numerici assegnati 0...9 . Nota: Dopo avere selezionato un canale, vengono visualizzate le seguenti informazioni: Numero e nome della banca preferiti attualmente selezionata. TV : F0 : TUTTI Lun.
  • Seite 64: Regolazione Suono

    All manuals and user guides at all-guides.com trasmessa su bande audio separate: in tal caso, nel riquadro sinistro viene visualizzato ad esempio 1 = Italiano e 2 = Tedesco, ed entrambe le lingue vengono trasmesse in stereofonia. Selezionare la lingua desiderata con i tasti W o V e confermare la selezione con il tasto OK .
  • Seite 65: Timer

    All manuals and user guides at all-guides.com 3.8 TIMER Premendo il tasto , è possibile accedere al menu di programmazione timer. È possibile impostare fino a 8 funzioni timer a scelta per canali Tv o radio. N.B.: E' importante ricordare che, in caso di selezione «VCR-Record = Standard», anche sul videoregistratore devono essere impostati gli stessi orari di regis- trazione.
  • Seite 66: Informazioni Programmi Epg (Navigatore Base)

    All manuals and user guides at all-guides.com 3.9 INFORMAZIONI PROGRAMMI EPG (NAVIGATORE BASE) La EPG (Electronic Programme Guide) contiene le informazioni relative ai programmi attuali e successivi. La quantità di informazioni sui canali dipende dai singoli provider e varia notevolmente da un canale all'altro.
  • Seite 67: Struttura Menu

    All manuals and user guides at all-guides.com STRUTTURA MENU 4.1 CANALI 4.1.1 Preferiti Richiamare il menu principale agendo sul tasto M e quindi premere due volte il tasto OK . Ordinare, spostare, copiare ed eliminare i canali – tutto in un unico menu! Seleziona uno degli elenchi preferiti 0…9.
  • Seite 68: Modifica Preferiti

    All manuals and user guides at all-guides.com Per spostarsi sulla finestra menu di sinistra, utilizzare i tasti W e V; per spostarsi sulla finestra menu di destra, utilizzare i tasti C e B. L'evidenziazione del canale e dell'intestazione della finestra contrassegna la finestra attiva. Per ogni azione (copiatura, spostamento o eliminazione) verrà...
  • Seite 69: Pool Di Canali (Per Utenti Esperti)

    All manuals and user guides at all-guides.com 4.1.3 Pool di canali (per utenti esperti) Il pool contiene tutti i canali in ordine alfabetico. La selezione per satellite avviene agendo sul tasto M ; la scelta di canali liberi o criptati avviene agendo sul tasto TV . Tutti i canali liberi (ovvero tutti i canali criptati) del satellite selezionato sono contenuti nella sezione «Tutti liberi», vale a dire tutti i canali liberi e criptati successivi al lancio della ricerca satellite.
  • Seite 70: Blocco Canali

    All manuals and user guides at all-guides.com 4.1.4 Blocco canali Il codice di sicurezza a cinque cifre (PIN) è impostato per default su 0 0 0 0 0 dal produttore. Modifica del codice di sicurezza (PIN) Selezionare il menu «Blocco canali» premendo il tasto 4 dal menu principale «Canali». Quindi, selezionare il campo di immissione {PIN} agendo sul tasto 2 oppure sul tasto W, e attivarlo premendo il tasto OK .
  • Seite 71: Modo Ricerca

    All manuals and user guides at all-guides.com 4.2 MODO RICERCA 4.2.1 Modo ricerca satellite Il modo ricerca satellite opera su tutte le frequenze del satellite selezionato. Scegliere le impostazioni desiderate dalla sequenza menu. La selezione dei singoli parametri avviene, dopo l’attivazione mediante il tasto OK , utilizzando i tasti CB.
  • Seite 72: Satelliti

    All manuals and user guides at all-guides.com 4.3 SATELLITI I satelliti ASTRA 19,2° e Eutelsat sono attivati con le impostazioni di default del produttore. Altri sei satelliti sono programmati, ma non attivati. Per espandere il sistema di ricezione, è possibile impostare e attivare i satelliti programmati dal menu ‘Satellite’.
  • Seite 73: Installazione / Impostazione Di Fabbrica

    All manuals and user guides at all-guides.com 4.4 INSTALLAZIONE / IMPOSTAZIONE DI FABBRICA Dopo avere inserito il codice numerico riportato di seguito nel menu «Modifica PIN», è possibile cancellare le modifiche apportate alle impostazioni dell'apparecchio e ripristinare le impostazioni di default (impostazioni di fabbrica). Selezionare il menu «Modifica PIN»...
  • Seite 74: Lingua Menu

    All manuals and user guides at all-guides.com 4.4.2 Lingua menu Selezionare la lingua. È possibile modificare la lingua menu tra {tedesco}, {inglese}, {francese}, {italiano}, {spagnolo}, {olandese} e {turco}. Selezionare il set di caratteri. L’adeguamento automatico del repertorio caratteri è impostato nello standard DVB. Tuttavia, non tutte le emittenti seguono questo standard.
  • Seite 75: Impostazioni Lnb

    All manuals and user guides at all-guides.com Standard Il segnale di uscita video (connettore 19 della presa VCR) verso il videoregistratore è sempre disponibile. Il connettore 8 della presa scart VCR (tensione di commutazione) è impostato come ingresso: avviando la riproduzione sul videoregistratore, i segnali audio e video provenienti dal videoregistratore vengono commutati automaticamente dal ricevitore satellitare attraverso la presa VCR sulla presa scart TV, e quindi inviati al televisore.
  • Seite 76: Diseqc (Digital Satellite Equipment Control)

    All manuals and user guides at all-guides.com 4.4.5 DiSEqC (Digital Satellite Equipment Control) I segnali di controllo contenuti nel menu DiSEqC devono essere impostati in conformità con i requisiti dell’attrezzatura satellitare. segnale 22 kHz {OFF} 22 kHz non attivo {High/Low} 22 kHz varia da banda alta a banda bassa {Pos.
  • Seite 77 All manuals and user guides at all-guides.com Dopo avere selezionato «1 software ricevitore», appare il menu seguente. N.B. Download software versione V Y.Y Software receiver versione V X.X Continuare? SI = OK NO = E Dopo avere premuto il tasto OK , viene verificata la versione del software. Se il carosello dati contiene una versione precedente, viene visualizzato un messaggio –...
  • Seite 78: Glossario

    All manuals and user guides at all-guides.com GLOSSARIO Banda Banda di frequenza di un satellite Banda bassa e banda alta. Conditional Access: denota i canali criptati. CVBS Composite Video Burst Sync: standard video per apparecchi TV o VCR. DiSEqC Digital Satellite Equipment Control. Digital Video Broadcast.
  • Seite 79: Dati Tecnici

    All manuals and user guides at all-guides.com DATI TECNICI Canali • 2000 memorie per canali TV e 2000 per canali radio. • 10 elenchi preferiti customizzabili individualmente con possibilità di contenere 1000 canali ognuno (p. es. per tipi di emittenti: SPORT, NOTIZIE, MUSICA, ecc.). •...
  • Seite 80 All manuals and user guides at all-guides.com Banda RF • Gamma di frequenza IF 950 - 2150 MHz • Gamma livelli d’ingresso 43 - 83 dBµV • Soglia di ricezione (EB/NO) < 4,5 dB Sistema digitale TV • Modulazione, FEC, demultiplatore DVB-S standard •...
  • Seite 81: Risoluzione Guasti

    All manuals and user guides at all-guides.com RISOLUZIONE GUASTI In caso di problemi con il ricevitore Philips DSR 1010, verificare innanzitutto i seguenti punti. PROBLEMA POSSIBILE CAUSA INTERVENTO Immagini assenti, audio assente, Il ricevitore non è collegato alla Verificare il collegamento alla visualizzazioni sul pannello rete elettrica, oppure non è...
  • Seite 82 All manuals and user guides at all-guides.com...
  • Seite 83 All manuals and user guides at all-guides.com Cher client, Félicitations pour avoir choisi le récepteur satellite Philips DSR 1010. Nous vous souhaitons de passer d’agréables moments avec votre Philips DSR 1010. Nota : Ce produit est destiné à l’Allemagne, l’Autriche et l’Italie. TABLE DES MATIÈRES CONSIGNES DE SÉCURITÉ...
  • Seite 84: Consignes De Sécurité

    All manuals and user guides at all-guides.com CONSIGNES DE SÉCURITÉ Remarques importantes concernant l’utilisation Le chapitre qui suit contient des remarques importantes concernant l’utilisation, le lieu d’installation et le raccordement du récepteur. Veuillez lire ces instructions avec la plus grande attention avant la première utilisation de votre appareil.
  • Seite 85 All manuals and user guides at all-guides.com Remarques importantes concernant l’emplacement et l’assemblage Emplacement Tous les équipements électriques dégagent de la chaleur, sans que cela ne représente de danger. Les surfaces de meubles ou placages fragiles peuvent s’altérer légèrement avec le temps en raison de cette émanation permanente de chaleur.
  • Seite 86: Raccordements

    All manuals and user guides at all-guides.com RACCORDEMENTS Les prises suivantes sont situées sur le panneau arrière du récepteur : 1 - 230 V/50 Hz : cordon d’alimentation secteur. 2 - AUDIO TV L & R : sorties audio gauche et droite pour matériel hi-fi stéréo. 3 - TV : prise péritélévision TV (câble péritélévision fourni).
  • Seite 87 All manuals and user guides at all-guides.com TÉLÉCOMMANDE : Affiche à l’écran les : Active le MENU fonctions détaillées PRINCIPAL : de la télécommande. • réglage des canaux • recherche des programmes : Appelle la liste de vos • sélection du satellite programmes favoris.
  • Seite 88: Utilisation

    All manuals and user guides at all-guides.com UTILISATION 3.1 FONCTIONNEMENT DU RÉCEPTEUR Ouvrez (et fermez) le volet du panneau avant en exerçant une pression sur la zone indiquée (sur le côté droit). A partir du récepteur, les opérations s'effectuent avec les touches STANDBY , 8 et 9 pour passer d’un programme à...
  • Seite 89: Fonctions De La Télécommande

    All manuals and user guides at all-guides.com 3.2 FONCTIONS DE LA TÉLÉCOMMANDE S’il est en veille, allumez votre récepteur en appuyant sur la touche rouge ou sur une des touches numériques 0 ... 9 . Le logiciel du récepteur contient une description des fonctions de la télécommande. Pour la consulter, appuyez sur la touche RC de la télécommande, puis sur les touches pour lesquelles vous avez besoin d’informations.
  • Seite 90: Gestion De Programmes Avec Regroupement De Programmes Et 10 Listes De Programmes Favoris

    All manuals and user guides at all-guides.com 3.4.4 Gestion de programmes avec regroupement de programmes et 10 listes de programmes favoris Les technologies de télévision numérique mettent à la portée du téléspectateur de nouveaux programmes toujours plus nombreux. Avec une installation de réception de satellites, placée pour capter par exemple les satellites Astra 19°...
  • Seite 91: Commutation Entre Mode Radio Et Mode Tv

    All manuals and user guides at all-guides.com Vous pouvez également modifier les noms des listes de favoris (reportez-vous au point 4.1.2) et/ou modifier la réservation des listes de favoris. On peut aussi imaginer que différents membres d'une famille mettent leur propre nom à leurs listes de favoris individuels. Au sein même d'une liste de favoris vous obtiendrez une meilleure clarté...
  • Seite 92: Mode Audio - Numérique / Analogique

    All manuals and user guides at all-guides.com 3.6 MODE AUDIO - NUMÉRIQUE / ANALOGIQUE Dans la technologie numérique de satellites, l'image et le son sont en général transmis sous forme numérique (codés MPEG). Lorsque l'on emploie dans ce chapitre le concept de «mode audio analogique», cela signifie que les signaux numériques dans l'appareil sont convertis en signaux sonores analogiques et qu'ils sont disponibles sous forme analogique aux prises Cinch «Left»...
  • Seite 93: Réglage Du Volume

    All manuals and user guides at all-guides.com Au cas où le choix vous est proposé, sélectionnez la langue ou piste audio souhaitée dans la fenêtre de gauche à l'aide des touches 8 ou 9, et confirmez votre choix en appuyant sur la touche OK. La piste audio actuellement sélectionnée est indiquée en blanc.
  • Seite 94: Epg - Informations Sur Les Programmes (Navigateur De Base)

    All manuals and user guides at all-guides.com 1...8 Sélectionnez le champ de saisie suivant avec les touches numériques 1... 8 ou les touches 9 ou 8. Sélectionnez les champs de saisie {Date} {Début} {Fin} et {Programme} (le champ sélectionné est surligné en blanc). Confirmez votre saisie à...
  • Seite 95 All manuals and user guides at all-guides.com Bandes-annonces et informations complémentaires Affichage du navigateur de base et des informations sur le programme en cours. Accéder à la bande-annonce. Selon votre fournisseur, vous pouvez recevoir une liste de programmes pour la journée en cours ou plusieurs jours à...
  • Seite 96: Organisation Du Menu

    All manuals and user guides at all-guides.com ORGANISATION DU MENU 4.1 PROGRAMMES 4.1.1 Listes de favoris Appelez le menu principal en appuyant sur la touche M , puis deux fois sur OK . Classez, déplacez, copiez et effacez des programmes avec un seul menu. Sélectionnez une des listes de favoris 0...9.
  • Seite 97: Modifier Le Nom Des Favoris

    All manuals and user guides at all-guides.com Le haut de la fenêtre active est mis en surbrillance. Pour chaque opération (copier, déplacer ou supprimer), vous pouvez ainsi voir quel programme est sélectionné dans la fenêtre active. La fonction de recherche repère également des canaux qui ne diffusent aucun programme télévisé.
  • Seite 98: Contrôle Parental

    All manuals and user guides at all-guides.com Si nécessaire, vous pouvez ajuster votre antenne parabolique avec le sous-menu «Signal d’antenne». Orientez l’antenne dans la meilleure position avec les indicateurs de puissance du signal et de qualité de réception du signal. Si le signal est très faible, l’échelle peut atteindre le niveau 0, auquel cas vous devrez améliorer le signal en utilisant l’échelle de qualité...
  • Seite 99: Mode Recherche

    All manuals and user guides at all-guides.com Activation du contrôle parental Pour bloquer l’accès à un programme marqué «?», commutez sur ON le champ {Sécurité} du menu «Contrôle parental» et validez avec la touche OK en quittant le menu. Si vous appelez un programme qui a été marqué, vous devrez saisir votre code à 5 chiffres. N.B.
  • Seite 100: Mode Manuel (Utilisateurs Confirmés)

    All manuals and user guides at all-guides.com Démarrez la recherche en appuyant sur la touche OK . Les programmes cryptés sont marqués du symbole «$». Les programmes que vous ne souhaitez pas transférer vers la liste de programmes peuvent être supprimés à l’aide de la touche TV .
  • Seite 101: Installation / Réglage D'usine

    All manuals and user guides at all-guides.com 4.4 INSTALLATION / RÉGLAGE D'USINE Après introduction de la combinaison de chiffres suivante dans le menu «modification du code secret», vous pouvez à nouveau annuler des modifications apportées aux réglages de l'appareil et rétablir l'état de l'appareil à la livraison (réglages d'usine). Choisissez le menu «modification du code secret»...
  • Seite 102: Langue Des Menus

    All manuals and user guides at all-guides.com 4.4.2 Langue des menus Sélectionner une langue. Vous pouvez choisir la langue des menus entre {allemand}, {anglais}, {français}, {italien}, {espagnol}, {néerlandais} et {turc}. Sélectionner un jeu de caractères La commutation automatique entre les jeux de caractères se fait selon la norme DVB - toutefois, toutes les stations ne respectent pas forcément cette norme, ce qui peut conduire à...
  • Seite 103: Réglages Lnb

    All manuals and user guides at all-guides.com Standard Le signal de sortie vidéo (connexion 19 de la prise VCR) vers le magnétoscope est toujours disponible. La connexion 8 de la prise VCR (tension de commutation) est commutée comme entrée, ce qui signifie que si vous actionnez la touche de lecture sur votre magnétoscope, les signaux vidéo et audio en provenance du magnétoscope seront automatiquement reliés par votre récepteur satellite par la prise VCR à...
  • Seite 104: Diseqc (Digital Satellite Equipment Control)

    All manuals and user guides at all-guides.com 4.4.5 DiSEqC (Digital Satellite Equipment Control) Dans le menu DiSEqC, le signal de contrôle doit être réglé en fonction de votre équipement satellite. Signal 22 kHz {OFF} 22 kHz inactif {haut/bas} 22 kHz commute entre bande haute et basse {Pos.
  • Seite 105 All manuals and user guides at all-guides.com Selon la disponibilité des nouvelles données (programme d’exploitation ou listes de programmes), vous avez le choix entre les options suivantes. Téléchargement Logiciel récepteur Listes de programmes CH+/- selection OK Si vous sélectionnez «1 Logiciel récepteur», le menu suivant apparaît. N.B.
  • Seite 106: Glossaire

    All manuals and user guides at all-guides.com GLOSSAIRE Bande Gamme de fréquences d’un satellite. Bande basse et haute. Conditional Access (accès conditionnel) : qualifie les programmes cryptés. CVBS Composite Video Burst Sync : norme vidéo pour les équipements TV et magnétoscope. DiSEqC Digital Satellite Equipment Control (contrôle numérique de l’équipement satellite).
  • Seite 107: Caractéristiques Techniques

    All manuals and user guides at all-guides.com CARACTÉRISTIQUES TECHNIQUES Programmes • 2000 emplacements de mémorisation de programmes TV et 2000 emplacements pour les programmes radio. • 10 listes de favoris personnalisables contenant chacune 1000 emplacements (p.ex. pour classer les types de programmes SPORT, INFORMATIONS, MUSIQUE etc.). •...
  • Seite 108: Informations Générales

    All manuals and user guides at all-guides.com Gamme RF • Gamme de fréquence Sat-FI 950 - 2 150 MHz • Niveau d’entrée 43 - 83 dBµV • Seuil de réception (EB/NO) < 4,5 dB Système TV numérique • Modulation, FEC, démultiplexeur norme DVB-S •...
  • Seite 109: Dépannage

    All manuals and user guides at all-guides.com DÉPANNAGE En cas de problème avec votre Philips DSR 1010, vérifiez tout d’abord les points suivants : PROBLÈME CAUSE POSSIBLE SOLUTION Pas d’image, pas de son et pas Le récepteur n’est pas relié au Vérifiez les branchements.
  • Seite 110 All manuals and user guides at all-guides.com...
  • Seite 111 All manuals and user guides at all-guides.com 0 ... 9 8 9...
  • Seite 112 All manuals and user guides at all-guides.com...
  • Seite 113 All manuals and user guides at all-guides.com...
  • Seite 114 All manuals and user guides at all-guides.com Uwaga: "...
  • Seite 115 All manuals and user guides at all-guides.com...
  • Seite 116 All manuals and user guides at all-guides.com Uwaga:...
  • Seite 117 All manuals and user guides at all-guides.com 0 ... 9 0 ... 9 8 + * 8 9...
  • Seite 118 All manuals and user guides at all-guides.com Wa¿ne: &...
  • Seite 119 All manuals and user guides at all-guides.com Wa¿ne: Uwaga:...
  • Seite 120 All manuals and user guides at all-guides.com...
  • Seite 121 All manuals and user guides at all-guides.com Wa¿ne: Uwaga: 1...8 0...9...
  • Seite 122 All manuals and user guides at all-guides.com Uwaga: Uwaga:...
  • Seite 123 All manuals and user guides at all-guides.com Uwaga:...
  • Seite 124 All manuals and user guides at all-guides.com Uwaga: 0...9 Uwaga: 0...9 "...
  • Seite 125 All manuals and user guides at all-guides.com M TV Uwaga:...
  • Seite 126 All manuals and user guides at all-guides.com Uwaga: Uwaga: WY£ Uwaga:...
  • Seite 127 All manuals and user guides at all-guides.com 1...8 Wpisywanie lub modyfikowanie nazwy 0...9...
  • Seite 128 All manuals and user guides at all-guides.com Uwaga: Wa¿ne: &...
  • Seite 129 All manuals and user guides at all-guides.com Uwaga: 0...9...
  • Seite 130 All manuals and user guides at all-guides.com Wa¿ne: Wa¿ne:...
  • Seite 131 All manuals and user guides at all-guides.com Uwaga: Uwaga:...
  • Seite 132 All manuals and user guides at all-guides.com Uwaga:...
  • Seite 133 All manuals and user guides at all-guides.com...
  • Seite 134 All manuals and user guides at all-guides.com • • • • • • • • • • • • • • • • • • • • • • • • • • • • • • • • • •...
  • Seite 135 All manuals and user guides at all-guides.com • • µ • • • • • • • • • • • • • • • • • • • • • • • • • •...
  • Seite 136 All manuals and user guides at all-guides.com...
  • Seite 137 All manuals and user guides at all-guides.com • • • • •...
  • Seite 138 All manuals and user guides at all-guides.com...

Inhaltsverzeichnis