Mediclinics M06A Installations- Und Benutzerhandbuch
Vorschau ausblenden
Andere Handbücher für M06A:
- Installations- und benutzerhandbuch (65 Seiten) ,
- Montage- und benutzerhandbuch (23 Seiten) ,
- Installations- und benutzerhandbuch (25 Seiten)
Inhaltsverzeichnis
Quicklinks
www.mediclinics.com
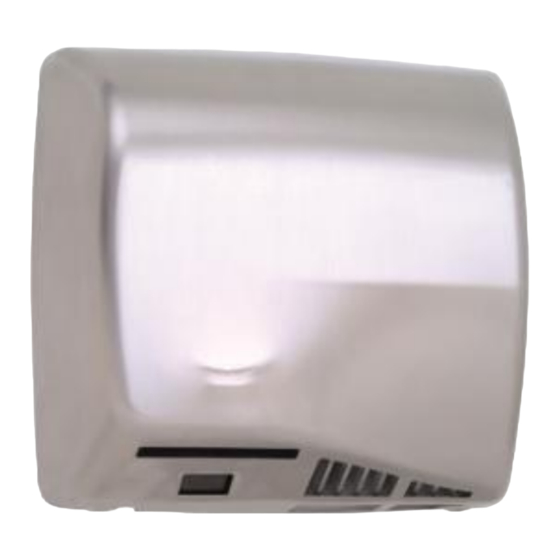
SECADOR DE MANOS / HAND DRYERS / SÉCHE-MAINS /
HÄNDETROCKNER / SECADOR DE MÃOS / ASCIUGAMANI /
СУШИЛКА ДЛЯ РУК / ΣΤΕΓΝΩΤΗΡΑΣ ΧΕΡΙΩΝ / ف اﻟﯾدﯾن
ﺟﮭﺎز ﺗﺟﻔﯾ
M06A / M06AC / M06ACS
M06AF / M06AB
MANUAL DE INSTALACIÓN Y UTILIZACIÓN
INSTALLATION AND OPERATING MANUAL
MANUEL D'INSTALLATION ET D'UTILISATION
INSTALLATIONS- UND BENUTZERHANDBUCH
MANUAL DE INSTALAÇÃO E UTILIZAÇÃO
MANUALE DI INSTALLAZIONE E D'USO
РУКОВОДСТВО ПО ЭКСПЛУАТАЦИИ
ΕΓΧΕΙΡΙΔΙΟ ΕΓΚΑΤΑΣΤΑΣΗΣ ΚΑΙ ΧΡΗΣΗΣ
دﻟﯾل اﻟﺗرﻛﯾب واﻟﺗﺷﻐﯾل
Inhaltsverzeichnis

Verwandte Anleitungen für Mediclinics M06A


Inhaltszusammenfassung für Mediclinics M06A
- Seite 1 SECADOR DE MANOS / HAND DRYERS / SÉCHE-MAINS / HÄNDETROCKNER / SECADOR DE MÃOS / ASCIUGAMANI / СУШИЛКА ДЛЯ РУК / ΣΤΕΓΝΩΤΗΡΑΣ ΧΕΡΙΩΝ / ف اﻟﯾدﯾن ﺟﮭﺎز ﺗﺟﻔﯾ M06A / M06AC / M06ACS M06AF / M06AB MANUAL DE INSTALACIÓN Y UTILIZACIÓN INSTALLATION AND OPERATING MANUAL MANUEL D’INSTALLATION ET D’UTILISATION...
-
Seite 2: Instrucciones De Seguridad
ESPAÑOL INSTRUCCIONES DE SEGURIDAD Antes de realizar cualquier operación, por favor, lea atentamente y tenga en cuenta todas y cada una de las siguientes instrucciones de seguridad: - Sólo un técnico cualificado puede instalar, ajustar y realizar el mantenimiento de este aparato. Todas las operaciones que se realicen sobre él deben estar de acuerdo con la legislación y la normativa de seguridad, tanto europea como local, que estén en vigor en ese momento. -
Seite 3: Instalación
- Este aparato pueden utilizarlo niños con edad de 8 años y superior y personas con capacidades físicas, sensoriales o mentales reducidas o falta de experiencia y conocimiento, si se les ha dado la supervisión o formación apropiadas respecto al uso del aparato de una manera segura y comprenden los peligros que implica. - Seite 4 La extracción de la carcasa debe realizarse como sigue: 1. Girar los tornillos inferiores en sentido horario (CW) con la llave especial suministrada hasta que queden completamente roscados (ver figura nº 1). 2. Retirar la carcasa levantándola con una ligera inclinación hasta liberar la lengüeta superior de sujeción (ver figura nº...
- Seite 5 3. Asegurar que los 4 silent-blocks de la base están correctamente posicionados. Atornillar la base a la pared usando los 4 tornillos suministrados, de manera que ésta quede fijada firmemente a la pared (ver figura nº7). 4. Conectar las dos fases (N y L) a la regleta y el cable de tierra al tornillo de toma de tierra (Clase I), según se indica en la figura nº...
-
Seite 6: Esquema Eléctrico
INSTALACIÓN ESQUEMA ELÉCTRICO M - Motor R - Resistencia... - Seite 7 DESPEICE BÁSICO COMPONENTE NÚMERO CÓDIGO Carcasa automática de RC 9231001SMD hierro fundido Carcasa automática de RC 9224001SMD acero blanca Carcasa automática de RC 9213001SMD acero inoxidable brillante Carcasa automática de RC 9212001SMD acero inoxidable satinado Turbina RC 9151001SMD Sensor electrónico...
-
Seite 8: Modo De Empleo
MODO DE EMPLEO La familia de secadores Speedflow opera de forma automática al detectar la presencia de las manos. Para obtener un buen secado de las manos es aconsejable un buen aclarado de las mismas, eliminando totalmente los restos de jabón. Colocar las manos a una distancia aproximada de 60 - 70 mm. -
Seite 9: Modo De Limpieza
MODO DE LIMPIEZA 1.- Desconectar la entrada de corriente al secador. 2.- Desmontar la carcasa. (Ver el apartado "INSTALACIÓN" de este manual). 3.- Con un cepillo de cerdas suaves limpiar el polvo acumulado en la turbina, efectuando manualmente el giro. -
Seite 10: Safety Instructions
ENGLISH SAFETY INSTRUCTIONS Before to carry on any operation, please read carefully and take into account the following safety instructions: - Only a qualified technician can install, adjust and maintain this device. All this operations must be always done according to the current legal European Standards of installation and according the local installation regulations as well. -
Seite 11: Installation
- This appliance can be used by children aged from 8 years and above and persons with reduced physical, sensory or mental capabilities or lack of experience and knowledge if they have been given supervision or instruction concerning use of the appliance in a safe way and understand the hazards involved. - Seite 12 2. Remove the cover by rasing it a slight angle until the upper securing tab is freed (see figure nº 2). Remove the cover in a vertical direction without striking the inside of the machine (see figure nº3). WARNING: when the cover is removed, live parts of the appliance are exposed.
- Seite 13 5. Installing the cover on the hand dryer taking care to insert the upper tab in its housing in the base-plate (see figure nº 9). 6. Unscrew the screws in a counter-clockwise direction (CCW) using the supplied special tool (see figure 10).
-
Seite 14: Wiring Diagram
INSTALLATION WIRING DIAGRAM M - Motor H - Heating element -14-... - Seite 15 BREAKDOWN LIST OF BASIC PARTS COMPONENT NUMBER CODE Cast iron cover RC 9231001SMD White cover RC 9224001SMD Brilliant cover RC 9213001SMD Satin cover RC 9212001SMD Turbine RC 9151001SMD Electronic sensor RC 9121014SMD Heating element RC 9141004SMD Motor RC 9111002SMD...
-
Seite 16: Method Of Use
METHOD OF USE Speedflow hand dryers family operates by hands detection when it detects their presence. To dry hands correctly we recommend rising well to remove all traces of soap. If hands are held 60 - 70 mm. (2.36 - 2.76") from the air outlet, the hand dryer will automatically start-up (see figure nº... -
Seite 17: Cleaning Method
CLEANING METHOD 1. Remove the mains supply to the hand-dryer. 2. Remove the cover (see the section "INSTALLATION" in this manual). 3. Clean away any accumulated dust on the scroll-fun with a soft-bristle brush while rotating it manually. 4. Use the same brush to clean away all accumulated dust from the other components. -
Seite 18: Consignes De Sécurité
FRANÇAIS CONSIGNES DE SÉCURITÉ Avant toute opération, veuillez lire attentivement et respecter les consignes de sécurité suivantes : - Seul un technicien qualifié peut installer, régler et effectuer l’entretien de cet appareil. Toutes ces opérations doivent être exécutées conformément aux normes d’installation établies par la législation européenne en vigueur, ainsi que par la réglementation locale. - Seite 19 - Cet appareil peut être utilisé par les enfants dès 8 ans, les personnes à capacités physiques, sensorielles ou mentales réduites, ou les personnes inexpérimentées, si elles sont supervisées par une autre personne ou si elles ont reçu des explications pour apprendre à se servir de l’appareil en toute sécurité, et qu’elles comprennent les risques encourus.
- Seite 20 2. Retirer la carcasse en la soulevant tout en l'inclinant légèrement jusqu'à dégager la languette supérieure de fixation (voir figure nº 2). Extraire la carcasse verticalement en évitant de taper à l'intérieur de la machine (voir figure nº 3). ATTENTION : le démontage de la carcasse découvre des parties actives de l'appareil.
- Seite 21 5. Monter la carcasse du sèche-mains sur la base en s'assurant que la languette supérieure s'encastre bien dans le logement de la base (figure nº 9). 6. Dévisser les vis dans le sens contraire des aiguilles d'une montre (CCW) avec la clé...
-
Seite 22: Schéma Électrique
INSTALLATION SCHÉMA ÉLECTRIQUE M - Moteur R - Résistance -22-... - Seite 23 LISTE DES PIÈCES DE BASE COMPOSANT NOMBRE CODE Carcasse automatique RC 9231001SMD en fonte Carcasse automatique RC 9224001SMD en acier blanc Carcasse automatique RC 9213001SMD en acier inoxidable brillant Carcasse automatique RC 9212001SMD en acier inoxidable satiné Turbine RC 9151001SMD Capteur électronique...
- Seite 24 MODE D’EMPLOI La gamme de sèche-mains Speedflow fonctionne de forme automatique par détection de la présence des mains. Pour obtenir un bon séchage des mains, il est conseillé de bien les rincer pour supprimer tout reste de savon. Placer les mains à environ 60 - 70 mm (2,36 - 2,76'') de la sortie d'air et les frotter (voir figure nº...
-
Seite 25: Mode De Nettoyage
MODE DE NETTOYAGE 1. Déconnecter l'entrée de courant électrique du sèche-mains. 2. Extraire la carcasse (voir le chapitre " INSTALLATION " de ce manuel). 3. Avec une brosse douce, nettoyer la poussière accumulée dans la turbine en la faisant tourner manuellement. -
Seite 26: Sicherheitshinweise
SICHERHEITSHINWEISE Bitte lesen und beachten Sie sorgfältig folgende Sicherheitshinweise, bevor Sie irgendwelche Vorgänge durchführen: - Die Vorrichtung darf ausschließlich durch einen qualifizierten Techniker installiert, eingestellt oder gewartet werden. All diese Vorgänge sind stets in Übereinstimmung mit den gegenwärtigen gesetzlichen europäischen Installationsstandards und den örtlichen Installationsvorschriften vorzunehmen. -
Seite 27: Montage
- Dieses Gerät kann von Kindern ab 8 Jahren und darüber sowie von Personen mit verringerten physischen, sensorischen oder mentalen Fähigkeiten oder Mangel an Erfahrung und Wissen benutzt werden, wenn sie beaufsichtigt oder bezüglich des sicheren Gebrauchs des Gerätes unterwiesen wurden und die daraus resultierenden Gefahren verstehen. - Seite 28 2. Das Gehäuse durch Anheben und leichte Schräglage lösen, so dass die obere Rastnase aus ihrer Aussparung gehoben wird (siehe Bild Nr. 2). Das Gehäuse jetzt senkrecht nach oben abziehen und darauf achten, dass dabei keine Teile im Inneren beschädigt werden (siehe Bild Nr. 3). ACHTUNG: Nach der Demontage des Gehäuses sind unter Spannung stehende Teile zugänglich! Während der Demontage ist folgendes zu beachten:...
- Seite 29 5. Das Gehäuse auf die Grundplatte montieren und darauf achten, dass die obere Rastnase richtig in die Aussparung der Grundplatte einrastet (siehe Bild Nr. 9). 6. Die beiden unteren Schrauben mit dem Spezialschlüssel gegen den Uhrzeigersinn (CCW) herausschrauben (siehe Bild Nr. 10).
- Seite 30 MONTAGE SHALTBILD M - Motor R - Heizwiderstand -30-...
-
Seite 31: Stückliste Der Hauptkomponenten
STÜCKLISTE DER HAUPTKOMPONENTEN BESTANDTEIL NUMMER CODE Automatisches Gehäuse RC 9231001SMD aus Gußeisen Automatisches Gehäuse RC 9224001SMD aus Stahl, weiß lackiert Automatisches Gehäuse RC 9213001SMD aus rostfreiem Stahl, glänzend Automatisches Gehäuse RC 9212001SMD aus rostfreiem Stahl, mattglänzend Turbine RC 9151001SMD... -
Seite 32: Vorbeugende Wartung Und Reiningung
GEBRAUCHSANWEISUNG Die Händetrockner der Serie Speedflow schalten sich automatisch ein, sobald eine Hand in den Erkennungsbereich gelangt. Um eine gute Trocknung der Hände zu erreichen, ist es ratsam, diese vorher gut zu spülen, um sie von allen Seifenresten zu befreien. Die Hände unterhalb des Luftausgangs in einem Abstand von 60 - 70 mm (2,36 - 2,76 ") halten und aneinander reiben (siehe Bild Nr. -
Seite 33: Reinigungsanweisung
REINIGUNGSANWEISUNG 1. Die Stromzufuhr zum Gerät abschalten. 2. Das Gehäuse abnehmen (siehe hierzu Abschnitt "MONTAGE" dieser Anleitung). 3. Mithilfe einer mit weichen Borsten versehenen Bürste den angehäuften Staub aus der Turbine entfernen und diese dabei von Hand drehen. 4. Mit der gleichen Bürste alle anderen Teile von Staub befreien. -
Seite 34: Instruções De Segurança
PORTUGUÊS INSTRUÇÕES DE SEGURANÇA Antes de prosseguir com qualquer operação, leia atentamente e tenha em conta as seguintes instruções de segurança: - Só um técnico qualificado pode instalar, ajustar e fazer a manutenção deste dispositivo. Todas estas operações têm de ser sempre feitas de acordo com as Normas Europeias legais actuais de instalação, bem como com os regulamentos de instalação locais. - Seite 35 - Este aparelho pode ser utilizado por crianças a partir dos 8 anos de idade e por pessoas com capacidades físicas, sensoriais ou mentais reduzidas ou sem experiência e conhecimentos, na condição de serem supervisionadas ou instruídas sobre a utilização em segurança do aparelho e compreenderem os perigos que podem estar envolvidos.
- Seite 36 1. Com a chave especial fornecida, aperte os parafusos inferiores no sentido dos ponteiros do relógio (CW) até que fiquem completamente aparafusados (ver figura nº 1). 2.Remova a cobertura, levantando-a com uma ligeira inclinação até libertar a patilha superior de fixação (ver figura nº...
- Seite 37 4. Ligue as duas fases (N e L) ao bloco de ligação e o cabo de terra ao parafuso de ligação à terra (Classe I), conforme se indica na figura nº 8. 5. Monte a cobertura do secador na base, certificando-se de que a patilha superior encaixa perfeitamente na ranhura da base (ver figura nº...
- Seite 38 INSTALAÇÃO ESQUEMA ELÉCTRICO M - Motor R - Resistência -38-...
- Seite 39 COMPONENTES BÁSICOS COMPONENTE NÚMERO CÓDIGO Cobertura automática de RC 9231001SMD ferro fundido Cobertura automática de RC 9224001SMD aço branca Cobertura automática de RC 9213001SMD aço inoxidável brilhante Cobertura automática de RC 9212001SMD aó inoxidável acetinado Turbina RC 9151001SMD Sensor electrónico RC 9121014SMD Resistência...
- Seite 40 MODO DE EMPLEO A família de secadores Speedflow opera de forma automática, ao detectar a presença das mãos. Para obter uma boa secagem das mãos é aconselhável enxaguá-las bem, eliminando os restos de sabão. Colocar as mãos a uma distância aproximada de 60-70 mm (2,36-2,76'') da saída do ar e esfregá-las uma na outra (ver figura n.º...
- Seite 41 MODO DE LIMPIEZA 1.- Desligue a entrada de corrente do secador. 2.- Retire a cobertura (ver a secção "INSTALAÇÃO" deste manual). 3.-Com um pincel de cerdas suaves, limpe o pó acumulado na turbina, fazendo-a rodar manualmente. 4.- Com o mesmo pincel, limpe o pó acumulado no resto dos componentes.
-
Seite 42: Istruzioni Di Sicurezza
ITALIANO ISTRUZIONI DI SICUREZZA Prima di effettuare qualsiasi operazione leggere accuratamente e tenere in considerazione le seguenti istruzioni di sicurezza: - Consentire di effettuare interventi di installazione, regolazione e manutenzione sul presente dispositivo esclusivamente a personale tecnico qualificato. Tutte le suddette operazioni vanno sempre svolte in conformità alle attuali normative europee in materia di installazione, nonché... -
Seite 43: Installazione
- È consentito l’utilizzo del presente dispositivo ai bambini a partire da 8 anni e a persone con ridotte capacità fisiche, sensoriali e mentali, inesperte o prive delle conoscenze necessarie solamente sotto supervisione o se istruite in merito all’uso sicuro del dispositivo in modo tale da comprendere i rischi implicati. - Seite 44 2. Rimuovere la carcassa, sollevandola leggermente inclinata sino a liberare la linguetta superiore di supporto (vedi figura n° 2). Estrarre la carcassa in modo verticale, evitando di causare dei colpi all'interno dell'apparecchio (vedere figura n° 3). ATTENZIONE: quando si smonta la carcassa, rimangono scoperte alcune parti sotto tensione dell'apparecchio.
- Seite 45 5. Montare la carcassa dell'asciugamani sulla base, facendo in modo che la linguetta superiore coincida perfettamente con l'alloggiamento della base (vedi figura n° 9). 6. Svitare le viti in senso antiorario (CCW), utilizzando la chiave appositamente fornita (vedi figura n° 10).
-
Seite 46: Schema Elettrico
INSTALLAZIONE SCHEMA ELETTRICO M - Motore R - Resistenza -46-... -
Seite 47: Componenti Principali
COMPONENTI PRINCIPALI COMPONENTE NÚMERO CÓDIGO Carcassa automatica in RC 9231001SMD ghisa Carcassa automatica in RC 9224001SMD acciaio bianca Carcassa automatica in RC 9213001SMD acciaio INOX lucido Carcassa automatica in RC 9212001SMD acciaio INOX satinato Turbina RC 9151001SMD Sensoer elettronico... - Seite 48 MODALITÀ D’USO Gli asciugamani elettrici della famiglia Speedflow si avviano automaticamente nel momento in cui il sensore rileva la presenza delle mani. Per ottenere una buona asciugatura, è consigliabile previamente risciacquare bene le mani, rimuovendo completamente i resti di sapone. Collocare le mani ad una distanza di circa 60-70 mm (2,36 - 2,76") davanti all'uscita dell'aria e sfregarle (vedi figura n°...
-
Seite 49: Metodo Di Pulizia
METODO DI PULIZIA 1. Interrompere la corrente in entrata all'asciugamani. 2. Estrarre la carcassa (vedi il capitolo "INSTALLAZIONE" del presente manuale). 3. Con una spazzola a setole morbide, togliere la polvere che si è eventualmente accumulata nella turbina, girandola manualmente. -
Seite 50: Инструкции По Технике Безопасности
ÐÓÑÑÊÈÉ ИНСТРУКЦИИ ПО ТЕХНИКЕ БЕЗОПАСНОСТИ Перед проведением каких-либо операций необходимо внимательно прочитать и принять во внимание следующие инструкции по технике безопасности. - К установке, настройке и обслуживанию данного устройства допускаются только квалифицированные специалисты. Все операции должны выполняться в соответствии с действующими правовыми европейскими стандартами... - Seite 51 - Специалист по установке должен обеспечить заземление электрической системы в соответствии с действующим законодательством. - К эксплуатации устройства допускаются дети старше 8 лет и лица с ограниченными физическими, сенсорными и умственными возможностями, а также не обладающие соответствующим опытом и...
- Seite 52 1.Ïîëíîñòüþ îòêðóòèòü íèæíèå âèíòû ñ ïîìîùüþ ïðèëàãàåìîãî ñïåöèàëüíîãî ãàå÷íîãî êëþ÷à, âðàùàÿ èõ ïî ÷àñîâîé ñòðåëêå (CW) (ñìîòðèòå ðèñ. 1). 2. Ñíÿòü êðûøêó, ñëåãêà íàêëîíèâ åå è âûñâîáîäèâ âåðõíèé êðåïåæíûé çàòâîð (ñìîòðèòå ðèñ. 2). Ïîòÿíóâ ââåðõ, ñíÿòü êðûøêó, ñòàðàÿñü ïðè ýòîì íå óäàðèòü...
- Seite 53 3. Óáåäèòüñÿ â òîì, ÷òî âñå 4 ðåçèíîìåòàëëè÷åñêèå âòóëêè âñòàâëåíû ïðàâèëüíî. Ïëîòíî çàêðåïèòü îñíîâàíèå íà ñòåíå, çàêðóòèâ 4 ïîñòàâëÿåìûõ â êîìïëåêòå øóðóïà (ðèñ. 7). 4. Ïîäñîåäèíèòü îáà ôàçîâûõ ïðîâîäà (N è L) ê êîëîäêå, à êàáåëü çàçåìëåíèÿ – ê âèíòó çàçåìëåíèÿ (Êëàññ I), êàê ïîêàçàíî íà ðèñ. 8.
- Seite 54 ÓÑÒÀÍÎÂÊÀ ÝËÅÊÒÐÈ×ÅÑÊÀß ÑÕÅÌÀ M - ëåêòðîäâèãàòåëü R - Íàãðåâàòåëüíûé ýëåìåíò -54-...
- Seite 55 ÎÑÍÎÂÍÛÅ ÊÎÌÏÎÍÅÍÒÛ ÍàÇÂàèå YNCïO KOÄ Àâòîìàòè÷åñêèé êîðïóñ èç RC 9231001SMD ëèòîé ñòàëè Àâòîìàòè÷åñêèé êîðïóñ èç RC 9224001SMD ñòàëè, áåëûé Àâòîìàòè÷åñêèé êîðïóñ èç RC 9213001SMD íåðæàâåþùåé ñòàëè, áëåñòÿùèé Àâòîìàòè÷åñêèé êîðïóñ èç RC 9212001SMD ñàòèíèðîâàííîé íåðæàâåþùåé ñòàëè, ìàòîâûé Âåíòèëÿòîð RC 9151001SMD Ýëåêòðîííûé...
- Seite 56 ÏÐÀÂÈËÀ ÝÊÑÏËÓÀÒÀÖÈÈ Ñåìåéñòâî ñóøèëîê äëÿ ðóê Speedflow àâòîìàòè÷åñêè ðåàãèðóåò íà ïðèáëèæåíèå ðóê. Äëÿ îáåñïå÷åíèÿ óäîâëåòâîðèòåëüíîé ñóøêè ðóê ðåêîìåíäóåòñÿ òùàòåëüíî âûìûòü èõ îò îñòàòêîâ ìûëà. Ïðèáëèçèòü ðóêè ê âûõîäíîìó îòâåðñòèþ âîçäóõà íà ðàññòîÿíèå 60 - 70 ìì (2,36 - 2,76"), ïðîèçâîäÿ äâèæåíèÿ, èìèòèðóþùèå ìûòüå (ñìîòðèòå ðèñ. 13).
- Seite 57 ÏÐÀÂÈËÀ ×ÈÑÒÊÈ 1. Îòêëþ÷èòü ýëåêòðîïèòàíèå ñóøèëêè. 2. Ñíÿòü êðûøêó. (Ñì. ðàçäåë "ÓÑÒÀÍÎÂÊÀ" äàííîãî ðóêîâîäñòâà). 3. Ùåòêîé ñ ìÿãêîé ùåòèíîé óäàëèòü ñêîïèâøóþñÿ íà âåíòèëÿòîðå ïûëü, âðàùàÿ åãî ðóêîé. 4. Ýòîé æå ùåòêîé ñíÿòü ïûëü, ñîáðàâøóþñÿ íà îñòàëüíûõ âíóòðåííèõ ÷àñòÿõ ñóøèëêè.
-
Seite 58: Οδηγιεσ Ασφαλειασ
ΟΔΗΓΙΕΣ ΑΣΦΑΛΕΙΑΣ Προτού προβείτε σε οποιαδήποτε λειτουργία, διαβάστε προσεκτικά και λάβετε υπόψη σας τις παρακάτω οδηγίες ασφαλείας: - Μόνο έμπειρος τεχνικός μπορεί να εγκαταστήσει, να ρυθμίσει και να συντηρήσει αυτή τη συσκευή. Όλες οι λειτουργίες πρέπει πάντα να πραγματοποιούνται σύμφωνα με τα ισχύοντα νομικά Ευρωπαϊκά Πρότυπα εγκατάστασης και σύμφωνα... - Seite 59 - Η συσκευή αυτή μπορεί να χρησιμοποιηθεί από παιδιά 8 ετών και άνω και άτομα με μειωμένη σωματική, αισθητηριακή ή νοητική ικανότητα ή έλλειψη εμπειρίας και γνώσης μόνο εάν είναι υπό επίβλεψη ή τους έχουν δοθεί οδηγίες σχετικά με την ασφαλή χρήση της συσκευής και αν έχουν κατανοήσει τους...
- Seite 60 2. Afairéste to períblhma, anasnkþnontáv to me elafrá klísh, mécri na apodesmeuteíh ánw proexocñ súndeshv (bl. eik. 2). Exágete to períblhma katakórufa, prosécontav na mh ctupñsete to eswterikó tou mhcanñmatov (bl. eik. 3). PROSOCH: Katá thn aposunarmológhsh tou periblñmatov apokalúptontai exartñmata thv suskeuñv, ta opoía brískontai upó plektrikñ...
- Seite 61 4. Sundéste tiv dúo fáseiv (N kai L) stouv akrodéktev kai to kalþdio thv geíwshv sth bída thv geíwshv (kathgoríav I), ópwv perigráfetai sthn eikóna 8. 5. Prosartñste to períblhma tou stegnþtñra sth básh, diasfalízontav óti h ánw proexocñ sunarmózei téleia me thn upodocñ thv báshv (bl. eik. 9).
- Seite 62 EGKATASTASH DIAGRAMMA HLEKTRIKHS SUNDESMOLOGIAS M - Kinhtñrav R - Antístash -62-...
- Seite 63 BASIKA EXARTHMATA sustatikó ariqmóa kwdikóa Autómato períblhma apó RC 9231001SMD cutosídhro Leukó autómato períblhma RC 9224001SMD apó cáluba Gualisteró autómato períblhma RC 9213001SMD apó anoxeídwto cáluba Mat autómato períblhma apó RC 9212001SMD anox eídwto cáluba Fushtñpav RC 9151001SMD Hlektronikóv aisqhtñrav RC 9121014SMD Antístash...
- Seite 64 TROPOS CRHSHS H seirá stegnwtñpwn ceriþn Speedflow anicneúei autómata thn parousía ceriþn. Gia na epitúcete éna kaló stégnwma twn ceriþn, sunistátai na ta xeplúnete kalá, kaqarízontáv ta plñrwv apó upóloipa sapounioú. Kratñste ta céria sav se mía apóstash 60-70 kiliostþn apó thn éxodo tou aéra (bl.
- Seite 65 PROLHPTIKI SUNTHRHSH KAI KAQARISMOS 1. Aposundéste to stegnwtñra apó to díktuo trofodosíav. 2. Afairéste to períblhma (bl. thn parágrafo "EGKATASTASH" sto parón egceirídio). 3. Kaqapíste th skónh pou écei sugkentrwqeí sto fushtñra, peristréfontáv me to céri sto eswterikó tou mía boúrtsa me malakév trícev.
- Seite 66 ﺳﻼﻣﺔ اﻟ ﺗﻌﻠﯾﻣﺎت أن ﺗؤﺧذ ﺑﻌﯾن اﻻﻋﺗﺑﺎر ﺗﻌﻠﯾﻣﺎت اﻟﺳﻼﻣﺔ اﻟﺗﺎﻟﯾﺔ ﯾﺟب ﻗﺑل اﻟﻘﯾﺎم ﺑﺄي ﻋﻣﻠﯾﺔ، ﯾرﺟﻰ اﻟﻘراءة ﺑﻌﻧﺎﯾﺔ و ﯾﺟب اﻟﻘﯾﺎم ﺑﮭذه اﻟﻌﻣﻠﯾﺎت داﺋﻣﺎ ً ﺗﺑﻌﺎ ً ﻟﻠﻣﻌﺎﯾﯾر ﻻ ﯾﻣﻛن أن ﯾﻘوم ﺑﺗرﻛﯾب اﻟﺟﮭﺎز وﺿﺑطﺗﮫ وﺻﯾﺎﻧﺗﮫ إﻻ ﺷﺧص ﻣؤھل ً ﻲ اﻟوﻗت اﻟﺣﺎﻟﻲ وﺗﺑﻌﺎ ً ﻟﻧظم اﻟﺗرﻛﯾب اﻟﻣﺣﻠﯾﺔ أﯾﺿﺎ اﻟﻘﯾﺎﺳﯾﺔ...
- Seite 67 -67-...
- Seite 68 -68-...
- Seite 69 -69-...
- Seite 70 -70-...
- Seite 71 MODELO MODEL MODÈLE MODELL M06AF M06AC M06ACS M06A / M06AB GENERAL: GENERAL: GÉNÉRAL : ALLGEMEIN: Stromversor- Alimentación: Power supply: Alimentation : 100 – 240 V 50/60Hz. gung: Power Consommation Consumo: Verbrauch: 8 - 4.8 A consumption: Potencia Puissance Rated power:...
- Seite 72 MODELO MODELLO МОДЕЛЬ ΜΟΝΤΕΛΟ M06AF M06AC M06ACS M06A/AB GERAL: GENERALE: ОБЩЕЕ: ΓΕΝΙΚΟ: Alimentazione Alimentação Питание: Τροφοδοσία: 100 – 240 V 50/60 Hz Потребление Consumo: Consumo: Κατανάλωση: 8 - 4,8 A Potência Potenza Номинальная Ονομαστική 800 -1.150 W nominal: nominale: мощность: Ισχύς:...
- Seite 73 M06AF M06AC M06ACS M06A/AB اﻟﻣودﯾل ﻓوﻟت – ﻋﺎم أﻣب – اﻟطﺎﻗﺔ اﻟﻛﮭرﺑﺎﺋﯾﺔ واط 1.150 اﻻﺳﺗﮭﻼك 15,21 ﻛﻐم أوﻧﺻﺔ 7,94 ﻛﻐم اﻟﻘوة اﻻﺳﻣﯾﺔ أوﻧﺻﺔ درﺟﺔ ﺣﻣﺎﯾﺔ اﻟوزن اﻟﻧوع اﻷول درﺟﺔ اﻟﺣﻣﺎﯾﺔ ﻧوع اﻟﻌزل اﻟﻣﺣرك اط و اﻟﻘوة ﻲ ﻋﺎﻟﻣ اﻟﻧوع...
- Seite 74 ANNEX MOUNTING INSTRUCTIONS • To mount onto wall, be sure there are no hidden electrical circuits or pipes in the mounting location. • Place the mounting template (provided) on the wall to mark location of four mounting screw holes. • Drill four holes (Fig.1) Ø8 (5/16”) diameter and 45mm (1 ¾”) depth. •...
- Seite 75 ANNEXE INSTRUCTIONS DE MONTAGE • En cas de montage sur un mur, s'assurer qu'aucun circuit électrique et qu'aucun tuyau ne sont dissimulés derrière l'emplacement choisi pour le montage. • Placer le modèle de montage (fourni) sur la paroi pour marquer l'emplacement des quatre trous pour les vis.
- Seite 76 ELIMINACIÓN DE RESIDUOS DE APARATOS ELÉCTRICOS Y ELECTRÓNICOS POR PARTE DE USUARIOS DOMÉSTICOS EN LA UNIÓN EUROPEA. El producto que ha adquirido ha sido diseñado y fabricado con materiales y componentes de alta calidad que pueden ser reciclados y reutilizados. Cuando vea un producto marcado con este símbolo de un contenedor de basura con ruedas tachado significa que dicho producto está...
- Seite 77 ELIMINAÇÃO DE RESÍDUOS DE EQUIPAMENTOS ELÉCTRICOS E ELECTRÓNICOS POR PARTE DE UTILIZADORES DOMÉSTICOS NA UNIÃO EUROPEIA O produto que adquiriu foi concebido e fabricado com materiais e componentes de elevada qualidade que podem ser reciclados e reutilizados. Quando vir um produto marcado com este símbolo de um contentor de rodas barrado com uma cruz significa que esse produto está...
- Seite 78 ΔΙΑΘΕΣΗ ΑΠΟΒΛΗΤΩΝ ΕΙΔΩΝ ΗΛΕΚΤΡΙΚΟΥ ΚΑΙ ΗΛΕΚΤΡΟΝΙΚΟΥ ΕΞΟΠΛΙΣΜΟΥ ΑΠΟ ΟΙΚΙΑΚΟΥΣ ΧΡΗΣΤΕΣ ΣΤΗΝ ΕΥΡΩΠΑΪΚΗ ΕΝΩΣΗ Το προϊόν που αγοράσατε σχεδιάστηκε και κατασκευάστηκε με υλικά και στοιχεία υψηλής ποιότητας, τα οποία μπορούν να ανακυκλωθούν και να επαναχρησιμοποιηθούν. Η επισήμανση προϊόντων με αυτό το σύμβολο ενός διαγραμμένου κάδου απορριμμάτων με ρόδες σημαίνει ότι η διάθεση...
- Seite 79 ______________________________________________________________________ ______________________________________________________________________ ______________________________________________________________________ ______________________________________________________________________ ______________________________________________________________________ ______________________________________________________________________ ______________________________________________________________________ ______________________________________________________________________ ______________________________________________________________________ ______________________________________________________________________ ______________________________________________________________________ ______________________________________________________________________ ______________________________________________________________________ ______________________________________________________________________ ______________________________________________________________________ ______________________________________________________________________ ______________________________________________________________________ ______________________________________________________________________ ______________________________________________________________________ ______________________________________________________________________ ______________________________________________________________________ ______________________________________________________________________ ______________________________________________________________________ ______________________________________________________________________ -79-...
- Seite 80 MEDICLINICS, S.A. Industria, 54 E-08025 BARCELONA SPAIN Tel.: +34 934 464 700 Fax: +34 933 481 039 info@mediclinics.com 12/11/13 COD.: 9631002SMD www.mediclinics.com...