Herunterladen Inhalt Inhalt Diese Seite drucken
INVENTOR DRVI32-09WF Benutzerhandbuch
Vorschau ausblenden Andere Handbücher für DRVI32-09WF:

Werbung

Verfügbare Sprachen

Verfügbare Sprachen

AIR CONDITIONING SYSTEMS
• USER'S MANUAL
• ΕΓΧΕΙΡΙΔΙΟ ΧΡΗΣΗΣ
• MANUAL UTILIZATORULUI
• BENUTZERHANDBUCH
ENGLISH | ΕΛΛΗΝΙΚΑ | ROMANA | DEUTSCH
WALL MOUNTED UNIT
MODELS:
DRVI32-09WF/DRVO32-09
DRVI32-12WF/DRVO32-12
DRVI32-18WF/DRVO32-18
DRVI32-24WF/DRVO32-24

Werbung

Inhaltsverzeichnis
loading

Inhaltszusammenfassung für INVENTOR DRVI32-09WF

  • Seite 1 AIR CONDITIONING SYSTEMS WALL MOUNTED UNIT • USER’S MANUAL • ΕΓΧΕΙΡΙΔΙΟ ΧΡΗΣΗΣ • MANUAL UTILIZATORULUI • BENUTZERHANDBUCH MODELS: DRVI32-09WF/DRVO32-09 DRVI32-12WF/DRVO32-12 DRVI32-18WF/DRVO32-18 DRVI32-24WF/DRVO32-24 ENGLISH | ΕΛΛΗΝΙΚΑ | ROMANA | DEUTSCH...
  • Seite 2 Read the precautions in this manual This appliance is filled with R32. carefully before operating the unit. Keep this manual where the user can easily nd it. WARNING: · Do not use means to accelerate the defrosting process or to clean, other than those ·...
  • Seite 3: Inhaltsverzeichnis

    Contents PARTS AND FUNCTIONS ....................OPERATION ......................... INDOOR UNIT INSTALLATION .................... MAINTENANCE ........................CAUTIONS ..........................TROUBLE SHOOTING ......................
  • Seite 4: Parts And Functions

    Parts and Functions Indoor Unit Remote controller Outer side of the controller Air Purifying Filter 5. ON / OFF button (inside) Inlet 6. Display of each function status Emergency 7. Operation mode display Inlet grille Switch 8. WIFI and CLOCK display Outlet 9.
  • Seite 5: Clock Set

    Operation 18. TIMER button Clock set 19. CLOCK button 10 ºC button Press CLOCK button, special heating set function: 10 degree heating maintaining (valuable for RS) 21. HEALTH button Press “+” or “-” to set 22. FAN MODE button correct time. 23.
  • Seite 6 r r e e t t a a o o i i H , A r r e e t t a a o o i i QUIET Operation QUIET Operation Unit start. Select operation mode. Press the COOL button on the remote control.
  • Seite 7 Operation SMART Operation (This function is unavailable on button. some models) One press can provide a more pressed, temp. setting comfortable room. increases ºC. The Air Conditioning unit can read the indoor temperature pressed, temp. setting and humidity and make adjust- decreases ºC.
  • Seite 8 Operation HEALTH AIRFLOW Operation FAN MODE Operation Press once to activate the function appears on the display. Avoid MODE the body. TIMER TIMER Fan mode: default low fan speed,fan mode , the setting temperature will again, appears on the display. not display, the temperature of indoor display is 24℃...
  • Seite 9: Swing Operation

    Operation TIMER Operation SWING Operation Set Clock correctly before starting Timer operation. You can let unit start or stop automatically at set times, like before you wake up in the morning, or get back from outside or after you fall asleep at night. Select your desired operation mode.
  • Seite 10 Operation Comfortable SLEEP Temp. under SLEEP mode is lower than temp. setting so that the room temperature won’t be too high for Before going to bed, you can simply press the SLEEP sleep. button and unit will operate in SLEEP mode and bring you a sound sleep.
  • Seite 11 Operation HEALTH Operation ON/OFF operation and test operation ON/OFF Operation: The Ionizer generates ions in Use this operation only when the remote controller is the air, and helps provide better defective or lost. For the Emergency Operation, use only air quality by killing bacteria and for a limited time.
  • Seite 12 IMPORTANT INFORMATION REGA- EUROPEAN REGULATIONS RDING THE REFRIGERANT USED CONFORMITY FOR THE MODELS Contains fluorinated greenhouse gases Climate:T1 Voltage:230V covered by the Kyoto Protocol All the products are in conformity with the following European provision: - 2014/53/EU(RED) 1+2= - 2014/517/EU(F-GAS) This product contains fluorinated greenhouse gases covered by - 2009/125/EC(ENERGY) the Kyoto Protocol.
  • Seite 13: Indoor Unit Installa Ion

    Indoor Unit Installa ion Necessary Tools for Installation Power Source Torque wrench Driver Before inserting power into receptacle, check the voltage without (17mm,22mm,26mm) Nipper fail. Pipe cutter Hacksaw The power supply is the same as the corresponding nameplate. Flaring tool Hole core drill Install an exclusive branch circuit of the power.
  • Seite 14: Indoor Unit Installation

    Indoor/outdoor electric cable and drain hose must be bound with efrigerant piping by protecting tape. 50mm A=135mm C=50mm DRVI32-09WF [ Other direction piping ] DRVI32-12WF Cut away, with a nipper, the lid for piping according to the piping Pay attention to the following points before installation of machine: direction and then bend the pipe according to theposition of wall hole.
  • Seite 15 Correct Incorrect When connecting the cable after installing the indoor unit 1. Insert from outside the room cable into left side of the wall Lean Damage of flare Crack Partial Too outside hole, in which the pipe has already existed. 2.
  • Seite 16: Maintenance

    Maintenance For Smart Use of The Air Conditioner Remote Controller Indoor Body Setting of proper room Do not block the air inlet temperature or outlet wipe the air conditioner by using a Proper temperature soft and dry cloth.For serious stains, use a neutral detergent diluted with Do not usewater,wipe the controller water.Wring the water out of the...
  • Seite 17: Cautions

    Cautions WARNING Please call Sales/Service Shop for the Installation. Do not attempt to install the air conditioner by yourself because improper works may cause electric shock, fire, water leakage. WARNING Check proper When abnormality such as burnt-small found, Use an exclusive immediately stop the operation button and power source installation of the...
  • Seite 18: Trouble Shooting

    Trouble shooting Cautions Before asking for service, check the following grille of the air Do not obstruct or cover the ventilation first. conditoner.Do not put fingers or any other things into the inlet/outlet and swing louver. This appliance is not intended for use by persons (including children) Phenomenon Cause or check points with reduced physiced, sensory or mental capabilities or lack of...
  • Seite 19 All the pictures in the manual are for explanatory purposes only. The actual shape of the unit you purchased may be slightly different, but the operations and functions are the same. The company may not be held responsible for any misprinted information. The design and the specifications of the product for reasons, such as product improvement, are subject to change without any prior notice.
  • Seite 20 STEP 5 Additional Details Additional Details Inventor warranty is now valid! Subscribe to Inventor's Newsletter to Inventor's Newsletter With the current warranty card you accept the terms and conditions. urrent warranty card you accept the terms and conditions.
  • Seite 21 R32. 1,2m H07RN-F. R32)
  • Seite 22 ............................................................................................................................................................
  • Seite 23 ON/OFF Ενδειξη επιπλέον λειτουργιών WIFI CLOCK TEMP ( TIMER SPEED SWING (ΑΥΤΟΜΑΤΗ ΚΙΝΗΣΗ ΠΕΡΣΙΔΩΝ) Ενδείξεις κίνησης Πάνω/Κάτω και Δεξιά/Αριστερά TIMER ON ( TIMER OFF ένδειξη ΘΕΡΜΑΝΣΗΣ OFF) CLOCK ένδειξη ΙΟΝΙΣΤΗ SMART ένδειξη ΑΦΥΓΡΑΝΣΗΣ ένδειξη ΨΥΞΗΣ POWER QUIET HEAT SMART Οι εμφάνιση του κλιματιστικού σας μπορεί να διαφέρει POWER από...
  • Seite 24 CLOCK ( TIMER CLOCK °C HEALTH SMART (ΕΞΥΠΝΟ) SMART Κάθε πάτημα αυξάνει ή μειώνει την ώρα κατά 1 λεπτό. Εαν SWING κρατηθεί πατημένο η ώρα θα αλλάξει πιο γρήγορα. SWING FAN MODE SLEEP ( HEALTH AIRFLOW FAN MODE Έλεγχος ενεργοποίησης / Αφού...
  • Seite 25 COOL, HEAT QUIET ( SMART POWER SMART POWER στο τηλεχειριστήριο QUIET ON/OFF AUTO...
  • Seite 26 SMART Το κλιματιστικό επιλέγει την κατάσταση λειτουργίας σύμφωνα με την θερμοκρασία του χώρου. Πιέστε έως ότου εμφανιστεί SMART στην οθόνη η επιθυμητή ρύθμιση θερμοκρασίας POWER SMART POWER FAN SPEED Κατά τη διάρκεια της λειτουργίας SMART H μονάδα θα λειτουργήσει στην επιλεγμένη ταχύτητα ανεμιστήρα.
  • Seite 27 FAN MODE HEALTH AIRFLOW Έξυπνη Κατανομή Αέρα Πατήστε το μπουτόν HEALTH AIRFLOW, εμφανίζεται ως ένδειξη. Ο αέρας θα MODE κατευθύνεται σχεδόν οριζόντια με το έδαφος. TIMER TIMER Πατήστε πάλι το μπουτόν HEALTH AIRFLOW, εμφανίζεται ως ένδειξη. Ο αέρας θα κατευθύνεται σχεδόν κάθετα στο έδαφος.
  • Seite 28 SWING TIMER σταματάει αυτόματα επιθυμητές ώρες, όπως πριν να ξυπνήσετε το πρωί, TIMER FAN MODE Τηλεχειριστήριο: FAN MODE APPLY παρατηρηθούν στην έξοδο αέρα εάν όλες οι κάθετες γρίλιες έχουν προσαρμοστεί προς τα δεξιά ή προς τα αριστερά. COOL λειτουργία, διαφορετικά, συμπυκνώματα νερού μπορεί να παρατηρηθούν.
  • Seite 29 SLEEP Μπορείτε να ενεργοποιήσετε την λειτουργία ύπνου πατώντας το SLEEP μπουτόν. 1. Ενεργοποιώντας την λειτουργία SLEEP σε κατάσταση COOL ή DRY, η θερμοκρασία θα ανέβει αυτόματα κατά 1°C από την ρυθμισμένη μετά το πέρας 1 ώρας και 1°C ακόμα 1 ώρα 3.
  • Seite 30 ON/OFF HEALTH ON/OFF Ο ιονιστής παράγει ιόντα στον χώρο, Χρησιμοποιήστε την λειτουργία αυτή μόνο σε περίπτωση αδρανοποιόντας βακτήρια και επιταχύνει προβλήματος ή απώλειας του χειριστηρίου. Μην την καθίζηση της σκόνης του χώρου, χρησιμοποιείτε την λειτουργία έκτακτης ανάγκες για μεγάλο συμβάλλοντας στην δημιουργία χρονικό...
  • Seite 31 Climate : T1 Voltage: 230V - 2014/53/EU(RED) - 2014/517/EU(F-GAS) - 2009/125/EC(ENERGY) - 2010/30/EU(ENERGY) - 2006/1907/EC(REACH) ROHS :R32 2011/65/ GWP*:675 GWP= (global warming potential) RoHS ) WEEE 2012/19/EU ( . . WIFI...
  • Seite 32 , 22 , 26 (17,19 09K 12K ø 6.35x0.8mm ø 9.52x0.8mm 18K 24K ø 6.35x0.8mm ø 12.7x0.8mm τοποθετήστε τον σωλήνα αποστράγγισής σε κλίση για φυσική ροή...
  • Seite 33 60mm 60mm 60mm 60mm C=110mm A=100mm C=120mm A=170mm DRVI32-24WF DRVI32-18WF 60mm 60mm 50mm A=135mm C=50mm DRVI32-09WF DRVI32-12WF , “ “, 0 mm, Agraffe ·...
  • Seite 34 wewn trzna · · 4G , mm EEPROM· EEPROM EEPROM· H05RN-F H07RN-F. · T.3.15A/250VAC ( · · R410A 0~0,5 mm 1,0~1,5 mm 1,5~2,0mm...
  • Seite 35 40 C, "FRONT" stopper.
  • Seite 36: Προειδοποιησεισ

    ΠΡΟΕΙΔΟΠΟΙΗΣΕΙΣ...
  • Seite 37 swishing :D.B 3 ℃ :D.B 21℃ :D.B 4 ℃ : D.B ℃ :D.B 27℃ : D.B 1 ℃ :D.B 24℃ :D.B -7℃ :D.B 24℃ :D.B -15℃ (INVERTER) COOL DRY. . 3.15A / 250V. DRY, dry, +2 oC, T.25A/250V A / C...
  • Seite 38 Όλες οι εικόνες στο παρόν εγχειρίδιο εξυπηρετούν επεξηγηματικούς σκοπούς. Το προϊόν που προμηθευτήκατε μπορεί να εμφανίζει ορισμένες διαφορές ως προς το σχήμα, ωστόσο οι λειτουργίες και τα χαρακτηριστικά παραμένουν ίδια. Η εταιρεία δεν φέρει ευθύνη για τυχόν τυπογραφικά λάθη. Ο σχεδιασμός και οι προδιαγραφές του προϊόντος...
  • Seite 39 Παρακαλούμε ελέγξτε και τον φάκελο με τα Ανεπιθύμητα εισερχόμενα. Διεύθυνση email* mail* κατοχύρωσης στο email σας ΒΗΜΑ 5 Έχετε υποβάλει επιτυχώς την εγγύηση του προϊόντος Inventor! Να εγγραφώ στο newsletter της Inventor στο newsletter της Inventor * Απαραίτητο πεδίο εδίο...
  • Seite 40 Continut Componente si functii ........................2 Operare ............................. 3 Instalarea unitatii interioare ......................14 Intretinere ............................18 Avertizari ............................19 Depanare ............................20...
  • Seite 41: Componente Si Functii

    Componente si Functii Unitate interna Telecomanda Admisie de aer partea externa a telecomenzii Panou afisaj (interior) Grilaj de 5. buton ON/OFF admisie 6. afisaj pentru fiecare functie Panou afisaj (interior) Evacuare 7. afisaj mod operare 8. afisaj WIFI si CEAS Lamela orizontala 9.
  • Seite 42: Operare

    Operare Setarea orei 18. buton CRONOMETRU 19. buton CEAS Apasati butonul CLOCK 20. buton 10ºC (functie speciala de incalzire: mentinere incalzire 10 grade/pretios pentru RS Apasati “+” sau “-“ pentru 21. buton SANATATE a seta ora corecta 22. buton SMART (folosit pentru functia SMART/aceasta optiune nu este valabila la unele modele)
  • Seite 43 Operation Operare Modurile de operare Operare silentioasa COOL, HEAT si DRY ON/OFF Unitatea porneste Selecteaza modul de operare Apasa pe butonul COOL de pe telecomanda. Operare silentioasa SMART SMART POWER POWER Silentios Apasa pe butonul HEAT de pe telecomanda. QUIET QUIET Puteti folosi aceasta functie cand aveti nevoie de liniste pentru odihna si pentru citit...
  • Seite 44 Operare Functionarea fluxului de aer sanitar Apasati o data Apasa pe butonul TEMP. pentru a activa De fiecare data cand functia fluxului de acest buton este apasat, aer sanatos. temperatura creste cu 0.5°C 1) Apasati butonul fluxului de aer De fiecare data cand sanatos, atunci cand apare pe acest buton este apasat,...
  • Seite 45 Operare Operatiunea SWING Operatiunea CRONOMETRU Setati Ora Exacta inainte sa incepeti operatiunea Cronometru. Puteti lasa unitatea sa porneasca sau sa se opreasca automat, cand se atinge momentul potrivit, ca de exemplu, balaiajul fluxului de aer inainte sa va treziti dimineata, sau cand va intoarceti de afara sau dup ace veti adormi, pe parcursul noptii.
  • Seite 46 Operare Somn odihnitor Inainte de a merge la culcare, puteti apasa butonul SLEEP si unitatea va rula in modul SOMN si va va adduce un somn linistit setarea temperaturii unitatea se opreste Apasati butonul SLEEP scade cu 2°C 1 ora 1 ora scade cu 2°C Modul Operational...
  • Seite 47 Operare Operatiunea SMART (aceasta functie nu este disponibila la anumite modele) o singura apasare poate furniza mai mult decat o incapere confortabila unitatea de Aer Conditionat poate indica temperatura din interior si umiditatea si poate face modificari in consecinta pornirea SMART SMART apasati butonul ON/OFF si aparatul SMART...
  • Seite 48: Scoaterea Bateriei

    Operare Operatiunea ON/OFF Operatiunea HEALTH si operatiunea de test Operatiunea ON/OFF • Folositi aceasta operatiune doar cand telecomanda este defecta sau pierduta. Pentru operatiuni Urgente, a se folosi pentru o perioada limitata • Cand intrerupatorul de operatiune de urgenta este apasat, un sunet se va auzi o singura data, cee ace inseamna inceputul acestei operatiuni •...
  • Seite 49 INFORMATII IMPORTANTE CU PRIVIRE LA CERTIFICAT DE CONFORMITATE TIPUL DE AGENT FRIGORIFIC FOLOSIT EUROPEAN PENTRU ACESTE MODELE Acest produs conține gaze fluorurate cu Climat: T1 Voltaj: 230 V efect de sera reglementate de Protocolul de la Kyoto. Declaratie conformitate Toate produsele sunt in conformitate cu urmatoarele dispozitii europene: 2014/53/EU (RED) 1+2=...
  • Seite 50: Instalarea Unitatii Interioare

    Instalarea unitatii interioare Instrumente necesare pentru instalare Sursa de energie Surubelnita Cheie dinamometrica Inainte de a introduce energie In recipient, verificati Cleste (17, 22 si 26 mm) tensiunea fara a se defecta. Fierastrau Freza de teava Sursa de alimentare este aceeasi cu placa de identificare Burghiu cu miez Instrument de ardere corespunzatoare.
  • Seite 51 A=170mm C=130mm 9/12K Ø 60mm Ø 60mm 50mm Cablul electric al unitatii A=135mm C=50mm DRVI32-09WF D=47mm interne / externe DRVI32-12WF D=47mm Capac pentru Material izolant Acordati atentie urmatoarelor puncte inainte de instalarea Tevi conducta din termic unitatii:...
  • Seite 52 4G1.0mm 4G1.0mm Instrument pentru Conectarea cablului electric a unitatii interne/externe Instrument de flacara conventional flacara pentru R410A Scoaterea capacului de cablare Piulita cu aripi Tip clatci Tip clatci (tipul rigid) (tip Imperial) 4G1.0mm Indepartati capacul terminalului in coltul din dreapta 0~0.5mm 1.0~1.5mm 1.5~2.0mm...
  • Seite 53 Verificarea instalarii si testarea La drenaj ■ Va rugam sa explicati clientilor modul de operare cu Indicarea Descrierea ajutorul manualului de instructiuni Analiza si diagnostic codului problemelor Defectiune la Verificati elementele pentru testare senzorul de £ Puneti marcajul P in casete temperatura al Conectarea defecta a camerei...
  • Seite 54: Intretinere

    Intretinere Pentru folosirea inteligenta a Aerului Conditionat cadru propice pentru NU blocati admisia de aer Telecomanda Corpul intern temperatura din camera sau evacuarea Proper Curatati aerul conditionat folosind o temperature carpa moale si uscata. Pentru pete NU folositi apa, stergeti telecomanda grave, folositi un detergent neutru cu o carpa uscata.
  • Seite 55: Avertizari

    Avertizari Atentie Va rugam apelati la Departamentul Vanzari/Service pentru instalare. Nu incercati sa instalati aerul conditionat de dumneavoastra insiva pentru ca lucrarile improprii pot cauza soc electric, foc, risipa de apa. Atentie Cand se gasesc anomalii, precum mici arsuri, imediat opriti XXXX XXXX imediat butonul de alimentare si contactati departamentul de...
  • Seite 56: Depanare

    Depanare Avertizari Inainte de a apela la service, verificati Nu obstructionati sau acoperiti grilajul de admisie al aerului urmatoarele aspecte intai. conditionat. Nu introduceti degetele sau alte lucruri in admisia de aer sau evacuare si fantele batante. Acest aparat nu este pentru folosirea de catre persoanele Fenomen Cauza sau puncte de reper (inclusive copii) cu capacitate fizice, senzoriale sau mentale...
  • Seite 57 Toate imaginile din acest manual au scop pur informativ. Forma reala a produsului pe care l-ati cumparat poate fi usor diferita insa functiile si operatiile sunt aceleasi. Compania nu isi asuma nici o responsabilitate pentru greselile de tipar. Aspectul fizic si specificatiile tehnice se pot schimba fara o notificare prealabila datorita imbunatatirii continue a echipamentelor noastre.
  • Seite 58 Spam. Odata ce garantia a fost activata, veti primi un email de confirmare PASUL 5 Ati activat cu succes Garantia Inventor! Newsletter-ul Inventor Abonati-va la Newsletter-ul Inventor...
  • Seite 60 Lesen Sie die Hinweise in diesem Handbuch sorgfältig durch, bevor Dieses Gerät ist befüllt mit R32. Sie das Gerät in Betrieb nehmen. Bewahren Sie diesem Handbuch an dem Ort, wo der Benutzer es leicht finden kann. Warnung: Verwenden Sie die Methode die Enteisung oder Reinigung nicht zu beschleunigen, wenn dies nicht vom Hersteller empfohlen sind.
  • Seite 61 Inhalt TEILE UND FUNKTIONEN ....................BETRIEB ..........................INSTALLATION DES INNENGERÄTS ................. WARTUNG ..........................VORSICHTSMASSNAHMEN....................FEHLERBEHEBUNG ......................
  • Seite 62: Teile Und Funktionen

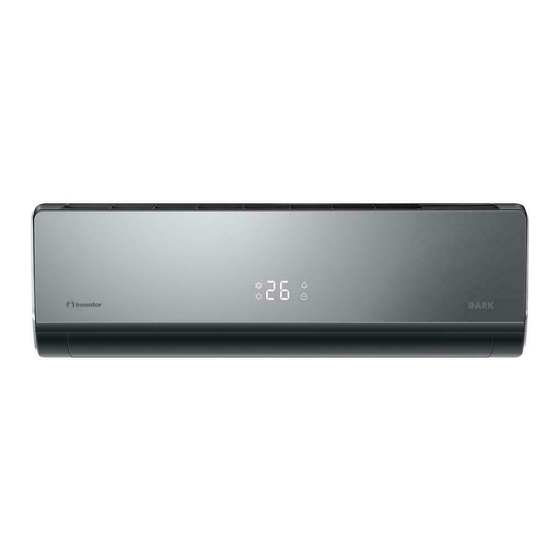
    Beuteile und Funktionen Inneneinheit Fernbedienung Außenseite der Fernbedienung Taste ON/OFF (EIN/OFF) Anzeige einzelnen Funktionzustände Betriebsweise WIFI und CLOCK (Uhr) TEMP (Temperatur) Feuchtigkeit FAN SPEED Ventilator-Geschwindigk eit) TIMER SWING Entsprechend dem gekauften Produkt könnte das tatsächliche (Luftleitlamellen-Schwing Einlassgitter von dem in der Anleitung abweichen. ung) Nach oben/ Nach unten Nach links/ Nach rechts...
  • Seite 63: Clock-Einstellung

    Bedienung Taste TIMER wird das Gerät diese Funktion abbrechen. Taste CLOCK(Uhr) Die Lichtquellen wie Lampen und das LED-Licht des Taste 10 °C Spezifische Fernsehens im Zimmer sowie die Bewegung der Tiere werden diese Heizungsfunktion: Funktion beeinflussen. 10°C-Heizung beibehalten HEALTH HEALTH AIRFLOW (verfügbar für RS) gleichen Zeit kann die Funkt ) eingestellt...
  • Seite 64: Bedienung

    Bedienung QUIET-Bedienung Bedienung der COOL, HEAT und DRY SMART POWER SMART POWER Sie können diese Funktion verwenden, wenn Ruhe für Rast oder Lesen benötigt wird. Für jede Drücke ist die Anzeige für den Start der QUIET-Funktion der Klimaanlage. Im QUIET-Modus wird die Ventilator-Geschwindigkeit AUTO auf den AUTO-Ventilator-Modus...
  • Seite 65 Bedienung Bedienung HEALTH AIRFLOW-Bedienung TIMER SMART FAN MODE POWER Drücken Sie die Taste HEALTH AIRFLOW wieder Drücken Sie die Taste FAN SPEED. Mit jeder Drücke wird die mal, dann wird die beide Einlass- und Austrittgitter Ventilator-Geschwindigkeit sich wie folgt ändern: des Klimagerätes geöffnet und arbeitet die Einheit unter Bedingung,...
  • Seite 66: Swing-Bedienung

    Bedienung SWING-Bedienung TIMER-Bedieunung Stellen Sie bitte die Uhr richtig ein, bevor Sie den Timer bedienen. Sie können die Einheit automatisch ein- oder ausschalten wie folgt: Bevor Sie am Morgen aufwachen oder von außen zurückkommen oder nachdem Sie in der Nacht eingeschlafen sind. FAN MODE FAN MODE Für jede Drücke der Taste...
  • Seite 67 Bedienung Komfortabler SLEEP Bevor Sie ins Bett gehen, können Sie die Taste SLEEP einfach drücken und die Einheit wird in SLEEP-Modus arbeiten, damit Ihnen guten Schalf bringt. TIMER Im SMART-Modus Das Gerät arbeitet in geeignetem Schlafmodus, der automatisch auf den gewählten Betriebsmodus angepasst wird. Wenn die Ruhiger-Schlaf-Funktion auf 8 Stunden eingestellt ist, kann die Zeit des Ruhigen-Schlafs nicht angepasst werden.
  • Seite 68: Smart-Bedienung

    Bedienung SMART-Bedienung SMART POWER SMART FRESH SMART ENTEISUNG SMART FAN SPEED SMART FAN HEALTH SMART DRY SMART SOFT SMART Temperaturkontrolle Unter der Kühlung-, Heizung- und Entfeuchtungsmodus drücken Sie die SMART-Taste um die SMART-Funktion einzutreten. Unter der SMART-Betriebsmodus, wenn das Klimagerät im Betrieb ist, wird es Kühlung-, Heizung, Entfeuchtung- oder Blasen-Modus automatisch auswählen.
  • Seite 69: Health-Bedienung

    Bedienung HEALTH-Bedienung OFF-Bedienung Prüfungsbedienung Der Wasser-Ionen-Generator im Klimagerät kann eine große Menge ON/OFF-Bedienung: von Anionen herstellen und die Qualität der Position und Anionen Bitte verwenden Bedienung nur wenn Fernbedienung defekt oder ausgefallen ist, und das Klimagerät in der Luft balancieren und kann auch die Bakterien abtöten sowie kann mit der Notfall-Funktion automatisch für eine Weile weiter arbeiten.
  • Seite 70: Konformität Der Modelle Mit Europäischen Verordnungen

    WICHTIGE INFORMATIONEN ZUM KONFORMITÄT DER MODELLE MIT EUROPÄISCHEN VERORDNUNGEN VERWENDETEN KÄLTEMITTEL Klima:TI Stromspannung:230V gemäß Kyoto-Protokoll Alle Produkte erfüllen die folgenden europäischen Vorschriften: - 2014/53/EU(RED) - 2014/517/EU(F-GAS) 1+2= - 2009/125/EC(ENERGY) - 2010/30/EU(ENERGY) koll. Nicht in die Atmosphäre entweichen lassen. - 2006/1907/EC(REACH) Kältemitteltyp: R32 GWP-Wert*: 675 RoHS-Richtlinie...
  • Seite 71: Installation Des Innengeräts

    Installation des Innengeräts Erforderliche Werkzeuge Stromversorgung für die Installation Drehmomentschlüssel Vergewissern Sie sich vor dem Anschluss an die Netzsteckdose, Schraubendreher (17 mm, 22 mm, 26 mm) dass die Versorgungsspannung konstant ist. Zange Rohrschneider Die Stromversorgung ist auf dem entsprechenden Typenschild Metallsäge angegeben.
  • Seite 72 Deckel für Rohrleitung links Deckel unter der Rohrleitung 50mm A=135mm C=50mm DRVI32-09WF DRVI32-12WF Mit Klebeband befestigen Elektrische Innen- und Außenkabel und der Ablaufschlauch müssen Vor der Installation der Anlage sind folgende Punkte zu beachten: mittels Schutzklebeband mit den Kältemittelleitungen verbunden sein.
  • Seite 73 Bei Anschluss des Kabels nach erfolgter Installation des Richtig Falsch Innengeräts 1. Führen Sie das Kabel von außerhalb des Raums durch die linke Seite der Schief Beschädigte Bördelung Riss Einseitig Zu weit außen 2. Ziehen Sie das Kabel an der Vorderseite heraus, und schließen Sie es mit ausreichender Reserve (Kabelschlaufe) an.
  • Seite 74: Wartung

    Wartung Intelligente Verwendung des Klimageräts Stellen Sie eine angemessene Blockieren Sie Lufteinlass und Fernbedienung Gehäuse des Innengeräts Raumtemperatur ein. Luftauslass nicht. Wischen Sie das Klimagerät mit einem Angemessene weichen und trockenen Tuch ab. Verwen- Temperatur den Sie bei hartnäckigen Flecken einen in Verwenden Sie kein Wasser.
  • Seite 75 Vorsicht WARNUNG Versuchen Sie nicht, das Klimagerät selbst zu installieren, da eine unsachgemäße Durchführung zu Stromschlägen, Bränden und Wasserleckagen führen kann. WARNUNG Wenn Betriebsstörungen wie Brandgeruch auftreten, Verwenden Sie eine eigene Vergewissern Sie sich, dass stoppen Sie sofort den Betrieb, und wenden Sie sich an Stromversorgung mit einem der Ablauf sicher installiert ist.
  • Seite 76: Fehlerbehebung

    Vorsicht Fehlerbehebung Überprüfen Sie folgende Punkte, bevor Blockieren oder bedecken Sie das Lüftungsgitter des Klimageräts nicht. Stecken Sie keine Finger oder Gegenstände in den Einlass/ Sie sich an den Kundendienst wenden. Auslass und die Schwenklamellen. Dieses Gerät ist für Personen (einschl. Kinder) mit Problem Ursache und Ausgangskontrollen eingeschränkten physischen, sensorischen oder psychischen...
  • Seite 77 Die Abbildungen in diesem Handbuch dienen lediglich zur Erläuterung der Funktionen. Die tatsächliche Form der Einheit, die Sie gekauft haben, kann etwas abweichen, aber die Bedienung und Funktionen sind gleich. Das Unternehmen übernimmt keinerlei Haftung für eventuell in diesem Dokument enthaltene falsch gedruckte Informationen.
  • Seite 78 NOTES...
  • Seite 80 AIR CONDITIONING SYSTEMS WALL MOUNTED UNIT V:1.0.20200925 INVENTOR A.G. S.A. Manufacturer: 24th km National Road Athens - Lamia & 2 Thoukididou Str., Ag.Stefanos, 14565 Tel.: +30 211 300 3300, Fax: +30 211 300 3333 - www.inventor.ac...

Inhaltsverzeichnis