Rotel U445CH1 Gebrauchsanweisung
Inhaltsverzeichnis
Verfügbare Sprachen
Verfügbare Sprachen
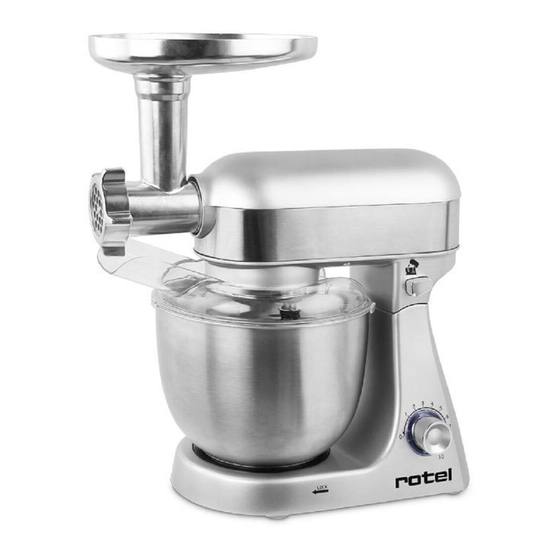
KITCHENMACHINE445CH1-3
U445CH1 = Grau / Gris / Grigio / Gray
U445CH2 = Grün / Vert / Verde / Green
U445CH3 = Pink / Rose / Rosa / Pink
• GEBRAUCHSANWEISUNG
MODE D'EMPLOI
•
ISTRUZIONI PER L'USO
•
INSTRUCTIONS FOR USE
•
Gebrauchsanweisung ○ Mode d'emploi ○ Istruzioni per l'uso ○ Instruction for use
U445CHx_BED_DFIE_Rev01_2020-10-15
Inhaltsverzeichnis

Verwandte Anleitungen für Rotel U445CH1


Inhaltszusammenfassung für Rotel U445CH1
- Seite 3 Deutsch Français Italiano English Fixierungsring Écrou annulaire Ghiera Ring nut Lochscheibe fein Disque de Disco trituratore Fine mincing disk hachage fin fine Lochscheibe me- Disque de Disco trituratore Medium mincing dium hachage moyen medio disk Lochscheibe grob Disque de Disco trituratore Coarse mincing hachage grossier per grana grossa...
- Seite 4 TECHNISCHE DATEN • Caractéristiques techniques • Specifiche tecniche Technical specifications • 220-240 V Nennspannung Tension nominale Tensione nominale Rated voltage 50 Hz Nennfrequenz Fréquence nominale Frequenza nominale Rated frequency 1000 W Nenneingangsleistung Puissance d’entrée nominale Potenza nominale Rated input power Gebrauchsanweisung ○...
- Seite 5 Inhaltsverzeichnis / Table des matières / Indice / Table of contents Deutsch ..............................7 Sicherheitshinweise ......................... 7 • • Arbeitsstellungen ..........................9 Geschwindigkeitsregelung ......................9 • • Verwendung von Knethaken, Rührbesen oder Schneebesen ............10 • Verwendung des Fleischwolfs ....................... 13 2.1 Fleischwolf ..........................
- Seite 7 Deutsch • SICHERHEITSHINWEISE Lesen Sie erst alle Hinweise, bevor Sie das Gerät in Be- trieb nehmen. o Dieses Gerät kann von Personen mit eingeschränk- ten physischen, sensorischen oder geistigen Fähig- keiten oder einem Mangel an Erfahrung und/oder Wissen verwendet werden, wenn sie beaufsichtigt werden oder bezüglich des sicheren Gebrauchs des Geräts unterwiesen wurden und die daraus resul- tierenden Gefahren verstanden haben.
-
Seite 8: Gerät Und Zuleitung Nie Auf Heisse Oberflächen
o Gerät und Zuleitung nie auf heisse Oberflächen stellen oder in der Nähe von offenen Gasflammen betreiben. o Motorsockel niemals ins Wasser tauchen oder un- ter fliessendem Wasser reinigen. o Wenn das Gerät in Betrieb ist, führen Sie kein Be- steck oder sonstige Metallgegenstände ein. -
Seite 9: Geschwindigkeitsregelung
• ARBEITSSTELLUNGEN Nehmen Sie das Küchengerät nur in Betrieb, wenn die in der Tabelle aufgeführten Zubehörteile angebracht sind und sich das Gerät in der Arbeitsstellung befindet. Punkt Stellung Zubehör • GESCHWINDIGKEITSREGELUNG Zubehör Abbildung Stufe Dauer Fassungsvermögen 30 Sek. bei Stufe 1 1000 g Mehl und Knethaken 1–3... - Seite 10 • VERWENDUNG VON KNETHAKEN, RÜHRBESEN ODER SCHNEEBE- Das Gerät auf eine flache Oberfläche, zum Beispiel eine Küchenarbeitsplatte, stellen und dabei auf einen sicheren Stand achten. Sicherstellen, dass sich die Schutzabde- ckung (11) auf dem Zubehöranschluss (12) befindet. Den Kippschalter (14) drücken und gleich- zeitig den Rührarm (13) mit der Hand anhe- ben, bis er hörbar einrastet.
- Seite 11 Das gewünschte Zubehör (20, 21 oder 22) wie in den Abbildungen A und B links ge- zeigt an der Motorspindel (18) an der Un- terseite des Rührarms (13) anbringen, bis die Stifte einrasten und das Zubehör sicher mit der Küchenmaschine verbunden ist. Das Zubehör darf weder locker sein, noch sollten Sie es nach unten ziehen können.
- Seite 12 Nach dem Rühren das Gerät ausschalten, indem Sie den Stufenschalter (15) nach links drehen. Den Stecker ziehen, bevor Sie Zubehör wechseln oder das Gerät ausei- nandernehmen oder wenn das Gerät nicht gebraucht wird. Den Kippschalter (14) drücken und gleich- zeitig den Rührarm (13) mit der Hand anhe- ben, bis er hörbar einrastet.
-
Seite 13: Verwendung Des Fleischwolfs
• VERWENDUNG DES FLEISCHWOLFS Das Gerät auf eine flache Oberfläche, zum Beispiel eine Küchenarbeitsplatte, stellen und dabei auf einen sicheren Stand achten. Die Schutzabdeckung (11) vom Zubehöran- schluss (12) abnehmen. Die Schnecke (7) mit dem Metallstift nach 2.1 Fleischwolf außen in das Fleischwolfgehäuse (8) einset- zen. -
Seite 14: Herstellung Von Kebbe
Die Schnecke (7) mit dem Metallstift nach 2.2 Herstellung von Kebbe außen in das Fleischwolfgehäuse (8) einset- zen. Fest andrücken, bis sie einrastet. Den Fleischvorsatz (27) und den Kebbe- Aufsatz (28) auf den Verbinder an der Schnecke setzen (siehe Abbildung). Drehen, bis die beiden Vertiefungen mit den Stiften am Fleischwolfgehäuse übereinander pas- sen. - Seite 15 Das Fleischwolfgehäuse (8) so in den Zube- höranschluss (12) einsetzen, dass der Pfeil mit dem Kreis eine Linie bildet. So lange drehen, bis die vertikale Position erreicht ist und die beiden Pfeile eine Linie bilden. Die Einfüllschale (9) so auf das Fleischwolf- gehäuse (8) setzen, dass sich der breitere Teil über dem Motor des Geräts befindet.
- Seite 16 Nach der Verwendung des Fleischwolfs das Gerät ausschalten, indem Sie den Stufen- schalter (15) nach links drehen. Den Ste- cker ziehen, bevor Sie Zubehör wechseln o- der das Gerät auseinandernehmen oder wenn das Gerät nicht gebraucht wird. Den Stopfer (10) und die Einfüllschale (9) entfernen.
-
Seite 17: Reinigung Und Pflege
• ENTSORGUNG Zur ordnungsgemässen Entsorgung geben Sie das Gerät bitte an einen Händler, den Kundendienst oder Rotel AG zurück. Die Richtlinie 2012/19/EU über Elektro- und Elektronik-Altgeräte (WEEE) legt fest, dass Haushaltsgeräte nicht mit dem normalen Hausmüll entsorgt werden dürfen. Alt- geräte sind getrennt zu sammeln, um einerseits Wiederverwertung und Recycling zu... - Seite 51 (see address below). Devices must be returned in their original packaging. Transport costs are to be borne by the purchaser. Remember to specify your address and give a short description of the fault if the defect is not obvious. Service station: Service après-vente: Rotel AG Servizio Assistenza: Parkstrasse 43 Tel.: +41 62 787 77 00 After-sales service: 5012 Schönenwerd...