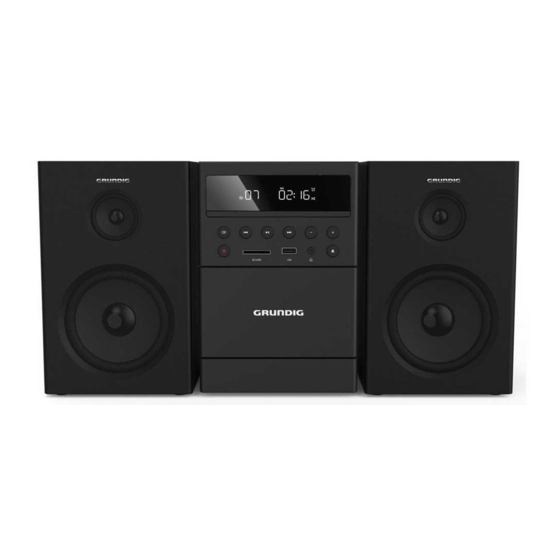
Herunterladen Inhalt Inhalt Diese Seite drucken

Werbung

Verfügbare Sprachen

Verfügbare Sprachen

Micro HiFi-System
User Manual
MS 300
DE - EN - FR
01M-GHF1050-4820-01

Werbung

Inhaltsverzeichnis
loading

Inhaltszusammenfassung für Grundig MS 300

  • Seite 1 Micro HiFi-System User Manual MS 300 DE - EN - FR 01M-GHF1050-4820-01...
  • Seite 2 DEUTSCH 09-28 ENGLISH 29-45 FRANÇAIS 46-64...
  • Seite 5 CLOCK ALARM...
  • Seite 6 Auto-Off FM D ISC U SB SDC AR D C ASSETTE AU X BT 1 20 O FF PO P C LASSIC R O C K f l at ANDROID IPHONE no device found BLUETOOTH Grundig MS 300...
  • Seite 7 U SB SD C AR D disc 87.5 C ASSETTE...
  • Seite 8 -------------------------------------------------------------------------------------------------------------------------- ANSCHLÜSSE EINSTELLUNGEN BLUETOOTH BETRIEB CONNECTIONS SETTINGS BLUETOOTH OPERATION CONNEXIONS RÉGLAGES BLUETOOTH FONCTIONNEMENT SD CARD DISC SD CARD DISC SD CARD DISC CASSETTE CASSETTE CASSETTE...
  • Seite 9 SICHERHEIT UND AUFSTELLUNG _________________ Sicherheits- und Betriebsanweisungen sollten gelesen werden, bevor dieses VORSICHT Produkt in Betrieb genommen wird. GEFAHR EINES STROMSCHLAGS NICHT ÖFFNEN Bewahren Sie diese Anweisungen • VORSICHT: UM DAS RISIKO EINES STROMSCHLAGS ZU VERRINGERN, Sicherheits- DARF DIE ABDECKUNG (ODER DIE RÜCKSEITE) NICHT ENTFERNT WERDEN.
  • Seite 10 SICHERHEIT UND AUFSTELLUNG ________________ - z.B. in einem nassen Keller oder Nur mit dem vom Hersteller • in der Nähe eines Schwimmbad und angegebenen oder mit dem ähnlichem. Gerät verkauften Wagen, Ständer, Stativ, Bügel oder Nur mit einem trockenen Tuch reinigen. •...
  • Seite 11 SICHERHEIT UND AUFSTELLUNG _________________ Die Belüftung sollte nicht durch gleichen oder einen gleichwertigen Typ • Abdecken der Lüftungsöffnungen ersetzen. mit Gegenständen wie Zeitungen, Warnung: Tischdecken, Vorhängen usw. Batterie (Batterien oder • behindert werden. Batteriesatz) darf nicht übermäßiger Stellen Sie keine offenen Flammen •...
  • Seite 12 SICHERHEIT UND AUFSTELLUNG ________________ direkt am Stecker, niemals am Kabel. an, während das Gerät eingeschaltet ist. Schalten Sie auch die anderen Änderungen oder Modifikationen an • Geräte aus, bevor Sie sie anschließen. diesem Gerät, die nicht ausdrücklich von der für die Einhaltung der Stecken Sie das Gerät erst in die •...
  • Seite 13 SICHERHEIT UND AUFSTELLUNG _________________ Dieser Apparat enthält dieses Etikette: von Babys und Kindern fern. Nicht in Kinderbetten, Betten, Kutschen Laserprodukt der Klasse 1 oder Laufgittern verwenden. Diese Die Verwendung von Bedienelemente • Beutel ist kein Spielzeug. Entsorgen oder die Durchführung von Verfahren, Sie den Beutel und alle anderen die nicht hierin beschrieben sind, kann Verpackungsmaterialien unmittelbar...
  • Seite 14 SICHERHEIT UND AUFSTELLUNG _________________ Rändern, um das Hinterlassen von Fingerabdrücken auf der Oberfläche vermeiden. Jeglicher Staub, Fingerabdrücke oder Kratzer können eine Fehlfunktion verursachen. Bringen Sie niemals ein Etikett oder Klebeband an der CD an. Hörsicherheit Hören einer moderaten Lautstärke. Warnung: Zu hoher Schalldruck oder •...
  • Seite 15: Bedienelemente Und Teile

    (EIN/AUS)-Taste Herzlichen Glückwunsch zum Kauf Ihres neuen Schalten Sie das Gerät zwischen EIN und Bereitschaft-Modus um. GRUNDIG Micro HIFI System MS 300. Bitte lesen Sie die folgenden Benutzeranweisungen 6. SD-Kartenbuchse sorgfältig durch, damit Sie noch viele Jahre Freude Kartenschlitz zum Einlegen einer Speicherkarte an Ihrem hochwertigen GRUNDIG Produkt haben.
  • Seite 16 AUF EINEN BLICK ____________________________ AC-Netzkabel Wiederholen Sie einen Kabel für Lautsprecher 12. A-B bestimmten Abschnitt innerhalb FM-Antenne eines Titels/Kapitels. 3,5 mm auf 3,5 mm Audiokabel 13. POP Wählen Sie Equalizer (EQ) ROCK Effekt. Fernbedienung Erhöhen/Verringern des Schalten Sie das Gerät zwischen Lautstärkepegels.
  • Seite 17: Ersetzen Der Batterie Der Fernbedienung

    VORBEREITUNGEN ___________________________ Bereiten Sie die Fernbedienung vor • Es können entweder wiederaufladbare oder nicht wiederaufladbare Batterien Mit der mitgelieferten Fernbedienung kann das verwendet werden. Beachten Sie die Gerät auch aus der Ferne bedient werden. Vorsichtsmaßnahmen auf ihren Etiketten. • Selbst wenn die Fernbedienung innerhalb der effektiven Reichweite von 6 m (19,7 •...
  • Seite 18: Anschluss Des Kopfhörers

    VERBINDUNGEN _____________________________ Verbindung zu Lautsprecher. • Verwenden Sie ein RCA-zu-3,5-mm- Audiokabel (nicht mitgeliefert), um die Hinweis: Audioausgangsbuchsen des Fernsehers mit • Verwenden Sie für optimalen Klang nur die der AUX-Buchse am Gerät zu verbinden. mitgelieferten Lautsprecher. Schließen Sie Anschließen der (FM)-Antenne nur Lautsprecher mit einer Impedanz an, die gleich oder höher als die der mitgelieferten •...
  • Seite 19 EINSTELLUNGEN _____________________________ Stellen Sie die Uhr ein einzustellen, und drücken Sie dann zur Bestätigung die OK-Taste auf der Fernbedienung, 1 Drücken Sie im Standby-Modus die CLOCK- der Modus blinkt auf dem Display. Taste und halten Sie sie gedrückt. 4 Drücken Sie die Tasten / auf der 2 Drücken Sie die Tasten / auf der...
  • Seite 20 EINSTELLUNGEN _____________________________ Tipps: • Jeder aktivierte Zustand wird gelöscht, wenn nicht innerhalb von 15 Sekunden eine Taste gedrückt wird. • Wenn der Alarm klingelt, drücken Sie die -Taste auf der Fernbedienung oder am Gerät. Der Alarm hört auf, aber die Alarmeinstellungen bleiben erhalten.
  • Seite 21: Modi Auswählen

    HAUPTBETRIEB _____________________________ Standby/EIN Wählen Sie Equalizer (EQ) Effekt • Drücken Sie die Tasten POP - CLASSIC - Wenn Sie die Haupteinheit zum ersten Mal an die Netzsteckdose anschließen, befindet sich die ROCK - FLAT auf der Fernbedienung, um den Haupteinheit im Standby-Modus. Equalizer auszuwählen.
  • Seite 22: Aux-Betrieb

    HAUPTBETRIEB _____________________________ 2 Drücken Sie die MODE-Taste am Gerät oder 3 Drücken Sie die Tasten / , um Y zu wählen, auf der Fernbedienung, um den AUX-Modus und drücken Sie dann die Taste OK, um die auszuwählen. Werkseinstellungen zurückzusetzen. 3 Bedienen Sie Ihr Audiogerät direkt für •...
  • Seite 23 Kopplungsmodus eingetreten. Das Gerät zeigt "PAIRING" an. • Bevor Sie ein Bluetooth Gerät mit diesem Gerät verbinden, stellen Sie sicher, dass Sie 3 Wählen Sie "Grundig MS 300" in der die Fähigkeiten des Geräts kennen. Kopplungsliste. Bei erfolgreicher Kopplung erscheint auf der Anzeigetafel "BT".
  • Seite 24 FM BETRIEB ________________________________ Automatisches Scannen Manuelle Voreinstellung Speichern voreingestellten Stationen Sie können bis zu 40 FM-Stationen voreinstellen. Station 1 Stellen Sie die gewünschte Station ein und 1 Drücken Sie die MODE-Taste am Gerät oder drücken Sie dann die Taste PROG. auf der Fernbedienung, um den FM-Modus zu 2 Drücken Sie die Tasten oder Nummer...
  • Seite 25: Schneller Vor- Und Rücklauf

    KASSETTEN-MODUS __________________________ Auswählen der Schneller Vor- und Rücklauf 1 Drücken Sie im Stoppmodus » « oder » Kassetteneingangsquelle «. 1 Drücken Sie die Taste am Gerät oder die • » « spult zum Anfang zurück, » « spult Taste MODE auf der Fernbedienung, um den schnell vor bis zum Ende.
  • Seite 26: Mögliche Ursache/Handlung

    FEHLERBEHEBUNG ___________________________ Versuchen Sie niemals, das System selbst zu reparieren, damit die Garantie gültig bleibt. Wenn Sie bei der Verwendung dieses Geräts auf Probleme stoßen, überprüfen Sie die folgenden Punkte, bevor Sie den Service anfordern. Problemstellung Mögliche Ursache/Handlung ALLGEMEINE INFORMATIONEN - Wenn das Gerät durch ein Gewitter, eine statische Aufladung oder einen anderen externen Faktor gestört wurde, befolgen Sie Keine Funktion...
  • Seite 27 SPEZIFIKATIONEN ____________________________ Abschnitt System Stromversorgung AC220-240V~ 50/60Hz Leistungsaufnahme 20 W Leistungsaufnahme im Standby-Modus < 1,0 W (Eco modus) Verstärker (Max. Gesamtausgangsleistung) Lautsprecher Impedanz 4Ω x 2 V 4,2 ( Unterstützt A2DP-, AVRCP-Profile) Bluetooth Frequenzband (Frequency band) 2400MHz ~ 2483,5MHz Übertragene Hochfrequenzleistung <5 dBm USB: 5,0 V 500 mA...
  • Seite 28: Einhaltung Der Rohs Richtlinie

    2009/125/EC und 2011/65/EU. Klassifikations symbol für Elektro- und Elektronik- Die CE Konformitätserklärung für das Gerät Altgeräte (WEEE). finden Sie in Form einer pdf Datei auf der Grundig Dieses Symbol zeigt an, dass dieses Homepage www.grundig.com/downloads/doc. Produkt am Ende seiner Lebensdauer...
  • Seite 29 SAFETY AND SET-UP _________________________ Keep these instructions – The safety • and operating instructions should be CAUTION retained for future reference. RISK OF ELECTRIC SHOCK DO NOT OPEN Heed all warnings – All warnings on • CAUTION: TO REDUCE THE RISK OF ELECTRIC SHOCK, DO the appliance and in the operating NOT REMOVE COVER (OR BACK).
  • Seite 30 SAFETY AND SET-UP _________________________ Do not defeat the safety purpose of the not operate normally, or has been • polarized or grounding plug. A polarized dropped. plug has two blades with one wider The apparatus shall not be exposed to •...
  • Seite 31 SAFETY AND SET-UP _________________________ The mains plug/appliance coupler is Changes or modifications to this unit • • used as the disconnect device, the not expressly approved by the party disconnect device must remain readily responsible for compliance will void operable. the user’s authority to operate the equipment.
  • Seite 32 SAFETY AND SET-UP _________________________ This apparatus includes this label: immediately after removing product. Class 1 Laser Product Do not re-use this bag. Use of controls adjustments or • To keep the laser pickup clean, do not • performance of procedures other than touch it, and always close the disc tray.
  • Seite 33 SAFETY AND SET-UP _________________________ Storage Put disc back in their case after playing them. Never expose disc to direct sunlight or heat sources. Never leave discs inside a car parked in full sunlight. Cleaning Use a clean soft lint-free cloth to clean the discs, working from the centre outwards in a straight line.
  • Seite 34: Controls And Parts

    (ON/OFF) Button Congratulations on the purchase of your new Switch the unit between ON and STANDBY mode. GRUNDIG Micro HIFI System MS 300. 6. SD CARD Socket Please read the following user notes carefully to Card slot for inserting a memory card (SD, SDHC, ensure full enjoyment of your quality GRUNDIG MMC).
  • Seite 35 AT A GLANCE _______________________________ Remote Control Repeat a specific section Switch the unit between ON 12. A-B within a track/chapter. and STANDBY mode. 13. POP 2. MODE Select the play function. Select Equalizer (EQ) Effect. ROCK 3. MENU Entering menu setup. Increase/decrease the volume level.
  • Seite 36: Prepare The Remote Control

    PREPARATIONS _____________________________ • Do not place the remote control on a wet Prepare the Remote Control object. The provided Remote Control allows the unit to be • Do not place the remote control under direct operated from a distance. sunlight or near sources of excessive heat. •...
  • Seite 37: Connect Power

    CONNECTIONS ______________________________ • Never leave the aerial where it can be pulled Connect to Speakers by pulled by young children. Note: Connect Power • For optimal sound, use the supplied speakers only. Connect only speakers with impedance Risk of product damage! that is the same or higher than the supplied •...
  • Seite 38 SETTINGS __________________________________ 5 Press the OK button on the remote control to Set the Clock confirm, the display will show the volume level. 1 In Standby mode, press and hold CLOCK 6 Press the / buttons on the remote control button.
  • Seite 39: Adjust The Brightness

    MAIN OPERATION ____________________________ Standby/ON Set the Sleep Timer When you first connect the main unit to the mains This unit can switch to standby automatically socket, the main unit will be in Standby mode. after a set period of time. •...
  • Seite 40: Play Control

    DISC/USB/SD OPERATION ______________________ Programme Setting DISC Operation The user can programme up to 20 tracks in CD/ 1 While in ON mode,Press the button on USB mode in any desired order. Programme the unit or MODE button on the remote control to mode is activated while in STOP mode .
  • Seite 41: Presetting Stations Manually

    (without any object between the Bluetooth The unit will show "PAIRING" . device and the unit). 3 Select "Grundig MS 300" in the pairing list. • Before you connect a Bluetooth device to this On successful pairing, the display panel shows unit, ensure you know the device’s capabilities.
  • Seite 42 CASSETTE MODE ____________________________ Selecting the cassette input source Recording onto cassette 1 Press the 1 Press » / « to open the tape compartment. button on the unit or MODE button on the remote control to select the CASSETTE Put in a recordable cassette. mode.
  • Seite 43 TROUBLESHOOTING __________________________ To keep the warranty valid, never try to repair the system yourself. If you encounter problems when using this unit, check the following points before requesting service. Fault Possible cause/action GENERAL INFORMATION -If the device has been disrupted by a thunderstorm, a static No function charge or another external factor, follow this procedure to resolve the problem: Disconnect the mains and then plug it in again.
  • Seite 44: System Section

    SPECIFICATIONS _____________________________ System Section Power Supply AC220-240V~ 50/60Hz Power Consumptiont 20 W Standby Mode Power Consumption < 1.0 W (Eco mode) Amplifier (Total Max. output power) Speaker Impedance 4Ω x 2 V 4.2 ( Supports A2DP, AVRCP profiles) Bluetooth Frequency Band 2400MHz ~ 2483.5MHz Radio Frequency Power Transmitted <5 dBm...
  • Seite 45: Technical Information

    You can find the CE declaration of conformity for equipment (WEEE). the device in the form of a pdf file on the Grundig This symbol indicates that this product Homepage www.grundig.com/downloads/doc. shall not be disposed with other household wastes at the end of its service life.
  • Seite 46: Tension Alternative

    LA SÉCURITÉ ET LA MISE EN PLACE ______________ doivent être lues avant d'utiliser ce produit. ATTENTION RISQUE DE CHOC ÉLECTRIQUE Conservez ces instructions - Les • NE PAS OUVRIR instructions de sécurité et d'utilisation ATTENTION : POUR REDUIRE TOUT RISQUE DELECTROCUTION, doivent être conservées pour référence NE PAS RETIRER LE COUVERCLE ARRIERE.
  • Seite 47 LA SÉCURITÉ ET LA MISE EN PLACE ______________ etc. Utilisez uniquement le chariot, • le support, le trépied, la Nettoyez-le uniquement avec un • console ou la table spécifiés chiffon sec. par le fabricant, ou vendus N'obstruez pas les ouvertures de •...
  • Seite 48 LA SÉCURITÉ ET LA MISE EN PLACE ______________ Veillez à ne pas gêner l'aération en Remplacez-la uniquement par une pile • couvrant les ouvertures avec des de type identique ou équivalent. journaux, une nappe, un rideau, etc. Avertissement : Ne placez aucune flamme nue, par •...
  • Seite 49 LA SÉCURITÉ ET LA MISE EN PLACE ______________ Cet appareil porte ce label : de cet appareil non expressément approuvé par la partie responsable de Produit laser de classe 1 la conformité annulera l'autorité de L'utilisation d'ajustements des contrôles • l'utilisateur à...
  • Seite 50 LA SÉCURITÉ ET LA MISE EN PLACE ______________ AVERTISSEMENT Manipulation Pour éviter tout risque d'étouffement, Ne touchez pas la face de lecture des • gardez ce sac hors de portée des disques. Tenez les disques par les bords bébés et des enfants. Il ne faut pas pour éviter de laisser des empreintes l'utiliser dans les lits d'enfant, les lits, digitales sur la surface.
  • Seite 51 LA SÉCURITÉ ET LA MISE EN PLACE ______________ Sécurité auditive Écoutez à un volume modéré. Avertissement : pression • sonore excessive en provenance des écouteurs et des casques peut entraîner une perte de l'audition. Pour éviter d'éventuelles lésions • auditives, n'écoutez pas à haut volume pendant de longues périodes.
  • Seite 52 Veuillez lire attentivement les notes d'utilisation 6. Port carte SD suivantes afin de pouvoir profiter pleinement de votre Fente pour l'insertion d'une carte mémoire (SD, produit GRUNDIG de qualité pendant de nombreuses SDHC, MMC). années. 7. Port USB Une approche responsable ! Insérez le périphérique USB pour écouter de la...
  • Seite 53 EN BREF ___________________________________ Cordon d'alimentation CA Répétez une section spécifique 12. A-B Câble de haut-parleur dans un titre/chapitre. Antenne FM x1 13. POP Sélectionner l'effet d'égalisation Câble audio de 3,5 mm à 3,5 mm x 1 ROCK (EQ) Augmenter ou diminuer le Télécommande niveau du volume.
  • Seite 54: Préparer La Télécommande

    PRÉPARATIONS _____________________________ Préparer la télécommande • Ne laissez rien heurter la télécommande. La télécommande fournie permet de faire • Ne renversez pas d'eau ou de liquide sur la fonctionner l'appareil à distance. télécommande. • Même si la télécommande est utilisée dans la •...
  • Seite 55 CONNEXIONS _______________________________ Connectez les haut-parleurs IMPORTANT : • Vous devrez peut-être ajuster la position de Remarque : l'antenne lors du réglage de la radio pour • Pour un son optimal, utilisez uniquement les recevoir le signal le plus fort. haut-parleurs fournis. Ne connectez que des •...
  • Seite 56: Régler L'horloge

    PARAMÈTRES _______________________________ Régler l'horloge 5 Appuyez sur la touche OK de la télécommande pour confirmer, l'écran affichera le niveau de 1 En mode veille, appuyez sur la touche CLOCK et volume. maintenez-la enfoncée. 6 Appuyez sur les touches / de la 2 Appuyez sur les / touches / de la télécommande télécommande pour régler le volume, puis appuyez pour sélectionner le format 12/24 heures, puis...
  • Seite 57: Ajuster La Luminosité

    OPÉRATION PRINCIPALE _______________________ Veille/MARCHE Ajuster la luminosité • Appuyez sur la touche DIMMER de la Lorsque vous connectez l'unité principale à la prise de courant pour la première fois, l'unité télécommande pour sélectionner le niveau de principale est en mode veille. luminosité.
  • Seite 58: Fonctionnement Aux

    OPÉRATION DISC/USB/SD ______________________ Effectuer une lecture rapide en avant/en Fonctionnement AUX arrière Lecture pour les appareils audio externes Sélectionnez les modes de lecture aléatoire. 1 Assurez-vous que l'appareil est connecté à la Répétez une fois : télévision ou à l'appareil audio. Répétez tout : 2 Appuyez sur la touche MODE de l'appareil ou Répéter le dossier :...
  • Seite 59 2 Activez votre appareil Bluetooth et sélectionnez le bouton de la télécommande et maintenez-le enfoncé. mode de recherche. « Grundig MS 300 » apparaîtra sur L'appareil Bluetooth sera déconnecté de l'unité. votre appareil Bluetooth. FONCTIONNEMENT DE LA RADIO FM _____________...
  • Seite 60 FONCTIONNEMENT DE LA RADIO FM _____________ Préréglage manuel des stations Vous pouvez prérégler jusqu'à 40 stations FM. 1 Réglez la station souhaitée, puis appuyez sur le bouton PROG. 2 Appuyez sur les touches , ou sur les , touches numériques (0 à 9) pour sélectionner le numéro préréglé.
  • Seite 61: Enregistrement Sur Cassette

    MODE CASSETTE (K7) _________________________ Sélection de la source d'entrée de la Recherche rapide en avant et en cassette arrière 1 Appuyez sur la touche de l'appareil ou 1 En mode arrêt, appuyez sur » « ou » «. • » sur la touche MODE de la télécommande pour «...
  • Seite 62 DÉPANNAGE ________________________________ Pour que la garantie reste valable, n'essayez jamais de réparer le système vous-même. Si vous rencontrez des problèmes lors de l'utilisation de cet appareil, vérifiez les points suivants avant de demander une réparation. Défaut Cause possible/action INFORMATIONS GÉNÉRALES -Si l'appareil a été...
  • Seite 63: Section Système

    SPÉCIFICATIONS _____________________________ Section Système Source d'alimentation AC220-240V~ 50/60Hz Consommation d’énergie 20 W Consommation d’énergie en mode veille < 1.0 W (Eco mode) Amplificateur (Puissance de sortie totale max.) Impédance de haut-parleur 4Ω x 2 Bluetooth V 4.2 ( prend en charge les profils A2DP, AVRCP) Bande de fréquence 2400MHz ~ 2483,5MHz Fréquence radio...
  • Seite 64: Information Technique

    Vous trouverez la déclaration CE de conformité aux déchets d’équipements électriques et du dispositif sous la forme d'un fichier pdf sur électroniques (WEEE). la page d'accueil de Grundig www.grundig.com/ Ce symbole indique que cet appareil ne downloads/doc. doit pas être mis au rebut avec les ordures ménagères à...
  • Seite 65 Beko Grundig Deutschland GmbH Thomas-Edison-Platz 3 D-63263 Neu-Isenburg www.grundig.com...

Inhaltsverzeichnis