Riello Gulliver RS5 Montage- Und Bedienungsanleitung
Vorschau ausblenden
Andere Handbücher für Gulliver RS5:
- Montage- und bedienungsanleitung (80 Seiten)
Inhaltsverzeichnis
Werbung
Verfügbare Sprachen
Verfügbare Sprachen
Quicklinks
Istruzioni per installazione, uso e manutenzione
Montage und Bedienungsanleitung
Installation, use and maintenance instructions
Bruciatori di gas ad aria soffiata
I
Gas-Gebläsebrenner
D
Forced draught gas burners
GB
Funzionamento monostadio
Einstufiger Betrieb
One stage operation
CODICE
CODE
3761912 - 3761916
3761958
MODELLO - MODELL
MODEL
RS5
TIPO - TYP
TYPE
920T1
2903095 (1) - 09/2009
Werbung
Kapitel
Inhaltsverzeichnis
Fehlerbehebung

Verwandte Anleitungen für Riello Gulliver RS5


Inhaltszusammenfassung für Riello Gulliver RS5
- Seite 1 Istruzioni per installazione, uso e manutenzione Montage und Bedienungsanleitung Installation, use and maintenance instructions Bruciatori di gas ad aria soffiata Gas-Gebläsebrenner Forced draught gas burners Funzionamento monostadio Einstufiger Betrieb One stage operation CODICE MODELLO - MODELL TIPO - TYP CODE MODEL TYPE 3761912 - 3761916...
-
Seite 3: Inhaltsverzeichnis
INDICE DESCRIZIONE DEL BRUCIATORE ..........1.1 Materiale a corredo . -
Seite 4: Descrizione Del Bruciatore
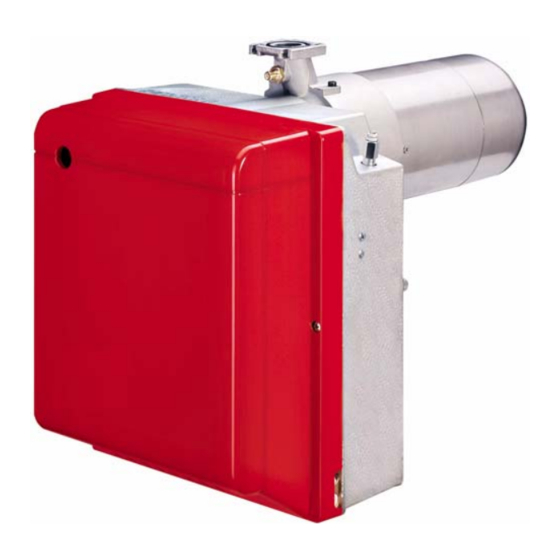
DESCRIZIONE DEL BRUCIATORE Bruciatore di gas con funzionamento monostadio. Il bruciatore risponde al grado di protezione IP X0D (IP 40) secondo EN 60529. Marcatura CE secondo direttiva gas 90/396/CEE; PIN 0085BM0114. Conforme alle Direttive: CEM 89/336/CEE, Bassa Tensione 73/23/CEE e Macchine 98/37/CEE. Rampa gas conforme a EN 676. -
Seite 5: Dati Tecnici
DATI TECNICI DATI TECNICI TIPO 920 T1 Potenza termica (1) 330 kW 137.600 283.800 kcal/h Pci: 8 12 kWh/Nm = 7000 10.340 kcal/Nm Gas naturale (Famiglia 2) Pressione: min. 20 mbar max. 100 mbar ± Alimentazione elettrica Monofase, 230 V 50Hz Motore 1,9 A assorbiti... -
Seite 6: Caldaie Commerciali
CAMPO DI LAVORO, (secondo EN 676) 130.000 170.000 210.000 250.000 290.000 kcal/h Potenza termica D6231 CALDAIE DI PROVA Il campo di lavoro è stato ottenuto su caldaie di prova secondo norma EN 676. CALDAIE COMMERCIALI L’abbinamento bruciatore-caldaia non pone problemi se la caldaia è conforme alla norma EN 303 e le dimensioni della sua camera di combustione sono prossime a quelle previste nella norma EN 676. -
Seite 7: Installazione
INSTALLAZIONE L’INSTALLAZIONE DEL BRUCIATORE DEVE ESSERE EFFETTUATA IN CONFORMITÀ ALLE LEGGI E NORMATIVE LOCALI. POSIZIONE DI FUNZIONAMENTO Il bruciatore è predisposto esclusi- vamente per il funzionamento nella posizione 1. Le installazioni nelle posizioni 2, 3, 5, 6, 7 non garantiscono la chiusura della serranda aria in sosta. -
Seite 8: Rampa Gas
RAMPA GAS, (secondo EN 676) La rampa gas viene fornita a parte e per la sua regolazione vedere le istruzioni che l’accompagnano. RAMPA GAS ATTACCHI IMPIEGO TIPO CODICE INGRESSO USCITA MBDLE 410 B01 3970549 Rp 1 1/4 Flangia 3 Gas naturale 200kW e GPL 160 330 kW MBDLE 412 B01... -
Seite 9: Collegamenti Elettrici
COLLEGAMENTI ELETTRICI LEGENDA – Condensatore – Spia blocco CN1 – Connettore sonda (230V - 0,5 A max) – Elettrodo T6A – Fusibile – Contaore – Terra bruciatore MV – Motore – Termostato limite – Pressostato aria min. – Termostato di sicurezza –... -
Seite 10: Funzionamento
FUNZIONAMENTO POTENZA ALL’ACCENSIONE Fig. 8 L’accensione deve avvenire a potenza ridotta e non superiore ai 120 kW. Per misurare la potenza all'accensione: – Scollegare il connettore (CN1) sul cavo della son- da di ionizzazione (vedi collegamenti elettrici a pag. 7); il bruciatore si accende e va in blocco dopo il tempo di sicurezza (3s). -
Seite 11: Regolazione Serranda Aria
ESTRAZIONE GRUPPO TESTA, (vedi fig. 8, pag. 8) Per l’estrazione del gruppo testa eseguire le seguenti operazioni: Estrarre il gruppo porta testa (1) dopo aver tolto le viti (7), sconnesso i collegamenti (3 e 5), sfilato il tubetto (4) e allentato le viti (10). Si raccomanda di non alterare la posizione di regolazione staffa–gomito nella fase di smontaggio RIMONTAGGIO GRUPPO TESTA, (vedi fig. -
Seite 12: Controllo Della Combustione
CONTROLLO DELLA COMBUSTIONE È consigliabile regolare il bruciatore, a seconda del tipo di gas utilizzato, secondo le indicazioni fornite nella tabella seguente: EN 676 ECCESSO D’ARIA: potenza max. 1,2 – potenza min. max. teorico Taratura CO 0 % O mg/kWh mg/kWh = 1,2 = 1,3... -
Seite 13: Funzione Di Riciclo
4.8 FUNZIONE DI RICICLO L’apparecchiatura permette il riciclo, ossia la ripetizione completa del programma di avviamento, per un massimo di 3 tentativi nel caso in cui la fiamma si spegne in funzionamento. 4.9 FUNZIONE DI POST-VENTILAZIONE La post-ventilazione è una funzione che mantiene la ventilazione dell’aria anche dopo lo spegnimento del bruciatore. -
Seite 14: Diagnostica Visiva Apparecchiatura
Verificare il corretto posizionamento della serranda aria. Verificare il corretto posizionamento della sonda di ionizzazione e dell'elettrodo (vedi fig. 9, pag. 9). Verificare la regolazione del pressostato aria e del pressostato gas. Lasciare funzionare il bruciatore a pieno regime per circa dieci minuti, tarando correttamente tutti gli elementi indicati nel presente manuale. -
Seite 15: Anomalie / Rimedi
ANOMALIE / RIMEDI Si elencano alcune cause e i possibili rimedi a una serie di anomalie che potrebbero verificarsi e portare ad un mancato o non regolare funzionamento del bruciatore. Un’anomalia, nel funzionamento nella maggior parte dei casi, porta alla accensione della segnalazione all’interno del pulsante di sblocco dell’apparecchia- tura di comando e controllo (4, fig. -
Seite 16: Anomalie In Funzionamento
ANOMALIE POSSIBILE CAUSA RIMEDIO Verificare la pressione in rete e/o re- Le elettrovalvole fanno passare golare l’elettrovalvola come indicato in troppo poco gas. questo manuale. Le elettrovalvole sono difettose. Procedere ad una loro sostituzione. Verificare il corretto inserimento dei Il bruciatore va in bloc- connettori. -
Seite 17: Avvertenze E Sicurezza
AVVERTENZE E SICUREZZA Al fine di garantire una combustione col minimo tasso di emissioni inquinanti, le dimensioni ed il tipo di ca- mera di combustione del generatore di calore, devono corrispondere a valori ben definiti. È pertanto consigliato consultare il Servizio Tecnico di Assistenza prima di scegliere questo tipo di brucia- tore per l’abbinamento con una caldaia. - Seite 19 INHALT BESCHREIBUNG DES BRENNERS ..........1.1 Mitgeliefertes Zubehör .
-
Seite 20: Beschreibung Des Brenners
BESCHREIBUNG DES BRENNERS Gasbrenner mit einstufigem Betrieb. Der Brenner entspricht dem Schutzart IP X0D (IP 40) gemäß EN 60529. CE Kennzeichnung gemäß der Gasgeräterichtlinie 90/396/EWG; PIN 0085BM0114. Gemäß Richtlinien: EMV 89/336/EWG, Niederspannungsrichtlinie 73/23/EWG und Maschinenrichtlinie 98/37/EWG. Gasstrecke gemäß der Euronorm EN 676. Der Brenner ist gemäß... -
Seite 21: Technische Merkmale
TECHNISCHE MERKMALE 2.1 TECHNISCHE DATEN 920 T1 Brennerleistung (1) 330 kW 137.600 283.800 kcal/h Unterer Heizwert: 8 12 kWh/Nm = 7000 10.340 kcal/Nm Erdgas (Familie 2) Anschlussdruck: Min. 20 mbar Max. 100 mbar ± Stromversorgung Einphasig, 230 V 50Hz Motor Stromaufnahme 1,9 A 2720 U/min. -
Seite 22: Handelsübliche Heizkessel
2.3 ARBEITSFELD (nach EN 676) D6231 130.000 170.000 210.000 250.000 290.000 kcal/h Brennerleistung PRÜFKESSEL Das Arbeitsfeld wurde an einem Prüfkessel, gemäß der Norm EN 676, ermittelt. HANDELSÜBLICHE HEIZKESSEL Die Abstimmung Brenner-Kessel ist ohne Probleme, wenn der Kessel der Euronorm EN 303 entspricht und die Abmessungen des Feuerraumes mit Euronorm EN 676 übereinstimmen. -
Seite 23: Installation
INSTALLATION DIE INSTALLATION DES BRENNERS MUSS IN ÜBEREINSTIMMUNG MIT DEN ÖRTLICHEN GESETZEN UND VORSCHRIFTEN AUSGEFÜHRT WERDEN. BETRIEBSPOSITION Der Brenner ist ausschließlich für den Betrieb in Position 1 vorbereitet. Installationen in den Positionen 2, 3, 5, 6 und 7 können den korrek- ten Betrieb de s Ger äts beein - trächtigen, da sie die Schließung der Luftklappe in Ruhestellung... -
Seite 24: Gasstrecken
3.3 GASSTRECKEN, (nach EN 676) Die Gasstrecke muß der Euronorm EN 676 entsprechen und wird extra bestellt. Die Einregulierung wird entsprechend der beigefügten Betriebsanleitung durchgeführt. GASSTRECKE ANSCHLÜSSE GEBRAUCH CODE EINGANG AUSGANG MBDLE 410 B01 3970549 Rp 1 1 / 4 Flansch 3 Erdgas 200kW und Flüssiggas 160... -
Seite 25: Elektrisches Verdrahtungsschema
3.6 ELEKTRISCHES VERDRAHTUNGSSCHEMA ZEICHENERKLÄRUNG – Kondensator – Störabschaltung-Fernmeldung CN1 – Verbinder Fühler (230V - 0,5A max.) – Zündelektrode T6A – Sicherung – 1. Stufe Stundenzähler TB – Brenner-Erdung MV – Motor – Grenzthermostat PA – Minimalluftdruckwächter – Sicherheitsthermostat PG – Minimalgasdruckwächter V10 –... -
Seite 26: Betrieb
BETRIEB ZÜNDLEISTUNG Abb. 8 Die Zündung Muß mit reduzierter Leistung und nicht über 120 kW gescheben. – Den Verbinder (CN1) vom Kabel der Ionisati- onssonde abtrennen (siehe Elektrisches Ver- drahtungsschema auf Seite 7); der Brenner schaltet ein und geht nach der Sicherheitszeit (3s) in Störabschaltung. -
Seite 27: Luftklappeneinstellung
ENTNAHME DES KOPFBLOCKS , (siehe Abb. 8, Seite 8) Um den Kopfblock-Halter herauszunehmen, die folgenden Tätigkeiten ausführen: den Kopf herausnehmen, nachdem vorher die Schrauben (7) weggenommen, die Verbindungen (3 und 5) getrennt, das Röhrchen (4) abge- nommen und die Schrauben (10) gelockert wurden. Es wird empfohlen, nicht die Einstellspindellage und den Schlitten während der Demontage zu ändern. -
Seite 28: Verbrennungskontrolle
4.5 VERBRENNUNGSKONTROLLE Der Brenner muß gemäß untenstehender Tabelle auf die jeweils vorhandene Gasart eingestellt werden: EN 676 1,2 – min. Leistung LUFTÜBERSCHUSS: max. Leistung Einstellung CO Theoretische Gehalt max. CO 0 % O mg/kWh mg/kWh = 1,2 = 1,3 G 20 11,7 G 25 11,5... -
Seite 29: Wiederanlauffunktion
4.8 WIEDERANLAUFFUNKTION Das Steuergerät ermöglicht den erneuten Anlauf bzw. die vollständige Wiederholung des Anfahrprogramms für max. 3 Versuche, falls die Flamme während des Betriebs erlischt. 4.9 NACHBELÜFTUNGSFUNKTION Die Nachbelüftung ist eine Funktion, mit der die Belüftung auch nach dem Ausschalten des Brenners statt- findet. -
Seite 30: Visuelle Diagnostik Des Steuergeräts
Die korrekte Positionierung des Ionisationsfühlers und der Elektrode überprüfen (siehe Abb. 9, Seite 9). Die Einstellung des Luft- und des Gasdruckwächters überprüfen. Den Brenner ca. zehn Minuten auf Vollbetrieb funktionieren lassen und alle in der vorliegenden Anleitung angegebenen Elemente korrekt einstellen. Dann eine Verbrennungsanalyse ausführen, mit Überprüfung von: Anteil (%);... -
Seite 31: Störungen / Abhilfe
STÖRUNGEN / ABHILFE Nachfolgend finden Sie einige denkbare Ursachen und Abhilfemöglichkeiten für Störungen, die den Betrieb des Brenners beeinflussen oder einen nicht ordnungsgemäßen Betrieb des Brenners verursachen könnten. In den meisten Fällen führt eine Störung zum Aufleuchten der Kontrolleuchte in der Entstörtaste des Steuergeräts (4, Abb. -
Seite 32: Mögliche Ursache
STÖRUNGEN MÖGLICHE URSACHE ABHILFE Gemäß den Angaben dieser Anleitung Gasdurchsatz zu gering. den Gasdruck prüfen und/oder die Ma- gnetventile einstellen. Die Magnetventile sind verschmutzt. Austauschen. Störabschaltung des Brenners nach Vorlüf- Die richtigen Kabelverbindung überprü- tung, keine Flammen- fen. Kein oder unregelmäßiger bildung. -
Seite 33: Hinweise Und Sicherheit
HINWEISE UND SICHERHEIT Um bestmögliche Verbrennungs-Ergebnisse sowie niedrige Emissionswerte zu erzielen, muß die Brenn- kammer-Geometrie des Heizkessels für den Brenner geeignet sein. Deshalb ist es notwendig, vor Einsatz des Brenners Informationen bei einzuholen, um ein einwandfreies Funktionieren des Brenners zu gewährleisten. Dieser Brenner darf nur für den Einsatzzweck verwendet werden, für den er hergestellt wurde. - Seite 35 INDEX BURNER DESCRIPTION ............1.1 Burner equipment .
-
Seite 36: Burner Description
BURNER DESCRIPTION One stage gas burner. The burner meets protection level of IP X0D (IP 40), EN 60529. CE marking according to Gas Appliance directive 90/396/EEC; PIN 0085BM0114. According to directives: EMC 89/336/EEC, Low Voltage 73/23/EEC and Machines 98/37/EEC. Gas train according to EN 676. The burner is approved for intermittent operation as per Directive EN 676. -
Seite 37: Technical Data
TECHNICAL DATA 2.1 TECHNICAL DATA TYPE 920 T1 Thermal power (1) 160 – 330 kW – 137.600 283.800 kcal/h Net heat value: 8 – 12 kWh/Nm = 7000 – 10,340 kcal/Nm Natural gas (Family 2) Pressure: min. 20 mbar max. 100 mbar ±... -
Seite 38: Firing Rate
2.3 FIRING RATE (as EN 676) D6231 130.000 170.000 210.000 250.000 290.000 kcal/h Thermal power TEST BOILER The firing rate has been defined according to EN 676 standard. COMMERCIAL BOILERS The burner-boiler matching is assured if the boiler is according to EN 303 and the combustion chamber dimensions are similar to those shown in the diagram EN 676. -
Seite 39: Installation
INSTALLATION THE BURNER MUST BE INSTALLED IN CONFORMITY WITH LEGISLATION AND LOCAL STANDARDS. WORKING POSITION The burner is designed for opera- tion in position 1 only. Installation in positions 2, 3, 5, 6 and 7 is not recommended as it is likely to hinder the unit’s proper operation since air damper closure cannot be guaranteed when the... -
Seite 40: Gas Train
3.3 GAS TRAIN, (as EN 676) The gas train is supplied separately, for its adjustment see the enclosed instructions. GAS TRAIN CONNECTIONS TYPE CODE INLET OUTLET MBDLE 410 B01 3970549 Rp 1 1 / 4 Flange 3 Natural gas 200kW and LPG 160 –... -
Seite 41: Electrical Wiring
3.6 ELECTRICAL WIRING KEY TO LAY-OUT – Capacitor S3 – Lock-out signal (230V - 0.5A max.) CN1 – Ionisation probe connector T6A – Fuse – Electrode TB – Burner-earth – Hour counter TL – Limit thermostat MV – Motor TS – Safety thermostat PA –... -
Seite 42: Working
WORKING FIRING OUTPUT Fig. 8 The firing must occur at reducer output and not higher than 120 kW. In order to measure the firing output: – Disconnect the connector (CN1) on the ioniza- tion probe cable (see electrical wiring at page 7); the burner will fire and then go into lock-out after the safety time (3s) has elapsed. -
Seite 43: Air Damper Setting
HEAD ASSEMBLY REMOVING, (see fig. 8, page 8) To remove the head assembly, carry out the following operations: Remove the head-older assembly (1), after taking away the screws (7), disconnect the connections (3 and 5), extract the small tube (4) and loose the screws (10). Do not modify the setting position of the bracket-elbow during the disassembly. -
Seite 44: Combustion Check
4.5 COMBUSTION CHECK It is advisable to set the burner according to the type of gas used and following the indications of the table: EN 676 1.2 – min. output AIR EXCESS: max. output Theoretical max. CO Setting CO 0 % O mg/kWh mg/kWh = 1.2... -
Seite 45: Re-Cycle Function
4.8 RE-CYCLE FUNCTION The control box allows re-cycling, i.e. the complete repetition of the starting programme, for 3 attempts maxi- mum, in the event the flame goes out during operation. 4.9 POST-VENTILATION FUNCTION Post-ventilation is a function that maintains air ventilation even after the burner is switched off. The burner switches off when the limit thermostat (TL) opens, cutting off the fuel supply to the valves. -
Seite 46: Visual Diagnostic Control Box
Check that the ionisation probe and the electrode are positioned correctly (see fig. 9, page 9). Check that the air pressure switch and the gas pressure switch are set correctly. Let the burner run at full capacity for about ten minutes, setting all the elements correctly as explained in this manual. -
Seite 47: Faults / Solutions
FAULTS / SOLUTIONS Here below you can find some causes and the possible solutions for some problems that could cause a failure to start or a bad working of the burner. A fault usually makes the lock-out lamp light which is situated inside the reset button of the control box (4, fig. -
Seite 48: Operating Irregularities
FAULTS POSSIBLE CAUSES SOLUTION Check the pressure in the network and/ The solenoid valves is passing too or adjust the solenoid valve according to little gas. the instructions of this manual. The solenoid valves are defective. Change them The burner locks out Check the right insertion of the connec- after prepurge... -
Seite 49: Safety Warnings
SAFETY WARNINGS The dimension of the boiler’s combustion chamber must respond to specific values, in order to guarantee a combustion with the lowest polluting emissions rate. The Technical Service Personnel will be glad to give you all the imformation for a correct matching of this burner to the boiler. - Seite 52 RIELLO S.p.A. I-37045 Legnago (VR) Tel.: +39.0442.630111 http:// www.riello.it http:// www.rielloburners.com Con riserva di modifiche - Änderungen vorbehalten! - Subject to modifications...