
Verwandte Anleitungen für Telestar DIRA M 14i


Inhaltszusammenfassung für Telestar DIRA M 14i
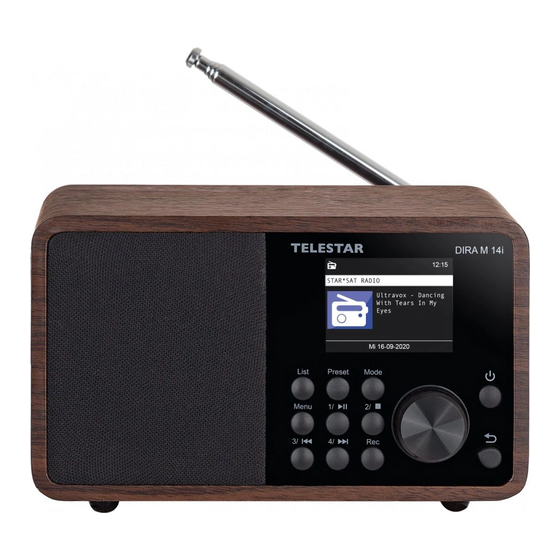
- Seite 1 Bedienungsanleitung User manual Manuel d’utilisation Istruzioni d‘uso Handleiding DIRA M 14i / DIRA S 24i V4_07_01_21...
-
Seite 3: Inhaltsverzeichnis
Inhalt 1. VORWORT ......... . .7 1.2. - Seite 4 INHALTSVERZEICHNIS 7. EINSTELLUNGEN........37 7.1. Grundlegende Bedienung ......37 7.1.1.
- Seite 5 INHALTSVERZEICHNIS 8. BEDIENUNG ........51 8.1.
- Seite 6 INHALTSVERZEICHNIS 9. FEHLERBEHEBUNG ....... . . 69 10. AUFBEWAHRUNG ....... . . 71 11.
-
Seite 7: Vorwort
1. Vorwort Sehr geehrter Kunde, vielen Dank, dass Sie Sich für dieses Produkt entschieden haben. Bitte lesen Sie diese Anweisungen sorgfältig durch, und bewahren Sie diese für zukünftige Gelegenheiten zum Nachschlagen auf. Diese Bedienungsanleitung ist ein Bestandteil des Gerätes! Sollten Sie das Gerät verkaufen oder weitergeben, händigen Sie bitte unbedingt auch diese Bedienungsanleitung aus. -
Seite 8: Bestimmungsgemässer Gebrauch
1. Vorwort 1.2. Bestimmungsgemäßer Gebrauch Bei diesem Produkt handelt es sich um ein Gerät der Unterhaltungselektronik. Das Gerät dient als Empfänger für Internet /UKW- und DAB+ Radiosignale und zur Wiedergabe von Audiodateien, gespeichert auf einen USB Datenträger oder auf einem Netzwerklaufwerk. Jede andere Bedienung oder Nutzung des Gerätes gilt als nicht bestimmungsgemäß... -
Seite 9: Sicherheitshinweise
2. SICHERHEITSHINWEISE 2.1. Zeichenerklärung Symbol Bedeutung Dieses Signalwort bezeichnet eine Gefährdung mit einem hohen GEFAHR! Risikograd, die bei Nichtbeachtung des Hinweises, den Tod oder eine schwere Verletzung zur Folge hat. Dieses Signalwort bezeichnet eine Gefährdung mit einem mittleren Risikograd, die, bei Nichtbeachtung WARNUNG! des Hinweises, den Tod oder eine schwere Verletzung zur Folge haben... - Seite 10 2. SICHERHEITSHINWEISE 2.1. Zeichenerklärung Symbol Bedeutung Dieses Signalwort warnt vor möglichen Sachschäden und weist HINWEIS! auf besondere Beschreibungen für den Betrieb des Gerätes hin. Dieses Zeichen warnt vor Gefahren. Schutzklasse II Elektrogeräte mit Schutzklasse II haben eine verstärkte oder doppelte Isolierung in Höhe der Bemessungsisolationsspannung zwischen aktiven und berührbaren Teilen (VDE 0100 Teil 410, 412.1).
- Seite 11 2. SICHERHEITSHINWEISE 2.1. Zeichenerklärung Symbol Bedeutung Bei Geräten mit Hohlsteckern kenn- Abb. 1 zeichnen diese Symbole die Polarität des Steckers. Hierbei wird zwischen 2 Varianten Abb. 2 unterschieden Abb 1: Außen Plus/ Innen Minus Abb 2: Innen Plus / Außen Minus Geräte mit diesem Zeichen dürfen nur im Haus in trockener Umgebung betrieben werden...
-
Seite 12: Sicherheitshinweis
2. SICHERHEITSHINWEISE 2.2. Sicherheitshinweis WARNUNG! Prüfen Sie das Gerät vor der Verwendung. Im Falle einer Beschädigung oder eines Defekts darf das Gerät nicht in Betrieb genommen werden. Verletzungsgefahr! Verletzungsgefahr für Kinder und Personen mit verringerten phy- sischen, sensorischen oder mentalen Fähigkeiten (beispielsweise teilweise Behinderte, ältere Personen mit Einschränkung ihrer physischen und mentalen Fähigkeiten) oder Mangel an Erfahrung und Wissen. -
Seite 13: Betriebssicherheit
Gerät sichtbare Schäden aufweist, nehmen Sie es nicht mehr in Betrieb. > Sollten Sie ein technisches oder mechanisches Problem feststellen, setzen Sie sich bitte mit dem TELESTAR Service in Verbindung. > Verwenden Sie nur das im Lieferumfang enthaltene Netzteil! Verwenden Sie niemals ein anderes Netzteil. - Seite 14 2. SICHERHEITSHINWEISE > Öffnen Sie niemals das Gehäuse des Gerätes. > Trennen Sie bei Betriebsstörungen das Gerät sofort von der Stromquelle. Trennen Sie dazu sofort das Netzteil von der Netzsteckdose und vom Gerät. > Verwenden Sie nur von uns gelieferte oder genehmigte Ersatz- und Zubehörteile.
- Seite 15 2. SICHERHEITSHINWEISE > Wenn Sie das Gerät von einer kalten in eine warme Umgebung bringen, kann sich im Inneren des Gerätes Feuchtigkeit niederschlagen. Warten Sie in diesem Fall etwa eine Stunde, bevor Sie es in Betrieb nehmen. > Bei längerer Abwesenheit oder bei Gewitter ziehen Sie das Gerät aus der Steckdose.
-
Seite 16: Gerät Anschließen
2. SICHERHEITSHINWEISE 2.4. Gerät anschließen > Schließen Sie das Gerät nur an eine fachgerecht installierte, geerdete und elektrisch abgesicherte Steckdose an. > Beachten Sie bitte, dass die Stromquelle (Steckdose) leicht zugänglich ist. > Knicken oder quetschen Sie keine Kabelverbindungen. > Prüfen Sie, bevor Sie das Gerät in Betrieb nehmen, ob die Spannungsangabe, die sich auf dem Gerät befindet, mit der örtlichen Netzspannung überein... - Seite 17 2. SICHERHEITSHINWEISE Vermeiden Sie die direkte Nähe von: Wärmequellen, wie z.B. Heizkörpern, offenem Feuer, wie z.B. Kerzen, Geräten mit starken Magnetfeldern, wie z. B. Lautsprechern. Setzen Sie das Gerät keinen extremen Bedingungen aus z.B. direkte Sonneneinstrahlung, hohe Luftfeuchtigkeit, Nässe, extrem hohe oder tiefe Temperaturen, offenes Feuer.
-
Seite 18: Verletzungsgefahr
2. SICHERHEITSHINWEISE 2.6. Verletzungsgefahr WARNUNG! Übermäßiger Schalldruck bei Verwendung von Ohr- oder Kopfhörern kann zu Schädigungen oder zum Verlust des Hörvermögens führen. Das Hören mit Ohrhörer oder Kopfhörer mit erhöhter Lautstärke über einen längeren Zeitraum kann Schäden beim Nutzer verursachen. Bitte prüfen Sie die Lautstärke, bevor Sie Ohrhörer oder Kopfhörer in Ihre Ohren einsetzen bzw. -
Seite 19: Umgang Mit Batterien
2. SICHERHEITSHINWEISE Halten Sie bitte daher einen sicheren und ausreichenden Abstand zwischen medizinischen Geräten und dem Radio ein. Wenn Sie einen Grund zur Annahme haben, dass das Radio eine Störung mit einem medizinischen Gerät verursacht, schalten Sie das Radio umgehend aus oder trennen es vom Strom. 2.8. - Seite 20 2. SICHERHEITSHINWEISE Batterien bei längerem Nichtgebrauch aus dem Gerät entfernen. Erschöpfte oder ausgelaufene Batterien sofort aus dem Gerät entfernen. Bei ausgelaufenen Batterien besteht bei Hautkontakt Verätzungsgefahr. Bewahren Sie sowohl neue, als auch gebrauchte Batterien außerhalb der Reichweite von Kindern auf. Beim Verschlucken von Batterien besteht die Gefahr innerer Verletzungen.
- Seite 21 2. SICHERHEITSHINWEISE WARNUNG! Bei unsachgemäßer Verwendung von Batterien besteht Explosionsgefahr! > Verwenden Sie nur neue Batterien des gleichen Typs. > Benutzen Sie bitte niemals neue und alte Batterien zusammen in einem Gerät. > Achten Sie beim Einlegen der Batterien auf die richtige Polarisation.
-
Seite 22: Gerät Reinigen
2. SICHERHEITSHINWEISE 2.9. Gerät reinigen Vor der Reinigung ziehen Sie das Gerät aus der Steckdose. Verwenden Sie ein trockenes, weiches Tuch um das Gerät zu reinigen. Bitte verwenden Sie keine Flüssigkeiten zur Reinigung des Gerätes. Verwenden Sie keine Lösungs- und Reinigungsmittel, weil diese die Oberfläche und/oder Beschriftungen des Gerätes beschädi- gen können. -
Seite 23: Lieferumfang
3. LIEFERUMFANG Bitte entnehmen Sie alle Teile aus der Verpackung und entfernen Sie alle Verpackungsmaterialien vollständig. Sollten ein oder mehrere der angebenenen Teile fehlen, wenden Sie sich bitte an: TELESTAR Service Center, Am Weiher 14, 56766 Ulmen e-mail: service@telestar.de Anzahl Erklärung... -
Seite 24: Übersicht Der Bedienelemente
4. ÜBERSICHT DER BEDIENELEMENTE 3 4 5 13 14 15 1 6... - Seite 25 4. ÜBERSICHT DER BEDIENELEMENTE 1. List Ruft eine Liste der letzten 10 angewählten Radiostationen auf. 2. Stationsspeichertaste 1/Multimedia Steuerungen Über diese Tasten schalten Sie im Radiomodus auf einen gewünschten Programmspeicherplatz. ▸II Startet oder pausiert die Wiedergabe von Musiktiteln auf einem angeschlossenen USB Datenträger. 3.
- Seite 26 4. ÜBERSICHT DER BEDIENELEMENTE Taste länger als 2 Sekunden gedrückt halten um das Timer Menü zur Aufzeichnung einer Radiosendung zu aktivieren. 8. Stationsspeichertaste 2/Multimedia Steuerungen Über diese Tasten schalten Sie im Radiomodus auf einen gewünschten Programmspeicherplatz. ■ Stoppt eine laufende Wiedergabe im USB/Media Modus.
- Seite 27 4. ÜBERSICHT DER BEDIENELEMENTE 14. Kopfhöreranschluss Stecken Sie hier einen Kopfhörer ein, um die vom Radio wiedergegebene Musik über einen Kopfhörer zu hören. Bei Anschluss eines Kopfhörers, wird die Musikwiedergabe über die Lautsprecher des Gerätes unterbrochen. 15. AUX IN Verbinden Sie hier eine externe Audioquelle wie MP3 Player, Smart Phone oder Tablet mit dem 3,5 mm AUX Klinken Kabel (siehe auch Kapitel 8.8.) 16.
-
Seite 28: Fernbedienung
5. FERNBEDIENUNG Das Radio kann sowohl über die Gerätetasten als auch die Fernbedienung gesteuert werden. Die Steuerung über die Fernbedienung ist die komfortablere und einfachere Art, das Gerät zu bedienen. - Seite 29 5. FERNBEDIENUNG 1. Standby Taste Schalten Sie mit dieser Taste das Gerät ein oder aus. 2. Mode Schalten Sie hier die verschiedenen Betriebsarten um. 3. Mute Schaltet den Ton des Gerätes lautlos. 4. EQ Equalizer Funktion Über diese Taste können Sie die Equalizer Funktion aktivieren und individuelle Klangeinstellungen vornehmen.
- Seite 30 5. FERNBEDIENUNG 11. INFO Zeigt Informationen des laufenden Radioprogramms. 12. Menü Aktivieren Sie das Menü des Gerätes über diese Taste ▯ Startet eine Aufzeichnung des laufenden Radiopro- gramms auf einen angeschlossenen USB Datenträger. Taste länger als 2 Sekunden gedrückt halten, um das Timer Menü...
-
Seite 31: Installation
6. INSTALLATION 6.1 Allgemeine Bedienungshinweise > Schalten Sie das Gerät mit der Standby Taste auf der Fernbedienung ein oder aus. Die Lautstärke erhöhen Sie mit der Taste VOL+ > auf der Fernbedienung. Die Lautstärke verringern Sie mit der Taste VOL- >... -
Seite 32: Stromanschluss
6. INSTALLATION Bei unsachgemäßer Verwendung von Batterien besteht Explosionsgefahr! Lesen Sie dazu die Sicherheitshinweise in Kapitel 2.8. Achten Sie auf die richtige Polung der Batterie! Setzen Sie danach das Batteriefach wieder ein. 6.3. Stromanschluss Verbinden Sie das im Lieferumfang enthaltene Netzteil mit der entsprechenden Buchse auf der Rückseite des Gerätes. -
Seite 33: Sprachwahl
6. INSTALLATION 6.4. Sprachwahl Über die Auf / Ab Tasten der Fernbedienung können Sie die Menüsprache wählen. Bestätigen Sie die gewünschte Menüsprache mit der ENTER Taste auf der Fernbedienung. 6.5. Datum Zeit Modus Wählen Sie hier aus, wie das Radio die Uhrzeit synchronisieren soll. -
Seite 34: Gmt Zeitzone
6. INSTALLATION konfiguriert. Wenn das Gerät über Netzwerk mit dem Internet verbunden ist, wird die Uhrzeit und das Datum automatisch syn- chronisiert. Eine Einstellung der Uhrzeit ist dann nicht erforderlich. Sie können diese Einstellungen jederzeit im Hauptmenü unter dem Punkt System ändern. 6.6. -
Seite 35: Sommerzeit
6. INSTALLATION 6.7. Sommerzeit Schalten Sie hier die Sommerzeit ein, wenn aktuell Sommerzeit herrscht. Über die Auf / Ab Tasten der Fernbedienung können Sie die die Auswahl treffen. Bestätigen Sie mit der ENTER Taste auf der Fernbedienung oder am Gerät. 6.8. -
Seite 36: Netzwerkauswahl
6. INSTALLATION Über die Auf / Ab Tasten der Fernbedienung können Sie die die Auswahl treffen. Bestätigen Sie mit der ENTER Taste auf der Fernbedienung oder am Gerät. 6.9. Netzwerkauswahl Im nächsten Schritt werden Ihnen alle verfügbaren W-LAN Netz- werke angezeigt, die sich in Reichweite des Gerätes befinden. Wählen Sie das Netzwerk aus, mit dem eine Verbindung hergestellt werden soll und bestätigen Sie mit der Taste ENTER. -
Seite 37: Einstellungen
6. INSTALLATION Bitte beachten Sie, dass der Anmeldevorgang am Router einige Zeit dauern kann. 7. EINSTELLUNGEN 7.1. Grundlegende Bedienung 7.1.1. Taste Menu Halten Sie die Menu Taste am Gerät oder auf der Fernbedienung für ca. 2 Sekunden gedrückt. Unabhängig von der aktuellen Einstellung des Gerätes gelangen Sie dadurch immer in das Hauptmenü... -
Seite 38: Taste Zurück
7. EINSTELLUNGEN InternetRadio Wetter Equalizer Lokal Radio UPnP System DAB Radio FM Radio Bluetooth Sie können die einzelnen Menüpunkte mit den Pfeiltasten►◄ a n - wählen. Bestätigen Sie die Auswahl mit der OK Taste de Fernbedienung oder durch Druck auf die Taste ENTER am Gerät. 7.1.2. -
Seite 39: Taste Mode
7. EINSTELLUNGEN 7.1.4. Taste Mode Über die Taste Mode können Sie die verschiedenen Betriebsarten des Radios schalten. 7.2. System Drücken Sie die Taste MENU auf der Fernbedienung oder am Gerät, und wählen Sie mit den Tasten ►◄ der Fernbedienung oder über den Drehregler am Gerät der Fernbedienung oder über den Drehregler am Gerät den Menüpunkt System aus. -
Seite 40: Sprache
7. EINSTELLUNGEN 7.2.1 Sprache Über die Auf / Ab Tasten der Fernbedienung können Sie die Menüsprache wählen. Bestätigen Sie die gewünschte Menüsprache mit der ENTER Taste auf der Fernbedienung. 7.2.2 Datum Zeit Über die Auf / Ab Tasten der Fernbedienung können Sie die die Auswahl treffen. -
Seite 41: Netzwerk
7. EINSTELLUNGEN 7.2.3. Netzwerk Damit das Gerät als Internetradio funktionieren kann, muss das Radio in ein Netzwerk mit Internetzugang eingebunden werden. Sofern Sie dies in der Erstinstallation noch nicht getan haben, können Sie in diesem Menüpunkt die Netzwerkverbindung herstellen. Drücken Sie die Taste MENU auf der Fernbedienung oder am Gerät, und wählen Sie mit den Tasten ►◄... - Seite 42 7. EINSTELLUNGEN Bestätigen Sie die Auswahl mit der ENTER Taste der Fernbedienung oder durch Druck auf die Taste ENTER am Gerät. Wählen Sie das Netzwerk mit Hilfe der Tasten ▼▲ der Fernbedie- nung aus, mit dem eine Verbindung hergestellt werden soll und bestätigen Sie mit ENTER.
-
Seite 43: Alarm/Wecker
7. EINSTELLUNGEN 7.2.4. Alarm/Wecker Das Gerät kann als Radiowecker eingesetzt werden. In diesem Menüpunkt können Sie bis zu 2 Weckzeiten einstellen. Außerdem kann hier eingestellt werden, ob der Wecker mit einem Ton, oder einem Internet Radiosender weckt. Um eine Weckzeit einzurichten, gehen Sie bitte wie folgt vor: Drücken Sie die Taste MENU auf der Fernbedienung oder am Gerät, und wählen Sie mit den Tasten ►◄... - Seite 44 7. EINSTELLUNGEN Aktivieren Sie den Wecker über die Zeile Status. Stellen Sie in der nächsten Zeile die Zeit ein, zu der der Wecker aktiviert werden soll. Nutzen Sie dazu die Zahlentastatur der Fernbedienung oder den Drehregler am Gerät. Um die einzelnen Eingaben zu bestätigen, müssen diese mit der ENTER Taste gespeichert werden.
-
Seite 45: Timer Bearbeiten
7. EINSTELLUNGEN auf der Fernbedienung oder am Gerät. Um eine Schlummer Funktion zu aktivieren, drücken Sie bei einem Alarm die den Drehregler am Gerät. Der Alarm wird da- durch für 5 Minuten pausiert. Nach 5 Minuten wird der Alarm wieder aktiviert. Um den Wecker bis zum nächsten Tag zu deaktivieren, drücken Sie die Taste Standby/Power am Gerät. -
Seite 46: Sleeptimer
7. EINSTELLUNGEN Wählen Sie hier die gewünschte Funktion aus, und bestätigen Sie durch Druck auf den Lautstärkeregler am Gerät oder mit der OK Taste auf der Fernbedienung. Eco Standby In diesem Modus hat das das Gerät im Standby ein sehr geringe Stromaufnahme. -
Seite 47: Hintergrundbeleuchtung
7. EINSTELLUNGEN Wählen Sie Aus, um diese Funktion zu deaktivieren oder wählen Sie eine vorgegebene Zeit zwischen 10 und 120 Minuten aus. Bestätigen Sie Ihre Eingabe mit OK auf der Fernbedienung oder bestätigen Sie durch Druck auf den Drehregler am Gerät. 7.2.8. -
Seite 48: Einstellung Ort
7. EINSTELLUNGEN Sie können die Hintergrundbeleuchtung sowohl für den Betrieb, als auch für den Standby Modus anpassen. Nutzen Sie dazu die Tasten►◄ oder den Drehregler am Gerät und bestätigen Sie mit ENTER. 7.2.9. Einstellung Ort Mit dieser Einstellung können Sie die Region einstellen, in der Sie sich befinden. -
Seite 49: Softwareupdate
Über die USB Schnittstelle haben Sie die Möglichkeit, die Betriebssoftware Ihres Radios zu aktualisieren, die, sofern erforderlich, auf www.telestar.de zum Download bereit steht. Die auf der Internetseite zur Verfügung gestellte Software muss entpackt werden. Die entpackte Datei spielen Sie dann auf ein entsprechendes Speichermedium und verbinden dieses via USB Anschluss mit dem Radio . -
Seite 50: Version
7. EINSTELLUNGEN Bestätigen Sie mit OK, wenn Sie die Werkseinstellung aufrufen möchten. Wählen Sie Abbrechen an, wenn Sie diese Aktion abbrechen möchten. Wenn Sie die Werkseinstellungen aktivieren, wird das Gerät in den Auslieferungszustand gesetzt. Alle gespeicherten Sender und Favoritenlisten gehen dabei verloren. 7.2.12. -
Seite 51: Bedienung
8. BEDIENUNG 8.1. Internet Radiostation auswählen Wählen Sie mit den Pfeiltasten►◄ im Hauptmenü des Gerätes den Punkt Internetradio an und bestätigen Sie die Auswahl mit der OK Taste der Fernbedienung oder durch Druck auf die Taste ENTER am Gerät. Sobald Sie in den Internetradio-Modus gewechselt haben, schaltet das Radio auf den zuletzt eingestellten Radiosender. -
Seite 52: Suche Eines Internetradio Senders
8. BEDIENUNG Favoritenliste Diese Liste zeigt Ihnen alle individuell gespeicherten Radiosender an. Um einen Radiosender zu speichern, lesen Sie bitte auch Kapitel 8.4. Radio In diesem Punkt erhalten Sie verschiedene Radioprogrammlisten. Podcasts Hier können Sie aus einer Reihe von Radiopodcasts wählen. Verlauf In dieser Liste befinden sich die 10 Radiosender, die als letztes angewählt worden sind. -
Seite 53: Radiostationen Abspeichern
8. BEDIENUNG Nutzen Sie dazu die Tasten ▼▲ ►◄. Bestätigen Sie die Eingabe mit ENTER. Das Radio sucht nun nach allen Sendern, die dieser Eingabe entsprechen. Wählen Sie einen Sender mit den Tasten ▼▲ aus und bestätigen Sie mit der ENTER Taste am Gerät. 8.3. -
Seite 54: Lokale Radiostationen
8. BEDIENUNG Halten Sie die FAV+ Taste auf der Fernbedienung für ca. 2 Sekunden gedrückt. Der Radio Sender wird auf der angewählten Position abgespeichert. 8.5. Lokale Radiostationen Um Ihnen die Suche nach Sendern Ihrer Umgebung im Internet- radiobetrieb zu erleichtern, können Sie im Menü des Gerätes gezielt nach Radiostationen aus Ihrer Region suchen. -
Seite 55: Lautstärke Ändern
8. BEDIENUNG Bestätigen Sie die Eingabe mit ENTER. 8.6. Lautstärke ändern Ändern Sie die Lautstärke über die Tasten VOL+/VOL- auf der Fernbedienung oder über den Drehregler am Gerät. Um den Ton des Radios stumm zu schalten, drücken Sie die Taste Mute auf der Fernbedienung. 8.7. -
Seite 56: Aux In
8. BEDIENUNG 8.8. AUX IN Sie können ein externes Musik Wiedergabe-Gerät, wie z.B. einen MP3-Player an das Radio anschließen. Schließen Sie dazu mit Hilfe eines passenden Kabels ein externes Gerät an der Radiorückseite an und schalten Sie dieses Gerät ein. Drücken Sie die Taste MENU auf der Fernbedienung oder am Gerät, und wählen Sie mit den Tasten ►◄... -
Seite 57: Upnp
8. BEDIENUNG Am Radio ist der AUX IN Eingang passend für einen 3,5 mm Klinken-Stereo-Stecker vorbereitet. 8.9. UPnP Sofern das Radio in ein Drahtlosnetzwerk eingebunden ist, kann das Radio auch als Mediaplayer genutzt werden, um via UPnP Musikdateien von im Netzwerk eingebundenen Geräten wie PCs oder Smartphones wiedergeben. -
Seite 58: Usb Wiedergabe
8. BEDIENUNG 8.10. USB Wiedergabe Sie können MP3 Musikdateien von einem USB Datenträger abspielen. Setzen Sie dazu einen USB Datenträger mit Musikdateien in die auf der Rückseite befindlichen USB Buchse ein. Drücken Sie die Taste MENU auf der Fernbedienung oder am Gerät, und wählen Sie mit den Tasten ►◄... - Seite 59 8. BEDIENUNG Wählen Sie mit den Tasten ▼▲ der Fernbedienung oder mit Hilfe des Drehreglers am Gerät im Hauptmenü den Menüpunkt Equalizer an und drücken Sie die Taste ENTER auf der Fernbedienung oder bestätigen Sie durch Druck auf den Lautstärkeregler am Gerät. Wählen Sie mit den Tasten ▼▲...
-
Seite 60: Wetter
8. BEDIENUNG Im Punkt EQ Advanced Settings können Sie verschiedene Frequenzbereiche anpassen. 8.12. Wetter Das Gerät kann aktuelle Wetterinformationen von Ihrem Standort anzeigen. Um die Wetterinformationen aufzurufen, wählen Sie im Hauptmenü des Radios den Menüpunkt Wetter an und bestätigen Sie mit OK. -
Seite 61: Radiosendungen Aufzeichnen
8. BEDIENUNG Über die Taste LIST auf der Fernbedienung oder am Gerät können Sie den Standort für die Wettermeldung ändern. Geben Sie dazu den Namen der Stadt ein, von der Sie die aktuel- len Wetterinformationen abrufen möchten. Sofern das Gerät mit dem Internet verbunden ist, können Sie sich Wetterinformationen über das Display des Gerätes anzeigen lassen. - Seite 62 8. BEDIENUNG Sie können eine Sendung direkt im laufenden Betrieb aufzeichnen, sofern Sie einen USB Datenträger am Radio angeschlossen haben. Drücken Sie während einer laufenden Sendung die Record Taste (Rec) am Gerät oder auf der Fernbedienung. Es erscheint ein rotes Aufnahmesymbol im Display. Um die Aufnahme zu beenden, drücken Sie die Stopp Taste und bestätigen Sie die Abfrage mit OK.
- Seite 63 8. BEDIENUNG Radiosendungen aufzuzeichnen, wenn Sie z.B. nicht zu Hause sind. Halten Sie dazu die Record Taste am Gerät oder auf der Fernbedienung länger als 2 Sekunden gedrückt. Alternativ wählen Sie im Menü System den Punkt Timer aufnehmen an. Name: Wählen Sie hier das Radioprogramm aus, das aufgezeichnet werden soll.
-
Seite 64: Bluetooth
8. BEDIENUNG 8.14. Bluetooth Das Radio kann optional via Bluetooth mit einem externen Gerät (z.B. Smartphone/Tablet) verbunden werden. Über die Bluetoothverbindung können dann Medien (lokal gespeicherte MP3 Dateien, gestreamte Musik, Webradio) vom externen Gerät über das Radio wiedergegeben werden. Wählen Sie über das Menü den Punkt Bluetooth an. Damit Sie via Bluetooth Audiodateien an das Radio senden können, muss eine Bluetooth Verbindung hergestellt werden. -
Seite 65: Dab+ Radio
8. BEDIENUNG Starten Sie die Wiedergabe der Musik auf dem externen Gerät, indem Sie die entsprechende Wiedergabefunktion (MP3 Player usw.) einschalten bzw. wählen Sie aus der jeweili- gen Wiedergabeliste einen Titel aus und beginnen Sie mit der Wiedergabe. 8.15. DAB+ Radio In diesem Radiomodus können Sie digital übertragene Radiosender empfangen. -
Seite 66: Dab Suchlauf
8. BEDIENUNG 8.15.2. DAB Suchlauf Um einen automatischen Sendersuchlauf im DAB- Empfangsmodus zu starten, drücken Sie die Taste Zurück ggf. mehrfach. Sollte das Radio noch keine Programme im DAB Modus gespeichert haben, wird ein Suchlauf automatisch gestartet, sobald das Radio in den DAB-Empfangsmodus geschaltet wird. Wechseln Sie in die Zeile automatische Sendersuche und bestätigen Sie mit der Taste Enter/OK auf der Fernbedienung oder durch Druck auf den Drehregler am Gerät. -
Seite 67: Dab Manuelle Suche
8. BEDIENUNG Die Zahl auf der rechten Seite zeigt die Anzahl der gefundenen Radiostationen an. Nach erfolgreicher Suche startet das Radio mit der Wiedergabe des zuerst gefundenen Senders. 8.15.3. DAB Manuelle Suche Sie können DAB Radiosender auch manuell suchen. Dazu muss die Sendefrequenz bekannt sein. Wählen Sie über diesen Menüpunkt die gewünschte Sendefre- quenz an und bestätigen Sie mit ENTER. -
Seite 68: Automatische Ukw Suche
8. BEDIENUNG 8.16.1. Automatische UKW Suche Nachdem Sie auf FM geschaltet haben, betätigen Sie die Taste List am Gerät. Halten Sie die OK Taste gedrückt, bis der Suchlauf startet. Das Gerät startet den automatischen Sendersuchlauf und speichert alle Frequenzen auf denen ein Radiosender gefunden wurde. -
Seite 69: Fehlerbehebung
9. FEHLERBEHEBUNG Symptom Mögliche Ursache und Abhilfe Keine Displayanzeige, Stellen Sie die Stromverbindung Radio reagiert nicht über das im Lieferumfang enthaltene auf Bedienung Netzteil her. Bedienung über Fern- Batterie leer oder nicht korrekt bedienung ist nicht eingesetzt. Bitte überprüfen Sie, ob möglich die Batterie in der richtigen Richtung eingesetzt sind. - Seite 70 9. FEHLERBEHEBUNG Symptom Mögliche Ursache und Abhilfe Netzwerkverbindung Überprüfen Sie die W-LAN Funktion. kann nicht aufgebaut Aktivieren Sie die DHCP Funktion des werden Routers, an dem das Radio angemel- det werden soll. Eventuell ist eine Firewall im Netzwerk aktiv. W-LAN Verbindung Überprüfen Sie die Verfügbarkeit von kann nicht aufgebaut W-LAN Netzwerken.
-
Seite 71: Aufbewahrung
9. FEHLERBEHEBUNG Symptom Mögliche Ursache und Abhilfe DAB+ Empfang Keine Sender vorhanden gestört Führen Sie einen Suchlauf durch. Antenne nicht vollständig ausgezogen. Verändern Sie den Standort des Radios (ggf. näher ans Fenster), führen Sie erneut einen Suchlauf durch. UKW Empfang Antenne nicht vollständig ausgezogen, gestört Ziehen Sie die FM-Antenne auf die volle... -
Seite 72: Entsorgungshinweis
12. ENTSORGUNGSHINWEIS 12.1. ENTSORGUNG DER VERPACKUNG Entsorgung Die Verpackung Ihres Gerätes besteht ausschließlich aus wiederverwertbaren Verpa Materialien. Bitte führen Sie diese Ihr Ge entsprechend sortiert wieder schäd dem “Dualen System” zu. Rohm werd 12.2. ENTSORGUNG DES GERÄTES werd Gerät Das rechts abgebildete Symbol einer durchgestrichenen Mülltonne auf Rädern Werfe zeigt an, dass dieses Gerät der... -
Seite 73: Entsorgung Von Batterien
12. ENTSORGUNGSHINWEIS 12.3. ENTSORGUNG VON BATTERIEN Batterien und Akkus dürfen nicht im Hausmüll entsorgt werden. Das rechts abgebildete Symbol bedeutet, dass Sie als Verbraucher verpflichtet sind, alle Batterien und Akkus einer gesonderten Entsorgung zuzuführen. Entsprechende Sammelbehälter stehen im Fachhandel und zahlreichen öffentlichen Einrichtungen bereit. Informationen zur Entsorgung alter Batterien und Akkus erhalten Sie zusätzlich auch bei Entsorgungsfachbetrieben, Stadt- und Gemeindeverwaltungen. -
Seite 74: Eigenschaften Und Technische Daten
13. EIGENSCHAFTEN UND TECHNISCHE DATEN Internetradio Audiocodecs MP3 (Bitrate bis 320 Kbits/s, Abtastratebis zu 48 KHz) AAC/AAC+ (Bitrate bis 320 Kbits/s, Abtastrate bis zu 48 KHz) WMA (Bitrate bis 320 Kbits/s, Abtastrate bis zu 48 KHz) DAB/DAB+/FM Empfangsbereich DAB Band III 174 MHz - 240 MHz FM 87,5 MHz -108 Mhz Display TFT Color Display... - Seite 75 13. EIGENSCHAFTEN UND TECHNISCHE DATEN Anschlüsse Kopfhörer 3,5 mm Klinkenbuchse Stereo AUX IN 3,5 mm Klinkenbuchse Stereo Polung Spannungsver- sorgungs Anschluss USB-Buchse USB 2.0 Standard 5 Volt DC Ausgang Betriebsbedingungen Temperaturbereich C - 45 Luftfeuchtigkeit 20% - 80% relative Luftfeuchtigkeit W-LAN Schnittstelle Frequenzereich 2,412 GHz - 2,4835 GHz...
- Seite 76 13. EIGENSCHAFTEN UND TECHNISCHE DATEN Leistungsaufnahme Standby 0,1 W Betrieb max. 20 W Lagerbedingungen Nur in trockenen Räumen lagern. Abmessungen und Gewicht M14 i Breite x Höhe x Tiefe 192 mm x 118 mm x 1125 mm Gewicht ca. 1200 g Abmessungen und Gewicht S 24 i Breite x Höhe x Tiefe 277 mm x 117 mm x 127 mm...
-
Seite 77: Service Und Support
In unserem Servicebereich stehen Ihnen professionelle Fachkräfte Rede und Antwort. Hier können Sie alle Fragen stellen, die Sie bezüglich der TELESTAR Produkte haben, sowie Tipps zur Lokalisierung einer möglichen Fehlerursache erhalten. Unsere Techniker stehen Ihnen von Montag - Freitag von 8.00 Uhr bis 16.45 Uhr unter folgender Rufnummer zur... -
Seite 78: Ce Kennzeichnung
15. CE KENNZEICHNUNG Ihr Gerät trägt das CE-Zeichen und erfüllt alle erforderlichen EU-Normen. Hiermit erklärt die TELESTAR DIGITAL GmbH, dass sich das Gerät in Übereinstimmung mit den grundlegenden Anforderungen und den übrigen einschlägigen Bestimmungen der RoHS Richtlinie 2011/65/EU, der RE Richtlinie 2014/53/ EU sowie der ErP Richtlinie 2009/125/EG befindet. - Seite 79 Stand der Drucklegung und können sich ohne vorherige Ankündigung ändern. Für Druckfehler und Irrtümer übernehmen wir keine Haftung. Abschrift und Vervielfältigung nur mit ausdrücklicher Genehmigung der TELESTAR-DIGITAL GmbH gestattet. Stand: Oktober 2020 Inverkehrbringer: TELESTAR DIGITAL GmbH Am Weiher 14...
- Seite 81 Operating Manual DIRA M 14i DIRA S 24i V4_07_01_2021...
- Seite 82 TABLE OF CONTENTS...
- Seite 83 TABLE OF CONTENTS 1. Preface ..........86 1.
- Seite 84 TABLE OF CONTENTS 6.9. Network selection ....... . 115 7. SETTINGS ......... 116 7.1.
- Seite 85 TABLE OF CONTENTS 8.6. Change volume ........134 8.7.
-
Seite 86: Preface
1. Preface Dear customer, Thank you for choosing this product. Please read these instructions carefully and keep them for future reference. This operating manual is part of the device! If you sell or pass on the device, please make sure you also hand over the operating manual. -
Seite 87: Preface
1. Preface 1.2. Intended use This product is a consumer electronics device. The device serves as a receiver for Internet/FM and DAB+ radio signals and for playing back audio files saved on a USB sto- rage device or on a network drive. Any other operation or use of the device is considered improper and can lead to personal injury or property damage. -
Seite 88: Safety Instructions
2. SAFETY INSTRUCTIONS 2.1. Explanation of symbols Symbol Meaning This signal word indicates a hazard with a high level of risk which, if the DANGER! instruction is not observed, will result in death or serious injury. This signal word indicates a hazard with a medium level of risk which, if WARNING! the instruction is not observed, can... - Seite 89 2. SAFETY INSTRUCTIONS 2.1. Explanation of symbols Symbol Meaning This signal word warns of possible property damage and indi- NOTE! cates special descriptions for the operation of the device. This symbol warns of dangers. Protection class II Electrical devices with protection class II have reinforced or double insulation in the amount of the rated insulation voltage between active and...
- Seite 90 2. SAFETY INSTRUCTIONS 2.1. Explanation of symbols Symbol Meaning For devices with coaxial plugs, these Fig. 1 symbols indicate the polarity of the plug. A distinction is made between 2 Fig. 2 variants Fig 1: Outside plus / inside minus Fig 2: Inside plus / outside minus Devices with this symbol may only be operated indoors in a dry environ-...
-
Seite 91: Safety Notice
2. SAFETY INSTRUCTIONS 2.2. Safety notice WARNING! Check the device before use. In the event of damage or a defect, the device must not be put into operation. Risk of injury! Risk of injury to children and people with reduced physical, sen- sory or mental abilities (e.g. -
Seite 92: Operational Safety
If you notice visible damage or if the device shows visible damage, do not use it anymore. > If you discover a technical or mechanical problem, please contact TELESTAR Service. > Only use the power adapter included in the scope of delivery! Never use any other power adapter. - Seite 93 2. SAFETY INSTRUCTIONS > Never open the housing of the device. > Immediately disconnect the device from the power source in the event of malfunction. To do this, immediately disconnect the power adapter from the power socket and the device. >...
- Seite 94 2. SAFETY INSTRUCTIONS > Unplug the device from the power socket if you are absent for a longer period or during a thunderstorm. Make sure that contact with moisture, water or splash water is avoided and that no objects filled with liquids - e.g.
-
Seite 95: Connect Device
2. SAFETY INSTRUCTIONS 2.4. Connect device > Only connect the device to a properly installed, earthed and electrically protected socket. > Please ensure that the power source (socket) is easily acces- sible. > Do not kink or crush any cable connections. >... - Seite 96 2. SAFETY INSTRUCTIONS Do not expose the device to extreme conditions, e.g. direct sunlight, high humidity, moisture, extremely high or low temperatures, open fire. > Ensure that there is sufficient distance to other objects so that the device is not covered so that adequate ventilation is always guaranteed.
-
Seite 97: Risk Of Injury
2. SAFETY INSTRUCTIONS 2.6. Risk of injury WARNING! Excessive sound pressure when using earphones or headphones can cause damage or loss of hearing. Listening with earphones or headphones at a high volume for a long period of time can cause injury to the user. Please check the volume before inserting or putting on head- phones or putting earphones in your ears. -
Seite 98: Handling Batteries
2. SAFETY INSTRUCTIONS If you have reason to believe that the radio is causing interfe- rence with a medical device, immediately turn off or unplug the radio. 2.8. Handling batteries In principle, only use the type of battery included in the scope of delivery. - Seite 99 2. SAFETY INSTRUCTIONS Remove batteries from the device if it is not going to be used for a long time. Remove exhausted or leaking batteries from the device immedi- ately. If batteries have leaked, there is a risk of burns if they come into contact with the skin.
- Seite 100 2. SAFETY INSTRUCTIONS WARNING! There is a risk of explosion if batteries are used improperly! > Only use new batteries of the same type. > Please never use new and old batteries together in one device. > Pay attention to the correct polarity when inserting the batte- ries.
-
Seite 101: Cleaning The Device
2. SAFETY INSTRUCTIONS 2.9. Cleaning the device Before cleaning, unplug the device from the socket. Use a dry, soft cloth to clean the device. Please do not use any liquids to clean the device. Do not use any solvents or cleaning agents as these can dama- ge the surface and/or the writing on the device. -
Seite 102: Scope Of Delivery
3. SCOPE OF DELIVERY Please take all parts out of the packaging and completely remove all packaging materials. If one or more of the specified parts are missing, please contact: TELESTAR Service Center, Am Weiher 14, 56766 Ulmen Email: service@telestar.de... -
Seite 103: Overview Of The Controls
4. OVERVIEW OF THE CONTROLS 3 4 5 13 14 15 16... - Seite 104 4. OVERVIEW OF THE CONTROLS 1. List Calls up a list of the last 10 selected radio stations. 2. Station memory button 1 / Multimedia controls Use these buttons to switch to a desired programme memory lo- cation in radio mode. ▸II Starts or pauses the playback of music tracks on a connected USB storage device.
- Seite 105 4. OVERVIEW OF THE CONTROLS 8. Station memory button 2 / Multimedia controls Use these buttons to switch to a desired programme memory lo- cation in radio mode. ■ Stops a current playback in USB/Media mode. 9. Volume control, confirmation button Use the control dial to change the volume or confirm menu entries by pressing this button.
- Seite 106 4. OVERVIEW OF THE CONTROLS 15. AUX IN Connect an external audio source such as MP3 player, smart phone or tablet with the 3.5 mm AUX jack cable (see also chapter 8.8.) 16. Power adapter connector Connect the device to this socket with the power adapter (includ- ed).
-
Seite 107: Remote Control
5. REMOTE CONTROL The radio can be operated both via the device buttons and the remote control. Operation via the remote control is the more comfortable and easier way to operate the device. - Seite 108 5. REMOTE CONTROL 1. Standby button Use this button to switch the device on or off. 2. Mode Switch between the various operating modes here. 3. Mute Mutes the sound of the device. 4. EQ equaliser function With this button you can activate the equaliser function and make custom sound settings.
- Seite 109 5. REMOTE CONTROL 11. INFO Shows information about the current radio programme. 12. Menu Activate the menu of the device with this button ▯ Starts a recording of the current radio programme on a connect- ed USB storage device. Press and hold the button for more than 2 seconds to activate the timer menu for recording a radio broadcast.
-
Seite 110: Installation
6. INSTALLATION 6.1 General operating instructions > Switch the device on or off with the standby button on the remote control. > Increase the volume with the VOL+ button on the remote control. > Reduce the volume with the VOL- button on the remote control. >... -
Seite 111: Power Connection
6. INSTALLATION 6.3. Power connection Connect the included power adapter to the corresponding port on the rear of the device. Now plug the power adapter into a 230V socket. Turn on the radio using the standby button on the remote con- trol or on the device. -
Seite 112: Date Time Mode
6. INSTALLATION 6.5. Date time mode Select how the radio should synchronise the time here. Use the up/down buttons on the remote control to make selec- tions. Confirm with the ENTER button on the remote control or on the device. The device is configured to automatic time setting at the factory. -
Seite 113: Gmt Time Zone
6. INSTALLATION 6.6. GMT time zone Select the time zone you are in here. For Germany and most of Europe, select GMT + 1:00. Use the up/down buttons on the remote control to make selec- ENTER button tions. Confirm with the on the remote control or on the device. -
Seite 114: Location Settings
6. INSTALLATION 6.8. Location settings Select the location where you are here. Select the continent and in the next step the country in which you are located. Use the up/down buttons on the remote control to make selec- ENTER button tions. -
Seite 115: Network Selection
6. INSTALLATION 6.9. Network selection In the next step, you will be shown all the available WiFi networks that are within range of the device. Select the network you are connecting to and confirm with the ENTER button. Enter the WiFi key. Use the ▼ ▲ buttons on the remote control or the control dial on the device to select a character, and use ►... -
Seite 116: Settings
6. INSTALLATION Please note that the registration process on the router can take some time. 7. SETTINGS 7.1. Basic operation 7.1.1. Menu button Hold the Menu button on the device or on the remote control for approx. 2 seconds. This always takes you to the main menu of the device, regardless of the current setting of the device. -
Seite 117: Back Button
7. SETTINGS Internet radio Weather Equaliser Local radio UPnP System DAB radio FM radio Bluetooth You can access the individual menu items using the arrow keys►◄. Confirm your selection with OK button on the remote control or by pressing the ENTER button on the device. -
Seite 118: Mode Button
7. SETTINGS 7.1.4. Mode button Use the Mode button to switch the different operating modes of the radio. 7.2. System Press the MENU button on the remote control or on the device, and use the ►◄ buttons on the remote control or the the control dial on the device to select the menu item System . -
Seite 119: Language
7. SETTINGS 7.2.1 Language Use the up/down buttons on the remote control to select the menu language. Confirm the desired menu language with the ENTER button on the remote control. 7.2.2 Date and time Use the up/down buttons on the remote control to make selec- tions. -
Seite 120: Network
7. SETTINGS 7.2.3. Network In order for the device to function as an Internet radio, the radio must be connected to a network with Internet access. If you have not already done this in the initial installation, you can set up the network connection in this menu item. - Seite 121 7. SETTINGS Confirm your selection with ENTER button on the remote control or by pressing the ENTER button on the device. Using the ▼ ▲ buttons on the remote control, select the network with which a connection is to be established and confirm with ENTER.
-
Seite 122: Alarm / Alarm Clock
7. SETTINGS 7.2.4. Alarm / alarm clock The device can be used as a radio alarm clock. In this menu item, you can set to 2 alarm times. In addition, you can set whether the alarm clock should use a sound or an Internet radio station. To set an alarm time, please proceed as follows: Press the MENU button on the remote control or on the device, and using the ►◄... - Seite 123 7. SETTINGS Activate the alarm clock via the Status line. In the next line, set the time at which the alarm clock should be activated. Use the numeric keypad on the remote control or the control dial on the device for this. To confirm the individual entries, they must be saved with the ENTER button.
-
Seite 124: Edit Timer
7. SETTINGS on the remote control or on the device. To activate the snooze function, press the control dial on the device when the alarm sounds. This paus- es the alarm for 5 minutes. The alarm is reactivated after 5 minutes. To deactivate the alarm until the next day, press the Standby/Power button on the device. -
Seite 125: Sleep Timer
7. SETTINGS Select the desired function here and confirm by pressing the volume control on the device or the OK button on the remote control. Eco standby In this mode, the device has a very low power consumption in standby. The standby time is not displayed. Standby with time In this mode, the time is displayed in standby if you turn the device off with the standby button. -
Seite 126: Backlight
7. SETTINGS Select Off to disable this feature or select a preset time between 10 and 120 minutes. Confirm your entry with OK on the remote control or confirm by pressing the control dial on the device. 7.2.8. Backlight With this function you can change the brightness of the display. Use the ▼... -
Seite 127: Location Setting
7. SETTINGS You can adjust the backlight for both operation and standby mode. Use ►◄ buttons or the control dial on the device and confirm with ENTER. 7.2.9. Location setting With this setting you can set the region you are in. The radio uses the local radio function to select radio stations in your area in this setting. -
Seite 128: Software Update
You can use the USB interface to update the operating software of your radio, which can be down- loaded from www.telestar.de if necessary. The software made available on the website must be unzipped. Execute the unzipped file on a suitable storage medium and connect it to the radio via USB. -
Seite 129: Version
7. SETTINGS Confirm with OK if you want to call up the default settings. Select Cancel if you want to cancel this action. If you activate the default settings, the device is set to factory settings at the time of delivery. All saved stations and favouri- tes lists will be lost. -
Seite 130: Service
8. SERVICE 8.1. Select Internet radio station Use the Arrow keys►◄ to select the Internet radio menu item in the main menu of the device and confirm your selection with the OK button on the remote control or by pressing the ENTER button on the device. -
Seite 131: Search For An Internet Radio Station
8. SERVICE Favourites list This list shows you all individually saved radio stations. To save a radio station, please also read chapter 8.4. Radio Under this item, you can see various radio programme lists. Podcasts Here you can choose from a number of radio podcasts. History This list contains the 10 radio stations that were selected last. -
Seite 132: Save Radio Stations
8. SERVICE The radio will now search for all stations that correspond to this entry. Select a station with the▼ ▲ buttons and confirm with the ENTER button on the device. 8.3. Save radio stations You can save up to 4 radio stations on one station memory button. -
Seite 133: Local Radio Stations
8. SERVICE Hold the FAV+ button on the remote control for approx. 2 seconds. The radio station will be saved in the selected location. 8.5. Local radio stations To make it easier for you to search for stations in your area in Internet radio mode, you can search specifically for radio stations in your are in the device menu. -
Seite 134: Change Volume
8. SERVICE Confirm your entry with ENTER. 8.6. Change volume Change the volume using the VOL+ / VOL- buttons on the remote control or using the control dial on the device. To mute the radio sound, press the Mute button on the remote control. -
Seite 135: Aux In
8. SERVICE 8.8. AUX IN You can connect an external music playback device, such as an MP3 player to the radio. To do this, use a suitable cable to connect an external device to the back of the radio and turn on the external device. -
Seite 136: Upnp
8. SERVICE 8.9. UPnP If the radio is integrated into a wireless network, the radio can also be used as a media player to play music files from connected devices in the network such as PCs or smartphones via UPnP. This requires the integration of the devices in the same home network and sharing of the corresponding media content on this network. -
Seite 137: Usb Playback
8. SERVICE 8.10. USB playback You can play MP3 music files from a USB storage device. To do this, insert a USB storage device with music files into the USB port on the back. Press the MENU button on the remote control or on the device, and using the ►◄... - Seite 138 8. SERVICE Use the ▼ ▲ buttons on the remote control or the control dial on the device to select the menu item Equaliser in the main menu and press the ENTER button on the remote control or confirm by pressing the volume control on the device.
-
Seite 139: Weather
8. SERVICE In the EQ Advanced Settings item you can adjust various frequency ranges. 8.12. Weather The device can show current weather information from your location. To view the weather information, in main menu of the radio, select the Weather menu item and confirm with OK. -
Seite 140: Record Radio Broadcasts
8. SERVICE Via the LIST button on the remote control or on the device, you can change the location for the weather report. To do this, enter the name of the city from which you want to call up the current weather information. If the device is connected to the Internet, you can have it show weather information on the device display. - Seite 141 8. SERVICE While a programme is on, press the Record button (Rec) on the device or on the remote control. A red recording symbol appears in the display. To stop recording, pres thes Stop button and confirm with OK. Similar to a video or DVD recorder, the radio can also be used to programme timed recordings to record radio broadcasts when you are not at home, for example.
-
Seite 142: Bluetooth
8. SERVICE Name: Select the radio programme that is to be recorded here. Date Enter the date on which the timer should start here. Highlight the Start time line, press the OK Start time: button and enter the time here during which the timer should be activated using the up/ down arrow buttons on the remote control or the control dial. -
Seite 143: Establish A Bluetooth Connection
8. SERVICE (locally stored MP3 files, streamed music, web radio) from an external device via the radio. Select the Bluetooth menu item via the menu. A Bluetooth connection must be established so that you can transmit audio files to the radio via Bluetooth. 8.14.1. -
Seite 144: 8:15 Am. Dab+ Radio
8. SERVICE 8:15 AM. DAB+ radio In this radio mode, you can receive digitally broadcast radio stations. Press the MENU button on the remote control or on the device use the ►◄ buttons to select the menu item DAB/DAB+. Confirm your selection by pressing the control dial on the device or by pressing the ENTER button on the remote control. - Seite 145 8. SERVICE Switch to the Automatic station search line and confirm with the Enter/OK button on the remote control or by pressing the control dial on the device. The radio now automatically searches for all receivable digital radio stations and then saves them in a station list. You can call these up as described in chapter 8.15.1.
-
Seite 146: Dab Manual Search
8. SERVICE 8.15.3. DAB manual search You can also search for DAB radio stations manually. The transmission frequency must be known for this. Use this menu item to select the desired transmission frequency and confirm with ENTER. 8.16. FM (VHF) ANALOG radio In this menu item you can receive analogue FM radio stations. - Seite 147 8. SERVICE frequencies on which a radio station was found. Please note that the sensitivity of the reception and the associ- ated number of radio stations found depends on the search sensitivity settings. To change the search sensitivity, press the Menu button in the FM mode.
-
Seite 148: Troubleshooting
9. TROUBLESHOOTING Symptom Possible cause and remedy No display, Connect to power radio not responding via the included during operation power adapter. Operation via remote Battery dead or incorrectly inserted. control is not Please check that the batteries are possible inserted in the correct direction. - Seite 149 9. TROUBLESHOOTING Symptom Possible cause and remedy Network connection Check the WiFi function. cannot be estab- Activate the DHCP function of the lished router to which the radio is to be registered. A firewall may be active in the network. WiFi connection can- Check the availability of WiFi networks.
-
Seite 150: Storage
9. TROUBLESHOOTING Symptom Possible cause and remedy DAB+ reception No stations available disturbed Perform a search. Antenna not fully extended. Change the location of the radio (possibly closer to the window), perform another search. FM reception Antenna not fully extended, disturbed Pull the FM antenna to the fully extended length. -
Seite 151: Disposal Information
12. DISPOSAL INFORMATION 12.1. DISPOSAL OF THE PACKAGING Entsorgung Your device is packaged in Verp exclusively recyclable Ihr G materials. Please place it in schä the “dual system” Rohm werd properly sorted. werd Gerä Werfe 12.2. DISPOSAL OF THE DEVICE keine Sie e The symbol on the right with the... -
Seite 152: Disposal Of Batteries
12. DISPOSAL INFORMATION 12.3. DISPOSAL OF BATTERIES Batteries and rechargeable batteries may not be disposed of in the household rubbish. The symbol on the right means that you as the consumer are obliged to dispose of batteries and rechargeable batteries separately. Collection containers are available at specialist retailers and numerous public institutions. -
Seite 153: Features And Technical Data
13. FEATURES AND TECHNICAL DATA Internet radio Audio codecs MP3 (bit rate up to 320 Kbits/s, sam- pling rate up to 48 KHz) AAC/AAC+ (bit rate up to 320 Kbits/s, sampling rate up to 48 KHz) WMA (bit rate up to 320 Kbits/s, sampling rate up to 48 KHz) DAB/DAB+/FM Reception range... - Seite 154 13. FEATURES AND TECHNICAL DATA Connections Headphone 3.5 mm stereo jack socket AUX IN 3.5 mm stereo jack socket Polarity Power adapter con- nection USB port USB 2.0 standard 5 volt DC output Operating conditions Temperature range C - 45 Humidity 20% - 80% relative humidity WiFi interface...
- Seite 155 13. FEATURES AND TECHNICAL DATA Power consumption Standby 0.1 W Operation Max. 20 W Storage conditions Store only in dry area. Dimensions and weight M14 i Width x height x depth 192 mm x 118 mm x 1125 mm Weight Approx.
-
Seite 156: Service And Support
The technical data corresponds to the current status at the time of printing. Changes are reserved. The warranty period for the TELESTAR DIRA corresponds to the statutory provisions at the time of purchase. We also offer a telephone HOTLINE service with professional help. -
Seite 157: Ce Marking
15. CE MARKING I.Your device bears the CE mark and fulfils all of the EU standards. TELESTAR DIGITAL GmbH hereby declares, that the device is in accordance with the basic requirements and the other relevant provisions of the RoHS Directive 2011/65/EU, the RE Directive 2014/53/ EU and the ErP Directive 2009/125/EC. - Seite 158 We assume no liability for misprints or errors. Copying and reproduction is permitted only with express approval from TELESTAR-DIGITAL GmbH. As of: October 2020 Distributor: TELESTAR DIGITAL GmbH...
- Seite 159 Manuel d’utilisation DIRA M 14i DIRA S 24i V4_07_01_2021...
- Seite 161 TABLE DES MATIÈRES 1. Avant-propos........165 1.
- Seite 162 TABLE DES MATIÈRES 6.9. Sélection de réseau....... 194 7. RÉGLAGES ........195 7.1.
- Seite 163 TABLE DES MATIÈRES 8. FONCTIONNEMENT ....... . 209 8.1. Sélectionner une station de radio Internet ..209 8.2.
- Seite 164 TABLE DES MATIÈRES 9. RÉSOLUTION DE PROBLÈMES ..... . 227 10. CONSERVATION ........230 11.
-
Seite 165: Avant-Propos
1. Avant-propos Cher client, nous vous remercions d’avoir choisi ce produit. Veuillez lire soigneusement les instructions présentes et les conserver pour une consultation ultérieure. Ce manuel d’utilisation fait partie intégrante de l'appareil ! Si vous vendez ou transmettez l'appareil, veuillez vous assurer que vous remettez également ce manuel d’utilisation. -
Seite 166: Avant-Propos
1. Avant-propos 1.2. Utilisation appropriée Ce produit est un appareil électronique grand public. L'appareil sert de récepteur pour les signaux radio Internet / OUC et DAB+ ainsi qu’à la diffusion de fichiers audio stockés sur un support de données USB ou un lecteur réseau. Tout autre utilisation ou usage de l’appareil n’est pas con- sidéré... -
Seite 167: Consignes De Sécurité
2. CONSIGNES DE SÉCURITÉ 2.1. Explication des signes Signification des symboles Cette mention d’avertissement signale un danger à risque élevé qui DANGER ! peut entraîner la mort ou des bles- sures graves en cas de non-respect. Cette mention d’avertissement signale un danger à risque moyen qui AVERTISSEMENT ! peut entraîner la mort ou des bles- sures graves en cas de non-respect. - Seite 168 2. CONSIGNES DE SÉCURITÉ 2.1. Explication des signes Signification des symboles Ce signe avertit d'un danger. Classe de protection II Les appareils électriques de la clas- se de protection II ont une isolation renforcée ou une double isolation égale à la tension d'isolation nomi- nale entre les parties actives et saisissables (VDE 0100 partie 410, 412.1).
- Seite 169 2. CONSIGNES DE SÉCURITÉ 2.1. Explication des signes Signification des symboles Ces symboles indiquent la polarité de la fiche dans le cas d’appareils équi- Fig. 1 pés de fiches creuses. Une distinction est faite entre 2 vari- antes Fig. 2 Fig.
-
Seite 170: Consigne De Sécurité
2. CONSIGNES DE SÉCURITÉ 2.2. Consigne de sécurité AVERTISSEMENT ! Contrôlez l’appareil avant de l’utiliser. L’appareil ne doit pas être mis en service en cas de dommage ou de défaut. Risque de blessure ! Risque de blessure pour les enfants et les personnes ayant des capacités physiques, sensorielles ou mentales réduites (les per- sonnes partiellement handicapées ou les personnes âgées ayant des capacités physiques et mentales réduites par exemple) ou... -
Seite 171: Sécurité De Fonctionnement
> Si vous constatez un problème technique ou mécanique, veuillez contacter le service client de TELESTAR. > Utilisez uniquement le bloc d’alimentation compris dans la livraison ! N’utilisez jamais un autre... - Seite 172 2. CONSIGNES DE SÉCURITÉ > N’ouvrez jamais le boîtier de l’appareil. > Débranchez l’appareil immédiatement en cas de dysfonctionnement. Pour ce faire, débranchez immédiatement le bloc d’alimentation de la prise de cou rant et de l’appareil. > Utilisez uniquement les pièces de rechange et les accessoires que nous avons livré...
- Seite 173 2. CONSIGNES DE SÉCURITÉ L’appareil ne doit plus être utilisé après un dysfonctionne- ment avant d’avoir été inspecté ou réparé par une personne autorisée. > Si vous déplacez l’appareil d’un environnement froid à un environnement chaud, de l’humidité peut se dépo ser à...
-
Seite 174: Branchement De L'appareil
2. CONSIGNES DE SÉCURITÉ 2.4. Branchement de l’appareil > Branchez l’appareil uniquement sur une prise électrique correctement installée, mise à la terre et sécurisée. > Assurez-vous que la source d’énergie (prise électrique) soit facilement accessible. > Les connexions de câbles ne doivent jamais être pliées ou coincées. - Seite 175 2. CONSIGNES DE SÉCURITÉ > Utilisez l’appareil uniquement dans des pièces sèches. Évitez la proximité immédiate de : sources de chaleur, telles que des radiateurs, de flammes nues telles que des bougies, d’appareils à fort champ magnétique tels que des hauts-parleurs. N’exposez pas l’appareil à...
-
Seite 176: Risque De Blessure
2. CONSIGNES DE SÉCURITÉ 2.6. Risque de blessure AVERTISSEMENT ! Une pression acoustique excessive lors de l'utilisation d'écouteurs ou de casques peut causer des dommages auditifs ou une perte d'audition. L’utilisation d’écouteurs ou de casques à un volume sonore élevé sur une longue période peut causer des dommages à l'utilisateur. -
Seite 177: Manipulation Des Piles
2. CONSIGNES DE SÉCURITÉ Éteignez ou débranchez la radio immédiatement si vous avez des raisons de penser qu’elle perturbe un appareil médical. 2.8. Manipulation des piles Utilisez uniquement le type de piles des piles contenues dans la livraison. DANGER ! Risque de blessure ! Une manipulation inappropriée des piles peut entraîner un risque de blessure ! - Seite 178 2. CONSIGNES DE SÉCURITÉ Retirez les piles de l’appareil lorsque vous ne l’utilisez pas pen- dant une période prolongée. Retirez immédiatement les piles vides ou qui fuient de l’appareil. Les piles qui fuient peuvent causer des brûlures par acide au contact de la peau.
- Seite 179 2. CONSIGNES DE SÉCURITÉ AVERTISSEMENT ! Une utilisation inappropriée des piles peut entraîner un risque d’explosion ! > Utilisez uniquement des piles neuves du même type. > N’utilisez jamais des piles neuves et anciennes en même temps dans un appareil. >...
-
Seite 180: Nettoyage De L'appareil
2. CONSIGNES DE SÉCURITÉ 2.9. Nettoyage de l’appareil Débranchez l’appareil de la prise électrique avant de le nettoyer. Utilisez un chiffon sec et doux pour nettoyer l’appareil. N’utilisez aucun liquide pour nettoyer l’appareil. N'utilisez pas de solvants ni de produits de nettoyage, car ils peu- vent endommager la surface et/ou les inscriptions de l'appareil. -
Seite 181: Contenu De La Livraison
3. CONTENU DE LA LIVRAISON Veuillez sortir toutes les pièces de l’emballage et éliminer entièrement les matériaux d’emballage. Si une ou plusieurs pièces devaient manquer, veuillez contacter : TELESTAR Service Center, Am Weiher 14, 56766 Ulmen Courriel : service@telestar.de Quan- Explication tité... -
Seite 182: Aperçu Des Éléments De Commande
4. APERÇU DES ÉLÉMENTS DE COMMANDE 3 4 5 13 14 15 1 6... - Seite 183 4. APERÇU DES ÉLÉMENTS DE COMMANDE 1. Liste Vous permet d’accéder à une liste des 10 dernières stations ra- dio sélectionnées. 2. Touche de mémoire de station 1 / Commandes multi-média Cette touche vous permet de passer à un emplacement de mémoire de station radio souhaité...
- Seite 184 4. APERÇU DES ÉLÉMENTS DE COMMANDE Appuyez sur la touche pendant plus de 2 secondes pour activer le menu de minuterie pour l’enregistrement d’une émission de radio. 8. Touche de mémoire de station 2 / Commandes multi-média Cette touche vous permet de passer à un emplacement de mémoire de station radio souhaité...
- Seite 185 4. APERÇU DES ÉLÉMENTS DE COMMANDE à partir de ceux-ci ou pour enregistrer des émissions de radio. 14. Prise pour écouteurs Pour écouteur la musique émise à la radio au moyen d’écouteurs, branchez-les sur cette prise. La diffusion de la musique par l’intermédiaire des hauts-parleurs est interrompue lorsque vous branchez des écouteurs.
-
Seite 186: Télécommande
5. TÉLÉCOMMANDE La radio peut être commandée au moyen des touches placées sur l’appareil ainsi qu’au moyen de la télécommande. La télécom- mande est le moyen le plus confortable et le plus facile de faire fonctionner l'appareil. - Seite 187 5. TÉLÉCOMMANDE 1. Touche Standby (veille) Allumez ou éteignez l’appareil au moyen de cette touche. 2. Mode Cette touche vous permet de passer d’un mode de fonctionne- ment à l’autre. 3. Mode silencieux (Mute) Ce mode désactive le son de l’appareil. 4.
- Seite 188 5. TÉLÉCOMMANDE ►II Démarre ou met la lecture en pause ►►I Sélectionner le titre suivant / Avance rapide 11. INFO Affiche les informations relatives à la chaîne de radio actuellement diffusée. 12. Menu Cette touche vous permet d’activer le menu de l’appareil ▯...
-
Seite 189: Installation
6. INSTALLATION 6.1 Instructions de fonctionnement générales > Allumez et éteignez l’appareil au moyen de la touche Standby (Veille) de la télécommande. > Vous pouvez augmenter le volume sonore avec la touche VOL+ de la télécommande. > Vous pouvez baisser le volume sonore avec la touche VOL- de la télécommande. -
Seite 190: Raccordement Électrique
6. INSTALLATION L’utilisation inappropriée des piles entraîne un risque d’explosion ! Lisez à ce propos les consignes de sécurité au chapitre 2.8. Assurez-vous de la bonne polarité des piles ! Puis réinsérez le compartiment à piles. 6.3. Raccordement électrique Branchez le bloc d’alimentation inclus dans la livraison sur la prise correspondante placée à... -
Seite 191: Mode Date Et Heure
6. INSTALLATION souhaitée avec la touche ENTER de la télécommande. 6.5. Mode date et heure Choisissez ici le mode de synchronisation de l’heure pour la radio. Les touches Haut / Bas de la télécommande vous permettent de sélectionner. Confirmez avec latouche ENTER de la télécom- mande ou de l’appareil. -
Seite 192: Fuseau Horaire Gmt
6. INSTALLATION Vous pouvez modifier ces réglages à n’importe quel moment sous le point Système dans le menu principal. 6.6. Fuseau horaire GMT Sélectionnez ici le fuseau horaire dans lequel vous vous trouvez. Sélectionnez GMT + 1:00 pour l’Allemagne et la majeure partie d l’Europe. -
Seite 193: Heure D'été
6. INSTALLATION 6.7. Heure d’été Activez ici l'heure d'été si l'heure d'été s'applique actuellement. Les touches Haut / Basvous permettent de sélectionner la de sélectionner. Confirmez avec latouche ENTER de la télécom- mande ou de l’appareil. 6.8. Réglages du lieu Sélectionnez ici le lieu où... -
Seite 194: Sélection De Réseau
6. INSTALLATION de sélectionner. Confirmez avec latouche ENTER de la télécom- mande ou de l’appareil. 6.9. Sélection de réseau Tous les réseaux Wifi qui se trouvent à portée du périphérique seront indiqués à l’étape suivante. Sélectionnez le réseau auquel vous voulez vous connecter et confirmez avec la touche ENTER. -
Seite 195: Réglages
6. INSTALLATION Veuillez noter que la procédure de connexion au routeur peut durer un certain temps. 7. RÉGLAGES 7.1. Fonctionnement de base 7.1.1. Touche Menu Appuyez pendant 2 secondes environ sur la touche Menu de l’ap- pareil ou de la télécommande. Ainsi vous accéderez toujours au menu principal de l’appareil, et ce quelque soit le réglage en cours sur celui-ci. -
Seite 196: Touche Retour
7. RÉGLAGES Radio Internet Météo Égaliseur Radio Locale UPnP Système Radio DAB Radio FM Bluetooth Les touches fléchées►◄vous permettent de sélectionner les élé- ments individuels du menu. Confirmez votre choix avec la touche OK de télécommande ou en appuyant sur la touche ENTER de l’appareil. 7.1.2. -
Seite 197: Touche Mode
7. RÉGLAGES 7.1.4. Touche Mode Vous pouvez activer les différents modes de diffusion de la radio au moyen de la touche Mode. 7.2. Système Appuyez sur la touche MENU de la télécommande ou de l’appareil et sélectionnez à l'aide des touches ►◄ de la télécom- mande ou de la molette de commande de l’appareil l'élément de menu Système. -
Seite 198: Langue
7. RÉGLAGES 7.2.1 Langue Les touches Haut / Basvous permettent de sélectionner la Sélectionner la langue du menu. Confirmez la langue du menu souhaitée avec la touche ENTER de la télécommande. 7.2.2 Date et heure Les touches Haut / Basvous permettent de sélectionner la de sélectionner. -
Seite 199: Réseau
7. RÉGLAGES 7.2.3. Réseau La radio doit être connectée à un réseau doté d’un accès à Internet pour que l’appareil fonctionne correctement en tant que radio Internet. Vous pouvez établir la connexion internet par l’intermédiaire de cet élément de menu si vous ne l’avez pas encore fait lors de l’installation initiale. - Seite 200 7. RÉGLAGES Confirmez votre choix avec la touche ENTER de la télécommande ou en appuyant sur la touche ENTER de l’appa- reil. Sélectionnez le réseau auquel vous souhaitez vous connecter au moyen des touches ▼▲ de la télécommandeet confirmez avec ENTER.
-
Seite 201: Alarme/Réveil
7. RÉGLAGES 7.2.4. Alarme/Réveil L’appareil peut être utilisé comme radio-réveil. Cet élément de menu vous permet de régler jusqu’à 2 alarmes de réveil. Vous pouvez également définir si le réveil doit se faire au moyen d’un son ou d’une station de radio Internet. Procédez de la manière suivante pour configurer une heure de réveil: Appuyez sur la touche MENU de la télécommande ou de... - Seite 202 7. RÉGLAGES Activez le réveil par l’intermédiaire de la barre d’état. Réglez l’heure et la date auxquelles le réveil doit être activé dans le champ suivant. Utilisez le clavier numérique de télécom- mande ou lamolette de commande de l’appareil. Les saisies individuelles doivent être mémorisées au moyen de la touche ENTER.
-
Seite 203: Modifier La Minuterie
7. RÉGLAGES de la télécommande ou de l’appareil. Pour activer une fonction snooze, appuyez sur la molette de commande de l’appareil lorsque l’alarme est activée. L’alarme s’arrête pendant 5 minutes. L’alarme est activée à nouveau après 5 minutes. Pour désactiver l’alarme jusqu'au lendemain, appuyez sur la touche Standby (veille)/Power de l’appareil. - Seite 204 7. RÉGLAGES Sélectionnez la fonction souhaitée et confirmez en appuyant sur la touche de réglage du volume sonore de l’appa- reil ou la touche OK de la télécommande. Standby (veille) Eco L’appareil en Standby (veille) consomme très peu d’électricité lors- qu’il se trouve dans ce mode de fonctionnement.
-
Seite 205: Sleeptimer (Minuterie De Sommeil)
7. RÉGLAGES 7.2.7. Sleeptimer (Minuterie de sommeil) La radio se met automatiquement en mode Standby (veille) au moyen de la fonction Sleeptimer (minuterie de sommeil). Vous pouvez définir ici la durée après laquelle l’appareil s’éteint automatiquement. Au moyen des touches ▼▲ de la télécommande ou à l’aide de la molette de commande de l’appareil, sélectionnez l’élément de menu Sleeptimer (Minuterie de sommeil) et appuyez ensuite sur la touche ENTER de la télécommande ou confirmez en ap-... -
Seite 206: Rétroéclairage
7. RÉGLAGES 7.2.8. Rétroéclairage Cette fonction vous permet de modifier la luminosité de l’écran. Au moyen des touches ▼▲ de la télécommande ou à l’aide de la molette de commande de l’appareil, sélectionnez l’élément de menu Rétroéclairage dans le menu « Système » et appuyez sur la touche ENTER de la télécommande ou confirmez en appuyant sur la touche de réglage du volume sonore de l’appareil. -
Seite 207: Mise À Jour Du Logiciel
à jour du logiciel d’exploitation de votre radio pouvant être téléchargée le cas échéant sous www.telestar.de peut être effectuée par l’intermédiaire de l’interface USB. Le logiciel disponible sur la page Internet doit être décompressé. Sauvegardez le fichier décompressé... -
Seite 208: Version
7. RÉGLAGES Confirmez avec OK si vous souhaitez rétablir les réglages par défaut. Appuyez sur Annuler si vous souhaitez interrompre cette action. L’appareil revient à son état de livraison lorsque vous activez les réglages par défaut. Toutes les stations de radio et les listes de favoris enregistrées sont alors perdues. -
Seite 209: Fonctionnement
8. FONCTIONNEMENT 8.1. Sélectionner une station de radio Internet Sélectionnez avec les touche fléchées►◄ dans le menu principal de l’appareil l'élément de menu Radio Internet et confirmez votre choix avec la touche OK de la télécommande ou en appuyant sur touche ENTER de l’appareil. -
Seite 210: Recherche D'une Station Radio Internet
8. FONCTIONNEMENT Liste des favoris Cette liste affiche les stations de radio que vous avez mémorisé. Veuillez lire également le chapitre 8.4. pour mémoriser une station de radio Radio Ce point vous permet d’accéder à de différentes listes de chaînes de radio. -
Seite 211: Mémoriser Les Stations De Radio
8. FONCTIONNEMENT Pour ce faire, utilisez les touches ▼▲ ►◄. Confirmez votre saisie avec la touche ENTER. La radio cherche à présent toutes les stations qui correspondent à votre saisie. Sélectionnez une station avec les touches ▼▲ et confirmez avec la touche ENTER de l’appareil. 8.3. -
Seite 212: Stations De Radio Locales
8. FONCTIONNEMENT Appuyez pendant 2 secondes environ sur latouche FAV+ de la télécommande. La station radio est mémorisée à la position choisie. 8.5. Stations de radio locales Pour simplifier la recherche de stations radio à proximité en mode radio Internet, vous pouvez chercher des stations radio de votre région de manière ciblée dans le menu de l’appareil. -
Seite 213: Modifier Le Volume Sonore
8. FONCTIONNEMENT Confirmez votre saisie avec la touche ENTER. 8.6. Modifier le volume sonore Réglez le volume sonore souhaité au moyen des touches VOL+/ VOL- de la télécommande ou de la molette de commande de l’ap- pareil. Appuyez sur la touche Mute de la télécommande pour désacti- ver le son de l’appareil. -
Seite 214: Aux In
8. FONCTIONNEMENT 8.8. AUX IN Vous pouvez brancher un appareil de lecture de musique externe tel qu’un lecteur MP3 à la radio. Pour ce faire, connectez un appareil externe à l'arrière de la radio à l'aide d'un câble approprié et allumez cet appareil. Appuyez sur la touche MENU de la télécommande ou de l’appareil et sélectionnez AUX off à... -
Seite 215: Upnp
8. FONCTIONNEMENT L’entrée AUX IN de la radio est prévue pour une prise Jack sté- réo de 3,5 mm. 8.9. UPnP Si la radio est connectée à un réseau sans fil, elle peut être également utilisée comme lecteur multimédia pour diffuser la musique de fichiers de musique provenant d'appareils connec- tés en réseau tels que des ordinateurs ou des Smartphone par l’inter-... -
Seite 216: Lecture Usb
8. FONCTIONNEMENT 8.10. Lecture USB Vous pouvez écouter la musique MP3 présente sur un support de données USB. Branchez un support de données USB contenant des fichiers mu- sicaux dans la prise USB située sur le panneau arrière. Appuyez sur la touche MENU de la télécommande ou de l’appareil et sélectionnez Multimédia à... -
Seite 217: Eq (Equalizer - Égaliseur)
8. FONCTIONNEMENT 8.11. EQ (Equalizer - Égaliseur) Cette section vous permet de sélectionner des sons préréglés individuels du menu. En plus de plusieurs sons préréglés, vous avez également la possibilité de personnaliser le son de votre radio et de mémoriser votre réglage dans « Mon EQ ». Au moyen des touches ▼▲... -
Seite 218: Météo
8. FONCTIONNEMENT L'élément de menu « EQ Advanced Settings (Réglages avancés de l’égaliseur) » vous permet d’ajuster de différentes plages de fréquence. 8.12. Météo L’appareil peut afficher les informations météo actuelles de votre emplacement. Pour accéder au bulletin météo, sélectionnez l’élément de menu «... - Seite 219 8. FONCTIONNEMENT Vous pouvez changer le lieu du bulletin météo par l’intermédiaire de la touche LIST de la télécommande ou de l’appareil. Saisissez le nom de la ville pour laquelle vous souhaitez recevoir le bulletin météo actuel. Si l'appareil est connecté à Internet, vous pouvez consulter les informations météorologiques sur l'écran de l'appareil.
-
Seite 220: Enregistrer Des Émissions Radio
8. FONCTIONNEMENT 8.13. Enregistrer des émissions radio L'appareil peut enregistrer des émissions radio sur un support de données USB. La radio crée un dossier dans lequel toutes les émissions vont être enregistrées dans le support de données USB connecté. Le dossier est dénommé... - Seite 221 8. FONCTIONNEMENT Tout comme un magnétoscope ou un enregistreur de DVD, vous pouvez également utiliser la radio pour programmer des enregis- trements d’émissions de radio lorsque vous n'êtes pas chez vous, par exemple. Pour ce faire, appuyez pendant plus de 2 secondes sur la touche Record de l’appareil ou de la la télécommande.
-
Seite 222: Bluetooth
8. FONCTIONNEMENT Date Saisissez la date à laquelle la minuterie doit se déclencher. Heure de début : marquez la ligne « Heure de début », appuyez sur la touche OK et saisissez ici l’heure à laquelle la minuterie doit être déclenchée à... -
Seite 223: Établir Une Connexion Bluetooth
8. FONCTIONNEMENT 8.14.1. Établir une connexion Bluetooth Lorsque vous sélectionnez le mode Bluetooth, la radio se trouve en mode d’appairage et cherche les appareils Bluetooth pouvant être connectés. Activez à présent la fonction Bluetooth de l’appareil externe que vous voulez connecter (Référez-vous au manuel d’utilisation de l’appareil externe pour de plus amples informations). -
Seite 224: Radio Dab
8. FONCTIONNEMENT 8.15. Radio DAB+ Ce mode vous permet de recevoir des stations de radio transmises de manière numérique. Maintenez la touche MENU de la télécommande ou de l’appa- reil enfoncée et sélectionnez l’élément de menu DAB/DAB+ au moyen des touches ►◄. Confirmez votre choix en appuyant sur la molette de commande de l’appareil ou au moyen de la touche ENTER de la télécommande. - Seite 225 8. FONCTIONNEMENT Passez à la ligne de recherche automatique de stations de radio et confirmez avec la touche Enter/OK de la télécommande ou en appuyant sur la molette de commande de l'appareil. La radio recherche automatiquement toutes les stations de radio numériques disponibles et les mémorise ensuite dans une liste de stations.
-
Seite 226: Recherche Dab Manuelle
8. FONCTIONNEMENT 8.15.3. Recherche DAB manuelle Vous pouvez également chercher les stations DAB manuelle- ment. Pour cela, vous devez connaître la fréquence de la station. Sélectionner la fréquence de station souhaitée au moyen de cet élément de menu et confirmez avec ENTER. 8.16. -
Seite 227: Résolution De Problèmes
9. RÉSOLUTION DE PROBLÈMES mémorise toutes les fréquences sur lesquelles une station de radio a été trouvée. Veuillez noter que la sensibilité de la réception et le nombre de stations radio trouvées y étant lié dépend des réglages de la sensibilité... - Seite 228 9. RÉSOLUTION DE PROBLÈMES Symptôme Cause possible et solution Aucun affichage sur Activez l’alimentation électrique l’écran, au moyen du bloc d’alimentation La radio ne réagit inclus dans la livraison. aux commandes La commande au Les piles sont vides ou mal installées. moyen de la télécom- Veuillez vérifier si les piles sont in- mande n’est...
- Seite 229 9. RÉSOLUTION DE PROBLÈMES Symptôme Cause possible et solution La connexion au Vérifiez la fonction Wifi. réseau ne peut pas Activez la fonction DHCP du routeur être établie auquel la radio doit être connectée. Un pare-feu est éventuellement actif dans le réseau. La connexion Wifi ne Contrôlez la disponibilité...
-
Seite 230: Conservation
9. RÉSOLUTION DE PROBLÈMES Symptôme Cause possible et solution Réception DAB+ Aucune station radio disponible perturbée Effectuez une recherche de stations. L’antenne n’est pas déployée sur toute sa longueur. Placez la radio à un autre endroit (plus près de la fenêtre le cas éché- ant), et effectuez une nouvelle recherche. -
Seite 231: Indication Pour La Mise Au Rebut
12. INDICATION POUR LA MISE AU REBUT 12.1. ÉLIMINATION DE L’EMBALLAGE Entsorgun L’emballage de votre appareil Verp se compose exclusivement de matériaux Ihr G recyclables. Veuillez les trier schä et les traiter Rohm werd selon le système de recyclage en vigueur. werd Gerä... -
Seite 232: Élimination Des Piles
12. INDICATION POUR LA MISE AU REBUT 12.3. ÉLIMINATION DES PILES Il est interdit de jeter les accumulateurs et les piles avec les ordures ménagères. Le symbole reproduit à droite indique que vous êtes obligé, en tant que consommateur, de déposer tous les accumulateurs et les piles dans un point de collecte prévu à... -
Seite 233: Caractéristiques Et Données Techniques
13. CARACTÉRISTIQUES ET DONNÉES TECHNIQUES Radio Internet Codecs audio MP3 (Débit binaire jusqu’à 320 Kbits/s, fréquence d’échantillonnage de 48 KHz) AAC/AAC+ (Débit binaire jusqu’à 320 kb/s, fréquence d’échantillonnage jusqu’à 48 KHz) WMA (Débit binaire jusqu’à 320 kb/s, fréquence d’échantillonnage allant jusqu’à... - Seite 234 13. CARACTÉRISTIQUES ET DONNÉES TECHNIQUES Connexions Écouteurs Prise Jack 3,5 mm stéréo AUX IN Prise Jack 3,5 mm stéréo Polarité Connexion pour ali- mentation électrique Port USB USB 2.0 Standard Sortie 5 Volt CC Conditions de fonctionnement Plage de tempéra- 0 ...
- Seite 235 13. CARACTÉRISTIQUES ET DONNÉES TECHNIQUES Consommation Mode veille 0,1 W Fonctionnement max. 20 W Conditions de stockage Stocker uniquement dans des locaux secs. Dimensions et poids Largeur x hauteur x pro- 192 mm x 118 mm x 1125 mm fondeur Poids env.
-
Seite 236: Service Et Assistance
Les données techniques correspondent à l’état actuel au moment de l’impression. Sous réserve de modifications. La durée de garantie pour la radio TELESTAR M12i correspond aux dispositions légales en vigueur au moment de l’achat. Nous vous proposons également une assistance professionnelle par l’intermédiaire de notre HOTLINE service client. -
Seite 237: Marquage Ce
15. MARQUAGE CE Votre appareil porte la marque CE et remplit toutes les normes UE requises. TELESTAR DIGITAL GmbH déclare par la présente que l’appareil répond aux exigences essentielles ainsi qu’aux dispositions pertinentes supplémentaires de la directive RoHS 2011/65/UE, de la directive RE 2014/53/UE ainsi de la directive ErP 2009/125/CE. - Seite 238 Nous déclinons toute responsabilité pour les erreurs et les fautes d’impression. La copie et la reproduction de ce manuel d’utilisation sont unique- ment permises avec l'autorisation explicite de TELESTAR-DIGITAL GmbH. État : octobre 2020 Responsable de la mise sur le marché :...
- Seite 239 Istruzioni d'uso DIRA M 14i DIRA S 24i V4_07_01_2021...
- Seite 241 INDICE 1. Introduzione ........245 1.
- Seite 242 INDICE 7. IMPOSTAZIONI........275 7.1.
- Seite 243 INDICE 8. COMANDI ......... 289 8.1.
- Seite 244 INDICE 9. ELIMINAZIONE DI ERRORI/GUASTI ....307 10. CONSERVAZIONE....... . . 309 11.
-
Seite 245: Introduzione
1. Introduzione Gentile cliente, La ringraziamo per aver scelto questo prodotto. La preghiamo di leggere con attenzione queste istruzioni per l’uso e di conservarle per poterle consultare in futuro. Queste istruzioni d’uso sono parte integrante dell’apparecchio! In caso di vendita o cessione di questo apparecchio, si assicuri di inserire anche le istruzioni d’uso nella confezione. -
Seite 246: Introduzione
1. Introduzione 1.2. Utilizzo conforme Questo prodotto è un apparecchio elettronico di consumo. L’apparecchio serve da ricevitore di segnali radio di internet, VHF e DAB+ e per la riproduzione di file audio salvati su un sup- porto dati USB o su un’unità di rete. Ogni alto utilizzo dell’apparecchio risulterà... -
Seite 247: Avvertenze Di Sicurezza
2. AVVERTENZE DI SICUREZZA 2.1. Spiegazioni dei simboli Simbolo Significato Questa indicazione segnala un peri- colo con un elevato grado di rischio, PERICOLO! che in caso l'indicazione venga disattesa, ha come conseguenza la morte o una lesione di grave entità. Questa indicazione segnala un perico- lo con un grado medio di rischio, che ATTENZIONE! - Seite 248 2. AVVERTENZE DI SICUREZZA 2.1. Spiegazioni dei simboli Simbolo Significato Questa indicazione avverte della pos- sibilità di danni materiali e richiama AVVERTENZA! l'attenzione su descrizioni particolari per l'azionamento e il funzionamento dell'apparecchio. Questo simbolo mette in guardia da pericoli. Classe di protezione II Apparecchi elettrici con classe di protezione II hanno un isolamento rin- forzato o doppio pari alla tensione di...
- Seite 249 2. AVVERTENZE DI SICUREZZA 2.1. Spiegazioni dei simboli Simbolo Significato Per gli apparecchi con connettore coassiale, questi simboli indicano la Fig. 1 polarità del connettore. Si possono qui distinguere due vari- anti differenti Fig. 2 Fig. 1: Esterno Positivo / Interno Negativo Fig.
-
Seite 250: Avvertenze Di Sicurezza
2. AVVERTENZE DI SICUREZZA 2.2. Avvertenze di sicurezza ATTENZIONE! Controllare l'apparecchio prima dell'utilizzo. Nel caso di un danneggiamento o di un difetto, l'apparecchio non deve essere messo in funzione. Pericolo di lesioni! Pericolo di lesioni per bambini e persone con ridotte capacità fisiche, sensoriale o mentali (ad es. -
Seite 251: Sicurezza Operativa
> Se si dovessero riscontrare problemi di carattere tecnico o meccanico, si prega di mettersi in contatto con il servizio di assistenza TELESTAR. > Utilizzare solo l’alimentatore in dotazione! Non utilizzare mai un altro alimentatore. - Seite 252 2. AVVERTENZE DI SICUREZZA > Non aprire mai il corpo dell'apparecchio. > In caso di anomalie nel funzionamento scollegare imme diatamente l’alimentazione elettrica. A tal fine scollegare subito l’alimentatore dalla presa elettrica e dall’apparecchio. > Utilizzare solo accessori e pezzi di ricambio forniti o approvati da noi.
- Seite 253 2. AVVERTENZE DI SICUREZZA Non estrarre mai l'alimentatore dalla presa tirandolo per il cavo. In seguito a un malfunzionamento, l'apparecchio non può più essere ulteriormente utilizzato fino a quando non sia stato controllato o riparato da personale autorizzato in tal senso. >...
-
Seite 254: Collegare L'apparecchio
2. AVVERTENZE DI SICUREZZA 2.4. Collegare l'apparecchio toccato con mani umide o bagnate. > Collegare l’apparecchio solo ad una presa correttamente installata, messa a terra e dotata di protezione elettrica. > Fare attenzione affinché la fonte d'alimentazione elettrica (presa) sia facilmente accessibile. >... -
Seite 255: Proteggere L'apparecchio Da Difetti
2. AVVERTENZE DI SICUREZZA 2.5. Proteggere l'apparecchio da difetti AVVERTENZA! > Condizioni ambientali sfavorevoli come umidità, calore eccessivo o mancanza di ventilazione possono danneggiare l’apparecchio. > Utilizzare l’apparecchio solo in ambienti asciutti. Evitare la diretta vicinanza a: fonti di calore, quali ad es. -
Seite 256: Pericolo Di Lesioni
2. AVVERTENZE DI SICUREZZA > Non mettere in funzione l’apparecchio in aree la cui aria sia contaminata da particolato (ad es. polvere di farina o di legno) 2.6. Pericolo di lesioni ATTENZIONE! Un'eccessiva pressione sonora durante l'utilizzo di auricolari o cuffie può... -
Seite 257: Gestione Delle Batterie
2. AVVERTENZE DI SICUREZZA Mantenere una distanza sicura e sufficiente tra i dispositivi medi- ci e la radio. Se si ha ragione di credere che la radio stia causando disturbi a un qualsiasi dispositivo medico, spegnere la radio e scollegarla immediatamente dall’alimentazione elettrica. - Seite 258 2. AVVERTENZE DI SICUREZZA Rimuovere la batterie dal dispositivo in caso di non utilizzo per lungo tempo. Rimuovere immediatamente dall’apparecchio le batterie esauste o con perdite. Le batterie con perdite possono causare ustioni a contatto con la pelle. Tenere le batterie nuove e usate fuori dalla portata dei bambini. In caso di ingestione delle batterie vi è...
- Seite 259 2. AVVERTENZE DI SICUREZZA ATTENZIONE! In caso di uso improprio delle batterie sussiste il pericolo di esplosione! > Utilizzare solo batterie nuove dello stesso tipo. > Non utilizzare mai batterie nuove e usate insieme nell’apparecchio. > Assicurarsi di inserire le batterie con la polarità corretta.
-
Seite 260: Pulire L'apparecchio
2. AVVERTENZE DI SICUREZZA 2.9. Pulire l'apparecchio Prima della pulizia scollegare l'apparecchio dalla presa. Per pulire l'apparecchio utilizzare un panno morbido e asciutto. Si prega di non utilizzare liquidi per la pulizia dell'apparecchio. Non utilizzare solventi e detergenti, poiché questi potrebbero danneggiare la superficie e/o le scritte dell'apparecchio. -
Seite 261: Contenuto Della Fornitura
3. CONTENUTO DELLA FORNITURA Estrarre tutti i pezzi dalla confezione e eliminare completamente tutti i materiali di imballaggio. Qualora dovessero mancare uno o più dei pezzi indicati, si prega di rivolgersi a: TELESTAR Service Center, Am Weiher 14, 56766 Ulmen E-mail: service@telestar.de Nume-... -
Seite 262: Panoramica Degli Elementi Di Comando
4. PANORAMICA DEGLI ELEMENTI DI COMANDO 3 4 5 13 14 15 1 6... - Seite 263 4. PANORAMICA DEGLI ELEMENTI DI COMANDO 1. Lista Riprende la lista delle ultime 10 stazioni radio scelte. 2. Tasto di salvataggio stazione 1 / Comando multimedia Con questo tasto si cambia in modalità radio sulla posizione di memoria per i programmi desiderata. ▸II Avvia o mette in pausa la riproduzione di titoli musicali su un supporto dati USB.
- Seite 264 4. PANORAMICA DEGLI ELEMENTI DI COMANDO Mantenere il tasto premuto per più di 2 secondi per attivare il timer menu e registrare una stazione radio. 8. Tasto di salvataggio stazione 2 / Comando multimedia Con questo tasto si cambia in modalità radio sulla posizione di memoria per i programmi desiderata.
- Seite 265 4. PANORAMICA DEGLI ELEMENTI DI COMANDO 14. Attacco per cuffie Collegare qui un paio di cuffie per ascoltare riprodotta dalla radio. Con l’attacco delle cuffie, la riproduzione della musica attraverso gli altoparlanti dell’apparecchio viene interrotta. 15. AUX IN Collegare qui una sorgente audio esterna come lettore MP3, smartphone o tablet tramite cavo AUX con jack maschio da 3,5 mm (vedere anche il capitolo 8.8) 16.
-
Seite 266: Telecomando
5. TELECOMANDO La radio può essere controllata sia tramite i tasti sull’apparecchio che anche tramite telecomando. Il controllo tramite il telecomando è il modo più facile e comodo per controllare l’ap- parecchio. - Seite 267 5. TELECOMANDO 1. Tasto Standby Accendere o spegnere l’apparecchio con questo tasto. 2. Mode Effettuare qui la commutazione fra i diversi tipi di funzionamento. 3. Mute Silenziare il suono dell’apparecchio. 4. Funzione Equalizzatore EQ Tramite questo tasto è possibile attivare la funzione Equalizzatore e operare impostazioni individuali per il suono.
- Seite 268 5. TELECOMANDO 11. INFO Mostra informazioni dei programmi radio correnti. 12. Menu Attivare attraverso questo tasto il menu dell’apparecchio ▯ Avvia una registrazione dei programmi audio su un supporto dati USB. Mantenere il tasto premuto per più di 2 secondi per attivare il timer menu e registrare una stazione radio.
-
Seite 269: Installazione
6. INSTALLAZIONE 6.1 Indicazioni generali per l’uso > Accendere o spegnere l’apparecchio con il tasto Standby sul telecomando. Aumentare il volume con il tasto VOL+ sul telecomando. > > Ridurre il volume con il tasto VOL- sul telecomando. > Le voci del menù possono essere selezionate tramite i tasti ▼▲... -
Seite 270: Attacco Della Corrente
6. INSTALLAZIONE Per ulteriori informazioni leggere le avvertenze di sicurezza nel cap. 2.8. Prestare attenzione alla corretta polarità della batteria! Reinserire di nuovo il vano batterie. 6.3. Attacco della corrente Collegare l’alimentatore di rete, che si trova in dotazione alla fornitura, alla rispettiva presa sul retro dell’apparecchio. -
Seite 271: Modalità Data E Ora
6. INSTALLAZIONE 6.5. Modalità Data e ora Scegliere la modalità secondo la quale la radio deve sincronizzare l’orario.Tramite i tasti Su/Giù del telecomando è possibile sce- gliere. Confermare con il tasto ENTER sul telecomando o vicino all’apparecchio. La configurazione di fabbrica dell’apparecchio prevede l’impo- stazione automatica di data e ora. -
Seite 272: Fuso Orario Gmt
6. INSTALLAZIONE 6.6. Fuso orario GMT Scegliere il fuso orario della zona in cui ci si trova. Per l’Italia e la maggior parte dell’Europa scegliere GMT + 1:00. Tramite i tasti Su/Giù del telecomando è possibile selezionare la scegliere. Confermare con il tasto ENTER sul telecomando o vicino all’apparecchio. -
Seite 273: Orario Solare
6. INSTALLAZIONE 6.7. Orario solare Attivare qui l’orario solare quando è in vigore. Tramite i tasti Su/Giù del telecomando è possibile selezionare la scegliere. Confermare con il tasto ENTER sul telecomando o vicino all’apparecchio. 6.8. Impostazioni luogo Scegliere qui il luogo in cui ci si trova. Scegliere prima il continente e poi il paese in cui ci si trova. -
Seite 274: Selezione Della Rete
6. INSTALLAZIONE scegliere. Confermare con il tasto ENTER sul telecomando o vicino all’apparecchio. 6.9. Selezione della rete Nel passo successivo vengono mostrate tutte le reti Wi-Fi dispo- nibili e leggibili dall’apparecchio. Scegliere la rete alla quale ci si vuole connettere e confermare con il tasto ENTER. Inserire la chiave della rete Wi-Fi. -
Seite 275: Impostazioni
6. INSTALLAZIONE Si prega di osservare che il processo di collegamento al router può avere una certa durata. 7. IMPOSTAZIONI 7.1. Comandi di base 7.1.1. Tasto Menu Tenere premuto il tasto Menu sull’apparecchio o sul telecomando per circa 2 secondi. Indipendentemente dalle impostazioni correnti dell’apparecchio, verrà... -
Seite 276: Tasto Indietro
7. IMPOSTAZIONI Internet radio Meteo Equalizzatore Local Radio UPnP Sistema Radio DAB Radio FM Bluetooth Si possono selezionare le singole voci del menu con i tasti frec- cia►◄ . Confermare la selezione con il tasto OK telecomando o premendo il tasto ENTER sull’apparecchio. 7.1.2. -
Seite 277: Tasto Mode
7. IMPOSTAZIONI 7.1.4. Tasto Mode Attraverso il tasto Mode è possibile cambiare le diverse modalità operative della radio. 7.2. Sistema Premere il tasto MENU sul telecomando o sull’apparecchio e selezionare con i tasti ►◄ del telecomando o tramite la rotella sull’apparecchio la voce di menu Sistema. Confermare la selezione con il tasto ENTER del telecomando o premendo il tasto ENTER sull’apparecchio. -
Seite 278: Lingua
7. IMPOSTAZIONI 7.2.1 Lingua Tramite i tasti Su/Giù del telecomando è possibile selezionare la lingua del menu. Confermare la lingua desiderata per il menu con il tasto ENTER sul telecomando. 7.2.2 Data e ora Tramite i tasti Su/Giù del telecomando è possibile selezionare la scegliere. -
Seite 279: Rete
7. IMPOSTAZIONI 7.2.3. Rete Affinché l’apparecchio possa funzionare come Internet radio, la radio deve essere collegata ad una rete con accesso internet. Se non si è fatto durante l’installazione iniziale, in questo punto del menù si può stabilire una connessione alla rete. - Seite 280 7. IMPOSTAZIONI Confermare la selezione con il tasto ENTER del telecomando o premendo il tasto ENTER sull’apparecchio. Selezionare con l’aiuto dei tasti ▼▲ del telecomando la rete, con cui deve essere creata una connessione e confermare con ENTER. Inserire la chiave della rete Wi-Fi. Mediante i tasti ▼▲ sul teleco- mando o mediante la rotella sull’apparecchio è...
-
Seite 281: Sveglia
7. IMPOSTAZIONI 7.2.4. Sveglia L’apparecchio può essere utilizzato come radiosveglia. Sotto questa voce del menu è possibile impostare fino a 2 orari di sveglia. Inoltre si può impostare se la sveglia deve svegliare con un suono o attivando la radio. Per impostare un orario per la sveglia, procedere come segue: Premere il tasto MENU sul telecomando o sull’apparecchio e selezionare con i tasti ►◄... - Seite 282 7. IMPOSTAZIONI Attivare la sveglia tramite la riga Stato. Nella riga successiva impostare l’orario per cui deve essere attiva- ta la sveglia. Utilizzare anche la Tastiera numerica del telecoman- do o la rotella sull’apparecchio. Per confermare le singole indicazioni, bisogna salvarle con il Tasto ENTER.
-
Seite 283: Modificare Il Timer
7. IMPOSTAZIONI Per fermare il segnale di sveglia, premere il tasto STANDBY sul telecomando o vicino all’apparecchio. Per attivare la funzione snooze, durante la sveglia premere la rotella sull’apparecchio. Il segnale viene con ciò interrotto per 5 minuti. Dopo 5 minuti, il segnale è di nuovo attivo. Per disattivare la sveglia fino al giorno successivo, premere il tasto Standby/Power sull’apparecchio. -
Seite 284: Sleep Timer
7. IMPOSTAZIONI Scegliere la funzione desiderata e confermare premendo sul regolatore di volume sull’apparecchio o sul Tasto OK sul telecomando. Eco Standby Nella modalità standby l’apparecchio ha un consumo di corrente molto basso. In modalità standby l’orario non viene mostrato. Standby con orario In questa modalità... -
Seite 285: Illuminazione Dello Sfondo
7. IMPOSTAZIONI Selezionare Off per disattivare questa funzione o selezionare un intervallo di tempo preimpostato tra 10 e 120 minuti. Confermare la scelta premendo OK sul telecomando o confermare premendo la rotella sull'apparecchio. 7.2.8. Illuminazione dello sfondo Con questa funzione si può regolare e cambiare la luminosità del display. -
Seite 286: Impostazione Luogo
7. IMPOSTAZIONI L’illuminazione dello sfondo può essere regolata sia quando in funzione sia nella modalità standby. Utilizzare i tasti►◄ o la rotella sull’apparecchio e confermare con ENTER. 7.2.9. Impostazione Luogo Con questa impostazione si può impostare la regione in cui ci si trova. -
Seite 287: Aggiornamento Software
Attraverso l’interfaccia USB si ha la possibilità di aggiornare il software operativo della propria radio, che qualora sia neces- sario è a disposizione per il download su www.telestar.de. Il software messo a disposizione sulla pagine Internet deve essere decompresso. Salvare poi il file decompresso su un adeguato supporto di memorizzazione dati e collegare questo tramite attacco USB alla radio. -
Seite 288: Versione
7. IMPOSTAZIONI Confermare con OK se si vuole richiamare l’impostazione di fabbrica. Cliccare su Abbandona se si vuole mettere fine a que- sta azione. Attivando le impostazioni di fabbrica l’apparecchio viene riporta- to allo stato di consegna. Andranno perse quindi tutte le stazio- ni salvate e le liste dei preferiti. -
Seite 289: Comandi
8. COMANDI 8.1. Scegliere la stazione Internet radio Scegliere con i tasti freccia nel menu principale ►◄ dell’apparecchio la voce Internetradio e confermare la scelta con il tasto OK del telecomando o premendo sul tasto ENTER sull’apparecchio. Non appena è stata attivata la modalità Internet radio, sintonizzare la radio sull’emittente radiofonica impostata. -
Seite 290: Cercare Una Stazione Internet Radio
8. COMANDI Lista preferiti Questa lista mostrerà tutte le stazioni radio salvate. Per salvare una stazione radio, leggere anche il cap. 8.4. Radio Cliccando su questa voce si visualizzano le diverse liste di program- mi radio. Podcasts Qui si può scegliere tra una serie di podcast radio. Cronologia In questa lista si trovano le ultime 10 stazioni radio selezionate di recente. -
Seite 291: Salvare Stazione Radio
8. COMANDI Inserire nel campo di ricerca, con l’aiuto della tastiera sul teleco- mando, il nome della stazione radio. Premere i tasti ▼▲ ►◄. Confermare l’inserimento con ENTER. La radio cerca ora tutte le stazioni che corrispondono all’inserimento. Selezionare un’emittente con i tasti ▼▲ e confermare con il tasto ENTER sull’apparecchio. -
Seite 292: Stazioni Radio Locali
8. COMANDI Premere il tasto FAV+ sul telecomando. Scegliere un numero sul quale si desidera salvare la stazione radio. Mantenere premuto il tasto FAV+ sul telecomando per circa 2 secondi. La stazione radiofonica verrà salvata sulla posizione scelta. 8.5. Stazioni radio locali Per facilitare la ricerca di emittenti del proprio circondario nella modalità... -
Seite 293: Cambiare Il Volume
8. COMANDI Confermare l’inserimento con ENTER. 8.6. Cambiare il volume Impostare il volume desiderato tramite i tasti VOL+/VOL sul telecomando o con la rotella sull’apparecchio. Per silenziare il volume della radio, premere sul tasto Muto sul telecomando. 8.7. Commutazione tipo di funzionamento Premere sul tasto MODE sul telecomando per poter cambiare tra le modalità... -
Seite 294: Aux In
8. COMANDI 8.8. AUX IN È possibile collegare un dispositivo esterno di riproduzione musi- cale, come ad es. un lettore MP3 alla radio. Con l’aiuto di un cavo adatto, collegare un apparecchio esterno al lato posteriore della radio e accendere l’apparecchio. Premere il tasto MENU sul telecomando o sull’apparecchio e selezionare con i tasti ►◄... -
Seite 295: Upnp
8. COMANDI Sulla radio è predisposto un ingresso AUX IN adatto per un con- nettore jack stereo da 3,5 mm. 8.9. UPnP Se la radio è integrata ad una rete wireless può essere utilizzata anche come media player, per poter riprodurre file musicali via UPnP da un apparecchio col- legato alla rete come PC o smartphone. -
Seite 296: La Riproduzione Usb
8. COMANDI 8.10. La riproduzione USB I file musicali MP3 possono essere riprodotti da un supporto dati USB. Inserire un supporto dati USB con file musicali nella porta USB posta sul lato posteriore. Premere il tasto MENU sul telecomando o sull’apparecchio e selezionare con i tasti ►◄... - Seite 297 8. COMANDI Selezionare con i tasti ▼▲ del telecomando o con l’aiuto della rotella sull’apparecchio nel menu principale la voce del menu Equalizzatore e premere il tasto ENTER sul telecomando o confermare premendo sul regolatore di volume sull’apparecchio. Selezionare con i tasti ▼▲ del telecomando o con l’aiuto della rotella sull’apparecchio un’impostazione audio e confermare la scelta premendo OK sul telecomando o premendo sul regolatore di volume sull’apparecchio.
-
Seite 298: Meteo
8. COMANDI Sotto la voce EQ Advanced Settings si possono regolare le gamme di frequenza. 8.12. Meteo L’apparecchio può mostrare le informazioni meteo del luogo. Per richiamare le informazioni meteo, selezionare la voce di menu Meteo nel menu principale della radio e confermare con OK. -
Seite 299: Registrare Una Stazione Radio
8. COMANDI Con il tasto LIST sul telecomando o sull’apparecchio è possibile modificare la località per il meteo. Inserire il nome della città per cui si vogliono ricevere le informa- zioni meteo. Fin quando l’apparecchio è collegato a Internet mostrerà le informazioni meteo sul display. - Seite 300 8. COMANDI USB alla radio. Durante l’emissione, premere sul tasto Record (Rec) sull’appa- recchio o sul telecomando. Sul display compare il simbolo rosso di registrazione. Per terminare la registrazione, cliccare sul tasto Stop e confer- mare la richiesta con OK. Come con un video o DVD recorder, anche con la radio è...
- Seite 301 8. COMANDI In alternativa scegliere dal menu Sistema la voce registrare Timer Nome: Scegliere qui il programma radiofonico che deve essere registrato. Data Inserire qui la data per la quale deve essere attivato il timer. Orario d’inizio: Selezionare la riga Orario d’inizio, premere il tasto OK e inserire l’orario con l’aiuto dei tasti freccia su/giù...
-
Seite 302: Bluetooth
8. COMANDI 8.14. Bluetooth La radio può anche essere collegato via Bluetooth a un dispositivo esterno (ad es. smartphone/tablet). Attraverso la connessione Bluetooth è possibile poi la riproduzio- ne sulla radio di media (file MP3 memorizzati localmente, musica in streaming, webradio) memorizzati su un dispositivo esterno. -
Seite 303: Riprodurre Contenuti Multimediali Via Bluetooth
8. COMANDI 8.14.2. Riprodurre contenuti multimediali via Bluetooth Se si è creata una connessione Bluetooth come descritto nel cap. 8.14.1, è possibile riprodurre file musicali memorizzati sul dispositivo esterno. A tal fine procedere come segue: Avviare la riproduzione della musica dal dispositivo esterno attivando la rispettiva funzione di riproduzione (MP3 Player, ecc.) o selezionare dalla rispettiva lista di riproduzio- ne una traccia e avviare la riproduzione. -
Seite 304: Ricerca Dab
8. COMANDI con successo. Si prega di leggere in proposito anche il cap. 8.15.2 8.15.2. Ricerca DAB Per avviare una ricerca automatica delle stazioni in ricezione DAB, premere il tasto Indietro, eventualmente più volte. Se la radio non ha memorizzato ancora alcun programma in modalità... -
Seite 305: Ricerca Dab Manuale
8. COMANDI Il numero sul lato destro indica il numero di stazioni radio trovate. Dopo una ricerca andata a buon fine, la radio inizia a riprodurre la prima stazione trovata. 8.15.3. Ricerca DAB manuale È possibile anche procedere alla ricerca DAB manuale. A tal fine è... -
Seite 306: Ricerca Vhf Automatica
8. COMANDI 8.16.1. Ricerca VHF automatica Dopo l'attivazione in FM, azionare il tasto Lista sull’apparecchio. Tenere premuto il tasto OK fino ad avviare la ricerca. L'apparecchio avvia la ricerca automatica delle stazioni e memo- rizza tutte le frequenze su cui è stata trovata una stazione radio. Si prega di osservare, che la sensibilità... -
Seite 307: Eliminazione Di Errori/Guasti
9. ELIMINAZIONE DI ERRORI/GUASTI Problema Possibile causa e soluzione Nessuna visualizzazi- Creare il collegamento con la corrente one sul display, elettrica la radio non reagisce tramite l’alimentatore di rete in dotazi- ai comandi alla fornitura. Non è possibile Batteria scarica o inserita non corret- l’azionamento tramite tamente. - Seite 308 9. ELIMINAZIONE DI ERRORI/GUASTI Problema Possibile causa e soluzione Non è possibile Controllare la funzione Wi-Fi. instaurare il collega- Attivare la funzione DHCP del router, a mento in rete cui la radio deve essere collegata. Eventualmente è attivo nella rete un firewall.
-
Seite 309: Conservazione
9. ELIMINAZIONE DI ERRORI/GUASTI Problema Possibile causa e soluzione Ricezione DAB+ Nessun emittente presente disturbata Eseguire di nuovo una ricerca auto- matica. Antenna non completamente estesa. Cambiare posizione della radio (ev. spostarla più vicino alla finestra), eseguire una nuova ricerca. Ricezione VHF Antenna non completamente estesa. -
Seite 310: Avvertenze Per Lo Smaltimento
12. AVVERTENZE PER LO SMALTIMENTO 12.1. SMALTIMENTO DELL’IMBALLAGGIO Entsorgun L’imballaggio del Suo apparecchio è composto Verp esclusivamente di materiali Ihr G riciclabili. Si prega di avviarli allo smaltimento schä opportunamente suddivisi per la raccolta differenziata. Gerä 12.2. SMALTIMENTO DELL’APPARECCHIO Il simbolo di un bidone su ruote barrato kein Sie e raffigurato qui a destra indica che... - Seite 311 12. AVVERTENZE PER LO SMALTIMENTO 12.3. SMALTIMENTO DI BATTERIE Le batterie e le batterie ricaricabili non devono essere smaltite insieme con i rifiuti domestici. Il simbolo raffigurato a destra significa che in qualità di consumatori si è obbligati a smaltire tutte le batterie e le batterie ricaricabili separatamente.
-
Seite 312: Caratteristiche E Dati Tecnici
13. CARATTERISTICHE E DATI TECNICI Internet radio Codec audio MP3 (velocità di trasmissione fino a 320 kbits/s, frequenza di campiona- mento fino a 48 kHz) AAC/AAC+ (velocità di trasmissione fino a 320 kbits/s, frequenza di campi- onamento fino a 48 kHz) WMA (velocità... - Seite 313 13. CARATTERISTICHE E DATI TECNICI Attacchi Cuffie Presa jack stereo da 3,5 mm AUX IN Presa jack stereo da 3,5 mm Polarità Attacco alimentazi- one di tensione Porta USB Uscita USB 2.0 Standard 5 Volt DC Condizioni di funzionamento Intervallo di tempera- C - 45 tura Umidità...
- Seite 314 13. CARATTERISTICHE E DATI TECNICI Potenza assorbita Standby 0,1 W metterlo nuova- max. 20 W mente Condizioni di conservazione Conservare solo in locali asciutti. Dimensioni e peso M14 i Larghezza x Altezza x 192 mm x 118 mm x 1125 mm Profondità...
-
Seite 315: Servizio Assistenza E Supporto
I dati tecnici corrispondono allo stato attuale al momento della stampa. Ci si riserva il diritto di modifica. Il periodo di garanzia per l’apparecchio TELESTAR DIRA cor- risponde alle disposizioni di legge al momento dell’acquisto. Le offriamo inoltre il nostro servizio assistenza telefonica professionale. -
Seite 316: Marcatura Ce
15. MARCATURA CE Il Suo apparecchio è provvisto del marchio CE ed è conforme a tutte le norme UE richieste. Con la presente TELESTAR DIGITAL GmbH dichiara che l’apparecchio è conforme ai requisiti essenziali e alle altre disposizioni pertinenti della Direttiva RoHS 2011/65/UE, della Direttiva sulle apparec- chiature radio (RED) 2014/53/UE e della Direttiva sugli Energy Related Products (ErP) 2009/125/CE. - Seite 318 Non ci assumiamo alcuna responsabilità per errori di stampa ed errori. La copia e la duplicazione sono consentite solo con espressa autorizzazione di TELESTAR-DIGITAL GmbH. Versione: ottobre 2020 Distributore: TELESTAR DIGITAL GmbH Am Weiher 14...
- Seite 319 Handleiding DIRA M 14i DIRA S 24i V4 _07_01_21...
- Seite 321 INHOUDSOPGAVE 1. Voorwoord......... 325 1.2.
- Seite 322 INHOUDSOPGAVE 6.9. Netwerkselectie ........354 7. INSTELLINGEN ........355 7.1.
- Seite 323 INHOUDSOPGAVE 8. BEDIENING ........369 8.1.
- Seite 324 INHOUDSOPGAVE 9. FOUTOPLOSSING ........387 10. OPSLAG ......... 389 11.
-
Seite 325: Voorwoord
1. Voorwoord Geachte klant, Hartelijk dank voor het feit dat u dit product hebt gekozen. Lees deze instructies zorgvuldig en bewaar hen voor toekomstige gevallen om deze opnieuw te kun- nen raadplegen. Deze handleiding maakt deel uit van het apparaat! Indien u het apparaat verkoopt of weggeeft, overhandigt u ook deze gebrui- kershandleiding. -
Seite 326: Beoogd Gebruik
1. Voorwoord 1.2. Beoogd gebruik Dit product maakt deel uit van de consumentenelektronica. Het apparaat dient als ontvanger voor internet-/UKW- en DAB+- radiosignalen en voor het afspelen van audiobestanden, opgesla- gen op een USB-opslagmedium of op een netwerkstation. Elke andere bediening of gebruik van het apparaat wordt als onjuist beschouwd en kan leiden tot persoonlijk letsel of mate- riële schade. -
Seite 327: Veiligheidsaanwijzingen
2. VEILIGHEIDSAANWIJZINGEN 2.1. Tekenverklaring Symbool Betekenis Dit signaalwoord duidt op een gevaar met een hoge risicograad die de GEVAAR! dood of zware verwonding tot gevolg heeft als de instructie niet in acht wordt genomen. Dit signaalwoord duidt op een gevaar met een gemiddelde risicograad die de dood of zware verwonding tot WAARSCHUWING! - Seite 328 2. VEILIGHEIDSAANWIJZINGEN 2.1. Tekenverklaring Symbool Betekenis Dit teken waarschuwt voor gevaren. Beschermingsklasse II Elektrische apparaten met bescher- mingsklasse II hebben een verste- vigde en dubbele isolatie ter hoogte van de nominale isolatiespanning en toegankelijke onderdelen (VDE 0100 deel 410, 412.1). Ze hebben meestal geen aansluiting aan de beschermende geleider.
- Seite 329 2. VEILIGHEIDSAANWIJZINGEN 2.1. Tekenverklaring Symbool Betekenis Bij toestellen met holle stekkers Afb. 1 wordt de polariteit van de stekker met dit symbool gekenmerkt. Hierbij wordt er een onderscheid Afb. 2 gemaakt tussen 2 varianten Afb. 1: Buiten plus/ binnen min Afb.
-
Seite 330: Veiligheidsaanwijzing
2. VEILIGHEIDSAANWIJZINGEN 2.2. Veiligheidsaanwijzing WAARSCHUWING! Controleer het apparaat voor gebruik. Bij beschadiging of defect mag dit apparaat niet in gebruik wor- den genomen. Verwondingsgevaar! Verwondingsgevaar voor kinderen en personen met vermin- derde fysieke, sensorische of mentale vaardigheden (bijvoorbeeld personen met een gedeeltelijke handicap, oudere personen met beperking van hun fysieke en mentale vaardigheden) of gebrek aan ervaring en kennis. -
Seite 331: Bedrijfsveiligheid
Wanneer u zichtbare schade vaststelt of het apparaat zichtbare schade vertoont, neemt u het niet meer in gebruik. > Indien u een technisch of mechanisch probleem vaststelt, neemt u contact op met de TELESTAR Service. > Gebruik alleen de meegeleverde stekker! Gebruik nooit een andere stekker. - Seite 332 2. VEILIGHEIDSAANWIJZINGEN > Open de behuizing van het apparaat nooit. > Ontkoppel het apparaat bij storingen onmiddellijk van de stroombron. Haal daarvoor onmiddellijk de stekker uit het stopcontact en uit het apparaat. > Gebruik alleen door ons geleverde of goedgekeurde reserveonderdelen of accessoires.
- Seite 333 2. VEILIGHEIDSAANWIJZINGEN > Wanneer u het apparaat uit een koude in een warme omgeving brengt, kan binnenin het apparaat vocht neerslaan. Wacht in dit geval ongeveer een uur voor u het in gebruik neemt. > Bij langere afwezigheid of bij onweer haalt u het apparaat uit het stopcontact.
-
Seite 334: Apparaat Aansluiten
2. VEILIGHEIDSAANWIJZINGEN 2.4. Apparaat aansluiten > Sluit het apparaat alleen op een correct geïnstalleerd, geaard en elektrisch beveiligd stopcontact aan. > Let erop dat de stroomvoorziening (stopcontact) makkelijk bereikbaar is. > Knik of knel geen kabelverbindingen. > Controleer voor u het apparaat in gebruik neemt of de spanningsindicatie die zich op het apparaat bevindt, met de plaatselijke netspanning overeen- stemt. - Seite 335 2. VEILIGHEIDSAANWIJZINGEN Vermijd de directe nabijheid van: Warmtebronnen zoals radiatoren, open vuur, zoals kaarsen, apparaten met sterke magnetische velden zoals luidsprekers. Stel het apparaat niet bloot aan extreme omstandighe den zoals directe zonnestralen, hoge luchtvochtigheid, natheid, extreem hoge of lage temperaturen, open vuur.
-
Seite 336: Verwondingsgevaar
2. VEILIGHEIDSAANWIJZINGEN 2.6. Verwondingsgevaar WAARSCHUWING! Overmatige geluidsdruk bij gebruik van oortjes of hoofdtelefoons kan beschadiging of verlies van het gehoorvermogen tot gevolg hebben. Luisteren met oortjes of hoofdtelefoon met verhoogd volume gedurende een langere periode kan schade veroorzaken bij de gebruiker. -
Seite 337: Omgang Met Batterijen
2. VEILIGHEIDSAANWIJZINGEN Indien u een reden hebt om aan te nemen dat de radio een sto- ring met een medisch apparaat veroorzaakt, schakelt u de radio onmiddellijk uit of koppelt het u af van de stroomvoorziening. 2.8. Omgang met batterijen Gebruik principieel alleen het batterijtype van de batterij die mee- geleverd wordt. - Seite 338 2. VEILIGHEIDSAANWIJZINGEN Batterijen uit het apparaat verwijderen als het langere tijd niet wordt gebruikt. Uitgeputte of uitgelopen batterijen uit het apparaat verwijderen. Bij uitgelopen batterijen bestaat verwondingsgevaar bij contact met de huid. Bewaar zowel nieuwe als gebruikte batterijen buiten het bereik van kinderen.
- Seite 339 2. VEILIGHEIDSAANWIJZINGEN WAARSCHUWING! Bij onjuist behandelen van batterijen bestaat er een risico op explosie! > Gebruik alleen batterijen van hetzelfde type. > Gebruik nooit nieuwe en oude batterijen samen in een apparaat. > Let bij het plaatsen op de juiste polariteit. >...
-
Seite 340: Apparaat Reinigen
2. VEILIGHEIDSAANWIJZINGEN 2.9. Apparaat reinigen Voor de reiniging haalt u het apparaat uit het stopcontact. Gebruik een droge, zachte doek om het apparaat te reinigen. Gebruik geen vloeistoffen om het apparaat te reinigen. Gebruik geen oplos- of reinigingsmiddelen omdat die het opperv- lak en/of belettering van het apparaat kunnen beschadigen. -
Seite 341: Bij De Levering Inbegrepen
3. BIJ DE LEVERING INBEGREPEN Neem alle onderdelen uit de verpakking en verwijder alle verpakkingsmaterialen. Indien één of meerdere vermelde onderdelen ontbreken, neem dan contact op met: TELESTAR Service Center, Am Weiher 14, 56766 Ulmen e-mail: service@telestar.de Aantal Verklaring TELESTAR DIRA Radio... -
Seite 342: Overzicht Van De Bedieningselementen
4. OVERZICHT VAN DE BEDIENINGSELEMENTEN 3 4 5 13 14 15 1 6... - Seite 343 4. OVERZICHT VAN DE BEDIENINGSELEMENTEN 1. Lijst Toont een lijst van de laatste 10 geselecteerde radiostations. 2. Stationgeheugenknop 1 / multimediabediening Gebruik deze knoppen om naar een gewenste programmageheu- genlocatie in radiomodus te schakelen. ▸II Start of pauzeert de weergave van muziektitels op een aangesloten USB-gegevensdrager.
- Seite 344 4. OVERZICHT VAN DE BEDIENINGSELEMENTEN Houd de knop langer dan 2 seconden ingedrukt om het timer-menu voor het opnemen van een radio-uitzending te active- ren. 8. Stationgeheugenknop 2 / multimediabedieningen Gebruik deze knoppen om naar een gewenste programmageheu- genlocatie in radiomodus te schakelen. ■...
- Seite 345 4. OVERZICHT VAN DE BEDIENINGSELEMENTEN ervan af te spelen of radioprogramma's op te nemen. 14. Hoofdtelefoonaansluiting Sluit hier een hoofdtelefoon aan om de door de radio afgespeelde muziek via een hoofdtelefoon te beluisteren. Als er een hoofdtelefoon wordt aangesloten, wordt het afspelen van muziek via de luidsprekers van het apparaat onderbroken.
-
Seite 346: Afstandsbediening
5. AFSTANDSBEDIENING De radio kan zowel via de apparaatknoppen als via de afstandsbediening bediend worden. De bediening via de afstandsbediening is de comfortabele en eenvoudigere wijze om het apparaat te bedienen. - Seite 347 5. AFSTANDSBEDIENING 1. Stand-by-knop Schakel het apparaat met deze knop in of uit. 2. Modus Schakel hier tussen de verschillende bedrijfsmodi. 3. Mute Schakelt het geluid van het apparaat uit. 4. EQ-equalizerfunctie Via deze toets kunt u de equalizerfunctie activeren en individuele klankinstellingen uitvoeren.
- Seite 348 5. AFSTANDSBEDIENING 11. INFO Toont informatie over het lopende radioprogramma. 12. Menu Activeer het menu van het apparaat via deze knop ▯ Start een opname van het huidige radioprogramma op een aangesloten USB-gegevensdrager. Houd de knop langer dan 2 seconden ingedrukt om het timer-menu voor het opnemen van een radio-uitzending te activeren.
-
Seite 349: Installatie
6. INSTALLATIE 6.1 Algemene bedieningsinstructies > Schakel het apparaat aan of uit met de stand-by-toets op de op de afstandsbediening. Het geluidsvolume verhoogt u met de toets VOL+ > op de afstandsbediening. Het geluidsvolume verlaagt u met de toets VOL- >... -
Seite 350: Stroomaansluiting
6. INSTALLATIE Bij onjuist behandelen van batterijen bestaat er een risico op explosie! Lees hierover de veiligheidsaanwijzingen in hoofdstuk 2.8. Let op de juiste polariteit van de batterij! Plaats het batterijvak daarna terug. 6.3. Stroomaansluiting Sluit de meegeleverde netstekker aan op de overeenkomsti- ge stopcontact aan de achterzijde van het apparaat. -
Seite 351: Datum- En Tijdmodus
6. INSTALLATIE met de ENTER-knop op de afstandsbediening. 6.5. Datum- en tijdmodus Selecteer hier hoe de radio de tijd moet synchroniseren. Via de Omhoog / Omlaag-knoppen van de afstandsbediening kunt u de selectie maken. Bevestig met de ENTER-knop op de afstandsbediening of op het apparaat. -
Seite 352: Gmt-Tijdzone
6. INSTALLATIE 6.6. GMT-tijdzone Selecteer hier de tijdzone waarin u zich bevindt. Selecteer GMT + 1:00 voor Duitsland en het grootste deel van Europa. Via de Omhoog / Omlaag-knoppen van de afstandsbediening kunt u de selectie maken. Bevestig met de ENTER-knop op de afstandsbediening of op het apparaat. -
Seite 353: Locatie-Instellingen
6. INSTALLATIE 6.8. Locatie-instellingen Selecteer de locatie waar u zich bevindt. Selecteer het continent en in de volgende stap het land waarin u zich bevindt. Via de Omhoog / Omlaag-knoppen van de afstandsbediening kunt u de selectie maken. Bevestig met de ENTER-knop op de afstandsbediening of op het apparaat. -
Seite 354: Netwerkselectie
6. INSTALLATIE 6.9. Netwerkselectie In de volgende stap worden alle beschikbare W-LAN-netwerken weergegeven die zich in het bereik van het apparaat bevinden. Selecteer het netwerk waarmee een verbinding gemaakt moet worden en bevestig met de toets ENTER. Voer het wifi-wachtwoord in. Met de knoppen ▼▲ op de afstands- bediening of via de schuifregelaar aan het apparaat kunt u een teken selecteren, met de knop ►... -
Seite 355: Instellingen
6. INSTALLATIE Denk eraan dat het aanmeldingsproces aan de router even kan duren. 7. INSTELLINGEN 7.1. Basisbediening 7.1.1. Menuknop Nu houd u de Menutoets op het apparaat of de afstandsbediening ongeveer 2 seconden ingedrukt. Ongeacht de huidige instelling van het apparaat, gaat u altijd naar het hoofdmenu van het apparaat. -
Seite 356: Retourknop
7. INSTELLINGEN Radio via Inter- Weer Equalizer Plaatselijke radio UPnP Systeem DAB-radio FM-radio Bluetooth U kunt de individuele menu-items met de pijltoetsen►◄ selecteren. Bevestig de selectie met de OK-knop op afstandsbediening of door op de ENTER-knop op het apparaat te drukken. -
Seite 357: Modusknop
7. INSTELLINGEN 7.1.4. Modusknop U kunt de modusknop gebruiken om de verschillende bedrijfsmodi van de radio te schakelen. 7.2. Systeem Druk op de knop MENU op de afstandsbediening of op het apparaat en kies met de toetsen ►◄ van de afstandsbediening of via de draaiknop op het apparaat het menupunt Systeem . -
Seite 358: Taal
7. INSTELLINGEN 7.2.1 Taal Via de Omhoog / Omlaag-knoppen van de afstandsbediening kunt u de menutaal kiezen. Bevestig de gewenste menutaal met de ENTER-knop op de afstandsbediening. 7.2.2 Datum en tijd Via de Omhoog / Omlaag-knoppen van de afstandsbediening kunt u de selectie maken. Bevestig met de ENTER-knop op de afstandsbediening of op het apparaat. -
Seite 359: Netwerk
7. INSTELLINGEN 7.2.3. Netwerk Om het apparaat als internetradio te laten werken, moet de radio in een netwerk met internettoegang geïntegreerd worden. Indien u dit bij de eerste installatie nog niet hebt gedaan, kunt u in dit menu-item de netwerkverbinding tot stand brengen. - Seite 360 7. INSTELLINGEN Bevestig de selectie met de ENTER-knop van de afstandsbediening of door op de ENTER-knop op het apparaat te drukken. Gebruik de ▼ ▲-knoppen op de afstandsbediening om het net- werk te selecteren waarmee u verbinding wilt maken en bevestig met ENTER.
-
Seite 361: Alarm/Wekker
7. INSTELLINGEN 7.2.4. Alarm/wekker Het apparaat kan als wekkerradio gebruikt worden. In dit menupunt kunt u tot 2 wektijden instellen. Bovendien kan hier ingesteld worden of de wekker u met een toonsignaal of een internetradiostation wakker maakt. Om een wektijd in te stellen gaat u als volgt te werk: Druk op de knop MENU op de afstandsbediening of op het apparaat en kies met de toetsen ►◄... - Seite 362 7. INSTELLINGEN Activeer de wekker via de Statusregel. Stel in de volgende regel het tijdstip in waarop de wekker geacti- veerd moet worden. Gebruik daarvoor het cijfertoetsenbord van de afstandsbediening of de draairegelaar op de het apparaat. Om individuele invoeren te bevestigen, moeten deze met de ENTER-toets worden opgeslagen.
-
Seite 363: Timer Bewerken
7. INSTELLINGEN op de afstandsbediening of op het apparaat. Om een sluimerfunctie te activeren drukt u bij een alarm op de draaiknop op het apparaat. Het alarm wordt daardoor gedurende 5 minuten gepauzeerd. Na 5 minuten wordt het alarm opnieuw geactiveerd. Om de wekker tot de volgende dag te deactiveren, drukt u op de toets Standby/Power op het apparaat. -
Seite 364: Sleeptimer
7. INSTELLINGEN Selecteer hier de gewenste functie en bevestig door een druk op de volumeregelaar op het apparaat of via de OK-knopop de afstandsbediening. Eco-stand-by In deze modus heeft het apparaat een zeer laag stroomverbruik in stand-by-positie. De tijdsweergave wordt in stand-by-positie niet weergegeven. -
Seite 365: Achtergrondverlichting
7. INSTELLINGEN Hier kunt u de tijd instellen, waarna het apparaat automatisch wordt uitgeschakeld. Selecteer met de knoppen ▼▲ van de afstandsbediening of met behulpvan de draairegelaar op het apparaat het menu-item Sleeptimer en druk op de ENTER-knop op de afstandsbediening of bevestig door op de volumeregelaar op het apparaat. -
Seite 366: Locatie Instellen
7. INSTELLINGEN U kunt de achtergrondverlichting aanpassen voor zowel de bedie- ning als de stand-by-modus. Gebruik hiervoor de ►◄-knoppen of de draairegelaar op het appa- raat en bevestig met ENTER. 7.2.9. Locatie instellen Met deze instelling kunt u de regio instellen waarin u zich bevindt. Met deze instelling gebruikt de radio de functie Plaatselijke radio om radiostations in uw regio te selecteren. -
Seite 367: Update Software
Via de USB-interface hebt u de mogelijkheid om de besturings- software van uw radio te actualiseren die, indien nodig, op www.telestar.de als download beschikbaar is. De op de internet- pagina beschikbare software moet unzipt worden. Het unzipte bestand slaat u dan binnen een overeenkomstig opslagmedium op en sluit dit via USB-aansluiting aan op de radio. -
Seite 368: Versie
7. INSTELLINGEN Bevestig met OK als u de fabrieksinstelling wilt oproepen. Selecteer Annuleren als u deze actie wilt annuleren. Indien u de fabrieksinstellingen activeert, wordt het apparaat ingesteld op de status van aflevering. Alle opgeslagen zenders en favorietenlijsten gaan daarmee verloren. 7.2.12. -
Seite 369: Bediening
8. BEDIENING 8.1. Internetradiostation selecteren Gebruik de pijlknoppen ◄ om het item Internetradio in het hoofd- menu van het apparaat te selecteren en bevestig de selectie met de OK-knop op de afstandsbediening of door te drukken op de ENTER-knop van het apparaat. Nadat u bent overgeschakeld naar de internetradiomodus schakelt de radio over naar het laatst ingestelde radiostation. -
Seite 370: Een Internetradiozender Zoeken
8. BEDIENING Favorietenlijst Deze lijst toont alle individueel opgeslagen radiostations. Lees om een radiozender op te slaan ook hoofdstuk 8.4. Radio In dit item verkrijgt u verschillende radioprogrammalijsten. Podcasts Hier kunt u kiezen uit een aantal radiopodcasts. Verloop Deze lijst bevat de 10 radiozenders die het laatst zijn geselecteerd. Zoeken Met deze functie kunt u naar een specifiek radiostation zoeken. -
Seite 371: Radiostations Opslaan
8. BEDIENING De radio zoekt naar alle zenders die met deze invoer overeenkomen. Selecteer een zender met de toetsen ▼▲ en bevestig met de ENTER-toets op het apparaat. 8.3. Radiostations opslaan U kunt tot 4 radiostations op een stationsgeheugenknop opslaan. Selecteer een radiostation dat u wilt opslaan en houd de stations- geheugenknop op het apparaat waarop u het radiostation wilt op- slaan ongeveer 3 seconden ingedrukt. -
Seite 372: Lokale Radiostations
8. BEDIENING De radiozender wordt zich in de geselecteerde positie opgeslagen. 8.5. Lokale radiostations Om het voor u gemakkelijker te maken om zenders in uw regio te vinden in internetradiomodus, kunt u naar radiostations uit uw regio zoeken in het menu van het apparaat. Selecteer in het hoofdmenu van het apparaat en kies met de toetsen ►◄... -
Seite 373: Geluidsvolume Wijzigen
8. BEDIENING Bevestig de invoer met ENTER. 8.6. Geluidsvolume wijzigen Wijzig het geluidsvolume via de toetsen VOL+/VOL- op de afstandsbediening of via de draairegelaar op de het apparaat. Om het radiogeluid te dempen, drukt u op de Mute-knop op de afstandsbediening. -
Seite 374: Aux In
8. BEDIENING 8.8. AUX IN U kunt ook een extern muziekafspeelapparaat,zoals een MP3-speler, op de radio aansluiten. Sluit daarvoor met behulp van een passende kabel een extern apparaat aan op de achterzijde van de radio en schakel dit appa- raat in. Druk op de MENU-knop op de afstandsbediening of op het apparaat en kies met de toetsen ►◄... -
Seite 375: Upnp
8. BEDIENING Op de radio is de AUX IN-ingang passend voor een stereokabel van 3,5 mm voorzien. 8.9. UPnP Voor zover de radio in een draadloos netwerk geïntegreerd is, kan de radio ook als mediaspeler worden gebruikt om via UPnP-muziekbestanden van in het netwerk geïntegreerde apparaten, zoals PC’s of smartphones, af te spelen. -
Seite 376: Usb-Weergave
8. BEDIENING 8.10. USB-weergave U kunt MP3-muziekbestanden van een USB-gegevensdrager afspelen. Steek daarvoor een USB-gegevensdrager met muziekbestanden in het USB-contact aan de achterzijde. Druk op de MENU-knop op de afstandsbediening of op het apparaat en kies met de toetsen ►◄ van de afstandsbediening of via de draaiknop op het apparaat Multimedia. - Seite 377 8. BEDIENING Selecteer met de knoppen ▼▲ van de afstandsbediening of met behulp van de draairegelaar op het apparaat in het hoofdmenu het menu-item Equalizer en druk op de knop ENTER op de afstandsbediening of bevestig door op de volumeregelaar op het apparaat. Selecteer met de knoppen ▼▲...
-
Seite 378: Weer
8. BEDIENING Binnen het item EQ Advanced Settings kunt u verschillende frequentiebereiken aanpassen. 8.12. Weer Het apparaat kan actuele weersinformatie over uw locatie weergeven. Om de weersinformatie op te roepen, selecteert u in het hoofdmenu van de radio het menu-item Weer en bevestigt u met OK. -
Seite 379: Radioprogramma's Opnemen
8. BEDIENING Via de LIJST-knop op de afstandsbediening of op het apparaat kunt u de locatie voor het weerbericht te wijzigen. Voer hiertoe de naam in van de stad waarvan u de actuele weers- informatie wilt ontvangen. Indien het apparaat met het internet is verbonden, kunt u weersinformatie via het display van het apparaat laten weergeven. - Seite 380 8. BEDIENING hebt aangesloten. Druk tijdens een programma op de Opnameknop (Rec) op het apparaat of op de afstandsbediening. Een rood opnamesymbool verschijnt op het display. Om de opname te stoppen, drukt u op de Stopknop en bevestigt u de vraag met OK. Net als bij een video- of dvd-recorder, kunt u de radio ook gebrui- ken om timeropnamen te programmeren om radioprogramma's op te nemen, bijvoorbeeld wanneer u niet thuis bent.
- Seite 381 8. BEDIENING Of selecteer in het menu Systeem het item timer opnemen. Naam: Selecteer hier het radioprogramma dat moet worden opgenomen. Datum Voer de datum in waarop de timer moet beginnen. Starttijd: Markeer de regel Starttijd, druk op de OK-knop en voer de tijd in met behulp van de pijltoetsen omhoog / omlaag op de afstandsbediening of via de draairegelaar waarop de timer moet worden geactiveerd.
-
Seite 382: Bluetooth
8. BEDIENING 8.14. Bluetooth De radio kan optioneel via Bluetooth met een extern apparaat (bijv. smartphone/tablet) worden verbonden. Via de Bluetoothverbinding kunnen vervolgens media (lokaal opgeslagen MP3-bestanden, gestreamde muziek, webra- dio)van het externe apparaat via radio afgespeeld worden. Selecteer via het menu het punt Bluetooth. Om via Bluetooth audiobestanden naar de radio te kunnen sturen, moet een Bluetooth-verbinding tot stand worden ge- bracht. -
Seite 383: Radio Dab
8. BEDIENING opgeslagen muziekbestanden via de radio afgespeeld. Hiervoor gaat u als volgt te werk: Start het afspelen van de muziek op het externe apparaat door de overeenkomstige afspeelfunctie (MP3-speler) in te schakelen resp. selecteer in de respectievelijke afspeellijst een titel en start het afspelen. 8.15. -
Seite 384: Dab-Zoekprocedure
8. BEDIENING 8.15.2. DAB-zoekprocedure Om een automatische zenderzoekprocedure in DA- ontvangstmodus te starten, drukt u op de toets Retour Eventueel meermaals. Indien de radio nog geen programma’s in de DAB-modus opgeslagen heeft, wordt een zoekprocedure gestart zodra de radio in de DAB-ontvangstmodus wordt gescha- keld. -
Seite 385: Dab Handmatige Zoekprocedure
8. BEDIENING Het aantal aan de rechter zijde toont het aantal gevonden radio- stations. Na de zoekprocedure start met de weergave van de eerst gevon- den zender. 8.15.3. DAB handmatige zoekprocedure U kunt DAB-radiozenders ook handmatig zoeken. Daarvoor moet de zendfrequentie bekend zijn. Selecteer via dit menupunt de gewenste zendfrequentie en be- vestig met ENTER. - Seite 386 8. BEDIENING Het apparaat start de automatische zenderzoekopdracht en slaat alle frequenties op waarop een radiozender werd gevonden. Let erop dat de gevoeligheid van de ontvangst en het daarmee samenhangende aantal gevonden radiostations van de instellin- gen van de zoekgevoeligheid afhangt. Om de zoekgevoeligheid te wijzigen, drukt u in de FM-modus op de knop Menu.
-
Seite 387: Foutoplossing
9. FOUTOPLOSSING Symptoom Mogelijke oorzaak en oplossing Geen displayweer- Maak een stroomaansluiting gave, via de meegeleverde de radio reageert stekker. niet op bediening Bediening via de Batterij leeg of niet correct geplaatst. afstandsbediening Controleer of de batterij in de juiste is niet richting geplaatst is. - Seite 388 9. FOUTOPLOSSING Symptoom Mogelijke oorzaak en oplossing Netwerkverbinding Controleer de wifi-functie. komt niet tot stand Activeer de DHCP-functie van de router waar de radio moet worden aangemeld. Er kan een firewall actief zijn in het netwerk. Wifi-verbinding komt Controleer de beschikbaarheid van wifi- niet tot stand netwerken.
-
Seite 389: Opslag
9. FOUTOPLOSSING Symptoom Mogelijke oorzaak en oplossing DAB+-ontvangst Geen zenders voorhanden verstoord Voer een zoekopdracht uit. Antenne niet volledig uitgetrokken. Verplaats de radio (ev. dichter bij het raam), voer opnieuw een zoekopdracht uit. UKW-ontvangst Antenne niet volledig uitgetrokken, verstoord Trek de FM-antenne tot de volledige lengte uit. -
Seite 390: Instructies Voor Afvoeren
12. INSTRUCTIES VOOR AFVOEREN 12.1. WEGWERPEN VAN DE VERPAKKING Entsorgung De verpakking van uw apparaat bestaat uitsluitend uit recycleerbare Verpa materialen. Voer deze af Ihr Ge dienovereenkomstig gesorteerd schäd volgens het “dual system”. Rohm werd 12.2. AFDANKING VAN HET APPARAAT werd Gerät Het rechts afgebeelde symbool van een... -
Seite 391: Wegwerpen Van Batterijen
12. INSTRUCTIES VOOR AFVOEREN 12.3. WEGWERPEN VAN BATTERIJEN Batterijen en oplaadbare batterijen mogen niet met het huishoudelijk afval afgevoerd worden. Het rechts afgebeelde symbool betekent dat u als consument verplicht bent alle (oplaadbare) batterijen en accu’s via een afzonderlijke afvalverwerking af te voeren. Overeenkomstige verzamelcontainers zijn beschikbaar in de vakhandel en talrijke openbare instellingen. -
Seite 392: Eigenschappen En Technische Gegevens
13. EIGENSCHAPPEN EN TECHNISCHE GEGEVENS Internetradio Audiocodecs MP3 (bitrate tot 320 Kbits/s, sampling rate tot 48 KHz) AAC/AAC+ (bitrate tot 320 Kbits/s, sampling rate tot 48 KHz) WMA (bitrate tot 320 Kbits/s, sampling rate tot 48 KHz) DAB/DAB+/FM Ontvangstbereik DAB-band III 174 MHz - 240 MHz FM 87,5 MHz -108 Mhz Display TFT Color Display... - Seite 393 13. EIGENSCHAPPEN EN TECHNISCHE GEGEVENS Aansluitingen Hoofdtelefoon 3,5 mm stereojack AUX IN 3,5 mm stereojack Polariteit Aansluiting voor stroomvoorziening USB-aansluiting USB 2.0 standaard 5 Volt DC-uitgang Bedrijfsomstandigheden Temperatuurbereik C - 45 Luchtvochtigheid 20% - 80% relatieve luchtvochtigheid Wifi-interface Frequentiebereik 2,412 GHz - 2,4835 GHz Modulatie CCK, DQPSK, DBPSK, 64-QAM, 16-QAM, QPSK, BPSK,...
- Seite 394 13. EIGENSCHAPPEN EN TECHNISCHE GEGEVENS Vermogen Stand-by 0,1 W in gebruik max. 20 W Opslagomstandigheden Uitsluitend in droge ruimtes bewaren. Afmetingen en gewicht M14 i Breedte x hoogte x diepte 192 mm x 118 mm x 1125 mm Gewicht ong. 1200 g Afmetingen en gewicht S 24 i Breedte x hoogte x diepte 277 mm x 117 mm x 127 mm...
-
Seite 395: Service En Ondersteuning
De technische gegevens komen overeen met de actuele stand van zaken op het moment van de druk. Wijzigingen voorbe- houden. De garantieperiode voor de TELESTAR DIRA voldoet aan de wettelijke bepalingen op het moment van aankoop. Wij bieden u eveneens onze telefonische HOTLINE-service met professionele hulp aan. -
Seite 396: Ce-Markering
15. CE-MARKERING Uw apparaat draagt het CE-kenmerk en voldoet aan alle vereiste EU-normen. Hiermee verklaart TELESTAR DIGITAL GmbH dat het apparaat in overeenstemming met de elementaire vereisten en de overige toepasselijke bepalingen van de RoHS-richtlijn 2011/65/EU, van de RE-richtlijn 2014/53/EU alsook de ErP-richtlijn 2009/125/EG is. - Seite 398 Voor drukfouten en errata zijn wij niet aansprakelijk. Kopiëren en dupliceren uitsluitend met uitdrukkelijke schriftelijke toestemming van TELESTAR-DIGITAL GmbH. Versie: oktober 2020 Distributeur: TELESTAR DIGITAL GmbH Am Weiher 14...