Herunterladen Inhalt Inhalt Diese Seite drucken
Inhaltsverzeichnis

Werbung

Verfügbare Sprachen
  • DE

Verfügbare Sprachen

  • DEUTSCH, seite 46
KN1 SERIES NOTEBOOK PC
USER'S MANUAL
E N G L I S H
Dec 2004
Downloaded from
www.Manualslib.com
manuals search engine

Werbung

Inhaltsverzeichnis
loading

Inhaltszusammenfassung für Gericom SUPERSONIC KN1-Serie

  • Seite 1 KN1 SERIES NOTEBOOK PC USER’S MANUAL E N G L I S H Dec 2004 Downloaded from www.Manualslib.com manuals search engine...
  • Seite 2: Inhaltsverzeichnis

    CONTENTS BEFORE YOU START ..................... 5 Make sure you have everything ..................5 Familiarize yourself with the computer ................ 6 OPENING THE DISPLAY PANEL ................6 FRONT OVERVIEW ....................7 LEFT SIDE OVERVIEW ....................9 RIGHT SIDE OVERVIEW ..................10 BACK OVERVIEW .....................
  • Seite 3 TAKING CARE OF YOUR NOTEBOOK PC To prevent possible overheating of the computer's DO NOT press or touch the display panel. processor, make sure you don't block the open- ings provided for ventilation. DO NOT place on uneven or unstable work DO NOT use your notebook computer under surfaces.
  • Seite 4 Avoid sudden changes in temperature or humid- DO NOT expose the computer to rain or ity by keeping it away fromA/C and heating vents. moisture. DO NOT place near fire or other sources of heat. DO NOT tamper with the batteries. Keep them away from children.
  • Seite 5: Before You Start

    BEFORE YOU START Make sure you have everything When you receive your notebook PC, unpack it carefully, and check to make sure you have all the items listed below. For a pre-configured model you should have the following: • Notebook Computer •...
  • Seite 6: Familiarize Yourself With The Computer

    BEFORE YOU START Familiarize yourself with the computer OPENING THE DISPLAY PANEL The lid locks to the computer chassis magnetically. To open, simply lift the lid up. When closing it, be sure not to slam it shut. Downloaded from www.Manualslib.com manuals search engine...
  • Seite 7: Front Overview

    BEFORE YOU START FRONT OVERVIEW The following is an overview of the front of the notebook. Display Panel Suspend/Resume/ Quick Start Buttons Power On Button Keyboard TouchPad Pointing Device Stereo Speakers Status Indicator Lights Stereo Speakers Display Panel The display panel is a color LCD panel with back lighting for the display of text and graphics. Keyboard A full-size keyboard with dedicated Windows keys.
  • Seite 8: Quick Start Buttons

    BEFORE YOU START Status Indicator Lights The Status indicator lights correspond to specific operating modes. These modes are: Hard Drive (HDD) Activity; Optical Disc Drive (ODD) Activity; and Battery status. Furthermore, at the top of the keyboard there are three additional status indicator lights: Wireless Status; Caps Lock; and Num Lock.
  • Seite 9: Left Side Overview

    BEFORE YOU START LEFT SIDE OVERVIEW The following is a brief description of the left side of the notebook. PC Card Slot IEEE Microphone Jack Infrared 1394 Headphone Memory Card (IrDA) Port Port Reader Jack Port Microphone Jack The microphone jack allows you to connect an external mono microphone. Headphone Jack The headphone jack allows you to connect headphones or external speakers and amplifiers.
  • Seite 10: Right Side Overview

    BEFORE YOU START RIGHT SIDE OVERVIEW The following is a brief description of the right side of the notebook. Optical Drive Emergency Kensington Optical Eject Button Tray Lock Port Drive Release Optical Drive The Optical Drive allows you to play back a media discs, such as CDs and DVDs. Optical Drive Eject Button The Optical Drive Eject Button allows you to open the Optical Drive tray to remove or insert a DVD or CD.
  • Seite 11: Back Overview

    BEFORE YOU START BACK OVERVIEW The following is an overview of the back of the notebook. Port Replicator Interface S-Video/TV Out Port Power Adapter Port USB Ports Modem External LAN Port (RJ-45) (RJ-11) Monitor Port Port Port Replicator Interface The Port Replicator interface extends the functionality of your notebook by providing ports to connect PS/2 devices, an external monitor, a serial device, a parallel device, USB devices, a LAN (RJ-45) cable, an external audio source.
  • Seite 12: Bottom Overview

    BEFORE YOU START BOTTOM OVERVIEW The following is an overview of the bottom of the notebook. Fan Outlets Rating Label Memory Compartment Bluetooth Wireless LAN Compartment Compartment Lithium Ion Battery Bay Hard Disk Drive Bay Fan Outlets These are open ports for the fan to dissipate heat from the computer's internal components. Do not block or place the computer in such a position that you inadvertently allow the outlets to become blocked.
  • Seite 13: Getting Started

    GETTING STARTED Power Sources Your computer has two types of power source: a Lithium ion battery or an AC adapter. CONNECTING THE POWER ADAPTERS The AC adapter provides power for operating your notebook PC and charging the battery. Connecting the AC Adapter 1.
  • Seite 14: Recharging The Battery

    GETTING STARTED RECHARGING THE BATTERY The Lithium ion battery is recharged internally using the AC adapter. To recharge the battery, make sure the battery is installed and the computer is connected to the AC. There is no "memory effect" in Lithium ion batteries; therefore you do not need to discharge the battery completely before recharging.
  • Seite 15: Starting Your Notebook

    GETTING STARTED Starting Your Notebook POWER ON Suspend/Resume/Power On Button The suspend/resume/power on switch is used to turn on your notebook from its off state. Once you have connected your AC adapter or charged the internal Lithium ion battery, you can power on your notebook by pressing the suspend/resume/on button located above the keyboard.
  • Seite 16: Status Indicators

    GETTING STARTED Status Indicators The Status indicator lights correspond to specific operating modes. These modes are: Battery status; AC Adapter Status; Hard Drive Activity; Optical Drive Activity; and Wireless LAN Activity. Furthermore, at the top of the keyboard there are two additional status indicator lights: Caps Lock;...
  • Seite 17 GETTING STARTED Wireless LAN Activity Indicator The Wireless LAN Activity indicator tells you whether your computer is connected to a wireless network or not. The Caps Lock Indicator The Caps Lock indicator tells you that the keyboard is set to type in all capital letters. The Num Lock Indicator The Num Lock indicator states that the internal keyboard is set in ten-key numeric keypad mode.
  • Seite 18: Using Function Keys

    GETTING STARTED Using Function Keys Your computer has 12 function keys, F1 through F12. The functions assigned to these keys differ for each application. You should refer to your software documentation to find out how these keys are used. The [FN] key provides extended functions for the notebook and is always used in conjunction with another key.
  • Seite 19: Using The Touchpad

    GETTING STARTED Using the TouchPad A TouchPad pointing device comes built into your computer. It is used to control the movement of the pointer to select items on your display panel. The TouchPad consists of a cursor control, a left and right button, and two scroll buttons. The cursor control works the same way a mouse does, and moves the cursor around the display.
  • Seite 20: Memory Module Upgrade

    GETTING STARTED Memory Module Upgrade Your notebook PC comes with either 128MB or 256MB of high speed Synchronous Dynamic RAM (SDRAM) factory installed. To increase your notebook's memory capacity (up to 2GB maximum), you may install an additional memory upgrade module. The memory upgrade must be a dual-in-line (DIMM) SDRAM module.
  • Seite 21: Troubleshooting

    TROUBLESHOOTING Your notebook PC is sturdy and subject to few problems in the field. However, you may encoun- ter simple setup or operating problems that you can solve on the spot, or problems with periph- eral devices, that you can solve by replacing the device. The information in this section helps you isolate and resolve some of these straightforward problems and identify failures that require service.
  • Seite 22: Appendix

    APPENDIX Notebook Specifications Processor & platform Intel ® Centrino Mobile Technology 1 Port Replicator Connector(factory option) Intel Dothan Processor 1.50GHz to 2.13GHz 1 DC-in (Intel Pentium M Processor 710~770) 1 PCMCIA Intel Celeron M processor 1.20G to 1.50G 1 Infrared IrDA port support FIR (Intel Celeron M processor 320~370) 2 Audio jacks: Microphone-in, Speaker-out(SPDIF out) Intel...
  • Seite 23 NOTEBOOK KN1 SERIES MANUEL DE L'UTILISATEUR F R A N Ç A I S Déc 2004 Downloaded from www.Manualslib.com manuals search engine...
  • Seite 24 TABLE DES MATIÈRES AVANT DE COMMENCER ..................5 Vérifiez que vous avez tout .................... 5 Familiarisez-vous avec l’ordinateur ................6 OUVRIR LE PANNEAU D’AFFICHAGE ..............6 PRÉSENTATION DE LA FACE AVANT ................. 7 PRÉSENTATION DU CÔTÉ GAUCHE ................ 9 PRÉSENTATION DU CÔTÉ DROIT ................10 PRÉSENTATION DE LA FACE ARRIÈRE ..............
  • Seite 25 PRENDRE SOIN DE VOTRE NOTEBOOK Pour éviter toute surchauffe du processeur de NE PAS toucher ni appuyer sur le panneau l’ordinateur, faites attention à ne pas boucher les d'affichage. ouvertures prévues pour la ventilation. NE PAS le placer sur une surface de travail NE PAS utiliser votre notebook dans des condi- instable.
  • Seite 26 Eviter les changements soudains de température NE PAS exposer l'ordinateur à la pluie ou à ou d’humidité en le maintenant à l’écart d’orifices l'humidité. d’A/C et de chauffage. NE PAS placer près d'un feu ou autre source de NE PAS agir à la légère avec les batteries. Rangez- chaleur.
  • Seite 27: Avant De Commencer

    AVANT DE COMMENCER Vérifiez que vous avez tout Quand vous recevez votre notebook, déballez-le avec précaution, et vérifiez que vous avez tous les éléments mentionnés ci-dessous. Pour un modèle pré-configuré vous devez avoir ce qui suit: • Ordinateur Notebook • Batterie Lithium ion •...
  • Seite 28: Familiarisez-Vous Avec L'ordinateur

    AVANT DE COMMENCER Familiarisez-vous avec l’ordinateur OUVRIR LE PANNEAU D’AFFICHAGE Le couvercle se verrouille magnétiquement au châssis de l’ordinateur. Pour ouvrir, soulevez simplement le couvercle. Quand vous le fermez, prenez soin de ne pas le faire claquer. Downloaded from www.Manualslib.com manuals search engine...
  • Seite 29: Présentation De La Face Avant

    AVANT DE COMMENCER PRÉSENTATION DE LA FACE AVANT Voici une présentation de la face avant du notebook. Panneau d’Affichage Bouton Suspension/ Boutons de Démarrage Reprise/Marche Rapide Clavier Périphérique de pointage TouchPad Haut-parleurs stéréo Lampes témoin d’état Haut-parleurs stéréo Panneau d’Affichage Le panneau d’affichage est un panneau LCD couleur avec rétroéclairage pour l’affichage du texte et des graphismes.
  • Seite 30 AVANT DE COMMENCER Lampes témoin d’état Les lampes témoin d’état correspondent à des modes de traitement spécifiques. Ces modes sont: Activité du disque dur (HDD); Activité du lecteur de disque optique (ODD); et état de la batterie. De plus, au sommet du clavier se trouvent trois lampes témoin d’état supplémentaires : Etat du réseau sans fil, Verr Maj et Verr Num.
  • Seite 31: Présentation Du Côté Gauche

    AVANT DE COMMENCER PRÉSENTATION DU CÔTÉ GAUCHE Voici une brève description du côté gauche du notebook. Connecteur de carte Port Prise Microphone Port Port IEEE Prise casque Lecteur de Infrarouge 1394 Carte Mémoire (IrDA) Prise Microphone La prise microphone vous permet de connecter un microphone mono externe. Prise casque La prise casque vous permet de connecter des casques ou des haut-parleurs externes et des amplificateurs.
  • Seite 32: Présentation Du Côté Droit

    AVANT DE COMMENCER PRÉSENTATION DU CÔTÉ DROIT Voici une brève description du côté droit du notebook. Libération Port de Lecteur Bouton du tiroir verrouillage optique d’éjection d’urgence Kensington du lecteur optique Lecteur optique Le lecteur optique vous permet de lire des disques média, tels que des CD et des DVD. Bouton d’éjection du lecteur optique Le bouton d’éjection du lecteur optique vous permet d’ouvrir le tiroir du lecteur optique pour retirer ou insérer un DVD ou CD.
  • Seite 33: Présentation De La Face Arrière

    AVANT DE COMMENCER PRÉSENTATION DE LA FACE ARRIÈRE Voici une présentation de la face arrière du notebook. Interface de réplicateur de port Port de sortie S-Vidéo/TV Port d’adaptateur d’alimentation Port Ports USB Port du Port LAN (RJ-45) Modem moniteur (RJ-11) externe Interface de réplicateur de port L’interface de Réplicateur de Port étend la fonctionnalité...
  • Seite 34: Vue De Dessous

    AVANT DE COMMENCER VUE DE DESSOUS Voici une présentation de la partie inférieure du notebook. Orifices de ventilation du ventilateur Etiquette des Compartiment caractéristiques mémoire Compartiment Compartiment Bluetooth LAN sans fil Baie de la batterie Baie du disque Lithium Ion Orifices de ventilation du ventilateur Ce sont des ouvertures permettant au ventilateur de dissiper la chaleur provenant des composants internes de l’ordinateur.
  • Seite 35: Mise En Route

    MISE EN ROUTE Sources d’alimentation Votre ordinateur possède deux sources d’alimentation : une batterie Lithium ion et un adaptateur CONNECTER L’ADAPTATEUR D’ALIMENTATION L’adaptateur CA fournit l’alimentation pour faire fonctionner votre notebook et recharger la batterie. Connexion de l’Adaptateur CA 1. Branchez le câble de sortie CC dans la prise d’alimentation CC de votre notebook. 2.
  • Seite 36: Recharger La Batterie

    MISE EN ROUTE RECHARGER LA BATTERIE La batterie Lithium ion est rechargée de façon interne à l’aide de l’adaptateur CA. Pour recharger la batterie, vérifiez que la batterie est installée et que l’ordinateur est connecté à l’alimentation Les batteries Lithium ion n’ont pas d’“effet mémoire”; vous n’avez donc pas à décharger entièrement la batterie avant de la recharger.
  • Seite 37: Démarrer Votre Notebook

    MISE EN ROUTE Démarrer votre Notebook MISE EN MARCHE Bouton Suspension/Reprise/Marche Le commutateur de suspension/reprise/marche est utilisé pour allumer votre notebook quand il est éteint. Une fois que vous avez connecté votre adaptateur CA ou rechargé la batterie Lithium ion interne, vous pouvez allumer votre notebook en appuyant sur le bouton suspension/reprise/ marche situé...
  • Seite 38: Témoins D'état

    MISE EN ROUTE Témoins d’état Les lampes témoin d’état correspondent à des modes de traitement spécifiques. Ces modes sont: Etat de la batterie, état de l’adaptateur CA, activité du disque dur, activité du lecteur optique, et activité LAN sans fil. De plus, au sommet du clavier se trouvent deux lampes témoin d’état supplémentaires: Verr Maj et Verr Num.
  • Seite 39 MISE EN ROUTE Témoin d’activité de LAN sans fil Le témoin d’activité de LAN sans fil vous indique si votre ordinateur est connecté ou non à un réseau sans fil. Le témoin Verr Maj Le témoin Verr Maj vous indique que le clavier est paramétré pour taper tout en lettres capitales. Le témoin Verr Num Le témoin Verr Num indique si le clavier interne est paramétré...
  • Seite 40: Utiliser Les Touches De Fonction

    MISE EN ROUTE Utiliser les touches de fonction Votre ordinateur possède 12 touches de fonction, F1 à F12. Les fonctions attribuées à ces touches diffèrent pour chaque application. Vous devez vous reporter à la documentation de votre logiciel pour découvrir comment ces touches sont utilisées. La touche [FN] offre des fonctions étendues pour le notebook et est toujours utilisée en conjonction avec une autre touche.
  • Seite 41: Utilisation Du Touchpad

    MISE EN ROUTE Utilisation du TouchPad Un dispositif de pointage TouchPad est intégré à votre ordinateur. Il est utilisé pour contrôler le mouvement du pointeur pour sélectionner les éléments sur votre panneau d’affichage. Le TouchPad est composé d’un contrôle du curseur, un bouton gauche et droit, et deux boutons de défilement.
  • Seite 42: Mise À Niveau Du Module Mémoire

    MISE EN ROUTE Mise à niveau du module mémoire Votre notebook est comporte 128Mo ou 256Mo de RAM Dynamique Synchrone à haute vitesse (SDRAM) installée en usine. Pour augmenter la capacité mémoire de votre notebook (jusqu’à 2Go maximum), vous pouvez installer un module mémoire supplémentaire. La mise à niveau de mémoire doit être un module SDRAM double en ligne (DIMM).
  • Seite 43: Dépannage

    DÉPANNAGE Votre notebook est robuste et présente rarement de problèmes dans ce domaine. Cependant, vous pouvez rencontrer de simples problèmes de configuration ou d’utilisation que vous pouvez résoudre sur place, ou des problèmes avec des périphériques, que vous pouvez résoudre en remplaçant le périphérique.
  • Seite 44: Appendice

    APPENDICE Spécifications du Notebook Processeur et plate-forme Technologie Mobile Intel ® Centrino 1 PCMCIA Processeur Intel Dothan 1,50GHz à 2,13GHz 1 FIR support de port IrDA Infrarouge (Processeur Intel Pentium M 710~770) 2 prises Audio : Entrée Microphone, Sortie Haut- Processeur Intel Celeron M 1,20G à...
  • Seite 45 NOTEBOOK-SERIE KN1 BENUTZERHANDBUCH D E U T S C H Dez. 2004 Downloaded from www.Manualslib.com manuals search engine...
  • Seite 46 INHALT ZUM BEGINN ......................5 Überprüfen der Lieferung auf Vollständigkeit ............5 Lernen Sie das Notebook kennen ................6 ÖFFNEN DES BILDSCHIRMS .................. 6 VORDERSEITE ......................7 LINKE SEITE ......................9 RECHTE SEITE ...................... 10 RÜCKSEITE ......................11 UNTERSEITE ......................12 ERSTE SCHRITTE ....................
  • Seite 47: Pflege Des Notebooks

    PFLEGE DES NOTEBOOKS Achten Sie darauf, dass die Lüftungsöffnungen Drücken Sie NICHT auf den Bildschirm. nicht verdeckt werden, um eine Überhitzung des Prozessors zu vermeiden. Legen Sie das Notebook NICHT auf unebene oder Verwenden Sie das Notebook NICHT bei wacklige Unterlagen. extremen Umgebungsbedingungen.
  • Seite 48: Sprühen Sie Kein Wasser Oder Andere

    Vermeiden Sie plötzliche Veränderungen von Setzen Sie das Notebook NICHT Regen und Temperatur und Luftfeuchtigkeit, und stellen Sie Feuchtigkeit aus. das Notebook nicht in die Nähe von Adaptern und Lüftungsöffnungen anderer Geräte. Stellen Sie das Notebook NICHT in der Nähe Versuchen Sie NICHT, den Akku zu manipulieren.
  • Seite 49: Zum Beginn

    ZUM BEGINN Überprüfen der Lieferung auf Vollständigkeit Wenn Sie das Notebook erhalten haben, packen Sie es vorsichtig aus, und überprüfen Sie, ob alle nachfolgend aufgeführten Teile enthalten sind. Bei einem vorkonfigurierten Modell sollten die folgenden Teile dabei sein: • Notebook •...
  • Seite 50: Lernen Sie Das Notebook Kennen

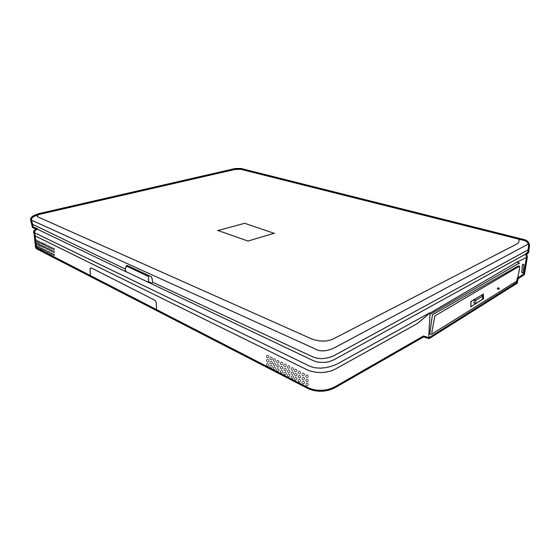
    ZUM BEGINN Lernen Sie das Notebook kennen ÖFFNEN DES BILDSCHIRMS Der Bildschirmdeckel wird magnetisch geschlossen. Öffnen Sie das Notebook, indem Sie einfach den Deckel nach oben klappen. Achten Sie beim Schließen darauf, dass der Deckel nicht zuknallt. Downloaded from www.Manualslib.com manuals search engine...
  • Seite 51: Vorderseite

    ZUM BEGINN VORDERSEITE Hier sehen Sie eine Ansicht des Notebooks von vorne. Bildschirm Taste Ein/Aus/ Schnellstart-Tasten Suspend/ Wiederaufnahme Tastatur TouchPad- Zeigegerät Stereo-Lautsprecher Statusanzeigelampen Stereo-Lautsprecher Bildschirm Beim Bildschirm handelt es sich um einen LCD-Farbmonitor mit Hintergrundbeleuchtung. Auf ihm werden die Texte und Grafiken angezeigt. Tastatur Das Notebook hat eine Tastatur in Normalgröße und besitzt eine festgelegte Windows -Taste.
  • Seite 52: Touchpad-Zeigegerät

    ZUM BEGINN Statusanzeigelampen Die Statusanzeigelampen entsprechen den spezifischen Betriebsmodi. Das sind: Festplattenaktivität (HDD), Aktivität des optischen Laufwerks (ODD) und Akkustatus. Oberhalb der Tastatur befinden sich drei zusätzliche Statusanzeigelampen: Status der Wireless-Verbindung, Caps-Lock und Num-Lock. TouchPad-Zeigegerät Beim TouchPad handelt es sich um eine mausähnliche Einrichtung zur Steuerung des Cursors mit vier Tasten (Links, Rechts und zwei Scroll-Tasten).
  • Seite 53: Linke Seite

    ZUM BEGINN LINKE SEITE Hier folgt eine kurze Beschreibung der linken Seite des Notebooks. Karten- Steckplatz IEEE- Mikrofonbuchse USB- Infrarot- 1394- Kopfhörerbuchse Speicherkartenleser Port Port Port (IrDA) Mikrofonbuchse An die Mikrofonbuchse können Sie ein externes Mono-Mikrofon anschließen. Kopfhörerbuchse An die Kopfhörerbuchse können Sie Kopfhörer oder externe Lautsprecher und Verstärker anschließen.
  • Seite 54: Rechte Seite

    ZUM BEGINN RECHTE SEITE Hier folgt eine kurze Beschreibung der rechten Seite des Notebooks. Notauswurföffnung Auswurftaste Öffnung für Optisches Laufwerk des optischen Kensington-Schloss Laufwerks Optisches Laufwerk Mit Hilfe des optischen Laufwerks können Sie Medien-Discs wie CDs und DVDs abspielen. Auswurftaste des optischen Laufwerks Drücken Sie auf die Auswurftaste des optischen Laufwerks, um das optische Laufwerk zu öffnen, wenn Sie eine DVD oder CD einlegen möchten.
  • Seite 55: Rückseite

    ZUM BEGINN RÜCKSEITE Hier sehen Sie eine Ansicht des Notebooks von hinten. Port-Replikator-Schnittstelle S-Video-/TV-Out-Port Netzadapteranschluss USB-Ports Modem- Externer LAN-Port (RJ-45) Port Monitoranschluss (RJ-11) Port-Replikator-Schnittstelle Die Port-Replikator-Schnittstelle erweitert die Funktionalität des Notebooks, indem es Ports für den Anschluss von PS/2-Geräten, einem externen Monitor, einem seriellen und einem parallelen Gerät, USB-Geräten, einem LAN-Kabel (RJ-45), einer externen Audioquelle.
  • Seite 56: Unterseite

    ZUM BEGINN UNTERSEITE Hier sehen Sie eine Ansicht des Notebooks von unten. Lüftungsöffnungen Etikett mit Speicherfach Stromdaten Bluetooth-Fach Wireless-LAN- Fach Fach für den Lithium-Ionen- Schacht für Akku Festplattenlaufwerk Lüftungsöffnungen Diese Lüftungsöffnungen dienen als Auslass für die heiße Luft, die der Lüfter zum Kühlen der Bauteile im Innern nach außen befördert.
  • Seite 57: Erste Schritte

    ERSTE SCHRITTE Stromversorgung Das Notebook kann auf zwei Arten mit Strom versorgt werden: mit einem Lithium-Ionen-Akku oder einem AC-Netzadapter, der an das Stromnetz angeschlossen wird. ANSCHLIESSEN DES NETZADAPTERS Der AC-Netzadapter versorgt das Notebook mit Strom und lädt gleichzeitig den Akku, wenn dieser sich im Notebook befindet.
  • Seite 58: Wiederaufladen Des Akkus

    ERSTE SCHRITTE WIEDERAUFLADEN DES AKKUS Der Lithium-Ionen-Akku wird im Gerät aufgeladen, wenn das Notebook an eine Netzsteckdose angeschlossen ist. Wenn Sie also den Akku aufladen möchten, muss sich dieser im Notebook befinden, und das Notebook muss an das Stromnetz angeschlossen sein. Bei Lithium-Ionen-Akkus tritt kein “Speichereffekt”...
  • Seite 59: Einschalten Des Notebooks

    ERSTE SCHRITTE Einschalten des Notebooks EINSCHALTEN Taste Ein/Aus/Suspend/Wiederaufnahme Taste Ein/Aus/Suspend/Wiederaufnahme Ist das Notebook ausgeschaltet, müssen Sie auf die Taste Ein/Aus/Suspend/Wiederaufnahme drücken, um es einzuschalten. Das Notebook kann eingeschaltet werden, wenn es mit dem AC- Netzadapter an das Stromnetz angeschlossen oder über den internen Lithium-Ionen-Akku mit Strom versorgt wird.
  • Seite 60: Statusanzeigen

    ERSTE SCHRITTE Statusanzeigen Die Statusanzeigelampen entsprechen den spezifischen Betriebsmodi. Das sind: Akkustatus, AC- Adapterstatus, Festplattenaktivität, Aktivität des optischen Laufwerks und Wireless-LAN- Aktivität. Oberhalb der Tastatur befinden sich zwei zusätzliche Statusanzeigelampen: Caps- Lock und Num-Lock. Stromanzeige Wireless E-mail Internet Festplattenaktivität Akkuanzeige Feststelltaste Num- Lock Optischen...
  • Seite 61: Anzeige Für Wireless-Lan-Aktivität

    ERSTE SCHRITTE Anzeige für Wireless-LAN-Aktivität An dieser Anzeige können Sie erkennen, ob das Notebook an ein Wireless-Netzwerk angeschlossen ist. Anzeige der Feststelltaste An dieser Anzeige können Sie erkennen, ob die Feststelltaste aktiv ist. Num-Lock-Anzeige Die Num-Lock-Anzeige zeigt an, dass das in die Tastatur eingebettete aus zehn Tasten bestehende Ziffernfeld aktiv ist.
  • Seite 62: Die Funktionstasten

    ERSTE SCHRITTE Die Funktionstasten Das Notebook verfügt über 12 Funktionstasten, Taste F1 bis F12. Je nach Programm sind die Funktionen, die diesen Tasten zugewiesen sind, unterschiedlich. In der Software-Dokumentation finden Sie die Funktionen der jeweiligen Tasten. Die Taste [FN] bietet dem Notebook zusätzliche Funktionen und wird immer zusammen mit einer anderen Taste gedrückt.
  • Seite 63: Benutzen Des Touchpads

    ERSTE SCHRITTE Benutzen des TouchPads Das TouchPad ist ein Zeigegerät, das in das Notebook integriert ist. Es kann zur Steuerung der Cursorbewegungen auf dem Bildschirm verwendet. Das TouchPad bestetht aus der Cursorsteuerung, einer linken und einer rechten Taste sowie zwei Scroll-Tasten.
  • Seite 64: Aufrüsten Des Speichermoduls

    ERSTE SCHRITTE Aufrüsten des Speichermoduls Das Notebook ist werkseitig entweder mit einem 128MB oder 256MB großen SDRAM-Speicher (Synchronous Dynamic RAM) ausgestattet. Wenn Sie die Speicherkapazität des Notebooks erhöhen möchten (bis max. 2 GB), können Sie ein zusätzliches Speichermodul installieren. Dafür müssen Sie ein DIMM-SDRAM-Modul verwenden.
  • Seite 65: Fehlerbehebung

    FEHLERBEHEBUNG Das Notebook ist sehr robust und sollte in dieser Hinsicht keinen Anlass zu Beschwerden geben. Es ist jedoch möglich, dass einfache Installations- und Betriebsprobleme auftreten, die Sie auf der Stelle beheben können. Es kann auch Probleme mit Peripheriegeräten geben, die behoben werden können, indem Sie das entsprechende Gerät austauschen.
  • Seite 66: Anhang

    ANHANG Technische Daten Prozessor & Plattform Mobile Intel ® Centrino Mobile Technologie 1 Port-Replikator-Anschluss (Fabrikoption) Intel Dothan Prozessor 1,50 bis 2,13 GHz 1 DC-Eingang (Intel Pentium M Prozessor 710-770) 1 PCMCIA Intel Celeron M Prozessor 1,20-1,50G 1 Infrarot-IrDA-Anschluss (unterstützt FIR) (Intel Celeron M Prozessor 320-370) 2 Audiobuchsen: Mikrofoneingang, Lautsprecherausgang Intel...
  • Seite 67 PC PORTÁTIL SERIE KN1 MANUAL DEL USUARIO E S P A Ñ O L Dic 2004 Downloaded from www.Manualslib.com manuals search engine...
  • Seite 68 CONTENIDO ANTES DE COMENZAR ..................5 Asegúrese de tenerlo todo ..................5 Familiarícese con el ordenador ................... 6 ABRIR LA PANTALLA ....................6 VISTA PREVIA FRONTAL ..................7 VISTA PREVIA DEL LATERAL IZQUIERDO ............... 9 VISTA PREVIA DEL LATERAL DERECHO ............... 10 VISTA PREVIA POSTERIOR ..................
  • Seite 69 CUIDADOS DE SU PC PORTÁTIL Para evitar el posible calentamiento del procesador NO presione ni toque la pantalla. del ordenador, asegúrese de no bloquear las aperturas de ventilación. NO lo coloque en superficies desiguales o NO utilice su ordenador portátil en condiciones inestables.
  • Seite 70 Evite cambios bruscos de temperatura o humedad NO exponga el ordenador a la lluvia o a la manteniéndolo alejado del aire acondicionado y humedad. calefactores. NO lo coloque cerca del fuego u otras fuentes de NO manipule las baterías. Manténgalas fuera del calor.
  • Seite 71: Antes De Comenzar

    ANTES DE COMENZAR Asegúrese de tenerlo todo Cuando reciba su PC portátil, retire el embalaje con cuidado y compruebe si tiene todos los artículos listados a continuación. Para un modelo preconfigurado debería tener lo siguiente: • Ordenador portátil • Batería de litio •...
  • Seite 72: Familiarícese Con El Ordenador

    ANTES DE COMENZAR Familiarícese con el ordenador ABRIR LA PANTALLA La tapa se cierra en el chasis del ordenador magnéticamente. Para abrirla, simplemente levante la tapa. Cuando la cierre, asegúrese de no golpearla bruscamente. Downloaded from www.Manualslib.com manuals search engine...
  • Seite 73: Vista Previa Frontal

    ANTES DE COMENZAR VISTA PREVIA FRONTAL Esta es una vista previa de la parte frontal del portátil. Pantalla Botón suspender/ Botones de inicio rápido reanudar/encender Teclado Dispositivo puntero TouchPad Altavoces estéreo Luces indicadoras de Altavoces estéreo estado Pantalla La pantalla es una pantalla LCD de color con luz de fondo para la visualización de texto y gráficos. Teclado Teclado de tamaño completo con teclas exclusivas para Windows ®...
  • Seite 74 ANTES DE COMENZAR Luces indicadoras de estado Las luces indicadoras de estado corresponden a modos de operación específicos. Estos modos son: Actividad del disco duro (HDD); actividad de la unidad de disco óptica (ODD) y estado de la batería. Además, en la parte superior del teclado hay tres luces indicadoras de estado adicionales: Estado inalámbrico;...
  • Seite 75: Vista Previa Del Lateral Izquierdo

    ANTES DE COMENZAR VISTA PREVIA DEL LATERAL IZQUIERDO A continuación se presenta una breve descripción del lateral izquierdo del portátil. Ranura de tarjeta Puerto Clavija de micrófono Puerto de Puerto IEEE Clavija de auriculares Lector de tarjetas de infrarrojos 1394 memoria (IrDA) Clavija de micrófono...
  • Seite 76: Vista Previa Del Lateral Derecho

    ANTES DE COMENZAR VISTA PREVIA DEL LATERAL DERECHO A continuación se presenta una breve descripción del lateral derecho del portátil. Botón de Expulsión de Puerto de Unidad expulsión de emergencia bloqueo óptica la unidad de la bandeja Kensington óptica Unidad óptica La unidad óptica le permite reproducir discos multimedia, como CDs y DVDs.
  • Seite 77: Vista Previa Posterior

    ANTES DE COMENZAR VISTA PREVIA POSTERIOR Esta es una vista previa de la parte posterior del portátil. Puerto de S-Vídeo/ Interfaz de reproducción de puertos Puertos USB salida TV Puerto del adaptador de alimentación Puerto Puerto para Puerto LAN (RJ-45) monitor externo módem (RJ-11)
  • Seite 78: Vista Previa Inferior

    ANTES DE COMENZAR VISTA PREVIA INFERIOR Esta es una vista previa de la parte inferior del portátil. Salidas del ventilador Etiqueta de Compartimento clasificacion de memoria Compartimiento Compartimiento Bluetooth de la LAN inalámbrica Bahía de batería de litio Bahía del disco duro Salidas del ventilador Son puertos abiertos para que el ventilador disipe el calor de los componentes internos del ordenador.
  • Seite 79: Primeros Pasos

    PRIMEROS PASOS Fuentes de alimentación Su ordenador tiene dos tipos de fuente de alimentación: una batería de litio o un adaptador de CA. CONECTAR LOS ADAPTADORES DE ALIMENTACIÓN El adaptador de CA suministra alimentación para el funcionamiento de su PC portátil y para cargar la batería.
  • Seite 80: Cargar La Batería

    PRIMEROS PASOS CARGAR LA BATERÍA La batería de litio se recarga internamente con el adaptador de CA. Para recargar la batería, asegúrese de tenerla instalada y que el ordenador esté conectado a la CA. Las baterías de litio no tienen “efecto de memoria”; por lo tanto no necesitará descargar la batería por completo antes de volver a cargarla.
  • Seite 81: Iniciar Su Portátil

    PRIMEROS PASOS Iniciar su portátil ENCENDER Botón suspender/reanudar/encender El interruptor para suspender/reanudar/encender se utiliza para encender el portátil cuando está apagado. Cuando haya conectado su adaptador de CA o cargado la batería de litio interna, podrá encender su portátil pulsando el botón suspender/reanudar/encender situado sobre el teclado. Si necesita tomar un descanso largo, pulse el botón de nuevo para apagarlo.
  • Seite 82: Indicadores De Estado

    PRIMEROS PASOS Indicadores de estado Las luces indicadoras de estado corresponden a modos de operación específicos. Estos modos son: Estado de la batería; estado del adaptador de CA; actividad del disco duro; actividad de la unidad óptica y actividad de la LAN inalámbrica. Además, en la parte superior del teclado hay dos luces indicadoras de estado adicionales: Bloqueo de mayúsculas y bloqueo numérico.
  • Seite 83 PRIMEROS PASOS Indicador de actividad de la LAN inalámbrica El indicador de actividad de la LAN inalámbrica informa si el ordenador está conectado a la red inalámbrica o no. El indicador de bloqueo de mayúsculas El indicador de bloqueo de mayúsculas informa si el teclado está listo para escribir en letras mayúsculas.
  • Seite 84: Usar Las Teclas De Función

    PRIMEROS PASOS Usar las teclas de función Su ordenador tiene 12 teclas de función, F1 a F12. Las funciones asignadas a las teclas difieren dependiendo de cada aplicación. Deberá consultar la documentación de su software para averiguar cómo se usan estas teclas. La tecla [FN] ofrece funciones extendidas para el portátil y siempre se utiliza junto con otra tecla.
  • Seite 85: Usar El Touchpad

    PRIMEROS PASOS Usar el TouchPad Su ordenador lleva incorporado un dispositivo puntero TouchPad. Se utiliza para controlar el movimiento del puntero para seleccionar elementos en la pantalla. El TouchPad consiste en un control de cursor, un botón izquierdo y derecho, y dos botones de desplazamiento.
  • Seite 86: Ampliación Del Módulo De Memoria

    PRIMEROS PASOS Ampliación del módulo de memoria Su PC portátil viene con 128MB o 256MB de RAM dinámica (SDRAM) sincrónica de alta velocidad instalada de fábrica. Para aumentar la capacidad de memoria del portátil (hasta un máximo de 2GB), puede instalar un módulo de ampliación de memoria. La ampliación de memoria debe ser un módulo SDRAM (DIMM) dual en línea.
  • Seite 87: Solución De Problemas

    SOLUCIÓN DE PROBLEMAS Su PC portátil es robusto y puede presentar pocos problemas. Sin embargo, puede encontrar problemas simples de configuración u operación que podrá resolver sobre la marcha o problemas con dispositivos periféricos que podrá resolver cambiando el dispositivo. La información en esta sección le ayuda a aislar y resolver algunos de estos sencillos problemas e identificar los fallos que necesitan reparación.
  • Seite 88: Apéndice

    APÉNDICE Especificaciones del portátil Procesador y plataforma Tecnología Mobile Intel ® Centrino 1 entrada DC Procesador Intel Dothan 1.50GHz a 2.13GHz 1 PCMCIA (Procesador Intel Pentium M 710~770) 1 puerto infrarrojos IrDA con soporte FIR Procesador Intel Celeron M 1.20G a 1.50G 2 clavijas de audio: Entrada de micrófono, salida (Procesador Intel Celeron M 320~370) de altavoz (salida SPDIF)
  • Seite 89 NOTEBOOK PC DI SERIE KN1 MANUALE DELL’UTENTE I T A L I A N O Dic 2004 Downloaded from www.Manualslib.com manuals search engine...
  • Seite 90 INDICE PER PRIMA COSA ....................5 Assicurarsi che tutti gli articoli siano presenti ............5 Familiarizzarsi con il computer ..................6 APERTURA DEL PANNELLO DEL DISPLAY ............6 PANNELLO ANTERIORE ..................7 PANNELLO A SINISTRA ................... 9 PANNELLO A DESTRA ................... 10 PANNELLO POSTERIORE ..................
  • Seite 91 CURA DEL NOTEBOOK PC Per evitare un surriscaldamento possibile del NON premere sul o toccare il pannello del processore nel computer, assicurarsi che le aper- display. ture per la ventilazione non siano mai bloccati. NON posare sulle superficie irregolari o instabili. NON usare il notebook computer in condizioni rigide.
  • Seite 92 Sempre evitare cambi bruschi della temperatura NON esporre il computer alla pioggia o o dell’umidità tenendolo lontano dal A/C e dai all’umidità. fonti di calore. NON posizionare vicino al fuoco o altri fonti di NON manomettere la batteria. Tenerla fuori dalla calore.
  • Seite 93: Per Prima Cosa

    PER PRIMA COSA Assicurarsi che tutti gli articoli siano presenti Dopo aver ricevuto il Notebook PC, disimballarlo attentamente e assicurarsi che tutti gli articoli qui sotto siano presenti. Per un modello preconfigurato, i seguenti articoli devono essere forniti: • Notebook Computer •...
  • Seite 94: Familiarizzarsi Con Il Computer

    PER PRIMA COSA Familiarizzarsi con il computer APERTURA DEL PANNELLO DEL DISPLAY Il coperchio viene serrato magneticamente al telaio del computer. Per aprire il display, sollevare semplicemente il coperchio. Badare a non sbattere il display chiudendolo. Downloaded from www.Manualslib.com manuals search engine...
  • Seite 95: Pannello Anteriore

    PER PRIMA COSA PANNELLO ANTERIORE Di seguito viene riportato una vista del pannello anteriore del notebook. Pannello del display Pulsante Suspend/ Pulsanti per avvio Resume/Power On veloce (Quick Start) (sospeso/ripresa/ Tastiera accensione) Periferica di puntamento del TouchPad Altoparlanti Stereo Lampadine indicatrici Altoparlanti Stereo dello stato Pannello del display...
  • Seite 96 PER PRIMA COSA Lampadine indicatrici dello stato Le lampadine indicatrici dello stato corrispondano alle modalità specifiche di funzionamento. Queste modalità sono: Attività unità disco rigido (HDD); Attività unità disco ottico (ODD); e stato della batteria. Inoltre, ci sono tre lampadine indicatrici dello stato sulla tastiera: Stato wireless;...
  • Seite 97: Pannello A Sinistra

    PER PRIMA COSA PANNELLO A SINISTRA Di seguito viene riportata una descrizione breve del pannello a sinistra del notebook. Slot per scheda Porta Jack per microfono Porta Porta IEEE Jack per cuffie Lettore schede infrarossa 1394 memoria (IrDA) Jack per microfono Il jack per microfono è...
  • Seite 98: Pannello A Destra

    PER PRIMA COSA PANNELLO A DESTRA Di seguito viene riportata una descrizione breve del pannello a destra del notebook. Pulsante di Rilascio Porta per Unità CD eiezione del carrello serratura all’unità CD in caso Kensington d’emergenza Unità CD L’unità CD permette la riproduzione dei dischi media, come CDs e DVDs. Pulsante di eiezione all’unità...
  • Seite 99: Pannello Posteriore

    PER PRIMA COSA PANNELLO POSTERIORE Di seguito viene riportata una descrizione breve del pannello posteriore del notebook. Interfaccia per replicatore porte Porta S-Video/TV Out Porta per adattatore alimentazione Porta Porte USB Porta per Porta LAN (RJ-45) Modem monitor (RJ-11) esterno Interfaccia per replicatore porte L’interfaccia per replicatore porte estende la funzionalità...
  • Seite 100: Pannello Inferiore

    PER PRIMA COSA PANNELLO INFERIORE Di seguito viene riportata una descrizione breve del pannello inferiore del notebook. Etichetta di Aperture per classificazione ventilatore Scompartimento per memoria Scompartimento Scompartimento Bluetooth Wireless LAN Scompartimento per batteria Scompartimento agli ioni di litio per unità di disco rigido Aperture per ventilatore Queste sono porte aperte per il ventilatore per la dissipazione del calore dai componenti interni...
  • Seite 101: Operazioni Preliminari

    OPERAZIONI PRELIMINARI Sorgenti di alimentazione Il computer può essere messo in servizio da due sorgenti di alimentazione: una batteria agli ioni di litio o un adattatore c.a. COLLEGAMENTO DEGLI ADATTATORI ALIMENTAZIONE L’adattatore c.a. fornisce l’alimentazione per la messa in servizio del notebook PC e per il caricamento della batteria.
  • Seite 102: Ricaricamento Della Batteria

    PRIMEROS PASOS RICARICAMENTO DELLA BATTERIA La batteria agli ioni di litio viene ricaricata internamente tramite l’adattatore c.a. Per ricaricare la batteria, assicurarsi che la batteria sia montata e che il computer sia collegato alla rete elettrica. Le batterie agli ioni di litio non causano un “effetto memoria”. Quindi, non sarà necessario scaricare completamente la batteria prima del ricaricamento.
  • Seite 103: Messa In Servizio Del Notebook

    PRIMEROS PASOS Messa in servizio del Notebook ACCENSIONE Pulsante Suspend/Resume/Power On (sospeso/ripresa/ accensione) Accendere il notebook dal suo stato Off (spento) premendo sul pulsante Suspend/Resume/Power On (sospeso/ripresa/accensione). Dopo aver collegato l’adattatore c.a. o caricato la batteria interna agli ioni di litio, accendere il notebook premendo sul pulsante Suspend/Resume/Power On (sospeso/ ripresa/accensione) trovandosi sopra la tastiera.
  • Seite 104: Indicatori Dello Stato

    PRIMEROS PASOS Indicatori dello stato Le lampadine indicatrici dello stato corrispondano alle modalità specifiche di funzionamento. Queste modalità sono: stato di batteria; stato dell’adattatore c.a.; attività del disco rigido; attivita dell’unità CD e attività LAN senza cavi. Inoltre, ci sono due lampadine indicatrici dello stato sulla tastiera: bloc maiusc e bloc num.
  • Seite 105 PRIMEROS PASOS Indicatore dell’attività LAN senza cavi L’indicatore dell’attività LAN senza cavi indica se il computer è stato collegato a una rete senza cavi o no. Indicatore Caps Lock (bloc maiusc) L’indicatore Caps Lock (bloc maiusc) indica che la tastiera è stata impostata per digitare le lettere in maiuscole.
  • Seite 106: Uso Dei Tasti Di Funzione

    PRIMEROS PASOS Uso dei tasti di funzione Il computer è fornito di 12 tasti di funzione, cioé F1 fino a F12. Le funzioni assegnate a questi tasti sono differenti per ogni applicazione. Per maggior informazioni sull’uso di questi tasti, fare riferimento alla documentazione del software.
  • Seite 107: Uso Del Touchpad

    PRIMEROS PASOS Uso del TouchPad Una periferica di puntamento TouchPad è incorporata nel computer. Viene utilizzata per gestire il movimento del puntatore per selezionare elementi sul pannello del display. Il TouchPad è composto di un controllo cursore, un pulsante a sinistra e a destra e di due pulsante per scorrere.
  • Seite 108: Aggiornamento Del Modulo Memoria

    PRIMEROS PASOS Aggiornamento del modulo memoria Il notebook PC è fornito di un RAM sincrono dinamico (SDRAM) da 128 MB o 256 MB ad alta velocità e installato dal fabbricante. Per aumentare la capacità della memoria del notebook (fino a un massimo di 2GB), è...
  • Seite 109: Risoluzione Dei Problemi

    RISOLUZIONE DEI PROBLEMI Il Suo notebook PC e robusto e soggetto a soltanto pochi problemi in questo campo. Comunque, è possibile che un problema può verificarsi durante la configurazione o installazione semplice o durante il funzionamento che l’utente potrà risolvere subitamente, o problemi delle periferiche che si potrà...
  • Seite 110: Appendice

    APPENDICE Specifiche del Notebook Processore & piattaforma Tecnologia di processore mobile Intel ® Centrino 1 PCMCIA Processore Intel Dothan da 1.50GHz a 2.13GHz 1 porta infrarossa IrDA sopporta FIR (Processore Intel Pentium M 710~770) 2 jacks audio: Microphone-in, Speaker-out(SPDIF out) Processore Intel Celeron M da 1.20G a 1.50G Audio AC'97 e Audio ad alta definizione 5.1/7.1CH integrati...

Inhaltsverzeichnis