Herunterladen Inhalt Inhalt Diese Seite drucken

Werbung

Verfügbare Sprachen
  • DE

Verfügbare Sprachen

  • DEUTSCH, seite 1
Corvette Americana
Dunstabzugshaube
Range Hood
Campana extractora
Hotte aspirante
Cappa aspirante
10035340

Werbung

Inhaltsverzeichnis
loading

Inhaltszusammenfassung für Klarstein Corvette Americana

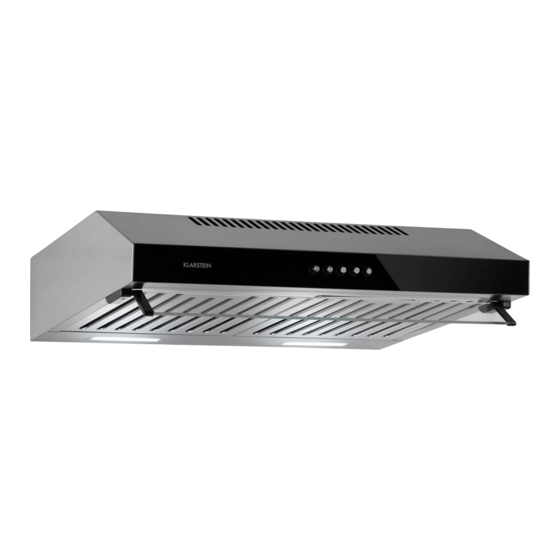
  • Seite 1 Corvette Americana Dunstabzugshaube Range Hood Campana extractora Hotte aspirante Cappa aspirante 10035340...
  • Seite 3: Inhaltsverzeichnis

    Sehr geehrter Kunde, wir gratulieren Ihnen zum Erwerb Ihres Gerätes. Lesen Sie die folgenden Hinweise sorgfältig durch und befolgen Sie diese, um möglichen Schäden vorzubeugen. Für Schäden, die durch Missachtung der Hinweise und unsachgemäßen Gebrauch entstehen, übernehmen wir keine Haftung. Scannen Sie den folgenden QR-Code, um Zugriff auf die aktuellste Bedienungsanleitung und weitere Informationen rund um das Produkt zu erhalten.
  • Seite 4: Sicherheitshinweise

    SICHERHEITSHINWEISE • Lesen Sie sich alle Hinweise vor der Benutzung sorgfältig durch und bewahren Sie die Bedienungsanleitung zum späteren Nachschlagen gut auf. • Die Montagearbeiten dürfen nur von einer Elektrofachkraft oder einer qualifizierten Person durchgeführt werden. Bevor Sie die Dunstabzugshaube verwenden, stellen Sie sicher, dass die Spannung (V) und die auf der Dunstabzugshaube angegebene Frequenz (Hz) der Spannung und Frequenz der Stromversorgung in Ihrem Haushalt entsprechen.
  • Seite 5 Wichtige Hinweise zum Abluftbetrieb WARNUNG Vergiftungsgefahr durch zurückgesaugte Abgase! Betreiben Sie das Gerät nicht im Abluftbetrieb, wenn es zusammen mit einer raumluftabhängigen Feuerstätte betrieben wird und keine ausreichende Luftzirkulation garantiert wird. Raumluftabhängige Feuerstätten wie Gas-, Öl-, Holz- oder Kohleheizungen, Boiler oder Durchlauferhitzer beziehen die Luft aus dem Raum und führen sie durch ein Abluftrohr oder einen Kamin ins Freie.
  • Seite 6: Installation

    INSTALLATION Vorbereitung Falls sie über einen Abzug nach außen verfügen, können Sie die Abzugshaube wie auf dem Bild rechts installieren. Der Abzugskanal sollte einen Durchmesser von mindestens 150 mm haben und aus Emaille, Aluminium oder einem flexiblen, hitzebeständigen Rohr bestehen. • Schalten Sie das Gerät vor der Installation aus und ziehen Sie den Stecker.
  • Seite 7 Installations-Methode A Bohren Sie für die Wandmontage 4 Löcher mit einem Durchmesser von 8 mm an einer geeigneten Stelle in die Wand. Orientieren Sie sich dabei am Abstand der Löcher auf der Rückseite der Dunstabzugshaube. Setzen Sie die Dübel in die Löcher ein. Setzen Sie die oberen Schrauben in die Dübel ein und ziehen Sie sie soweit fest, dass die Dunstabzugshaube gerade noch darüber passt.
  • Seite 8 Installations-Methode B Bohren Sie 4 Löcher mit einem Durchmesser von 6 mm in den Boden des Hängeschranks. Achten Sie darauf dass der Abstand zwischen der Rückseite der Dunstabzugshaube und der Wand eingehalten wird. Befestigen Sie den Luftauslass an der Dunstabzugshaube und montieren Sie dann Dunstabzugshaube am Schrankboden montieren, indem Sie sie mit den beiliegenden 4 Schrauben, Unterlegscheiben und Muttern festziehen.
  • Seite 9: Bedienung

    Einstellung der Belüftung • Belüftung per Abluftbetrieb: Drehen Sie den Regler auf Abluftbetrieb (Abbildung A). Installieren Sie den Abluftschlauch und schalten Sie die Dunstabzugshaube ein. Die Abluft wird nun nach außen abgeführt. • Belüftung per Umluft: Drehen Sie den Regler auf Umluftbetrieb (Abbildung B). Befestigen Sie die Auslassabdeckungen und schalten Sie die Dunstabzugshaube ein.
  • Seite 10: Reinigung Und Wartung

    REINIGUNG UND WARTUNG Schalten Sie die Dunstabzugshaube vor der Reinigung und Wartung aus und ziehen Sie den Stecker aus der Steckdose. Die Außenflächen sind anfällig für Kratzer und Flecken. Benutzen Sie daher zur Reinigung keine Scheuermittel und wischen Sie Rückstände von alkalischen oder saure Substanzen (Zitronensaft, Essig) nach der Reinigung umgehend weg.
  • Seite 11 So entfernen und installieren Sie die Fettfilter Entfernen Sie die Fettfilter, indem Sie den Knopf am Griff des Filters drücken und den Filter abnehmen. Um die Filter wieder zu installieren, befolgen Sie die folgenden Schritte: Winkeln Sie den Filter an und setzen Sie ihn in die Schlitze an der Rückseite der Haube ein.
  • Seite 12 Lampe austauschen Entfernen Sie den Fettfilter. Entfernen Sie die Abdeckung mit einem Schraubenzieher entfernen (Abbildung 1). Ziehen Sie die Lampe von Hand nach außen und entfernen Sie die Drahtklemme, um die Lampe auszutauschen (Abbildung 2). Zum Wiedereinbau der Lampe, gehen Sie in umgekehrter Reihenfolge vor. Max.
  • Seite 13: Fehlerbehebung

    FEHLERBEHEBUNG Fehler Mögliche Ursache Lösung Das Licht ist an, aber der Die Lüftung ist blockiert. Entfernen Sie die Motor läuft nicht. Blockade. Der Kondensator ist Lassen Sie den kaputt. Kondensator ersetzen. Der Motor ist kaputt. Lassen Sie den Motor ersetzen. Der Motor riecht Lassen Sie den Motor merkwürdig.
  • Seite 14: Hinweise Zur Entsorgung

    HINWEISE ZUR ENTSORGUNG Befindet sich die linke Abbildung (durchgestrichene Mülltonne auf Rädern) auf dem Produkt, gilt die Europäische Richtlinie 2012/19/EU. Diese Produkte dürfen nicht mit dem normalen Hausmüll entsorgt werden. Informieren Sie sich über die örtlichen Regelungen zur getrennten Sammlung elektrischer und elektronischer Gerätschaften.
  • Seite 15 Dear Customer, Congratulations on purchasing this device. Please read the following instructions carefully and follow them to prevent possible damages. We assume no liability for damage caused by disregard of the instructions and improper use. Scan the QR code to get access to the latest user manual and more product information.
  • Seite 16 SAFETY INSTRUCTIONS • Thank you for purchasing this cooker hood. Please read the instruction manual carefully before you use the cooker hood, and keep it in a safe place. • The installation work must be carried out by a qualified electrician or competent person.
  • Seite 17 Important Notes about the Extraction Mode WARNING Risk of poisoning from exhaust gases sucked back. Never operate the device in extraction mode simultaneously with an open flue appliance when there is not adequate airflow guaranteed. Open fl ue combustion equipment (for example, gas, oil, wood or coal-fi red heaters, tankless water heaters, water heaters) pulls combustion air from the room and runs it through an exhaust pipe or chimney to the outside.
  • Seite 18 INSTALLATION Preparation If you have an outlet to the outside, your cooker hood can be connected as below picture by means of an extraction duct (enamel, aluminium, flexible pipe or inflammable material with an interior diameter of 150 mm). • Before installation, turn the unit off and unplug it from the outlet.
  • Seite 19 Installation Method A For wall mounting, drill 4 holes with a diameter of 8 mm at a suitable point in the wall. Use the distance between the holes on the back of the cooker hood as a guide. Insert the dowels in the holes. Insert the top screws into the dowels and tighten them until the cooker hood just fits over them.
  • Seite 20 Installation Method B Drill 4 holes with a diameter of 6 mm in the bottom of the wall cabinet. Ensure that the distance between the back of the cooker hood and the wall is maintained. Fit the air outlet on the cooker hood, then mount the cooker hood on the cabinet base by tightening it with the 4 screws, washers and nuts supplied.
  • Seite 21 Setting the ventilation • Exhaust ventilation: Turn the control knob to exhaust mode (Figure A). Install the exhaust hose and switch on the cooker hood. The exhaust air is now discharged to the outside. • Recirculation ventilation: Turn the control knob to recirculation mode (Figure B). Fasten the outlet covers and switch on the cooker hood.
  • Seite 22 CLEANING AND MAINTENANCE Turn off the cooker hood before cleaning and maintenance and unplug the appliance from the wall outlet. The exterior surfaces are susceptible to scratches and stains. Therefore, do not use abrasive cleaners and wipe away any alkaline or acidic residue (lemon juice, vinegar) immediately after cleaning.
  • Seite 23 How to remove and install the grease filters Remove the grease filters by pressing the button on the handle of the filter and removing the filter. To reinstall the filters, follow the steps below: Angle the filter and insert it into the slots on the back of the hood. Press the button on the handle of the filter.
  • Seite 24 Replacing the lamp Remove the grease filter. Remove the cover with a screwdriver (Figure 1). Pull the lamp out by hand and remove the wire clamp to replace the lamp (Figure 2). To reinstall the lamp, follow the steps in reverse order. Max.
  • Seite 25 TROUBLESHOOTING Fault Possible Cause Solution Light on, but motor does The leaf blocked. Get rid of the blocking. not work. The capacitor damaged. Replace capacitor. The motor jammed Replace motor. bearing damaged. The internal with of motor Replace motor. off or a bad smell from the motor.
  • Seite 26 HINTS ON DISPOSAL According to the European waste regulation 2012/19/EU this symbol on the product or on its packaging indicates that this product may not be treated as household waste. Instead it should be taken to the appropriate collection point for the recycling of electrical and electronic equipment.
  • Seite 27 Estimado cliente, Le felicitamos por la adquisición de este producto. Lea atentamente las siguientes instrucciones y sígalas para evitar posibles daños. No asumimos ninguna responsabilidad por los daños causados por el incumplimiento de las instrucciones y el uso inadecuado. Escanee el siguiente código QR para obtener acceso a la última guía del usuario y más información sobre el producto.
  • Seite 28: Indicaciones De Seguridad

    INDICACIONES DE SEGURIDAD • Lea atentamente todas las indicaciones y conserve este manual para consultas posteriores. • Los trabajos de montaje deben ser realizados solamente por un electricista u otro profesional. Antes de utilizar la campana extractora, asegúrese de que la tensión (V) y la frecuencia indicada en la campana extractora (Hz) coinciden con la tensión (V) y frecuencia (Hz) de su suministro eléctrico.
  • Seite 29 Notas importantes acerca del modo de extracción ADVERTENCIA Peligro de muerte, riesgo de intoxicación provocado por gases en combustión aspirados. Nunca ponga en funcionamiento la función de extracción simultáneamente con un dispositivo que genere calor en una estancia estanca si no se ha garantizado una ventilación sufi ciente.
  • Seite 30: Instalación

    INSTALACIÓN Preparación Si cuenta con una salida de aire al exterior, puede instalar la campana tal y como indica la ilustración de la derecha. El tiro de aire debe contar con un diámetro mínimo de 150 mm y el conducto deberá estar fabricado en esmalte, aluminio o un material flexible y resistente al calor.
  • Seite 31 Método de instalación A Para el montaje en pared, perfore 4 orificios con un diámetro de 8 mm en una zona adecuada de la pared. Oriéntese por la distancia de los orificios presentes en la parte trasera de la campana extractora. Coloque los tacos en los orificios.
  • Seite 32 Método de instalación B Perfore 4 orificios de 6 mm de diámetro en la base del armario. Asegúrese de que la distancia entre la parte trasera de la campana extractora y la pared se mantenga. Fije la salida de aire a la campana extractora y, a continuación, monte la campana extractora en la base del armario con los 4 tornillos, arandelas y tuercas incluidas.
  • Seite 33: Manejo

    Regulación de la ventilación • Ventilación con funcionamiento de extracción: Gire el regulador al modo de extracción (ilustración A). Instale el conducto de extracción y encienda la campana extractora. El aire de extracción se conducirá al exterior. • Ventilación con funcionamiento de recirculación de aire: Gire el regulador al modo de recirculación de aire (ilustración B).
  • Seite 34: Limpieza Y Mantenimiento

    LIMPIEZA Y MANTENIMIENTO Antes de limpiar y mantener la campana extractora, apáguela y desenchufe el aparato de la toma de corriente. Las superficies exteriores son susceptibles a arañazos y manchas. Por lo tanto, no utilice limpiadores abrasivos y limpie cualquier residuo alcalino o ácido (jugo de limón, vinagre) inmediatamente después de la limpieza.
  • Seite 35: Instalación Del Filtro De Carbón Activo (Opcional)

    Cómo eliminar e instalar el filtro antigrasa Desmonte el filtro antigrasa presionando el botón del asa del filtro y extrayendo el filtro. Para volver a instalar el filtro, siga estos pasos: Incline el filtro y colóquelo en la ranura de la parte trasera de la campana. Presione el botón situado en el asa del filtro.
  • Seite 36 Sustituir la lámpara Retire el filtro antigrasa. Retire la cubierta con un destornillador (ilustración 1). Tire de la lámpara hacia afuera con la mano y retire las abrazaderas que la sujetan (ilustración 2). Para volver a colocar la lámpara, proceda en el orden inverso. Potencia Dimensiones: ILCOS D...
  • Seite 37: Solución De Problemas

    SOLUCIÓN DE PROBLEMAS Problema Posible causa Solución La luz está encendida La ventilación está Retire aquello que pero el motor no funciona. bloqueada. obstruye la ventilación. El condensador está Sustituya el condensador. averiado. El motor está averiado. Sustituya el motor. El motor genera un olor Sustituya el motor.
  • Seite 38: Retirada Del Aparato

    RETIRADA DEL APARATO Si el aparato lleva adherida la ilustración de la izquierda (el contenedor de basura tachado) entonces rige la normativa europea, directiva 2012/19/UE. Este producto no debe arrojarse a un contenedor de basura común. Infórmese sobre las leyes territoriales que regulan la recogida separada de aparatos eléctricos y electrónicos.
  • Seite 39 Chère cliente, cher client, Toutes nos félicitations pour l’acquisition de ce nouvel appareil. Veuillez lire attentivement et respecter les instructions de ce mode d’emploi afin d’éviter d’éventuels dommages. Nous ne saurions être tenus pour responsables des dommages dus au non-respect des consignes et à...
  • Seite 40: Consignes De Sécurité

    CONSIGNES DE SÉCURITÉ • Lisez attentivement toutes les consignes avant d’utiliser l’appareil et conservez ce mode d’emploi pour vous y référer ultérieurement. • Les travaux de montage doivent être effectués uniquement par électricien professionnel ou un spécialiste. Avant d‘utiliser la hotte aspirante, assurez-vous que la tension (V) et la fréquence indiquée sur la hotte aspirante (Hz) correspondent à...
  • Seite 41 Remarques importantes concernant le mode d‘extraction MISE EN GARDE Danger de mort, risques d‘intoxication ! Par la ré-aspiration de gaz de combustion. Ne jamais utiliser la fonction d’aspiration de l’appareil en même temps qu’un foyer dépendant de l’air ambiant si l’air frais est insuffi sant.
  • Seite 42: Installation

    INSTALLATION Préparation Si l’espace dispose d’une bouche d’aération dirigée vers l’extérieur, il est possible d’installer la hotte comme sur l’image de droite. Le conduit d’aspiration doit avoir un diamètre d’au moins 150 mm et doit être composé d’émail, d’aluminium ou d’un tuyau flexible et thermorésistant. •...
  • Seite 43 Méthode d‘installation A Pour le montage mural, percez 4 trous d'un diamètre de 8 mm à un endroit approprié dans le mur. Utilisez la distance entre les trous à l'arrière de la hotte aspirante comme guide. Insérez les chevilles dans les trous. Insérez les vis supérieures dans les chevilles et serrez-les jusqu'à...
  • Seite 44 Méthode d‘installation B Percez 4 trous d'un diamètre de 6 mm au fond de l'élément mural. Assurez- vous que la distance entre l'arrière de la hotte aspirante et le mur est maintenue. Fixez la sortie d'air à la hotte, puis montez la hotte au fond de l'élément en la serrant avec les 4 vis, rondelles et écrous fournis.
  • Seite 45: Utilisation

    Réglage de la ventilation • Ventilation par extraction d‘air : tournez le contrôleur pour passer en mode d‘extraction d‘air (Figure A). Installez le tuyau d‘évacuation et allumez la hotte aspirante. L‘air est maintenant évacué vers l‘extérieur. • Ventilation par circulation d‘air : tournez le contrôleur en mode circulation d‘air (Figure B).
  • Seite 46: Nettoyage Et Maintenance

    NETTOYAGE ET MAINTENANCE Éteignez la hotte avant le nettoyage et l’entretien, puis débranchez la fiche de la prise. Les surfaces extérieures sont sujettes aux rayures et aux taches. Par conséquent, n‘utilisez pas d‘abrasifs pour le nettoyage et essuyez immédiatement les restes de substances alcalines ou acides (jus de citron, vinaigre) après le nettoyage.
  • Seite 47 Comment installer et démonter les filtres à graisse Retirez les filtres à graisse en appuyant sur le bouton de la poignée du filtre. Pour réinstaller les filtres, suivez les étapes ci-dessous : Inclinez le filtre et insérez-le dans les fentes à l‘arrière de la hotte. Appuyez sur le bouton sur la poignée du filtre.
  • Seite 48 Remplacement de la lampe Retirez le filtre à graisse. Retirez le couvercle à l‘aide d‘un tournevis (Figure 1). Tirez la lampe à la main et retirez la pince pour remplacer la lampe (Figure 2). Pour réinstaller la lampe, procédez dans l‘ordre inverse. Puissance Dimensions: ILCOS D...
  • Seite 49: Résolution Des Problèmes

    RÉSOLUTION DES PROBLÈMES Problème Cause possible Solution La lumière est allumée La bouche d’aération est Éliminer la source du mais le moteur ne bloquée. blocage. fonctionne pas. Le condensateur est cassé. Faire remplacer le condensateur. Le moteur est cassé. Faire remplacer le moteur. Le moteur dégage une Faire remplacer le moteur.
  • Seite 50: Informations Sur Le Recyclage

    INFORMATIONS SUR LE RECYCLAGE Vous trouverez sur le produit l’image ci-contre (une poubelle sur roues, barrée d‘une croix), ce qui indique que le produit se trouve soumis à la directive européenne 2012/19/ UE. Renseignez-vous sur les dispositions en vigueur dans votre région concernant la collecte séparée des appareils électriques et électroniques.
  • Seite 51 Gentile cliente, La ringraziamo per aver acquistato il dispositivo. La preghiamo di leggere attentamente le seguenti istruzioni per l’uso e di seguirle per evitare possibili danni. Non ci assumiamo alcuna responsabilità per danni scaturiti da una mancata osservazione delle avvertenze di sicurezza e da un uso improprio del dispositivo.
  • Seite 52 AVVERTENZE DI SICUREZZA • Leggere attentamente tutte le istruzioni prima dell´uso e conservare il manuale per consultazioni future. • Il montaggio può essere eseguito solo da un tecnico qualificato. Prima di utilizzare la cappa aspirante, accertarsi che la tensione (V) e la frequenza (Hz) indicate corrispondano alla tensione (V) e alla frequenza (Hz) domestiche.
  • Seite 53 Note importanti circa la modalità di estrazione AVVERTENZA Pericolo di morte, pericolo di intossicazione da gas di scarico! Non azionare l´apparecchio con funzione di scarico mentre è attivo un impianto di riscaldamento che utilizza l´aria ambiente, se l´areazione non è suffi ciente. Gli impianti di riscaldamento che sfruttano l´aria ambiente (ad es.
  • Seite 54 INSTALLAZIONE Preparazione Se si possiede uno scarico verso l‘esterno, è possibile installare la cappa come mostrato nell‘immagine a destra. Il condotto di scarico deve avere un diametro minimo di 150 mm ed essere composto da smalto, alluminio, da un tubo flessibile, resistente al calore. •...
  • Seite 55 Metodo di installazione A Realizzare nella parete 4 fori di 8 mm di diametro in una posizione adeguata all’installazione della cappa. Utilizzare la distanza dei fori sul retro della cappa come riferimento. Inserire i tasselli nei fori. Inserire le viti nei tasselli in alto e stringerle fino a poter giusto agganciare la cappa.
  • Seite 56 Metodo di installazione B Realizzare 4 fori di 9 mm di diametro sul fondo del mobile pensile. Assicurarsi di rispettare la distanza tra il retro della cappa e la parete. Fissare l’uscita dell’aria della cappa e montare poi la cappa al fondo del mobile, stringendo le 4 viti in dotazione con rondelle e dadi.
  • Seite 57 Impostare la ventilazione • Ventilazione con scarico dell’aria: ruotare la manopola su funzione di scarico (immagine A). Installare il tubo di scarico e accendere la cappa. Lo scarico viene convogliato all’esterno. • Ventilazione con ricircolo: ruotare la manopola su funzione di ricircolo (immagine B).
  • Seite 58 PULIZIA E MANUTENZIONE Spegnere la cappa e staccare la spina dalla presa elettrica prima di pulizia o manutenzione. Le superfici dell’alloggiamento possono graffiarsi e macchiarsi. Rispettare le avvertenze relative alla pulizia per garantire i migliori risultati possibili senza causare danni. Non utilizzare prodotti abrasivi e rimuovere immediatamente residui di sostanze alcaline o acide (come succo di limone, aceto, ecc.) dalle superfici.
  • Seite 59 Come togliere e installare i filtri antigrasso Togliere i filtri antigrasso premendo il tasto sull’impugnatura e tirandoli fuori. Per rimontare il filtro, seguire questi passaggi: 1. Inclinare il filtro e inserirlo nella fessura sul retro della cappa. 2. Premere il tasto sull’impugnatura del filtro. 3.
  • Seite 60 Cambiare la lampadina 1. Togliere il filtro antigrasso. 2. Togliere la copertura con un cacciavite (immagine 1). 3. Togliere la lampadina con la mano e rimuovere la clip metallica per sostituire la lampadina (immagine 2). 4. Per rimontare la lampada, procedere al contrario. Potenza Dimensioni: ILCOS D...
  • Seite 61 RISOLUZIONE DEI PROBLEMI Problema Causa possibile Soluzione La luce è accesa ma il L´areazione è bloccata. Rimuovere l´ostruzione. motore non funziona. Il condensatore è guasto. Sostituire il condensatore. Il motore è guasto. Sostituire il motore. Il motore emette un odore Sostituire il motore.
  • Seite 62 SMALTIMENTO Se sul prodotto è presente la figura a sinistra (il cassonetto mobile sbarrato), si applica la direttiva europea 2012/19/ UE. Questi prodotti non possono essere smaltiti con i rifiuti normali. Informarsi sulle disposizioni vigenti sulla raccolta separata di dispositivi elettrici ed elettronici. Non smaltire i vecchi dispositivi con i rifiuti domestici.

Diese Anleitung auch für:

10035340

Inhaltsverzeichnis