Herunterladen Inhalt Inhalt Diese Seite drucken
Tekno Point CONSOLLE Serie Benutzer- Und Installationsanleitung

Tekno Point CONSOLLE Serie Benutzer- Und Installationsanleitung

Bodenkonsole klimaanlage
Inhaltsverzeichnis

Werbung

Verfügbare Sprachen

Verfügbare Sprachen

MANUALE DI USO E INSTALLAZIONE
USER AND INSTALLATION MANUAL
MANUEL D'UTILISATION ET
INSTALLATION
BENUTZER- UND
INSTALLATIONSANLEITUNG
Condizionatore consolle a pavimento
Floor standing console air conditioner
Climatiseur console de plancher
Bodenkonsole Klimaanlage
CONSOLLE
CNS-09
CNS-12

Werbung

Inhaltsverzeichnis
loading

Inhaltszusammenfassung für Tekno Point CONSOLLE Serie

  • Seite 1 MANUALE DI USO E INSTALLAZIONE USER AND INSTALLATION MANUAL MANUEL D’UTILISATION ET INSTALLATION BENUTZER- UND INSTALLATIONSANLEITUNG Condizionatore consolle a pavimento Floor standing console air conditioner Climatiseur console de plancher Bodenkonsole Klimaanlage CONSOLLE CNS-09 CNS-12...
  • Seite 2 Is in compliance with the follow ECC directives, latest modification included, and the relevant nationale granting regulations in force: 2004/108/CE 2006/95/CE 2003/108/CE 2011/65/CE 2012/2016/CE TEKNO POINT ITALIA S.R.L. L’amministratore Via dell’Artigianato, 5 | 30020 Marcon VE - IT Bolgan Rocco Tel. 041 5020421 | Fax 041 5029514 commerciale@teknopoint.com www.teknopoint.com | www.climainvisibili.it...
  • Seite 3 ITALIANO...
  • Seite 4: Inhaltsverzeichnis

    Indice Avvisi per l’utilizzo Precauzioni......................1 Nome dei componenti..................5 Guida operativa Guida operativa....................6 Telecomando ....................... 7 Pulsanti sul telecomando.................. 8 Manutenzione Pulizia e Manutenzione ..................14 Malfunzionamenti Analisi dei malfunzionamenti................16 Installazione Disegno di installazione................... 19 Preparazione all’installazione ................. 19 Installazione dell’unità...
  • Seite 5: Precauzioni

    Precauzioni ATTENZIONE Funzionamento e manutenzione Questo apparecchio può essere utilizzato da bambini di età pari o superiore a 8 anni e persone con ridotte capacità fisiche, sensoriali o mentali o mancanza di esperienza e conoscenza solo se supervisionati o istruiti sull'uso dell'apparecchio in modo sicuro e comprendono i pericoli coinvolti.
  • Seite 6 Precauzioni ATTENZIONE Non bloccare l'uscita dell'aria o l'ingresso dell'aria. Potrebbe causare un malfunzionamento. Non versare acqua sul telecomando, altrimenti il telecomando potrebbe rompersi. Quando si verifica un fenomeno di quelli sotto, disattivare immediatamente il condizionatore d'aria e scollegare l'alimentazione, quindi contattare il rivenditore o professionisti qualificati per l'assistenza.
  • Seite 7 Precauzioni ATTENZIONE Installato un dispositivo di sicurezza adeguato, si prega di notare la seguente tabella. Con il condizionatore dell'aria dovrebbe essere incluso una fibbia magnetica e una funzione fibbia di riscaldamento, queste possono proteggere il cortocircuito e sovraccarico. Non utilizzare un cavo di alimentazione non qualificato. Assicurarsi che l'alimentazione corrisponda al requisito del condizionatore d'aria.
  • Seite 8 Precauzioni ATTENZIONE L'apparecchio deve essere posizionato in modo tale che la spina sia accessibile. Tutti i fili dell'unità interna e dell'unità esterna devono essere collegati da un professionista. Se la lunghezza del cavo di collegamento dell'alimentazione è insufficiente, contattare il fornitore per uno nuovo. Evitare di estendere il cavo da soli.
  • Seite 9: Unità Interna

    Componenti Unità interna Panello Aria in uscita Feritoia orizzontale Filtro Presa d’aria Cavo di alimentazione Aria in uscita Tubo a parete Fasciatura Telecomando Display Temp. display Finestra di ricezione Power display ON/OFF Modalità Modalità raffreddamento riscaldamento Nota: NOTA: Quando si preme il tasto POWER entro 1 Il prodotto reale può...
  • Seite 10: Installazione Delle Batterie

    Guida operativa Installazione delle batterie 1.Premere sul retro del telecomando il lato indicato con " ", come mostrato nella figura, quindi spingere il coperchio del vano batteria lungo la direzione della freccia. 2. Installare due batterie da 7 # (AAA 1.5V) e assicurarsi che la posizione di "+" e "-" siano corrette.
  • Seite 11: Telecomando

    Telecomando Imposta la velocità ventola I feel ● Wi-Fi Modalità silenziosa Modalità turbo Modalità Clean Modalità Automatica ● Temp. selezionata Modalità raffreddamento ● Health function modalità dry ● ECO mode modalità notte Modalità ventilatore ● Modalità riscaldamento ● Sicurezza bambini Oscilazione destra-sinistra Livello luminosità...
  • Seite 12: Pulsanti Sul Telecomando

    Pulsanti telecomando Dopo aver collegato l'alimentazione, il condizionatore emetterà un suono. L'indicatore di alimentazione è acceso. Successivamente, è possibile accendere il condizionatore d'aria utilizzando il telecomando. Sotto stato ON, premendo il tasto sul telecomando, il display mostrerà le corrispondenti icone di funzione impostate.
  • Seite 13 Pulsanti telecomando Pulsante FAN È possibile regolare la velocià in modo che sia: auto (AUTO), fan1( ), fan2 ( fan3 ( ) , fan4 ( ), fan5 ( ), stepless speed. AUTO fan1 fan2 fan3 flusso continuo fan5 fan4 Nota: ●...
  • Seite 14 Pulsanti telecomando ● In condizioni di oscillazione statica, premendo questo pulsante, l'angolo di oscillazione destra-sinistra cambia come di seguito: No display ● Quando si seleziona " " con il telecomando si attiva l’oscillazione automatica. Il flap oscillerà automaticamente a sinistra e a destra con angolo massimo. ●...
  • Seite 15 Pulsanti telecomando Pulsante I FEEL Premere questo tasto per avviare la funzione I FEEL e " " verrà visualizzato sul telecomando. Dopo aver impostato questa funzione, il telecomando invierà la temperatura ambiente rilevata all'unità interna e l'unità regolerà automaticamente la temperatura interna in base a quella rilevata.
  • Seite 16 Pulsanti telecomando " " sul telecomando lampeggeranno. Premere il pulsante "+" o "-" entro 5 secondi per impostare l'ora. Tenere premuto il tasto "+" o "-", il tempo cambierà rapidamente fino al raggiungimento del tempo richiesto. Premere "TIMER ON" per confermare. La parola "ON" smetterà...
  • Seite 17: Pulizia E Manutenzione

    Pulizia e manutenzione Pulsante Wi-Fi Premere questo pulsante per accendere o spegnere la funzione SMART, per maggiori dettagli, vedere la prossima pagina per la Guida dell'utente di Smart APP. Introduzione alla funzione per pulsanti combinati Funzione blocco per I bambini Premere contemporaneamente "+"...
  • Seite 18: Pulizia Dei Filtri

    Pulizia e manutenzione ATTENZIONE ■ Spegnere il condizionatore d'aria e scollegare l'alimentazione prima di pulirlo per evitare scosse elettriche. ■ Non lavare il condizionatore d'aria con acqua per evitare scosse elettriche. ■ Non utilizzare liquidi volatili per pulire il condizionatore d'aria. Pulire la superficie dell'unità...
  • Seite 19: Informazioni Per Lo Smaltimento

    Pulizia e manutenzione 4. Installazione del filtro Installare il filtro e quindi chiudere saldamente il coperchio del pannello. Filtro NOTA: ● Il filtro dovrebbe essere pulito ogni tre mesi. Se c'è molta polvere nell'ambiente operativo, la frequenza pulita può essere aumentata. ●...
  • Seite 20 Analisi di malfunzionamento Analisi generale dei fenomeni Si prega di controllare sotto gli articoli prima di chiedere la manutenzione. Se il malfunzionamento non può ancora essere eliminato, contattare il rivenditore locale o i professionisti qualificati Fenomeno Articoli da controllare Soluzioni Controllare se è...
  • Seite 21: Analisi Dei Malfunzionamenti

    Analisi di malfunzionamento Fenomeno Articoli da controllare Soluzione Se l’aria interna viene raffreddata Viene emessa rapidamente, dopo un po', la nebbia dalla presa Controllare se la temperatura temperatura interna e l'umidità d'aria dell'unità interna e l'umidità sono elevate diminuiranno e la nebbia sparirà. interna.
  • Seite 22: Codici Di Errore

    Analisi di malfunzionamento Codici di errore Quando lo stato del condizionatore d'aria è anormale, l'indicatore della temperatura sull'unità interna lampeggia per indicare il corrispondente codice di errore. Fare riferimento all'elenco seguente per l'identificazione del codice di errore. Si prega di fare riferimento all'elenco dei codici di errore nel manuale in tempo reale per ulteriori informazioni.
  • Seite 23: Installazione

    Installazione Staffa Incastro Installazione Utensili 1 Metro 2 Cacciavite 3 Trapano a percussione 4 Avvitatore 5 Espansore di tubi 6 Chiave 7 Chiave inglese 8 Tagliatubi 9 Rilevatore di perdite 10 Pompa a vuoto 11 Pressostato 12 Metro 14 Nastro 13 Chiave esagonale Selezionare la posizione Requisiti di base...
  • Seite 24 Installazione Selezionare una posizione che sia utile per il collegamento dell'unità esterna e vicino alla presa di corrente. 4. Seleziona un luogo fuori dalla portata dei bambini. 5. La posizione dovrebbe essere in grado di sostenere il peso dell'unità interna e non aumentare il rumore e le vibrazioni.
  • Seite 25: Installazione Dell'unità Interna

    Installazione dell’unità interna Passaggio 1: scelta del percorso di installazione Raccomandare il percorso di installazione al cliente. Aggancio Passaggio 2: installazione di un gancio 1. Fissare una staffa di installazione orizzontalmente a una parete. 2. Apporre un segno sulla parete in base alla posizione del foro indicata sul cartone di installazione.
  • Seite 26 Installazione dell’unità interna Procedere come segue quando si tagliano le parti inferiori: 1. Aprire il coperchio del pannello e rimuovere le 4 viti sul pannello. Rimuovere il pannello nella direzione indicata dalla freccia. Panello Panello Vite Panello superiore Panello lato sistro 2.
  • Seite 27 Installazione dell’unità interna Passaggio 5: collegare il tubo dell'unità interna 1. Aggiungere il giunto del tubo alla corrispondente bocchetta di vetro. 2. Stringere il dado con la mano. pipe 3. Regolare la forza della coppia facendo riferimento pipe joint union nut al seguente foglio.
  • Seite 28: Installazione Dell'unità Esterna

    Installazione dell’unità esterna fermaglio Vite Ś ŝ ś fermaglio Ŝ ş Ş Fermaglio 4. Riposizionare il coperchio del cablaggio e serrare la vite. Giallo- verde 5. Riposizionare il coperchio e il pannello. Unità estera connessione Nota: ● Tutti i fili dell'unità interna e dell'unità esterna devono essere collegati da un professionista. ●...
  • Seite 29: Controllo Dopo L'installazione

    Controllo dopo l'installazione Verificare in base ai seguenti requisiti dopo aver terminato l'installazione. Articoli da controllare Possibile malfunzionamento L'unità potrebbe cadere, scuotere o emettere rumore Controllare se l'unità è stata installata saldamente Potrebbe causare insufficiente capacità di Eseguire il test di tenuta del raffreddamento (riscaldamento).
  • Seite 30 ENGLISH...
  • Seite 31 Content Operation Notices Precautions ......................28 Parts name ......................30 Operation Guide Operation guide....................31 Remote controller ....................33 Buttons on remote controller................33 Maintenance Clean and maintenance ................... 36 Malfunction Malfunction analysis ..................40 Installation Installation drawing ..................42 Installation prepare ..................
  • Seite 32: Precautions

    Precautions WARNING Operation and Maintenance This appliance can be used by children aged of 8 years and above and persons with reduced physical, sensory or mental capabilities or lack of experience and knowledge if they have been given supervision or instruction concerning use of the appliance in a safe way and understand the hazards involved.
  • Seite 33 Precautions WARNING Do not block air outlet or air inlet. It may cause malfunction. Do not spill water on the remote controller, otherwise the remote controller may be broken. When below phenomenon occurs, please turn off air conditioner and disconnect power immediately, and then contact the dealer or qualified professionals for service.
  • Seite 34 Precautions WARNING Including an circuit break with suitable capacity, please note the following table.Air switch should be included magnet buckle and heating buckle function, it can protect the circuit-short and overload. Don't use unqualified power cord. Make sure the power supply matches with the requirement of air conditioner.Unstable power supply or incorrect wiring or malfunction.
  • Seite 35 Precautions WARNING The appliance must be positioned so that the plug is accessible. All wires of indoor unit and outdoor unit should be connected by a professional. If the length of power connection wire is insufficient, please contact the supplier for a new one. Avoid extending the wire by yourself.
  • Seite 36: Parts Name

    Parts name Indoor unit Panel Air outlet Horizontal louver Filter Air inlet Power cord Air outlet Wall tube Bandage Belt Remote controller Display Temp. display Receiving window Power display ON/OFF Cooling mode Heating mode Note: When you press the POWER key within 1 minute after startup, the buzzer sounds, and you can choose to power on only the indoor unit, the outdoor unit, or both of them.
  • Seite 37: Operation Guide

    Operation guide Installation batteries 1. Press the back side of remote controller marked with " ", as shown in the fig, and then push out the cover of battery box along the arrow direction. 2. Installation two 7# (AAA 1.5V) dry batteries, and make sure the position of "+" polar and "-" polar are correct.
  • Seite 38: Remote Controller

    Remote controller Set fan speed I feel Wi-Fi signal ● Turbo mode Quiet mode Auto mode Clean mode ● Dual-8 nixietube Cooling mode Health function ● Dry mode ECO mode ● Fan mode Sleep mode ● Heating mode Child lock ●...
  • Seite 39: Buttons On Remote Controller

    Buttons on remote controller After connecting the power, the air conditioner will make a sound. Power indicator is ON. After that, you can operate the air conditioner by using remote controller. Under on status, pressing the button on the remote controller, the display will show the corresponding set function icons.
  • Seite 40 Buttons on remote controller FAN button Pressing this button can set fan speed circularly as: auto (AUTO), fan1( ), fan2 ( fan3 ( ) , fan4 ( ), fan5 ( ), stepless speed. AUTO fan1 fan2 fan3 stepless speed fan5 fan4 Note: ●...
  • Seite 41: Turbo Button

    Buttons on remote controller ● In static swing condition, pressing this button, the swing angle of left&right swing louver changes as below: No display ● When selecting " " with remote controller, it’s auto swing. left&right swing louver of air conditioner will swing left&right automatically at the maximum angle.
  • Seite 42: Clock Button

    Buttons on remote controller I FEEL button Press this button to start I FEEL function and " " will be displayed on the remote controller. After this function is set, the remote controller will send the detected ambient temperature to the indoor unit and the unit will automatically adjust the indoor temperature according to the detected temperature.
  • Seite 43: Light Button

    Buttons on remote controller hour. Press this button again, "ON" and " " icon on remote controller will blink. Press "+" or "-" button within 5s to set the time. Press this button another time, "ON" and " " icon on remote controller will blink. Press "+" or "-" button within 5s to set the time. Hold "+" or "-"...
  • Seite 44 Buttons on remote controller button Press this button to turn on or turn off the SMART function, for more details, please see next page for Smart APP User Guide. Function introduction for combination buttons Child lock function Press "+" and "-" simultaneously to turn on or turn off child lock function. When child lock function is on, "...
  • Seite 45: Clean And Maintenance

    Clean and maintenance WARNING ■ Turn off the air conditioner and disconnect the power before cleaning the air conditioner to avoid electric shock. ■ Do not wash the air conditioner with water to avoid electric shock. ■ Do not use volatile liquid to clean the air conditioner. Clean surface of indoor unit When the surface of indoor unit is dirty, it is recommended to use a soft dry cloth or wet...
  • Seite 46 Clean and maintenance 4.Installation filter Installtion the filter and then close the panel cover tightly. Filter NOTE: ● The filter should be cleaned every three months. If there is much dust in the operation environment, clean frequency can be increased. ●...
  • Seite 47: Malfunction Analysis

    Malfunction analysis General phenomenon analysis Please check below items before asking for maintenance. If the malfunction still can't be eliminated,please contact local dealer or qualified professionals. Phenomenon Check items Solution Whether it's interfered severely Pull out the plug. Reinsert the plug (such as static electricity, stable after about 3min, and then turn on voltage)?
  • Seite 48 Malfunction analysis Phenomenon Check items Solution Because indoor air is cooled rapidly. Mist is emitted Indoor temperature and humidity After a while, indoor temperature and from indoor unit’s is high? humidity will be decrease and mist air outlet. will disappear. Temperature can’t be adjusted under Unit is operating under auto auto mode.
  • Seite 49: Error Code

    Malfunction analysis Error Code When air conditioner status is abnormal, temperature indicator on indoor unit will blink to dispiay corresponding error code. Please refer to below list for identification of error code. Below listed error codes are only part error codes. Please refero to error code list in serive manual for more information.
  • Seite 50: Installation Drawing

    Installation drawing Wall mounted Embedded Installation prepare Tools 1 Level meter 2 Screw driver 3 Impact drill 4 Drill head 5 Pipe expander 6 Torque wrench 7 Open-end wrench 8 Pipe cutter 9 Leakage detector 10 Vacuum pump 11 Pressure meter 12 Universal meter 13 Inner hexagon spanner 14 Measuring tape...
  • Seite 51: Installation Prepare

    Installation prepare 3. Select a location which is convenient to connect the outdoor unit and near the power socket. 4. Select a location which is out of reach for children. 5. The location should be ableto withstand the weight of indoor unit and won't increase noise and vibration.
  • Seite 52: Installation Of Indoor Unit

    Installation of indoor unit Step 1: Choosing installation location Recommend the installation location to the client and then confirm it with the client. Step 2: Installing a hook Hooking 1. Attach an installation cardboard horizontally to a wall. 2. Make a mark on the wall according to the hole location indicated on the installation cardboard.
  • Seite 53 Installation of indoor unit Proceed as follows when cutting off the lower parts: 1.Open the panel cover and Panel cover remove the 4 screws on the panel. Remove the panel in the direction as indicated by the arrow. Panel Screw Upper panel Left side panel 2.
  • Seite 54 Installation of indoor unit Step 5: Connect the pipe of indoor unit 1. Aim the pipe joint at the corresponding bellmouth. 2. Pretightening the union nut with hand. 3. Adjust the torque force by referring to the following pipe pipe joint union nut sheet.
  • Seite 55 Installation of indoor unit Clasp Screw Clasp Clasp 4. Put wiring cover back and then tighten the screw. 5. Put back the cover and panel. yellow- green Outdoor unit connection Note: ● All wires of indoor unit and outdoor unit should be connected by a professional. ●...
  • Seite 56: Check After Installation

    Check after installation Check according to the following requirement after finishing installation. Items to be checked Possible malfunction Has the unit been installed firmly? The unit may drop, shake or emit noise. Have you done the refrigerant leakage It may cause in sufficient cooling (heating) test? capacity.
  • Seite 57 FRANÇAIS...
  • Seite 58 INDEX Avis d'utilisation Précautions......................54 Nom des composants..................55 Guide d'utilisation Guide d'utilisation....................57 Télécommande ..................... 58 Boutons de la télécommande ................59 Entretien Nettoyage et entretien ..................62 Dysfonctionnements Analyse des dysfonctionnements..............65 Pose Dessin d'installation……................... 66 Préparation pour l'installation................68 Installation de l'unité...
  • Seite 59: Précautions

    Précautions MISE EN GARDE Fonctionnement et maintenance Cet appareil peut être utilisé par des enfants âgés de 8 ans ou plus et des personnes ayant des capacités physiques, sensorielles ou mentales réduites ou un manque d'expérience et de connaissances que si elles sont supervisées ou instruites de l'utilisation de l'appareil en toute sécurité...
  • Seite 60 Précautions MISE EN GARDE Ne bloquez pas la sortie ou l'entrée d'air. Cela peut provoquer un dysfonctionnement. Ne versez pas d’eau sur la télécommande, sinon la télécommande pourrait se casser. Lorsque le phénomène ci-dessous se produit, éteignez immédiatement le climatiseur et débranchez le cordon d'alimentation, puis contactez votre revendeur ou des professionnels qualifiés pour obtenir de l'aide.
  • Seite 61 Précautions MISE EN GARDE Installé un dispositif de sécurité approprié, veuillez noter le tableau suivant. Avec le climatiseur doit être inclus une boucle magnétique et une fonction de boucle de chauffage, ceux-ci peuvent protéger le court-circuit et la surcharge. Ne pas utiliser un cordon d'alimentation non qualifié. Assurez-vous que l’alimentation correspond aux exigences du climatiseur.
  • Seite 62 Précautions MISE EN GARDE L'appareil doit être placé de manière à ce que la fiche soit accessible. Tous les fils de l’unité intérieure et de l’unité extérieure doivent être connectés par un professionnel. Si la longueur du câble de raccordement d'alimentation est insuffisante, contactez le fournisseur pour en obtenir un nouveau.
  • Seite 63: Unité Interne

    Parts name Unité interne Panneau Air sortant Fente horizontale Filtre Douille Cordon d'alimentation Air sortant Tube mural Bandage Télécommande Afficher Temp. display Reception window Power display ON/OFF Mode Mode chauffage refroidissement Note: Lorsque vous appuyez sur le bouton POWER dans la minute qui suit le démarrage, un bourdonnement est activé...
  • Seite 64: Installer Les Piles

    Guide d'utilisation Installer les piles Appuyez sur le côté indiqué par " " à l'arrière de la télécommande, comme indiqué sur la figure, puis poussez le couvercle du compartiment à piles dans le sens de la flèche. 2. Installez deux piles 7 # (AAA 1.5V) et assurez-vous que les positions "+" et "-" sont correctes.
  • Seite 65: Remote Control

    Remote control Réglez la vitesse du ventilateur I feel Wi-Fi ● Mode silencieux Mode turbo Mode Propre Mode automatique ● Temp sélectionné Mode de refroidissement ● Fonction de santé Mode écologique Mode sec ● Mode nuit Mode ventilateur ● Mode de chauffage ●...
  • Seite 66: Boutons De La Télécommande

    Boutons de la télécommande Après avoir branché l’alimentation, le climatiseur émet un son. L'indicatore di alimentazione è acceso. Successivamente, è possibile accendere il condizionatore d'aria utilizzando il telecomando. Sotto stato ON, premendo il tasto sul telecomando, il display mostrerà le corrispondenti icone di funzione impostate.
  • Seite 67 Boutons de la télécommande Bouton FAN Vous pouvez ajuster la vitesse pour qu'elle soit: auto (AUTO), fan1( ), fan2 ( fan3 ( ) , fan4 ( ), fan5 ( ), stepless vitesse. AUTO fan1 fan2 fan3 flux continu fan5 fan4 Note: ●...
  • Seite 68 Boutons de la télécommande ● En conditions d'oscillation statique, en appuyant sur ce bouton, l'angle d'oscillation droite- gauche change comme suit: No display ● Lorsque " " est sélectionné avec la télécommande, le balayage automatique est activé. Le volet pivote automatiquement à gauche et à droite avec un angle maximum. ●...
  • Seite 69 Boutons de la télécommande Bouton I FEEL Appuyez sur cette touche pour lancer la fonction I FEEL et " " sera affiché sur la télécommande. Après avoir réglé cette fonction, la télécommande enverra la température ambiante détectée à l'unité intérieure et celle-ci ajustera automatiquement la température interne en fonction de celle détectée.
  • Seite 70 Boutons de la télécommande "ON" et " " de la télécommande clignoteront. Appuyez sur le bouton "+" ou "-" dans les 5 secondes pour régler l'heure. Appuyez de nouveau sur cette touche, les icônes "ON" et " " de la télécommande clignoteront.
  • Seite 71 Boutons de la télécommande Bouton Wi-Fi Appuyez sur ce bouton pour activer ou désactiver la fonction SMART. Pour plus de détails, voir la page suivante du Guide de l'utilisateur Smart APP. Introduction à la fonction des boutons combinés Fonction de verrouillage enfant Appuyez simultanément sur "+"...
  • Seite 72: Nettoyage Du Filtre

    Propreté et entretien ATTENTION ■ Éteignez le climatiseur et débranchez le cordon d'alimentation avant le nettoyage pour éviter les chocs électriques. ■ Ne lavez pas le climatiseur à l'eau pour éviter tout risque d'électrocution. ■ N'utilisez pas de liquides volatiles pour nettoyer le climatiseur. Nettoyez la surface de l'unité...
  • Seite 73 Propreté et entretien 4. Installation du filtre Installez le filtre puis fermez le couvercle du panneau fermement. Filtre NOTE: ● Le filtre doit être nettoyé tous les trois mois. S'il y a beaucoup de poussière dans l'environnement d'exploitation, la fréquence de nettoyage peut être augmentée. ●...
  • Seite 74: Dysfonctionnements

    Analyse de dysfonctionnement Analyse générale des phénomènes Veuillez vérifier les éléments ci-dessous avant de demander un entretien. Si le problème ne peut pas encore être résolu, contactez votre revendeur local ou des professionnels qualifiés Phénomène Articles à vérifier Solutions Vérifiez s'il est gravement Retirez la fiche, insérez-la au bout de perturbé...
  • Seite 75 Analyse de dysfonctionnement Phénomène Articles à vérifier Solution Un brouillard est Si l'air intérieur est refroidi rapidement, au bout d'un moment, la température et émis par la prise Vérifiez si la température interne l'humidité internes vont diminuer et le d'air de l'unité et l'humidité...
  • Seite 76: Codes D'erreur

    Analyse de dysfonctionnement Codes d'erreur Lorsque l'état du climatiseur est anormal, le voyant de température de l'unité intérieure clignote pour indiquer le code d'erreur correspondant. Reportez-vous à la liste ci-dessous pour identifier le code d'erreur. Veuillez vous référer à la liste des codes d'erreur dans le manuel en temps réel pour plus d'informations.
  • Seite 77: Pose

    Dessin d'installation POSE Outils 1 métro 2 Cacciavite 3 perceuse à percussion 4 visseuses 5 Expandeur de tuyau 6 clés 9 détecteur de fuite 7 Clé à molette 8 coupeur 10 Pompa a vuoto 11 pressostat 12 métro 14 Nastro 13 Chiave esagonale Sélectionnez l'emplacement Exigences de base...
  • Seite 78 POSE 3. Sélectionnez un emplacement utile pour connecter l'unité extérieure et à proximité de la prise de courant. 4. Choisissez un endroit hors de la portée des enfants. 5. La position doit pouvoir supporter le poids de l'unité intérieure et ne pas augmenter le bruit et les vibrations.
  • Seite 79: Installation De L'unité Intérieure

    Installation de l'unité intérieure Étape 1: choix du chemin d'installation Recommander le chemin d'installation au client. Étape 2: installer un crochet Aggancio 1. Fixez un support d'installation horizontalement sur un mur. 2. Placez une marque sur le mur en fonction de l'emplacement du trou indiqué...
  • Seite 80: Installation De L'unité Extérieure

    Installation de l'unité extérieure Procédez comme suit pour couper les parties inférieures: 1. Ouvrez le couvercle du panneau et retirez les 4 vis du panneau. Retirez le panneau dans la direction indiquée par la flèche. panneau panneau Panneau supérieur Panneau latéral gauche 2.
  • Seite 81 Installation de l'unité intérieure Étape 5: Connectez le tuyau de l'unité intérieure 1. Ajoutez le raccord de tuyau à la buse en verre correspondante. 2. Serrez l'écrou avec votre main. pipe pipe joint union nut 3. Ajustez la force de couple en vous référant à la feuille suivante.
  • Seite 82 Installation de l'unité extérieure Clip Ś ŝ ś clip Ŝ ş Ş Clip 4. Replacez le couvercle de câblage et serrez la vis. jaune- vert 5. Replacez le couvercle et le panneau. Unité de connexion externe Note: ● Tous les fils de l'unité intérieure et de l'unité extérieure doivent être connectés par un professionnel.
  • Seite 83: Vérifier Après L'installation

    Vérifier après l'installation Vérifiez selon les exigences suivantes après avoir terminé l'installation. Articles à vérifier Dysfonctionnement possible Vérifiez si l'unité a été correctement installée L'unité peut tomber, trembler ou émettre du bruit Cela pourrait causer une capacité de Effectuer le test de fuite de réfrigérant refroidissement insuffisante (chauffage).
  • Seite 84 DEUTSCH...
  • Seite 85 Inhalt Hinweise zur Verwendung Vorsichtsmaßnahmen..................81 Name der Komponenten..................85 Betriebsanleitung Betriebsanleitung....................86 Fernsteuerung ....................87 Tasten auf der Fernbedienung................88 Wartung Reinigung und Wartung..................94 Fehlfunktions Störungsanalyse....................96 Installieren Installationszeichnung..................99 Vorbereitung für die Installation..............99 Installation des Innengeräts .................101 Überprüfen Sie nach der Installation ............
  • Seite 86: Vorsichtsmaßnahmen

    Vorsichtsmaßnahmen VORSICHT Betrieb und Wartung Dieses Gerät kann nur von Kindern ab 8 Jahren und Personen mit eingeschränkten körperlichen, sensorischen oder geistigen Fähigkeiten oder mangelnder Erfahrung und Kenntnissen verwendet werden, wenn sie beaufsichtigt oder angewiesen werden, das Gerät sicher zu verwenden und die damit verbundenen Gefahren zu verstehen Kinder dürfen nicht mit dem Gerät spielen.
  • Seite 87: Annektieren

    Vorsichtsmaßnahmen VORSICHT Blockieren Sie nicht den Luftauslass oder den Lufteinlass. Dies kann zu Fehlfunktionen führen. Gießen Sie kein Wasser auf die Fernbedienung, da sonst die Fernbedienung kaputt gehen kann. Wenn ein der folgenden Phänomene auftritt, schalten Sie die Klimaanlage sofort aus und trennen Sie die Stromversorgung. Wenden Sie sich dann an Ihren Händler oder an qualifizierte Fachkräfte.
  • Seite 88 Vorsichtsmaßnahmen VORSICHT Beachten Sie nach der Installation einer geeigneten Sicherheitsvorrichtung die folgende Tabelle. Die Klimaanlage sollte eine Magnetschnalle und eine Heizschnalle enthalten. Diese können Kurzschluss und Überlastung schützen. Verwenden Sie kein unqualifiziertes Netzkabel. Stellen Sie sicher, dass das Netzteil den Anforderungen der Klimaanlage entspricht.
  • Seite 89 Vorsichtsmaßnahmen VORSICHT Das Gerät muss so positioniert werden, dass der Stecker zugänglich ist. Alle Kabel des Innengeräts und des Außengeräts müssen von einem Fachmann angeschlossen werden. Wenn die Länge des Stromanschlusskabels nicht ausreicht, wenden Sie sich an den Lieferanten, um ein neues zu erhalten.
  • Seite 90: Name Der Komponenten

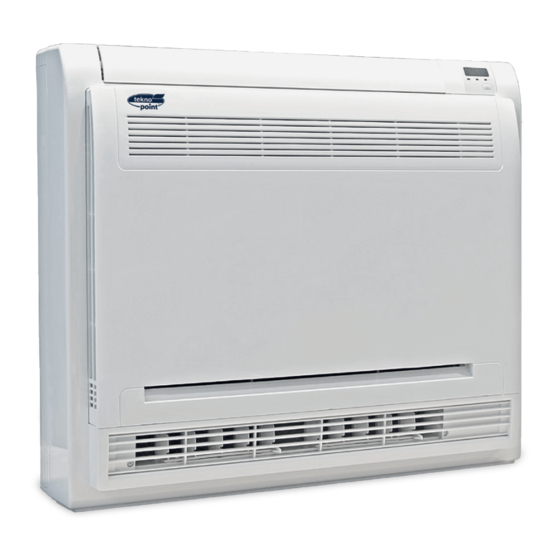
    Name der Komponenten Innengerät Platte Horizontaler Schlitz Luft raus d’aria Filter Lufteinlass Netzkabel Luft raus Wandrohr Verband Fernsteuerung Anzeige Temperatur Empfangsfenster Leistungsanzeige ON/OFF Kühlmodus Heizmodus Hinweis: Wenn Sie die POWER-Taste innerhalb von 1 Minute nach dem Start drücken, wird ein Summton aktiviert und Sie können wählen, ob nur das Innengerät, nur das Außengerät oder beide eingeschaltet werden sollen Hinweis: Das tatsächliche Produkt kann von den obigen Grafiken abweichen.
  • Seite 91: Batterieeinbau

    Bedienungsanleitung Batterieeinbau ", wie in der Abbildung 1. Drücken Sie auf die Seite auf der Rückseite der Fernbedienung " gezeigt, Schieben Sie dann den Batteriefachdeckel in Pfeilrichtung. 2. Legen Sie zwei 7 # (AAA 1,5 V) Batterien ein und stellen Sie sicher, dass die Positionen "+"...
  • Seite 92: Fernbedienung

    Fernbedienung Stellen Sie die Lüftergeschwindigkeit ein Wi-Fi I feel ● Stummschaltung Turbo-Modus Reinigungsmodus Auto-modus ● Ausgewählte Temp Kühlmodus Gesundheitsfunktion ● Luftentfeuchter-Modus ● ECO modus Nachtmodus Lüftermodus ● Heizmodus Schlüsselschloss ● Rechts-Links-Schwingung Helligkeitsstufe Anzeigetemp High-Low-Swing ● pulsante Mode Lüfterknopf High-Low-Swing-Taste - Taste + Taste EIN/AUS-Taste Rechts-Links-Swing-Taste...
  • Seite 93: Einstellknöpfe Für Die Fernbedienung

    Einstellknöpfe für die Fernbedienung Nach dem Anschließen der Stromversorgung gibt die Klimaanlage ein Geräusch von sich. Die Betriebsanzeige leuchtet. Danach können Sie die Klimaanlage mit der Fernbedienung einschalten. Wenn Sie im Status EIN die Taste auf der Fernbedienung drücken, werden auf dem Display die entsprechenden Funktionssymbole angezeigt.
  • Seite 94 Einstellknöpfe für die Fernbedienung FAN-Taste Sie können die Geschwindigkeit so einstellen, dass sie ist: auto (AUTO), fan1( fan2 ( ), fan3 ( ) , fan4 ( ), fan5 ( ), stepless speed. AUTO fan1 fan2 fan3 kontinuierlicher Fluss fan5 fan4 Hinweis: ●...
  • Seite 95 Einstellknöpfe für die Fernbedienung ● Unter statischen Schwungbedingungen ändert das Drücken dieser Taste den Schwenkwinkel von links nach rechts wie folgt: No display ● Wenn mit der Fernbedienung " " ausgewählt wird, wird die automatische Schwingung aktiviert. Die Klappe schwingt automatisch mit maximalem Winkel nach links und rechts. ●...
  • Seite 96 Einstellknöpfe für die Fernbedienung I FEEL Taste Drücken Sie diese Taste, um die I FEEL-Funktion zu starten. " " Wird auf der Fernbedienung angezeigt. Nach dem Einstellen dieser Funktion sendet die Fernbedienung die erkannte Raumtemperatur an das Innengerät und das Gerät passt die Innentemperatur automatisch an die erkannte an.
  • Seite 97 Einstellknöpfe für die Fernbedienung Drücken Sie diese Taste erneut. Die Symbole "ON" und " " auf der Fernbedienung blinken. Drücken Sie innerhalb von 5 Sekunden die Taste "+" oder "-", um die Stunde einzustellen. Halten Sie die Taste "+" oder "-" gedrückt. Die Zeit ändert sich schnell, bis die gewünschte Zeit erreicht ist.
  • Seite 98: Einführung In Die Funktion Für Kombinierte Tasten

    LIGHT Taste Drücken Sie diese Taste, um das Licht für die Anzeige des Innengeräts auszuschalten. Das Symbol " " auf der Fernbedienung verschwindet. Drücken Sie diese Taste erneut, um das Licht für das Innengerät einzuschalten. Das Symbol " " auf der Fernbedienung wird angezeigt.
  • Seite 99: Reinigung Und Wartung

    Reinigung und Wartung VORSICHT ■ Schalten Sie die Klimaanlage aus und trennen Sie die Stromversorgung, bevor Sie sie reinigen, um einen Stromschlag zu vermeiden. ■ Waschen Sie die Klimaanlage nicht mit Wasser, um einen elektrischen Schlag zu vermeiden. ■ Verwenden Sie keine flüchtigen Flüssigkeiten, um die Klimaanlage zu reinigen.
  • Seite 100: Filterinstallation

    Reinigung und Wartung 4. Filterinstallation Installieren Sie den Filter und schließen Sie die Abdeckung sicher. Filter Hinweis: ● Der Filter sollte alle drei Monate gereinigt werden. Wenn sich in der Betriebsumgebung viel Staub befindet, kann die Reinigungsfrequenz erhöht werden. ● Berühren Sie nach dem Entfernen des Filters nicht die Lamellen, um Verletzungen zu vermeiden.
  • Seite 101: Allgemeine Analyse Der Phänomene

    Störungsanalyse Allgemeine Analyse der Phänomene Bitte überprüfen Sie die folgenden Punkte, bevor Sie um Wartung bitten. Wenn die Störung immer noch nicht behoben werden kann, wenden Sie sich an Ihren Händler vor Ort oder an qualifizierte Fachkräfte Zu überprüfende Elemente Phänomen Lösungen Überprüfen Sie, ob es stark...
  • Seite 102: Störungsanalyse

    Störungsanalyse Zu überprüfende Elemente Phänomen Lösungen Nebel wird vom Wenn die Innenluft nach einer Weile Überprüfen Sie, ob die schnell abgekühlt wird, sinken die Lufteinlass des Innentemperatur und Innentemperatur und die Luftfeuchtigkeit Innengeräts und der Nebel verschwindet. Luftfeuchtigkeit hoch sind abgegeben.
  • Seite 103: Fehlercodes

    Störungsanalyse Fehlercodes Wenn der Status der Klimaanlage nicht normal ist, blinkt die Temperaturanzeige am Innengerät, um den entsprechenden Fehlercode anzuzeigen. In der folgenden Liste finden Sie Informationen zur Identifizierung des Fehlercodes. Weitere Informationen finden Sie in der Fehlercodeliste im Echtzeithandbuch. Codes Stück im Irrtum Lösung...
  • Seite 104: Installieren

    Installationszeichnung Klammer Joint Installieren Werkzeuge 1 Meter 2 Schraubendreher 3 Bohrhammer 4 Schraubendreher 5 Rohrexpander 6 Schlüssel 7 Schraubenschlüssel 8 Rohrschneider 9 Lecksucher 10 Vakuumpumpe 11 Druckschalter 12 Meter 14 Farbband 13 Inbusschlüssel Wählen Sie den Ort Grundvoraussetzungen Die Installation des Geräts an folgenden Stellen kann zu Fehlfunktionen führen. Wenn dies unvermeidbar ist, wenden Sie sich an Ihren Händler vor Ort: 1.
  • Seite 105: Sicherheitsvorkehrungen

    Installieren 3. Wählen Sie einen Ort aus, der zum Anschließen des Außengeräts und in der Nähe der Steckdose nützlich ist. 4. Wählen Sie einen Ort außerhalb der Reichweite von Kindern. 5. Der Standort sollte in der Lage sein, das Gewicht des Innengeräts zu tragen und Geräusche und Vibrationen nicht zu erhöhen.
  • Seite 106: Installation Des Innengeräts

    Installation des Innengeräts Schritt 1: Wählen Sie den Installationspfad. Empfehlen Sie dem Kunden den Installationspfad. Schritt 2: Installieren eines Hakens Anspannen 1. Befestigen Sie eine Montagehalterung horizontal an einer Wand. 2. Platzieren Sie eine Markierung an der Wand entsprechend der auf dem Installationskarton angegebenen Lochposition.
  • Seite 107 Installation des Innengeräts Gehen Sie beim Schneiden der unteren Teile wie folgt vor: 1. Öffnen Sie die Bedienfeldabdeckung und entfernen Sie die 4 Schrauben an der Schalttafel. Entfernen Sie die Verkleidung in der durch den Pfeil angegebenen Richtung. Panello Linke Schraube Oberes Feld Linke Seitenwand...
  • Seite 108: Schritt 6: Installieren Sie Den Ablaufschlauch

    Installation des Innengeräts Schritt 5: Schließen Sie den Schlauch des Innengeräts an Überwurfmutter 1. Fügen Sie die Rohrverbindung zur entsprechenden Glasdüse hinzu. Ziehen Sie die Mutter mit Ihrer Hand an. Rohr Stellen Sie die Drehmomentkraft gemäß dem folgenden Rohrverbindung Blatt ein. Setzen Sie den Schraubenschlüssel auf die Rohrverbindung und setzen Sie den Drehmomentschlüssel auf die Überwurfmutter.
  • Seite 109: Schritt 8: Binden Sie Das Rohr

    Installation des Innengeräts Klammer Schraube Ś ŝ Klammer ś Ŝ ş Ş Klammer 4. Bringen Sie die Kabelabdeckung wieder an und ziehen Sie die Schraube fest. Gelb-Grün 5. Bringen Sie die Abdeckung und die Abdeckung wieder an. Hinweis: Anschluss Außengerät ●...
  • Seite 110: Überprüfen Sie Nach Der Installation

    Überprüfen Sie nach der Installation Müssen Sie nach der Installation. Zu überprüfende Elemente Mögliche Fehlfunktion Das Gerät kann herunterfallen, wackeln oder Überprüfen Sie, ob das Gerät sicher installiert wurde Geräusche machen. Dies kann zu einer unzureichenden Führen Sie die Kältemittelleckprüfung Kühlleistung führen.
  • Seite 112 Tekno Point Italia si riserva la facoltà di apportare in qualsiasi momento tutte le modifiche ritenute necessarie per il miglioramento del prodotto. Tekno Point Italia reserves the right to make any changes it deems necessary to improve the product at any time.

Diese Anleitung auch für:

Consolle cns-09Consolle cns-12

Inhaltsverzeichnis