Inhaltsverzeichnis
Werbung
Verfügbare Sprachen
Verfügbare Sprachen
AKKU IP
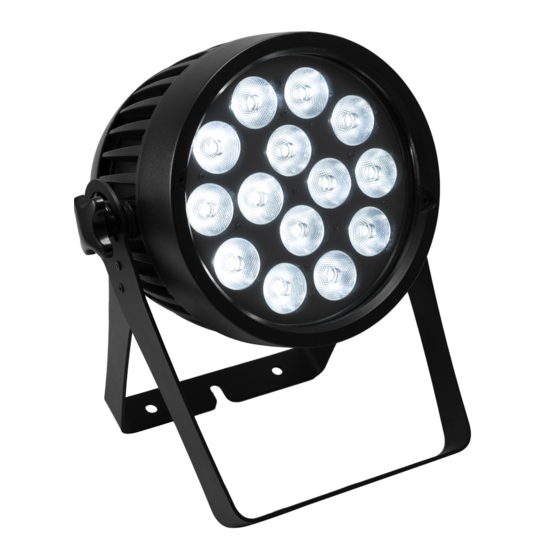
PAR 14
LED Outdoor Spot
Bedienungsanleitung
User Manual
AKKU IP PAR 14 HCL QuickDMX
Leistungsstarker IP65-Akku-Scheinwerfer, RGBWA/UV-LEDs, QuickDMX, Frostfilter und IR-Fernbedienung
Powerful IP65 battery-powered spotlight with RGBW
BATTERY
RGB
WA/
POWERED
DMX
No. 41700800
www.eurolite.de
A/UV
REMOTE
UV
15°/27°/30°/60°
CONTROL
LEDs,
Quick
DMX, frost filter and IR remote control
STAND
MASTER
SLAVE
ALONE
IP65
STROBE
Werbung
Inhaltsverzeichnis

Verwandte Anleitungen für EuroLite AKKU IP PAR 14 HCL QuickDMX


Inhaltszusammenfassung für EuroLite AKKU IP PAR 14 HCL QuickDMX
- Seite 1 AKKU IP PAR 14 LED Outdoor Spot Bedienungsanleitung User Manual AKKU IP PAR 14 HCL QuickDMX Leistungsstarker IP65-Akku-Scheinwerfer, RGBWA/UV-LEDs, QuickDMX, Frostfilter und IR-Fernbedienung Powerful IP65 battery-powered spotlight with RGBW A/UV LEDs, Quick DMX, frost filter and IR remote control STAND...
-
Seite 2: Inhaltsverzeichnis
Inhaltsverzeichnis EINFÜHRUNG ..............................4 Produktmerkmale ............................4 SICHERHEITSHINWEISE ..........................5 GERÄTEBESCHREIBUNG..........................7 INSTALLATION ..............................8 Abstrahlwinkel ..............................8 DMX512-ANSTEUERUNG ..........................9 Via DMX-Kabel ............................... 9 Drahtlos via QuickDMX ..........................10 NETZANSCHLUSS ............................11 Akku aufladen .............................. 11 Ladezustand ..............................11 BEDIENUNG .............................. - Seite 3 Diese Bedienungsanleitung gilt für die Artikelnummer / This user manual is valid for the article number: 41700800 Das neueste Update dieser Bedienungsanleitung finden Sie im Internet unter: You can find the latest update of this user manual in the Internet under: www.eurolite.de 3/40 00128658, Version 1.0...
-
Seite 4: Einführung
• Stufenlose RGBAW/UV-Farbmischung, Farbwechsel, Farbüberblendung, Dimmer und Strobe-Effekt mit variabler Geschwindigkeit • Adressierung und Einstellung über Steuereinheit mit LCD-Anzeige und 4 Bedientasten • Bequeme Fernsteuerung per mitgelieferter IR-Fernbedienung EUROLITE IR-7 • 2, 3, 6-1, 6-2 oder 12 DMX-Kanäle wählbar • Schwenkbarer Montagebügel •... -
Seite 5: Sicherheitshinweise
SICHERHEITSHINWEISE WARNUNG! Lesen Sie aufmerksam die Sicherheitshinweise und benutzen Sie das Produkt nur wie in dieser Anleitung beschrieben, damit es nicht versehentlich zu Verletzungen oder Schäden kommt. • Das Produkt dient zur mobilen Beleuchtung im Innen- und Außenbereich und ist nach IP65 aufgebaut. Es darf im Betrieb im Innen- und Außenbereich montiert und betrieben werden und ist nicht dimmbar. - Seite 6 Warnung vor Verbrennung und Brand • Der zulässige Umgebungstemperaturbereich (Ta) beträgt -5 bis +45 °C. Verwenden Sie das Gerät niemals außerhalb dieses Temperaturbereichs. • Die Gehäusetemperatur (Tc) kann im Betrieb bis zu 50 °C betragen. Vermeiden Sie den Kontakt mit Personen oder Gegenständen.
-
Seite 7: Gerätebeschreibung
GERÄTEBESCHREIBUNG (1) Feststellschraube (8) DMX-Ausgang (2) Befestigung Diffusor-Scheibe (9) Netzschalter (3) Infrarotsensor für die Fernbedienung (10) Netzanschluss (4) 10-W-RGBWA/UV-LEDs (11) Fangseilöse (5) Montage- und Standbügel (12) Netzausgang (6) DMX-Eingang (13) Druckausgleichsstopfen (7) Bedientasten mit LCD-Anzeige 7/40 00128658, Version 1.0... -
Seite 8: Installation
INSTALLATION WARNUNG! Verletzungsgefahr durch Herabfallen Über Kopf installierte Geräte können beim Herabstürzen erhebliche Verletzungen verursachen! Stellen Sie sicher, dass das Gerät sicher installiert ist und nicht herunterfallen kann. Die Montage darf nur durch eine Fachkraft erfolgen, die mit den Gefahren und den einschlägigen Vorschriften hierfür vertraut ist. -
Seite 9: Dmx512-Ansteuerung
DMX512-ANSTEUERUNG Via DMX-Kabel Gerät 1 Gerät 2 Gerät 3 Startadresse 1 Startadresse 13 Startadresse 25 DMX Controller Program Chase32 Step100 Für die Ansteuerung des Geräts per DMX512 ist eine Datenverbindung notwendig. Das Gerät verfügt dazu über 3-polige XLR-Anschlüsse. Verbinden Sie den Ausgang Ihres Controllers mit dem DMX-Eingang DMX IN des Geräts über ein DMX- Kabel. -
Seite 10: Drahtlos Via Quickdmx
Drahtlos via QuickDMX Schließen Sie den QuickDMX-Funksender an das DMX-Steuergerät an. Nehmen Sie den Funksender und den Scheinwerfer in Betrieb. Stellen Sie dann die Geräte auf den gleichen Übertragungskanal ein. Nutzen Sie dazu am Scheinwerfer die Menüoption „SET 2.4G“. Das DMX-Funknetz ist damit aufgebaut und der Scheinwerfer ist mit dem Funksender gekoppelt. -
Seite 11: Netzanschluss
NETZANSCHLUSS Die Stromversorgung des Geräts kann mittels Netzspannung und für den mobilen Einsatz auch über den eingebauten Akku erfolgen. Das Gerät verfügt über ein Schaltnetzteil, das eine Netzspannung zwischen 100 und 240 Volt erlaubt. Schließen Sie das beiliegende Netzkabel an und stecken den Netzstecker in eine geerdete Schutzkontaktsteckdose ein. -
Seite 12: Bedienung
Menüeinstellungen für die jeweilige Betriebsart mit den Bedientasten vor. Auch wenn Sie das Gerät vom Stromnetz trennen, bleiben alle Einstellungen gespeichert. Das Gerät kann entweder im Standalone-Modus über das Bedienfeld und die Fernbedienung EUROLITE IR-7 oder im DMX-gesteuerten Modus über einen handelsüblichen DMX-Controller betrieben werden. -
Seite 13: Standalone-Betrieb
Grün Blau Wireless 2.4G SET 2.4G Übertragungskanal Drahtlos-DMX IR-Fernbedienung an IR-Fernbedienung INFRARED IR-Fernbedienung aus Standalone-Betrieb Farbvoreinstellungen Im Modus STATIC strahlt das Gerät konstant in einer von 27 vorgegebenen Farben. Drücken Sie die Taste MENU so oft, bis das Display die Betriebsart STATIC anzeigt. Bestätigen Sie mit der Taste ENTER. - Seite 14 Farbüberblendung Der Modus FADING aktiviert die Farbüberblendung. Die Überblendgeschwindigkeit ist einstellbar. Drücken Sie die Taste MENU so oft, bis das Display das Menu FADING anzeigt. Bestätigen Sie mit der Taste ENTER. Wählen Sie mit den Tasten UP und DOWN die gewünschte Geschwindigkeit (00-99). Bestätigen Sie mit der Taste ENTER.
-
Seite 15: Fernbedienung Ir-7
Fernbedienung IR-7 Das Gerät muss für die Ansteuerung per Fernbedienung aktiviert werden. Wählen Sie dazu im Menüpunkt INFRARED die Einstellung ON. Halten Sie beim Betätigen einer Taste die Fernbedienung immer in Richtung des Sensors auf der Gerätevorderseite. Zwischen Fernbedienung und Sensor muss Sichtverbindung bestehen. -
Seite 16: Dmx-Gesteuerter Betrieb
DMX-gesteuerter Betrieb Anzahl der DMX-Kanäle und DMX-Startadresse einstellen Für den Betrieb über einen Controller mit DMX512-Protokoll verfügt das Gerät über 12 Steuerkanäle. Es kann aber auch in einen Modus mit 2, 3, 6-1 oder 6-2 Kanälen umgeschaltet werden, wenn andere Funktionen benötigt werden. - Seite 17 3-Kanal-Modus Kanal Wert Funktion 000 – 255 Rot 0-100% 000 – 255 Grün 0-100% 000 – 255 Blau 0-100% 6-1-Kanal-Modus Kanal Wert Funktion 000 – 255 Rot 0-100% 000 – 255 Grün 0-100% 000 – 255 Blau 0-100% 000 – 255 Weiß...
- Seite 18 000 – 255 Geschwindigkeit interne Programme, zunehmend Ablaufgeschwindigkeit 000 – 009 Keine Funktion 010 – 049 Weiß 2700 K Farbtemperatur 050 – 089 Weiß 3200 K 090 – 129 Weiß 4300 K für die Werte 010 – 255 im 6-Kanal Modus 130 –...
-
Seite 19: Reinigung Und Wartung
000 – 009 Keine Funktion 010 – 049 Weiß 2700 K Farbtemperatur 050 – 089 Weiß 3200 K für die Werte 090 – 129 Weiß 4300 K 010 – 255 130 – 169 Weiß 5600 K im 12-Kanal-Modus muss in Kanal 9 + 10 der 170 –... -
Seite 20: Technische Daten
TECHNISCHE DATEN Spannungsversorgung: 100-240 V AC, 50/60 Hz Schutzklasse: Schutzart: IP65 Stromanschluss: Batterie/Akku eingebaut IP T-Con (M) Einbauversion Stromanschlusskabel mit Schutzkontaktstecker (mitgeliefert) Stromausgang: IP T-Con (W) Einbauversion Akkutyp: 1 x Lithium-Ion 22,2 V, 4400 mAh, 97,68 Wh, Akku: Betriebsdauer bis zu 26h je nach verwendetem Programm, Ladedauer 3h LED: 14 x 10 W 6in1 HCL RGBWA/UV (homogene Farbmischung) Farbtemperatur:... -
Seite 21: Zubehör
Zubehör EUROLITE TPC-10 Klammer, silber Best.-Nr. 59006856 EUROLITE Sicherungsseil A 4x1000mm bis 15kg silber Best.-Nr. 58010320 PSSO DMX Kabel IP65 3pol 3m sw Best.-Nr. 3022783C EUROLITE QuickDMX Funksender/Empfänger Best.-Nr. 70064703 EUROLITE QuickDMX Funksender Best.-Nr. 70064700 EUROLITE Diffusorscheiben Set 1 Best.-Nr. 51914179 EUROLITE IR-7 Fernbedienung Best.-Nr. -
Seite 22: Introduction
• Dimmer speed (step response) adjustable • Addressing and setting via control panel with 4 buttons and LCD • Convenient wireless control via included IR remote control EUROLITE IR-7 • 2, 3, 6-1, 6-2, or 121 DMX channels selectable • Swivel mounting brackets •... -
Seite 23: Safety Instructions
SAFETY INSTRUCTIONS WARNING! Please read the safety warnings carefully and only use the product as described in this manual to avoid accidental injury or damage. Intended use • This product is designed to light indoor and outdoor areas and is IP65 rated. It can be mounted and operated in indoor and outdoor areas and is not dimmable. - Seite 24 Warning – risk of burns and fire • The admissible ambient temperature range (Ta) is -5 to +45°C. Do not operate the device outside of this temperature range. • The housing temperature (Tc) can be up to 50°C during use. Avoid contact by persons and materials. •...
-
Seite 25: Description Of The Device
DESCRIPTION OF THE DEVICE (1) Fixation screw (8) DMX output (2) Diffuser disc mounting screws (9) Power on/off (3) Infrared sensor for the remote control (10) Power input (4) 10 W RGBWA/UV LEDs (11) Safety eyelet (5) Mounting and stand bracket (12) Power output (6) DMX input (13) Pressure compensation plug... -
Seite 26: Installation
INSTALLATION WARNING! Risk of injury caused by falling objects Devices in overhead installations may cause severe injuries when crashing down. Make sure that the device is installed securely and cannot fall down. The installation must be carried out by a specialist who is familiar with the hazards and the relevant regulations. The device may be placed on the floor by unfolding the brackets or fastened to a truss or similar rigging structure. -
Seite 27: Dmx512 Control
DMX512 CONTROL Via DMX cable Device 1 Device 2 Device 3 Start Address 1 Start Address 13 Start Address 25 DMX Controller Program Chase32 Step100 A DMX512 data link is required in order to control the device via DMX. The device provides 3-pin XLR connectors for DMX connection. -
Seite 28: Wireless Via Quickdmx
Wireless via QuickDMX Connect the QuickDMX transmitter to the DMX controller. Put the transmitter and the spotlight into operation and set them to the same transmission channel. Use menu option SET 2.4G on the spotlight to do this. Thus, the wireless DMX network is set up and the spotlight is paired to the QuickDMX transmitter. The assignment of the spotlight to the transmitter is kept memorized even after disconnecting the power supply. -
Seite 29: Power Supply
POWER SUPPLY The device can be operated with mains voltage and for mobile use via the internal rechargeable battery. The device uses an auto-range power supply that accepts input voltages between 100 und 240 volts. Connect the device via the mains cable to a grounded mains socket. Thus the unit is switched on. To switch off the unit, disconnect the power plug. -
Seite 30: Operation
All settings remain stored even if the device is disconnected from the mains. The device can be operated in stand-alone mode via the control board and the EUROLITE IR-7 remote control or in DMX-controlled mode via any commercial DMX controller. -
Seite 31: Stand-Alone Mode
Stand-alone mode Preset colors In the STATIC mode the device will constantly emit one of 27 preset colors. Press the MENU button so many times until STATIC is indicated in the display. Confirm with the ENTER button. Use the buttons UP and DOWN to adjust the desired color. Confirm with the ENTER button. Automatic mode In automatic mode, 9 show programs are available that run at an adjustable speed. - Seite 32 Interconnecting several devices (master/slave operation) Several devices may be interconnected (max. 32). Then all slave units can be synchronized and controlled with the master unit without the need for a DMX controller. The devices must be set to the corresponding operating modes.
-
Seite 33: Remote Control Ir-7
Remote control IR-7 The device must be activated for remote control. For this, set menu item INFRARED to ON. When actuating a button, always direct the remote control towards the sensor. There must be no obstacles between remote control and the sensor. Button Function BLACKOUT... -
Seite 34: Dmx Controlled Operation
DMX controlled operation Setting the number of DMX channels and the DMX starting address For operation with a controller with DMX512 protocol, the device is equipped with 12 control channels. However, it can also be switched to a mode with 2, 3, 6-1, or 6-2 channels if different functions are required. Tobe able to operate the device with a DMX controller, the DMX starting address must be set. - Seite 35 6-1-channel mode Channel Value Function 000 – 255 Red 0-100% 000 – 255 Green 0-100% 000 – 255 Blue 0-100% 000 – 255 White 0-100% 000 – 255 Amber 0-100% 000 – 255 UV 0-100% 6-2-channel mode Channel Value Function 000 –...
- Seite 36 12-channel mode Channel Value Function 000 – 255 Total brightness 0-100 % Master dimmer 000 – 009 No function Strobe 010 – 255 Strobe slow > fast 000 – 255 Red 0-100% 000 – 255 Green 0-100% 000 – 255 Blue 0-100% 000 –...
-
Seite 37: Cleaning And Maintenance
CLEANING AND MAINTENANCE The outside of the device should be cleaned periodically to remove contaminants such as dust etc. The lenses, in particular, should be clean to ensure that light will be emitted at maximum brightness. Disconnect the device from power and allow it to cool before cleaning. Clean the surface with a soft lint-free and moistened cloth. -
Seite 38: Technical Specifications
TECHNICAL SPECIFICATIONS Power supply: 100-240 V AC, 50/60 Hz Protection class: IP classification: IP65 Power connection: Battery/battery pack built in IP T-Con (M) mounting version Power supply cord with safety plug (provided) Power output: IP T-Con (F) mounting version Battery pack type: 1 x Lithium ion 22,2 V, 4400 mAh, 97,68 Wh Battery pack: Battery operation up to 26h depending on program used, recharging... -
Seite 39: Accessories
Accessories EUROLITE TPC-10 Coupler, silver No. 59006856 EUROLITE Safety Bond A 4x1000mm up to 15kg silver No. 58010320 PSSO DMX cable IP65 3pin 3m bk No. 3022783C EUROLITE QuickDMX Wireless Transmitter/Receiver No. 70064703 EUROLITE QuickDMX Wireless Transmitter No. 70064700 EUROLITE Diffuser Cover kit 1 No. - Seite 40 Eurolite is a brand of Steinigke Showtechnic GmbH · Andreas-Bauer-Str. 5 · 97297 Waldbüttelbrunn Germany D00128658 Version 1.0 Publ. 08/04/2020...