Klarstein BORNHOLM SMART Bedienungsanleitung
Vorschau ausblenden
Andere Handbücher für BORNHOLM SMART:
- Bedienungsanleitung (28 Seiten) ,
- Bedienungsanleitung (64 Seiten) ,
- Bedienungsanleitung (76 Seiten)
Inhaltsverzeichnis
Werbung
Verfügbare Sprachen
Verfügbare Sprachen
Quicklinks
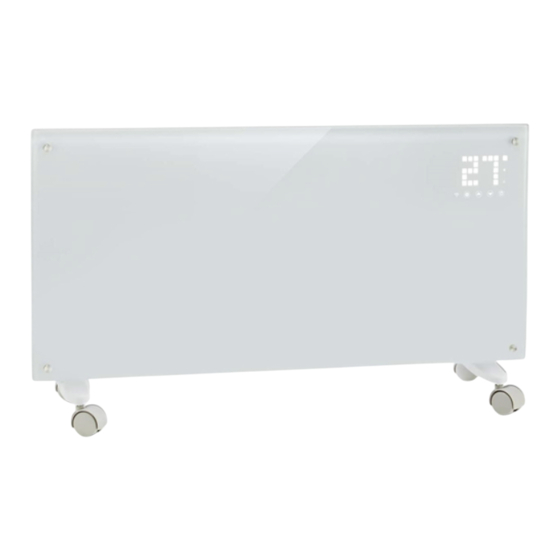
BORNHOLM
SMART
Konvektionsheizung
Convection Heater
Radiador de convección
Radiateur convecteur
Radiatore a convezione
10045427 10045428 10045429 10045430
www.klarstein.com
Hinweis: Dieses Produkt ist nur für gut isolierte Räume
oder für den gelegentlichen Gebrauch geeignet.
Note: This product is only suitable for well insulated
spaces or occasional use.
Advertencia: Este producto está indicado únicamente en
lugares abrigados o para una utilización punctual.
Remarque : Ce produit ne peut être utilisé que dans
des locaux bien isolés ou de manière occasionnelle.
Nota: Questo prodotto è adatto solo per spazi
ben isolati o uso occasionale.
Werbung
Kapitel
Inhaltsverzeichnis

Verwandte Anleitungen für Klarstein BORNHOLM SMART


Inhaltszusammenfassung für Klarstein BORNHOLM SMART
- Seite 1 Radiador de convección Radiateur convecteur Radiatore a convezione 10045427 10045428 10045429 10045430 www.klarstein.com Hinweis: Dieses Produkt ist nur für gut isolierte Räume oder für den gelegentlichen Gebrauch geeignet. Note: This product is only suitable for well insulated spaces or occasional use.
-
Seite 3: Inhaltsverzeichnis
Sehr geehrter Kunde, wir gratulieren Ihnen zum Erwerb Ihres Gerätes. Lesen Sie die folgenden Hinweise sorgfältig durch und befolgen Sie diese, um möglichen Schäden vorzubeugen. Für Schäden, die durch Missachtung der Hinweise und unsachgemäßen Gebrauch entstehen, übernehmen wir keine Haftung. Scannen Sie den folgenden QR-Code, um Zugriff auf die aktuellste Bedienungsanleitung und weitere Informationen rund um das Produkt zu erhalten. -
Seite 4: Produktdatenblatt
PRODUKTDATENBLATT Modellkennung(en) 10045427,10045428 Angabe Symbol Wert Einheit Angabe Einheit Wärmeleistung Nur bei elektrischen Speicher-Einzelraumheizgeräten: Art der Regelung der Wärmezufuhr Nennwärmeleistung Manuelle Regelung der Wärmezufuhr mit nein integriertem Thermostat Mindestwärmeleistung 0,75 Manuelle Regelung der Wärmezufuhr nein (Richtwert) mit Rückmeldung der Raum- und/oder Außentemperatur Maximale kontinuierliche Elektronische Regelung der Wärmezufuhr... -
Seite 5: Produktdatenblatt
PRODUKTDATENBLATT Modellkennung(en) 10045429, 10045430 Angabe Symbol Wert Einheit Angabe Einheit Wärmeleistung Nur bei elektrischen Speicher-Einzelraumheizgeräten: Art der Regelung der Wärmezufuhr Nennwärmeleistung Manuelle Regelung der Wärmezufuhr mit nein integriertem Thermostat Mindestwärmeleistung 1,25 Manuelle Regelung der Wärmezufuhr nein (Richtwert) mit Rückmeldung der Raum- und/oder Außentemperatur Maximale kontinuierliche Elektronische Regelung der Wärmezufuhr... -
Seite 6: Sicherheitshinweise
SICHERHEITSHINWEISE • Benutzen Sie das Gerät erst, wenn es wie in dieser Anleitung beschrieben sicher installiert wurde. • Prüfen Sie vor der Benutzung die angegebene Spannung auf dem Typenschild und schließen Sie das Gerät nur an Steckdosen an, die der Spannung des Geräts entsprechen. -
Seite 7: Installation
• Kinder ab 8 Jahren, psychisch, sensorisch und körperlich eingeschränkte Menschen dürfen das Gerät nur benutzen, wenn sie vorher von einer für sie verantwortlichen Aufsichtsperson ausführlich mit den Funktionen und den Sicherheitsvorkehrungen vertraut gemacht wurden und die damit verbundenen Risiken verstehen. •... - Seite 8 Wandinstallation 4-Haken-Typ-Halterung: Nehmen Sie 4 Halterungen, 6 Expansionsschrauben und 6 Schrauben aus dem Karton und befestigen Sie 2 Halterungen an der Wand entsprechend den angegebenen Abständen zwischen den Löchern der Halterung (siehe Bild unten). Gesamtbild Einheit : mm Befestigungslöcher für 1500 W Befestigungslöcher für 2500 W...
- Seite 9 Befestigen Sie 2 Halterungen an der Unterseite des Geräts (siehe Bild unten). Halten Sie das Gerät an den Seiten fest, achten Sie auf die Position der Bohrungen auf der Geräterückseite und setzen Sie das Gerät auf die Wandhalterungen. Damit ist die Wandinstallation abgeschlossen (siehe Bild unten).
-
Seite 10: Bedienfeld
BEDIENFELD Display und Tastenfunktionen WLAN (Anzeige) Anti-Frost-Funktion (Anzeige) Heizmodus (Anzeige) Anzeige an = Heizen ein, Einstellungen (Taste) Anzeige aus = Heizen aus Tastensperre (Anzeige) Auf (Taste) Timer (Anzeige) Ab (Taste) Ein/Aus und WLAN-Einstellung Hohe Heizleistung (Anzeige) (Taste) Niedrige Heizleistung (Anzeige) -
Seite 11: Fernbedienung
FERNBEDIENUNG Tastenfunktionen Licht-Taste Temperatur runter Tastensperre Moduswechsel Temperatur hoch Ein/Aus Timer... -
Seite 12: Inbetriebnahme Und Bedienung
INBETRIEBNAHME UND BEDIENUNG Hinweis: Im Folgenden wird die Bedienung über das Display beschrieben. Das Gerät piept, sobald der Netzstecker in die Steckdose gesteckt wurde. Das Gerät befindet sich nun im Standbymodus und zeigt das WLAN-Symbol die aktuelle Raumtemperatur in °C an. Heizvorgang starten Drücken Sie die Ein/Aus-Taste , um den Heizvorgang zu starten. -
Seite 13: Tastensperre
Gerät gibt dabei keinen Ton von sich! GERÄTESTEUERUNG PER SMARTPHONE Wenn Sie Ihr Klarstein-Gerät in Ihr heimisches WLAN einbinden, können Sie es ganz bequem über die dazugehörige Klarstein-App bedienen. Die App ermöglicht es Ihnen, nicht nur das Gerät über Ihr Smartphone fernzusteuern, sondern bietet Ihnen zudem Zugang zu Rezepten und weiterführenden Informationen. -
Seite 14: Fehlerbehebung Bei Verbindungsproblemen
Android Fehlerbehebung bei Verbindungsproblemen Wenn Ihr Klarstein-Gerät im WLAN nicht gefunden werden kann, überprüfen Sie Folgendes: Das Gerät ist nicht eingesteckt. Stellen Sie sicher, dass Ihr Gerät an eine Steckdose angeschlossen ist. Das Gerät befindet sich nicht im Kopplungsmodus. Stellen Sie sicher, dass die WiFi-Anzeige (LED) auf dem Bedienfeld des Smart-Geräts blinkt, wie in der... -
Seite 15: Reinigung Und Pflege
Unterschiedliche Anmeldedaten im Smartphone und in der App. Stellen Sie sicher, dass die in der Klarstein-App eingegebenen WiFi-Anmeldedaten mit denen übereinstimmen, mit denen Ihr Smartphone verbunden ist. Wenn Sie die oben genannten Punkte befolgt haben und Ihr Smartphone sich immer noch nicht mit der App verbinden kann, wenden Sie sich bitte per E-Mail an uns, um Unterstützung zu erhalten: appsupport@go-bbg.com... -
Seite 16: Spezielle Entsorgungshinweise Für Verbraucher In Deutschland
SPEZIELLE ENTSORGUNGSHINWEISE FÜR VERBRAUCHER IN DEUTSCHLAND Entsorgen Sie Ihre Altgeräte fachgerecht. Dadurch wird gewährleistet, dass die Altgeräte umweltgerecht verwertet und negative Auswirkungen auf die Umwelt und menschliche Gesundheit vermieden werden. Bei der Entsorgung sind folgende Regeln zu beachten: • Jeder Verbraucher ist gesetzlich verpflichtet, Elektro- und Elek- tronikaltgeräte (Altgeräte) sowie Batterien und Akkus getrennt vom Hausmüll zu entsorgen. - Seite 17 • Bei einem Vertrieb unter Verwendung von Fernkommunikationsmitteln ist die unentgeltliche Abholung am Ort der Abgabe auf Elektro- und Elektronikgeräte der Kategorien 1, 2 und 4 gemäß § 2 Abs. 1 ElektroG, nämlich „Wärmeüberträger“, „Bildschirmgeräte“ (Oberfläche von mehr als 100 cm²) oder „Großgeräte“...
-
Seite 18: Hinweise Zur Entsorgung
Berlin Brands Group UK Limited PO Box 42 272 Kensington High Street London, W8 6ND United Kingdom Hiermit erklärt Chal-Tec GmbH, dass der Funkanlagentyp Bornholm Smart der Richtlinie 2014/53/EU entspricht. Der vollständige Text der EU-Konformitätserklärung ist unter der folgenden Internetadresse verfügbar: use.berlin/10045427... -
Seite 19: Technical Data
Dear customer, Congratulations on your purchase. Please read the following instructions carefully and follow them to prevent potential damage. We accept no liability for damage caused by disregarding the instructions and improper use. Please scan the QR code to access the latest operating instructions and further information about the product. -
Seite 20: Product Data Sheet
PRODUCT DATA SHEET Model identifier(s) 10045427,10045428 Specification Symbol Value Unit Specification Unit Heat output Only for electric storage room heaters: Type of heat supply control Nominal heat output Manual control of the heat supply with integrated thermostat Minimum heat output 0.75 Manual control of the heat supply with (guide value) -
Seite 21: Product Data Sheet
PRODUCT DATA SHEET Model identifier(s) 10045429, 10045430 Specification Symbol Value Unit Specification Unit Heat output Only for electric storage room heaters: Type of heat supply control Nominal heat output Manual control of the heat supply with integrated thermostat Minimum heat output 1.25 Manual control of the heat supply with (guide value) -
Seite 22: Safety Instructions
SAFETY INSTRUCTIONS • Do not use the device until it has been safely installed as described in this guide. • Before use, check the voltage specified on the rating plate and only connect the appliance to sockets that match the voltage of the appliance. •... -
Seite 23: Installation
• Children from the age of 8 years and mentally, sensory and physically impaired persons may only use the device if they have been informed in detail about the functions and safety precautions by a supervisor responsible for them beforehand and understand the associated risks. •... -
Seite 24: Wall Installation
Wall installation 4-hook type bracket: Take 4 brackets, 6 expansion screws and 6 screws out of the box and fix 2 brackets to the wall according to the indicated distances between the holes of the bracket (see picture below). Overall picture Unit: mm Mounting holes for 1500 W Mounting holes for 2500 W... - Seite 25 Attach 2 brackets to the bottom of the unit (see picture below). Hold the unit by the sides, pay attention to the position of the holes on the back of the unit and place the unit on the wall brackets. This completes the wall installation (see picture below).
-
Seite 26: Control Panel
CONTROL PANEL Display and button functions WiFi (display) Anti-frost function (display) Heating mode (display) Display on = heating on, Setting (button) Display off = heating off Key lock (display) Up (button) Timer (display) Down (button) Power and WiFi setting High heat output (display) (button) Low heat output (display) -
Seite 27: Remote Control
REMOTE CONTROL Button functions Light button Temperature down Key lock Mode change Temperature high On/off Timer... -
Seite 28: Setup And Operation
SETUP AND OPERATION Note: Operation via the display is described below. The device beeps as soon as the mains plug is plugged into the socket. The device is now in standby mode and displays the WiFi symbol and the current room temperature in °C. -
Seite 29: Backlight
Make sure your smartphone is connected to the same WiFi network that your Klarstein device is to be connected to. Open the Klarstein app. Sign in to your account. If you do not have an account, sign up in the Klarstein app. Follow the instructions from the app. - Seite 30 Firewall settings of your WiFi network; the firewall setting of your WiFi network may not allow the Klarstein app to configure the WiFi settings on your smart device. Please make sure that you are not using a public WiFi network, e.g.
-
Seite 31: Cleaning And Care
CLEANING AND CARE Note: Switch off the appliance and remove the plug from the socket. Wait until the appliance has cooled down completely before cleaning it. • Use a cleaner to clean the ventilation slots and grilles. • Remove dust from the exterior surfaces with a damp (not wet) cloth. •... -
Seite 32: Disposal Considerations
272 Kensington High Street London, W8 6ND United Kingdom Hereby, Chal-Tec GmbH declares that the radio equipment type Bornholm Smart is in compliance with Directive 2014/53/EU. The full text of the EU declaration of conformity is available at the following internet address: use.berlin/10045427... -
Seite 33: Fiche Technique
Cher client, chère cliente, Toutes nos félicitations pour l’acquisition de ce nouvel appareil. Lisez attentivement les consignes suivantes et suivez-les pour éviter d'éventuels dommages. Nous ne saurions être tenus pour responsables des dommages dus au non-respect des consignes et à la mauvaise utilisation de l’appareil. -
Seite 34: Fiche De Données Produit
FICHE DE DONNÉES PRODUIT Référence(s) du modèle 10045427,10045428 Donnée Symbole Valeur Unité Donnée Unité Puissance thermique Uniquement pour les radiateurs électriques à accumulation : type de contrôle de l'apport de chaleur Puissance thermique Contrôle manuel de l'apport de chaleur avec nominale un thermostat intégré... -
Seite 35: Fiche De Données Produit
FICHE DE DONNÉES PRODUIT Référence(s) du modèle 10045429, 10045430 Donnée Symbole Valeur Unité Donnée Unité Puissance thermique Uniquement pour les radiateurs électriques à accumulation : type de contrôle de l'apport de chaleur Puissance thermique Contrôle manuel de l'apport de chaleur avec nominale un thermostat intégré... -
Seite 36: Consignes De Sécurité
CONSIGNES DE SÉCURITÉ • N'utilisez pas l'appareil tant qu'il n'a pas été installé en toute sécurité comme décrit dans ce guide. • Avant utilisation, vérifiez la tension sur l'étiquette de l'appareil et connectez l'appareil uniquement à des prises qui correspondent à sa tension. •... -
Seite 37: Installation
• Les enfants à partir de 8 ans et les personnes souff rant de handicaps mentaux, sensoriels et physiques ne peuvent utiliser l'appareil que s'ils ont été parfaitement familiarisés avec les fonctions et les précautions de sécurité par une personne responsable et s'ils comprennent les risques associés. •... -
Seite 38: Installation Murale
Installation murale Support de type 4 crochets : Prenez 4 supports, 6 vis d'expansion et 6 vis dans le carton et fixez 2 supports au mur espacés selon les distances indiquées entre les trous (voir image ci- dessous). Aperçu général Unité... - Seite 39 Fixez 2 supports sur la partie inférieure de l'appareil (voir image ci-dessous). Tenez l'appareil par les côtés, faites attention à la position des perçages à l'arrière de l'appareil et placez l'appareil sur les supports muraux. L'installation murale est ainsi terminée (voir l'image ci-dessous). Remarque : Avant de percer, assurez-vous qu'il n'y a pas de câbles ou de tuyaux dans le mur afin d'éviter tout dommage.
-
Seite 40: Panneau De Commande
PANNEAU DE COMMANDE Écran et fonctions des touches Wifi (voyant) Fonction antigel (voyant) Mode chauffage (voyant) Voyant allumé = chauffage en Réglages (touche) marche, Voyant éteint = chauffage éteint Verrouillage des touches Haut (touche) (voyant) Minuterie (voyant) Bas (touche) Puissance de chauffage élevée Réglage de l'alimentation et du (voyant) Wi-Fi (touche) -
Seite 41: Télécommande
TÉLÉCOMMANDE Fonctions des touches Touche d'éclairage Diminuer la température Verrouillage Changement des touches de mode Augmenter la Marche/ température arrêt Minuterie... -
Seite 42: Mise En Marche Et Utilisation
MISE EN MARCHE ET UTILISATION Remarque : Les commandes par l'affichage sont décrites ci-dessous. L'appareil émet un bip lorsque vous branchez la fiche secteur dans la prise. Le radiateur se trouve en mode veille et affiche l'icône Wifi ainsi que la température ambiante actuelle en °C. -
Seite 43: Rétroéclairage
également accès à des recettes et à des informations supplémentaires. Procédez comme suit pour connecter votre smartphone avec votre appareil Klarstein : Téléchargez d‘abord l‘application Klarstein en scannant le code QR avec votre smartphone (voir ci-dessous) ou téléchargez-le directement depuis l‘App Store ou Google Play. - Seite 44 Android Résolution des problèmes de connexion Si votre appareil Klarstein est introuvable dans le Wifi, vérifiez les points suivants : L‘appareil n‘est pas branché. Vérifiez que votre appareil est branché à une prise. L‘appareil ne se trouve pas en mode d‘appairage. Vérifiez que le voyant WiFi (LED) du panneau de commande de l‘appareil intelligent clignote comme...
-
Seite 45: Nettoyage Et Entretien
Différentes données de connexion dans le smartphone et dans l‘application. Vérifiez que les données de connexion WiFi saisies dans l‘application Klarstein correspondent à celles de votre smartphone. Si vous avez suivi les instructions ci-dessus et que votre smartphone ne parvient toujours pas à... -
Seite 46: Conseils Pour Le Recyclage
London, W8 6ND United Kingdom Le soussigné, Chal-Tec GmbH, déclare que l’équipement radioélectrique du type Bornholm Smart est conforme à la directive 2014/53/UE. Le texte complet de la déclaration UE de conformité est disponible à l’adresse internet suivante : use.berlin/10045427... -
Seite 47: Datos Técnicos
Estimado cliente: Le felicitamos por la adquisición de este producto. Lea atentamente el siguiente manual y siga cuidadosamente las instrucciones de uso con el fin de evitar posibles daños. La empresa no se responsabiliza de los daños ocasionados por un uso indebido del producto o por haber desatendido las indicaciones de seguridad. -
Seite 48: Ficha Técnica Del Producto
FICHA TÉCNICA DEL PRODUCTO Denominación(es) del 10045427,10045428 modelo Datos Símbolo Valor Unidad Datos Unidad Potencia calorífica Solo en calefactores eléctricos para habitaciones individuales: tipo de regulación del suministro de calor Potencia calorífica nominal Regulación manual del suministro calorífico con termostato integrado Potencia calorífica mínima 0,75 Regulación manual del suministro calorífico... -
Seite 49: Ficha Técnica Del Producto
FICHA TÉCNICA DEL PRODUCTO Denominación(es) del 10045429, 10045430 modelo Datos Símbolo Valor Unidad Datos Unidad Potencia calorífica Solo en calefactores eléctricos para habitaciones individuales: tipo de regulación del suministro de calor Potencia calorífica nominal Regulación manual del suministro calorífico con termostato integrado Potencia calorífica mínima 1,25 Regulación manual del suministro calorífico... -
Seite 50: Indicaciones De Seguridad
INDICACIONES DE SEGURIDAD • No utilice la unidad hasta que se haya instalado de forma segura tal y como se describe en este manual. • Antes de su utilización, compruebe la tensión indicada en la placa técnica del aparato y conéctelo solamente a tomas de corriente con la misma tensión. •... -
Seite 51: Instalación
• Los niños mayores de 8 años y las personas con discapacidad física, sensorial o psíquica pueden utilizar el aparato si han sido previamente instruidos por una persona responsable sobre su funcionamiento y conocen las funciones, las indicaciones de seguridad y los riesgos asociados. •... - Seite 52 Instalación en la pared Soporte de 4 ganchos: Saque de la caja 4 soportes, 6 tornillos de expansión y 6 tornillos y fije 2 soportes a la pared de acuerdo con las distancias indicadas entre los agujeros del soporte (ver imagen inferior). Imagen completa Unidad: mm Agujeros de montaje para 1500 W...
- Seite 53 Coloque 2 soportes en la parte inferior de la unidad (véase la imagen de abajo). Sostenga la unidad por los lados, preste atención a la posición de los agujeros en la parte posterior de la unidad y coloque la unidad en los soportes de pared.
-
Seite 54: Panel De Control
PANEL DE CONTROL Pantalla y funciones de las teclas WiFi Función antihielo (pantalla) Modo calefacción (pantalla) Pantalla encendida = calefacción encendida, Ajuste del modo (botón) Pantalla apagada = calefacción apagada Bloqueo de botones (pantalla) Arriba (tecla) Temporizador (pantalla) Abajo (tecla) Potencia calorífica alta Encendido/apagado y (pantalla) -
Seite 55: Mando A Distancia
MANDO A DISTANCIA Funciones de los botones Botón de luz Temperatura hacia abajo Bloqueo de Cambio de modo botones Subir temperatura Encender/ apagar Temporizador... -
Seite 56: Puesta En Marcha Y Funcionamiento
PUESTA EN MARCHA Y FUNCIONAMIENTO Nota: A continuación se describe el funcionamiento a través de la pantalla. El aparato emite un pitido en cuanto se introduce el enchufe en la toma de corriente. El aparato se encuentra ahora en modo de espera y muestra el símbolo WLAN y la temperatura ambiente actual en °C. -
Seite 57: Iluminación De Fondo
CONTROL DEL DISPOSITIVO POR SMARTPHONE Si conecta el aparato a su red WLAN doméstica, podrá controlarlo cómodamente mediante la App correspondiente de Klarstein. La App le permite no solo controlar el aparato mediante su smartphone, sino que también le ofrece acceso a recetas y otra información adicional. - Seite 58 Android Solución de problemas de conexión Si su dispositivo Klarstein no se puede encontra en la WLAN, verifique lo siguiente: El aparato no está enchufado. Asegúrese de que su dispositivo esté conectado a un enchufe. El aparato no se encuentra en modo sincronización. Asegúrese de que el indicador de WiFi (LED) parpadea en el panel de control del dispositivo inteligente, tal y como se describe en las instrucciones “Restablecer la...
-
Seite 59: Limpieza Y Cuidado
Los diferentes datos de inicio de sesión en el teléfono inteligente y en la aplicación le aseguran de que los datos de inicio de sesión WiFi de la aplicación de Klarstein coincidan con los que está conectado su teléfono inteligente. -
Seite 60: Retirada Del Aparato
London, W8 6ND United Kingdom Por la presente, Chal-Tec GmbH declara que el tipo de equipo radioeléctrico Bornholm Smart es conforme con la Directiva 2014/53/UE. El texto completo de la declaración UE de conformidad está disponible en la dirección Internet... - Seite 61 Gentile cliente, La ringraziamo per l'acquisto del dispositivo. La preghiamo di leggere attentamente le seguenti indicazioni e di seguirle per evitare eventuali danni. Non ci assumiamo alcuna responsabilità per danni scaturiti da una mancata osservanza delle avvertenze di sicurezza e da un uso improprio del dispositivo.
-
Seite 62: Scheda Informativa Del Prodotto
SCHEDA INFORMATIVA DEL PRODOTTO Contrassegno/i del 10045427,10045428 modello Indicazione Simbolo Valore Unità Indicazione Unità Potenza termica Solo per dispositivi elettrici di accumulo di calore per locali singoli: tipo di regolazione dell'afflusso di calore Potenza termica nominale Controllo manuale dell'apporto termico con termostato integrato Potenza termica minima 0,75... - Seite 63 SCHEDA INFORMATIVA DEL PRODOTTO Contrassegno/i del 10045429, 10045430 modello Indicazione Simbolo Valore Unità Indicazione Unità Potenza termica Solo per dispositivi elettrici di accumulo di calore per locali singoli: tipo di regolazione dell'afflusso di calore Potenza termica nominale Controllo manuale dell'apporto termico con termostato integrato Potenza termica minima 1,25...
-
Seite 64: Avvertenze Di Sicurezza
AVVERTENZE DI SICUREZZA • Utilizzare il dispositivo solo dopo averlo installato in modo sicuro, come descritto in questo manuale. • Prima dell'utilizzo, verificare la tensione sulla targhetta del dispositivo e collegarlo solo a prese con tensione equivalente. • Se il cavo d'alimentazione è danneggiato, deve essere sostituito da un tecnico qualificato. - Seite 65 • I bambini a partire da 8 anni e le persone con limitate capacità fi siche, psichiche e sensoriali possono utilizzare il dispositivo solo se sono stati istruiti da una persona responsabile della loro supervisione sulle modalità d'uso e sulle procedure di sicurezza e comprendono i rischi associati. •...
-
Seite 66: Installazione A Parete
Installazione a parete Supporto a 4 ganci: Prendere dalla scatola 4 supporti, 6 viti a espansione e 6 viti e fissare 2 supporti al muro, rispettando le distanze indicate tra i fori del supporto (v. immagine sotto). Schema completo Unità: mm Fori di fissaggio per 1500 W Fori di fissaggio per 2500 W... - Seite 67 Attaccare 2 supporti al lato inferiore del dispositivo (v. immagine sotto). Tenere il dispositivo dai lati, fare attenzione alla posizione dei fori sul retro e posizionarlo sui supporti a muro. L'installazione a parete è completa (v. immagine sotto). Nota: prima di realizzare i fori, assicurarsi che non ci siano cavi o tubi nel muro per evitare danni.
-
Seite 68: Pannello Di Controllo
PANNELLO DI CONTROLLO Display e tasti funzione WiFi (indicazione) Funzione antigelo (indicazione) Modalità riscaldante (indicazione) Indicazione accesa = Impostazione della modalità riscaldamento acceso (tasto) Indicazione spenta = riscaldamento spento Blocco dei tasti (indicazione) Verso l'alto (tasto) Timer (indicazione) Verso il basso (tasto) Potenza riscaldante elevata On/Off e impostazione WiFi (indicazione) - Seite 69 TELECOMANDO Funzione dei tasti Tasto della luce Ridurre la temperatura Blocco dei tasti Cambiare modalità Aumentare la On/Off temperatura Timer...
-
Seite 70: Messa In Funzione E Utilizzo
MESSA IN FUNZIONE E UTILIZZO Nota: di seguito viene descritto l'utilizzo tramite il display. Quando si inserisce la spina nella presa elettrica, il dispositivo emette un segnale acustico. Il dispositivo si trova in modalità standby, mostra il simbolo WiFi e la temperatura ambiente attuale in °C. -
Seite 71: Gestione Tramite Smartphone
Per collegare il telefono al dispositivo Klarstein, procedere come segue: Per prima cosa scaricare l‘app Klarstein scansionando il codice QR con lo smartphone (vedere sotto) o scaricarla direttamente dall‘App Store o da Google Play. - Seite 72 Android Correzione degli errori in caso di problemi di connessione Se non è possibile trovare il dispositivo Klarstein nella rete Wi-Fi, controllare i seguenti punti: La spina non è collegata. Assicurarsi che il dispositivo sia collegato a una presa elettrica.
-
Seite 73: Pulizia E Manutenzione
Diversi dati di registrazione su smartphone e app. Assicurarsi che i dati di registrazione Wi-Fi inseriti nella app Klarstein corrispondano a quelli con cui è collegato lo smartphone. Se sono stati rispettati i punti citati in precedenza e lo smartphone continua a non connettersi alla app, si prega di inviare un‘email al seguente indirizzo per... -
Seite 74: Smaltimento
272 Kensington High Street London, W8 6ND United Kingdom Il fabbricante, Chal-Tec GmbH, dichiara che il tipo di apparecchiatura radio Bornholm Smart è conforme alla direttiva 2014/53/UE. Il testo completo della dichiarazione di conformità UE è disponibile al seguente indirizzo Internet: use.berlin/10045427...