Herunterladen Inhalt Inhalt Diese Seite drucken
Videotec WASEX Bedienungsanleitung
Vorschau ausblenden Andere Handbücher für WASEX:
Inhaltsverzeichnis

Werbung

Verfügbare Sprachen
  • DE

Verfügbare Sprachen

  • DEUTSCH, seite 77
ENGLISH
EN
English - Instruction manual
IT
Italiano - Manuale di istruzioni
FR
Français - Manuel d'instructions
Washer pump with ex-proof solenoid valve
DE
Deutsch - Bedienungsanleitung
RU
Русский - Руководство по эксплуатации
PT
Português - Manual de instruções
WASEX

Werbung

Inhaltsverzeichnis
loading

Inhaltszusammenfassung für Videotec WASEX

  • Seite 1 ENGLISH WASEX Washer pump with ex-proof solenoid valve English - Instruction manual Deutsch - Bedienungsanleitung Italiano - Manuale di istruzioni Русский - Руководство по эксплуатации Français - Manuel d’instructions Português - Manual de instruções...
  • Seite 3 ENGLISH WASEX Washer pump with ex-proof solenoid valve English - Instruction manual...
  • Seite 5: Inhaltsverzeichnis

    Contents E N G L I S H 1 About this manual ........................5 1.1 Typographical conventions ..............................5 2 Notes on copyright and information on trademarks ............. 5 3 Safety rules..........................5 4 Identification ..........................7 4.1 Product description and type designation ........................7 4.2 Product marking ..................................
  • Seite 6 10.4 Environment ..................................21 10.5 Certifications - Marine applications ..........................21 11 Technical drawings .......................22 MNVCWASEX_2013_EN...
  • Seite 7: About This Manual

    1 About this manual 3 Safety rules Read all the documentation supplied carefully before CAUTION! The electrical system to which the installing and using this product. Keep the manual in unit is connected must be equipped with a a convenient place for future reference. 15A max automatic bipolar circuit breaker.
  • Seite 8 • Make sure that the device is firmly anchored so personnel and of the installation. that it cannot become detached. • Use only VIDEOTEC original spare parts. • Since the user is responsible for choosing the • Before proceeding with installation, check the...
  • Seite 9: Identification

    The marking plate is designation fitted on the solenoid valve. The WASEX washer pump is an important element for effective video surveillance in hazardous areas because it guarantees sharp images in all environmental conditions and reduces the need for maintenance.
  • Seite 10: Preparing The Product For Use

    5 Preparing the product for 5.2 Unpacking When the product is delivered, make sure that the package is intact and that there are no signs that it has been dropped or scratched. Any change that is not expressly approved by the manufacturer will invalidate the If there are obvious signs of damage, contact the guarantee.
  • Seite 11: Safely Disposing Of Packaging Material

    5.4 Safely disposing of packaging 5.5.2 Assembly of the seal rings (optional) material During assembly, be careful not to damage The packaging material can all be recycled. The the rubber and thereby reduce its air- installer technician will be responsible for separating tightness.
  • Seite 12: Assembly On Supports

    Check that the power supply socket and Fig. 10 WASEX+NXCOL. cable are adequately dimensioned. 6.2.1 Connection of the solenoid valve For further information, refer to the product use and installation manual.
  • Seite 13: Connection To Ptz

    • Open the cover of the solenoid valve. the products, use the communication box • Identify the terminals L, N. by VIDEOTEC, MAXIMUS MBX or MAXIMUS MBA, alternatively use an explosion- • Connect as in the diagram below (Fig. 13, page 11).
  • Seite 14: Connection To Maximus Mvx

    (Tab. To install electrical connections between 2, page 12). the products, use the communication box SIGNAL CABLE CONNECTION by VIDEOTEC, MAXIMUS MBX or MAXIMUS Colour Function MBA, alternatively use an explosion- proof junction box with equivalent...
  • Seite 15: Connection To Maximus-Mhx

    • Open the cover of the solenoid valve. the products, use the communication box • Identify the terminals L, N. by VIDEOTEC, MAXIMUS MBX or MAXIMUS MBA, alternatively use an explosion- • Connect as in the diagram below (Fig. 17, page 13).
  • Seite 16: Installation Of The Pump

    6.3 Installation of the pump Turn the safety valve to release any residual pressure in the tank. It is possible to install or service the pump without removing the tank (Fig. 19, page 14). To remove the tank (01), release the metal clamps (02) and disconnect the connecting pipe (03).
  • Seite 17: Washer Installation (Ptz)

    6.4 Washer installation (PTZ) Connect the delivery pipe (01), passing it through the seal ring (02). Fasten the support (01) onto the PTZ body with the metal clip (02) provided. Fig. 25 Version with single cable entry Fig. 23 Insert the guard and tighten the safety screw. Fig.
  • Seite 18 Attach the pipe to the washer support using the To calibrate the jet, orientate the nozzle towards the bracket (01), the screws (02) and the washers (03) window of the housing. supplied. Connect the supply pipe (04). Fig. 29 Version with single cable entry Fig.
  • Seite 19: Washer Installation (Maximus Mvx)

    6.5 Washer installation (MAXIMUS MVX) Fasten the bracket (01) onto the body of the MAXIMUS MVX with the metal clip (02) provided. Fasten the support for the delivery pipe (03) by means of the screws and washers provided. Fig. 35 Shorten the washer pipe (06) as needed.
  • Seite 20: Washer Installation (Maximus-Mhx)

    6.6 Washer installation (MAXIMUS-MHX) Fasten the bracket (01) onto the body of the MAXIMUS-MHX with the metal clip (02) provided. Fasten the support for the delivery pipe (03) by means of the screws and washers provided. Fig. 41 Shorten the washer pipe (06) as needed. Unscrew the nut (07) and slide it along the pipe.
  • Seite 21: Installation Examples

    6.6.1 Installation examples Fig. 45 Fig. 47 Fig. 46 MNVCWASEX_2013_EN...
  • Seite 22: Maintenance

    The device should be cleaned using a damp cloth; compressed air must not be used. Whenever replacing the parts as indicated, 9 Information on disposal always use VIDEOTEC original spare parts and meticulously follow the maintenance and recycling instructions supplied with every spare parts kit.
  • Seite 23: Technical Data

    Consumption: 5W Tested at 70°C (158°F) for 16 hours in compliance with WASEX2T4KC EN60068-2-2 Power supply: 24Vdc Consumption: 10.6W 10.6 Certifications - Explosion-proof applications WASEX - CERTIFICATIONS AND MARKINGS Part number Certification Marking Ambient temperature WASEX2T4AT ATEX (Solenoid valve) 2 II GD Ex d IIC T6 or T5 or T4 Gb -40°C ≤...
  • Seite 24: Technical Drawings

    11 Technical drawings The indicated measurements are expressed in millimetres. Fig. 49 WASEX. MNVCWASEX_2013_EN...
  • Seite 26 Email: info@videotec.com Tel. +33 1 60491816 - Fax +33 1 69284736 Email: info.fr@videotec.com Asia Pacific Videotec (HK) Ltd Americas Videotec Security, Inc. Flat 8, 19/F. On Dak Industrial Building, No. 2-6 Wah Sing Street Gateway Industrial Park, 35 Gateway Drive, Suite 100 Kwai Chung, New Territories - Hong Kong Plattsburgh, NY 12901 - U.S.A.
  • Seite 27 ITALIANO WASEX Pompa lavavetro con elettrovalvola antideflagrante Italiano - Manuale di istruzioni...
  • Seite 29 Sommario I T A L I A N O 1 Informazioni sul presente manuale ..................5 1.1 Convenzioni tipografiche ..............................5 2 Note sul copyright e informazioni sui marchi commerciali ........... 5 3 Norme di sicurezza ........................5 4 Identificazione .......................... 7 4.1 Descrizione e designazione del prodotto ........................
  • Seite 30 10.4 Ambiente ....................................21 10.5 Certificazioni - Applicazioni marine ..........................21 11 Disegni tecnici ........................22 MNVCWASEX_2013_IT...
  • Seite 31: Informazioni Sul Presente Manuale

    1 Informazioni sul presente 3 Norme di sicurezza manuale ATTENZIONE! L’impianto elettrico al quale è collegata l’unità deve essere dotato di Prima di installare e utilizzare questo prodotto, un interruttore di protezione bipolare leggere attentamente tutta la documentazione automatico da 15A max. La distanza fornita.
  • Seite 32 • Dato che la scelta della superficie di montaggio • Utilizzare solo parti di ricambio VIDEOTEC. è a cura dell’utente non si forniscono viti per il • Prima di procedere con l'installazione, controllare fissaggio sicuro del dispositivo alla superficie. È...
  • Seite 33: Identificazione

    Il sistema WASEX è pensato per i prodotti della serie Fig. 3 MAXIMUS ed è compatibile anche con dispositivi di Il numero di serie del prodotto è indicato terze parti.
  • Seite 34: Preparazione Del Prodotto Per L'utilizzo

    5 Preparazione del prodotto 5.2 Disimballaggio per l'utilizzo Alla consegna del prodotto verificare che l'imballo sia integro e non presenti segni evidenti di cadute o abrasioni. Qualsiasi intervento non espressamente approvato dal costruttore fa decadere la In caso di danni evidenti all'imballo contattare garanzia.
  • Seite 35: Smaltimento In Sicurezza Dei Materiali Di Imballaggio

    5.4 Smaltimento in sicurezza dei 5.5.2 Montaggio degli anelli di tenuta (opzionale) materiali di imballaggio Durante il montaggio è necessario prestare I materiali d'imballo sono costituiti interamente da attenzione a non danneggiare la gomma materiale riciclabile. Sarà cura del tecnico installatore per non comprometterne l’impermeabilità.
  • Seite 36: Montaggio Sui Supporti

    All’atto dell’installazione controllare che le caratteristiche di alimentazione fornite dall’impianto corrispondano a quelle richieste dal dispositivo. Fig. 10 WASEX+NXCOL. Verificare che la sorgente e il cavo di alimentazione siano adeguatamente dimensionati. 6.2.1 Collegamento dell'elettrovalvola Fare riferimento al manuale d’uso ed installazione del prodotto per ulteriori informazioni.
  • Seite 37: Collegamento Al Ptz

    • Aprire il coperchio della elettrovalvola. tra prodotti utilizzare le commnunication • Individuare i morsetti L, N. box di VIDEOTEC, MAXIMUS MBX o MAXIMUS MBA, in alternativa utilizzare una • Effettuare i collegamenti come da schema scatola di giunzione antideflagrante con sottostante (Fig.
  • Seite 38: Collegamento Alla Maximus Mvx

    Per effettuare le connessioni elettriche riferimento alla tabella (Tab. 2, pagina 12). tra prodotti utilizzare le commnunication COLLEGAMENTO DEI CAVI DI SEGNALE box di VIDEOTEC, MAXIMUS MBX o Colore Funzione MAXIMUS MBA, in alternativa utilizzare una scatola di giunzione antideflagrante con Rosa Relè...
  • Seite 39: Collegamento Alla Maximus-Mhx

    • Aprire il coperchio della elettrovalvola. tra prodotti utilizzare le commnunication • Individuare i morsetti L, N. box di VIDEOTEC, MAXIMUS MBX o MAXIMUS MBA, in alternativa utilizzare una • Effettuare i collegamenti come da schema scatola di giunzione antideflagrante con sottostante (Fig.
  • Seite 40: Installazione Della Pompa

    6.3 Installazione della pompa Rimuovere l'eventuale pressione residua del serbatoio agendo sulla valvola di sicurezza. Nelle operazioni di installazione o manutenzione della pompa è possibile lasciare il serbatoio in posizione oppure rimuoverlo (Fig. 19, pagina 14). Per rimuovere il serbatoio (01) agire sulle fascette metalliche (02) e sganciare il tubo di collegamento (03).
  • Seite 41: Installazione Del Lavavetro (Ptz)

    6.4 Installazione del lavavetro Collegare il tubo di mandata (01) facendolo passare attraverso l'anello di tenuta (02). (PTZ) Fissare il supporto (01) al corpo del PTZ tramite l'apposita fascetta metallica (02) in dotazione. Fig. 25 Versione con singolo ingresso cavi Fig.
  • Seite 42 Fissare il tubo al sostegno lavavetro tramite Per calibrare il getto orientare l’ugello verso la finestra la staffetta (01), le viti (02) e le rondelle (03) in della custodia. dotazione. Collegare il tubo di mandata (04). Fig. 29 Versione con singolo ingresso cavi Fig.
  • Seite 43: Installazione Del Lavavetro (Maximus Mvx)

    6.5 Installazione del lavavetro (MAXIMUS MVX) Fissare la staffa (01) al corpo del MAXIMUS MVX tramite l'apposita fascetta metallica (02) in dotazione. Fissare il sostegno per il tubo di mandata (03) tramite le viti e le rondelle in dotazione. Fig. 35 Accorciare il tubo del lavavetro (06) secondo necessità.
  • Seite 44: Installazione Del Lavavetro (Maximus-Mhx)

    6.6 Installazione del lavavetro (MAXIMUS-MHX) Fissare la staffa (01) al corpo del MAXIMUS-MHX tramite l'apposita fascetta metallica (02) in dotazione. Fissare il sostegno per il tubo di mandata (03) tramite le viti e le rondelle in dotazione. Fig. 41 Accorciare il tubo del lavavetro (06) secondo necessità.
  • Seite 45: Esempi Di Installazione

    6.6.1 Esempi di installazione Fig. 45 Fig. 47 Fig. 46 MNVCWASEX_2013_IT...
  • Seite 46: Manutenzione

    9 Informazioni sullo Come indicato, qualsiasi sostituzione di ricambi, deve essere eseguita utilizzando smaltimento e il riciclo solamente ricambi originali VIDEOTEC, seguendo scrupolosamente le istruzioni La Direttiva Europea 2012/19/UE sui Rifiuti di di manutenzione allegate ad ogni kit di Apparecchiature Elettriche ed Elettroniche (RAEE) ricambio.
  • Seite 47: Dati Tecnici

    Compatibilità elettromagnetica: EN60945 WASEX2T4KC Resistenza alla nebbia salina: EN60068-2-52 Alimentazione: 24Vdc Provato a 70°C per 16 ore in accordo con EN60068-2-2 Consumo: 10.6W 10.6 Certificazioni - Applicazioni antideflagranti WASEX - CERTIFICAZIONI E MARCATURE Codice prodotto Certificazione Marcatura Temperatura am- biente WASEX2T4AT...
  • Seite 48: Disegni Tecnici

    11 Disegni tecnici Le misure indicate sono espresse in millimetri. Fig. 49 WASEX. MNVCWASEX_2013_IT...
  • Seite 50 Email: info@videotec.com Tel. +33 1 60491816 - Fax +33 1 69284736 Email: info.fr@videotec.com Asia Pacific Videotec (HK) Ltd Americas Videotec Security, Inc. Flat 8, 19/F. On Dak Industrial Building, No. 2-6 Wah Sing Street Gateway Industrial Park, 35 Gateway Drive, Suite 100 Kwai Chung, New Territories - Hong Kong Plattsburgh, NY 12901 - U.S.A.
  • Seite 51 FRANÇAIS WASEX Pompe lave-glace avec valve solénoïde antidéflagrante Français - Manuel d’instructions...
  • Seite 53 Sommaire F R A N Ç A I S 1 À propos de ce mode d’emploi ....................5 1.1 Conventions typographiques ............................5 2 Notes sur le copyright et informations sur les marques de commerce ........ 5 3 Normes de securité ........................5 4 Identification ..........................
  • Seite 54 10.4 Environnement ...................................21 10.5 Certifications - Applications marines ..........................21 11 Dessins techniques .......................22 MNVCWASEX_2013_FR...
  • Seite 55: Propos De Ce Mode D'emploi

    1 À propos de ce mode 3 Normes de securité d’emploi ATTENTION! Le circuit électrique auquel l'unité est reliée doit être équipé d'un Avant d'installer et d'utiliser ce produit, lire interrupteur de protection bipolaire attentivement toute la documentation fournie. automatique de 15A max. La distance Garder le manuel à...
  • Seite 56 • Utiliser uniquement des pièces détachées • Le choix de la surface de montage étant confié à VIDEOTEC. l'utilisateur, aucune vis n'est fournie pour la fixation • Avant de procéder à l’installation, contrôler que du dispositif à la surface. L'installateur est tenu le matériel fourni correspond à...
  • Seite 57: Identification

    Le système WASEX est conçu pour les produits de la série MAXIMUS et est également compatible avec les Fig. 3 dispositifs tiers.
  • Seite 58: Préparation Du Produit En Vue De L'utilisation

    5 Préparation du produit en 5.2 Déballage vue de l’utilisation Lors de la livraison du produit, vérifier que l’emballage est en bon état et l’absence de tout signe évident de chute ou d’abrasion. Toute modification non approuvée expressément par le fabricant entraînera En cas de dommages évidents, contacter l’annulation de la garantie.
  • Seite 59: Élimination Sans Danger Des Matériaux D'emballage

    5.4 Élimination sans danger des 5.5.2 Montage des anneaux d'étanchéité (en option) matériaux d’emballage Pendant le montage il faut faire attention à Le matériel d’emballage est entièrement composé ne pas endommager le caoutchouc pour ne de matériaux recyclables. Le technicien chargé de pas compromettre son imperméabilité.
  • Seite 60: Montage Sur Supports

    Contrôler que les sources d'alimentation et les câbles de branchement sont en mesure de supporter la consommation du système. Fig. 10 WASEX+NXCOL. Vérifier que la source et le câble d'alimentation sont adéquatement dimensionnés. 6.2.1 Branchement de l'électrovanne Pour plus d'informations, se référer au manuel d'utilisation et d'installation du produit.
  • Seite 61: Branchement Au Ptz

    • Ouvrir le couvercle de l’électrovanne. Pour procéder aux branchements • Identifier les bornes L, N. électriques entre les produits, utiliser les boîtiers de communication VIDEOTEC, • Procéder aux branchements selon le schéma ci- MAXIMUS MBX ou MAXIMUS MBA, dessous (Fig. 13, page 11).
  • Seite 62: Branchement À La Maximus Mvx

    Pour procéder aux branchements tableau (Tab. 2, page 12). électriques entre les produits, utiliser les CONNEXION DES CÂBLES DE SIGNALISATION boîtiers de communication VIDEOTEC, Couleur Fonction MAXIMUS MBX ou MAXIMUS MBA, ou utiliser un boîtier de jonction...
  • Seite 63: Branchement À La Maximus-Mhx

    • Ouvrir le couvercle de l’électrovanne. Pour procéder aux branchements • Identifier les bornes L, N. électriques entre les produits, utiliser les boîtiers de communication VIDEOTEC, • Procéder aux branchements selon le schéma ci- MAXIMUS MBX ou MAXIMUS MBA, dessous (Fig. 17, page 13).
  • Seite 64: Installation De La Pompe

    6.3 Installation de la pompe Enlever la pression résiduelle éventuelle du réservoir en agissant sur la soupape de sécurité. Pour les opérations d'installation ou d'entretien de la pompe il est possible de laisser le réservoir en position ou en l'enlevant (Fig. 19, page 14). Pour enlever le réservoir (01) agir sur les colliers métalliques (02) et décrocher le tuyau de raccordement (03).
  • Seite 65: Installation Du Lave-Vitre (Ptz)

    6.4 Installation du lave-vitre Raccorder le tuyau de refoulement (01) en le faisant passer à travers l'anneau d'étanchéité (02). (PTZ) Fixer le support (01) au corps du PTZ à l'aide du collier métallique (02) fourni. Fig. 25 Version avec une seule entrée câbles Fig.
  • Seite 66 Fixer le tube au support lave-vitre au moyen de la Pour calibrer le jet, orientez le gicleur vers la fenêtre bride (01), des vis (02) et des rondelles (03) fournies. du caisson. Raccorder le tuyau de refoulement (04). Fig. 29 Version avec une seule entrée câbles Fig.
  • Seite 67: Installation Du Lave-Vitre (Maximus Mvx)

    6.5 Installation du lave-vitre (MAXIMUS MVX) Fixer la bride (01) au corps du MAXIMUS MVX à l'aide du petit collier métallique (02) fourni. Fixer le soutien pour le tube de refoulement (03) à l'aide des vis et des rondelles fournies. Fig.
  • Seite 68: Installation Du Lave-Vitre (Maximus-Mhx)

    6.6 Installation du lave-vitre (MAXIMUS-MHX) Fixer la bride (01) au corps du MAXIMUS-MHX à l'aide du petit collier métallique (02) fourni. Fixer le soutien pour le tube de refoulement (03) à l'aide des vis et des rondelles fournies. Fig. 41 Raccourcir le tube du lave-vitre (06) selon la nécessité.
  • Seite 69: Exemple D'installation

    6.6.1 Exemple d'installation Fig. 45 Fig. 47 Fig. 46 MNVCWASEX_2013_FR...
  • Seite 70: Entretien

    9 Informations sur doit être effectué en utilisant uniquement des pièces de rechange originales l'élimination et le recyclage VIDEOTEC, en suivant scrupuleusement les instructions d'entretien annexées avec La Directive Européenne 2012/19/UE sur les déchets chaque kit de rechange. d'équipements électriques et électroniques (DEEE) Pour pouvoir demander une pièce détachée quelle...
  • Seite 71: Données Techniques

    Résistant à la brume saline: EN60068-2-52 WASEX2T4KC Éprouvé à 70°C pendant 16 heures conformément à Alimentation: 24Vdc la norme EN60068-2-2 Consommation: 10.6W 10.6 Certifications - Applications anti-déflagrations WASEX - CERTIFICATIONS ET MARQUAGES Références Certification Marquage Température am- biante WASEX2T4AT ATEX (Valve solénoïde)
  • Seite 72: Dessins Techniques

    11 Dessins techniques Les tailles indiquées sont en millimètres. Fig. 49 WASEX. MNVCWASEX_2013_FR...
  • Seite 74 Email: info@videotec.com Tel. +33 1 60491816 - Fax +33 1 69284736 Email: info.fr@videotec.com Asia Pacific Videotec (HK) Ltd Americas Videotec Security, Inc. Flat 8, 19/F. On Dak Industrial Building, No. 2-6 Wah Sing Street Gateway Industrial Park, 35 Gateway Drive, Suite 100 Kwai Chung, New Territories - Hong Kong Plattsburgh, NY 12901 - U.S.A.
  • Seite 75: Scheibenwaschpumpe Mit Ex-Geschützten Solenoidventil

    DEUTSCH WASEX Scheibenwaschpumpe mit ex-geschützten Solenoidventil Deutsch - Bedienungsanleitung...
  • Seite 77 Inhaltsverzeichnis D E U T S C H 1 Allgemeines ..........................5 1.1 Schreibweisen..................................5 2 Anmerkungen zum Copyright und Informationen zu den Handelsmarken ......5 3 Sicherheitsnormen ........................5 4 Identifizierung .......................... 7 4.1 Beschreibung und Bezeichnung des Produktes ......................7 4.2 Kennzeichnung des Produkts ............................
  • Seite 78 10.4 Umgebung ...................................21 10.5 Zertifizierungen - Marine-Anwendungen .........................21 11 Technische Zeichnungen......................22 MNVCWASEX_2013_DE...
  • Seite 79: Allgemeines

    1 Allgemeines 3 Sicherheitsnormen Vor der Installation und Anwendung dieses Produkts ACHTUNG! Die elektrische Anlage, an ist die gesamte mitgelieferte Dokumentation der die Einheit angeschlossen ist, muss aufmerksam zu lesen. Zum späteren Nachschlagen mit einem automatischen zweipoligen das Handbuch in Reichweite aufbewahren. Schutzschalter 15A max ausgestattet sein.
  • Seite 80 Personals und der Anlage schwer gefährden. • Da der Betreiber entscheidet, auf welcher • Verwenden Sie nur Ersatzteile der Firma VIDEOTEC. Oberfläche die Montage erfolgt, werden keine • Vor der Installation ist anhand des Schrauben für die sichere Befestigung der Kennzeichnungsschildes nachzuprüfen, ob das...
  • Seite 81: Identifizierung

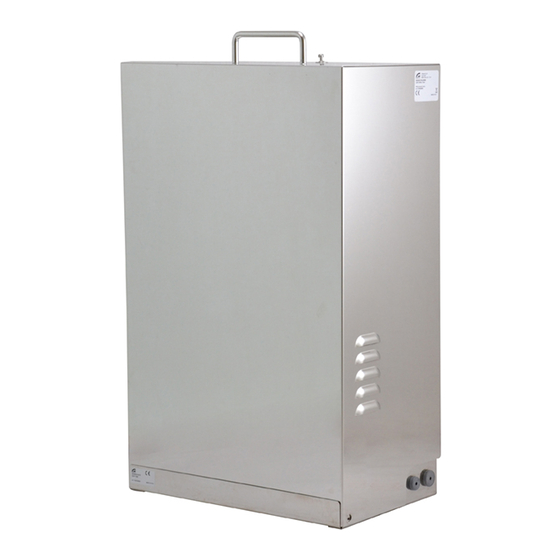
    Videoüberwachungssystem für explosionsgefährdete Umgebungen, weil sie scharfe Bilder in allen Umgebungsbedingungen bietet und die Wartung reduziert. Das WASEX System ist für Produkte von MAXIMUS Serie gedacht und ist auch kompatibel mit Geräten von Drittherstellern. Abb. 3 Das Kit besteht aus einem 10-Liter-Tank...
  • Seite 82: Vorbereitung Des Produktes Auf Den Gebrauch

    5 Vorbereitung des 5.2 Entfernen der Verpackung Produktes auf den Gebrauch Bei der Lieferung des Produktes ist zu prüfen, ob die Verpackung intakt ist oder offensichtliche Anzeichen von Stürzen oder Abrieb aufweist. Jede vom Hersteller nicht ausdrücklich genehmigte Veränderung führt zum Verfall Bei offensichtlichen Schadensspuren an der der Gewährleistungsrechte.
  • Seite 83: Sichere Entsorgung Der Verpackungsmaterialien

    5.4 Sichere Entsorgung der 5.5.2 Montage der Dichtungsringe (Sonderausstattung) Verpackungsmaterialien Während der Montage muss Acht gegeben Die Verpackungsmaterialien sind vollständig werden, den Gummi nicht zu beschädigen, wiederverwertbar. Es ist Sache des um nicht die Impermeabelität zu Installationstechnikers, sie getrennt, auf jeden gefährden.
  • Seite 84: Anbringung Auf Den Halterungen

    Die verwendete Flüssigkeit darf keine Einschaltung der Atmosphäre verursachen. 6.2 Anschluss der Stromversorgung Abb. 10 WASEX+NXCOL. Im Zuge der Installation ist zu prüfen, ob die Merkmale der von der Anlage bereitgestellten Versorgung mit den erforderlichen Merkmalen der Einrichtung übereinstimmen.
  • Seite 85: Anschluss An Die Ptz-Einheit

    Zum Durchführen der Elektroanschlüsse • Deckel des EM-Ventils öffnen. unter den Produkten die • Die Klemmen L, N bestimmen. Kommunikationsbox von VIDEOTEC, MAXIMUS MBX oder MAXIMUS MBA • Die Anschlüsse nach dem untenstehenden verwenden. Alternativ hierzu einen Schema durchführen (Abb. 13, Seite 11).
  • Seite 86: Anschluss An Maximus Mvx

    Mit vorverdrahteten mehradrigen Kabeln, anschluss der Signalkabel an das Relais - siehe Tabelle (Tab. 2, Zum Durchführen der Elektroanschlüsse Seite 12). unter den Produkten die ANSCHLUSS DER SIGNALKABEL. Kommunikationsbox von VIDEOTEC, Farbe Funktion MAXIMUS MBX oder MAXIMUS MBA verwenden. Alternativ hierzu einen Rosa Relais 1, Terminal A explosionsgeschützten Anschlusskasten...
  • Seite 87: Anschluss An Maximus-Mhx

    Zum Durchführen der Elektroanschlüsse • Deckel des EM-Ventils öffnen. unter den Produkten die • Die Klemmen L, N bestimmen. Kommunikationsbox von VIDEOTEC, MAXIMUS MBX oder MAXIMUS MBA • Die Anschlüsse nach dem untenstehenden verwenden. Alternativ hierzu einen Schema durchführen (Abb. 17, Seite 13).
  • Seite 88: Installation Der Pumpe

    6.3 Installation der Pumpe Eventuellen Restdruck des Tanks entfernen, indem das Sicherheitsventil betätigt wird. Bei den Installations- oder Wartungsarbeiten der Pumpe kann der Tank in Position gelassen oder entfernt werden (Abb. 19, Seite 14). Um den Tank (01) zu entfernen, die Metallschellen (02) betätigen und die Anschlussleitung (03) aushaken.
  • Seite 89: Installation Der Scheibenwascheinheit (Ptz)

    6.4 Installation der Die Druckleitung (01) anschließen, sie dabei durch den Dichtungsring (02) führen. Scheibenwascheinheit (PTZ) Die Halterung (01) an den Korpus der PTZ-Einheit mittels der entsprechenden im Lieferumfang enthaltenen Metallschelle (02) befestigen. Abb. 25 Version mit Einkabeleinführung Abb. 23 Das Gehäuse einsetzen und die Sicherheitsschraube anziehen.
  • Seite 90 Die Leitung mit dem Bügel (01), den Schrauben (02) Zum Einstellen des Strahls die Düse Richtung und den Unterlegscheiben (03), alles im Lieferumfang Gehäusescheibe richten. enthalten, an der Stütze der Scheibenwaschanlage fixieren. Druckrohr anschließen (04). Abb. 29 Version mit Einkabeleinführung Abb.
  • Seite 91: Installation Der Scheibenwascheinheit (Maximus Mvx)

    6.5 Installation der Scheibenwascheinheit (MAXIMUS MVX) Den Bügel (01) an den Korpus von MAXIMUS MVX mittels der entsprechenden im Lieferumfang enthaltenen Metallschelle (02) befestigen. Die Halterung für die Zuflussleitung (03) mittels der im Lieferumfang enthaltenen Schrauben und Unterlegscheiben befestigen. Abb. 35 Die Scheibenwaschleitung (06) je nach Bedarf kürzen.
  • Seite 92: Installation Der Scheibenwascheinheit (Maximus-Mhx)

    6.6 Installation der Scheibenwascheinheit (MAXIMUS-MHX) Den Bügel (01) an den Korpus von MAXIMUS-MHX mittels der entsprechenden im Lieferumfang enthaltenen Metallschelle (02) befestigen. Die Halterung für die Zuflussleitung (03) mittels der im Lieferumfang enthaltenen Schrauben und Unterlegscheiben befestigen. Abb. 41 Die Scheibenwaschleitung (06) je nach Bedarf kürzen. Die Mutter (07) lösen und auf der Leitung laufen lassen.
  • Seite 93: Montagebeispiel

    6.6.1 Montagebeispiel Abb. 45 Abb. 47 Abb. 46 MNVCWASEX_2013_DE...
  • Seite 94: Wartung

    Zuhilfenahme von Druckluft vorgenommen werden. Das Auswechseln der aufgeführten Bauteile 9 Informationen bezüglich darf nur durch originale Ersatzbauteile von VIDEOTEC erfolgen, dabei müssen strikt Entsorgung und Recycling die Wartungsanweisungen im Anhang von jedem Ersatzteilbausatz befolgt werden. Die EU-Richtlinie 2012/19/ЕU über Elektro- und Elektronik-Altgeräte (WEEE) verpflichtet, dass...
  • Seite 95: Technische Daten

    Verbrauch: 5W Salznebelbeständig: EN60068-2-52 WASEX2T4KC Getestet bei 70°C für 16 Stunden in Übereinstimmung Netzteil: 24Vdc mit EN60068-2-2 Verbrauch: 10.6W 10.6 Zertifizierungen - Explosionsgeschützte Anwendungen WASEX - ZERTIFIZIERUNGEN UND KENNZEICHNUNGEN Artikelcode Zertifizierung Kennzeichnung Umgebungstempe- ratur WASEX2T4AT ATEX (Solenoidventil) 2 II GD Ex d IIC T6 or T5 or T4 Gb -40°C ≤...
  • Seite 96: Technische Zeichnungen

    11 Technische Zeichnungen Die Maße sind in Millimetern angegeben. Abb. 49 WASEX. MNVCWASEX_2013_DE...
  • Seite 98 Email: info@videotec.com Tel. +33 1 60491816 - Fax +33 1 69284736 Email: info.fr@videotec.com Asia Pacific Videotec (HK) Ltd Americas Videotec Security, Inc. Flat 8, 19/F. On Dak Industrial Building, No. 2-6 Wah Sing Street Gateway Industrial Park, 35 Gateway Drive, Suite 100 Kwai Chung, New Territories - Hong Kong Plattsburgh, NY 12901 - U.S.A.
  • Seite 99 РУССКИЙ WASEX Насос омывателя с взрывобезопасным электромагнитным клапаном Русский - Руководство по эксплуатации...
  • Seite 101 Комплект оборудования Р У С С К И Й 1 О настоящем руководстве ..................... 5 1.1 Типографские условные обозначения ........................5 2 Примечания в отношении авторского права и информация о торговых марках..5 3 Правила техники безопасности ................... 5 4 Обозначение ..........................7 4.1 Описание...
  • Seite 102 10.4 Окружающая среда .................................21 10.5 Сертификаты - Морское применение ........................21 11 Технические чертежи ......................22 MNVCWASEX_2013_RU...
  • Seite 103: Настоящем Руководстве

    1 О настоящем 3 Правила техники руководстве безопасности Перед установкой и использованием ПРЕДУПРЕЖДЕНИЕ! Система этого изделия внимательно прочтите всю электропитания, к которой предоставленную документацию. Всегда держите подключается устройство, должна руководство под рукой, чтобы им можно было иметь автоматический двухполюсный воспользоваться в будущем. выключатель...
  • Seite 104 • Мы настоятельно рекомендуем использовать персонала и системы. при установке только разрешенные кронштейны и комплектующие. • Используйте только запчасти компании VIDEOTEC. • Проверить, что устройство закреплено прочно и надёжно. • Перед монтажом проверьте соответствие поставленных материалов спецификациям • Учитывая, что монтажная поверхность...
  • Seite 105: Обозначение

    4.1 Описание и обозначение определяется маркировкой электроклапана. типа устройства Маркировочная табличка расположена на самом электроклапане. Насос омывателя WASEX – это важный элемент для эффективного видеонаблюдения в опасных зонах, поскольку он обеспечивает четкое изображение в любых условиях окружающей среды и снижает необходимость проведения технического...
  • Seite 106: Подготовка Устройства К Использованию

    5 Подготовка устройства к 5.2 Распаковка использованию При получении устройства убедитесь, что упаковка не повреждена и не имеет явных признаков падения или царапин. Любое изменение, которое выполняется без разрешения, явным образом В случае наличия видимых повреждений предоставленного производителем, незамедлительно свяжитесь с поставщиком. аннулирует...
  • Seite 107: Безопасная Утилизация Упаковочных Материалов

    5.4 Безопасная утилизация 5.5.2 Монтаж уплотнительных колец (при необходимости) упаковочных материалов Во время монтажа необходимо Упаковочные материалы могут подвергаться проявлять осторожность, чтобы не переработке. Технический специалист повредить резину во избежание установщика отвечает за сортировку материалов нарушения герметичности. для переработки, а также за соблюдение требований...
  • Seite 108: Монтаж На Опоры

    Используемая жидкость не должна вызывать воспламенение атмосферы. 6.2 Подключение линии питания Перед началом монтажа убедитесь в том, что характеристики источника Рис. 10 WASEX+NXCOL. питания соответствуют характеристикам устройства. Проверьте соответствие размеров гнезда питания и кабеля. 6.2.1 Подключение электромагнитного клапана Для получения дополнительной информации...
  • Seite 109: Подключение К Ptz

    Для выполнения электрических • Откройте крышку электромагнитного клапана. соединений между изделиями • Найдите клеммы L, N. используйте блоки связи VIDEOTEC, MAXIMUS MBX или MAXIMUS MBA, в • Выполните соединения согласно изображенной качестве альтернативы используйте ниже схеме (Рис. 13, страница 11).
  • Seite 110: Подключение К Maximus Mvx

    С предустановленным кабелем многополярный, cм. порядок подключения сигнальных кабелей к Для выполнения электрических реле в таблице (Табл. 2, страница 12). соединений между изделиями ПОДКЛЮЧЕНИЕ СИГНАЛЬНОГО КАБЕЛЯ используйте блоки связи VIDEOTEC, Цвет Функция MAXIMUS MBX или MAXIMUS MBA, в качестве альтернативы используйте Розовый...
  • Seite 111: Подключение К Maximus-Mhx

    Для выполнения электрических • Откройте крышку электромагнитного клапана. соединений между изделиями • Найдите клеммы L, N. используйте блоки связи VIDEOTEC, MAXIMUS MBX или MAXIMUS MBA, в • Выполните соединения согласно изображенной качестве альтернативы используйте ниже схеме (Рис. 17, страница 13).
  • Seite 112: Установка Насоса

    6.3 Установка насоса Удалите остаточные давления бака, повернув на предохранительный клапан. При операциях установки или техобслуживания насоса можно оставлять бак в позиции или удалить его (Рис. 19, страница 14). Для удаления бака (01) нажмите на металлические хомутики (02) и отсоедините соединяющую трубу (03).
  • Seite 113: Установка Омывателя (Ptz)

    6.4 Установка омывателя (PTZ) Подсоедините впускную трубу (01), давая ей пройти через уплотнительное кольцо (02). Прикрепите опору (01) к корпусу PTZ, используя специальную прилагаемую металлическую стяжку (02). Рис. 25 Версия с одним кабельным вводом Рис. 23 Вставьте картер и завинтите винт безопасности. Рис.
  • Seite 114 Закрепите трубу к стойке омывателя стекла При выполнении калибровки струи поверните посредством кронштейна (01), винтов (02) и шайб форсунку в сторону окна кожуха. (03) в комплекте. Подсоединение впускной трубы (04). Рис. 29 Версия с одним кабельным вводом Рис. 31 Версия с одним кабельным вводом Рис.
  • Seite 115: Установка Омывателя (Maximus Mvx)

    6.5 Установка омывателя (MAXIMUS MVX) Закрепите кронштейн (01) на корпусе MAXIMUS MVX, используя специальную прилагаемую металлическую стяжку (02). Закрепите опору нагнетательной трубки (03), используя прилагаемые винты и шайбы. Рис. 35 Укоротите трубку стеклоомывателя (06) до необходимой длины. Открутите гайку (07), переместив...
  • Seite 116: Установка Омывателя (Maximus-Mhx)

    6.6 Установка омывателя (MAXIMUS-MHX) Закрепите кронштейн (01) на корпусе MAXIMUS- MHX, используя специальную прилагаемую металлическую стяжку (02). Закрепите опору нагнетательной трубки (03), используя прилагаемые винты и шайбы. Рис. 41 Укоротите трубку стеклоомывателя (06) до необходимой длины. Открутите гайку (07), переместив ее по трубке. Вставьте конец трубки в кольцо...
  • Seite 117: Примеры Установки

    6.6.1 Примеры установки Рис. 45 Рис. 47 Рис. 46 MNVCWASEX_2013_RU...
  • Seite 118: Техническое Обслуживание

    специализированным персоналом. сжатый воздух. 9 Информация об Любая замена указанных деталей должна быть выполнена только оригинальными утилизации и переработке запчастями VIDEOTEC при строгом соблюдении инструкций техобслуживания, Европейская директива 2012/19/ЕС Об Отходах которые входит в комплект каждой Электрического и Электронного оборудования запчасти.
  • Seite 119: Технические Характеристики

    Электромагнитная совместимость: EN60945 Источник питания: 24Vdc Защита от солевого тумана: EN60068-2-52 Энергопотребление: 10.6W Испытание при 70°C в течение 16 часов в соответствии с EN60068-2-2 10.6 Сертификаты - Взрывобезопасное применение WASEX - СЕРТИФИКАТЫ И МАРКИРОВКА Номер изделия Сертификаты Маркировка Температура окружающей среды WASEX2T4AT ATEX (Электроклапан)
  • Seite 120: Технические Чертежи

    11 Технические чертежи Размеры указаны в миллиметрах. Рис. 49 WASEX. MNVCWASEX_2013_RU...
  • Seite 122 Email: info@videotec.com Tel. +33 1 60491816 - Fax +33 1 69284736 Email: info.fr@videotec.com Asia Pacific Videotec (HK) Ltd Americas Videotec Security, Inc. Flat 8, 19/F. On Dak Industrial Building, No. 2-6 Wah Sing Street Gateway Industrial Park, 35 Gateway Drive, Suite 100 Kwai Chung, New Territories - Hong Kong Plattsburgh, NY 12901 - U.S.A.
  • Seite 123 PORTUGUÊS WASEX Bomba lava-vidro com eletroválvula à prova de explosão Português - Manual de instruções...
  • Seite 125 Sumário P O R T U G U Ê S 1 Informações neste manual....................... 5 1.1 Convenções tipográficas..............................5 2 Direitos autorais e informações sobre marcas registradas ........... 5 3 Normas de segurança ....................... 5 4 Identificação ..........................7 4.1 Descrição e designação do produto ..........................7 4.2 Etiqueta do produto ................................
  • Seite 126 10.4 Ambiente ....................................21 10.5 Certificações - Aplicações marinhas ..........................21 11 Desenhos técnicos ........................22 MNVCWASEX_2013_PT...
  • Seite 127: Informações Neste Manual

    1 Informações neste manual 3 Normas de segurança Antes de instalar e utilizar este produto, leia com ATENÇÃO! O sistema elétrico ao qual está atenção toda a documentação fornecida. Manter o ligada a unidade deve ter um interruptor de manual ao alcance da mão para consultas futuras. proteção bipolar automática de 15A max.
  • Seite 128 • Confirme que todas as partes estão fixadas de • Use peças de reposição somente da VIDEOTEC. maneira sólida e confiável. • Antes de prosseguir com a instalação, verificar se • Dado que a escolha da superfície de montagem o material fornecido corresponde às necessidades...
  • Seite 129: Identificação

    4.1 Descrição e designação do marcação da eletroválvula. A etiqueta de marcação é produto fixada na própria eletroválvula. A bomba de lavagem WASEX é um elemento fundamental nos equipamentos de videovigilância de áreas potencialmente explosivas, porque garante imagens sempre nítidas em qualquer condição ambiental e reduz as intervenções de manutenção.
  • Seite 130: Preparação Do Produto Para O Uso

    5 Preparação do produto 5.2 Desembalagem para o uso Na entrega do produto, verificar se a embalagem está íntegra e se possui sinais evidentes de quedas ou abrasões. A realização de alterações não aprovadas expressamente pelo fabricante invalidará a Em caso de sinais evidentes de dano à embalagem, garantia.
  • Seite 131: Eliminação Segura Dos Materiais De Embalagem

    5.4 Eliminação segura dos 5.5.2 Montagem dos anéis de retenção (opcional) materiais de embalagem Durante a montagem é necessário Os materiais de embalagem são constituídos prestar atenção para não danificar a inteiramente por material reciclável. O técnico que borracha, de modo a não comprometer a fizer a instalação deve eliminá-los segundo as regras impermeabilidade.
  • Seite 132: Montagem Sobre Suporte

    No momento da instalação, controlar se as características de alimentação fornecidas pelo sistema correspondem àquelas solicitadas pelo dispositivo. Fig. 10 WASEX+NXCOL. Verificar que a fonte e o cabo de alimentação estejam dimensionados adequadamente. 6.2.1 Conexão da eletroválvula Para informações adicionais, consultar o manual de uso e instalação do produto.
  • Seite 133: Conexão A Ptz

    • Abra a tampa da eletroválvula. produtos use a caixa de comunicação da • Localize os bornes L, N. VIDEOTEC, MAXIMUS MBX ou MAXIMUS MBA, como alternativa, use uma caixa • Faça as conexões como no esquema abaixo (Fig. de conexões à prova de explosões com 13, página 11).
  • Seite 134: Conexão À Maximus Mvx

    Para fazer as conexões elétricas entre os Tab. 2, página 12). produtos use a caixa de comunicação da LIGAÇÃO DOS CABOS DE SINAL VIDEOTEC, MAXIMUS MBX ou MAXIMUS Função MBA, como alternativa, use uma caixa de conexões à prova de explosões com Rosa Relé...
  • Seite 135: Conexão À Maximus-Mhx

    • Abra a tampa da eletroválvula. produtos use a caixa de comunicação da • Localize os bornes L, N. VIDEOTEC, MAXIMUS MBX ou MAXIMUS MBA, como alternativa, use uma caixa • Faça as conexões como no esquema abaixo (Fig. de conexões à prova de explosões com 17, página 13).
  • Seite 136: Instalação Da Bomba

    6.3 Instalação da bomba Retire eventual pressão residual do reservatório apertando a válvula de segurança. Nas operações de instalação ou manutenção da bomba, é possível deixar o reservatório na posição ou retirá-lo (Fig. 19, página 14). Para retirar o reservatório (01), aperte as abraçadeiras metálicas (02) e solte o tubo de conexão (03).
  • Seite 137: Instalação Do Lava-Vidros (Ptz)

    6.4 Instalação do lava-vidros Conecte o tubo de alimentação (01) fazendo atravessar o anel de retenção (02). (PTZ) Fixe o suporte (01) no corpo do PTZ por meio da abraçadeira metálica dedicada (02) que acompanha o produto. Fig. 25 Versão com entrada de cabos simples Fig.
  • Seite 138 Fixe o tubo de sustentação do lava-vidros por meio Para calibrar o jato, oriente a ponta na direção da da placa de fixação (01), os parafusos (02) e as janela da caixa. arruelas (03) que acompanham o produto. Conectar o tubo de alimentação (04).
  • Seite 139: Instalação Do Lava-Vidros (Maximus Mvx)

    6.5 Instalação do lava-vidros (MAXIMUS MVX) Fixe o suporte (01) no corpo do MAXIMUS MVX por meio da abraçadeira metálica dedicada (02) que acompanha o produto. Fixe a sustentação do tubo de alimentação (03) usando os parafusos e as arruelas que acompanham o produto.
  • Seite 140: Instalação Do Lava-Vidros (Maximus-Mhx)

    6.6 Instalação do lava-vidros (MAXIMUS-MHX) Fixe o suporte (01) no corpo do MAXIMUS-MHX por meio da abraçadeira metálica dedicada (02) que acompanha o produto. Fixe a sustentação do tubo de alimentação (03) usando os parafusos e as arruelas que acompanham o produto.
  • Seite 141: Exemplos De Instalação

    6.6.1 Exemplos de instalação Fig. 45 Fig. 47 Fig. 46 MNVCWASEX_2013_PT...
  • Seite 142: Manutenção

    A limpeza deve ser efetuada com um pano úmido e deve ser feita usando apenas peças de sem a utilização de ar comprimido. reposição originais VIDEOTEC seguindo 9 Informações sobre cuidadosamente as instruções de manutenção incluídas em cada peça do kit.
  • Seite 143: Dados Técnicos

    Resistente a névoa salina: EN60068-2-52 WASEX2T4KC Testado a 70°C por 16 horas de acordo com EN60068- Alimentação: 24Vdc Consumo: 10.6W 10.6 Certificações - Aplicações à prova de explosões WASEX - CERTIFICAÇÕES E MARCAÇÕES Código do produto Certificado Marcação Temperatura am- biente WASEX2T4AT ATEX (Eletroválvula)
  • Seite 144: Desenhos Técnicos

    11 Desenhos técnicos As medidas indicadas estão expressas em milímetros. Fig. 49 WASEX. MNVCWASEX_2013_PT...
  • Seite 146 Email: info@videotec.com Tel. +33 1 60491816 - Fax +33 1 69284736 Email: info.fr@videotec.com Asia Pacific Videotec (HK) Ltd Americas Videotec Security, Inc. Flat 8, 19/F. On Dak Industrial Building, No. 2-6 Wah Sing Street Gateway Industrial Park, 35 Gateway Drive, Suite 100 Kwai Chung, New Territories - Hong Kong Plattsburgh, NY 12901 - U.S.A.
  • Seite 148 Email: info@videotec.com Tel. +33 1 60491816 - Fax +33 1 69284736 Email: info.fr@videotec.com Asia Pacific Videotec (HK) Ltd Americas Videotec Security, Inc. Flat 8, 19/F. On Dak Industrial Building, No. 2-6 Wah Sing Street Gateway Industrial Park, 35 Gateway Drive, Suite 100 Kwai Chung, New Territories - Hong Kong Plattsburgh, NY 12901 - U.S.A.

Inhaltsverzeichnis