Herunterladen Inhalt Inhalt Diese Seite drucken
Targus ExpressCard ACP60EU Bedienungsanleitung

Targus ExpressCard ACP60EU Bedienungsanleitung

Notebook docking station with digital video and audio
Inhaltsverzeichnis

Werbung

Verfügbare Sprachen
  • DE

Verfügbare Sprachen

  • DEUTSCH, seite 27
TM
ExpressCard
Notebook
Docking Station
with Digital Video
and Audio
USER GUIDE

Werbung

Inhaltsverzeichnis
loading

Inhaltszusammenfassung für Targus ExpressCard ACP60EU

  • Seite 1 ExpressCard Notebook Docking Station with Digital Video and Audio USER GUIDE...
  • Seite 2: Inhaltsverzeichnis

    Docking Station Universale per Notebook ExpressCard con Video e Audio Digitale................98 Nederlands ExpressCard Universal Notebook Docking Station met digitale video en audio................122 Português ExpressCard Universal Notebook Docking Station com Digital Vídeo e Áudio................146 Finnish Kannettavan Targus Expresscard -tietokoneen Telakointiasema Digitaalisilla Kuva- Ja Äänitoiminnoilla ........170...
  • Seite 3: Video And Audio

    S/PDIF, and a serial port for legacy device. The docking station also offers Targus Always On technology, Targus USB Power Ports providing twice as much power as the standard USB spec and widely spaced to accommodate for larger adapters. Targus Always On provides power to the...
  • Seite 4: Package Contents

    Targus ExpressCard Notebook Docking Station with Digital Video and Audio Ergonomic Design Ergonomic design helps increase airflow under notebook for cooler operation. The raised platform provides a more comfortable position for typing. Features • (4) High Speed USB 2.0 ports •...
  • Seite 5: System Requirements

    Targus ExpressCard Notebook Docking Station with Digital Video and Audio System Requirements Hardware • PC with an Intel® Pentium® processor or equivalent • CD-ROM drive • ExpressCard 34mm or 54mm slot Operating System • Windows Vista • Windows® XP - Service Pack 2 or greater NOTE: TO DOWNLOAD THE LATEST SERVICE PACKS, PLEASE VISIT YOUR COMPUTER MANUFACTURER’S WEBSITE OR MICROSOFT’S DOWNLOAD...
  • Seite 6 Targus ExpressCard Notebook Docking Station with Digital Video and Audio About the ExpressCard Connector Card The ExpressCard dock comes with a cable, a spacer (see “Using the Spacer Connector” for additional instructions) and 34mm card to connect to an ExpressCard slot in your notebook. The cable is removable from the card.
  • Seite 7 Targus ExpressCard Notebook Docking Station with Digital Video and Audio Using the Spacer Connector A spacer is supplied to ensure the proper fitting of the 34mm Express- Card into a 54mm slot. This spacer has no functionality other than to prevent any movement of the card once it is inserted into the 54mm slot.
  • Seite 8 Targus ExpressCard Notebook Docking Station with Digital Video and Audio Instructions for connecting the spacer to the ExpressCard Before beginning make sure the spacer and PC card are aligned as below. 1. When attaching the spacer, ensure the spacer is at a 45 degree angle to the PC card.
  • Seite 9 Targus ExpressCard Notebook Docking Station with Digital Video and Audio Installing the Docking Station Driver Installing the docking station driver enables your operating system to recognize the docking station and its ports once it’s connected. 1. Turn on your computer.
  • Seite 10 INSTALL PROPERLY. IT MIGHT TAKE UP TO 5 MINUTES OR MORE DEPENDING ON YOUR COMPUTER’S CONFIGURATION. 6. You will see a Targus Display logo icon located at the system tray. The monitor mode selection can be set by right clicking on this icon.
  • Seite 11 Targus ExpressCard Notebook Docking Station with Digital Video and Audio LED Status Indicator Lights Once all device drivers are installed, the USB LED status indicator lights on on each side of the docking station glow when you connect devices to the docking station.
  • Seite 12 Targus ExpressCard Notebook Docking Station with Digital Video and Audio Lock slot for use with “Easy Access” Targus locks - Models High power USB nos. PA410U or ports with PA450U (not included) LED light indicator Connecting New Devices To avoid possible damage when connecting a new device, do not force the cable connector into the port on the docking station.
  • Seite 13: Connecting A Usb Device

    Targus ExpressCard Notebook Docking Station with Digital Video and Audio Connecting a PDA 1. Attach the cable connector to the serial port on the docking station. 2. Verify that the COM port setting, in either your HotSync® or ActiveSync® software, matches the setting on the docking station.
  • Seite 14: Connecting And Configuring An Audio Device

    Targus ExpressCard Notebook Docking Station with Digital Video and Audio Connecting and Configuring an Audio Device This docking station comes with a 5.1 Audio Support. The back of the Device has 5 ports dedicated to Audio. NOTE: IF YOU ARE HAVING PROBLEMS WITH YOUR SPEAKERS AFTER ATTACHING THE DOCKING STATION, PLEASE SEE THE TROUBLESHOOTING SECTION FOR MORE INFORMATION.
  • Seite 15 Targus ExpressCard Notebook Docking Station with Digital Video and Audio 2. To connect a microphone, plug it into the Pink 3.5mm port. 3. To enable your headphones or speakers, you must first choose C- Media USB Sound Device in the Properties Settings 4.
  • Seite 16 Targus ExpressCard Notebook Docking Station with Digital Video and Audio Installing and Configuring a S/PDIF (Sony/ Philips Digital Interface) Device 1. In order to enable S/PDIF, you have to turn it on. This can be done by opening the USB 3D Sound Configuration applet located in your system tray.
  • Seite 17 4. Click "OK" to close the "Display properties" screen To Change the resolution and modes using the Targus Display icon: 1. Position the Mouse on the top of the Targus Icon and right click on it. 2. From this screen, you can change the resolutions and modes that the Dock operates in (see below explanation of the video modes supported).
  • Seite 18 Targus ExpressCard Notebook Docking Station with Digital Video and Audio Notebook Secondary Screen Monitor or LCD Primary: Extended: Mirror: Off: NOTE: SOME LCDS HAVE BEEN OPTIMIZED FOR A SPECIFIC RESOLUTION. IF THE OPTIMUM RESOLUTION IS NOT 1280 X 1024, THE RESULTS MAY NOT BE AS DESIRED.
  • Seite 19 Targus ExpressCard Notebook Docking Station with Digital Video and Audio Global Suspend Mode When your computer is in suspend mode, the docking station also enters suspend mode to avoid power consumption. When your computer wakes up, the docking station wakes up automatically.
  • Seite 20 Targus ExpressCard Notebook Docking Station with Digital Video and Audio Troubleshooting Device Not Working • Make sure that the device is fully inserted into the correct port on the docking station. • Plug the device into a different port on the docking station. If it still doesn’t work, test the device by connecting it directly to your...
  • Seite 21 Targus ExpressCard Notebook Docking Station with Digital Video and Audio From the Device Manager window, expand the following: • Display Adapters - Targus ExpressCard w/ video • Human Interface Devices - displays keyboards and pointing devices: mice, trackballs, and joysticks •...
  • Seite 22 Targus ExpressCard Notebook Docking Station with Digital Video and Audio Video Can I get a higher resolution on my monitor? • Highest resolution is 1600 x 1200, 32-bit color. Movie playback is not smooth when played at 1600x1200x32 bit resolution. It is worse when playing a media clip in full screen? The Targus ExpressCard Docking station is not primarily designed for playing back movie content at maximum resolution and color depth.
  • Seite 23 Targus ExpressCard Notebook Docking Station with Digital Video and Audio My system crashes during boot up with the Card connector installed? Try switching the Pre-boot switch to the on position and boot again. Can two separate displays be connected to the ExpressCard...
  • Seite 24: Technical Support

    Targus ExpressCard Notebook Docking Station with Digital Video and Audio Technical Support For technical questions, please visit: Internet http://www.targus.com/support.asp English http://www.targus.com/uk/support.asp French http://www.targus.com/fr/support.asp German http://www.targus.com/de/support.asp Spanish http://www.targus.com/sp/support.asp Italian http://www.targus.com/it/support.asp Our knowledgeable staff is also available to answer your questions through one of the following telephone numbers.
  • Seite 25: Product Registration

    This warranty does not cover accidental damage, wear and tear, or consequential or incidental loss. Under no conditions is Targus liable for loss of, or damage to a computer; nor loss of, or damage to, programs, records, or data; nor any consequential or incidental damages, even if Targus has been informed of their possibility.
  • Seite 26: Declaration Of Conformity

    Changes or modifications not authorized by the party responsible for compliance could void the user’s authority to operate this product Declaration of Conformity Hereby, Targus, declares that this device is in compliance with the essential requirements and other relevant provisions of Directive 1999/5/EC. Targus Recycling Directive At the end of this product’s useful life please dispose at an...
  • Seite 27: Universelle Expresscard Notebook-Dockingstation Mit Digitalem

    Monitor oder LCD, Hochgeschwindigkeits-Gigabit-Ethernet/LAN, 5.1-Leitungen PC Audio mit Glasleiterfaser S/PDIF und eine serielle Schnitt- stelle für Altgeräte anzuschliessen. Ferner verfügt die Dockingstation über die Targus- Always- On-Technologie, Targus USB-Power-Ports mit doppelt so viel Leistungsvermögen eine herkömmliche USB- Spezifikation, und sie bietet genügend Platz für den Anschluss größerer Adapter.
  • Seite 28: Lieferumfang

    Targus ExpressCard Notebook Docking Station with Digital Video and Audio Ergonomisches Design Das ergonomische Design fördert die Luftführung unter dem Notebook und sorgt für einen kühleren Betrieb. Die angehobene Plattform ermöglicht eine bequemere Handhaltung. Merkmale •(4) schnelle USB 2.0 Ports •(1) Serieller Anschluss (RS232)
  • Seite 29: Systemanforderungen

    Targus ExpressCard Notebook Docking Station with Digital Video and Audio Systemanforderungen Hardware • PC mit einem Intel Pentium oder entsprechenden Prozessor • CD-ROM-Laufwerk • 34 mm oder 54 mm Expresscard-Slot Betriebssystem • Windows Vista oder • Windows XP - Service Pack 2 oder höher...
  • Seite 30: Die Expresscard Steckkarte

    Targus ExpressCard Notebook Docking Station with Digital Video and Audio Die ExpressCard Steckkarte Das ExpressCard Dock wird zusammen mit einem Kabel, Abstandhal- ter (siehe "Benutzen des Abstandhalter-Anschlusses" für zusätzliche Information) und einer 34mm Karte für den Anschluss an die Express- Card Schnittstelle Ihres Notebooks geliefert.
  • Seite 31 Targus ExpressCard Notebook Docking Station with Digital Video and Audio Abstandanschluss benutzen Der Abstandhalter dient der sicheren Einfügung der 34mm Express- Card in die 54mm Schnittstelle. Dieser Abstandhalter hat keine andere Funktion, außer die Karte zu stabilisieren, nachdem sie an den 54mm Slot angeschlossen wurde.
  • Seite 32: Anweisungen Zum Anbringen Des Abstandhalters An Die Expresscard

    Targus ExpressCard Notebook Docking Station with Digital Video and Audio Anweisungen zum Anbringen des Abstand- halters an die ExpressCard Bevor Sie anfangen, vergewissern Sie sich, dass der Abstandhalter und die PC Karte wie unten dargestellt ausgerichtet sind. 1. Achten Sie beim anbringen des Abstandhalters darauf, dass dieser im 45 Grad Winkel zur PC Karte steht.
  • Seite 33: Dockingstation-Treiber Installieren

    Targus ExpressCard Notebook Docking Station with Digital Video and Audio Dockingstation-Treiber installieren Das Installieren des Dockingstation-Treibers erlaubt Ihrem Betriebs- system die Dockingstation und ihre Ports zu identifizieren, nachdem sie angeschlossen wurde. 1. Schalten Sie Ihren Computer ein. 2. Legen Sie die Treibersoftware-CD in das CD-ROM-Laufwerk Ihres Computers ein.
  • Seite 34 UM DIE TREIBER KORREKT ZU INSTALLIEREN. ES KANN BIS ZU 5 MINUTEN ODER LÄNGER DAUERN, ABHÄNGIG VON DEN KONFIGURATIONEN IHRES COMPUTERS. 6. In der Systemablage befindet sich das Targus Display Logo. Der Bildschirmmodus kann durch einen Rechtsklick auf dieses Symbol eingestellt werden.
  • Seite 35: Led-Statusanzeigen

    Targus ExpressCard Notebook Docking Station with Digital Video and Audio LED-Statusanzeigen Nachdem Sie die Dockingstation an Ihren Computer angeschlossen haben, werden automatisch die standardmäßigen Treiber für jeden der Ports installiert. • Die grüne Tx-LED leuchtet beim Anschluss an ein Netzwerk, und die gelbe Rx-LED blinkt, wenn Daten zum oder vom Netzwerk übertragen werden.
  • Seite 36: Anschliessen Neuer Geräte

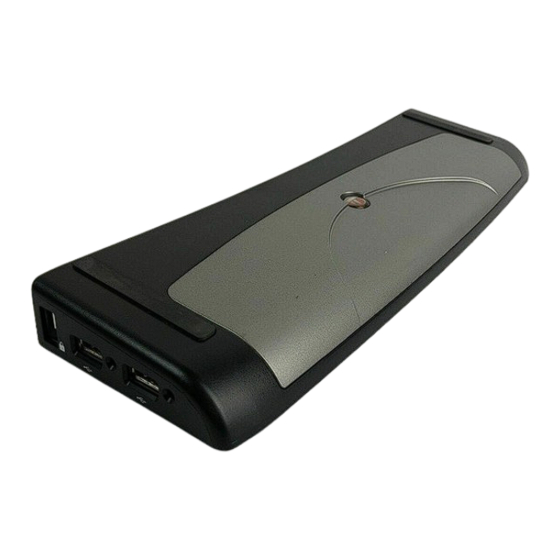
    Targus ExpressCard Notebook Docking Station with Digital Video and Audio Lock-Slot für Targus "Easy Access" Locks High-Power USB-Ports mit LED-Statusanzeige Anschliessen neuer Geräte Um mögliche Schäden zu vermeiden, dürfen die Kabel neuer Geräte nicht mit Gewalt an die Dockingstation angeschlossen werden. Sollte sich ein Kabel nicht problemlos anschliessen lassen, drehen Sie den Stecker um, und probieren Sie erneut.
  • Seite 37: Anschliessen Eines Pda

    Targus ExpressCard Notebook Docking Station with Digital Video and Audio Anschliessen eines PDA 1. Schliessen Sie den Stecker an den seriellen Port der Dockingstation 2.Überprüfen Sie, ob die COM-Port-Einstellung, entweder in der HotSync- oder ActiveSync-Software, mit den Einstellungen an der Dockingstation übereinstimmt.
  • Seite 38: Anschliessen Eines Audiogerätes

    Targus ExpressCard Notebook Docking Station with Digital Video and Audio Anschliessen Konfigurieren eines Audiogerätes Diese Dockingstation verfügt über eine 5.1 Audioauflage. Auf der Rückseite der Dockingstation befinden sich 5 Audio-Ports. SOLLTEN SIE PROBLEME MIT IHREN LAUTSPRECHERN HABEN, NACHDEM DIE DOCKINGSTATION ANGESCHLOSSEN WURDE, SEHEN SIE FÜR WEITERE INFORMATIONEN DEN ABSCHNITT FEHLERBEHEBUNG.
  • Seite 39 Targus ExpressCard Notebook Docking Station with Digital Video and Audio 2. Ein Mikrofon schliessen Sie an den rosanen 3.5mm Port an. 3. Um Ihre Kopfhörer oder Lautsprecher benutzen zu können, müssen Sie zunächst in den Eigenschafteneinstellungen C-Media USB Sound Device wählen.
  • Seite 40: Installieren Eines S/Pdif (Sony/Philips Digital Interface)-Gerätes

    Targus ExpressCard Notebook Docking Station with Digital Video and Audio Installieren Konfigurieren eines S/PDIF (Sony/Philips Digital Interface)-Gerätes 1.Um die S/PDIF-Funktion zu aktivieren, müssen Sie sie einschalten. Dies kann erfolgen, indem man das USB 3D-Konfigurierungsprogramm im Infofeld öffnet. (klicken Sie auf das USB-Symbol, um den Konfigurationsbildschirm aufzurufen) 2.
  • Seite 41: Anschliessen An Einen Bildschirm Oder Lcd-Bildschirm

    4. Klicken Sie auf "OK", um den Bildschirm "Eigenschaften anzeigen". Auflösung und Modi über Targus Display-Symbol ändern. 1. Positionieren Sie die Maus auf das Targus Symbol und klicken Sie mit der rechten Maustaste darauf. 2. Auf diesem Bildschirm können Sie die Auflösung und die Modi ändern, mit welchen das Dock operiert (siehe die folgende Erklärung zu den...
  • Seite 42 Targus ExpressCard Notebook Docking Station with Digital Video and Audio Notebook- Zweiter Bildschirm Bildschirm oder LCD-Bildschirm Primär: Erweitert: Spiegel: Aus: ACHTUNG:EINIGE LCD-BILDSCHIRME WURDEN FÜR EINE SPEZIFISCHE AUFLÖSUNG OPTIMIERT.WENN DIE OPTIMALE AUFLÖSUNG NICHT 1280 X 1024 IST, KÖNNEN DIE ERGEBNISSE NICHT WIE ERWÜNSCHT SEIN.
  • Seite 43: Allgemeiner Ruhezustandsmodus

    Targus ExpressCard Notebook Docking Station with Digital Video and Audio Allgemeiner Ruhezustandsmodus Wenn sich Ihr Computer im Ruhezustand befindet, wechselt auch die Dockingstation in den Ruhezustand, um Energie zu sparen. Sobald Ihr Computer reaktiviert wird, geschieht dies automatisch auch mit der Dockingstation.
  • Seite 44: Das Gerät Funktioniert Nicht

    Targus ExpressCard Notebook Docking Station with Digital Video and Audio Fehlerbehebung Das Gerät funktioniert nicht • Kontrollieren Sie, ob das Gerät vollständig am richtigen Port der Dockingstation angeschlossen ist. • Schliessen Sie das Gerät an einen anderen Port der Dockingstation an.
  • Seite 45: Überprüfen Eines Seriellen Modems Anschluss

    Targus ExpressCard Notebook Docking Station with Digital Video and Audio Im Fenster des Geräte-Managers können Sie folgende Elemente erweitern: • Grafikkarten-Targus Expresscard mit Video, • Eingabe- und ZeigegeräteTastaturen und andere Zeigegeräte: Mäuse, Trackballs und Joysticks, • Netzwerkadapter-zeigt den Realtek RTL 8110SC Ethernet-Adapter, •...
  • Seite 46 Targus ExpressCard Notebook Docking Station with Digital Video and Audio Video Kann ich eine höhere Auflösung auf meinem Bildschirm erzielen? • Die höchste Auflösung ist 1600x1200, 32-Bit Farbe Die Filmwiedergabe bei 1600x1200 Bit ist nicht gleichmäßig. Ist die Auflösung noch schlechter, wenn ein Videoclip auf dem...
  • Seite 47 Targus ExpressCard Notebook Docking Station with Digital Video and Audio Mein System stürzt beim Booten bei installierter Steckkarte ab. Versuchen Sie den Vor-Start-Schalter auf An und starten Sie das System neu. Können zwei separate Displays an die ExpressCard Dockingsta- tion (VGA und DVI-D) angeschlossen werden und zwei separate...
  • Seite 48: Technische Unterstützung

    Targus ExpressCard Notebook Docking Station with Digital Video and Audio Technische Unterstützung Wenn Sie technische Fragen haben, besuchen Sie bitte: Internet http://www.targus.com/support.asp Englisch http://www.targus.com/uk/support.asp Französisch http://www.targus.com/fr/support.asp Deutsch http://www.targus.com/de/support.asp Spanisch http://www.targus.com/sp/support.asp Italienisch http://www.targus.com/it/support.asp Unser Expertenteam steht Ihnen auch telefonisch zur Beantwortung Ihrer Fragen zur Verfügung.
  • Seite 49: Produktregistrierung

    Targus ExpressCard Notebook Docking Station with Digital Video and Audio Produktregistrierung Targus empfiehlt die Registrierung des Targus-Zubehörs sofort nach dem Kauf. Die Registrierung von Targus-Zubehör erfolgt unter: http://www.targus.com/registration.asp Geben Sie bitte Ihren vollständigen Namen, Ihre E-Mail-Adresse, Telefonnummer und Firmeninformationen an (falls zutreffend).
  • Seite 50: Konformitätserklärung

    Targus ExpressCard Notebook Docking Station with Digital Video and Audio unsachgemäßer Installation und einer Verwendung, die nicht gemäß den Anweisungen erfolgt, können störende Interferenzen in der Radiokommunikation auftreten. Es liegt jedoch keine Garantie vor, dass bestimmten Installationen keine Interferenzen auftreten.
  • Seite 51 La estación de conexión ofrece también una ultra Tecnología Targus, Los puertos USB de Targus suministran dos veces más potencia que los USB estándar y están ampliamente espaciados para acomodar adaptadores más grandes. La tecnología de Targus suministra potencia en los puertos USB...
  • Seite 52: Características

    Targus ExpressCard Notebook Docking Station with Digital Video and Audio Diseño ergonómico El diseño ergonómico ayuda en aumentar la corriente de aire debajo del ordenador portátil para operaciones de enfriamiento. La plataforma más elevada ofrece una posición más cómoda para escribir a máquina.
  • Seite 53: Requisitos Del Sistema

    Targus ExpressCard Notebook Docking Station with Digital Video and Audio Requisitos del sistema Hardware • PC con un procesador Intel® Pentium® o equivalente • Drive para CD-ROM • Ranura Expresscard de 34mm o 54mm Sistema operativo • Windows Vista • Windows® XP - Paquete de servicios 2 o superior NOTA: PARA DESCARGAR LOS ÚLTIMOS PAQUETES DE SERVICIO, POR...
  • Seite 54 Targus ExpressCard Notebook Docking Station with Digital Video and Audio Sobre la tarjeta conectora ExpressCard La conexión ExpressCard se suministra con un cable, un espaciador (vea "Usar el Conector espaciador" para instrucciones adicionales) y una tarjeta de 34mm para conectar a una ranura ExpressCard en su ordenador portátil.
  • Seite 55 Targus ExpressCard Notebook Docking Station with Digital Video and Audio Usar el conector espaciador Un espaciador está suministrado para asegurar el ajuste apropiado de Express-Card de 34 mm en una ranura de 54 mm. Este espaciador no tiene otra funcionalidad que prevenir cualquier movimiento de la tarjeta una vez insertada en la ranura de 54mm.
  • Seite 56 Targus ExpressCard Notebook Docking Station with Digital Video and Audio Instrucciones para conectar el espaciador a la tarjeta ExpressCard Antes de comenzar, asegúrese de que el espaciador y la tarjeta de PC estén alineados como se muestra a continuación. 1. Cuando coloque el espaciador, asegúrese de que éste se encuentre en un ángulo de 45 grados en relación con la tarjeta de PC.
  • Seite 57 Targus ExpressCard Notebook Docking Station with Digital Video and Audio Instalar el driver de la estación de conexión La instalación del driver de la estación de conexión permite que su sistema operativo reconozca la estación de conexión y sus puertos una vez conectada.
  • Seite 58 INSTALAR APROPIADAMENTE. ESTO PUEDE DURAR 5 MINUTOS O MÁS EN DEPENDENCIA DE LA CONFIGURACIÓN DE SU ORDENADOR. 6, Usted verá el icono del logo de la pantalla Targus localizado en el tray del sistema. Esta selección del modo de monitor se puede ajustar al pulsar con lel botón derecho del ratón en este icono.
  • Seite 59 Targus ExpressCard Notebook Docking Station with Digital Video and Audio El indicador del estado LED se ilumina Una vez todos los drivers del dispositivo instalados, el indicador del estado de LED USB se ilumina en cada parte de la estación de conexión cuando usted conecta los dispositivos a la estación de...
  • Seite 60 Targus ExpressCard Notebook Docking Station with Digital Video and Audio Ranura de bloqueo para Puertos USB de uso con bloqueos alta potencia Targus "Acceso fácil" con indicador de luz Conectar dispositivos nuevos Para evitar daños posibles cuando conecta un nuevo dispositivo, no fuerce el conector de cable en el puerto de la estación de conexión.
  • Seite 61 Targus ExpressCard Notebook Docking Station with Digital Video and Audio Conectar un PDA 1 Adjunte el conector del cable al puerto serial en la estación de conexión. 2 Verifique si la configuración del puerto COM en cualquiera del software HotSync® o ActiveSync® corresponde a la configuración de la estación de conexión.
  • Seite 62 Targus ExpressCard Notebook Docking Station with Digital Video and Audio Conectar y configurar un disposi- tivo audio La estación de conexión ofrece un soporte audio 5,1,. La parte trasera del dispositivo tiene 5 puertos dedicados a audio. SI USTED TIENE PROBLEMAS CON SUS AURICULARES DESPUÉS DE CONECTAR- LOS LA ESTACIÓN DE CONEXIÓN, POR FAVOR VEA LA SECCIÓN SOLUCIÓN DE...
  • Seite 63 Targus ExpressCard Notebook Docking Station with Digital Video and Audio 2. Para conectar un micrófono, enchúfelo en puerto rosa de 3.5mm. 3. Para conectar sus auriculares o sus altavoces, usted debe primero elegir Dispositivo de Sonido USB C-media en las Configuraciones de las Propiedades 4.
  • Seite 64 Targus ExpressCard Notebook Docking Station with Digital Video and Audio Instalar y configurar un dispositivo S/PDIF (Dispositivo de interfaz digi- tal Sony/ Philips) 1. Para permitir S/PDIF, usted debe encenderlo. Esto se puede realizar al abrir el applet de Configuración de Sonido 3D USB situado en la bandeja de su sistema.
  • Seite 65 Opciones del menú de vídeo Las opciones del menú de vídeo se pueden acceder al hacer clic derecho con elratón en el icono del Display Targus en la bandeja del sistema o por medio de las Propiedades del Display de Windows.
  • Seite 66 Targus ExpressCard Notebook Docking Station with Digital Video and Audio Monitor Pantalla del secundario ordenador o LCD portátil Fundamental: Apagado Encendido Extendido: Encendido Encendido Espejo: Encendido Encendido Apagado: Apagado Encendido NOTA: ALGUNOS LCDS SE HAN OPTIMIZADO PARA UNA RESOLUCIÓN ESPECÍFICA. SI LA RESOLUCIÓN ÓPTIMA NO ES DE 1280 X 1024, LOS RESULTADOS PUEDEN NO SER LOS DESEADOS.
  • Seite 67 Targus ExpressCard Notebook Docking Station with Digital Video and Audio Modo de Suspensión global Cuando su ordenador está en el modo de Suspensión, la estación de conexión también entra en el modo de Suspensión para evitar consumo de potencia. Cuando su ordenador se activa, la estación de conexión se activa automáticamente.
  • Seite 68: Solución De Problemas

    Targus ExpressCard Notebook Docking Station with Digital Video and Audio Solución de problemas El dispositivo no funciona • Asegúrese de que el dispositivo está completamente insertado en el puerto correcto de la estación de conexión. • Enchufe el dispositivo en un puerto diferente de la estación de conexión.
  • Seite 69 Targus ExpressCard Notebook Docking Station with Digital Video and Audio De la ventana de Administrador de Dispositivo, se expande lo siguiente: • Adaptadores de Display - Expresscard w/ vídeo Targus • Dispositivos de Interfaz humana - visualiza teclados y dispositivos señaladores: ratón, bola de seguimiento y palanca de mando...
  • Seite 70 Targus ExpressCard Notebook Docking Station with Digital Video and Audio Video ¿Puedo conseguir una resolución más alta de mi monitor? • La resolución más alta es de 1600 x 1200, 32-bit colores. La reproducción de película no es correcta cuando selecciona resolución de 1600x1200x32 bit.
  • Seite 71 Targus ExpressCard Notebook Docking Station with Digital Video and Audio ¿Mi sistema falla durante el arranque con el conector de Tarjeta instalado? Trate de cambiar el interruptor de prearranque a la posición de encendido y arranque otra vez. ¿Pueden dos displays separados conectarse a la estación de conexión ExpressCard (VGA y DVI-D) y visualizar dos imágenes...
  • Seite 72: Soporte Técnico

    Targus ExpressCard Notebook Docking Station with Digital Video and Audio Soporte técnico Si tiene preguntas técnicas, por favor visite: Internet http://www.targus.com/support Inglés http://www.targus.com/uk/support.asp Francés http://www.targus.com/fr/support.asp Alemán http://www.targus.com/de/support.asp Español http://www.targus.com/sp/support.asp Italiano http://www.targus.com/it/support.asp Nuestro personal experto también puede contestarle sus preguntas a través de uno de los siguientes números telefónicos.
  • Seite 73: Registro Del Producto

    Targus se le informó de la posibilidad que existieran. La presente garantía no afecta los derechos que la ley le otorga.
  • Seite 74: Declaración De Conformidad

    Declaración de Conformidad Por medio de la presente Targus declara que al equipo cumple con los requisitos esenciales y cualesquiera otras disposiciones aplicables o exigibles de la Directiva 1999/5/CE. Este dispositivo es de baja potencia.
  • Seite 75: Station D'accueil Universelle Expresscard Pour Ordinateur

    USB et des ports largement espacés pour permettre le branchement d'adaptateurs plus grands. Targus Always On alimente les ports USB même lorsque le portable est arrêté, déconnecté de la station d'accueil ou en mode veille ou veille prolongée, ce qui permet aux périphériques USB se chargeant via le port de rester...
  • Seite 76: Contenu De L'emballage

    Targus ExpressCard Notebook Docking Station with Digital Video and Audio Design Ergonomique La conception ergonomique aide à l’augmentation du flux d'air sous l’ordinateur portable pour l'opération de refroidissement. La plate- forme levée fournit une position plus confortable pour taper au clavier.
  • Seite 77: Configuration Requise

    Targus ExpressCard Notebook Docking Station with Digital Video and Audio Configuration requise Matériel • PC avec microprocesseur Intel® Pentium® ou équivalant • Lecteur de CD-ROM • Un port Expresscard 34mm ou 54mm Système d'exploitation • Windows Vista • Windows® XP - Service Pack 2 ou supérieur NOTE : POUR TÉLÉCHARGER LES DERNIERS PACKS SERVICE, VEUILLEZ...
  • Seite 78 Targus ExpressCard Notebook Docking Station with Digital Video and Audio A propos du connecteur de la carte ExpressCard La station ExpressCard est livrée avec un câble, une adaptatrice (voir « Utilisation de Connecteur d'adaptation »” pour des instructions complémentaires) et une carte de 34 mm pour le branchement à la prise ExpressCard de votre ordinateur portable.
  • Seite 79 Targus ExpressCard Notebook Docking Station with Digital Video and Audio Utilisation de l'entretoise de connecteur Une entretoise est fournie pour assurer l'adaptation correcte de la carte de 34 mm dans la prise de 54 mm. Cette entretoise n'a aucune autre fonction que d'empêcher le mouvement de la carte une fois qu'elle est insérée dans le port de 54mm.
  • Seite 80 Targus ExpressCard Notebook Docking Station with Digital Video and Audio Instructions pour connecter l’entretoise à la carte Express Avant de commencer, assurez-vous que l'entretoise et la carte PC soient alignées comme indiqué ci-dessous. 1. Lors de l’installation de l’entretoise, assurez-vous qu'elle soit à 45 degrés de la carte PC.
  • Seite 81 Targus ExpressCard Notebook Docking Station with Digital Video and Audio Installation du pilote de la station d'accueil L'installation du pilote de la station d'accueil permettra à votre système d'exploitation de reconnaître celle-ci ainsi que ses ports une fois la connexion effective.
  • Seite 82 INSTALLATION CORRECTE DES DRIVERS. CECI POURRAIT PRENDRE 5 MINUTES OU PLUS SELON LA CONFIGURATION DE VOTRE ORDINATEUR. 6. Vous verrez un logo Ecran Targus placé au niveau de la barre de système. Le choix du mode moniteur peut être effectué par un clic droit sur ce logo .
  • Seite 83 Targus ExpressCard Notebook Docking Station with Digital Video and Audio Lampes indicateurs d'état Une fois que tous les pilotes de périphériques sont installés, les lampes des indicateurs d'état USB situées à l'arrière de la station d'accueil s'allument lorsque vous branchez les périphériques.
  • Seite 84 Targus ExpressCard Notebook Docking Station with Digital Video and Audio Verrou de sécurité de Ports USB haute connexion pour puissance "Accès l'utilisation avec le Facile" (Easy verrou Targus Access) avec témoin lumineux Branchement de nouveaux périphériques Afin d'éviter tout dommage éventuel lors de la connexion d'un nouveau périphérique, ne forcez pas sur le connecteur du câble lors de son...
  • Seite 85: Branchement D'un Périphérique Usb

    480 Mbps et un minimum de 500 mA d’alimentation. Notez que 2 des 4 ports USB sont conçu pour fournir 1000 mA, deux fois plus que la norme USB. Voir « Targus toujours en marche » et « Utiliser des dispositifs USB qui exigent plus de...
  • Seite 86 Targus ExpressCard Notebook Docking Station with Digital Video and Audio Branchement et configuration d'un périphérique audio Cette station d'accueil dispose d'un support Audio 5.1. L'arrière du périphérique offre 5 ports dédiés à l'Audio. SI VOUS AVEZ DES PROBLÈMES AVEC VOS HAUT-PARLEURS APRÈS LA...
  • Seite 87 Targus ExpressCard Notebook Docking Station with Digital Video and Audio 2. Pour connecter un microphone, branchez-le sur le port rose 3,5mm. 3. Pour activer le casque ou les haut-parleurs, vous devez d'abord sélectionner C-media USB Sound Device dans le réglage des paramètres...
  • Seite 88 Targus ExpressCard Notebook Docking Station with Digital Video and Audio Installation et configuration d'un périphérique S/PDIF (Sony/ Philips Digital Interface) 1. Pour utiliser S/PDIF, vous devez l'activer. Pour cela, ouvrez l'applet Configuration son USB 3D situé dans la barre d'état système (cliquez sur l'icône USB pour ouvrir l'écran de configuration)
  • Seite 89 3. Changer la résolution d'écran ou le nombre de couleur dans cette fenêtre. 4. Cliquer "OK" pour fermer la fenêtre "Propriétés d'affichage" Pour changer la résolution et les modes utilisés à partir de l'icône Targus: 1. Placez la souris sur l'icône Targus et cliquez avec le bouton droit.
  • Seite 90 Targus ExpressCard Notebook Docking Station with Digital Video and Audio Moniteur ou Ecran du écran à cristaux portable liquides secondaire Primary: Arrêt Marche Extended: Marche Marche Mirror: Marche Marche Arrêt: Marche Arrêt NOTE : CERTAINS ECRANS A CRISTAUX LIQUIDES ONT ETE OPTIMISES POUR UNE RESOLUTION SPECIFIQUE.
  • Seite 91 Targus ExpressCard Notebook Docking Station with Digital Video and Audio Mode Veille générale Lorsque votre ordinateur est en mode veille, la station d'accueil se met également en mode veille afin d'éviter de consommer de l'électricité inutilement. Lorsque votre ordinateur revient en mode actif, la station d'accueil en fait de même.
  • Seite 92 Targus ExpressCard Notebook Docking Station with Digital Video and Audio Dépannage Le périphérique ne marche pas • Assurez-vous qu'il est bien inséré dans le bon port de la station d'accueil. • Connectez le périphérique à un autre port de la station d'accueil. S'il ne fonctionne toujours pas, testez le périphérique en le connectant...
  • Seite 93 Targus ExpressCard Notebook Docking Station with Digital Video and Audio À partir de la fenêtre du gestionnaire de périphériques, affichez les informations suivantes : • Adaptateurs d’affichage — Périphérique Targus ExpressCard avec fonction vidéo • Périphériques interface utilisateur — Les claviers et les dispositifs de pointage : souris, boules de commande et manettes de jeu.
  • Seite 94 La lecture d'un film est-elle de plus mauvaise qualité lorsqu'elle est réalisée en mode plein écran ? La station d'accueil Targus ExpressCard n'est pas conçue à la base pour lire des films en résolution et couleurs maximales. Le meilleur mode pour afficher le contenu de la vidéo est la résolution 1280x1024 (SXGA) ou plus basse.
  • Seite 95 Targus ExpressCard Notebook Docking Station with Digital Video and Audio Assurez-vous que votre système possède la dernière version BIOS disponible. La majorité des vendeurs de système les plus connus ont lancé des mises à jour du BIOS qui corrige beaucoup de problèmes liés à...
  • Seite 96: Support Technique

    Targus ExpressCard Notebook Docking Station with Digital Video and Audio Support technique Pour les questions techniques, merci de visiter : Internet http://www.targus.com/support Anglais http://www.targus.com/uk/support.asp Français http://www.targus.com/fr/support.asp Allemand http://www.targus.com/de/support.asp Espagnol http://www.targus.com/sp/support.asp Italien http://www.targus.com/it/support.asp Nos employés qualifiés sont également disponibles aux numéros de téléphone ci-dessous pour répondre à vos questions.
  • Seite 97: Enregistrement Du Produit

    (le cas échéant). Garantie Targus garantit ce produit contre tout défaut de matériel ou de fabrication pour une durée de deux ans. Si votre accessoire Targus s'avère défectueux sous cette garantie, nous veillerons à...
  • Seite 98 Targus ExpressCard Notebook Docking Station with Digital Video and Audio dans un milieu résidentiel. L'appareil génère, utilise et peut diffuser de l'énergie sur les fréquences radio et, s'il n'est pas installé et utilisé conformément au mode d'emploi, il peut brouiller les communications radio.
  • Seite 99: Audio Digitale

    La docking station offre anche la tecnologia Targus Always On, le Porte di Corrente USB Targus che forniscono il doppio della corrente rispetto alle specifiche USB standard e debita- mente spaziate per adattatori più grandi. Always On Targus...
  • Seite 100: Caratteristiche

    Targus ExpressCard Notebook Docking Station with Digital Video and Audio Design Ergonomico Il design ergonomico migliora il flusso di aria sotto al notebook per un funzionamento fresco. La piattaforma rialzata offre una posizione più confortevole per scrivere. Caratteristiche • (4) porte ad Alta Velocità USB 2.0 •...
  • Seite 101: Requisiti Di Sistema

    Targus ExpressCard Notebook Docking Station with Digital Video and Audio Requisiti di Sistema Hardware • PC con un processore Intel® Pentium® o equivalente • unità CD-ROM • slot da 34 mm o 54 mm Expresscard Sistema Operativo • Windows Vista •...
  • Seite 102 Targus ExpressCard Notebook Docking Station with Digital Video and Audio Informazioni sulla Scheda di Connessione ExpressCard Il dock ExpressCard possiede un cavo, un distanziale (vedere “Utilizzo del connettore del distanziale” per istruzioni supplementari) e una scheda da 34 mm da collegare ad uno slot ExpressCard sul notebook.
  • Seite 103 Targus ExpressCard Notebook Docking Station with Digital Video and Audio Utilizzo del Connettore con Spaziatore Viene fornito un distanziale per garantire il corretto inserimento della ExpressCard da 34 mm nello slot da 54 mm. Questo spaziatore non ha altra funzionalità se non quella di prevenire un eventuale movimento della scheda una volta che viene inserita nello slot da 54 mm.
  • Seite 104 Targus ExpressCard Notebook Docking Station with Digital Video and Audio Istruzioni per collegare lo spaziatore all'ExpressCard Prima di iniziare, assicuratevi che lo spaziatore e la scheda PC siano allineati some sotto. 1. Quando collegate lo spaziatore, assicuratevi che sia ad un angolo di 45 gradi alla scheda PC.
  • Seite 105 Targus ExpressCard Notebook Docking Station with Digital Video and Audio Installazione del Driver della Docking Station L'installazione del driver della docking station permette al sistema operativo di riconoscere la docking station e le sue porte una volta che viene connessa.
  • Seite 106 CORRETTA INSTALLAZIONE DEI DRIVER. POTREBBERO VOLERCI 5 MINUTI O DI PIÚ A SECONDA DELLA CONFIGURAZIONE DEL COMPUTER. 6. Sarà possibile vedere l'icona del Display Targus sulla barra delle applicazioni. La selezione della modalità monitor può essere impostata facendo clic con il destro del mouse su questa icona.
  • Seite 107 Targus ExpressCard Notebook Docking Station with Digital Video and Audio Luci LED Indicatori di Stato Una volta che tutti i driver dei dispositivi sono installati, le luci LED indicatori di stato USB su ogni lato della docking station lampeggiano quando connettete i dispositivi alla docking station.
  • Seite 108 Targus ExpressCard Notebook Docking Station with Digital Video and Audio Slot di bloccaggio per Porte USB ad Alta l'utilizzo di meccanismi Potenza "Easy di bloccaggio Targus Access" con indicatori LED di luce Collegamento di Nuovi Dispositivi Per evitare un possibile danneggiamento quando si collega un nuovo dispositivo, non forzare il connettore del cavo nella porta della docking station.
  • Seite 109 Targus ExpressCard Notebook Docking Station with Digital Video and Audio Collegamento di un PDA 1. Inserite il connettore del cavo nella porta seriale sulla docking station. 2. Verificate che le impostazioni della porta COM, in entrambi i casi sia per software HotSync® che ActiveSync®, corrispondano alle impostazioni della docking station.
  • Seite 110 Targus ExpressCard Notebook Docking Station with Digital Video and Audio Collegamento de Configurazione di un Dispositivo Audio Questa docking station possiede un Supporto Audio 5.1. La parte posteriore del Dispositivo ha 5 porte dedicate all'Audio. SE AVETE PROBLEMI CON LE VOSTRE CASSE DOPO IL COLLEGAMENTO DELLA DOCKING STATION, SIETE PREGATI DI VEDERE LA SEZIONE RISOLUZIONE PROBLEMATICHE PER ULTERIORI INFORMAZIONI.
  • Seite 111 Targus ExpressCard Notebook Docking Station with Digital Video and Audio 2. Per collegare un microfono, inseritelo nella porta Rosa da 3.5 mm. 3. Per abilitare le vostre cuffie o casse, dovete prima scegliere C-media USB Sound Device nelle Impostazioni delle Proprietà...
  • Seite 112 Targus ExpressCard Notebook Docking Station with Digital Video and Audio Installazione e Configurazione di un Dispositivo S/PDIF (Sony/Philips Digital Interface) 1. Per abilitare S/PDIF, dovete accenderlo. Questa operazione può essere eseguita aprendo la vostra applicazione di Configurazione Suono 3D USB che si trova nella Barra delle Applicazioni. (cliccate sull'icona USB per aprire la Schermata di Configurazione) 2.
  • Seite 113 Cambiare le risoluzioni e modalità utilizzando l'icona dello Schermo Targus: 1. Posizionate il Mouse sull'icona Targus e cliccate con il destro su di essa. 2. Da questa schermata, potete cambiare le risoluzioni e modalità con cui la Piattaforma opera (vedere la spiegazione riguardante le modalità...
  • Seite 114 Targus ExpressCard Notebook Docking Station with Digital Video and Audio Schermo Monitor o Notebook LCD Secondario Primary: Extended: Mirror: Off: NOTA: ALCUNI LCD SONO STATI OTTIMIZZATI PER UNA RISOLUZIONE SPECIFICA. SE LA RISOLUZIONE OTTIMA NON E' 1280x1024, IL RISULTATO PUO' ESSERE DIVERSO DA QUELLO DESIDERATO.
  • Seite 115: Modalità Standby

    Targus ExpressCard Notebook Docking Station with Digital Video and Audio Modalità Standby Quando il vostro computer è in modalità standby, anche la docking station entra in modalità standby per evitare consumo di corrente. Quando il computer viene "risvegliato", la docking station torna attiva automaticamente.
  • Seite 116: Risoluzione Problematiche

    Targus ExpressCard Notebook Docking Station with Digital Video and Audio Risoluzione Problematiche Il Dispositivo non Funziona • Assicuratevi che il dispositivo sia inserito completamente nella porta corretta sulla docking station • Inserite il dispositivo in una porta diversa della docking station. Se continua a non funzionare, provate il dispositivo collegandolo direttamente al vostro computer.
  • Seite 117 Targus ExpressCard Notebook Docking Station with Digital Video and Audio Dalla finestra Gestione Periferiche, espandete i seguenti. • Adattatori Schermo - Targus ExpressCard con video • Human Interface Device - visualizza le tastiere e i dispositivi di puntamento: mouse, trackball e joystick •...
  • Seite 118 Targus ExpressCard Notebook Docking Station with Digital Video and Audio Video Posso ottenere una risoluzione più alta sul mio monitor? • Risoluzione Massima 1600 x 1200, colori a 32-bit. La riproduzione di film non è nitida con la risoluzione 1600x1200x32 bit. E' peggio quando si riproduce una clip multimediale a schermo intero? la Docking Station ExpressCard Targus non è...
  • Seite 119 Targus ExpressCard Notebook Docking Station with Digital Video and Audio Il mio sistema si interrompe all'avvio con il connettore di Schede installato? Provate a cambiare l'interruttore Pre-boot nella posizione on e riavviate. Possono essere collegati due Docking Station Expresscard (VGA...
  • Seite 120: Supporto Tecnico

    Targus ExpressCard Notebook Docking Station with Digital Video and Audio Supporto tecnico In caso di quesiti tecnici, visitare: Internet http://www.targus.com/support.asp Inglese http://www.targus.com/uk/support.asp Francese http://www.targus.com/fr/support.asp Tedesco http://www.targus.com/de/support.asp Spagnolo http://www.targus.com/sp/support.asp Italiano http://www.targus.com/it/support.asp Il nostro staff di tecnici esperti è anche disponibile per rispondere telefonicamente alle vostre domande.
  • Seite 121: Registrazione Del Prodotto

    (se applicabili). Garanzia Targus garantisce per la durata di due anni che questo prodotto è privo di difetti di materiale e di manodopera. Se l'accessorio Targus dovesse rivelarsi difettoso durante questo periodo, verrà...
  • Seite 122 Targus ExpressCard Notebook Docking Station with Digital Video and Audio garanzie avvengano interferenze particolari installazioni. Qualora questo apparecchio dovesse creare interferenze per la ricezione di radio o televisioni, che possono essere determinate dall'accensione e dallo spegnimento dell'apparato, al cliente viene consigliato di provare a correggere l'interferenza tramite l'utilizzo di una o piu' di una delle seguenti soluzioni: •...
  • Seite 123 S/PDIF en een seriële poort voor legacy device aan te sluiten. Het docking station biedt bovendien de technologie Targus Always On, Targus USB Power Ports die tweemaal zoveel potentie bieden als de standaard USB-norm en die ver uit elkaar liggen om grotere adapters te accommoderen. Targus...
  • Seite 124: Ergonomisch Ontwerp

    Targus ExpressCard Notebook Docking Station with Digital Video and Audio Ergonomisch ontwerp Ergonomisch ontwerp doet de luchtstroom onder het notebook toenemen voor koelere werking. Het geheven platform biedt een comfortabelere positie voor het typen. Kenmerken • (4) Hoge snelheid USB 2.0 poorten •...
  • Seite 125 Targus ExpressCard Notebook Docking Station with Digital Video and Audio Systeemeisen Hardware • PC met een Intel® Pentium® processor of gelijkwaardig • CD-ROM drive • Expresscard 34mm of 54mm sleuf Besturingssysteem • Windows Vista • Windows® XP - Service Pack 2 of hoger...
  • Seite 126 Targus ExpressCard Notebook Docking Station with Digital Video and Audio Info over de ExpressCard Connector Card De ExpressCard dock wordt geleverd met een kabel, een tussenstuk (zie “De tussenstuk connector gebruiken” voor extra instructies) en 34mm kaart om op een ExpressCard slot in uw notebook aan te sluiten.
  • Seite 127 Targus ExpressCard Notebook Docking Station with Digital Video and Audio Gebruik maken van de Spacer Connector Er wordt een tussenstuk verstrekt om te verzekeren dat de 34mm Express-Card juist past op een 54mm slot. Deze spacer heeft geen andere functionaliteit dan beweging van de kaart te voorkomen zodra die in de 54mm sleuf geplaatst is.
  • Seite 128 Targus ExpressCard Notebook Docking Station with Digital Video and Audio Instructies voor het verbinden van het opzetstuk aan de ExpressCard Voordat u begint verzeker u zich ervan dat het opzetstuk en de PC kaart zijn uitgelijnd als hieronder. 1. Wanneer u het opzetstuk verbindt, verzeker u er zich van dat het opzetstuk op een hoek van 45 graden is met de PC kaart en dat de haak op het opzetstuk zit in de gleuf op de PC kaart.
  • Seite 129 Targus ExpressCard Notebook Docking Station with Digital Video and Audio De Docking Station Driver installeren Het installeren van de docking station driver stelt uw besturingssys- teem in staat het docking station en de poorten daarvan te herkennen zodra de aansluiting voltooid is.
  • Seite 130 GEïNSTALLEERD WORDEN. HET IS MOGELIJK DAT HET TOT 5 MINUTEN OF MEER DUURT, AFHANKELIJK VAN DE CONFIGURATIE VAN UW COMPUTER. 6. U zult een weergavelogo van Targus zien in het systeemvak. De modusselectie van de monitor kan ingesteld worden door met de rechtermuisknip op dit pictogram te klikken.
  • Seite 131: Led Statusindicators

    Targus ExpressCard Notebook Docking Station with Digital Video and Audio LED statusindicators Zodra alle apparaatdrivers zijn geïnstalleerd, lichten de USB LED statusindicators aan elke zijde van het docking station op als u apparaten met het docking station verbindt. • Het groene tx-lampje licht op als er verbinding met een netwerk is en het gele rx-lampje knippert als er gegevens overgezet worden van en naar het netwerk.
  • Seite 132 Targus ExpressCard Notebook Docking Station with Digital Video and Audio “Easy Access” Slotsleuf voor gebruik High power USB met Targus-sloten poorten met LED indicators Nieuwe apparaten aansluiten Om mogelijke schade te vermijden bij het aansluiten van een nieuw apparaat, forceer de kabelaansluiting niet in de poort op het docking station.
  • Seite 133: Een Usb Apparaat Aansluiten

    Targus ExpressCard Notebook Docking Station with Digital Video and Audio Een PDA aansluiten 1 Sluit de kabelaansluiting aan op de seriële poort op het docking station. 2 Controleer of de COM-poortinstelling in uw HotSync® of ActiveSync® software overeenkomt met de instelling op het docking station.
  • Seite 134 Targus ExpressCard Notebook Docking Station with Digital Video and Audio Een audio-apparaat aansluiten en configureren Dit docking station wordt geleverd met een 5.1 Audio Support. De achterkant van het apparaat heeft 5 aan audio toegewezen poorten. ALS U PROBLEMEN HEBT MET UW LUIDSPREKERS NADAT HET DOCKING STATION IS AANGESLOTEN, ZIE DE SECTIE PROBLEEMOPLOSSING VOOR MEER INFORMATIE.
  • Seite 135 Targus ExpressCard Notebook Docking Station with Digital Video and Audio 2. Als u een microfoon wilt aansluiten, steek hem in de roze 3.5mm poort. 3. Als u uw koptelefoon of luidsprekers werkzaam wilt maken, moet u eerst C-media USB Sound Device in de eigenschapinstellingen kiezen.
  • Seite 136 Targus ExpressCard Notebook Docking Station with Digital Video and Audio Een S/PDIF-apparaat (Sony/ Philips Digital Interface) installeren en con- figureren 1. Om S/PDIF werkzaam te maken, moet u het inschakelen. Dit kan gedaan worden door het applet USB 3D Geluidsconfiguratie te openen in uw systeemdienblad.
  • Seite 137 Als u de resolutie en modi wilt wijzigen door gebruik te maken van het weergavepictogram van Targus: 1. Plaats de muis bovenop het pictogram van Targus en klik er met de rechtermuisknop op. 2. U kunt de resoluties en modi waarin de dock functioneert vanaf dit scherm wijzigen (zie onderstaande toelichting over ondersteunde videomodi).
  • Seite 138 Targus ExpressCard Notebook Docking Station with Digital Video and Audio Secondaire Notebookscherm monitor of LCD Primair: Uitgebreid: Spiegel: Off: OPMERKING: SOMMIGE LCD'S ZIJN GEOPTIMALISEERD VOOR EEN SPECIFIEKE RESOLUTIE. ALS DE OPTIMALE RESOLUTIE NIET 1280 X 1024 IS, KUNNEN DE RESULTATEN NIET ZIJN ZOALS GEWENST.
  • Seite 139 Targus ExpressCard Notebook Docking Station with Digital Video and Audio Globale standby-modus Als uw computer in standby-modus is, gaat het docking station ook in standby-modus om stroomconsumptie te vermijden. Als uw computer ontwaakt, ontwaakt het docking station automatisch. Gebruik maken van USB apparaten...
  • Seite 140: Probleemoplossing

    Targus ExpressCard Notebook Docking Station with Digital Video and Audio Probleemoplossing Apparaat werkt niet • Controleer of het apparaat volledig is ingevoerd in de juiste poort op het docking station. • Steek het apparaat in een andere poort op het docking station. Als het nu nog steeds niet werkt, test het apparaat door het rechtstreeks op uw computer aan te sluiten.
  • Seite 141 Targus ExpressCard Notebook Docking Station with Digital Video and Audio Open vanuit het venster Apparaatbeheerder het volgende: • Beeldschermadapters - Targus ExpressCard met video • Human Interface Devices - geeft toetsenborden en aanwijsapparatuur weer: muizen, trackballs en joysticks • Netwerkadapters — Realtek RTL 8110SC Ethernet Adapter •...
  • Seite 142 Targus ExpressCard Notebook Docking Station with Digital Video and Audio Video Kan ik een hogere resolutie op mijn monitor krijgen? • Hoogste resolutie is 1600 x 1200, 32-bits kleuren. Het afspelen van films verloopt niet vlot bij een resolutie van 1600x1200x32 bits.
  • Seite 143 Targus ExpressCard Notebook Docking Station with Digital Video and Audio Crasht mijn systeem gedurende boot-up terwijl de kaartaansluit- ing geïnstalleerd is? Zet de preboot-schakelaar in de ON positie en poog opnieuw te booten. Kunnen twee afzonderlijke weergaves op het docking station van...
  • Seite 144: Technische Ondersteuning

    Targus ExpressCard Notebook Docking Station with Digital Video and Audio Technische ondersteuning Met technische vragen kunt u terecht op: Internet http://www.targus.com/support Engels http://www.targus.com/uk/support.asp Frans http://www.targus.com/fr/support.asp Duits http://www.targus.com/de/support.asp Spaans http://www.targus.com/sp/support.asp Italiaans http://www.targus.com/it/support.asp kunnen vragen tevens telefonisch beantwoorden. België 02-717-2451 Denemarken 45 0 35-25-87 51...
  • Seite 145: Fcc-Verklaring

    Targus ExpressCard Notebook Docking Station with Digital Video and Audio Productregistratie Targus raadt aan dat u uw Targus-product zo snel mogelijk na de aankoop registreert. U kunt uw Targus-product registreren op: http://www.targus.com/registration.asp U zult uw volledige naam, e-mailadres, telefoonnummer en bedrijfsinformatie (indien van toepassing) moeten opgeven.
  • Seite 146 Targus Recycle Policy Wanneer het apparaat niet meer wordt gebruikt, voert u het dan af via een officieel recylcle punt. De Targus Recycle Policy is te vinden op www.targus.com/recycling Microsoft, Windows en Windows Vista zijn gedeponeerde handelsmerken of handelsmerken van Microsoft Corporation in de Verenigde Staten en/of andere landen.
  • Seite 147: Expresscard

    áudio de canal PC 5.1 com fibra ótica S/PDIF, e uma porta serial para dispositivo pré-existente. A docking station também oferece a tecnologia Targus Always On, Targus USB Power Ports oferece duas vezes mais potência do que a especificações padrão USB e amplamente espaçado para acomodar adaptadores maiores.
  • Seite 148: Conteúdos Da Embalagem

    Targus ExpressCard Notebook Docking Station with Digital Video and Audio Design Ergonômico Design ergonômico ajuda a aumentar o fluxo de ar debaixo do notebook para operação mais resfriada. A plataforma elevada oferece uma posição mais confortável para digitação. Características • (4) Portas High Speed USB 2.0 •...
  • Seite 149: Requisitos Do Sistema

    Targus ExpressCard Notebook Docking Station with Digital Video and Audio Requisitos do Sistema Hardware • PC com processador Intel® Pentium® ou equivalente • CD-ROM drive • Expresscard abertura 34mm ou 54mm Sistema Operacional • Windows Vista • Windows® XP - Service Pack 2 ou maior Obs: PARA DOWNLOAD DOS ÚLTIMOS PACOTES DE SERVIÇOS, VISITE O...
  • Seite 150 Targus ExpressCard Notebook Docking Station with Digital Video and Audio Sobre o ExpressCard Connector Card A plataforma ExpressCard vem com um cabo, um espaçador, (ver “Usando o conector do espaçador” para instruções adicionais) e o cartão 34mm para conectar a um encaixe ExpressCard no seu notebook.
  • Seite 151 Targus ExpressCard Notebook Docking Station with Digital Video and Audio Usando o Spacer Connector Um espaçador é fornecido para garantir o encaixe adequado para um Express-Card 34mm numa ranhura de 54mm. Este espaçador não tem outra função além de evitar qualquer movimento da placa uma vez inserida no encaixe 54mm.
  • Seite 152 Targus ExpressCard Notebook Docking Station with Digital Video and Audio Instruções para ligar o espaçador ao ExpressCard Antes de iniciar assegure-se de que o espaçador e o PC card estão alinhados como em baixo. 1. Quando estiver a ligar ao espaçador, assegure-se de que o espaça- dor está...
  • Seite 153 Targus ExpressCard Notebook Docking Station with Digital Video and Audio Instalando o Docking Station Driver A instalação do docking station driver permite seu sistema operacional reconhecer a docking station e suas portas depois de conectados. 1. Ligue o seu computador 2.
  • Seite 154 DRIVERS SEREM CORRETAMENTE INSTALADOS. PODERÁ LEVAR ATÉ 5 MINUTOS OU MAIS DEPENDENDO DA CONFIGURAÇÃO DO SEU COMPUTADOR. 6. Você verá um ícone com o logo Targus Display localizado na bandeja do sistema. A seleção do modo monitor pode ser ajustando clicando com a direita neste ícone.
  • Seite 155 Targus ExpressCard Notebook Docking Station with Digital Video and Audio Luzes Indicadoras de Status LED Depois de todos os drivers dos dispositivos estarem instalados, as luzes indicadoras de status do USB LED, de cada lado da docking station brilham quando você conecta dispositivos nela.
  • Seite 156 Targus ExpressCard Notebook Docking Station with Digital Video and Audio Portas “Easy Abertura da ranhura Access” High para uso com cadeados power USB com luz da Targus de LED indicadora Conectando Novos Dispositivos Para evitar possíveis danos ao conectar um novo dispositivo, não force o cabo conector na porta da docking station.
  • Seite 157 Targus ExpressCard Notebook Docking Station with Digital Video and Audio Conectando um PDA 1 Anexe o conector do cabo na porta serial na docking station. 2 Verifique que a configuração da porta COM, tanto no seu HotSync® ou ActiveSync® software, combina com a configuração na docking station.
  • Seite 158 Targus ExpressCard Notebook Docking Station with Digital Video and Audio Conectando Configurando Dispositivo de Áudio Esta docking station vem com um 5.1 Audio Support. Atrás do Disposi- tivo tem 5 portas dedicadas ao Áudio. SE VOCÊ TIVER PROBLEMAS COM SEUS ALTO-FALANTES APÓS CONECTAR A DOCKING STATION, VEJA A SEÇÃO DE RESOLUÇÃO DE PROBLEMAS PARA MAIS...
  • Seite 159 Targus ExpressCard Notebook Docking Station with Digital Video and Audio 2. Para conectar um microfone, plugue na porta Pink 3.5mm. 3. Para habilitar seus headphones ou alto-falantes, primeiro você deve escolher C-media USB Sound Device em Ajustes de Propriedades 4. Para Windows® XP, vá ao Painel de Controle e escolha Som e Áudio.
  • Seite 160 Targus ExpressCard Notebook Docking Station with Digital Video and Audio Instalando e Configurando um Dis- positivo S/PDIF (Sony/ Philips Digi- tal Interface) 1. Para poder habilitar S/PDIF, você precisa ligá-lo. Isto pode ser feito abrindo a applet USB 3D Sound Configuration localizado na bandeja do seu sistema.
  • Seite 161 Para alterar a resolução e modos usando o ícone Targus Display: 1. Posicione o mouse no sobre o ícone Targus e clique nele com a direita. 2. Desta tela, você pode mudar as resoluções e modos que a Dock opera (ver explicação abaixo dos modos de vídeo suportados).
  • Seite 162 Targus ExpressCard Notebook Docking Station with Digital Video and Audio Tela do Monitor ou Notebook LCD Secundário Primário: Estendido: Espelho: Off: OBS: ALGUNS LCDS TÊM SIDO OTIMIZADOS PARA UMA RESOLUÇÃO ESPECÍFICA. SE A RESOLUÇÃO ÓTIMA NÃO FOR 1280 X 1024, OS RESULTA- DOS PODEM NÃO SER OS DESEJADOS.
  • Seite 163 Targus ExpressCard Notebook Docking Station with Digital Video and Audio Modo Suspender Global Quando seu computador está no modo suspender, a docking station também entra neste modo para evitar consumo de energia. Quando seu computador “desperta”, a docking station desperta automatica- mente.
  • Seite 164: Resolução De Problemas

    Targus ExpressCard Notebook Docking Station with Digital Video and Audio Resolução de Problemas Aparelho Não Funciona • Certifique-se que o dispositivo está totalmente encaixado na porta correta da docking station. • Plugue o dispositivo numa porta diferente da docking station. Se ainda não funcionar, teste o aparelho conectando-o diretamente ao...
  • Seite 165 Targus ExpressCard Notebook Docking Station with Digital Video and Audio Da janela Gerenciador de dispositivos, expanda o seguinte: • Adaptadores do Display - Targus ExpressCard c/ vídeo • Human Interface Devices - mostra teclados e apontadores: mouses, trackballs e joysticks •...
  • Seite 166 Targus ExpressCard Notebook Docking Station with Digital Video and Audio Video Posso ter uma resolução mais alta no meu monitor? • Resolução mais alta é 1600 x 1200, 32-bit color. Reprodução de filmes não é suave quando reproduzido na resolução 1600x1200x32 bit. É pior quando reproduzir um clipe de mídia em tela cheia?
  • Seite 167 Targus ExpressCard Notebook Docking Station with Digital Video and Audio Meu sistema colapsa durante o boot up com o conector de placa instalado? Tente mudar a chave de Pre-boot para a posição on e faça novamente o boot. Podem dois displays separados ser conectados à ExpressCard Docking station (VGA e DVI-D) e mostrar duas imagens separadas ou trabalhar para estender a imagem pelas três telas (incluindo a...
  • Seite 168: Assistência Técnica

    Targus ExpressCard Notebook Docking Station with Digital Video and Audio Assistência Técnica Para questões de ordem técnica, é favor visitar: Internet: http://www.targus.com/support.asp Inglês http://www.targus.com/uk/support.asp Francês http://www.targus.com/fr/support.asp Alemão http://www.targus.com/de/support.asp Espanhol http://www.targus.com/sp/support.asp Italiano http://www.targus.com/it/support.asp O nosso pessoal especializado está também disponível para responder às suas questões através de um dos seguintes números de telefone.
  • Seite 169: Registo De Produto

    Targus ExpressCard Notebook Docking Station with Digital Video and Audio Registo de Produto A Targus recomenda que registe o seu acessório Targus logo após o ter comprado. Para registar o seu acessório Targus, vá a: http://www.targus.com/registration.asp Necessitará de fornecer o seu nome completo, endereço de email, número de telefone e informação sobre a companhia (se...
  • Seite 170: Declaração De Conformidade

    Targus ExpressCard Notebook Docking Station with Digital Video and Audio utilizado de acordo com as instruções, poderá causar interferência prejudicial em comunicações de rádio. No entanto, não existe qualquer garantia de que não ocorrerá interferência numa instalação em particular. Se este equipamento não causar interferência prejudicial para a recepção de rádio ou televisão, o que pode ser determinado...
  • Seite 171: Kannettavan Targus Expresscard -Tietokoneen Telakointiasema

    äänilaitteen optisella S/PDIF-kaapelilla ja sarjaliitännäisen yhteensopivan laitteen. Telakointiasemassa on myös Targus Always On -ominaisuus ja Targus USB Power Port -liitännät, jotka mahdollistavat kaksinkertaisen tehon tavanomaisiin USB-laitteisiin verrat- tuna. Kookkaampienkin sovitinten käyttö onnistuu väljän asemoinnin ansiosta. Targus Always On -toiminto takaa USB-porttien virransaannin tietokoneen ollessa pois päältä,...
  • Seite 172: Pakkauksen Sisältö

    Targus ExpressCard Notebook Docking Station with Digital Video and Audio Ergonominen muotoilu Ergonomisen muotoilun ansiosta ilma pääsee virtaamaan paremmin kannettavan tietokoneen alta ja tuuletus toimii tehokkaammin. Kohotettu alusta tarjoaa paremman kirjoitusasennon. Ominaisuudet • (4) Nopeat USB 2.0 -portit • (1) Sarjaportti (RS232) •...
  • Seite 173 Targus ExpressCard Notebook Docking Station with Digital Video and Audio Järjestelmävaatimukset Laitteisto • Tietokone, jossa on Intel® Pentium® -suoritin tai vastaava • CD-ROM-asema • Paikka 34 tai 54 mm:n ExpressCard-kortille Käyttöjärjestelmä • Windows Vista • Windows® XP - Service Pack 2 tai uudempi...
  • Seite 174 Targus ExpressCard Notebook Docking Station with Digital Video and Audio ExpressCard-liitäntäkortti ExpressCard-telakointiasemaan kuuluu kaapeli, välike (lisätietoja on Välikeliittimen käyttö -kohdassa) ja 34 mm:n kortti, jonka voit yhdistää tietokoneen ExpressCard-korttipaikkaan. Kaapelin voi irrottaa kortista. Voit jättää kortin koneeseen, kun lopetat käytön.
  • Seite 175 Targus ExpressCard Notebook Docking Station with Digital Video and Audio Välikeliittimen käyttö Laitteeseen kuuluu välike, jotta 34 mm:n ExpressCard saadaan varmasti liitettyä tukevasti 54 mm:n paikkaan. Välikkeellä ei ole muuta tarkoitusta kuin estää korttia liikkumasta 54 mm:n korttipaikassa. Välikettä ei tarvita, jos tietokoneessasi on 34 mm:n korttipaikka.
  • Seite 176 Targus ExpressCard Notebook Docking Station with Digital Video and Audio Välikkeen liittäminen ExpressCard- asemaan Varmista ensin, että välike ja PC-kortti on kohdistettu jäljempänä olevan kuvan mukaisesti. 1. Varmista, että välike on 45 asteen kulmassa PC-korttiin nähden. Välikkeen väkäsen on oltava PC-korttipaikassa. Lisätietoja on kuvassa.
  • Seite 177 Targus ExpressCard Notebook Docking Station with Digital Video and Audio Telakointiaseman ohjaimen asennus Jotta käyttöjärjestelmä tunnistaisi tietokoneeseen liitetyn telakointia- seman ja sen portit, telakointiaseman ohjain on asennettava. 1. Käynnistä tietokone. 2. Aseta ohjain-CD-levy tietokoneen CD-ROM-asemaan. Jos asennus ei käynnisty automaattisesti, valitse Käynnistä - Suorita ja kirjoita D:\Setup.exe (D: on CD-ROM-aseman polku).
  • Seite 178 Targus ExpressCard Notebook Docking Station with Digital Video and Audio 4. Kytkettyäsi ExpressCard-aseman tietokoneeseen, odota että tietokone on tunnistanut laitteet ennen kuin napsautat OK- painiketta. Tämä vie noin 3–5 minuuttia. Windows XP -valintaikkuna Windows Vista -valintaikkuna Napsauta Valmis ja käynnistä tietokone uudelleen telakointiaseman asennusohjelman sitä...
  • Seite 179 Targus ExpressCard Notebook Docking Station with Digital Video and Audio LED-tilailmaisimet Kun kaikki laiteohjaimet on asennettu, USB-portin tilan LED- merkkivalot syttyvät telakointiaseman molemmin puolin liittäessäsi laitteita asemaan. • Vihreä Tx-valo syttyy, kun laite kytketään verkkoon, ja keltainen Rx- valo vilkkuu, kun aseman ja verkon välillä on tiedonsiirtoa.
  • Seite 180 Targus ExpressCard Notebook Docking Station with Digital Video and Audio Targus-lukkoihin (malli Helppokäyttöiset PA410E (ei mukana)) suurteho-USB- sopiva lukituspaikka portit LED- merkkivaloineen Uusien laitteiden liittäminen Liittäessäsi uuden laitteen älä yritä työntää kaapeliliitintä telakointiase- man porttiin väkisin. Jos liitin ei mene paikalleen helposti, käännä se toisin päin ja yritä...
  • Seite 181 Targus ExpressCard Notebook Docking Station with Digital Video and Audio Kämmentietokoneen liittäminen 1. Liitä kaapeliliitin telakointiaseman sarjaporttiin. 2. Tarkista, että COM-portin asetukset joko HotSync® tai ActiveSync®-ohjelmistossa vastaavat telakointiaseman asetuksia. Voit tarkistaa telakointiaseman COM-portin asetukset Laitteiden asennuksen tarkistaminen -kohdasta. Voit tarkistaa kämmentietokoneen COM-portin asetukset noudattamalla laitteen...
  • Seite 182 Targus ExpressCard Notebook Docking Station with Digital Video and Audio Äänilaitteen liittäminen ja asetukset Telakointiasemassa on 5.1-kanavaisen äänen tuki. Laitteen takana on viisi ääniporttia. HUOMAA: JOS KAIUTTIMET EIVÄT TOIMI NORMAALISTI LIITETTYÄSI TELAKOINTIASEMAN, KATSO LISÄTIETOJA VIANMÄÄRITYS-KOHDASTA. S/PDIF FRONT CENTER REAR Mikrofonin tuloliitäntä – vaaleanpunainen Etukanava tai linjalähtö...
  • Seite 183 Targus ExpressCard Notebook Docking Station with Digital Video and Audio 2. Liitä mikrofoni vaaleanpunaiseen 3,5 mm:n porttiin. 3. Jos haluat käyttää kuulokkeita tai kaiuttimia, valitse Ominaisuuksien asetukset -kohdasta C-media USB-äänilaite. 4. Jos koneessa on Windows® XP, avaa Ohjauspaneeli ja valitse Äänet ja äänilaitteet.
  • Seite 184 Targus ExpressCard Notebook Docking Station with Digital Video and Audio S/PDIF-laitteen (Sony/Philips Digital Interface) asennus asetukset 1. Käynnistä S/PDIF-laite. Avaa ilmaisinalueella näkyvä USB 3D -ääniasetusten pienoissovellus. (avaa Asetusnäyttö napsauttamalla USB-kuvaketta) 2. Käynnistä S/PDIF napsauttamalla tekstin S/PDIF-lähtö vieressä olevaa painiketta. 3. Valitse ilmaisinalueella äänilähdöksi digitaalinen ääni.
  • Seite 185 Targus ExpressCard Notebook Docking Station with Digital Video and Audio Liittäminen näyttöön tai nestekidenäyttöön Telakointiaseman videoporttiin liitettävien näyttöjen tai nestekidenäyt- töjen enimmäistarkkuus on 1600x1200, 32-bittiset värit. Kuvavalikon vaihtoehdot Avaa Kuvavalikon vaihtoehdot napsauttamalla hiiren kakkospainik- keella ilmaisinalueella näkyvää Targus-näytön kuvaketta tai Windowsin Näytön ominaisuudet -valintaikkunan kautta.
  • Seite 186 Targus ExpressCard Notebook Docking Station with Digital Video and Audio Kakkosnäyttö Kannettavan tai nestekidenäyttö tietokoneen näyttö Pois Päällä Ensisijainen Päällä Päällä Laajennettu näyttö Peili: Päällä Päällä Päällä Pois Ei käytössä HUOMAA: JOTKUT NESTEKIDENÄYTÖT TOIMIVAT PARHAITEN TIETYLLÄ TARKKUUDELLA. JOS OPTIMITARKKUUS EI OLE 1280 X 1024, KUVAN LAATU EI VÄLTTÄMÄTTÄ...
  • Seite 187 Targus ExpressCard Notebook Docking Station with Digital Video and Audio Valmiustila Tietokoneen ollessa valmiustilassa myös telakointiasema menee valmiustilaan virran säästämiseksi. Kun tietokonetta jälleen käytetään, myös telakointiasema käynnistyy automaattisesti. Enemmän tehoa tarvitsevien USB- laitteiden käyttö Telakointiasemassa on neljä suurteho-USB-porttia, joista kahden enimmäisteho on 1000 mA.
  • Seite 188: Vianmääritys

    Targus ExpressCard Notebook Docking Station with Digital Video and Audio Vianmääritys Laite ei toimi • Tarkista, että laite on liitetty kunnolla telakointiaseman oikeaan porttiin. • Liitä laite johonkin toiseen telakointiaseman porttiin. Jos laite ei vieläkään toimi, testaa se liittämällä laite suoraan tietokoneeseen.
  • Seite 189 Targus ExpressCard Notebook Docking Station with Digital Video and Audio Tarkista Laitehallinta-ikkunasta seuraavat kohteet: • Näyttösovittimet - Targus ExpressCard w/ video • Näppäimistöt ja osoitinlaitteet: hiiret, pallohiiret ja ohjaussauvat • Verkkosovittimet – Realtek RTL 8110SC Ethernet -sovitin • Portit (COM & LPT) – Sarja-USB [COM x] •...
  • Seite 190 Targus ExpressCard Notebook Docking Station with Digital Video and Audio Videokuva Voinko lisätä näytön tarkkuutta? • Enimmäistarkkuus on 1600 x 1200, 32-bittiset värit. Katsottaessa elokuvia 1600x1200x32-bitin tarkkuudella kuvan laatu on vain tyydyttävä. Heikkeneekö laatu katseltaessa koko ruudun kokoisena? Targus ExpressCard-telakointiasemaa ei ole suunniteltu ensisijaisesti elokuvien toistoon enimmäistarkkuudella ja -värisyvyydellä.
  • Seite 191 Targus ExpressCard Notebook Docking Station with Digital Video and Audio Järjestelmä jumiutuu käynnistysvaiheessa korttiliittimen asennuksen jälkeen. Siirrä Pre-boot-kytkin on-asentoon ja käynnistä uudelleen. Voinko liittää ExpressCard-telakointiasemaan kaksi erillistä näyttöä (VGA ja DVI-D) ja näyttää niissä kaksi eri sisältöä tai jakaa näytön kolmeen eri kuvaruutuun (mukaan lukien kannettavien tietokoneiden näytöt)?
  • Seite 192: Tekninen Tuki

    Targus ExpressCard Notebook Docking Station with Digital Video and Audio Tekninen tuki Teknisiä lisätietoja saat osoitteesta Internet http://www.targus.com/support.asp English http://www.targus.com/uk/support.asp Ranska http://www.targus.com/fr/support.asp Saksa http://www.targus.com/de/support.asp Espanja http://www.targus.com/sp/support.asp Italia http://www.targus.com/it/support.asp Saat asiantuntevaa apua myös asiakaspalvelustamme soittamalla seuraaviin numeroihin: 01 795 676 42 Itävalta...
  • Seite 193: Tuotteen Rekisteröinti

    Targus ExpressCard Notebook Docking Station with Digital Video and Audio Tuotteen rekisteröinti Suosittelemme, että rekisteröit Targus-oheislaitteen pian hankinnan jälkeen. Voit rekisteröidä Targus-lisälaitteet Internetissä: http://www.targus.com/registration.asp Lomakkeessa pyydetään ilmoittamaan nimi, sähköpostiosoite, puhelinnumero ja yrityksen tiedot (tarvittaessa). Takuu Targus antaa tuotteelle kahden vuoden virheettömyystakuun materiaalien ja työn osalta.
  • Seite 194: Vaatimustenmukaisuusvakuutus

    Microsoft, Windows ja Windows Vista ovat Microsoft Corporationin rekisteröityjä tavaramerkkejä tai tavaramerkkejä Yhdysvalloissa ja/tai muissa maissa. Kaikki tavaramerkit ja rekisteröidyt tavaramerkit ovat omistajiensa omaisuutta. Kaikki oikeudet pidätetään. Oikeus muutoksiin pidätetään. © 2007, Targus Group International, Inc. ja Targus, Inc., Anaheim, CA 92806 USA...
  • Seite 195 Visit our Website at www.targus.com/emea Features and specifications subject to change without notice. © 2007 Targus Group International, Inc. and Targus Group (UK) Ltd. ACP60EU...

Diese Anleitung auch für:

Expresscard acp60us

Inhaltsverzeichnis