Herunterladen Inhalt Inhalt Diese Seite drucken
Sony PWS-110CM1 Bedienungsanleitung

Sony PWS-110CM1 Bedienungsanleitung

Content management station
Inhaltsverzeichnis

Werbung

Verfügbare Sprachen
  • DE

Verfügbare Sprachen

  • DEUTSCH, seite 27
CONTENT MANAGEMENT STATION
PWS-110CM1
電気製品は、安全のための注意事項を守らないと、火災や人
身事故になることがあります。
このオペレーションマニュアルには、事故を防ぐための重要な注意事項と製品
の取り扱いかたを示してあります。このオペレーションマニュアルをよくお読
みのうえ、製品を安全にお使いください。お読みになったあとは、いつでも見
られるところに必ず保管してください。
OPERATION MANUAL
[Japanese/English/French/German/Italian/Spanish/Chinese/Korean]
1st Edition (Revised 3)

Werbung

Inhaltsverzeichnis
loading

Inhaltszusammenfassung für Sony PWS-110CM1

  • Seite 1 CONTENT MANAGEMENT STATION PWS-110CM1 電気製品は、安全のための注意事項を守らないと、火災や人 身事故になることがあります。 このオペレーションマニュアルには、事故を防ぐための重要な注意事項と製品 の取り扱いかたを示してあります。このオペレーションマニュアルをよくお読 みのうえ、製品を安全にお使いください。お読みになったあとは、いつでも見 られるところに必ず保管してください。 OPERATION MANUAL [Japanese/English/French/German/Italian/Spanish/Chinese/Korean] 1st Edition (Revised 3)
  • Seite 2: Inhaltsverzeichnis

    日本語 目次 概要 ..........................3 システム構成と接続..........................3 対応機器........................... 3 対応 NIC ................................3 各部の名称と働き ......................4 前面 ..................................4 前面(パネルを外した場合) ....................... 4 背面 ..................................5 準備 ..........................6 初期設定................................6 アプリケーションの表示........................6 アプリケーションの設定........................7 システムの設定 ............................7 メンテナンスアプリケーションの操作 ................ 7 使用上のご注意...
  • Seite 3: システム構成と接続

    概要 対応機器 本機は、4K-Live システムで PWS-4500/BPU4800 に保存さ 本機が動作を確認している機器を次に示します。 れた映像コンテンツを管理するシステムです。 ユーザーは映像コンテンツのメタデータを利用したワーク 対応 NIC フローの構築が可能になり、Web ブラウザーからメタデー タの編集、複数台の PWS-4500/BPU4800 内の映像コンテン 下記の 10 GbE ネットワークカードとの動作を確認してい ツのソート、PWS-4500/BPU4800 間や NAS などの外部ス ます。 トレージへの映像コンテンツの転送が効率的にできます。 Intel Ethernet Converged Network Adapter X520-DA1 ◆ 操作について詳しくは、アプリケーションのヘルプを参照して ください。 システム構成と接続 本機と 4K-Live システムをイーサネットで接続します。 お客様へのお願い 本機のインストールは、ソニーのサービス担当者または...
  • Seite 4: 各部の名称と働き

    各部の名称と働き 前面 a オン/スタンバイボタンおよびインジケーター オレンジ色点滅(1 秒周期) :ワーニング発生 本機のオン / スタンバイを切り換えます。電源コードを接 赤色高速点滅(1/4 秒周期) :エラー発生 続するとスタンバイ状態になり、インジケーターが赤色に c フロントパネル LED 点灯します。スタンバイ状態のときにオン / スタンバイボ Web メニューでの設定によって、点灯 / 消灯します。設定 タンを押すと、本機が起動してオン状態になり、インジ は、メンテナンス画面の[Settings]ページ−[001: LINE ケーターが緑色に点灯します。オン状態のときにオン / ス LED]で行います。 タンバイボタンを 2 秒以上長押しすると、スタンバイ状態 への移行を開始し、スタンバイ状態になるとインジケー d USB 端子(前面) ターが赤色に点灯します。オン状態からスタンバイ状態に 本機の初期設定をする際に、キーボードやマウスを接続で した後、再度オンにする場合は、インジケーターが赤色に...
  • Seite 5 a FAN インジケーター c TEMP インジケーター ファンのいずれかに障害が発生した場合に、対応するイン 本機内部温度の異常上昇を検出した場合に赤く点灯します。 ジケーターが赤く点灯します。 b POWER インジケーター AC 電源ユニットのどちらかに故障が検出された場合に、 対応するインジケーターが赤く点灯します。 背面 LAN1 LAN2 a SYSTEM TC 端子 f LAN 端子 本システムでは使用しません。 ギガビットイーサネットに接続します。 b Remote 端子(1/2、3/4、5) g HDMI 端子 本システムでは使用しません。 HDMI ケーブルでディスプレイに接続します。 HDMI ケーブルは、下記の規格に適合したケーブルをご使 c AC 電源ユニット 用ください。...
  • Seite 6: 初期設定

    日時を設定する 準備 コントロールパネルの[Clock, Language, and Region] で[Date and Time]−[Set the time and date]を選 択する。 初期設定 [Date and Time]タブの[Change time zone]をク 本機を使用する前に、本機内の Windows の設定を行いま リックして、タイムゾーンを選択する。 す。設定方法については、標準的な Windows 8 の操作方法 に準じます。 [Date and Time]タブの[Change date and time]を クリックして、日付と時刻を設定する。 ご注意 [Internet Time]タブの[Change settings]ボタンを 本機を再起動する場合は、Windows の再起動ではなく、いったん...
  • Seite 7: アプリケーションの設定

    上記推奨環境を備えたコンピューターを、本機背面の メンテナンスアプリケー LAN1 端子または LAN2 端子に接続します。コンピュー ターの Web ブラウザーのアドレス欄に「https://(ホスト ションの操作 名)/cm1/」と入力して、アプリケーションを表示させま す。 ログイン画面が表示されたら、ユーザー名とパスワードを 入力してログインします。 システム管理者向けメンテナンスアプリケーション 工場出荷時は、下記のユーザー名とパスワードが設定され (Maintenance Web Application)の操作については、本機 ています。 にログオンしてデスクトップ上にあるショートカットを開 いてマニュアルを参照してください。 ユーザー名 : admin パスワード : cm1 アプリケーションの設定 アプリケーションを起動し、本システムに必要な設定を行 います。 ◆ 設定方法については、アプリケーションのヘルプを参照してく ださい。 システムの設定 Web メニューのメンテナンス画面で、本システムの設定を 行います。 ◆ メンテナンス画面の操作については、 「 メンテナンスアプリ ケーションの操作」...
  • Seite 8: 使用上のご注意

    使用上のご注意 仕様 電源に関する注意事項 一般 本機が動作中に突然電源が切れた場合、データが壊れる可 電源 AC 100 V ∼ 240 V 能性があります。データ保護のため、UPS(無停電電源装 50/60 Hz 置)のご使用をお勧めします。 消費電力 235 W また、電源コードを抜く場合やブレーカーを落とす場合は、 待機電力 3 W 以下 必ず事前に本機のオン / スタンバイボタンを押して本機の 使用温度 5 ℃ ∼ 35 ℃ 動作を停止させてください。 保存温度 −20 ℃ ∼ +60 ℃ 使用湿度...
  • Seite 9 入出力 • 必ず事前に記録テストを行い、正常に記録されている RJ-45(2) ことを確認してください。本機や記録メディア、外部 1000BASE-T ストレージなどを使用中、万一これらの不具合により 100BASE-TX 記録されなかった場合の記録内容の補償については、 SFP+ (1) ご容赦ください。 1) 2) 10GBASE-SR/LR (Add-in Card) • お使いになる前に、必ず動作確認を行ってください。 1) 本機に接続されているネットワークカード 故障その他に伴う営業上の機会損失等は保証期間中お • Intel Ethernet Converged Network Adapter X520-DA1 よび保証期間経過後にかかわらず、補償はいたしかね ネットワークカードの情報については、以下のサイトを参照し ますのでご了承ください。 てください。 http://www.intel.com/support/go/network/adapter/ • 本製品を使用したことによるお客様、または第三者か userguide.htm らのいかなる請求についても、当社は一切の責任を負 2) SFP+ モジュール装着時のみ利用できます。 いかねます。...
  • Seite 10 English Table of Contents Overview................11 System Configuration and Connection ......... 11 Supported Devices ............. 11 Supported NIC ..............11 Name and Function of Parts ..........12 Front View ................12 Front View (Panel Removed)..........12 Rear View................13 Setting Up................14 Initial Settings ...............
  • Seite 11: Overview

    System Configuration and Connection Connect the unit to a 4K-Live system using Ethernet. Notice to customers Installation of the unit should be performed by your Sony service personnel or a technician who has received service training. Overview / Supported Devices...
  • Seite 12: Name And Function Of Parts

    Name and Function of Parts Front View a On/Standby button and indicator Flashing orange (once per second): A warning has been generated. Switches the unit on/off (standby state). Connecting the High-speed flashing read (four times per second): An power cord places the unit in standby state, and the error has occurred.
  • Seite 13: Rear View

    Use a DisplayPort cable that conforms to the following standard. • DP v1.2a (compliant) For details about installing or replacing a power supply i Ground terminal unit, consult your Sony sales or service representative. Connect to ground. d SFP+ slot Attach to an SFP+ module.
  • Seite 14: Setting Up

    Click [Change time zone] on the [Date and Time] tab, Setting Up and select the time zone. Click [Change date and time] on the [Date and Time] tab, and set the date and time. Initial Settings Click the [Change settings] button on the [Internet Before using the unit, configure the Windows settings Time] tab.
  • Seite 15: Application Settings

    User name: admin Maintenance Web Password: cm1 Application Operation Application Settings Launch the application and configure the required system For details about the operation of the Maintenance Web settings. Application for system administrators, log in to the unit and click the shortcut icon on the desktop to refer to the For details about configuration, refer to the Help in the Operation Manual.
  • Seite 16: Usage Precautions

    Usage Precautions Specifications Power supply precautions General If the unit is suddenly turned off during operation, data loss Power requirement may occur. To maintain data integrity, the use of an 100 V to 240 V AC uninterruptible power supply (UPS) is recommended. 50/60 Hz To disconnect the power cord or turn off the breaker, Power consumption...
  • Seite 17: Optional Accessories

    EXPIRATION OF THE WARRANTY, OR FOR right port (900 mA), not supported on ANY OTHER REASON WHATSOEVER. other three ports • SONY WILL NOT BE LIABLE FOR CLAIMS OF HDMI Type A (1) ANY KIND MADE BY USERS OF THIS UNIT OR HDMI Ver.
  • Seite 18 For the customers in Taiwan Specifications...
  • Seite 19 Français Table des matières Présentation................ 20 Configuration système et connexion ........20 Périphériques pris en charge..........20 NIC pris en charge..............20 Nomenclature ..............21 Vue de face ................21 Vue de face (Panneau retiré) ..........21 Vue arrière ................22 Mise en service..............
  • Seite 20: Présentation

    Connectez l’appareil au système 4K-Live à l’aide d’Ethernet. Avis à l’intention des clients L’installation de l’appareil doit être réalisée par un membre du personnel de service après-vente Sony ou un technicien qui a suivi une formation. Présentation / Périphériques pris en charge...
  • Seite 21: Nomenclature

    Nomenclature Vue de face a Touche on/attente et indicateur Clignote en orange (une fois par seconde) : Un avertissement a été généré. Met l’appareil sous/hors tension (mode d’attente). La Clignote rapidement en rouge (quatre fois par connexion du cordon d’alimentation met l’appareil en seconde) : Une erreur s’est produite.
  • Seite 22: Vue Arrière

    Pour les détails sur l’installation ou le remplacement • DP v1.2a (compatible) d’une unité d’alimentation, contactez votre service après- vente ou concessionnaire Sony. i Borne de mise à la terre Connectez à la mise à la terre. d Fente SFP+ A raccorder à...
  • Seite 23: Mise En Service

    Réglage de la date et l’heure Mise en service Sélectionnez [Set the time and date] sous [Date and Time] dans le panneau de configuration [Clock, Language, and Region]. Réglages initiaux Cliquez sur [Change time zone] dans l’onglet [Date Avant d’utiliser l’appareil, configurez les réglages and Time], puis sélectionnez le fuseau horaire.
  • Seite 24: Réglages De L'application

    sur l’arrière du panneau de l’appareil. Saisissez « https:// Fonctionnement de (nom_hôte)/cm1/ » dans la barre d’adresse du navigateur Web sur l’ordinateur pour afficher l’application. l’application Maintenance Saisissez le nom d’utilisateur et le mot de passe lorsque l’écran de connexion apparaît. Le nom d’utilisateur et le mot de passe suivants sont configurés par défaut.
  • Seite 25: Précautions D'utilisation

    Précautions d’utilisation Spécifications Précautions relatives à l’alimentation Généralités électrique Conditions d’alimentation 100 V à 240 V CA Une mise hors tension soudaine de l’appareil lors de son 50/60 Hz fonctionnement peut entraîner une perte de données. Afin Consommation électrique de préserver l’intégrité des données, l’utilisation d’un 235 W onduleur est recommandée.
  • Seite 26: Accessoires En Option

    Avant : prise en charge de l’alimentation pour toute autre raison quelle qu’elle soit. fournie (900 mA/port) • Sony n’assumera pas de responsabilité pour les Arrière : le port en bas à droite prend en réclamations, quelle qu’elles soient, effectuées par charge l’alimentation fournie...
  • Seite 27 Deutsch Inhaltsverzeichnis Überblick ................28 Systemkonfiguration und Verbindung ........28 Unterstützte Geräte ............28 Unterstützte Netzwerkkarte ........... 28 Name und Funktion der Teile ..........29 Vorderansicht ................. 29 Vorderansicht (mit abgenommener Blende) ......29 Rückansicht ................30 Einrichtung ................. 31 Anfangseinstellungen ............
  • Seite 28: Überblick

    Einzelheiten zum Betrieb siehe Hilfe in der Anwendung. Systemkonfiguration und Verbindung Verbinden Sie die Einheit über Ethernet mit einem 4K- Live-System. Hinweis für Kunden Die Installation des Gerätes sollte durch Ihr Sony- Servicepersonal oder einen Techniker mit abgeschlossener Serviceschulung durchgeführt werden. Überblick / Unterstützte Geräte...
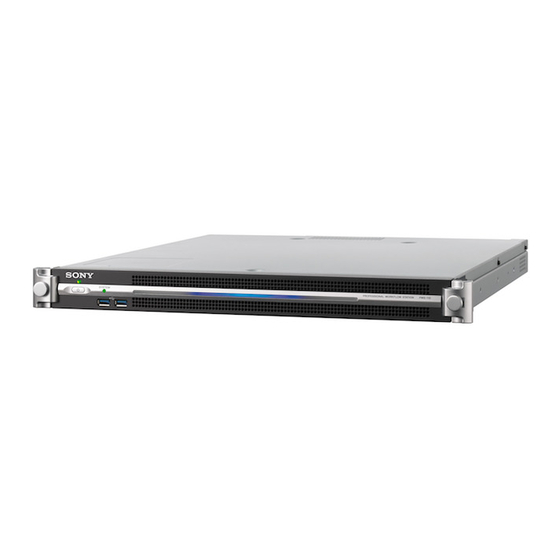
  • Seite 29: Name Und Funktion Der Teile

    Name und Funktion der Teile Vorderansicht a Taste und LED Ein/Bereitschaft Schnelles rotes Blinken (viermal pro Sekunde): Ein Fehler ist aufgetreten. Schaltet das Gerät ein- und aus (Bereitschaftsmodus). Wenn das Netzkabel angeschlossen wird, wird das Gerät c LED auf der Frontblende in den Bereitschaftsmodus versetzt und die LED leuchtet rot.
  • Seite 30: Rückansicht

    Kabel) Ausführliche Informationen zum Installieren oder h DisplayPort-Anschluss Austauschen eines Netzteils erhalten Sie von Ihrem Mittels eines DisplayPort-DVI-Konvertierungskabels örtlichen Sony-Vertreter oder Kundendienst. oder eines DisplayPort-HDMI-Konvertierungskabels mit einem Monitor verbinden. d SFP+ Steckplatz Verwenden Sie aktive Konvertierungskabel. Mit einem SFP+ Modul verbinden.
  • Seite 31: Einrichtung

    Einstellen von Datum und Uhrzeit Einrichtung Wählen Sie im Fenster „Control Panel“ [Clock, Language, and Region] und dann unter [Date and Time] die Option [Set the time and date]. Anfangseinstellungen Klicken Sie auf der Registerkarte [Date and Time] auf Bevor Sie das Gerät verwenden, konfigurieren Sie die [Change time zone] und wählen Sie die Zeitzone.
  • Seite 32: Einstellungen In Der Anwendung

    Verbinden Sie einen Computer, der die oben aufgeführten Bedienung der Anforderungen erfüllt, mit dem Anschluss LAN1 oder LAN2 an der Rückseite der Einheit. Geben Sie „https:// Webanwendung (hostname)/cm1/“ in die Adresszeile des Webbrowsers auf dem Computer ein, um die Anwendung aufzurufen. „Maintenance“...
  • Seite 33: Vorsichtsmaßnahmen

    Vorsichtsmaßnahmen Spezifikationen Vorsichtsmaßnahmen bezüglich der Allgemein Stromversorgung Leistungsbedarf 100 V bis 240 V Wechselspannung Falls das Gerät während des Betriebs plötzlich 50/60 Hz ausgeschaltet wird, könnte ein Datenverlust auftreten. Um Leistungsaufnahme die Datenintegrität aufrecht zu erhalten wird die 235 W Verwendung einer unterbrechungsfreien Stromversorgung Leistungsaufnahme im Bereitschaftsmodus (UPS) empfohlen.
  • Seite 34: Optionales Zubehör

    Anschlüssen BENUTZERN DIESES GERÄTS ODER VON HDMI Typ A (1) DRITTER SEITE ÜBERNEHMEN. HDMI Ver. 1.4a, • SONY KANN KEINE HAFTUNG FÜR VERLUST, maximale Auflösung 1920 × 1200, RETTUNG ODER WIEDERHERSTELLUNG VON 60 Hz DATEN IM INTERNEN SPEICHERSYSTEM, AUF DisplayPort...
  • Seite 35 Italiano Indice Descrizione ................. 36 Configurazione e connessione del sistema ......36 Dispositivi supportati............36 Schede di rete supportate............36 Denominazione e funzione dei componenti ..... 37 Vista anteriore ................ 37 Vista anteriore (pannello rimosso) ......... 37 Vista posteriore............... 38 Configurazione ..............
  • Seite 36: Descrizione

    Configurazione e connessione del sistema Collegare l’unità a un sistema 4K-Live tramite Ethernet. Avviso ai clienti L’installazione dell’apparecchio dovrà essere eseguita da un tecnico di assistenza tecnica Sony o da un tecnico debitamente addestrato e qualificato per fornire assistenza. Descrizione / Dispositivi supportati...
  • Seite 37: Denominazione E Funzione Dei Componenti

    Denominazione e funzione dei componenti Vista anteriore a Pulsante e indicatore On/Standby Arancione lampeggiante (una volta al secondo): è stato generato un avvertimento. Consente di accendere e spegnere l’unità (stato di Rosso con lampeggiamento veloce (quattro volte al standby). Quando si collega il cavo di alimentazione, secondo): si è...
  • Seite 38: Vista Posteriore

    Connettore DisplayPort sostituzione di un alimentatore, consultare il rivenditore o Consente il collegamento a un monitor mediante un cavo il centro di assistenza Sony locale. di conversione a DisplayPort-DVI o DisplayPort-HDMI. Utilizzare un cavo di conversione di tipo attivo.
  • Seite 39: Configurazione

    Impostazione di data e ora Configurazione Selezionare [Set the time and date] sotto [Date and Time] nel pannello di controllo [Clock, Language, and Region]. Impostazioni iniziali Fare clic su [Change time zone] nella scheda [Date and Prima di procedere con l’utilizzo dell’apparecchio, Time] e selezionare il fuso orario appropriato.
  • Seite 40: Impostazioni Dell'applicazione

    Collegare un computer che soddisfi le caratteristiche Utilizzo di Maintenance raccomandate al connettore LAN1 o LAN2 sul pannello posteriore dell’unità. Visualizzare l’applicazione Web Application immettendo “https://(nome_host)/cm1/” nella barra degli indirizzi del browser Web sul computer. Quando è visualizzata la schermata di login immettere il nome utente e la password.
  • Seite 41: Precauzioni Per L'uso

    Precauzioni per l’uso Caratteristiche tecniche Precauzioni sull’alimentazione Generale Se l’unità si spegne improvvisamente durante il Alimentazione Da 100 V a 240 V CA funzionamento, potrebbero verificarsi perdite di dati. Per 50/60 Hz mantenere l’integrità dei dati, si consiglia l’uso di un Potenza assorbita gruppo statico di continuità...
  • Seite 42: Accessori Opzionali

    (6, 2 anteriori, 4 posteriori) • Verificare sempre che l’apparecchio stia funzionando Pannello anteriore: in grado di fornire correttamente prima di usarlo. LA SONY NON SARÀ alimentazione (900 mA per porta) RESPONSABILE DI DANNI DI QUALSIASI TIPO, Pannello posteriore: porta in basso a...
  • Seite 43 Español Contenido Descripción general ............44 Configuración del sistema y conexión ........44 Dispositivos compatibles ..........44 NIC compatible ..............44 Nombre y función de los componentes ......45 Vista frontal ................45 Vista frontal (con el panel extraído)........45 Vista posterior ................
  • Seite 44: Descripción General

    Conecte la unidad a un sistema 4K-Live mediante Ethernet. Aviso para clientes La instalación de la unidad se debe llevar a cabo por el personal del servicio técnico de Sony o un técnico que haya recibido formación sobre el servicio. Descripción general / Dispositivos compatibles...
  • Seite 45: Nombre Y Función De Los Componentes

    Nombre y función de los componentes Vista frontal a Botón e indicador On/Standby Parpadea en naranja (una vez por segundo) :se ha generado una advertencia. Enciende y apaga la unidad (estado de espera). Al conectar Parpadea en rojo a alta velocidad (cuatro veces por el cable de conexión, la unidad entra en estado de espera y segundo): se ha producido un error.
  • Seite 46: Vista Posterior

    DisplayPort-DVI o de DisplayPort-HDMI. póngase en contacto con un representante de servicio o Utilice un cable de conversión de tipo activo. ventas de Sony. Nota d Ranura para SFP+ Utilice un cable DisplayPort que cumpla con el siguiente estándar.
  • Seite 47: Configuración

    Haga clic en [Change time zone] en la pestaña [Date Configuración and Time] y seleccione la zona horaria. Haga clic en [Change date and time] en la pestaña [Date and Time] y seleccione la fecha y la hora. Configuración inicial Haga clic en el botón [Change settings] en la pestaña Antes de utilizar la unidad, configure los ajustes de [Internet Time].
  • Seite 48: Configuración De La Aplicación

    El nombre de usuario y la contraseña que se indican a Funcionamiento de la continuación están configurados por defecto. aplicación Maintenance Nombre de usuario: admin Contraseña: cm1 Configuración de la aplicación Para obtener información acerca del funcionamiento de la aplicación Maintenance Web para administradores del Inicie la aplicación y configure los ajustes del sistema que sistema, inicie sesión en la unidad y haga clic en el icono sean necesarios.
  • Seite 49: Precauciones De Uso

    Precauciones de uso Especificaciones Precauciones sobre el suministro de General alimentación Requisitos de alimentación CA de 100 V a 240 V Si la unidad se apaga de repente, podrían perderse datos. 50/60 Hz Para mantener la integridad de los datos es recomendable Consumo de alimentación utilizar un sistema de alimentación ininterrumpida (SAI).
  • Seite 50: Accesorios Opcionales

    REALIZADAS POR USUARIOS DE ESTA puertos restantes no UNIDAD O POR TERCEROS. HDMI Tipo A (1) • SONY NO SE HACE RESPONSABLE POR LA HDMI Ver. 1.4a, PERDIDA, REPARACIÓN O REPRODUCCIÓN DE 1920 × 1200 resolución máxima, CUALQUIER DATO GRABADO EN EL SISTEMA...
  • Seite 51 中文 机型名称:内容管理工作站 使用产品前请仔细阅读本书,并请妥善保管...
  • Seite 52 目录 概述............53 系统配置和连接 ........53 支持的设备..........53 支持的 NIC ..........53 部件的名称和功能.......... 54 正面 ..........54 正面 (面板被移除)........54 背面 ..........55 设置............56 初始设置 ..........56 显示应用程序 .......... 56 应用程序设置 .......... 56 系统设置 ..........57 维护 Web 应用程序操作........57 使用注意事项..........
  • Seite 53: 系统配置和连接

    使用以下设备的操作已经过验证。 BPU4800 上的视频内容的系统。 用户可以使用视频内容的元数据构建工作流,从 Web 浏览器编辑元数据,对多个 PWS-4500/BPU4800 设备 支持的 NIC 中的视频内容进行分类,还可以在 PWS-4500/ BPU4800 设备之间高效传输视频内容并且可以把视频 使用以下 10 GbE 网卡的操作已经过验证。 内容高效传输到 NAS 或其他外部存储器。 Intel Ethernet Converged Network Adapter X520- 有关操作的详细信息,请参阅应用程序中的帮助。 系统配置和连接 使用以太网将本设备连接到 4K-Live 系统。 客户须知 设备的安装工作应由 Sony 服务人员或受过服务培训 的技术人员执行。 概述 / 支持的设备...
  • Seite 54: 部件的名称和功能

    部件的名称和功能 正面 a 开机 / 待机键和指示灯 闪烁橙色 (每秒闪烁一次) : 生成了警告。 快速闪烁红色 (每秒闪烁四次) :发生了错误。 在开机和关机 (待机状态)之间切换。 连接电源线 后,本机将处于待机状态,此指示灯会亮起红色。 在 c 前面板 LED 待机状态下按开机 / 待机键可启动本机,此指示灯会 亮起绿色。 长按开机 / 待机键两秒可将本机切换至待 根据 Web 应用程序中的设置打开。 使用 “维护”屏 机状态,此时此指示灯将变为红色。 要在将本机从开 幕上 [Settings] 页面中的 [001: LINE LED] 配置该 机状态切换至待机状态后重新开启本机,请在此指示...
  • Seite 55 使用符合以下标准的 DisplayPort 电缆。 • DP v1.2a (兼容) 插入电源线并连接到电源插座。 出厂时只安装了一个 AC 电源装置。 i 接地端子 可安装第二个可选电源装置来提供冗余电源。 在要求 高可靠性的系统中使用时,冗余电源可让本机在发生 接地。 电力故障时继续运行。 有关安装或更换电源装置的详细信息,请联系 Sony 销售代表或服务代表。 d SFP+ 插槽 连接至 SFP+ 模块。 e USB 接口 (后面板) 使用 USB 电缆连接至驱动器单元。 不支持本文档中未列出的 USB 设备。 注意 • 在后面板上的四个 USB 接口中,只有右下方的端口支持功率...
  • Seite 56: 初始设置

    单击 [Date and Time] 选项卡上的 [Change date 设置 and time],然后设置日期和时间。 单击 [Internet Time] 选项卡上的 [Change settings] 按钮。 初始设置 指定 NTP 服务器,然后单击 [Update Now] 按钮。 使用本机前,请在本机内配置 Windows 设置。 以下描 述将介绍 Windows 8 中的标准设置。 选中 [Synchronize with an Internet time server],使用 NTP 服务器定期纠正时钟。 注意...
  • Seite 57: 系统设置

    系统设置 维护 Web 应用程序操作 在 Web 应用程序中的 “维护”屏幕上配置系统设置。 有关适用于系统管理员的 “维护 Web 应用程序”操 有关 “维护”屏幕的详细信息,请参阅 “维护 Web 作的详细信息,请登录设备并单击桌面上的快捷方式 应用程序操作” (第 57 页) 。 图标,参阅操作手册。 维护 Web 应用程序操作...
  • Seite 58: 使用注意事项

    使用注意事项 规格说明 电源注意事项 一般规格 如果本机在操作期间突然关闭,可能会发生数据丢 电源要求 100 V 至 240 V 交流 失。 为了保证数据的完整性,建议使用不间断电源 50/60 Hz (UPS)。 功耗 235 W 要断开电源线或关闭断路器,请务必先按下本机上的 待机电源消耗 3 W 或更低 开机 / 待机键以停止本机,然后再操作。 工作温度 5 °C 至 35 °C 存储温度 -20 °C 至 +60 °C 工作湿度...
  • Seite 59 无论是在保修期以内或者以外,Sony 均不作任何 userguide.htm 赔偿。 2) 仅当连接 SFP+ 模块时支持。 • SONY对本产品用户或第三方的任何索赔概不负责。 USB (前面板 / 后面板) • SONY 对内部存储系统、记录介质、外部存储系统 Super Speed USB (USB 3.0),A 型 或任何其他介质或存储系统上记录的任何数据的 (6 个,前面板 2 个,后面板 4 个) 丢失、修复和还原概不负责。 正面: 支持功率输出 (900 mA/ 端 • SONY 对因任何情况导致终止或停止使用本机相关...
  • Seite 60 한국어 목차 개요 ..............61 시스템 구성 및 연결 ........... 61 지원 장치 ............61 지원되는 NIC ........... 61 부품의 명칭과 기능 ..........62 앞면 ..............62 앞면 ( 패널 제거됨 ) ..........62 뒷면 ..............63 설정 ..............64 초기 설정 ............64 응용...
  • Seite 61: 시스템 구성 및 연결

    작동에 대한 자세한 내용은 응용 프로그램의 도움말 을 참조하십시오 . 시스템 구성 및 연결 이더넷을 사용하여 기기를 4K- 라이브 시스템에 연 결합니다 . 고객을 위한 알림 장치 설치는 Sony 서비스 직원 또는 서비스 교육을 받은 기술자가 수행해야 합니다 . 개요 / 지원 장치...
  • Seite 62: 부품의 명칭과 기능

    부품의 명칭과 기능 앞면 a On/Standby 버튼 및 표시등 빠른 속도로 읽기 깜박임 (1 초에 4 번 ): 오류가 발생 했습니다 . 장치를 켜고 끕니다 ( 대기 상태 ). 전원 코드를 연결 하면 장치가 대기 상태가 되며 표시등이 빨간색으로 c 앞쪽 패널 LED 켜집니다...
  • Seite 63 동할 수 있습니다 . Speed HDMI 케이블 ) 전원 공급 장치의 설치 또는 교체에 대한 자세한 내용 h DisplayPort 커넥터 은 Sony 영업 담당자나 서비스 담당자에게 문의하십 DisplayPort-DVI 컨버터 케이블 또는 시오 . DisplayPort-HDMI 컨버터 케이블을 사용하여 모 니터에 연결합니다 .
  • Seite 64: 초기 설정

    날짜 및 시간 설정 설정 [Clock, Language, and Region] 제어판의 [Date and Time] 에서 [Set the time and date] 을 선택합니다 . 초기 설정 [Date and Time] 탭에서 [Change time 장치를 사용하기 전에 , 장치 내 Windows 설정을 구 zone] 을 클릭하여 시간대를 선택합니다 . 성하십시오...
  • Seite 65: 응용 프로그램 설정

    의 웹 브라우저의 주소 표시줄에 "https:// Maintenance Web (host_name)/cm1/"을 입력하여 응용 프로그램을 표시합니다 . Application 작동 로그인 화면이 나타나면 사용자 이름과 암호를 입력 합니다 . 기본적으로 다음 사용자 이름이 암호가 구성되어 있 습니다 . 시스템 관리자용 Maintenance Web Application 의 작동에 대한 자세한 내용은 장치에 사용자...
  • Seite 66: 사용 주의 사항

    사용 주의 사항 사양 전원 공급 주의 사항 일반 본 기기가 작동하는 도중에 갑자기 끄면 데이터 손실 사용 전원 100 V ~ 240 V AC 이 발생할 수 있습니다 . 데이터 무결성을 유지하려면 50/60 Hz 무정전 전원 공급 장치 (UPS) 를 사용하는 것이 좋 소비...
  • Seite 67 USB( 앞쪽 패널 / 뒤쪽 패널 ) 또는 변상하지 않습니다 . Super Speed USB(USB 3.0) • SONY 는 이 장치에 의해 발생했거나 제 3 자가 제 타입 A( 앞쪽 6, 2, 뒤쪽 4) 기한 어떠한 종류의 보상 청구에 대해서도 책임을...
  • Seite 68 사양...
  • Seite 69 Sony Corporation. El material de este manual contiene informacion que es propiedad de Sony Corporation y se destina al uso por parte de los compradores del equipo descrito en este manual. Sony Corporation prohibe expresamente la duplicacion de...
  • Seite 70 Printed in Japan Sony Corporation 2018.08 32 PWS-110CM1(SYL/CNC) 4-698-630-04(1) © 2017...

Inhaltsverzeichnis