Inhaltsverzeichnis
Werbung
Verfügbare Sprachen
Verfügbare Sprachen
Quicklinks
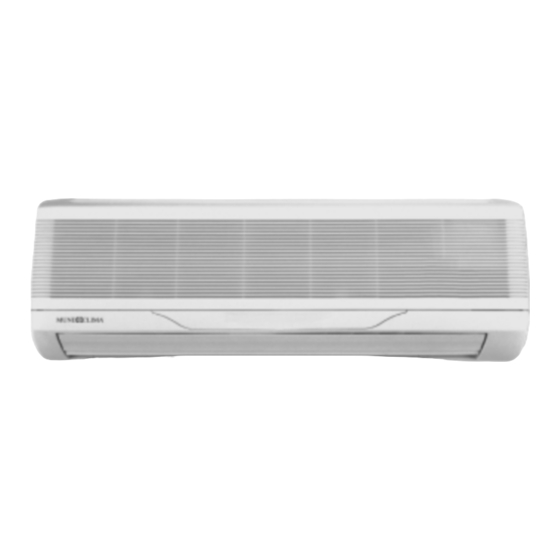
SPLITS MURALES 1x1 R-407C
MUP-07 CN/HN MUP-09
MUP-12
CN/HN
MUP-21
CN/HN
Minisplit mural
E
Instrucciones de Instalación
Wall Minisplit
GB
Installation Instructions
Minisplit mural
F
Instructions d'installation
Mini-split mural
P
Instruções de Instalação
Minisplit a parete
I
Istruzioni per l'installazione
Minisplit Wandmodell
D
Hinweise zum Einbau
Mini-split air conditioners vorr wandbevestiging
NL
Installatie-instructies
Minisplit mural
N
Instruksjoner for innstallering
CN/HN
MUP-16
CN/HN
MUP-24
CN/HN
MUND CLIMA
®
5
6
7
8
9
10
11
12
Werbung
Inhaltsverzeichnis

Verwandte Anleitungen für mundoclima MUP-07 CN/HN


Inhaltszusammenfassung für mundoclima MUP-07 CN/HN
- Seite 1 SPLITS MURALES 1x1 R-407C MUND CLIMA MUP-07 CN/HN MUP-09 CN/HN ® MUP-12 CN/HN MUP-16 CN/HN MUP-21 CN/HN MUP-24 CN/HN Minisplit mural Instrucciones de Instalación Wall Minisplit Installation Instructions Minisplit mural Instructions d'installation Mini-split mural Instruções de Instalação Minisplit a parete...
- Seite 2 Fig. 1 Mod. 520, 527, 535, 540 Mod. 570 > 15 cm AUTO TEST AUTO > 15 cm >15 cm > 70 cm AUTO SWING LIGHT AIR T-ON +°C -°C T-OFF ON/OFF > 15 cm > 30 cm > 50 cm >...
- Seite 3 Fig. 4 Fig. 5 Fig. 6 Fig. 7 1- Tecla función auto (funcionamiento de emergencia) 5- Líneas frigoríficas 9- Indicador de calefacción Auto operation button (emergency operation) Cooling lines Heating indicator Poussoir fonction auto (fonctionnement de secours) Lignes frigorifiques Indicateur de chauffage Tecla da função auto (funcionamento de emergência) Linhas frigoríficas Indicador de calefacção...
- Seite 4 Dimensiones generales / General dimensions mm / Dimensions générales / Dimensões gerais Dimensioni d'ingombro / Algemeine abmessungen / Algemene afmetingen / Generelle dimensjoner Modelo & 2 5 0 7 1 0 1 8 0 & 2 8 5 8 3 0 1 8 9 2 9 0 9 0 7...
-
Seite 10: Hinweise Zum Einbau
Montageplatte hängen (siehe Fig. 2). Anschluss schließen. Hinweise zum Einbau Durch ein versuchsweises Hin- und Her- 7- Frontblende aufsetzen. Überprüfung schieben des Gehäuses die korrekte An- Leiterquerschnitte Bei Erhalt der Ware muss diese sofort auf bringung des Geräts überprüfen. mögliche Transportschäden überprüft wer- Kondensatablauf Baugröße den. - Seite 13 SPLITS MURALES 1x1 R-407C MUND CLIMA MUP-07 CN/HN MUP-09 CN/HN ® MUP-12 CN/HN MUP-16 CN/HN MUP-21 CN/HN MUP-24 CN/HN Condensadoras sólo frío y bomba de calor Instrucciones de instalación 16-17 Condensing Units, Cool Only and Heat Pump Installation Instructions 18-19 Unités de condensation froid seul et réversible...
- Seite 15 Dimensiones generales / General dimensions / Dimensions générales / Dimensões gerais Dimensioni d’ingombro / Allgemeine Abmessungen / Algemene afmetingen / Generelle dimensjoner Fig. 6 (mm) 2000 MUP-07 & 09 K F ( R ) - 2 0 & 2 5 W / A 2 0 7 2 0 2 6 0 4 3 0...
- Seite 26 Hinweise zum Einbau des Geräuschpegels sind die Verdichter mit - Trockenfilter und Verdichter nicht offen ste- einer entsprechenden Schallisolierung aus- hen lassen. Überprüfung gerüstet. - Beim Löten Lötstäbe mit niedrigem Bei Erhalt der Ware muss diese sofort auf Schmelzpunkt und mindestens 5% Silber mögliche Transportschäden überprüft wer- Einbau verwenden.
-
Seite 27: Technische Angaben
Technische Angaben Modell MUP-07 CN/HN MUP-09 CN/HN MUP-12 CN/HN MUP-16 CN/HN MUP-21 CN/HN MUP-24 CN/HN Außengerät R-407 Leistungswerte Kühlen Keizen Verdichter Rotativo Kältemitten R-407C Expansion/unterbringung Kapillar/Außengerät Elektr. Anschluß V.ph.Hz 230.1.50 Verbrauch 0,97 Nennverbrauch 11,3 15,4 Verbrauch beim Anlauf AM-Sicherung Geräuschpegel außen (3 m) dB (A) Außendurchm. - Seite 32 SPLITS MURALES 1x1 R-407C MUND CLIMA MUP-07 CN/HN MUP-09 CN/HN ® MUP-12 CN/HN MUP-16 CN/HN MUP-21 CN/HN MUP-24 CN/HN Minisplits y Multisplits murales Manual para el usuario - Instrucciones de Manejo y Mantenimiento 33-34 Wall Minisplits and Multisplits User manual...
-
Seite 43: Hinweise Zu Bedienung Und Wartung
Hinweise zu Bedienung und Wartung IR-Fernbedienung KÜHLEN ENTFEUCHTEN BELÜFTEN HEIZEN AUTOMATIKBETRIEB NACHTBETRIEB AUTO AUTOMATISCHE BELÜFTUNG VENTILATORGESCHWINDIGKEIT Anm.: Nur AAA-Alkalin-Batterien verwenden. Heizen 1. Mit der Taste EIN/AUS wird das Kli- 4. Timer-Funktionen Bei Betriebsweise Heizen kann der Ventila- Die Fernbedienung ist mit einem Timer aus- magerät ein- und ausgeschaltet. -
Seite 44: Betrieb
Sleep die im folgenden beschriebenen Be- liegt bei 25°C. Das Gerät arbeitet mit Gerät (nach Wiederherstellung der Strom- triebsphasen 1-2 ab: Automatikbetrieb. versorgung) automatisch wieder in der vor Phase 1: Das Gerät arbeitet im Heizbetrieb, der Unterbrechung bestehenden Betriebs- Schalter Modelle KF & KFR bis der Bezugspunkt der Raum- weise in Gang.