mundoclima MUPO-12-H9 Bedienungs Und Installationsanleitung Handbuch
Vorschau ausblenden
Andere Handbücher für MUPO-12-H9:
- Installations- und bedienungsanleitung (28 Seiten)
Inhaltsverzeichnis
Werbung
Verfügbare Sprachen
Verfügbare Sprachen
Quicklinks
MUPO-12-H9
ACONDICIONADOR DE AIRE LOCAL
LOCAL AIR CONDITIONER
CLIMATISEUR LOCAUX
LOKALE KLIMAGERÄTE
APARELHO DE AR CONDICIONADO LOCAL
Manual de instalación y usuario
Installation and owner's manual
Manuel d'installation et d'utilization
Bedienungsanleitung und Installationshandbuch
Manual de instalação e utilização
CL20014
www.mundoclima.com
Werbung
Kapitel
Inhaltsverzeichnis

Verwandte Anleitungen für mundoclima MUPO-12-H9


Inhaltszusammenfassung für mundoclima MUPO-12-H9
- Seite 1 MUPO-12-H9 ACONDICIONADOR DE AIRE LOCAL LOCAL AIR CONDITIONER CLIMATISEUR LOCAUX LOKALE KLIMAGERÄTE APARELHO DE AR CONDICIONADO LOCAL Manual de instalación y usuario Installation and owner's manual Manuel d'installation et d'utilization Bedienungsanleitung und Installationshandbuch Manual de instalação e utilização CL20014 www.mundoclima.com...
- Seite 2 Manual de instalación y usuario Installation and owner's manual Manuel d'installation et l'utilisauter Benutzer- oder Installationshandbuch Manual de instalação e utilização .................................................................................................................................
-
Seite 3: Inhaltsverzeichnis
Manual de Instalación y Usuario ÍNDICE MEDIDAS DE SEGURIDAD ..................4 PRECAUCIONES ......................5 ADVERTENCIAS (SOLO PARA EL USO DE REFRIGERANTE R290/R32) ....6 PREPARACIONES ..................... 10 INSTALACIÓN ......................11 FUNCIONAMIENTO ....................13 MANTENIMIENTO ...................... 16 SOLUCIÓN DE PROBLEMAS ..................17 NOTAS DE DISEÑO Y CUMPLIMIENTO .............. -
Seite 4: Medidas De Seguridad
Medidas de seguridad Este símbolo indica que no cumplir con estas instrucciones puede causar daños graves o la muerte. ADVERTENCIA: Para evitar lesiones al usuario y otras personas además de daños a objetos, se deben cumplir las siguientes medidas de seguridad. La no observación de estas medidas puede provocar lesiones, personales o daños materiales. -
Seite 5: Precauciones
Precauciones Precauciones Los niños a partir de 8 años y personas enfermas con conocimiento del aparato y sus riesgos, pueden manipular el equipo. Los niños no deben jugar con el equipo. Ni tampoco pueden realizar la limpieza ni el mantenimiento del equipo sin supervisión. - Se debe supervisar que los niños no jueguen con la unidad. -
Seite 6: Advertencias (Solo Para El Uso De Refrigerante R290/R32)
-No perfore ni queme la unidad. -Asegúrese de que los refrigerantes no despidan olor. La unidad MUPO-12-H9 se debe instalar, hacer funcionar y guardar en una habitación que tenga una superficie mínima de 12 m -Observe el cumplimiento de las regulaciones nacionales sobre el gas. - Seite 7 Advertencias (sólo para el uso de refrigerante R290/R32) 1. Transporte el equipo que contiene refrigerantes Todas las fuentes de ignición posibles, incluyendo fumar inflamables según indican las regulaciones vigentes. cigarrillos se deben realizar a una distancia prudente del 2. Etiquetas en el equipo con símbolos según las sitio de instalación, reparación, extracción y desecho del regulaciones locales.
- Seite 8 Advertencias (sólo para el uso de refrigerante R290/R32) No debe haber componentes eléctricos bajo tensión y (El detector se debe calibrar en un área sin refrigerantes). Asegúrese de que el detector no es una fuente potencial cableado expuesto durante la carga, recuperación o de ignición y que sea compatible con el refrigerante usado.
- Seite 9 Advertencias (sólo para el uso de refrigerante R290/R32) e deben tomar todas las medidas de seguridad para no 16. Recuperación sobrecargar el sistema de refrigerante. Antes de la Se recomienda usar las buenas prácticas recomendadas recarga del sistema se debe comprobar la presión con cuando extraiga el refrigerante ya sea por mantenimiento OFN.
-
Seite 10: Preparaciones
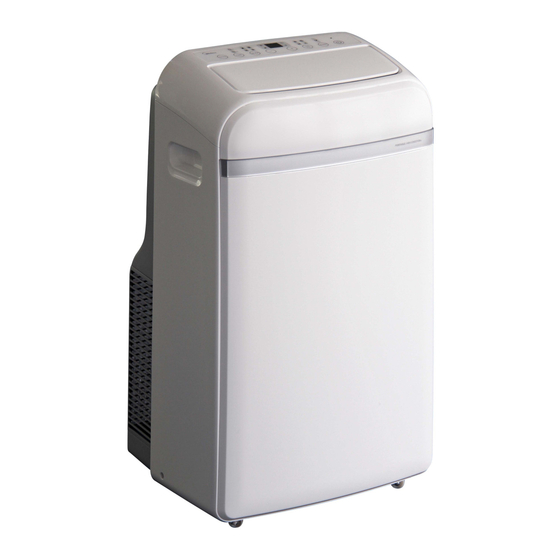
Preparación Panel de control Lamas horizontales Filtro de aire superior (oscilación automát.) (detrás de la rejilla) Asa (ambos lados) Entrada de aire superior Salida de drenaje Panel Salida de aire Filtro de aire inferior Entrada de aire inferior Salida de drenaje (solo bomba de calor) Enrollador de cable Rueda... -
Seite 11: Instalación
Instalación Elegir la ubicación ideal El lugar de instalación debe cumplir los siguientes requisitos: -Asegúrese de instalar la unidad sobre una superficie plana para minimizar el ruido y las vibraciones. -La unidad debe instalarse cerca de un enchufe con conexión a tierra, y el drenaje de la bandeja de condensados (que se encuentra en la parte posterior de la unidad) debe estar accesible. - Seite 12 Instalación Tubo de salida de aire Conjunto del Kit de ventana tubo de Paso Uno: Preparación del conjunto del tubo de salida de Introducir Introducir salida de aire aire. Presione el tubo de salida de aire en el adaptador del kit de ventana y en el adaptador de la unidad, sujete el tubo automáticamente con abrazaderas elásticas.
-
Seite 13: Funcionamiento
Funcionamiento NOTA: El panel de control puede parecerse a uno de los siguientes: NOTA: En algunos modelos está en lugar de °F. En algunos modelos (WIRELESS light) es en lugar de (power light). NOTA: Algunas funciones como: ION, FOLLOW ME, HEAT, WIRELESS etc. son opcionales. ION no se aplica en las unidades R32/R290. - Seite 14 Funcionamiento Botón Sleep (Eco) (Nocturno) Botón SWING (oscilación) Se utiliza para iniciar la función de oscilación Se usa para iniciar el funcionamiento de SLEEP/ECO. automática. Cuando operación está ENCENDIDA, presione el botón SWING para Botón de encendido detener la persiana en el ángulo deseado. Encendido/ apagado Botón Timer (Temporizador)
- Seite 15 Funcionamiento -Cuando la unidad esté apagada, presione el botón de Instrucciones de funcionamiento temporizador para iniciar el programa de arranque Funcionamiento COOL (Refrigeración) automático (Auto-on); si lo presiona de nuevo dentro de los 5 segundos iniciará el programa de apagado -Presione el botón "MODE"...
-
Seite 16: Mantenimiento
Funcionamiento Adaptador de la manguera RETARDO 3 MINUTOS ANTES DE REANUDAR LA √ de drenaje OPERACIÓN Después de haberse detenido la unidad, no volverá a funcionar hasta pasados 3 minutos. Esta función es para Adaptador de proteger el equipo. El funcionamiento comenzará la manguera automáticamente pasados los 3 minutos. -
Seite 17: Solución De Problemas
Mantenimiento -Haga funcionar el aparato en modo ventilador FAN durante 12 horas en una habitación caliente para Sugerencias para el mantenimiento secarlo y evitar el moho. -Asegúrese de limpiar el filtro de aire cada 2 semanas para -Apague el aparato y desenchúfelo. un rendimiento óptimo. -
Seite 18: Notas De Diseño Y Cumplimiento
5-30°C (41-86°F) Calefacción NOTA: Para cumplir con la norma EN 61000-3-11, el producto MUPO-12-H9 se conectará únicamente a una fuente de alimentación de la impedancia del sistema: | Zsys|=0.348 ohms o menos. Antes de conectar el producto a la red eléctrica pública, consulte a la autoridad local de suministro de energía para asegurarse de que la red eléctrica... -
Seite 19: Responsabilidad Social
Responsabilidad Social Al utilizar esta unidad en los países europeos, se debe seguir la siguiente información: ELIMINACIÓN: No elimine este producto como desecho común junto con otros residuos domésticos no clasificados. La unidad se debe desechar por separado, es necesario que reciba un tratamiento especial. -
Seite 20: Control Remoto
CONTROL REMOTO ● Este manual ofrece una descripción detallada de todas las precauciones que se deben tener en cuenta durante el funcionamiento. ● Para asegurar el buen funcionamiento del control remoto cableado, le rogamos lea este manual cuidadosamente antes de usar la unidad. -
Seite 21: Temperatura Ambiente
Especificaciones técnicas Modelo R51M/(C)E, R51M/BG(C)E, RG51M2/(C)E, RG51A/(C)E, RG51M3/(C)E, RG51M3/BG(C)E, RG51M8/(C)E,RG51M9/(C)E. Tensión nominal 3.0V(dos pilas alcalinas tipo LR03) Voltaje minimo de 2.0V funcionamiento Distancia de transmisión 8m (con una tensión de 3.0, alcanza 11m) Temperatura ambiente -5 C 60 C Características de funcionamiento 1. - Seite 22 : Pulse este botón para disminuir la temperatura Botón TEMP configurada. Botón TEMP : Pulse este botón para aumentar la temperatura configurada. Botón sefleccfión de MODO (mode) : Cada vez que pulse este botón, el modo de funcionamiento cambiará en la dirección de las flechas: AUTO FRÍO DESH.
- Seite 23 Botón TEMPORIZADOR OFF (TIMER OFF) : Pulse este botón para ac- tivar el apagado automático. Cada vez que se pulse, aumentará la hora de apagado en intervalos de 30 minutos. Al llegar a 10, los intervalos serán de 60 minutos. Para cancelar la función de apa- gado automático, simplemente ajuste la hora de apagado en 0.0.
- Seite 24 ENCENDIDO/APAGADO : El símbolo de ON/OFF aparecerá cuando se encienda la unidad a través del mando a distancia, y desapare- cerá al apagarla. MODO DE FUNCIONAMIENTO : Al pulsar la tecla de modo, se mostrará el modo de funcionamiento actual: AUTO / FRÍO / DESHUMIDIF./ CALOR (no disponible en modelos de solo frío) o VENTILADOR.
- Seite 25 FUNCIONAMIENTO AUTOMÁTICO 1. Seleccione AUTO con el botón de modo de funcionamiento. 2. Pulse el botón TEMP para configurar la temperatura deseada. La temperatura óptima se encuentra entre 21~28ºC. 3. Pulse ON/OFF para arrancar el aire acondicionado. El indicador de funcionamiento del panel de la unidad interior se encenderá. La VELOCIDAD DEL VENTILADOR es automática y en la pantalla del mando a distancia no se muestran indicadores.
- Seite 26 DESHUMIDIFICADOR 1. Seleccione DESHUMIDIFICADOR (DRY) con el botón de funcionam. 2. Pulse el botón TEMP para configurar la temperatura deseada. La temperatura óptima se encuentra entre 21~28ºC. 3. Pulse ON/OFF para arrancar el aire acondicionado. La unidad funcio- nará en modo deshumidificador a velocidad baja. Vuelva a pulsar el botón ON/OFF para detener la unidad.
- Seite 27 3. Configurar la hora de apagado y encendido 3.1 Pulse TIMER ON y el mando a distancia mostrará la hora del último encendido automático y la señal “H” en la pantalla digital. Ahora podrá volver a configurar la hora de encendido automático. 3.2 Pulse TIMER ON e inserte la hora de encendido deseada.
- Seite 28 Installation and Owner's Manual CONTENT SAFETY PRECAUTIONS ...................29 CAUTIONS ........................30 WARNINGS (FOR USING R290/R32 REFRIGERANT ONLY) ........31 PREPARATIONS ......................35 INSTALLATION ......................36 OPERATION ........................ 38 MAINTENANCE ......................41 FAULTS DIAGNOSIS ....................42 DESIGN AND COMPLIANCE NOTES ............... 43 SOCIABLE REMARK ....................44 REMOTE CONTROLLER ....................
-
Seite 29: Safety Precautions
Safety Precautions This symbol indicates that ignoring instructions may cause death or serious injury. WARNING: To prevent death or injury to the user or other people and property damage, the following instructions must be followed. Incorrect operation due to ignoring of instructions may cause death, harm or damage. -
Seite 30: Cautions
Cautions Cautions -This appliance can be used by children aged from 8 years and above and person with reduced physical, sensory or mental capabilities or lack of experience and knowledge if they have been given supervision or instruction concerning use of the appliance in a safe way and understand the hazards involved. -
Seite 31: Warnings (For Using R290/R32 Refrigerant Only)
-Do not pierce or burn. -Be aware that the refrigerants may not contain an odour. Appliance MUPO-12-H9 should be installed, operated and stored in a room with a floor area larger than 12 m . -Compliance with national gas regulations shall be observed. - Seite 32 Warnings (for using R290/R32 refrigerant only) 1.Transport of equipment containing flammable refrigerants explosion. All possible ignition sources, including cigarette See transport regulations smoking, should be kept sufficiently far away from the site 2.Marking of equipment using signs of installation, repairing, removing and disposal, during See local regulations which flammable refrigerant can possibly be released to the 3.Disposal of equipment using flammable refrigerants...
- Seite 33 Warnings (for using R290/R32 refrigerant only) exposed while charging, recovering or purging the system; may need re-calibration. (Detection equipment shall be calibrated in a refrigerant-free area.) Ensure that the That there is continuity of earth bonding. detector is not a potential source of ignition and is suitable 7.Repairs to sealed components for the refrigerant used.
- Seite 34 Warnings (for using R290/R32 refrigerant only) practice that all refrigerants are removed safely. Extreme care shall be taken not to overfill the refrigeration When transferring refrigerant into cylinders, ensure that only system. Prior to recharging the system it shall be pressure appropriate refrigerant recovery cylinders are employed.
-
Seite 35: Preparations
Preparation control panel horizontal louver blade upper air filter (swing automatically) (behind the grille) handle (both sides) upper air intake drain outlet Panel air outlet lower air filter lower air intake drain outlet (only for pump heating mode) power cord buckle Caster power cord outlet power plug socket... -
Seite 36: Installation
Installation Choosing The Right Location Your installation location should meet the following requirements: -Make sure that you install your unit on an even surface to minimize noise and vibration. -The unit must be installed near a grounded plug, and the Collection Tray Drain (found on the back of the unit) must be accessible. - Seite 37 Installation Window Installation Kit Exhaust hose Exhaust hose assembly Step One: Preparing the Exhaust Hose assembly Press into Press into Press the exhaust hose into the window slider adaptor and unit adaptor, clamp automatically by elastic buckles Window slider of the adaptors. adaptor Unit adaptor Step Two: Install the Exhaust hose assembly to the unit...
-
Seite 38: Operation
Operation NOTE: The control panel may be look like one of the followings: NOTE: On some models is instead of °F. On some models (WIRELESS light) is instead of (power light). NOTE: Some features(ION, FOLLOW ME, HEAT, WIRELESS etc.) are optional. ION is not applicable for R32/R290 units. - Seite 39 Operation Fan/Ion button(Ion is optional) Swing button Used to initiate the Auto swing feature. When Control the fan speed. Press to select the fan the operation is ON, press the SWING button speed in four steps-LOW, MED, HIGH and AUTO. can stop the louver at the desired angle.
-
Seite 40: Other Features
Operation Operation Instructions -When the unit is off, press the Timer button to initiate COOL operation the Auto-on start program, press it again within 5 -Press the "MODE" button until the "COOL" indicator light seconds will initiate the Auto-off stop program. comes on. -
Seite 41: Water Drainage
Operation drain hose WAIT 3 MINUTES BEFORE RESUMING OPERATION adaptor √ After the unit has stopped, it can not be restarted drain hose operation in the first 3 minutes. This is to protect the unit. adaptor Operation will automatically start after 3 minutes. POWER MANAGEMENT feature(on some models) When the ambient temperature is lower than the setting Press the power... -
Seite 42: Faults Diagnosis
Maintenance -Run the appliance on FAN mode for 12 hours in a warm room to Maintenance Tips dry it and prevent mold. -Be sure to clean the air filter every 2 weeks for optimal performance. -Turn off the appliance and unplug it. -The water collection tray should be drained immediately after P1 -Clean the air filter according to the instructions in the previous error occurs, and before storage to prevent mold. -
Seite 43: Design And Compliance Notes
30°C (86°F) heat mode) NOTE: To be in compliance EN 61000-3-11, the product MUPO-12-H9 shall be connected only to a supply of the system impedance: | Zsys|=0.348 ohms or less. Before connect the product to public power network, please consult your local power supply authority to ensure the power network meet above requirement. -
Seite 44: Sociable Remark
Sociable Remark When using this unit in the European countries, the following information must be followed: DISPOSAL: Do not dispose this product as unsorted municipal waste. Collection of such waste separately for special treatment is necessary. It is prohibited to dispose of this appliance in domestic household waste. For disposal, there are several possibilities: A) The municipality has established collection systems, where electronic waste can be disposed of at least free of charge to the user. -
Seite 45: Remote Controller
REMOTE CONTROLLER ● This manual gives detailed description of the precautions that should be brought to your attention during operation. ● In order to ensure correct service of the wired controller please read this manual carefully before using the unit. ●... - Seite 46 Remote Controller Specification Model R51M/(C)E, R51M/BG(C)E, RG51M2/(C)E, RG51A/(C)E, RG51M3/(C)E, RG51M3/BG(C)E, RG51M8/(C)E,RG51M9/(C)E. Rated Voltage 3.0V(Alkaline dry batteries LR03 2) Lowest Voltage of CPU 2.0V Emitting Signal 8m (when using 3.0 voltage, Transmission Distance it Gets 11m) Environment -5 C 60 C Performance Features 1.
- Seite 47 TEMP Button Push this button to decrease the indoor temperature setting. TEMP Button Push this button to increase the indoor temperature setting . MODE Selection Button: Each time the button is pressed, the operation mode is shifted in the direction of the arrow: AUTO COOL HEAT...
- Seite 48 TIMER OFF Button: Press this button to initiate the auto-off time sequence. Each press will increase the auto-timed setting in 30 minutes increments. When the setting time displays 10, each press will increase the auto-timed setting 60 minutes increments. To cancel the auto-timed program, simply adjust the auto-off time to 0.0.
- Seite 49 ON/OFF Indicator: This symbol appears when the unit is turned on by the remote controller, and disappear when the unit is turned off. OPERATION MODE Indicator: When press the MODE button, it shows the current operating mode -- AUTO COOL HEAT (Cooling only model without) mode.
- Seite 50 AUTOMATIC OPERATION 1. Use the MODE button to select AUTO. 2. Push the TEMP button to set the desired room temperature . The most comfortable temperature settings are between 21 C to 28 C. 3. Push the ON/OFF button to start the air conditioner. The OPE- RATION lamp on the display panel of the indoor unit lights.
- Seite 51 DRY Operation 1. Push the MODE button to select DRY. 2. Push the TEMP button to set the desired temperature from 17 C to 30 C. 3. Push the ON/OFF button, the OPERATION lamp lights and the air conditioner starts to operate in DRY mode at LOW fan speed.
- Seite 52 3. Set the starting & stopping time 3.1 Push the TIMER ON button, the remote controller will show TIMER ON, the last set time for START operation and the signal "h" will be shown on the DIGITAL display area. You are now ready to readjust the TIMER ON to start the operation.
- Seite 53 Warning 1. Be sure there are no obstacles between the remote controller and the receiver of indoor unit otherwise the air conditioner will not work. 2. Keep the Remote Controller away from any liquids. 3. Protect the remote controller from the high temperatures and exposure to radiation.
- Seite 54 Manuel d'installation et l'utilisateur INDEX MESURES DE SÉCURITÉ .....................55 PRÉCAUTIONS ......................56 AVERTISSEMENTS (UNIQUEMENT POUR L’UTILISATION DE RÉFRIGÉRANT R290/R32) ..................57 PRÉPARATION ......................INSTALLATION ......................FONCTIONNEMENT ...................... ENTRETIEN ........................RÉSOLUTION DE PROBLÈMES ..................NOTES DE CONCEPTION ET DE CONFORMITÉ ............RESPONSABILITÉ SOCIALE ..................TÉLÉCOMMANDE ......................
-
Seite 55: Mesures De Sécurité
Mesures de sécurité Ce symbole indique que le non-respect de ces instructions peut causer des blessures graves ou mortelles. AVERTISSEMENT: Pour éviter des lésions à l’utilisateur et à d’autres personnes ainsi que des dégâts matériels, les instructions suivantes doivent être respectées : Le non-respect de ces mesures peut entraîner des blessures, des dommages corporels ou matériels. -
Seite 56: Précautions
Précautions Précautions -Les enfants à partir de 8 ans et les malades peuvent manipuler l’appareil s’ils ont une conna- issance de l’appareil et de ses risques. Les enfants ne doivent pas jouer avec l’appareil. Les enfants ne doivent pas effectuer le nettoyage ni l’entretien de l’appareil sans surveillance. - Les enfants doivent être surveillés pour s’assurer qu’ils ne jouent pas avec l’appareil. - Seite 57 - Ne perforez pas brûlez pas l’appareil. - Veillez à ce que les réfrigérants ne dégagent pas d’odeur. L’unité MUPO-12-H9 doit être installé et mise en fonction dans une pièce qui a au minimum une superficie de 12 m .
- Seite 58 vertissements (uniquement pour l’utilisation du gaz réfrigérant R290/R32) 1. Transportez l’équipement qui contient des 6) Sans sources d’inflammation réfrigérants inflammables comme l’indiquent les Il est interdit à toute personne effectuant des travaux règlement en vigueur. liés à un système de réfrigération impliquant l’exposition de tuyaux contenant ou contenant 2.
-
Seite 59: Avertissements (Uniquement Pour L'utilisation De Réfrigérant R290/R32)
Avertissements (uniquement pour l’utilisation du gaz réfrigérant R290/R32) immédiatement et qu’il continue de fonctionner, vous 10. Détection des réfrigérants inflammables Quelles pouvez utiliser une solution appropriée temporaire. que soient les circonstances, vous ne devez pas Informez vous de la panne auprès du fabricant. utiliser les sources d’inflammabilité... - Seite 60 Avertissements (uniquement pour l’utilisation du gaz réfrigérant R290/R32) f) Allumez la machine de récupération et faites la devez ventilé le système de pression atmosphérique fonctionner selon les instructions du fabricant. pour permettre son fonctionnement. Cette opération est g) Ne remplissez pas excessivement les cylindres. importante lorsque vous aller souder.
-
Seite 61: Préparation
Avertissements (uniquement pour l’utilisation du gaz réfrigérant R290/R32) Le réfrigérant récupéré doit être renvoyé au fournisseur, dans le bon cylindre de récupération ainsi que la note de transfert de réponse correspondent actualisée. Ne mélangez pas les réfrigérants dans les appareils de récupération et par dessus tout dans les cylindres. Si des compresseurs ou des huiles de compresseur doivent être éliminés, s’assurer qu’ils ont été... -
Seite 62: Installation
Installation Choix de l’emplacement idéal Le lieu d’installation doit répondre aux exigences suivantes : - Veillez à installer l’appareil sur une surface plane pour minimiser le bruit et les vibrations. - L’appareil doit être installé près d’une prise de terre et l’évacuation du bac à... - Seite 63 Installation Kit de fenêtre Tubes de sortie d’air Première étape : Préparation de l’assemblage du tube de sortie Ensemble du Introduire tuyau de sortie d’air. Introduire d’air Enfoncez le tuyau de sortie d’air dans l’adaptateur du kit fenêtre et dans l’adaptateur de l’appareil, maintenez le tuyau automatiquement avec des pinces élastiques.
-
Seite 64: Fonctionnement
Fonctionnement REMARQUE : Le panneau de commande peut ressembler à l’un des éléments suivants : REMARQUE: Certains modèles affichent à la place de °F. Sur certains modèles (WIRELESS light) est à la place de (power light) . REMARQUE: Certaines fonctions comme: ION, FOLLOW ME, HEAT, WIRELESS etc. sont optionnels. - Seite 65 Fonctionnement Bouton SWING (oscillation) Bouton Sommeil (Eco) (Nuit) S’utilise pour activer la fonction d’oscillation Permet de démarrer le fonctionnement SLEEP/ automatique. Lorsque l’opération est ACTIVÉE, ECO. appuyez sur le bouton SWING pour arrêter la lamelle à l’angle désiré. Bouton de mis en marche Mise en marche/arrêt.
- Seite 66 Fonctionnement Instructions de fonctionnement -Lorsque l’appareil est éteint, appuyez sur la touche du Fonctionnement COOL (Réfrigération) TIMER pour démarrer le programme Auto-on (mis en -Appuyez sur la touche “MODE” jusqu’à que le voyant marche); appuyez de nouveau sur cette touche dans les “COOL ”...
-
Seite 67: Entretien
Fonctionnement Adaptateur de tube de sortie d’air DÉLAI DE 3 MINUTES AVANT LA REPRISE DU FONCTIONNEMENT Après avoir arrêté l’unité, elle ne se remettra pas à Adaptateu fonctionner avant que les 3 minutes se soient écoulées. r de tube Cette fonction permet de protéger l’appareil. L’opération de sortie va commencer automatiquement après 3 min. -
Seite 68: Résolution De Problèmes
Entretien Suggestions d’entretien - Éteignez l’appareil et débranchez-le. -Veillez à nettoyer le filtre à air toutes les deux semaines - Nettoyer le filtre à air selon les instructions de la pour une performance optimale. section précédente. Réinstallez l’appareil propre et sec -Le bac à... -
Seite 69: Notes De Conception Et De Conformité
5-30°C (41-86°F) Chauffage REMARQUE: Conformément à la norme EN 61000-3-11, le MUPO-12-H9 sera raccordé uniquement à une alimen- tation d’impédance de réseau: | Zsys|=0.348 ohms ou moins. Avant de raccorder le produit au réseau électrique public, consulter l’autorité locale en charge de l’alimentation électrique pour s’assurer que le réseau électrique est... -
Seite 70: Responsabilité Sociale
Responsabilité sociale Lors de l’utilisation de cet appareil dans les pays européens, les informations suivantes doivent être respectées : ÉLIMINATION : Ne jetez pas ce produit comme un déchet commun avec les autres ordures ménagères non triées. L’unité doit être jetée séparément, elle doit subir un traitement spécial. Il est interdit de jeter cet appareil avec les déchets domestiques non triés. -
Seite 71: Télécommande
TÉLÉCOMMANDE • Ce manuel donne une description précise de toutes les précautions à prendre en compte pendant le fonctionnement. • Pour assurer le bon fonctionnement de la commande murale, nous vous prions de lire attentivement ce manuel avant d’utiliser l’unité. •... -
Seite 72: Spécifications Techniques
Spécifications techniques Modèle R51M/(C)E, R51M/BG(C)E, RG51M2/(C)E, RG51A/(C)E, RG51M3/(C)E, RG51M3/BG(C)E, RG51M8/(C)E,RG51M9/(C)E. 3,0V (deux piles alcalines type LR03) Tension nominale Tension minimale de 2,0V fonctionnement 8m (11m si la tension est de 3,0V) Distance de transmission -5 C 60 C Température ambiante Caractéristiques de fonctionnement 1. - Seite 73 1. Bouton TEMP : Appuyez sur cette touche pour diminuer la température configurée. 2. Bouton TEMP : Appuyez sur cette touche pour augmenter la température configurée. 3. Bouton sélection de MODE: À chaque pression sur cette touche, le mode de fonctionnement sera changé...
- Seite 74 12. Bouton TIMER OFF (programmateur d’arrêt): Appuyez sur cette touche pour activer l’arrêt automatique. À chaque pression, l’heure d’arrêt augmentera par tranches de 30 minutes. Après 10 fois, les tranches seront de 60 minutes. Pour désactiver la fonction d’arrêt automatique, réglez simplement l’heure d’arrêt sur 0:00. 13.
-
Seite 75: Fonctionnement De La Télécommande
3. MARCHE/ARRÊT: Le symbole ON/OFF apparaît sur l’écran lors de l’allumage de l’appareil avec la télécommande, et il disparaîtra lors de l’arrêt. 4. MODE DE FONCTIONNEMENT: Si vous appuyez sur la touche MODE, les différents mode de fonctionnement pourront être sélectionnés selon la séquence : AUTO / RÉFRIG. / DESHUMIDIF./ CHAUFF. - Seite 76 FONCTIONNEMENT AUTOMATIQUE 1. Sélectionnez le mode de fonctionnement AUTO en utilisant la télécommande. 2. Appuyez sur la touche TEMP pour configurer la température souhaitée. La température optimale se trouve entre 21~28ºC. 3. Appuyez sur ON/OFF pour allumer le climatiseur. Le voyant lumineux de fonctionnement du tableau de l’unité...
- Seite 77 DÉSHUMIDIFICATION 1. Sélectionnez DÉSHUMIDIFICATEUR (DRY) avec la touche de fonct. 2. Appuyez sur la touche TEMP pour configurer la température souhaitée. La température optimale se trouve entre 21~28ºC. 3. Appuyez sur ON/OFF pour allumer le climatiseur. L’appareil fonctionnera en mode déshumidificateur à...
- Seite 78 Modifier la configuration du TEMPORISATEUR Pour modifier l’heure de mise en marche /d’arrêt automatiques, appuyez sur la touche TIMER correspondante et configurez à nouveau. Pour annuler l’heure d’allumage/arrêt automatique, sélectionnez 0:00 comme heure du programmateur. Avertissement 1. Assurez-vous qu’il n’y ait pas d’obstacles entre la télécommande et le récepteur de l’unité intérieure, sinon l’appareil ne fonctionnera pas.
- Seite 79 Benutzer- oder Installationshandbuch INHALTSVERZEICHNIS VORSICHTSMAßNAHMEN ..................80 SICHERHEITSANWEISUNGEN .................. 81 WARNUNG (NUR BEI VERWENDUNG DES KÄLTEMITTELS R290/R32) ....82 VORBEREITUNGEN ....................86 INSTALLATION ......................87 BETRIEB ........................89 WARTUNG ........................92 PROBLEMLÖSUNG ....................93 HINWEISE ZU DESIGN UND KONFORMITÄT ............94 GESELLSCHAFTLICHE VERANTWORTUNG ............
-
Seite 80: Vorsichtsmaßnahmen
Vorsichtsmaßnahmen Dieses Symbol weist darauf hin, dass die Nichtbeachtung dieser Anweisungen zu schweren Verletzungen oder zum Tod führen kann. WARNUNG: Um Verletzungen des Benutzers und anderer Personen sowie Beschädigungen an Gegenständen zu vermeiden, sind folgende Sicherheitsmaßnahmen zu beachten. Eine falsche Bedienung kann zu, Körperverletzungen oder Materialschäden führen. -
Seite 81: Sicherheitsanweisungen
Sicherheitsanweisungen ßnahmen Vorsichtsmaßnahmen - Kinder ab 8 Jahren und kranke Personen mit Fachkenntnis des Gerätes und dessen Risiken können das Gerät handhaben. Kinder dürfen nicht mit der Einheit spielen. Kinder dürfen das Gerät ohne Aufsicht weder putzen noch warten. - Kinder sollten beaufsichtigt werden, damit sie nicht mit dem Produkt spielen. Kinder in der Nähe des Gerätes müssen stets von einem Erwachsenen beaufsichtigt werden. -
Seite 82: Warnung (Nur Bei Verwendung Des Kältemittels R290/R32)
Gasherd oder ein elektrisches Heizgerät). - Durchbohren oder verbrennen sie das Gerät nicht. - Vergewissern Sie sich, dass die Kühlmittel keinen Geruch ausströmen. Das Gerät MUPO-12-H9 muss in einem Raum mit einer Mindestfläche von 12 m installiert, in Betrieb genommen und aufbewahrt werden. - Seite 83 Warnung (nur bei Verwendung von Kältemittel R290/R32) zum Ort der Installierung, Reparatur, Entnahme oder 1. Transportieren Sie das Gerät, das brennbare Kühlmittel enthält, gemäß den geltenden Regelungen. Entsorgung des Geräts einhalten, während dieses das 2. Etiketten mit Symbolen, die auf dem Gerät angebracht brennbare Kühlmittel beinhaltet, welches entströmen sind, gemäß...
- Seite 84 Warnung (nur bei Verwendung von Kältemittel R290/R32) brennbare Kühlmittel geeignet. Man muss den Während des Ladevorgangs, der Rückgewinnung oder der Spülung des Systems dürfen keine spannungsführenden Schwellenwert einstellen und die Geräte neu kalibrieren. elektrischen Komponenten und freiliegenden Leitungen (Die Detektionsgeräte müssen in einem kühlmittelfreien vorhanden sein, die Erdung muss kontinuierlich erfolgen.
- Seite 85 Warnung (nur bei Verwendung von Kältemittel R290/R32) Verunreinigungen durch verschiedene Kältemittel Wenn die Zylinder gefüllt wurden und der Vorgang vorhanden sind. Sowohl die Schläuche als auch die erfüllt wurde, vergewissern Sie sich, dass die Zylinder Rohre müssen so kurz wie möglich sein, um die und die Ausstattung rechtzeitig aus ihrem Platz Menge der enthaltenen Kühlmittel zu minimieren.
-
Seite 86: Vorbereitungen
Warnung (nur bei Verwendung von Kältemittel R290/R32) Rückgewinnungseinheiten und vor allem nicht in den Zylindern. Muss man die Kompressoren oder deren Öle entnehmen, vergewissern Sie sich, dass sie in einem leidlichen Stand entleert wurden, um sicherzustellen, dass das brennbare Kühlmittel nicht ins Schmiermittel gelangt. Die Entleerung muss vor der Rückgabe an die Zulieferer erfolgen. -
Seite 87: Installation
Installation Wahl des idealen Standortes Der Aufstellungsort muss die folgenden Anforderungen erfüllen: -Stellen Sie sicher, dass Sie das Gerät auf einer ebenen Fläche installieren, um Geräusche und Vibrationen zu minimieren. -Das Gerät muss in der Nähe eines geerdeten Steckers installiert werden, und der Kondensatwanne (auf der Rückseite des Gerätes) muss zugänglich sein. - Seite 88 Installation Inklusive Fensterkit Luftaustrittsrohr Luftauslassrohr Schritt Eins: Vorbereitung der Luftauslassrohr. Einführen Einführen Drücken Sie das Luftauslassrohr in den Fensteradapter und in den Geräteadapter, halten Sie das Rohr automatisch mit elastischen Klemmen. Adapter des Geräteadapter Fensterkits Achten Sie darauf, dass der Adapterhaken Schritt Zwei: Installieren sie den Luftauslassrohr mit der Bohrung in der Luftauslasshalterung Setzen Sie den Adapter der Luftauslassrohr in den unteren...
-
Seite 89: Betrieb
Betrieb HINWEIS: Das Bedienfeld kann ähnlich wie eines der folgenden aussehen: HINWEIS: Bei einigen Modellen wird dieses Symbo anstelle von °F angezeigt. In einigen Modellen zeigen (WIRELESS light) anstelle von (POWER light). HINWEIS: Einige Funktionen wie: ION, FOLLOW ME, HEAT, WIRELESS usw. - Seite 90 Betrieb Schlaftaste (Eco) (Nacht) SWING-Taste (Schwingung) Dient Starten automatischen Wird verwendet, um den SLEEP/ECO-Betrieb zu starten. Oszillationsfunktion. Wenn Vorgang EINGESCHALTET IST, drücken Sie die Taste Einschalttaste SWING, um den Verschluss im gewünschten Winkel zu stoppen. Ein- / Ausschalten Bildschirm LED TIMER Knopf (Zeitschaltuhr) Zeigt die Temperatureinstellung in °C oder °F...
-
Seite 91: Weitere Eigenschaften
Betrieb -Wenn das Gerät ausgeschaltet ist, drücken Sie die Betriebsanweisungen Timertaste, um das Auto-on-Programm zu starten; Kühlungsbetrieb COOL (Kühlung) ein erneutes Drücken innerhalb von 5 Sekunden startet das Auto-off-Programm. -Drücken Sie die Taste "MODE", bis die Kontrollleuchte -Halten Sie die AUF- oder AB-Taste gedrückt, um die "COOL"... -
Seite 92: Wartung
Betrieb Adapter von Luftauslassleitung VERZÖGERUNG 3 MINUTEN VOR √ WIEDERAUFNAHME DES BETRIEBS Nachdem das Gerät angehalten wurde, wird es erst nach 3 Auslaufrohr- Min. erneut funktionieren. Diese Funktion dient dem adapter Schutz des Geräts. Das Gerät schaltet sich ein autom. nach 3 Min. -
Seite 93: Problemlösung
Wartung -Lassen Sie das Gerät im FAN-Modus 12 Stunden lang in einem warmen Raum laufen, um zu trocknen und Schimmel Vorschläge für die Wartung zu vermeiden. -Achten Sie darauf, den Luftfilter alle 2 Wochen zu reinigen, -Schalten Sie das Gerät aus und ziehen Sie den Netzstecker. um eine optimale Leistung zu erzielen. -
Seite 94: Hinweise Zu Design Und Konformität
Heizung 5-30°C (41-86°F) HINWEIS: Um der EN 61000-3-11 zu entsprechen, wird das MUPO-12-H9 nur an ein Netzteil mit Systemimpedanz angeschlossen: | Zsys|=0.348 Ohm oder weniger. Bevor Sie das Produkt an das öffentliche Stromnetz anschließen, bitte wenden Sie sich an die örtliche Energieversorgungsbehörde, um sicherzustellen, dass das Stromnetz den... -
Seite 95: Gesellschaftliche Verantwortung
Gesellschaftliche Verantwortung Wenn Sie dieses Gerät in europäischen Ländern verwenden, sollten Sie die folgenden Informationen beachten: ENTSORGUNG: Abfallentsorgung Entsorgen Sie dieses Produkt nicht zusammen mit gewöhnlichem Abfall und anderen, nicht klassifizierten Haushaltsabfällen. Die Einheit muss getrennt entsorgt werden. Ein besonderer Umgang ist notwendig. Es ist untersagt, dieses Gerät zusammen mit den nicht klassifizierten Haushaltsabfällen zu entsorgen. -
Seite 96: Fernbedienung
FERNBEDIENUNG ● Dieses Handbuch beschreibt ausführlich alle Vorsichtsmaßnahmen, die man während des Betriebs beachten sollte. ● Wir bitten Sie, dieses Handbuch vor dem Nutzen der Einheit sorgfältig durchzulesen, um den korrekten Betrieb der verkabelten Steuerung zu gewährleisten. ● Bewahren Sie das Handbuch in Ihrem eigenen Interesse nach dem Lesen auf, um es für künftiges Nachschlagen parat zu haben. - Seite 97 Technische Eigenschaften Modell R51M/(C)E, R51M/BG(C)E, RG51M2/(C)E, RG51A/(C)E, RG51M3/(C)E, RG51M3/BG(C)E, RG51M8/(C)E,RG51M9/(C)E. Nennspannung 3.0V (zwei alkalische Batterien Typ LR03) Min. Voltzahl 2.0V 8 m (mit einer Spannung von 3.0, erreicht 11m) Sendeentfernung Umgebungstemperatur -5 C 60 C Betriebseigenschaften: 1. Betriebsmodi: AUTO, KÜHL, LUFTENTFEUCHTUNG, HEIZUNG (nur im Kühl- /Heizmodus) und BELÜFTUNG.
- Seite 98 : Drücken Sie diesen Knopf, um die eingestellte Taste TEMP Temperatur zu verringern. : Drücken Sie diesen Knopf, um die eingestellte Taste TEMP Temperatur zu erhöhen. MODUS-Auswahl (Mode): Jedes Mal, wenn Sie den Knopf drücken, verändert sich der Betriebsmodus in folgender Reihenfolge: AUTO KÜHLEN ENTFEUCH.
- Seite 99 Drücken Sie diese ZEITSCHALTUHR OFF Taste (TIMER OFF) : Taste, um die Selbstabschaltung zu aktivieren. Jedes Mal, wenn Sie drücken, erhöht sich die Stundenzahl des Abschaltung in 30 Minuten Abständen. Beim Erreichen von 10 verändern sich die Abstände auf 60 Minuten. Um die Selbstabschaltung zu beenden, stellen Sie einfach die Aktivierungsuhrzeit auf 0.0.
- Seite 100 Das ON/OFF Symbol erscheint beim Einschalten der EIN-/ABSCHALTEN: Einheit via Fernbedienung und verschwindet beim Ausschalten. Beim Drücken dieser Taste wird der aktuelle Betriebsmodus BETRIEBSMODUS : angezeigt: AUTO/KÜHLUNG/ENTFEUCH./ HEIZUNG (nicht vorhanden bei reinen Kühlmodellen) oder BELÜFTUNG Das Lämpchen leuchtet nach dem Drücken der Sperr-Taste LOCK : (LOCK) auf.
- Seite 101 AUTOMATISCHER BETRIEB: 1. Wählen Sie den AUTO-Modus mithilfe des Betriebsmodus‘ aus. 2. Drücken Sie die TEMP-Taste, um die gewünschte Temperatur einzustellen. Die optimale Temperatur liegt zwischen 21~28ºC. 3. Drücken Sie ON/OFF, um die Klimaanlage zu starten. Das Lämpchen für den Betrieb auf der Tafel der Einheit leuchtet auf. Die Ventilatorgeschwindigkeit ist automatisch und wird nicht auf dem Bildschirm der Fernbedienung angezeigt.
- Seite 102 Luftentfeuchtung 1. Wählen Sie mithilfe der Betriebstaste die Luftentfeuchtung aus. 2. Drücken Sie die TEMP-Taste, um die gewünschte Temperatur einzustellen. Die optimale Temperatur liegt zwischen 21~28ºC. 3. Drücken Sie ON/OFF, um die Klimaanlage zu starten. Die Einheit wird im Entfeuchtungsmodus bei niedriger Geschwindigkeit funktionieren.
- Seite 103 3. Einstellen der Ein- und Ausschaltuhrzeit 3.1 Die zuletzt verwendete Einschaltuhrzeit wird automatisch angezeigt und es erscheint das „H“-Signal auf dem digitalen Bildschirm. Nun können Sie die automatische Einschaltuhrzeit einstellen. 3.2 Drücken Sie TIMER ON und geben Sie die gewünschte Uhrzeit ein. 3.3 Die zuletzt verwendete Ausschaltuhrzeit wird automatisch angezeigt und es erscheint das „H“-Signal auf dem digitalen Bildschirm.
- Seite 104 Manual de instalação e do utilizador ÍNDICE MEDIDAS DE SEGURANÇA..................CUIDADOS ........................106 AVISOS (APENAS PARA O USO DO REFRIGERANTE R290/R32) ......107 PREPARAÇÕES ......................111 INSTALAÇÃO .........................112 FUNCIONAMENTO ......................114 MANUTENÇÃO ......................118 SOLUÇÃO DE PROBLEMAS ..................118 NOTAS DE DESIGN E CONFORMIDADE..............119 RESPONSABILIDADE SOCIAL ..................120 CONTROLO REMOTO ....................121 IMPORTANTE:...
-
Seite 105: Medidas De Segurança
Medidas de segurança Este símbolo indica que o não cumprimento destas instruções pode resultar em ferimentos graves ou morte. AVISO: Para evitar lesões ao utilizador e outras pessoas, além de danos a objetos, devem-se cumprir as seguintes medidas de segurança. A não observação destas medidas pode provocar lesões pessoais ou danos materiais. -
Seite 106: Cuidados
Medidas de segurança - Toda a cablagem deve realizar-se estritamente de acordo com o diagrama de cablagem localizado dentro da unidade. - O circuito impresso do equipamento (PCB) foi criado com um fusível para fornecer proteção em caso de sobrecarga. As especificações do fusível estão impressas no circuito impresso, tais como: T 3,15 A/250 V, etc. -
Seite 107: Avisos (Apenas Para O Uso Do Refrigerante R290/R32)
visos (apenas para o uso do refrigerante R290/R32) - Não tente acelerar o processo de descongelamento nem a limpeza, e siga as recomendações do fabricante. - A unidade deve ser guardada numa divisão sem fontes de calor ativas (por ex.: chamas abertas, cozinhas a gás ou aquecedores elétricos). - Seite 108 visos (apenas para o uso do refrigerante R290/R32) de tubos que contenham ou tenham contido refri- 1. Transporte o equipamento que contenha refrigerantes gerante inflamável, deve utilizar algum tipo de inflamáveis de acordo com as normas em vigor. fonte de ignição que possa provocar algum risco 2.
- Seite 109 visos (apenas para o uso do refrigerante R290/R32) Métodos de deteção de fugas. apropriada. O proprietário deve ser Os seguintes métodos de deteção de fugas são informado acerca da avaria. aceites para os sistemas que contêm refrigerantes As verificações prévias de segurança devem incluir: Que os condensadores estejam descarregados, o que inflamáveis.
- Seite 110 visos (apenas para o uso do refrigerante R290/R32) g) Ligue a máquina de recuperação e faça-a funcio- Certifique-se de que a saída da bomba de vácuo nar de acordo com as instruções do fabricante. não está fechada a fontes de ignição e de que existe h) Não encha os cilindros em demasia.
-
Seite 111: Preparações
visos (apenas para o uso do refrigerante R290/R32) O refrigerante recuperado deve ser devolvido ao fornecedor no cilindro de recuperação correto e a nota de transferência de resíduos deve ser preenchida. Não misture os refrigerantes nas unidades de recuperação e, acima de tudo, nos cilindros. Se for necessário eliminar os compressores ou os seus óleos, certifique-se de que foram evacuados a um nível aceitável para se assegurar de que o refrigerante inflamável não está... -
Seite 112: Instalação
Instalação Escolhendo o local ideal O local de instalação deve cumprir os seguintes requisitos: - Certifique-se de instalar a unidade em uma superfície plana para minimizar o ruído e a vibração. - A unidade deve ser instalada em uma tomada com ligação à terra, e o dreno do tabuleiro de condensados (localizado na parte traseira da unidade deve estar acessível. - Seite 113 Instalação Conjunto do Tubo de saída de ar tubo de saída Kit de janela de ar Introduzir Introduzir Primeiro passo: Preparação do conjunto do tubo de saída de ar. Introduza o tubo de saída de ar no adaptador do kit Adaptador do de janela e no adaptador da unidade, fixe-o imediatamente Adaptador...
-
Seite 114: Funcionamento
Funcionamento NOTA: O painel de controlo pode se parecer com um dos seguintes: NOTA: Em alguns modelos, está no lugar de °F. Em alguns modelos, (WIRELESS light) está no lugar de Power light). NOTA: Algumas funções como: ION, FOLLOW ME, HEAT, WIRELESS, etc., são opcionais. ION não se aplica nas unidades R32/R290. - Seite 115 Funcionamento Botão SLEEP/ECO (Modo noturno) Botão SWING (Oscilação) Utiliza-se para iniciar o funcionamento do modo Utiliza-se para iniciar a função de oscilação auto- SLEEP/ECO. mática. Quando a operação estiver ATIVADA, pressione o botão SWING para parar a persiana Botão de alimentação no ângulo desejado.
- Seite 116 Funcionamento -Quando a unidade estiver desligada, pressione o botão Instruções de funcionamento do temporizador para iniciar o programa de arranque Funcionamento COOL (Refrigeração) automático (Auto-On); pressionando novamente dentro - Pressione o botão MODE até que a luz indicadora de 5 segundos, iniciará o programa de desligamento “COOL ”...
-
Seite 117: Manutenção
Funcionamento Adaptador da mangueira de drenagem ATRASO DE 3 MINUTOS ANTES DE RETOMAR A OPERAÇÃO Adaptador da Depois de desligar a unidade, esta não voltará a fun- mangueira de drenagem cionar até que se tenham passado três minutos. Esta função ajuda a proteger o equipamento. Introduza o enrolador de O funcionamento começará... -
Seite 118: Solução De Problemas
Manutenção Sugestões para a manutenção - Desligue o aparelho e retire-o da tomada. - Certifique-se de limpar o filtro de ar a cada 2 semanas - Limpe o filtro de ar de acordo com as instruções da para um ótimo desempenho. secção anterior. -
Seite 119: Notas De Design E Conformidade
5-30 °C (41-86 °F) NOTA: Para cumprir com a norma EN 61000-3-11, o produto MUPO-12-H9 deve ser ligado apenas a uma fonte de alimentação da impedância do sistema: | Zsys|=0,348 ómios ou menos. Antes de ligar o produto à rede elétrica pública, verifique com a autoridade local de fornecimento de energia se a rede elétrica cumpre com os requisitos... -
Seite 120: Responsabilidade Social
Responsabilidade Social Ao utilizar esta unidade em países europeus, as seguintes informações devem ser seguidas: ELIMINAÇÃO: Não deite fora este produto juntamente com outros resíduos domésticos não triados como se fosse lixo comum. A unidade deve ser deitada fora em separado para que possa ser tratada de forma especial. É... -
Seite 121: Controlo Remoto
CONTROLO REMOTO • Este manual oferece uma descrição detalhada de todos os cuidados a ter em consideração durante o funcionamento. • Para garantir um bom funcionamento do controlo remoto com fios, pedimos-lhe que leia atentamente este manual antes de utilizar a unidade. •... -
Seite 122: Especificações Técnicas
Especificações técnicas Modelo R51M/(C)E, R51M/BG(C)E, RG51M2/(C)E, RG51A/(C)E, RG51M3/(C)E, RG51M3/BG(C)E, RG51M8/(C)E,RG51M9/(C)E. Tensão nominal 3,0 V (duas pilhas alcalinas do tipo LR03) Tensão mínima de funciona- 2,0 V mento Distância de transmissão 8 m (com uma tensão de 3,0 V alcança 11 m) Temperatura ambiente -5 °C a 60 °C Caraterísticas de funcionamento... - Seite 123 Botão TEMP : Carregue neste botão para diminuir a temperatura configurada. Botão TEMP : Carregue neste botão para aumentar a temperatura configurada. Botão MODE (Seleção de modo): Sempre que carregar neste botão, o modo de funcionamento será mudado na direção das setas: AUTO FRIO DESUM.
- Seite 124 Botão LOCK (Bloqueio): Ao carregar no botão interior LOCK, a configuração atual ficará bloqueada e o comando à distância não irá funcionar com nenhum botão a não ser que se carregue em LOCK. Carregue novamente para cancelar a função de bloqueio. Botão TURBO: Carregue neste botão para ativar ou cancelar a função TURBO.
-
Seite 125: Modo De Funcionamento
Indicador ON/OFF: O símbolo ON/OFF aparecerá quando se ligar a unidade através do comando à distância, e desaparecerá quando se desligar. MODO DE FUNCIONAMENTO: Ao carregar na tecla MODE, será mostrado o modo de funcionamento atual: AUTO / COOL / DRY / HEAT (não disponível nos modelos que emitem apenas frio) ou FAN. BLOQUEIO: O indicador de bloqueio será... - Seite 126 FUNCIONAMENTO AUTOMÁTICO Selecione AUTO com o botão MODE. Carregue no botão TEMP para configurar a temperatura desejada. A temperatura mais confortá- vel encontra-se entre 21 e 28 °C. Carregue em ON/OFF para ligar o ar condicionado. O indicador de funcionamento do painel da unidade interior se ligará.
- Seite 127 1.2 Carregue em TIMER ON e insira a hora desejada para ligar. 1.3 Depois de configurar a hora para ligar, o comando enviará o sinal à unidade num intervalo de 0,5 segundos. Depois de dois segundos, o sinal “H” desaparecerá e será mostrada novamente a hora para ligar automaticamente no comando.
- Seite 128 C/ NÁPOLES 249 P1 08013 BARCELONA SPAIN (+34) 93 446 27 80 SAT: (+34) 93 652 53 57 www.mundoclima.com...