Inhaltsverzeichnis
Werbung
Werbung
Inhaltsverzeichnis

Verwandte Anleitungen für VESTEL SCHOTT CERAN VEA25016


Inhaltszusammenfassung für VESTEL SCHOTT CERAN VEA25016
- Seite 1 VEA25016 INDUKTIONSKOCHFELD INSTALLATION UND BEDIENUNGSANLEITUNG...
- Seite 7 �I I l� l e _ e_s_c_H_R_Eı _ e _uN_G_ D _Es _ G _E� _ ·_· r _s __________ Werte Kunden, Bitte lesen Sie dieses Bedienungsanleitung sorgfaltig durch, bevor Sie das Kochfeld verwenden, und bewahren Sie sie zur spateren Verwendung auf .. Kochfeld mit 3 Heizelementen: lnduktions-Heizelement Bedi nfeld...
- Seite 17 Induktionskochfeld D (MM) H (MM) W (MM) ABMESSUNGEN C2 (MM) CI (MM) AUSSCHNITT MASSE NACHBARSCHAFTSWÄNDE MIN A (MM) MIN B (MM) HOLZ BETON ODER KERAMISCH GEKANNT...
- Seite 19 D (MM) H (MM) W (MM) ABMESSUNGEN C2 (MM) CI (MM) AUSSCHNITT MASSE NACHBARSCHAFTSWÄNDE MIN A (MM) MIN B (MM) HOLZ BETON ODER KERAMISCH GEKANNT...
- Seite 23 Das Netzkabel muss von direkten Warmequellen ferngehalten werden. Es darf keinen Temperaturen mehr als 50 °C über der Raumtemperatur ausgesetzt werden. Elektrisches Anschlussdiagramm 5x1.5mm 380V~, 3N~ 3x2.5mm 220V~ 5x1.5mm 400V~, 3N~ 3x2.5mm 230V~ 5x1.5mm 415V~, 3N~ 3x2.5mm 240V~ Für das Kochfeld ist ein Kabel vom Typ H05W-F 3X2,5 mm2 / 60227 IEC 53 zu verwenden . DasAnschlussdiagramm befindet sich auf der Rückseite des Gerates.
- Seite 24 Versorgungsspannung...
- Seite 25 Marke Modell VEA25016 Kochfeldart Elektro Anzahl Kochzonen Heiztechnologie – 1 Induktion Größe – 1 Ø 16,0 Energieverbrauch – 1 182,0 Wh/kg Heiztechnologie – 2 Induktion Größe – 2 Ø 16,0 Energieverbrauch – 2 182,0 Wh/kg Heiztechnologie – 3 Induktion Größe – 3 Ø21,0 Energieverbrauch –...
- Seite 26 Konformitätserklärung Wir erklären, dass unsere Produkte die geltenden europäischen Richtlinien, Entscheidungen und Regularien sowie die in den referenzierten Standards gelisteten Anforderungen erfüllen. Entsorgung des Gerätes Altgeräte dürfen nicht in den Hausmüll! Sollte das Gerät einmal nicht mehr benutzt werden können, so ist jeder Verbraucher gesetzlich verpflichtet, Altgeräte getrennt vom l Hausmüll z.B bei einer Sammelstelle seiner Gemeinde / seines Stadtteils abzugeben.
-
Seite 27: Induction Hob
INDUCTION HOB INSTALLATION AND OPERATING INSTRUCTIONS... -
Seite 28: Inhaltsverzeichnis
CONTENTS: Safety instructions.....................3 Description of the appliance................5 Cooking surface and control panel of heaters............5 Operation of the appliance................7 Switching the appliance on and off...............7 Switching the cooking-zones on and off...............7 Smart Pause......................7 Residual heat indicator..................8 Safety switch off function..................9 Child Lock......................9 Timer function (*optional)..................10 Buzzer .........................11 Boost Function ....................11... -
Seite 29: Safety Instructions
SAFETY INSTRUCTIONS READ THESE INSTRUCTIONS CAREFULLY AND COMPLETELY BEFORE USING YOUR APPLIANCE, AND KEEP IT IN A CONVENIENT PLACE FOR REFERENCE WHEN NECESSARY. THIS MANUAL IS PREPARED FOR MORE THAN ONE MODEL IN COMMON. YOUR APPLIANCE MAY NOT HAVE SOME OF THE FEATURES THAT ARE EXPLAINED IN THIS MANUAL. PAY ATTENTION TO THE EXPRESSIONS THAT HAVE FIGURES, WHILE YOU ARE READING THE OPERATING MANUAL. - Seite 30 - WARNING: If the surface is cracked, switch off the appliance to avoid the possibility of electric shock. - For induction hobs, metallic objects such as knives, forks, spoons and lids should not be placed on the hob surface since they can get hot.
- Seite 31 - Your appliance is produced in accordance with all applicable local and international standards and regulations. - Maintenance and repair work must be made only by authorized service technicians. Installation and repair work that is carried out by unauthorized technicians may endanger you. It is dangerous to alter or modify the specifications of the appliance in any way.
-
Seite 32: Description Of The Appliance
DESCRIPTION OF THE APPLIANCE Dear Customer, Please read the instructions in this user guide before using the hob and keep it for future reference. Cooking Surface for 3 heater: Induction heating element Control panel... - Seite 33 Control Panel for 3 heater : Timer Display Upper left Increase heater selection heat setting/ Heater Key Lock timer(optional) Lock Display Indicator Smart Pause Decrease lower left Boost On/Off Lower Right heat setting heater selection heater selection / timer(optional) Timer...
-
Seite 34: Operation Of The Appliance
OPERATION OF THE APPLIANCE Use the induction cooking zones with suitable cookware. After mains voltage is applied, all displays are come on for a moment. When this time is over, the hob is in the stand-by mode and it is ready for operation. The hob is controlled with electronic sensors which are operated by touching the related sensors. -
Seite 35: Smart Pause
Switching all cooking-zones off: To turn all the cooking zones off at once, touch the key. In the stand-by mode, an "H" appears on all cooking zones which are hot. Residual heat indicator: Residual heat indicator indicates that the glass ceramic has a dangerous touch temperature in the circumference of a cooking zone. -
Seite 36: Safety Switch Off Function
Safety switch off function: Every cooking zone will be switched off after a defined maximum operation time if the heat setting is not modified. Every change in the cooking zone puts back the maximum operation time to the initial value of the operating time limitation. The maximum operation time depends on the selected temperature level. -
Seite 37: Timer Function (*Optional)
Timer function (*optional): The timer function is realized in two versions: Minute minder timer (1..99 min): The minute minder timer can be operated if the cooking zones are switched off. The timer display shows "00" with a blinking dot. Touch to increase the time or touch to decrease the time. -
Seite 38: Buzzer
When the timer has run down, a signal sounds and the timer display shows "00" statically, the assigned cooking zone timer LED blinks. The programmed cooking zone will be switched off and the "H" will be displayed if the cooking zone is hot. The sound signal and the blinking of the timer LED will be stopped automatically after 2 minutes and/or by operating any key. -
Seite 39: Hints And Tips
HINTS AND TIPS Cookware · Use thick, flat, smooth bottomed cookwares that are the same diameter as the element. This will help reduce cooking times. · Cookware made of steel, enamelled steel, cast iron and stainless steel (if appropriately abelled by the manufacturer) will give you the best results. - Seite 40 Examples of cooking applications The information given in the following table is for guidance only. Use for Settings Element off 1 - 3 Delicate warming 4 - 5 Gentle simmering, slow warming Reheating and rapid simmering 6 -7 Boiling, saute and searing Maximum heat Boost function Cleaning tips...
-
Seite 41: Installation Of The Appliance
INSTALLATION OF THE APPLIANCE WARNING: The electrical connection of this hob should be carried out by a qualified electrician, according to the instructions in this guide and in compliance with the current regulations. In the event of any damage that occurs as a result of improper connection or installation, the warranty will not be valid. This appliance must be earthed. - Seite 42 60cm inducti on o...
- Seite 46 · Apply the one-sided self-adhesive sealing tape supplied all the way round the lower glass edge of the cooking surface along the outer edge of the glass ceramic panel. Do not stretch it. · Screw the 4 worktop mounting brackets on the side walls of product. worktop mounting bracket...
-
Seite 47: Making An Electrical Connection
Making an electrical connection Before making a connection, check that: · The mains voltage is the same as that quoted on the rating plate which is situated at the back of your hob. · The circuit can support the appliance load (see the rating plate). ·... -
Seite 48: Electrical Connection Diagram
temperature. Electrical connection diagram 5x1.5mm 380V~, 3N~ 3x2.5mm 220V~ 5x1.5mm 400V~, 3N~ 3x2.5mm 230V~ 5x1.5mm 415V~, 3N~ 3x2.5mm 240V~ Figure 6 For the induction hob, the cable must be H05VV-F 3X2,5 mm²/60227 IEC 53 ••. You will find the connection diagram shown on the bottom of your appliance. - Seite 49 ERROR CODES If there is an error, error code will be showed at heater displays. E1 : Cooling Fan is disabled, call authorized service agents. wait E3 : Supply coltage is over than rated values, turn the hob off by touching until “H”...
- Seite 50 Brand Model VEA25016 Type of Hob Electric Number of Cooking Zones Heating Technology-1 Induction Size-1 Ø16,0 Energy Consumption-1 182,0 Wh/kg Heating Technology-2 Induction Size-2 Ø16,0 Energy Consumption-2 182,0 Wh/kg Heating Technology-3 Induction Size-3 Ø21,0 Energy Consumption-3 182,0 Wh/kg Heating Technology-4 Induction Size-4 Ø21,0...
-
Seite 51: Recycling
Declaration of conformity We declare that our products meet the applicable European Directives, Decisions and Regulations and the requirements listed in the standards referenced. Disposal of the device Old devices cannot be placed in the household waste! If the device can no longer be used, every consumer is legally obliged to hand in devices separately from household waste e.g. -
Seite 61: Description De L'appareil
DESCRIPTION DE L'APPAREIL Chere cliente, cher client, Veuillez lire les consignes de cette notice d'utilisation avant d'utiliser votre plaque et conservez-les car vous pouvez en avoir besoin ulterieurement. Plaque avec 3 zones de cuisson: Element chauffant induction Panneau de contrôle... - Seite 79 Marque Modèle VEA25016 Type de plaque de cuisson Électrique Nombre de zones de cuisson Technologie de chauffage - zone de cuisson 1 Induction Taille - zone de cuisson 1 Ø 16,0 Consommation énergétique - zone de cuisson 1 182,0 Wh/kg Technologie de chauffage - zone de cuisson 2 Induction Taille - zone de cuisson 2...
- Seite 80 Déclaration de conformité Nous déclarons que nos produits sont conformes aux Directives, Décisions et Règlementations européennes en vigueur et aux exigences visées dans les normes citées en référence. Mise au rebut de l'appareil Les appareils usagés ne doivent être traités comme des ordures ménagères ! Chaque consommateur est légalement tenu d'éliminer les appa- reils non utilisables indépendamment des ordures ménagères,...
- Seite 81 INDUCTIE KOOKPLAAT BEDIENING EN INSTALLATIE INSTRUCTIES...
-
Seite 82: Veiligheidswaarschuwingen
Veiligheidswaarschuwingen LEES DEZE BROCHURE ZORGVULDIG EN VOLLEDIG VOOR U UW FORNUIS IN GEBRUIK NEEMT EN BEWAAR ZE OP EEN HANDIGE LOCATIE VOOR EEN EVENTUELE RAADPLEGING IN DE TOEKOMST. DEZE HANDLEIDING IS GEMAAKT VOOR MEER DAN ÉÉN MODEL. HET IS MOGELIJK DAT EEN AANTAL KENMERKEN DIE IN DEZE HANDLEIDING WORDEN BESPROKEN NIET AANWEZIG ZIJN OP UW APPARAAT. - Seite 83 - WAARSCHUWING: Brandgevaar: u mag geen voorwerpen opslaan op de kookoppervlakten. - WAARSCHUWING: Als de oppervlakte gebarsten is, moet u het toestel uitschakelen om het risico op elektrische schokken te vermijden. - Bij inductiekookplaten mag u geen metalen voorwerpen zoals messen, vorken, lepels en deksels op de kookoppervlakte plaatsen want deze kunnen oververhit raken.
- Seite 84 - Gebruik geen stoomreinigers om het apparaat schoon te maken. - Uw apparaat werd geproduceerd conform de toepasselijke lokale en internationale normen en reglementeringen. - De onderhouds- en reparatiewerkzaamheden mogen uitsluitend door geautoriseerd onderhoudspersoneel worden uitgevoerd. Installatie- en reparatiewerken die worden uitgevoerd door niet-geautoriseerde technici kunnen risico’s inhouden.
-
Seite 85: Beschrijving Van Het Apparaat
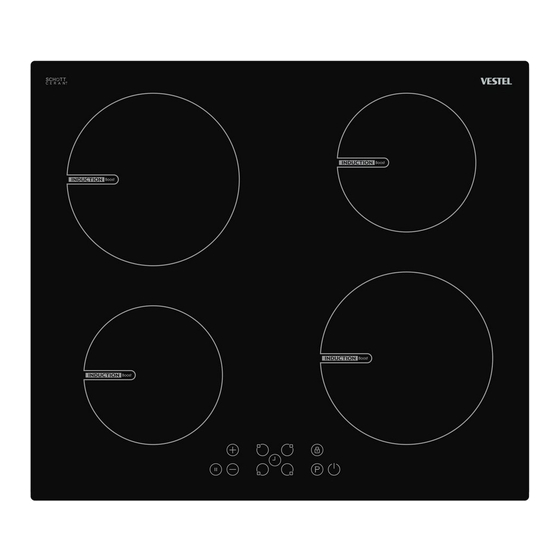
BESCHRIJVING VAN HET APPARAAT Beste klant, Lees de instructies in deze handleiding voor de kookplaat in gebruik neemt en bewaar ze voor een eventuele raadpleging in de toekomst. Kookoppervlakte voor 4 branders: Bedieningspaneel voor 4 branders: Inductie verwarmingselement Bedieningspaneel... - Seite 86 Bedieningspaneel voor 4 branders: Timer Display Bovenste linker brander selectie/ver- Bovenste linker Warmte instelling ver- hogen brander selectie/ver- Vergrendeltoets lagen/Timer verlagen hogen brandersch- indicator Slot (optioneel) ermen Smart Pause Aan/Uit Boost Bovenste linker Warmte instelling Bovenste brander selec- verlagen/Timer ver- linker tie/verhogen lagen (optioneel)
-
Seite 87: Werking Van Het Apparaat
WERKING VAN HET APPARAAT Gebruik de inductie kookzones met geschikte kookwaar. Wanneer de spanning wordt aangesloten, schakelen alle schermen een ogenblik in. Daarna schakelt de kookplaat over op de stand-by modus en ze is klaar voor gebruik. De kookplaat wordt bediend met elektrische sensoren die worden bediend door de betrokken sensoren aan te raken. - Seite 88 Alle kookoppervlakten uitschakelen: Om alle kookoppervlakten gelijktijdig uit te schakelen, raakt u de toets aan. In de stand-by modus verschijnt een “H” op alle kookzones die warm zijn. Residuele warmte-indicator: De residuele warmte-indicator wijst erop dat de glazen keramische plaat een gevaarlijke aan- raaktemperatuur heeft bereikt in de omgeving van een kookzone.
- Seite 89 Veiligheidschakelaar uit functie: Iedere kookzone wordt uitgeschakeld na een gedefinieerde operationele tijdsduur als de warmte- instelling niet wordt gewijzigd. Iedere wijziging in de kookzone schakelt de maximum operationele tijdsduur terug tot de oorspronkelijke waarde van de operationele tijdsduur beperking. De maximale operationele tijdsduur hangt af van het geselecteerde temperatuurniveau.
- Seite 90 TImerfunctie (*Optioneel): De timerfunctie bestaat in twee versies: Minuuttimer (1..99 min): De minuuttimer kan worden bediend als de kookzones uitgeschakeld zijn. Het timerscherm geeft “00” weer met een knipperend punt. Raak aan om de tijd te verhogen of raak aan om de tijdsduur te verminderen. Het instel- lingbereik ligt tussen 0 en 99.
-
Seite 91: Boost-Functie
Als de timer uitgeteld is, weerklinkt een geluidsignaal en de timer geeft “00” statisch weer. De LED van de toegewezen kookzone timer knippert. De geprogrammeerde kookzone schakelt uit en de “H” wordt weergegeven als de kookzone heet is. Het geluidsignaal en het knipperen van de timer LED worden automatisch gestopt na 2 minuten en/of door een toets in te drukken. -
Seite 92: Hints En Tips
HINTS EN TIPS Kookwaar • Gebruik dikke, vlakke, gladde kookwaar met dezelfde diameter als het element. Dit helpt de kookduur te verlagen. • Kookwaar uit staal, email staal, gietijzer en roestvrij staal (indien geschikt, gelabeld door de fabrikant) levert de beste resultaten. •... - Seite 93 Voorbeelden van kooktoepassingen De informatie vermeld in de tabel dient uitsluitend als richtlijn. Instellingen Gebruik voor Element uit 1 - 3 Delicaat opwarmen 4 - 5 Zacht sudderen langzaam opwarmen 6 -7 Heropwarmen en snel sudderen Koken, sauteren en schroeien Maximum warmte Boost functie Schoonmaaktips...
-
Seite 94: Installatie Van Het Apparaat
INSTALLATIE VAN HET APPARAAT WAARSCHUWING: De elektrische aansluiting van deze kookplaat moet worden uitgevoerd door een gekwalificeerde elektricien, in overeenstemming met de instructies in deze handleiding en conform de geldige reglementeringen. In het geval van schade als resultaat van een incorrecte aansluiting of installatie wordt de garantie nietig verklaard. - Seite 95 Neighboards wall...
- Seite 99 Schroef de 4 werkblad montagesleuven vast op de zijwanden van het product. Wandmontage beugel • Bevestig de kookplaat op zijn plaats door het in de uitsnijding van het werkblad te plaatsen. • Voor u de oven invoegt, moet u het achterste paneel van de keuken verwijderen in de zone van de ovenopening om voldoende koeling te leveren.
- Seite 100 Een elektrische aansluiting tot stand brengen Voor u een verbinding maakt, moet u contreren of: • De netspanning overeenstemt met de spanning vermeld op het naamplaatje op de achterzijde van de kookplaat. • Het circuit de belasting van het apparaat aan kan (zie het naamplaatje). •...
- Seite 101 Het netsnoer moet uit de buurt van directe warmtebronnen worden geplaatst. Het mag niet worden onderworpen aan een temperatuurstijging van meer dan 50°C boven de kamertemperatuur. Elektrisch aansluitdiagram 5x1.5mm 380V~, 3N~ 3x2.5mm 220V~ 5x1.5mm 400V~, 3N~ 3x2.5mm 230V~ 5x1.5mm 415V~, 3N~ 3x2.5mm 240V~ Voor de inductiekookplaat moet de kabel H05VV-F 3X2,5 mm²/60227 IEC 53 ••...
- Seite 102 FOUTCODES Als er zich een fout voordoet, wordt de foutcode weergegeven in de display van de verwarmer. E1: De koelventilator is uitgeschakeld; bel een bevoegde servicemonteur. E3: Stroomtoevoer is hoger dan de toegekende waarden. Schakel de kookplaat uit door aan te raken, wacht tot “H” voor alle zones verdwijnt, schakel de kookplaat in door te raken en zet het gebruik voort.
- Seite 103 Merk VEA25016 Model Type kookplaat Elektrisch Aantal kookzones Verwarmtechnologie-1 Inductie Formaat-1 Ø 16,0 Energieverbruik-1 182,0 Wh/kg Verwarmtechnologie-2 Inductie Formaat-2 Ø 16,0 Energieverbruik-2 182,0 Wh/kg Verwarmtechnologie-3 Inductie Formaat-3 Ø21,0 Energieverbruik-3 182,0 Wh/kg Verwarmtechnologie-4 Inductie Formaat-4 Ø21,0 Energieverbruik-4 182,0 Wh/kg Energieverbruik van kookplaat 182,0 Wh/kg Deze kookplaat voldoet aan EN 60350-2...
-
Seite 104: Eg-Conformiteitsverklaring
EG-conformiteitsverklaring We verklaren dat onze producten voldoen aan de van toepassing zijnde Europese richtlijnen, besluiten en voorschriften in de normen waarnaar wordt verwezen. Dit apparaat werd uitsluitend ontworpen voor huishoudelijk gebruik. Het gebruik voor andere doeleinden (zoals het verwarmen van een ruimte) is niet toegestaan en gevaarlijk.